Introduction to MERN Stack: Part 1
 Saish Rane
Learn to Create a Server Using Express.js
Hello everyone, today we will create a server using express.js. First, create a folder named "server" and inside it, create a file named "server.js". Navigate to that folder using "cd server".
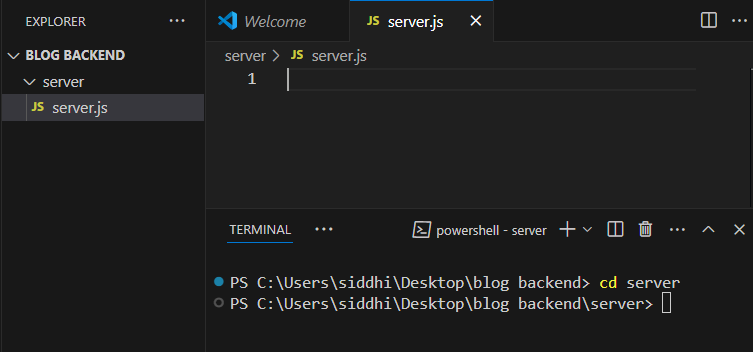
You can refer to the above image for the process described.
Further, you need to install some packages. You can do so using 'npm', i.e., Node Package Manager.
The packages to install are:
express: It offers various features for routing, middleware, and handling HTTP requests and responses. This helps developers build web applications and APIs quickly and efficiently.
npm i expressnodemon: This is optional. It will automatically run our server every time we make changes to the file, so we don't need to restart it manually each time
npm i nodemon
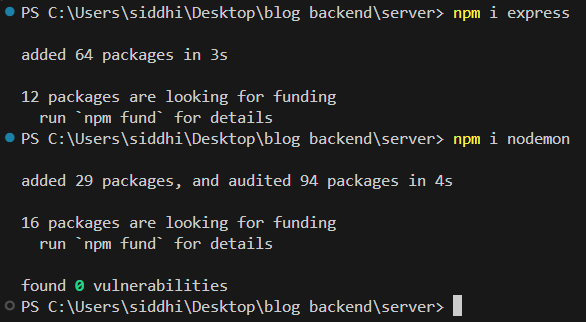
After this, you need to require Express in the server.js file. You can see the code below for creating a server with Express:
const express = require('express');
const app = express();

app.get('/', (req, res) => {
  res.send('Hello World!');
});

app.listen(3000, () => {
  console.log('Server is running on port 3000');
});
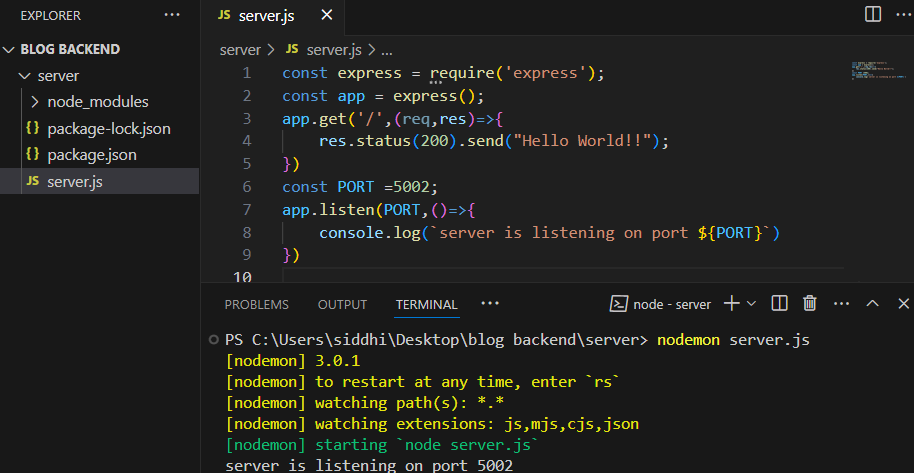
To start, you need to enter the command nodemon server.js to start the server.
Express Router
Now, we will use Express Router to keep our code organized. Instead of putting all routes in server.js, we will keep it clean. Let's start by creating a folder named "routes." Inside that folder, create a file named "authRoutes.js." We will use this file for registration and login routes.
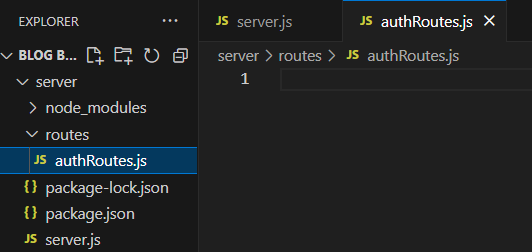
In above image you can see the folder structure now will shft the routes from server.js to authRoutes.js
so code in routes.js will be
const express = require('express');
const router= express.Router();

router.route('/').get((req,res)=>{
    res.status(200).send("This is Home Page");
})
router.route('/register').get((req,res)=>{
    res.status(200).send("This is registration Page");
})
router.route('/login').get((req,res)=>{
    res.status(200).send("This is Login Page");
})

module.exports = router;
Now we need to update server.js. Remove all the routes we previously added there. Then, require authRoutes and use it by specifying the path that will precede the routes defined in authRoutes.js. const authRoutes = require('./routes/authRoutes'); app.use('/api/auth',authRoutes);
The above lines need to be added to server.js.
Final server.js will be,
const express = require('express');
const app = express();

const authRoutes = require('./routes/authRoutes');
app.use('/api/auth',authRoutes);

const PORT =5002;
app.listen(PORT,()=>{
    console.log(`server is listening on port ${PORT}`)
})
Making Controllers
Controllers are used to manage all routes and perform operations such as registration, login, and more.
This keeps our routes simple and easy to understand.
So, let's create a folder named "controllers" and add a file named "authController.js" inside it.
The authController.js file will look like this:
const home = async (req,res)=>{
    try{
        res.status(200).send("This is Home Page");
    }catch(error){
        res.status(404).send("Page not found");
    }
}
const register= async (req,res)=>{
    try{
        res.status(200).send("This is registration Page");
    }catch(error){
        res.status(404).send("Page not found");
    }
}
const login= async (req,res)=>{
    try{
        res.status(200).send("This is login Page");
    }catch(error){
        res.status(404).send("Page not found");
    }
}

module.exports = {home,register,login};
Now, authRoutes.js will look like this:
const express = require('express');
const router= express.Router();
const authController = require('../controllers/authController')

router.route('/').get(authController.home)
router.route('/register').get(authController.register);
router.route('/login').get(authController.login)

module.exports = router;
Connect MongoDB to the backend
To connect, let's create a folder named "utils" and add a file called "db.js" inside it.
You need to install the mongoose package for this: npm i mongoose
You need to create a variable URI and specify the URI of your MongoDB database.
So, db.js will look like this:
const mongoose = require('mongoose');
const URI = 'mongodb://127.0.0.1:27017/mern_admin'
const connectDb = async ()=>{
    try{
        await mongoose.connect(URI);
        console.log("Database Connected Successfully");
    }catch(error){
        console.log("Database not Connected")
    }
}
module.exports = connectDb;
we need to include following in our server.js file so that if database is connected then only our server will run
const connectDb = require('./utils.db/db'); connectDb().then( app.listen(PORT,()=>{ console.log(`server is listening on port ${PORT}`) }) )
Above code we need to include in server.js. So our final server.js will look like this:
const express = require('express');
const app = express();

const authRoutes = require('./routes/authRoutes');
const connectDb = require('./utils.db/db');
app.use('/api/auth',authRoutes);

const PORT =5002;

connectDb().then(
    app.listen(PORT,()=>{
        console.log(`server is listening on port ${PORT}`)
    })
)

Use 'dotenv' to keep data private
To use dotenv, you need to install the package 'dotenv' using npm: npm i dotenv.
Include require('dotenv').config(); in the server.js file.
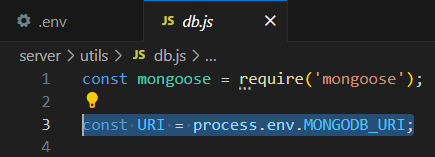
Now, create a .env file in the server folder and add MONGODB_URI to it.

You can use data from the .env file by using process.env.VARIABLE_NAME
Final folder structure for now will look like this:
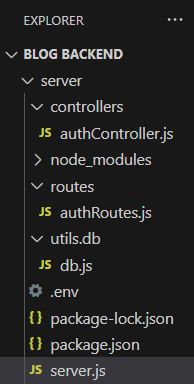
Summary:
So far, we have created a server, routes, controllers, and connected our backend to MongoDB. Next, we will create a user schema and write a registration function in our controllers. If you have read the entire blog and gained some knowledge, please like and comment. Thank you!
Subscribe to my newsletter
Read articles from Saish Rane directly inside your inbox. Subscribe to the newsletter, and don't miss out.
Written by
