Continuous Integration of Applications to CloudHub 2.0 with Bitbucket
 NagaRaju Kukkadapu
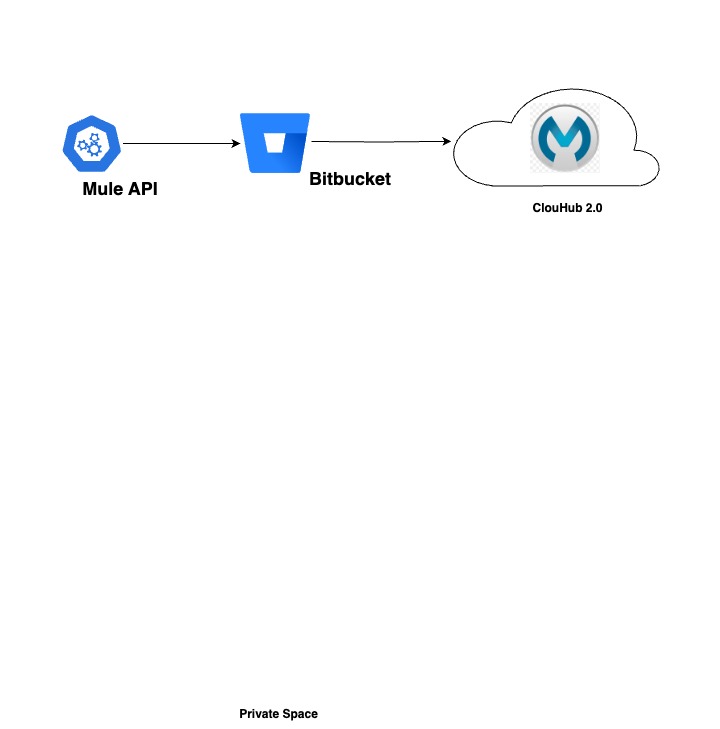
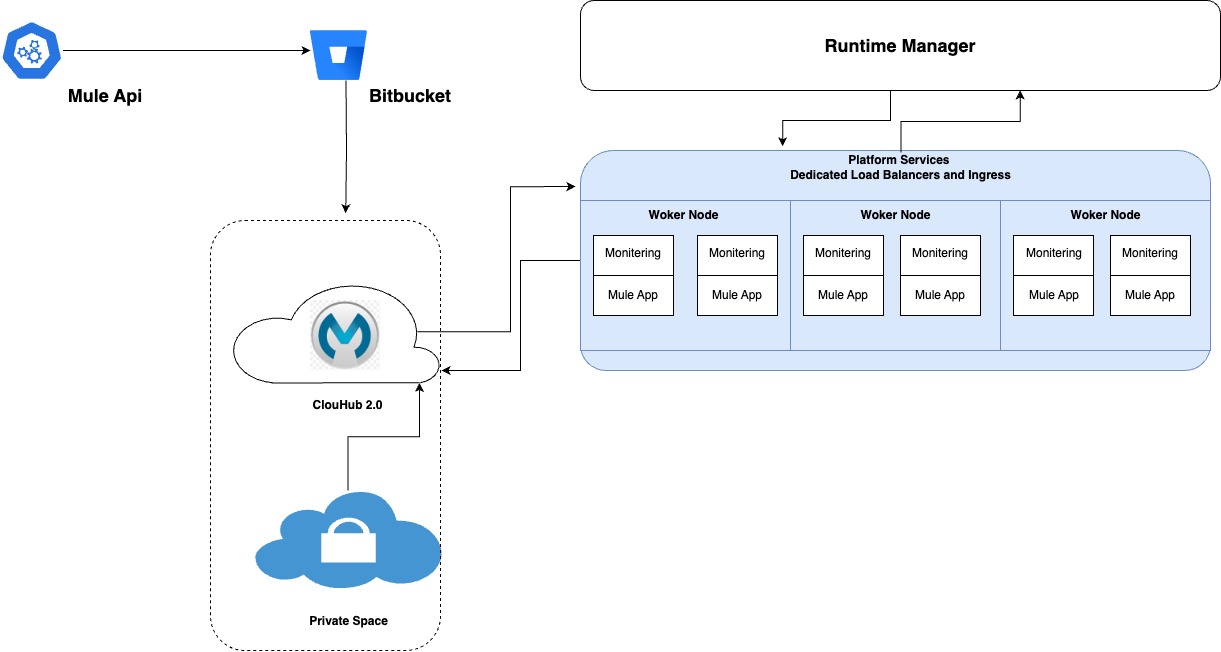
Prerequisites:
Bitbucket
Anypoint Platform (Exchange Contributor, Runtime Access)
Mule API Project Structure:
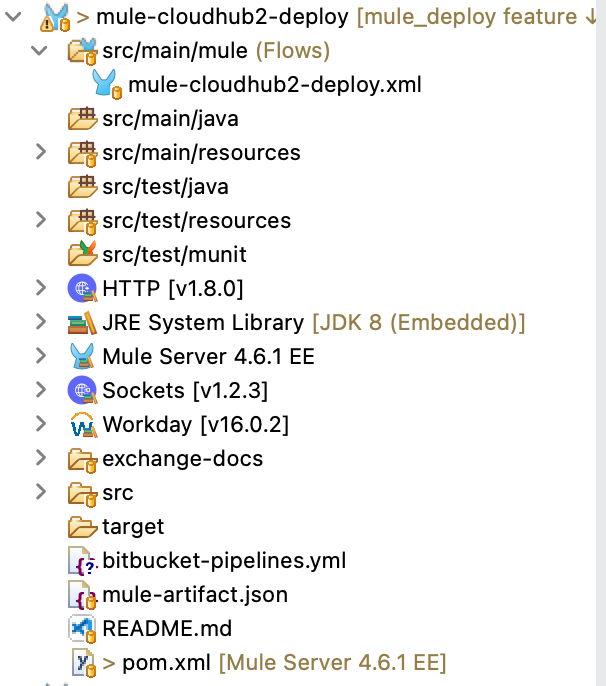
Before you Deploy Mule Application to Cloudhub 2.0
Update Pom xml file with Distribution Management
<distributionManagement>
  <repository>
    <id>exchange-connected-app-v3</id>
    <name>Exchange Private Repository</name>
    <url>https://maven.anypoint.mulesoft.com/api/v3/organizations/${project.groupId}/maven</url>
    <layout>default</layout>
  </repository>
</distributionManagement>
Update Pom Xml with repositories
<repositories>
        <repository>
            <id>exchange-connected-app-v3</id>
            <name>Anypoint Exchange</name>
            <url>https://maven.anypoint.mulesoft.com/api/v3/maven</url>
            <layout>default</layout>
        </repository>
        <repository>
            <id>mulesoft-releases</id>
            <name>MuleSoft Releases Repository</name>
            <url>https://repository.mulesoft.org/releases/</url>
            <layout>default</layout>
        </repository>
        <repository>
            <id>anypoint-exchange-v3</id>
            <name>Anypoint Exchange V3</name>
            <url>https://maven.anypoint.mulesoft.com/api/v3/maven</url>
            <layout>default</layout>
        </repository>
</repositories>
For groupId please refer How to know my Organization ID (Org ID) on the Anypoint Platform
To deploy a Mule application to CloudHub 2.0, the application must first be published to Anypoint Exchange and then deployed.
To publish the application to Anypoint Exchange, create a file named settings.xml within it.
<?xml version="1.0"?>
<settings>

  <pluginGroups>
    <pluginGroup>org.mule.tools</pluginGroup>
  </pluginGroups>

  <servers>
    <server>
        <username>~~~Client~~~</username>
        <password>${CLOUDHUB_CLIENT_ID}~?~${CLOUDHUB_CLIENT_SECRET}</password>
        <id>exchange-connected-app-v3</id>
      </server>
  </servers>

  <profiles>
    <profile>
        <properties>
          <org.id>ffb8acd1-c3ef-428d-8f40-b6e01fa634c2</org.id>
        </properties>
        <repositories>
          <repository>
            <id>exchange-connected-app-v3</id>
            <name>Corporate Repository</name>
            <url>https://maven.anypoint.mulesoft.com/api/v3/organizations/${org.id}/maven</url>
          </repository>
          <repository>
            <id>exchange-connected-app-v2</id>
            <name>Corporate Repository</name>
            <url>https://maven.anypoint.mulesoft.com/api/v2/organizations/${org.id}/maven</url>
          </repository>
        </repositories>
        <id>exchange-repos</id>
      </profile>
  </profiles>

    <activeProfiles>
    <activeProfile>exchange-repos</activeProfile>
  </activeProfiles>

</settings>
This repository will serve as an example. The code for your Mule application should be stored here.
After your code is uploaded to Bitbucket, create a new YAML file containing the pipeline's actual code.
image: maven:3.8.4-openjdk-8

pipelines:
    branches:
      develop:
        - step:
            name: Git Security Scan
            caches:
                - maven
            script:
                - pipe: atlassian/git-secrets-scan:0.5.1
        - step:
            name: Validate & Compile
            caches:
                - maven
            script:
                - mvn -B clean -DskipTests package
          step:
            name: Publish to Exchange
            caches:
                - maven
            script:
                - mvn deploy -s settings.xml
        - step:
            name: Deploy to dev cloudhub
            deployment: Sandbox
            caches:
                - maven
            script:
                - mvn deploy -s settings.xml -DmuleDeploy -Denvironment=Sandbox -DtargetName=Cloudhub-US-East-2 -DmuleVersion=4.6.2 -Dworkers=1 -DworkerType=MICRO -DCLOUDHUB_CLIENT_ID=$CLOUDHUB_CLIENT_ID -DCLOUDHUB_CLIENT_SECRET=$CLOUDHUB_CLIENT_SECRET -DappName=mule-cloudhub2-deploy14
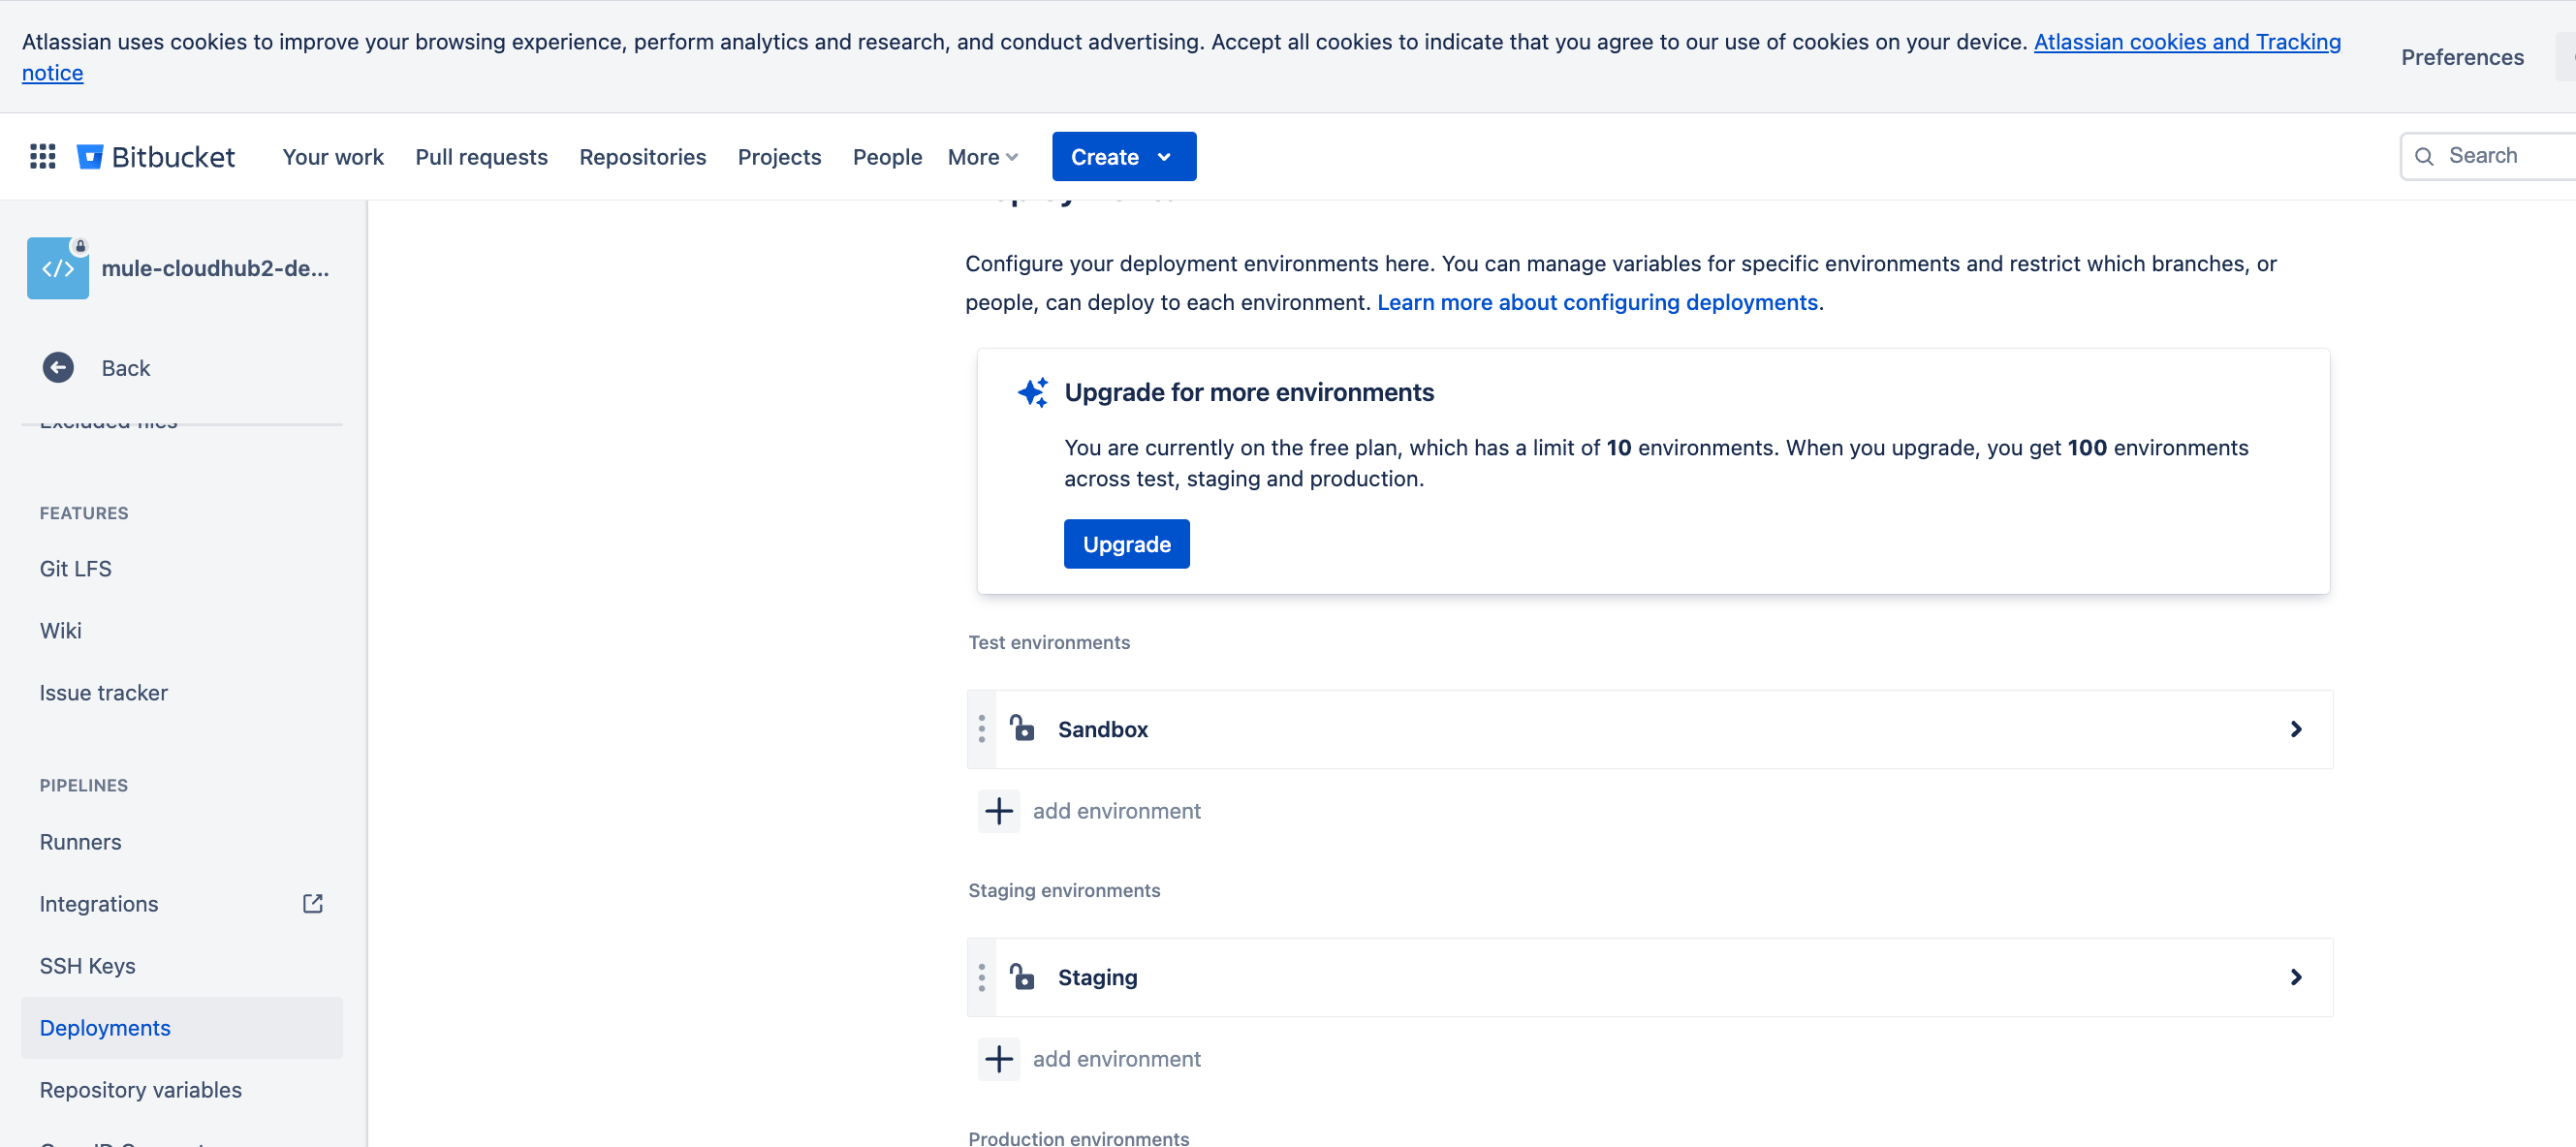
Create Deployment enveironment:
create a environment in bitbucket Named as per the deployment environment added in the Deploy to dev cloudhub step.
Update Repository Variables:
For connected app credentials refer Connected App functionality
update connected app secrets in repository settings as below

In the above bibucket yaml is written to run manually, In Pipelines select branch and step to run the pipeline as below.
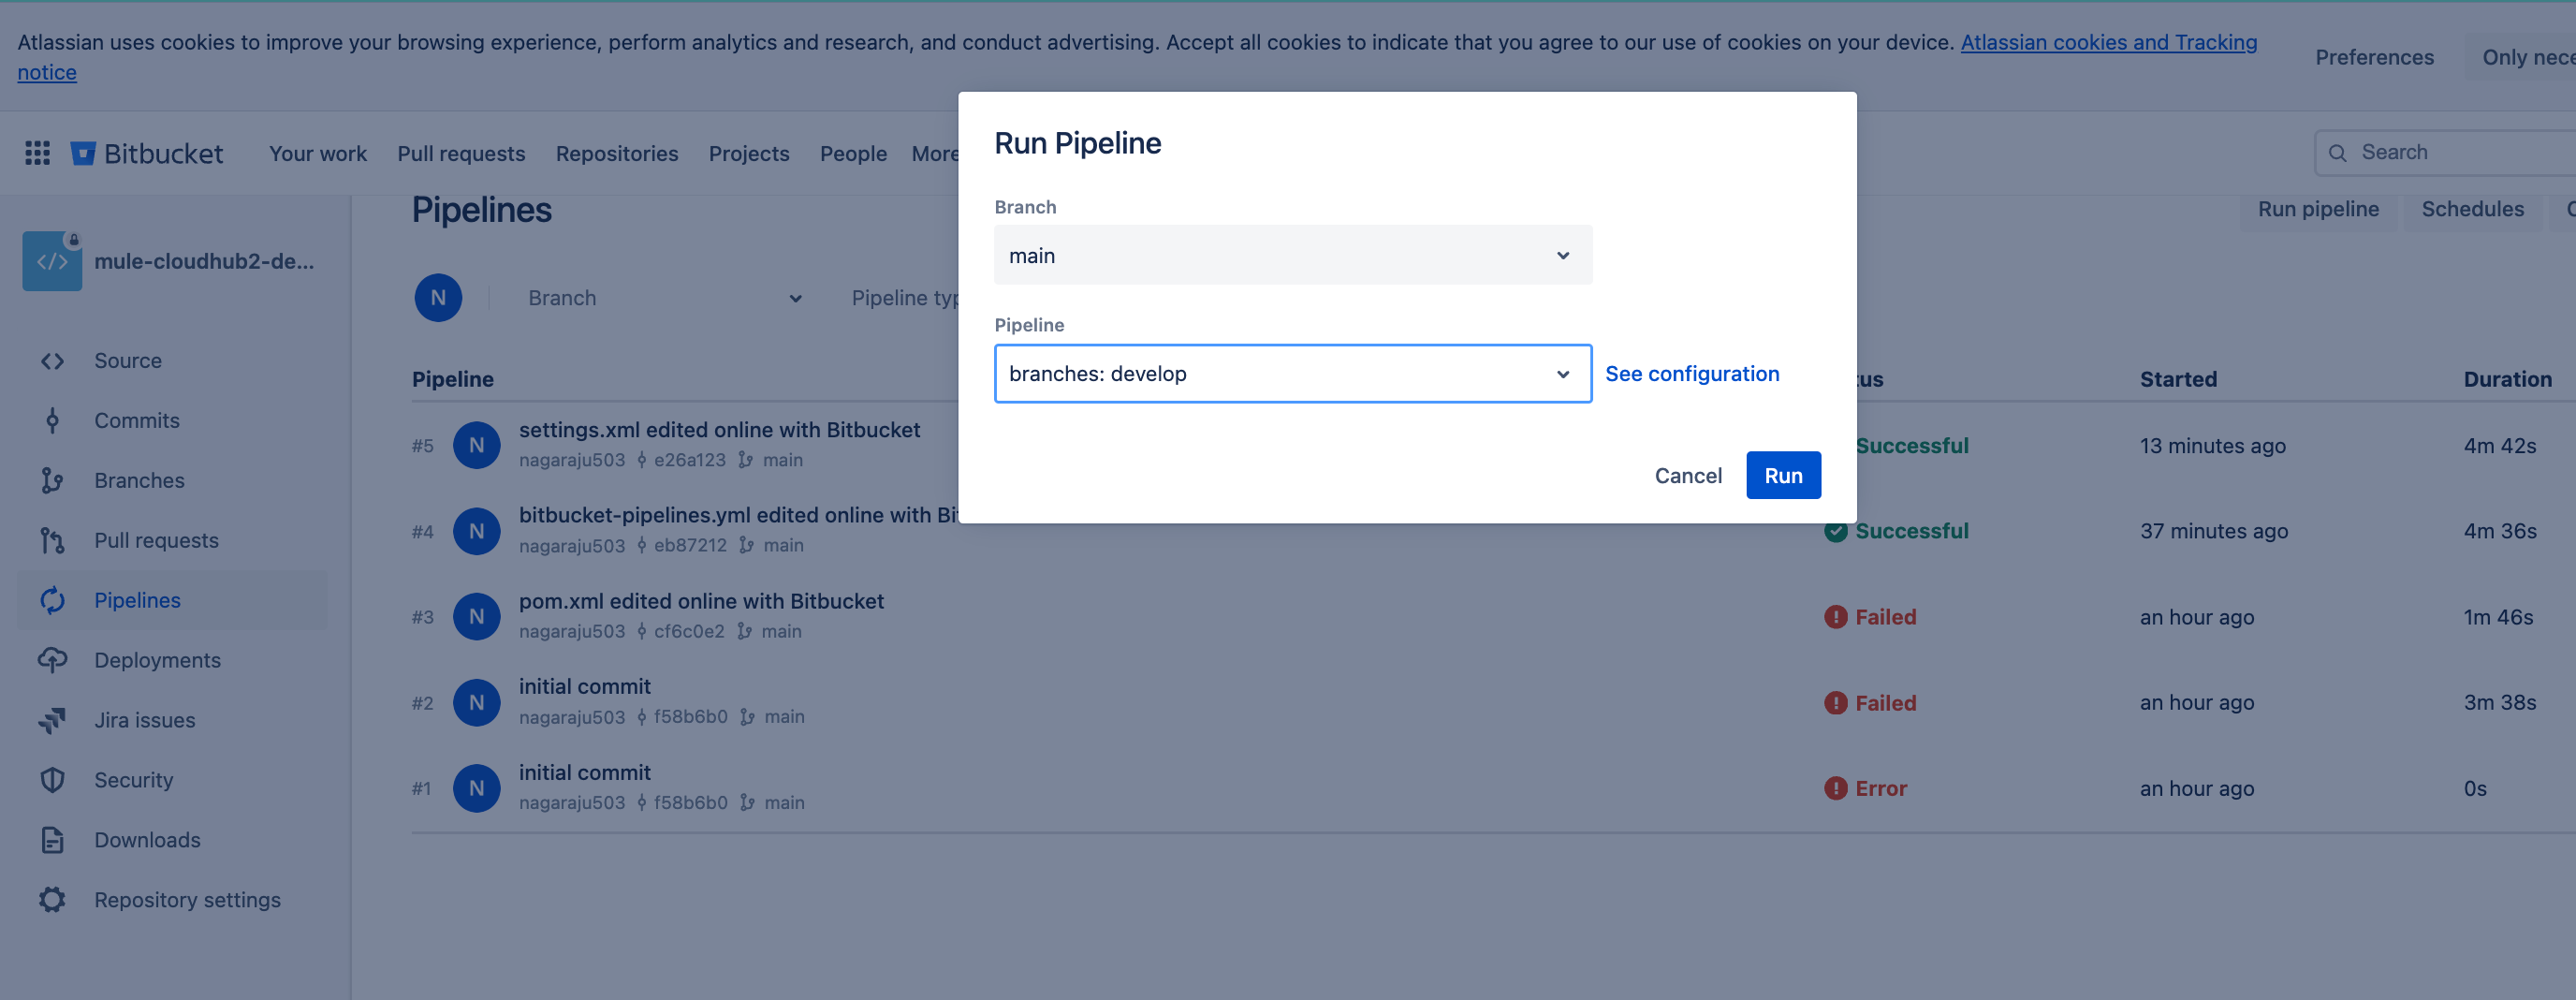
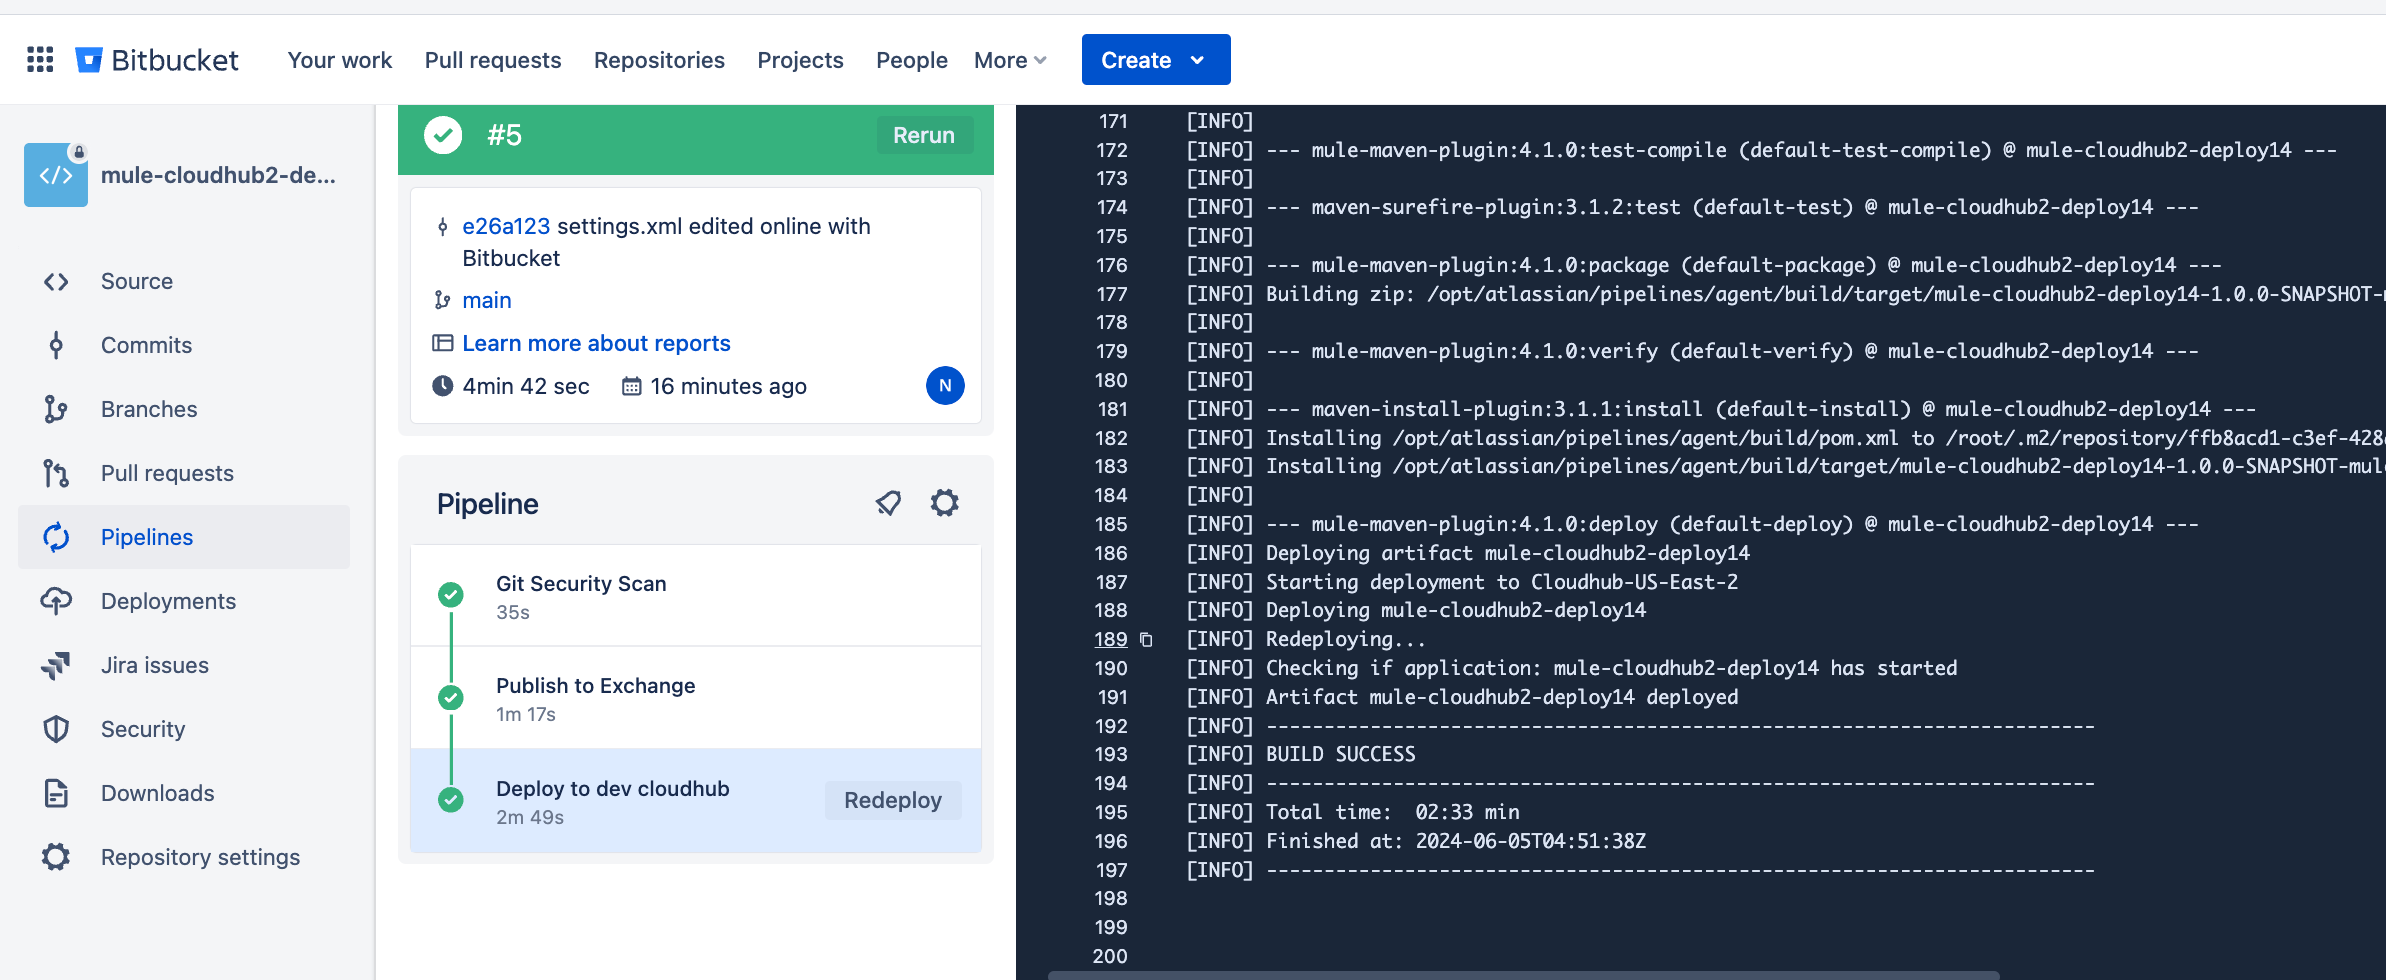
once the pipeline is triggered application will be published to Anypoint Exchange and deployed.
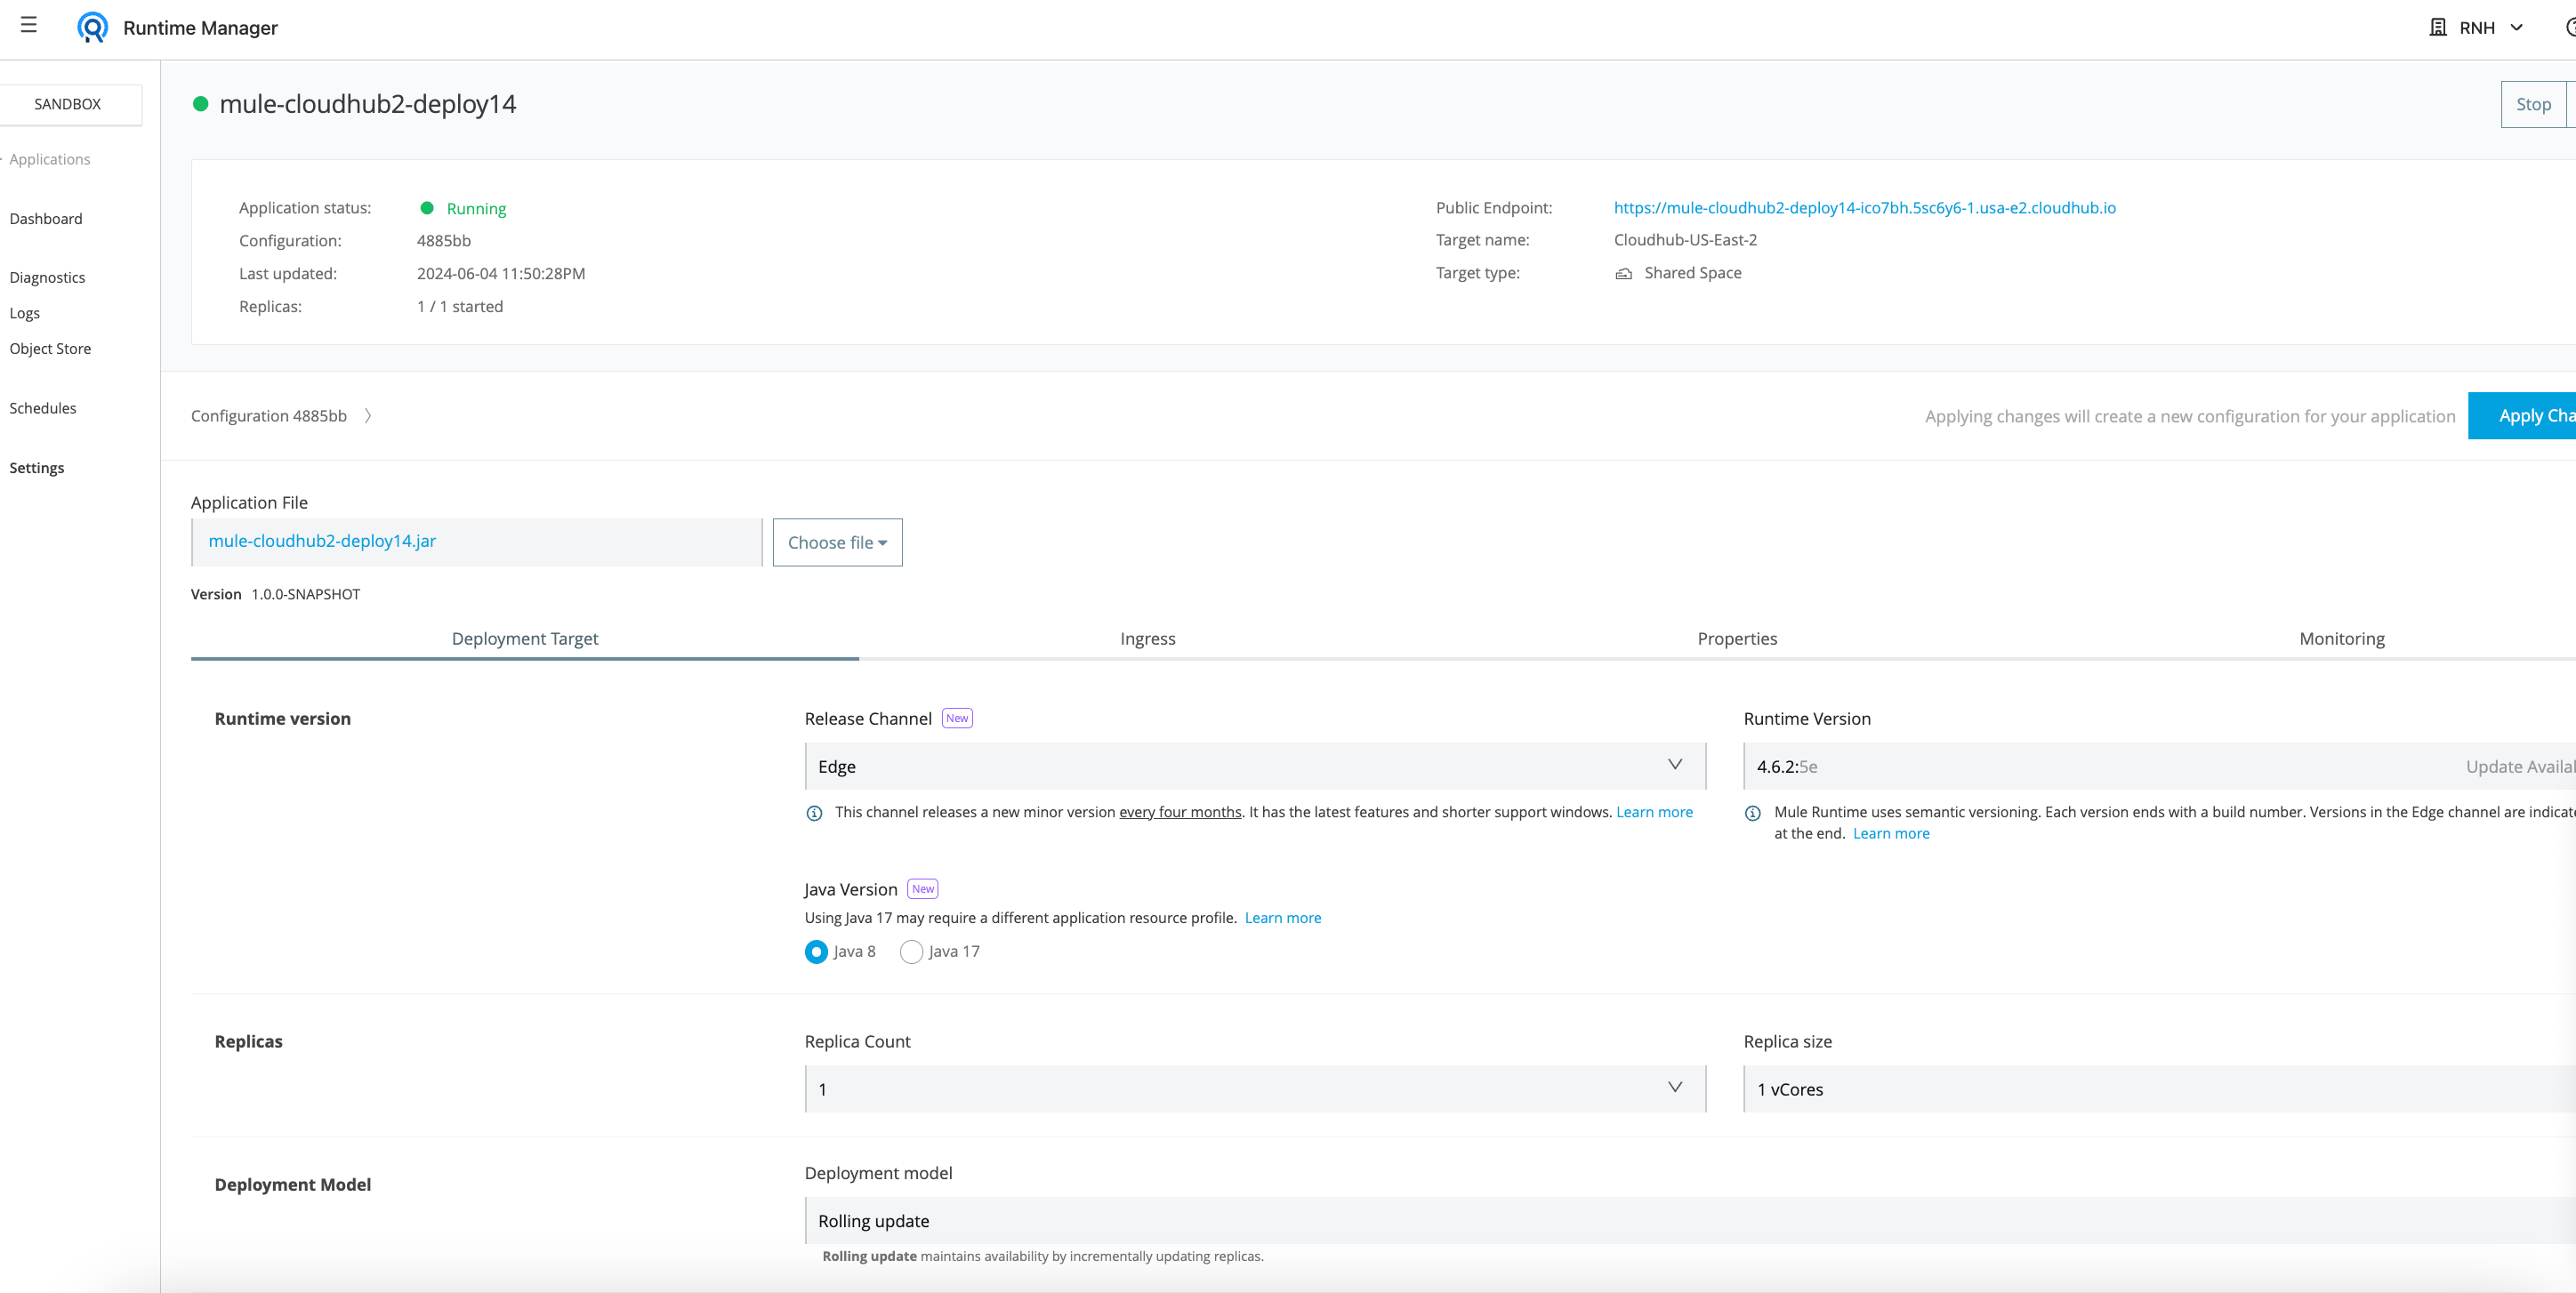
Application deployed to Cloudhub 2.0.
Subscribe to my newsletter
Read articles from NagaRaju Kukkadapu directly inside your inbox. Subscribe to the newsletter, and don't miss out.
Written by

NagaRaju Kukkadapu
NagaRaju Kukkadapu
I'm an Integration developer with extensive knowledge on designing, developing & architecture integration solutions using MuleSoft,Workato,Celigo,Talend,Spring,Java