Building a Contact Form with Astro and Cloudflare Workers: A Simple Guide
 Hunter Bertoson
Introduction
Brief overview of Astro and Cloudflare Workers
Astro and Cloudflare Workers represent two distinct yet powerful tools in modern web development. Astro is a framework designed for building fast and efficient websites, emphasizing performance through static site generation and hybrid rendering capabilities. It supports popular front-end frameworks and optimizes content delivery by pre-rendering HTML. On the other hand, Cloudflare Workers enable developers to execute code at the edge of Cloudflare's global network, bringing compute capabilities closer to users for improved latency and scalability. This serverless platform allows for powerful edge computing tasks such as API handling, real-time processing, and security enhancements, making it ideal for enhancing web applications with performance-critical functionalities directly at the network edge. By integrating these two tools, we can create a seamless contact form.
Importance of contact forms in web development
Contact forms are an essential part of any website. They enable you to collect emails, phone numbers, and other necessary information.
Purpose of the guide
Highlight how to set up Astro and Cloudflare workers to create a Contact Form.
Prerequisites
Basic knowledge of JavaScript and web development
This guide assumes you have a basic understanding of Javascript and web development. If you are wanting to learn web development. Free Code Camp is a great resource to start learning.
Node.js and npm installed
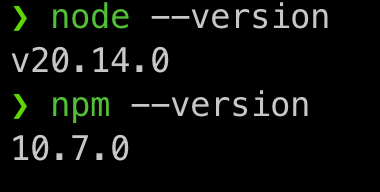
You can confirm that you have node installed by running node --version from your terminal.
These are the versions I am currently using for this guide. But any version should work just fine.

Cloudflare account
You will need a Cloudflare account and a domain for this. You can create an account here Cloudflare
If you already have a domain outside of Cloudflare. You will need to change your nameservers to Cloudflares. This guide wont cover that. But you can find documentation here https://developers.cloudflare.com/dns/zone-setups/full-setup/setup/
Setting Up the Astro Project
Creating a new Astro project
You can set up a basic astro project by running npm create astro@latest and follow the prompts. Accepting the defaults on everything is fine for this tutorial.
Installing necessary dependencies
We are also going to use Tailwind to styling and React for the Contact Form. So run npx astro add tailwind react in your terminal and accept everything.
Designing the Contact Form
Creating the form component
Inside of src/components create a ContactForm.tsx component and export it.
It should look like this to start
import {useState} from 'react';
export default function ContactForm() {
      const [responseMessage, setResponseMessage] = useState("");
    return (
        <h1>This is a Contact Form!</h1>
    );
}
Then inside of index.astro add the Component.
---
import ContactForm from '../components/ContactForm';
import Layout from '../layouts/Layout.astro';
---

<Layout title="Welcome to Astro.">
    <ContactForm client:load />
</Layout>
Adding form fields (name, email, message)
Lets add some fields!
Main contact Form
return (
<div className="isolate  px-6   lg:px-8">
   {responseMessage ? (
   <div className="mx-auto max-w-2xl text-center">
      <h2 className="text-3xl font-bold tracking-tight text-gray-900 sm:text-4xl">
         {responseMessage}
      </h2>
   </div>
   ) : (
   <>
   <div className="mx-auto max-w-2xl text-center">
      <h2 className="text-3xl font-bold tracking-tight text-gray-900 sm:text-4xl">
         Contact us
      </h2>
      <p className="mt-2 text-lg leading-8 text-gray-600">
         Have any questions or want to get in touch? Fill out the form
         below and we'll get back to you as soon as possible.
      </p>
   </div>
   <form
      className="mx-auto mt-16 max-w-xl sm:mt-20"
      onSubmit={submit}
      ref={formRef}
      >
      <div className="grid grid-cols-1 gap-x-8 gap-y-6 sm:grid-cols-2">
         <div>
            <label
               htmlFor="first-name"
               className="block text-sm font-semibold leading-6 text-gray-900"
               >
            First name
            </label>
            <div className="mt-2.5">
               <input
                  type="text"
                  name="first-name"
                  id="first-name"
                  autoComplete="given-name"
                  className="block w-full rounded-md border-0 px-3.5 py-2 text-gray-900 shadow-sm ring-1 ring-inset ring-gray-300 placeholder:text-gray-400 focus:ring-2 focus:ring-inset focus:ring-indigo-600 sm:text-sm sm:leading-6"
                  required
                  />
            </div>
         </div>
         <div>
            <label
               htmlFor="last-name"
               className="block text-sm font-semibold leading-6 text-gray-900"
               >
            Last name
            </label>
            <div className="mt-2.5">
               <input
                  type="text"
                  name="last-name"
                  id="last-name"
                  autoComplete="family-name"
                  className="block w-full rounded-md border-0 px-3.5 py-2 text-gray-900 shadow-sm ring-1 ring-inset ring-gray-300 placeholder:text-gray-400 focus:ring-2 focus:ring-inset focus:ring-indigo-600 sm:text-sm sm:leading-6"
                  />
            </div>
         </div>
         <div className="sm:col-span-2">
            <label
               htmlFor="email"
               className="block text-sm font-semibold leading-6 text-gray-900"
               >
            Email
            </label>
            <div className="mt-2.5">
               <input
                  type="email"
                  name="email"
                  id="email"
                  autoComplete="email"
                  className="block w-full rounded-md border-0 px-3.5 py-2 text-gray-900 shadow-sm ring-1 ring-inset ring-gray-300 placeholder:text-gray-400 focus:ring-2 focus:ring-inset focus:ring-indigo-600 sm:text-sm sm:leading-6"
                  />
            </div>
         </div>
         <div className="sm:col-span-2">
            <label
               htmlFor="phone-number"
               className="block text-sm font-semibold leading-6 text-gray-900"
               >
            Phone number
            </label>
            <div className="relative mt-2.5">
               <input
                  type="tel"
                  name="phone-number"
                  id="phone-number"
                  autoComplete="tel"
                  className="block w-full rounded-md border-0 px-3.5 py-2  text-gray-900 shadow-sm ring-1 ring-inset ring-gray-300 placeholder:text-gray-400 focus:ring-2 focus:ring-inset focus:ring-indigo-600 sm:text-sm sm:leading-6"
                  />
            </div>
         </div>
         <div className="sm:col-span-2">
            <label
               htmlFor="message"
               className="block text-sm font-semibold leading-6 text-gray-900"
               >
            Message
            </label>
            <div className="mt-2.5">
               <textarea
                  name="message"
                  id="message"
                  rows={4}
                  className="block w-full rounded-md border-0 px-3.5 py-2 text-gray-900 shadow-sm ring-1 ring-inset ring-gray-300 placeholder:text-gray-400 focus:ring-2 focus:ring-inset focus:ring-indigo-600 sm:text-sm sm:leading-6"
                  />
            </div>
         </div>
      </div>
      <div className="mt-10">
         <button className="block w-full rounded-md bg-indigo-600 px-3.5 py-2.5 text-center text-sm font-semibold text-white shadow-sm hover:bg-indigo-500 focus-visible:outline focus-visible:outline-2 focus-visible:outline-offset-2 focus-visible:outline-indigo-600">
         Let's talk
         </button>
      </div>
   </form>
   </>
   )}
</div>
);
Implementing form validation
We are doing some basic validation here using required and other attributes. Feel free to add your own as you feel fit.
Setting Up Cloudflare Workers
Domain Records
We need to add some domain records so that Mailchannels will work.
Setup Domain Lockdown
Create a TXT record with your domain to activate Domain Lockdown, crucial for using MailChannels through Cloudflare Workers.
Name:
_mailchannels
Setup SPF
Create an SPF record to mark MailChannels as an authorized email sender for your domain, hence reducing the chances of your emails being flagged as spam.
Name:
@Value:
v=spf1 include:relay.mailchannels.net-all
Setup DKIM
Generate and deploy a DKIM private key using OpenSSL to validate that the emails are indeed sent from your domain, ensuring that the message content remains unaltered during transmission.
Run
openssl genrsa 2048 | tee priv_key.pem | openssl rsa -outform der | openssl base64 -A > priv_key.txtto generate a DKIM private key.Run
echo -n "v=DKIM1;p=" > pub_key_record.txt && openssl rsa -in priv_key.pem -pubout -outform der | openssl base64 -A >> pub_key_record.txtto generate a DKIM public key.
Create a TXT record for DKIM to make the public key discoverable.
Name:
mailchannels._domainkeyValue: Record from
pub_key_record.txt
Creating a new Worker
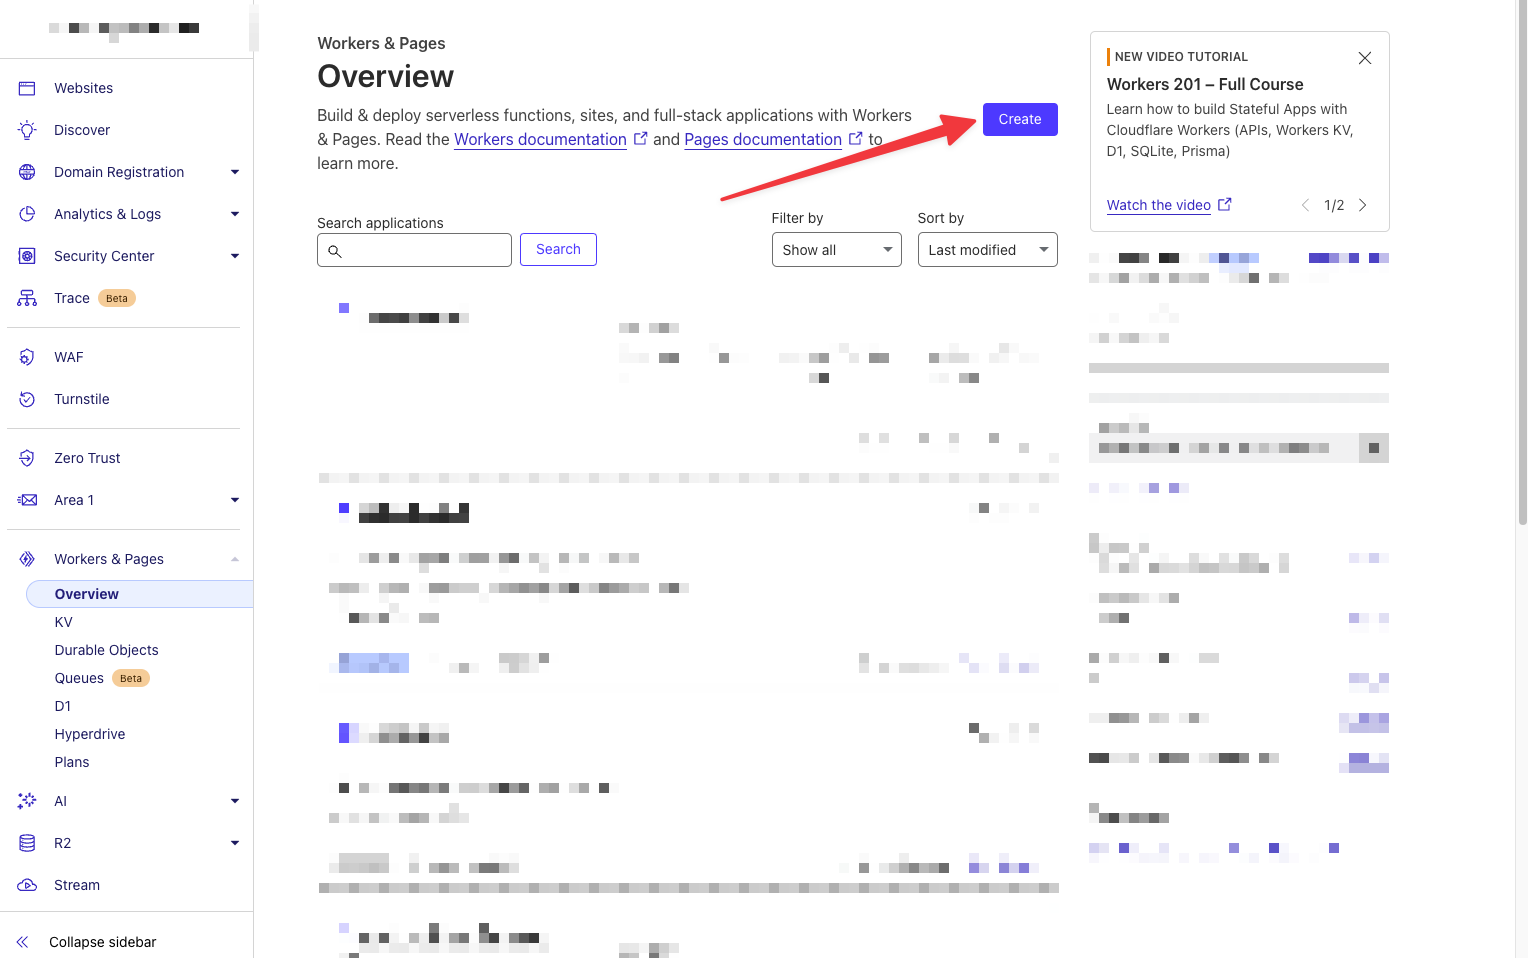
Inside of Cloudflare. On the left hand side click Workers and Pages

Then choose Create

Then choose the Hello World worker and name it however you feel.
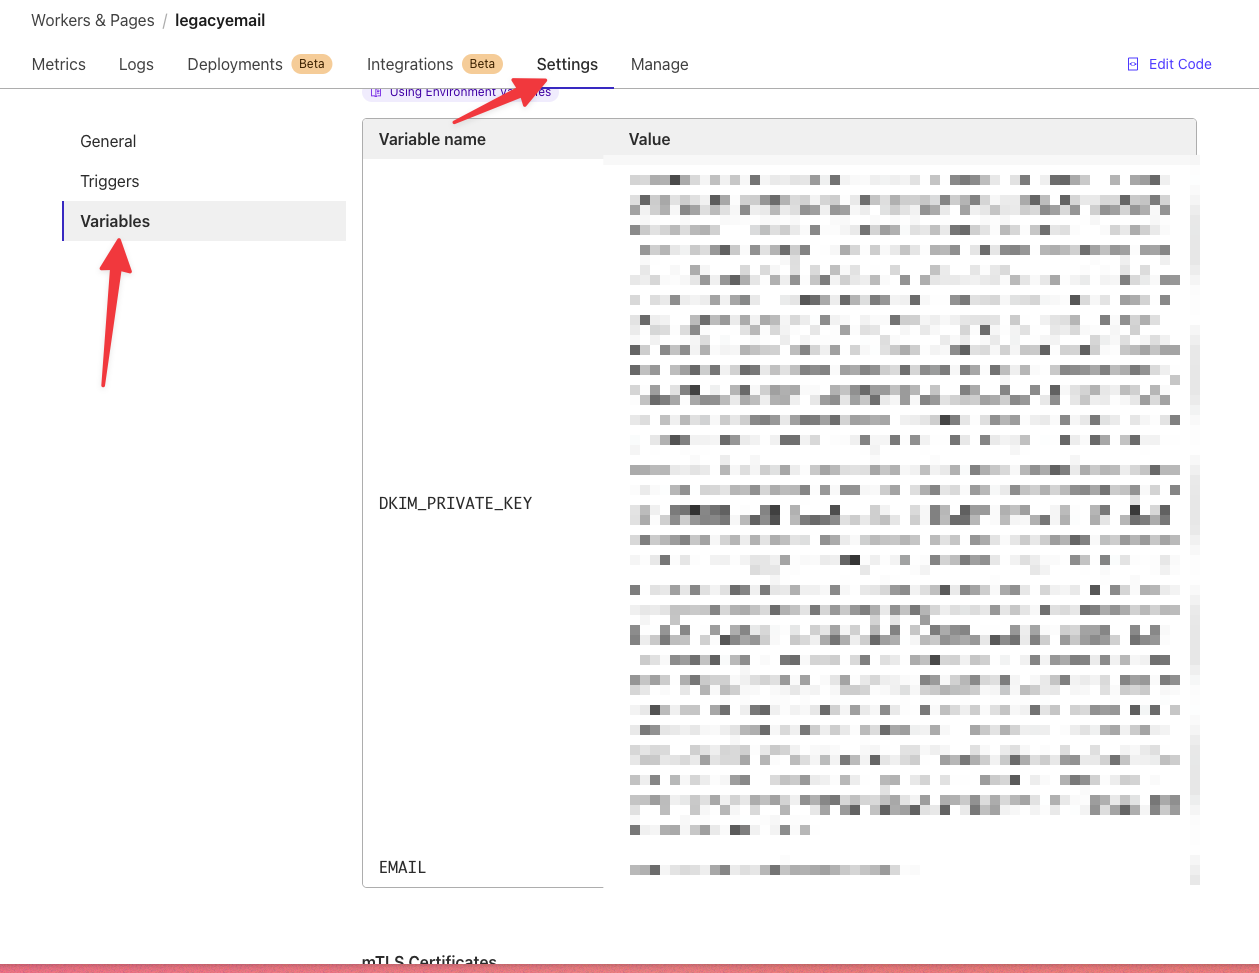
Once its deployed hit Continue to Project. We need to add some Environment Variables.
DKIM_PRIVATE_KEY should contain the value from your priv_key.txt file that we generated earlier.
EMAIL is whatever email you want to send from. I suggest noreply@yourdomain.com

Once those have been added. You can save and Deploy. Then hit Edit Code.
Writing the Worker script to handle form submissions
This is the basic code needed to send an email
export default {
    async fetch(request, env){
        if (request.method !== 'POST') {
            const message = 'Method Not Allowed';
            return new Response(JSON.stringify(message), { status: 405 });
        }

        let requestBody;
        try {
            requestBody = await request.json();
        } catch (jsonError) {
            return new Response(JSON.stringify({ message: 'Invalid JSON data in request' }), { status: 400 });
        }

        const { firstName, lastName, email, phoneNumber, message } = requestBody;

        if (!firstName || !lastName || !email || !phoneNumber || !message) {
            const message = 'Missing values';
            return new Response(JSON.stringify(message), { status: 400 });
        }
        let send_request = new Request('https://api.mailchannels.net/tx/v1/send', {
            method: 'POST',
            headers: {
                'content-type': 'application/json',
            },
            body: JSON.stringify({
                personalizations: [
                    {
                        to: [{ email: email, name: `${firstName}${lastName}` }],
                        dkim_domain: 'yourdomain.com',
                        dkim_selector: 'mailchannels',
                        dkim_private_key: env.DKIM_PRIVATE_KEY,
                    },
                ],
                from: {
                    email: env.EMAIL,
                    name: 'New Contact Submission',
                },
                subject: 'New Contact Submission',
                content: [
                    {
                        type: 'text/html',
                        value: `
            <p><strong>Name:</strong> ${firstName} ${lastName}</p>
            <p><strong>Email:</strong> ${email}</p>
            <p><strong>Phone Number:</strong> ${phoneNumber}</p>
            <p><strong>Message:</strong> ${message}</p>
            `,
                    },
                ],
            }),
        });
        try {
            let response = await fetch(send_request);
            if (response.status !== 200) {
                return new Response(`Error: ${response.statusText}`, { status: response.status });
            }
            return new Response('Email sent successfully', { status: 200 });
        } catch (error) {
            console.error('Error sending email:', error);
            return new Response('Failed to send email', { status: 500 });
        }
    },
};
Integrating the Contact Form with Cloudflare Workers
Configuring the form to send data to the Worker
Back in our code. We need to submit the ContactForm.tsx script again.
import { type FormEvent, useState, useRef } from "react";

const formRef = useRef<HTMLFormElement>(null);
const [responseMessage, setResponseMessage] = useState("");
const submit = async (e: FormEvent<HTMLFormElement>) => {
    e.preventDefault();
    if (data.success) {
      const formData = new FormData(e.target as HTMLFormElement);
      const response = await fetch("/api/contact", {
        method: "POST",
        body: formData,
      });
      if (response.ok) {
        setResponseMessage("Thanks for reaching out! We'll be in touch soon.");
      }
    } else {
      alert("There was an error submitting the form. Please try again.");
    }
  };
This will add the proper imports we need and set it up to start working properly.
Astro API Endpoint
Inside of src/pages create an api folder and create a contact.ts file
Add this code inside of it
import type { APIRoute } from "astro";

export const prerender = false;

export const POST: APIRoute = async ({ request }) => {
  const data = await request.formData();
  const firstName = data.get("first-name");
  const lastName = data.get("last-name");
  const email = data.get("email");
  const phoneNumber = data.get("phone-number");
  const message = data.get("message");
  const response = await fetch("yourworkerurl", {
    method: "POST",
    headers: {
      "Content-Type": "application/json",
    },
    body: JSON.stringify({
      firstName,
      lastName,
      email,
      phoneNumber,
      message,
    }),
  });
  return new Response(response.statusText, { status: 200 });
};
Be sure to update the fetch to use your actual worker url.
Once you have saved. Go ahead and try it out and as long as everything got entered correctly. You should receive an email to the email you put in the contact form.
Using in Production
The only thing you want to change in your production worker is this line
to: [{ email: 'emailyouwantformsubmissionsat', name: `${firstName}${lastName}` }],
Conclusion
Recap of the steps
Created Astro Project
Created Cloudflare Worker
Created API Endpoint
Encouragement to explore further enhancements and features
You can add more fields, more validation, captcha. This is just the tip of the iceberg for this.
You can find all the code on my Github here: https://github.com/hkbertoson/cloudflare-workers-email
Subscribe to my newsletter
Read articles from Hunter Bertoson directly inside your inbox. Subscribe to the newsletter, and don't miss out.
Written by
