Understanding Load Balancing and Auto Scaling
 Utkarsh Gupta
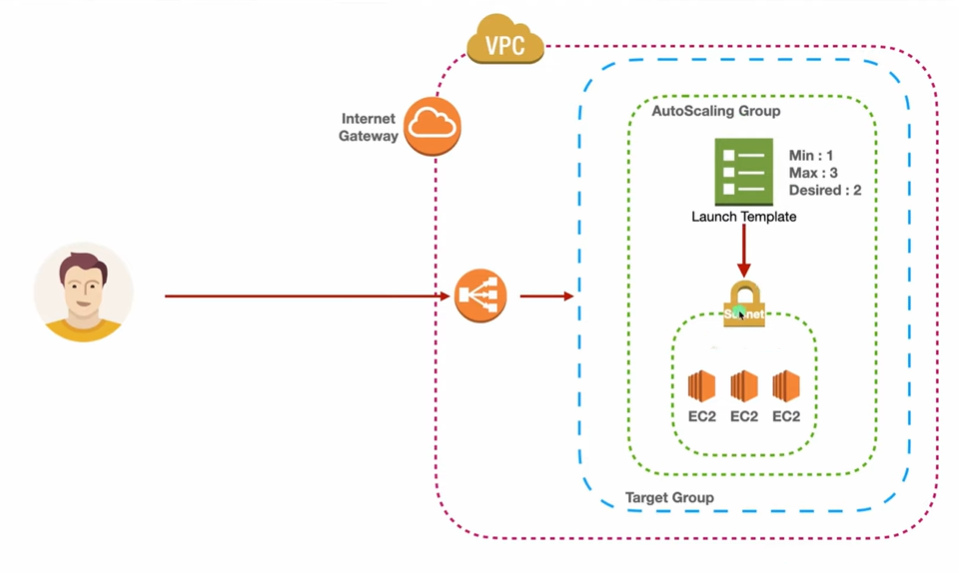
𝙇𝙤𝙖𝙙 𝘽𝙖𝙡𝙖𝙣𝙘𝙚𝙧 𝙖𝙣𝙙 𝘼𝙪𝙩𝙤𝙎𝙘𝙖𝙡𝙞𝙣𝙜 𝙂𝙧𝙤𝙪𝙥!
Load Balancer in AWS:
🔁 Distributes incoming traffic across multiple instances or services
🚀 Ensures optimal performance and high availability
⚖️ Balances the workload to prevent resource overload
📈 Improves application scalability and fault tolerance
Auto Scaling Group (ASG) in AWS:
🔢 Automatically adjusts instance count based on demand
⏰ Ensures availability of desired instances at all times
🔄 Works with other AWS services to monitor and adjust capacity
⚙️ Optimizes resource utilization and cost
👍 Enhances scalability, fault tolerance, and performance
Benefits of Load Balancer and Auto Scaling Group:
💪 Improved performance and responsiveness
🔄 High availability and fault tolerance
📈 Scalability to handle traffic spikes
💰 Cost optimization through resource management
🤖 Simplified operations with automated processes
Step 1: Launch an EC2 Instance :

Note: Create a image of any one instance.
Find the User data field and enter your installation script for Nginx. For example: (This script installs Nginx and starts it.)
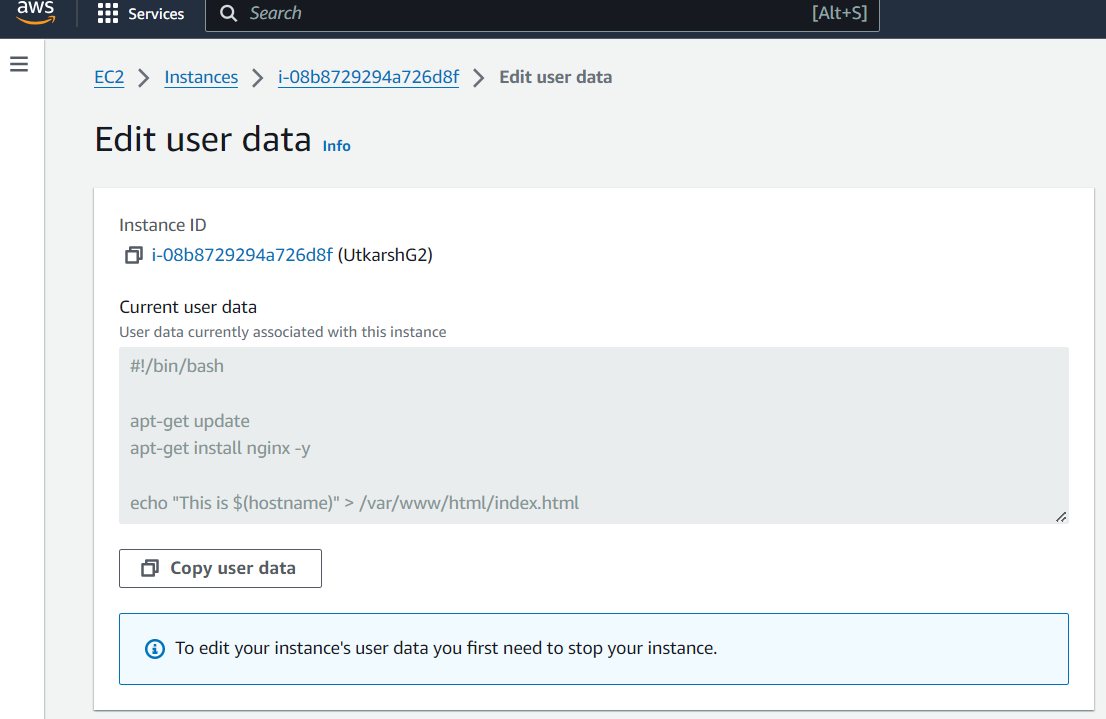
- Once the instances are running, copy their Public IP addresses. Open a web browser and paste the Public IP address of each EC2 instance into the address bar. You should see a webpage displaying your name on one instance and "welcome to learning-Utkarsh.com :)" on the other instance "This is ip-172-31-39-109 :)".


Step 2: Create a Load Balancer(LB) :
Go to the EC2 dashboard in the AWS Management Console. Click on "Load Balancers" in the left sidebar.
Click on "Create Load Balancer" and select "Application Load Balancer".
Configure the load balancer with a name, listener (HTTP on port 80), and availability zones and select mapping zones in your region as you wanted to create. In my case selecting all.
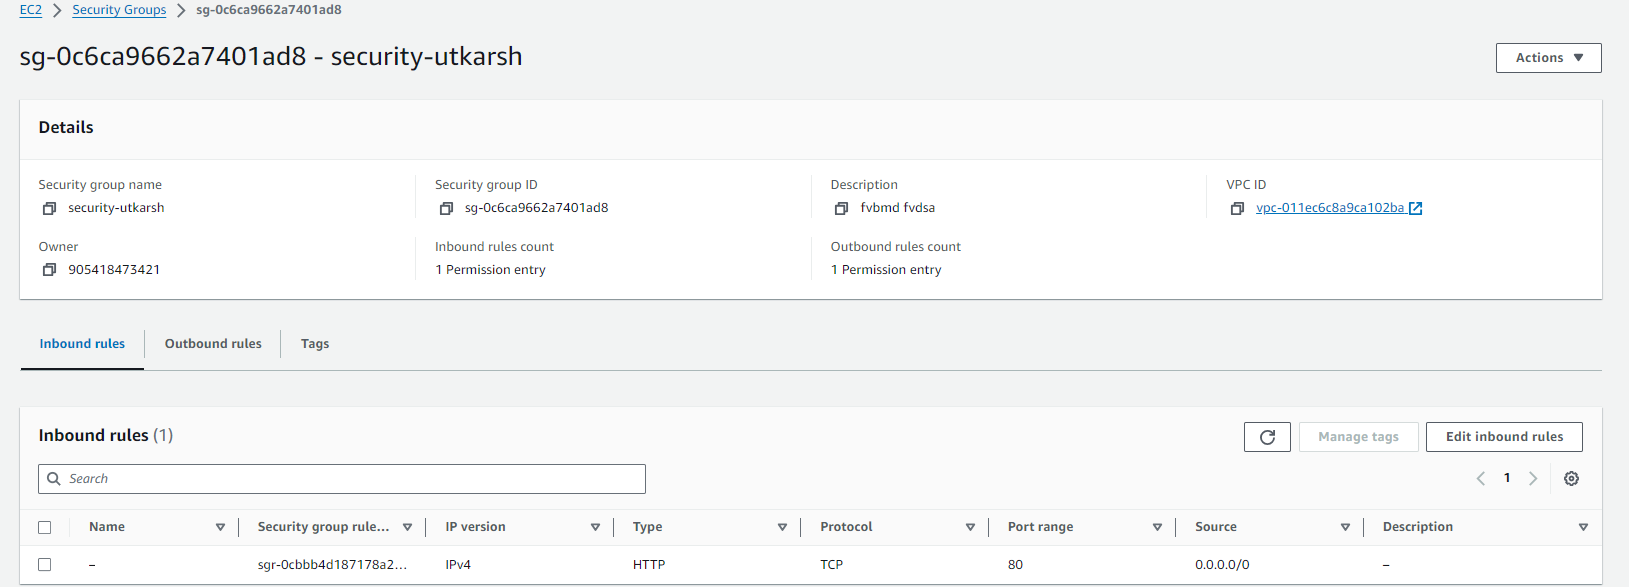
Now You have to create security Group for load balancer. By default AWS provides you a group and also you can select launch-wizard-1, 2, 3, 4 in Security group.
Good practice to create new one so click on Create New Security Group in Security Group Section. It will take you to the new tab on browser. Fill your group name as you want & give Description. Set Inbound Rule to HTTP port 80 And keep rest all by default and click on create group and refresh your security group and select your group.

Now in Listeners and routing Section there you find the select target group but we don't have the Target group So we click on Create Target Group and it will take you to a new browser. Now you have to Select Target Type as a Instance Because we use our ec2 instance for load balancing. Now enter the Target group name.
Scroll Down to bottom and click on Next. Now you see There is your all running instance so you have to select instance for load balancing And click on Include as pending below now you have a option to review targets review and click on create Target Group.
Now you have a option to review targets review and click on create Target Group:
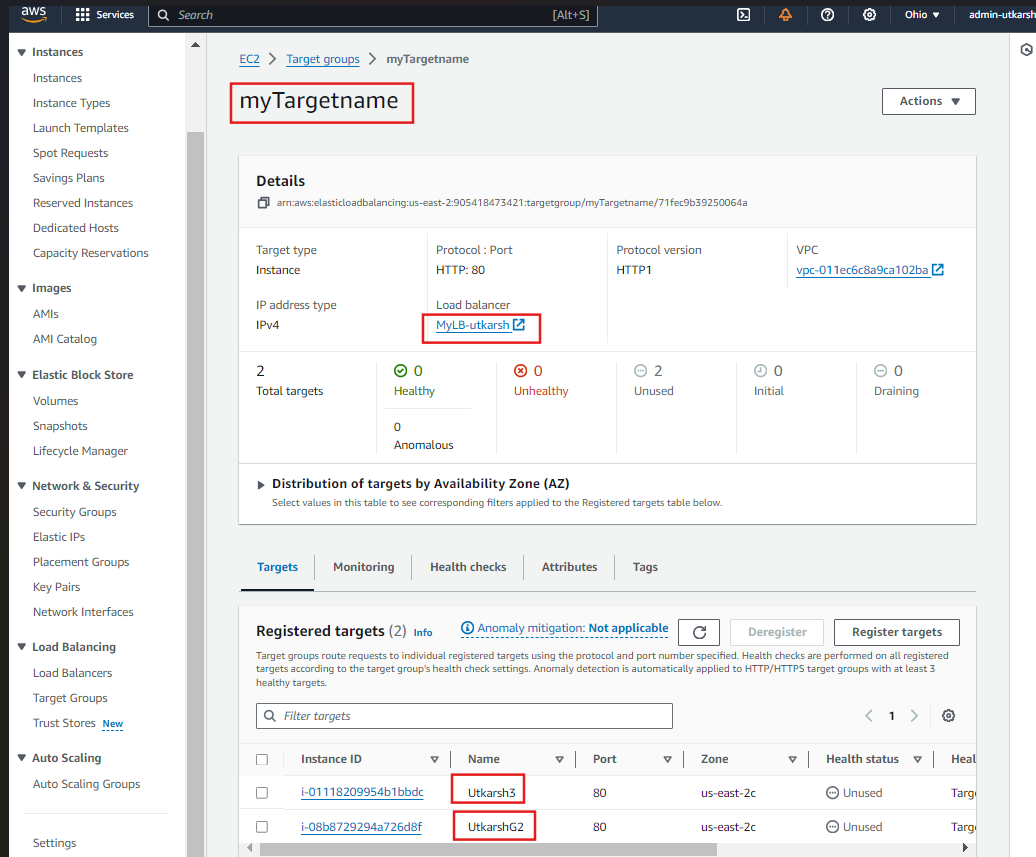
- Come back go to the browsers Load Balancer tab and refresh the target group section and there you will find your target group that you created now select that.
- Scroll down and there you will see the summary about load balancer review it and click on create load balancer.
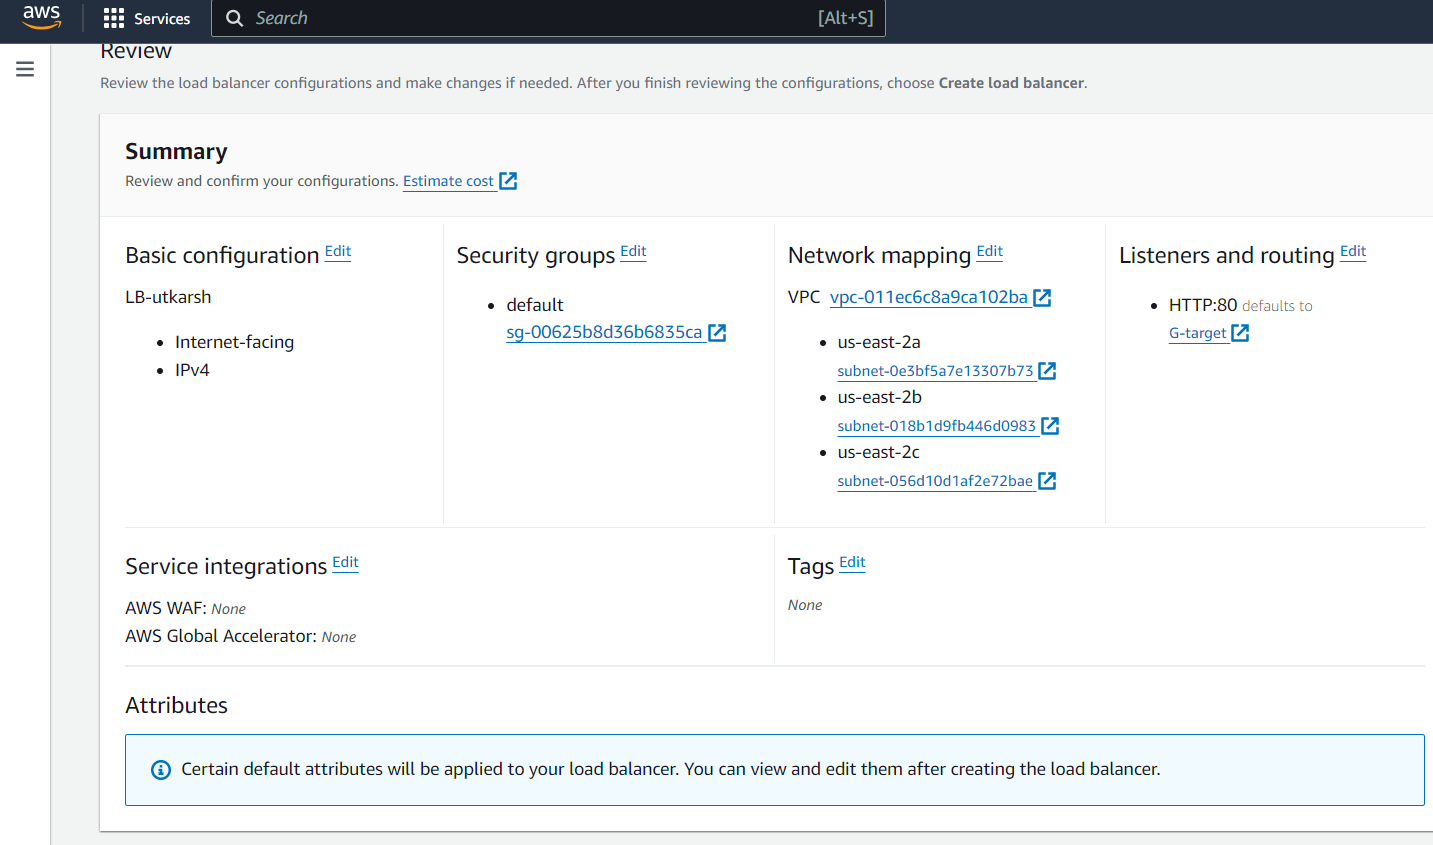
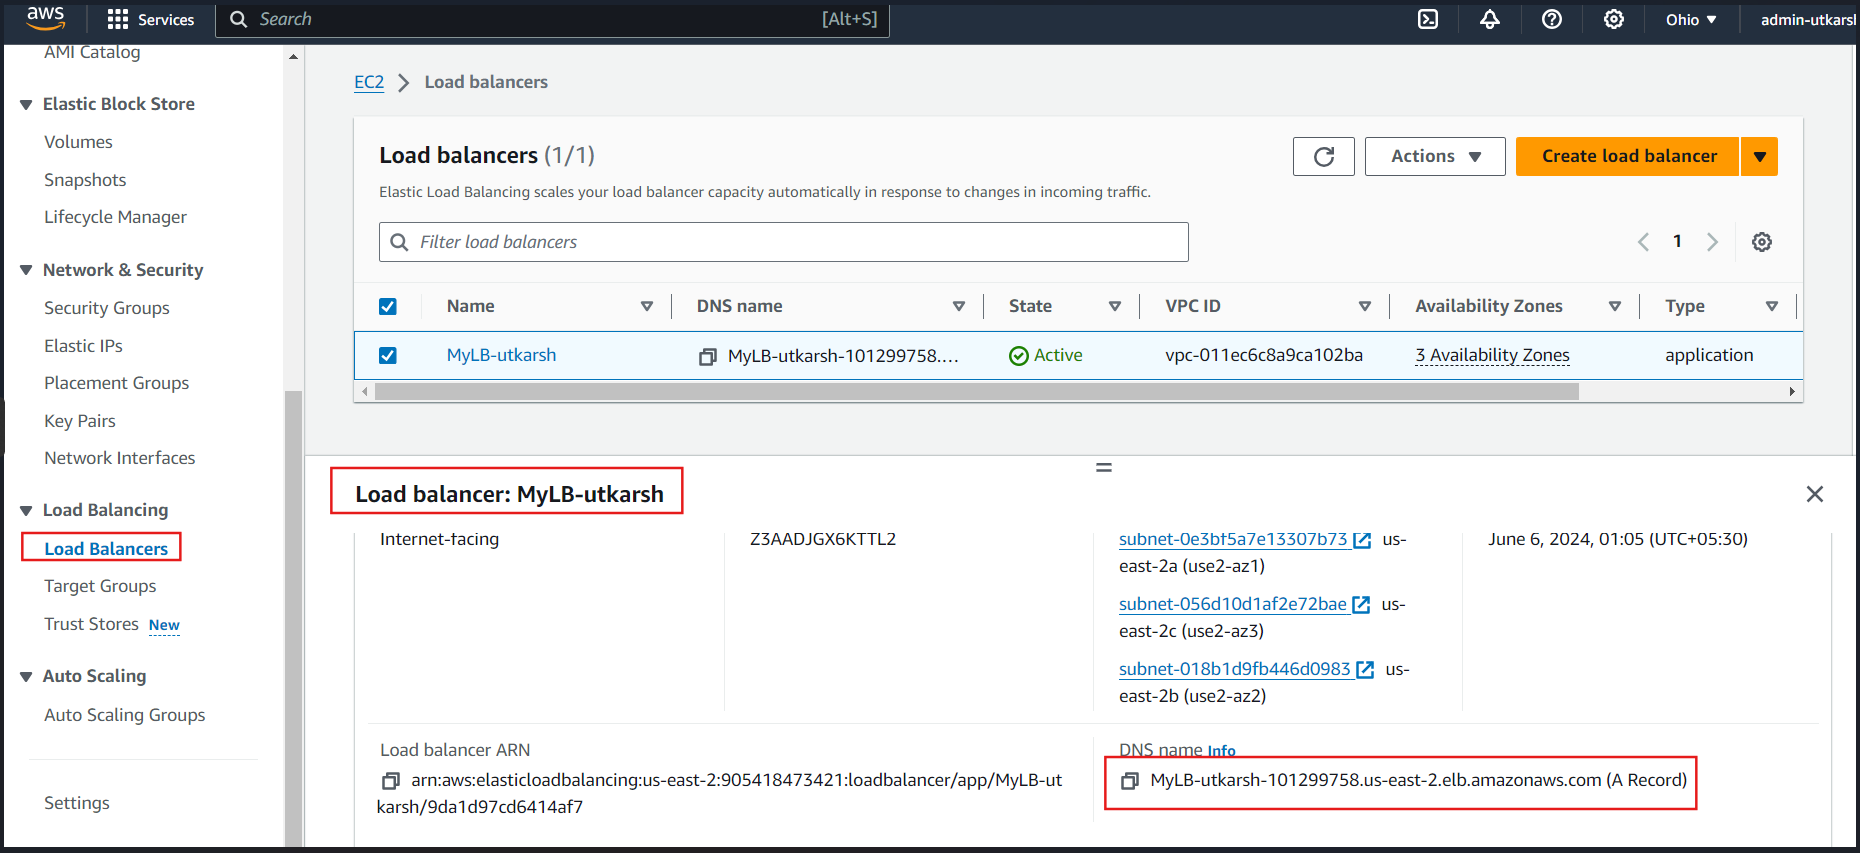
The status of Load balancer is showing Active for EC2 instance.

- Now Its Time to test your Load Balancer. Copy the DNS name from Load balancer Description and paste in new browser tab and refresh it again and again you will see your two difference sentence in your servers file. If you didn't see that please wait for 2 min load balancer take time to active.

Step 3: Create a Auto Scaling Groups :
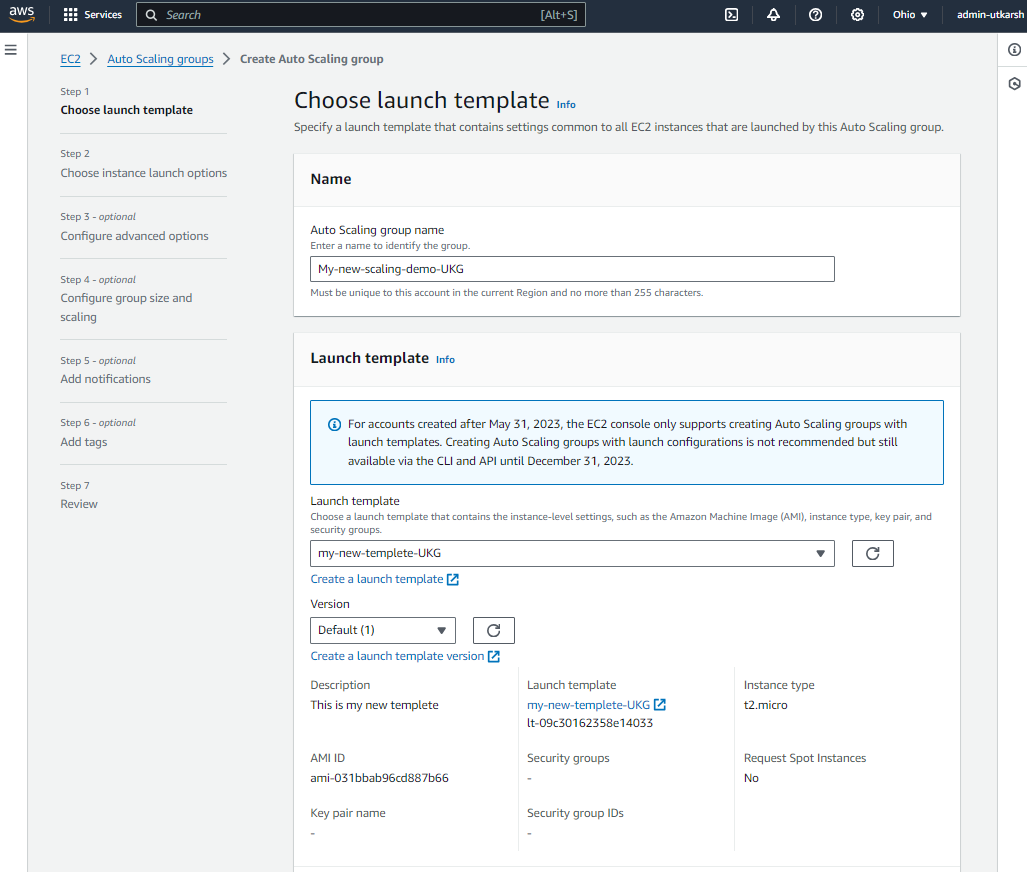
1. Choose launch template
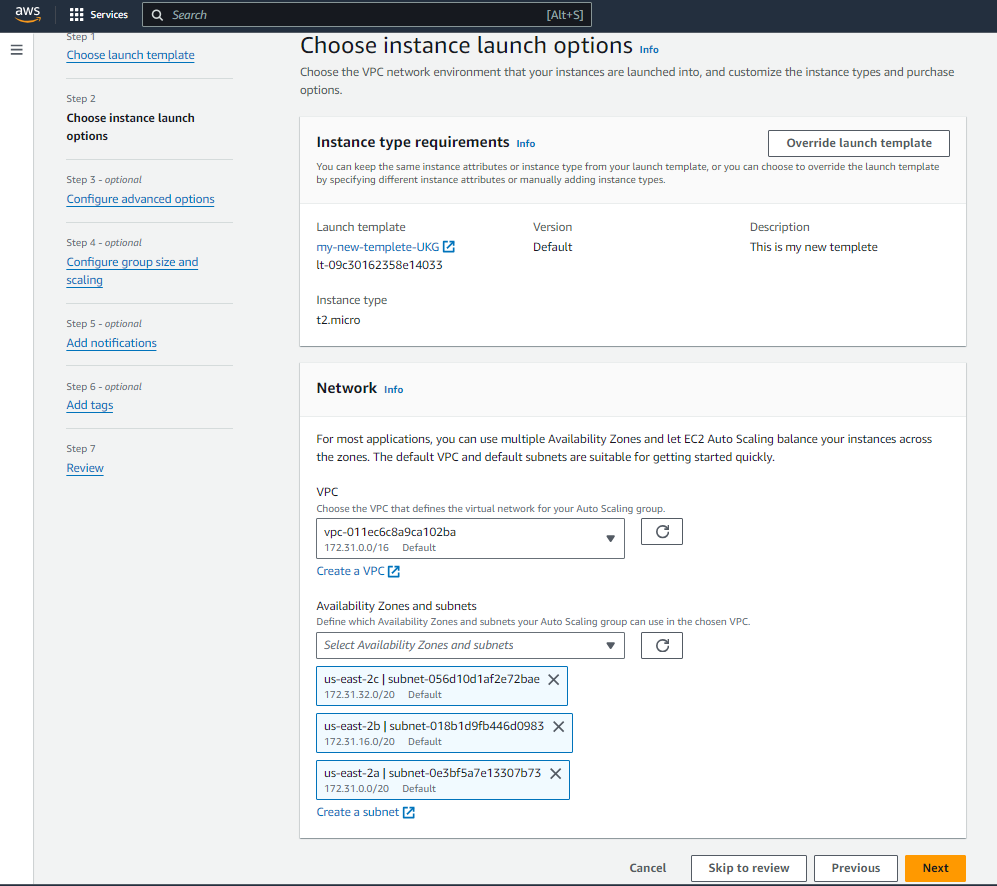
2. Choose instance launch options
3. Configure advanced options
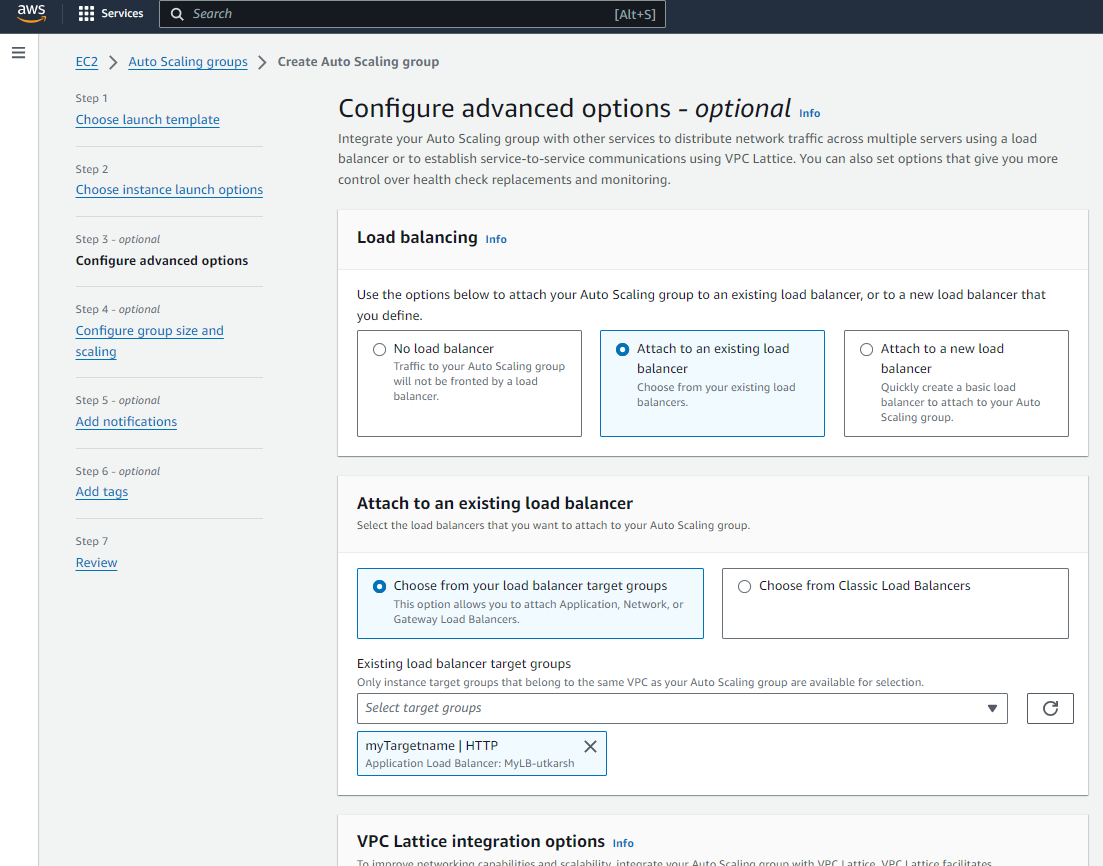
4. Configure group size and scaling
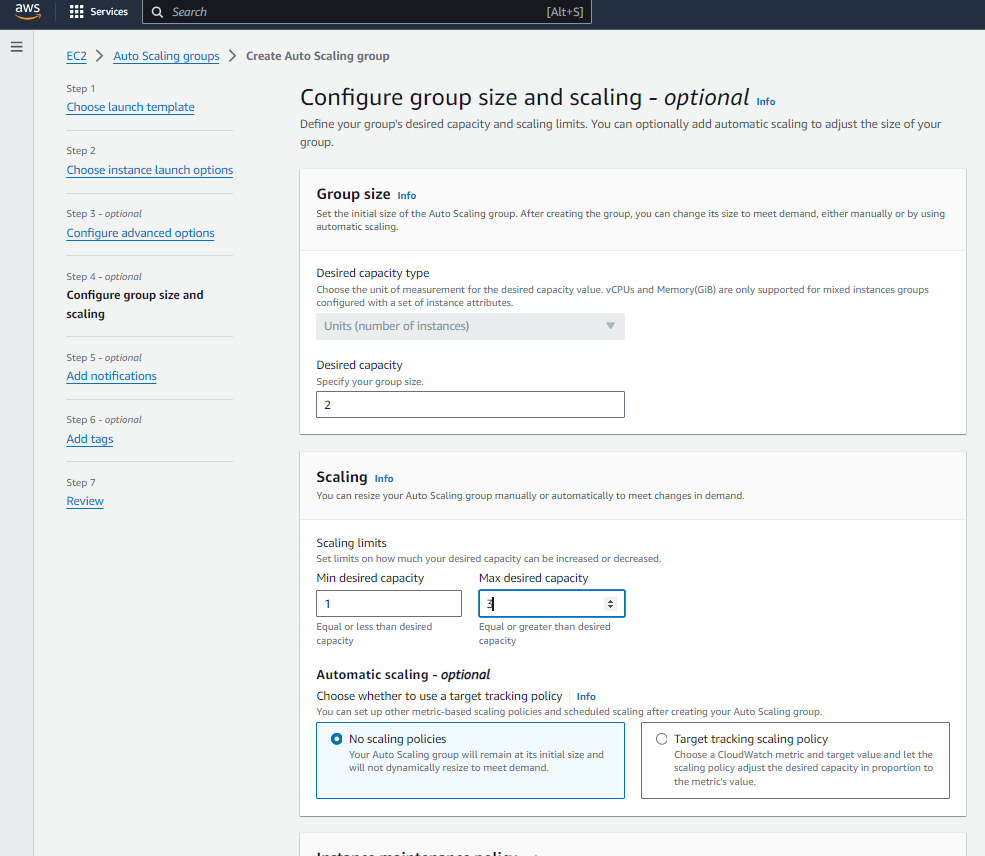
5. Add notifications
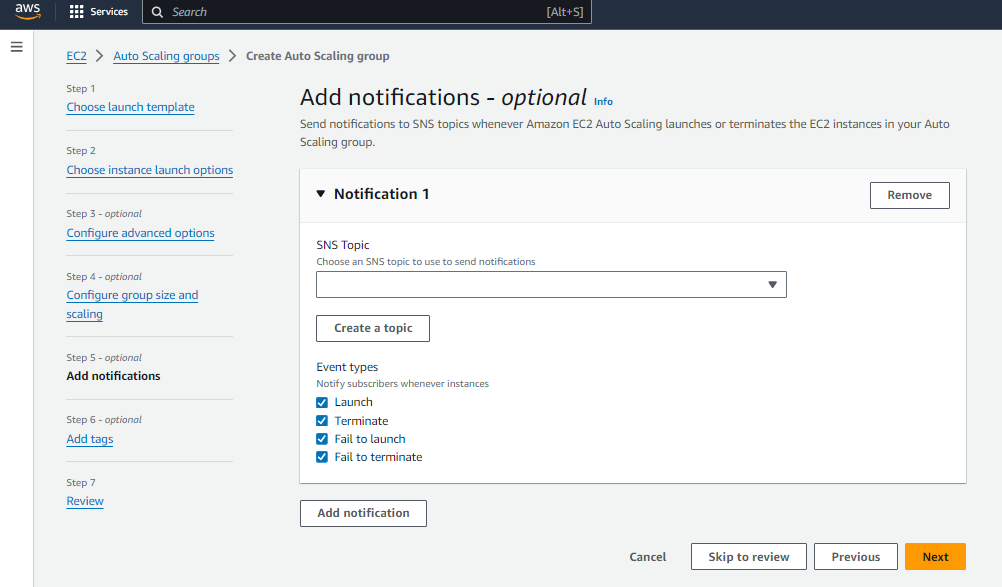
6. Add tags
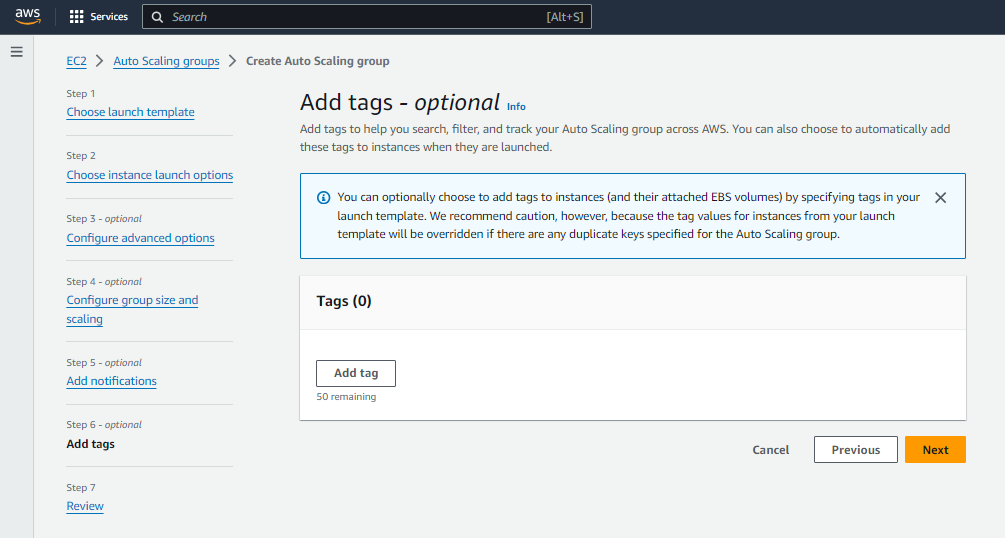
7. Review
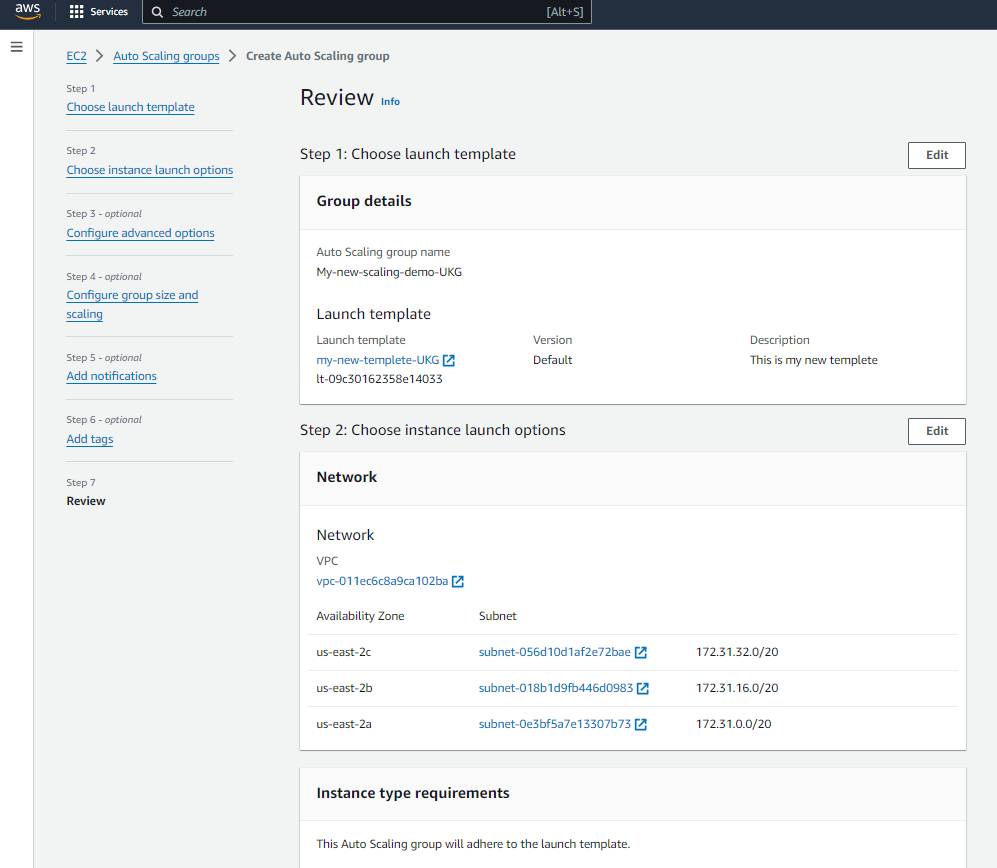
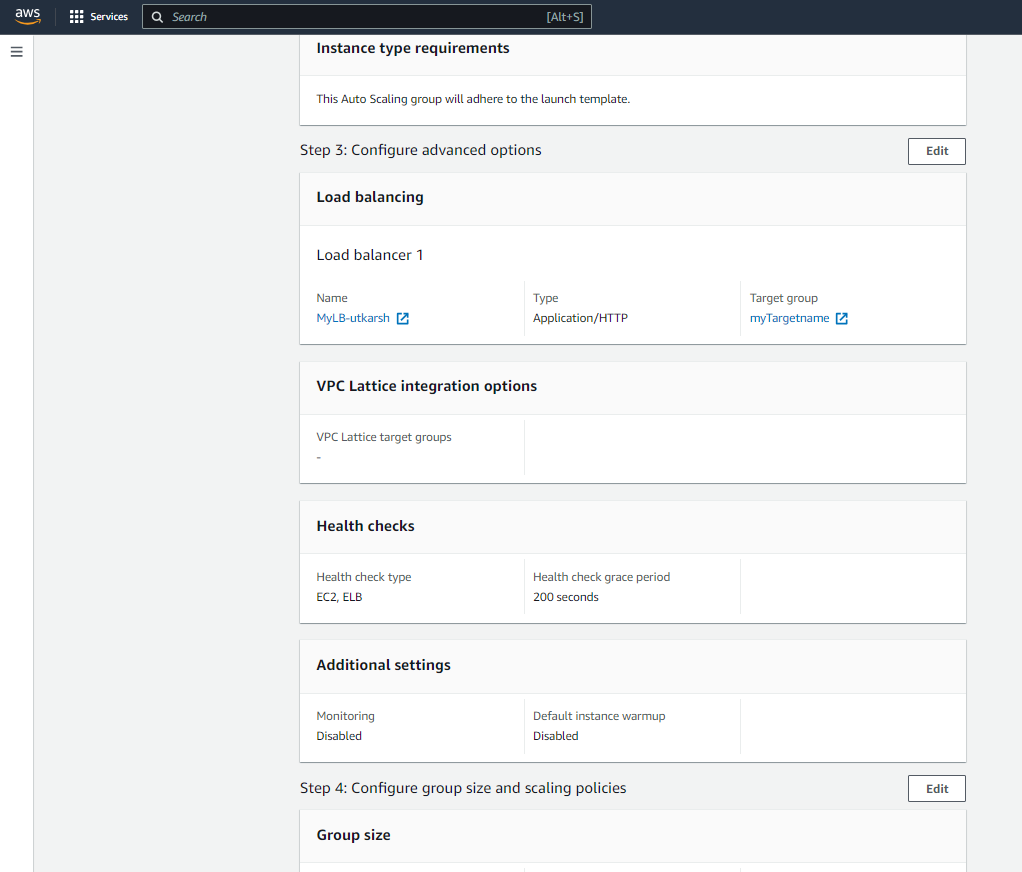
Now, Auto Scaling groups Successfully created
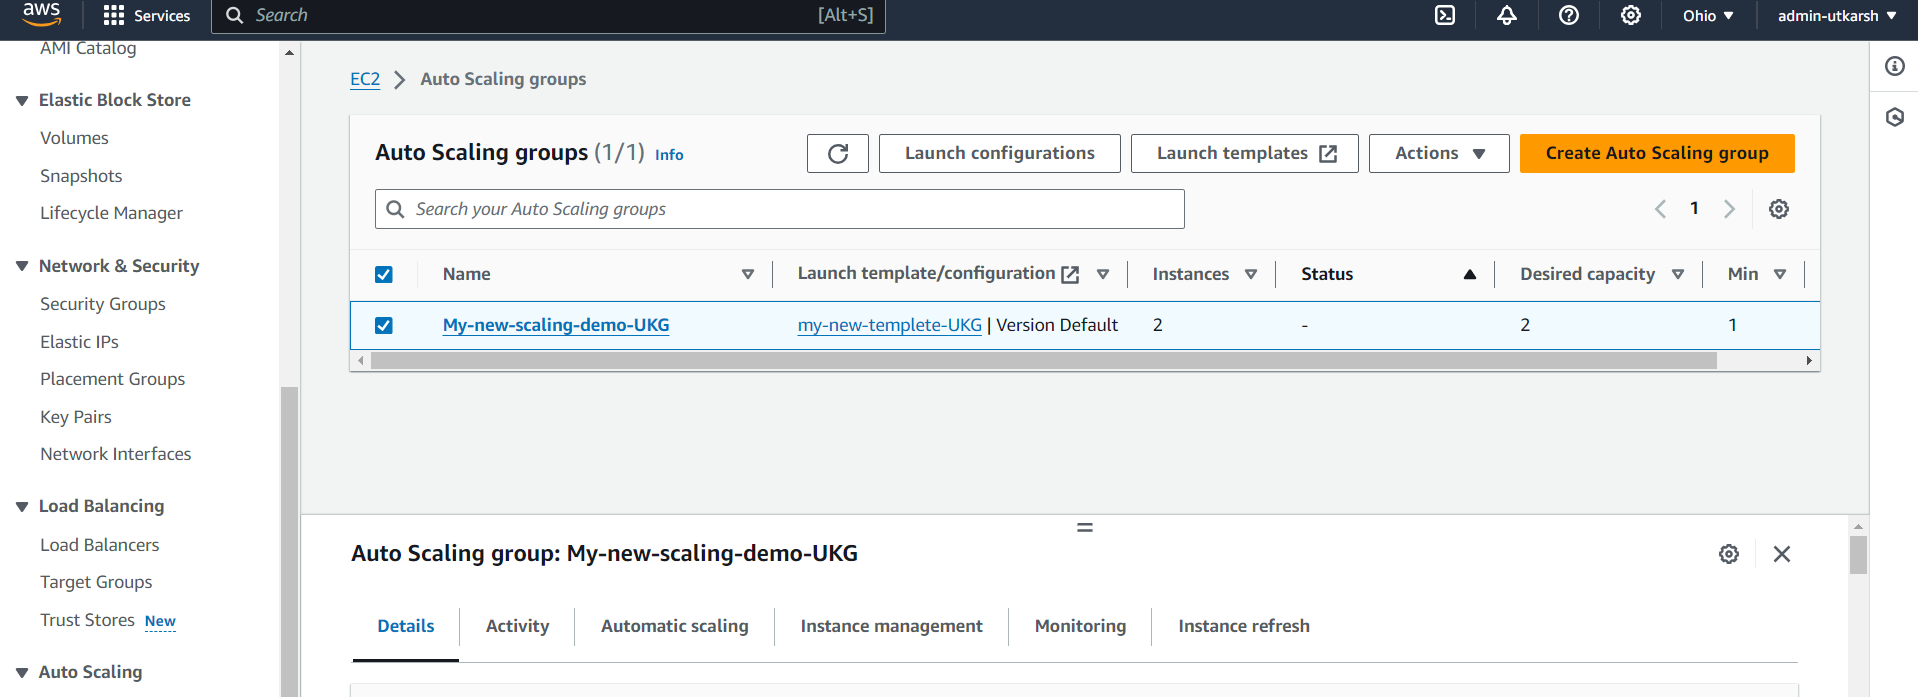
Now it's time to test your Auto Scaling groups. We had set the desired capacity is two in the installation. So it create two EC2 instances.

Again copy the DNS name from Load balancer and paste in new browser tab

Automatically adjusts instance count based on demand. We had set the Max desired capacity is 3 . So it create three EC2 instances base on demand:

Thank you for the reading!😊
Subscribe to my newsletter
Read articles from Utkarsh Gupta directly inside your inbox. Subscribe to the newsletter, and don't miss out.
Written by

Utkarsh Gupta
Utkarsh Gupta
🚀 Hi everyone! I'm Utkarsh Gupta, IAM Consultant. I am very passionate for all things DevOps. Right now, I'm learning and working on some cool projects and I can't wait to share what I'm learning with you all! 🛠️ Here's what's in my toolbox: Linux Docker Kubernetes Jenkins AWS Python Prometheus Grafana Ansible Terraform Join me as we explore AWS DevOps together. Let's learn and grow together in this ever-changing field! 🤝 Feel free to connect with me for: Sharing experiences Friendly chats Learning together Follow my journey on Hashnode and LinkedIn for daily updates. Let's dive into the world of DevOps together! 🚀 #DevOps #AWS #DevOpsJourney #90DaysOfDevOps