How to Deploy Rancher on MicroK8s: A Step-by-Step Guide
 Santosh Parajuli
MicroK8s is a low-ops, minimal production Kubernetes.
MicroK8s is an open-source system for automating the deployment, scaling, and management of containerized applications. It offers the core features of Kubernetes in a compact form, scalable from a single node to a high-availability production cluster.
Get started
what you'll need
An Ubuntu 22.04.4 LTS environment to run the commands.
MicroK8s runs with as little as 540MB of memory, but to handle workloads, you need a system with at least 20GB of disk space and 4GB of memory.
An internet connection
Install MicroK8s
MicroK8s will install a minimal, lightweight Kubernetes that you can run on almost any machine. You can install it with a snap:
sudo snap install microk8s --classic --channel=1.27Join the group
MicroK8s creates a group to allow easy use of commands that need admin privileges. To add your current user to the group and access the .kube caching directory, run these three commands:
 sudo usermod -a -G microk8s $USER
 mkdir -p ~/.kube
 chmod 0700 ~/.kube
re-enter the session
Check the status
MicroK8s has a built-in command to display its status. During installation, you can use the
--wait-readyflag to wait for the Kubernetes services to initialize:microk8s status --wait-readyAccess Kubernetes
MicroK8s includes its own version of
kubectlfor accessing Kubernetes. Use it to run commands to monitor and control your Kubernetes setup. For example, to view your node, you can use the following command:microk8s kubectl get nodes…or to see the running services:
microk8s kubectl get servicesMicroK8s uses a namespaced kubectl command to avoid conflicts with any existing kubectl installations. If you don't have kubectl installed, you can add an alias to make it easier to use. Just append the following to
~/.bash_aliases:alias kubectl='microk8s kubectl'MetalLB
MetalLB is a load-balancer implementation for bare metal Kubernetes clusters, using standard routing protocols. It will monitor for services with the type
LoadBalancerand assign them an IP address from a virtual pool.microk8s enable metallbIngress
Ingress exposes HTTP and HTTPS routes from outside the cluster to services within the cluster. Traffic routing is controlled by rules defined on the Ingress resource.
 microk8s enable ingress

 # Get ingress-controller External-IP
 microk8s kubectl -n ingress get svc
 NAME      TYPE           CLUSTER-IP       EXTERNAL-IP   PORT(S)                      AGE
 ingress   LoadBalancer   10.152.183.125   10.10.11.60   80:31468/TCP,443:32521/TCP   67s
What is a Rancher?
Rancher is a Kubernetes management tool that allows you to deploy and run clusters anywhere and on any provider.
Rancher can set up Kubernetes from a hosted provider, create compute nodes, install Kubernetes on them, or import existing Kubernetes clusters running anywhere.
Deploy a Rancher
Add the Helm Chart Repository
Use
helm repo addcommand to add the Helm chart repository that contains charts to install Rancher.# Stable: Recommended for production environments microk8s helm repo add rancher-stable https://releases.rancher.com/server-charts/stableEnable cert-manager
microk8s enable cert-managerInstall a Rancher
 microk8s helm install rancher rancher-stable/rancher
 --create-namespace \
 --namespace cattle-system \
 --version v2.8.1 \
 --set hostname=10.10.11.57.sslip.io \
 --set bootstrapPassword=Rancher@123# \
 --set replicas=1
Verify that the Rancher Server is Successfully Deployed
 kubectl -n cattle-system rollout status deploy/rancher
 deployment "rancher" successfully rolled out

 kubectl -n cattle-system get deploy rancher
 NAME      READY   UP-TO-DATE   AVAILABLE   AGE
 rancher   3/3     3            3           5m48s
Finishing Up
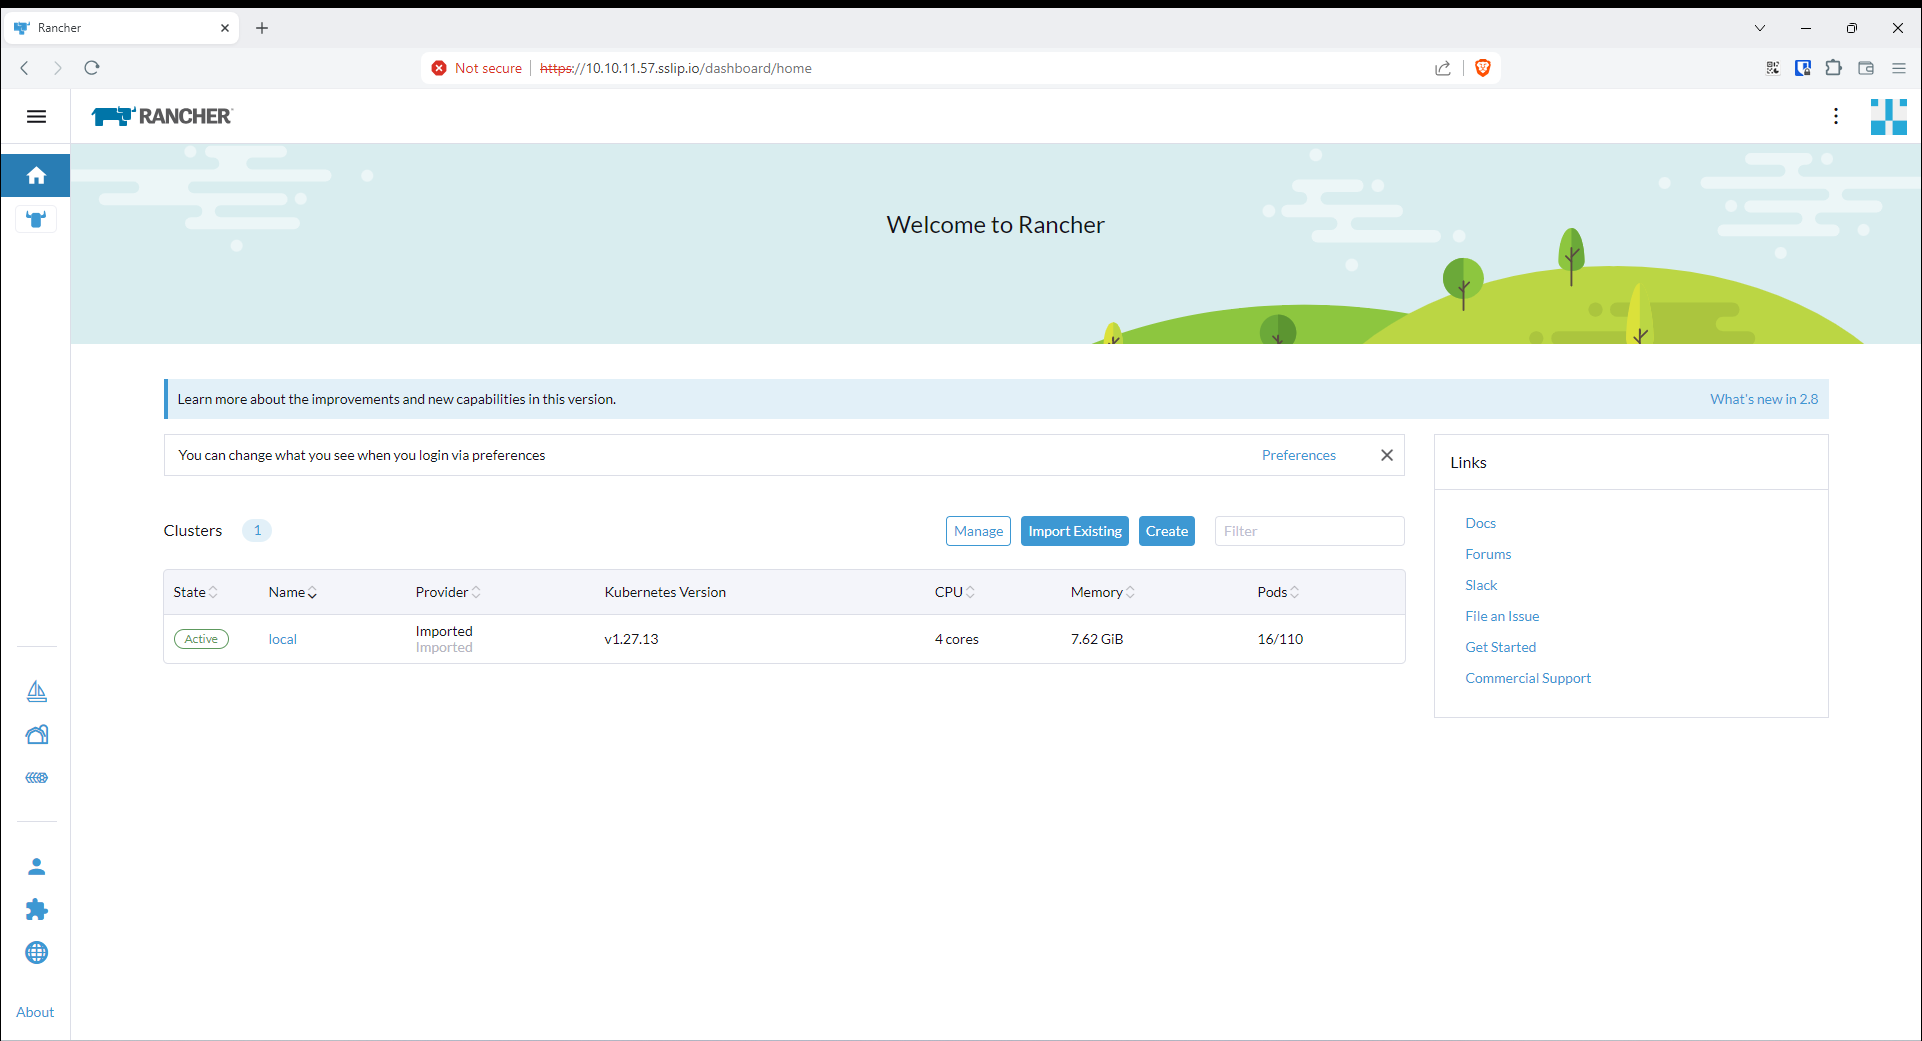
That's it. You should have a functional Rancher server.

Subscribe to my newsletter
Read articles from Santosh Parajuli directly inside your inbox. Subscribe to the newsletter, and don't miss out.
Written by

Santosh Parajuli
Santosh Parajuli
I'm passionate about technology and always ready to learn new advancements. Mastering the latest tools keeps me ahead of the curve and fuels my growth and innovation.