How to Create an EC2 Instance and host a simple Web Page : A Step-by-Step Guide
 Rishabh Mishra
Table of contents
- Prerequisites
- Step 1: Log in to AWS Management Console
- Step 2: Navigate to EC2 Dashboard
- Step 3: Launch Instance
- Step 4: Choose an Amazon Machine Image (AMI)
- Step 5: Choose an Instance Type
- Step 6: Create a Key Pair
- Step 7: Configure Instance
- Step 8: Add Storage
- Step 9: Configure Security Group
- Step 10: Review and Launch
- Step 11: EC2 instance is in running state
- Step 12: Connect to Your Instance
- Step 13: Install Apache (httpd)
- Step 14: Start and Enable Apache
- Step 15: Create a Web Page
- Step 16: Access Your Web Page
- Conclusion
- Thank you

EC2, also known as Elastic Compute Cloud, is one of the most popular AWS offerings. It provides a way to perform infrastructure as a service.
Creating an EC2 instance and hosting a simple web page is a great way to get started with AWS. In this guide, I'll show you how to launch an EC2 instance, set up a key pair, install Apache, and create a simple web page.
Prerequisites
Before we begin, make sure you have:
An AWS account
Basic knowledge of AWS services
Step 1: Log in to AWS Management Console
First, log in to your AWS Management Console. Once logged in, you will see the AWS dashboard.
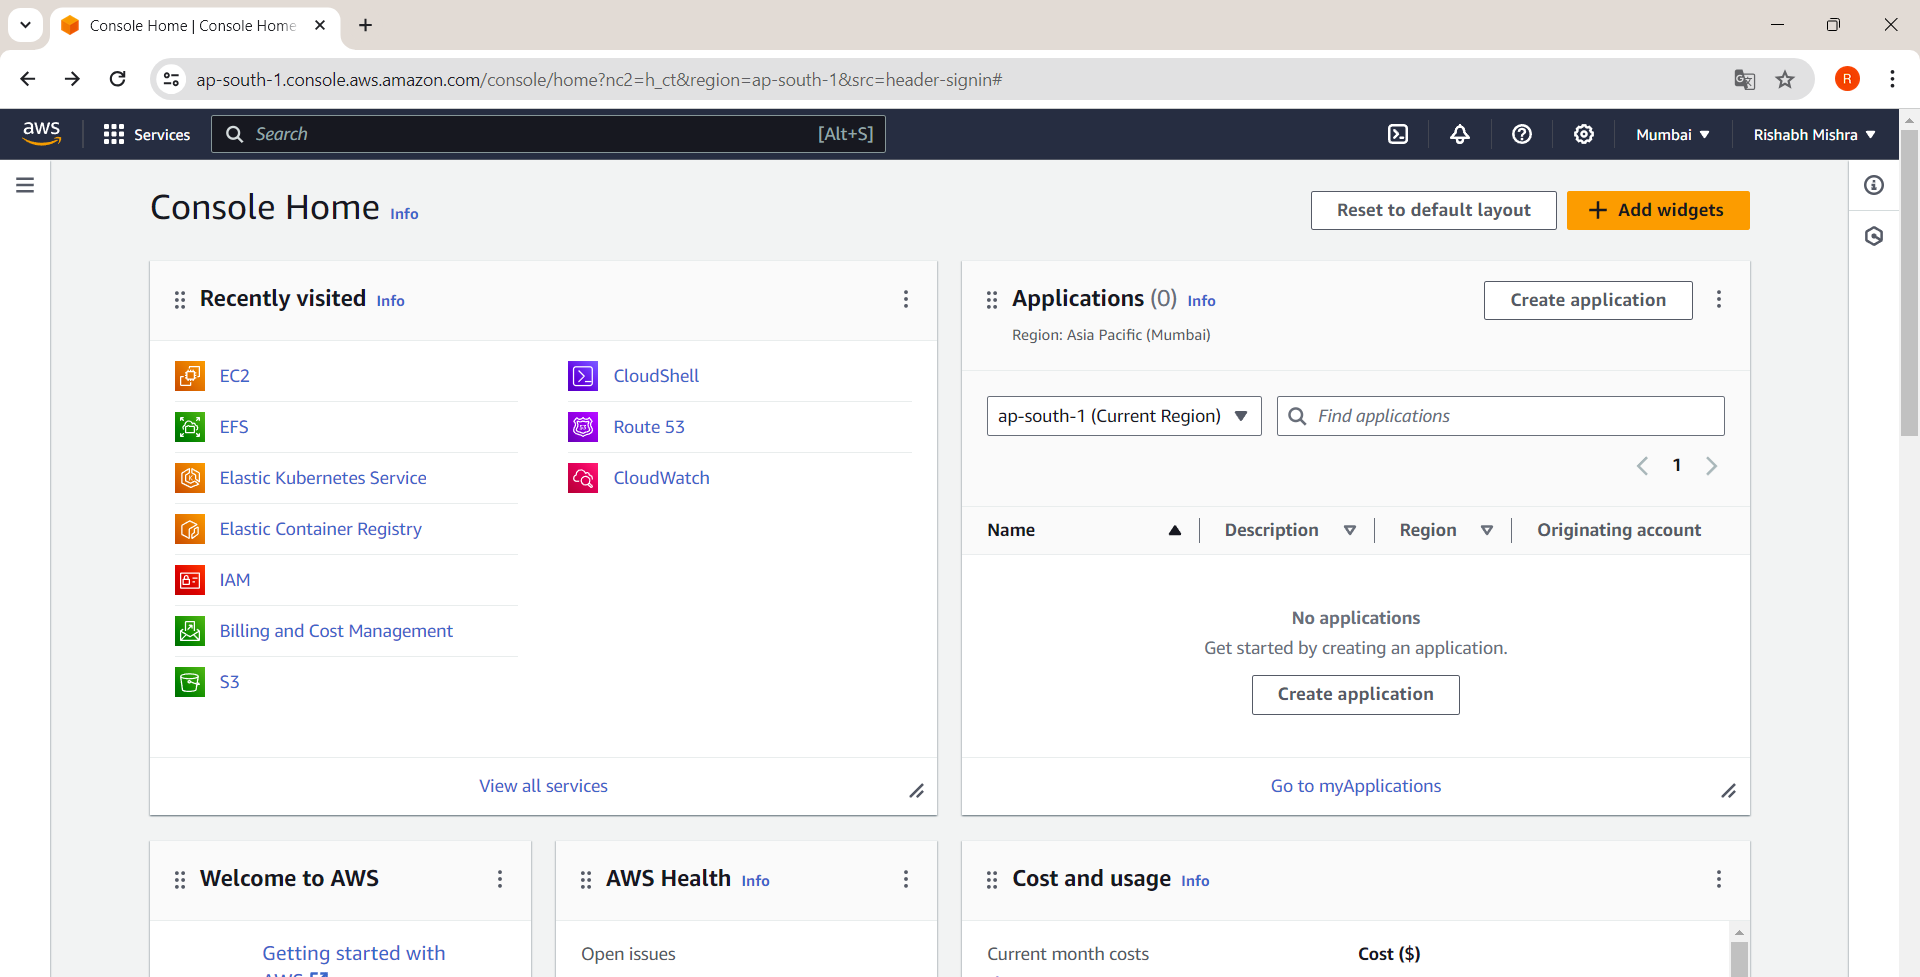
Step 2: Navigate to EC2 Dashboard
From the AWS Management Console, find the "EC2" service under the "Compute" section. Click on it to open the EC2 Dashboard.
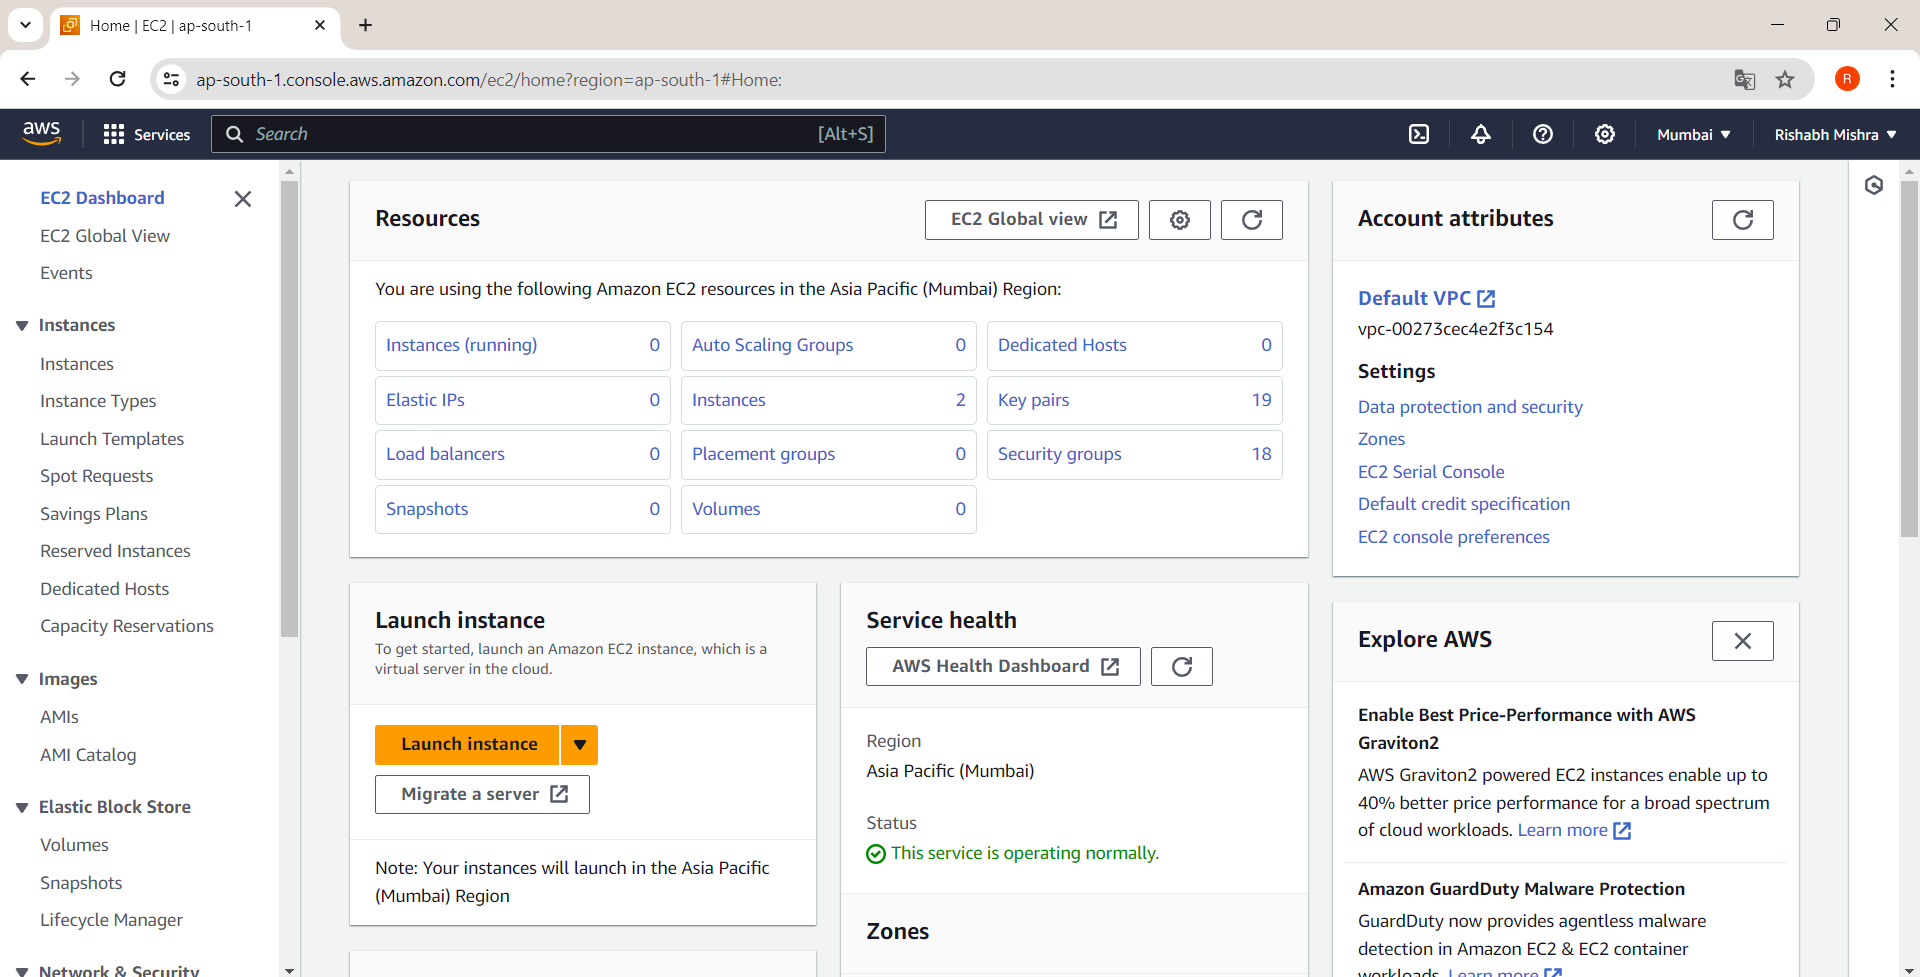
Step 3: Launch Instance
In the EC2 Dashboard, click on the “Launch Instance” button to start the instance creation process.
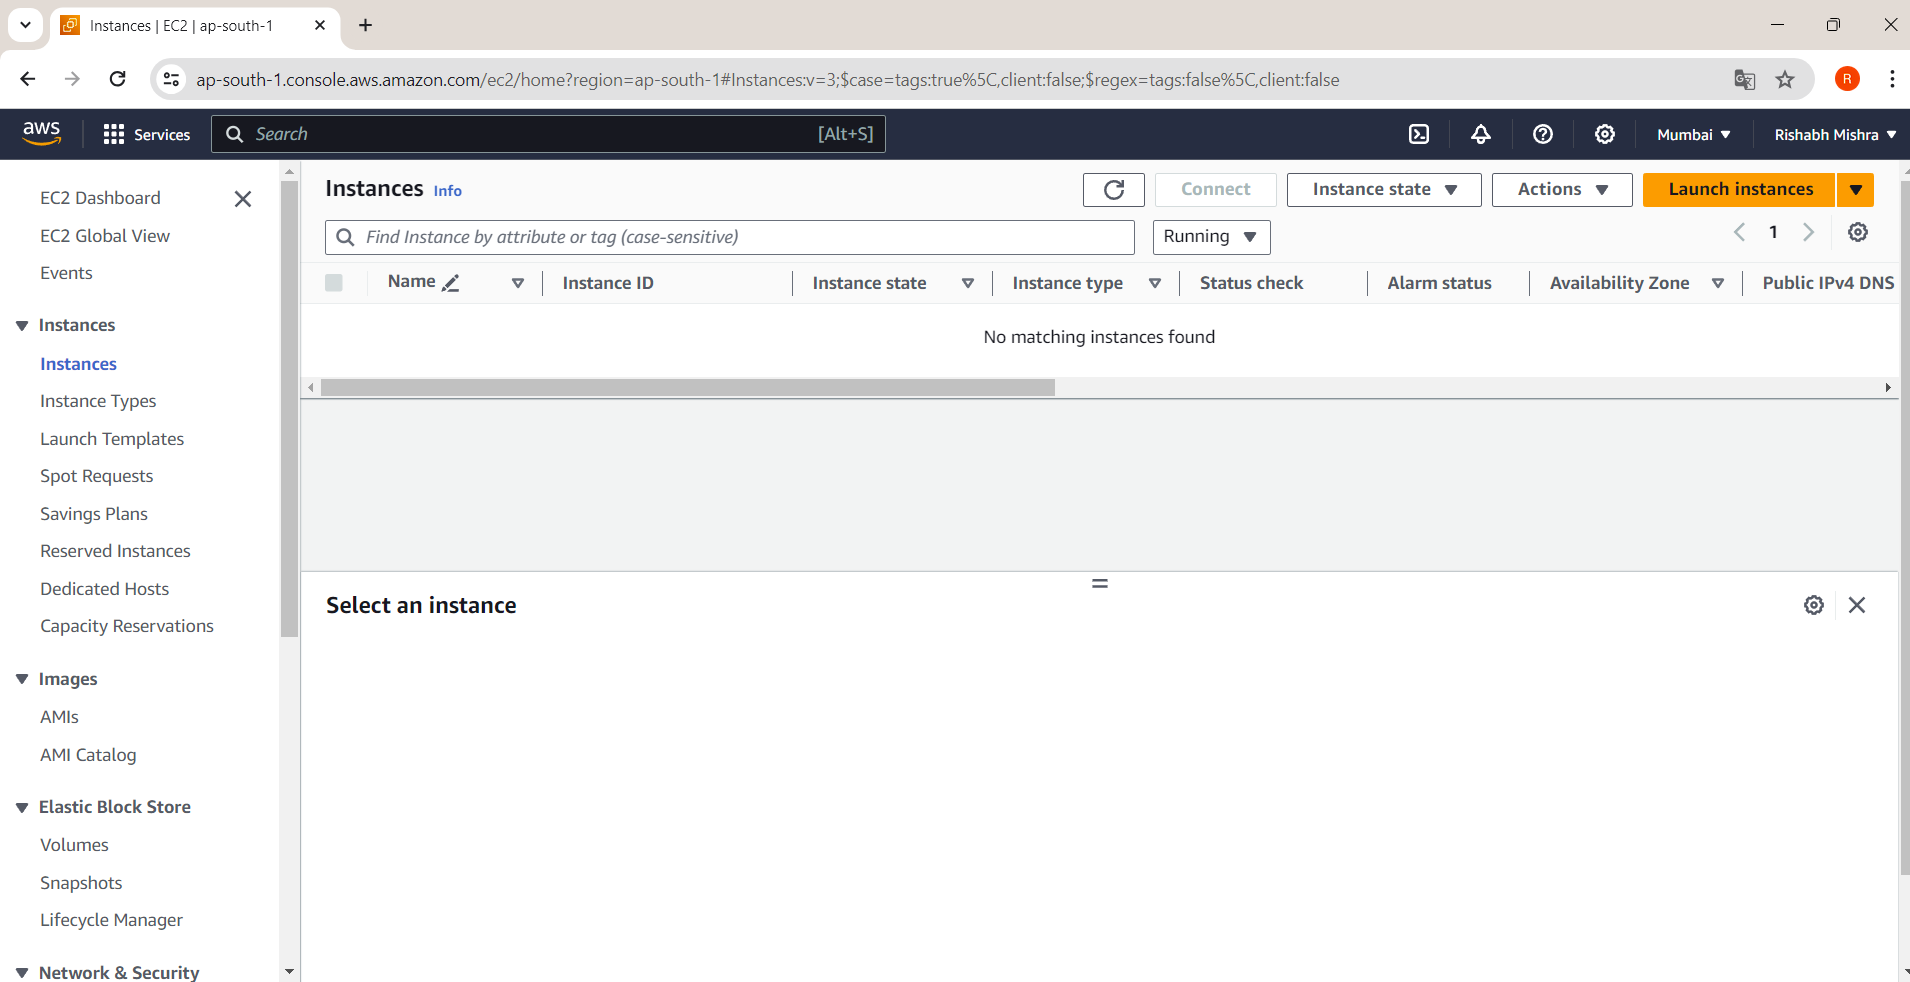
Step 4: Choose an Amazon Machine Image (AMI)
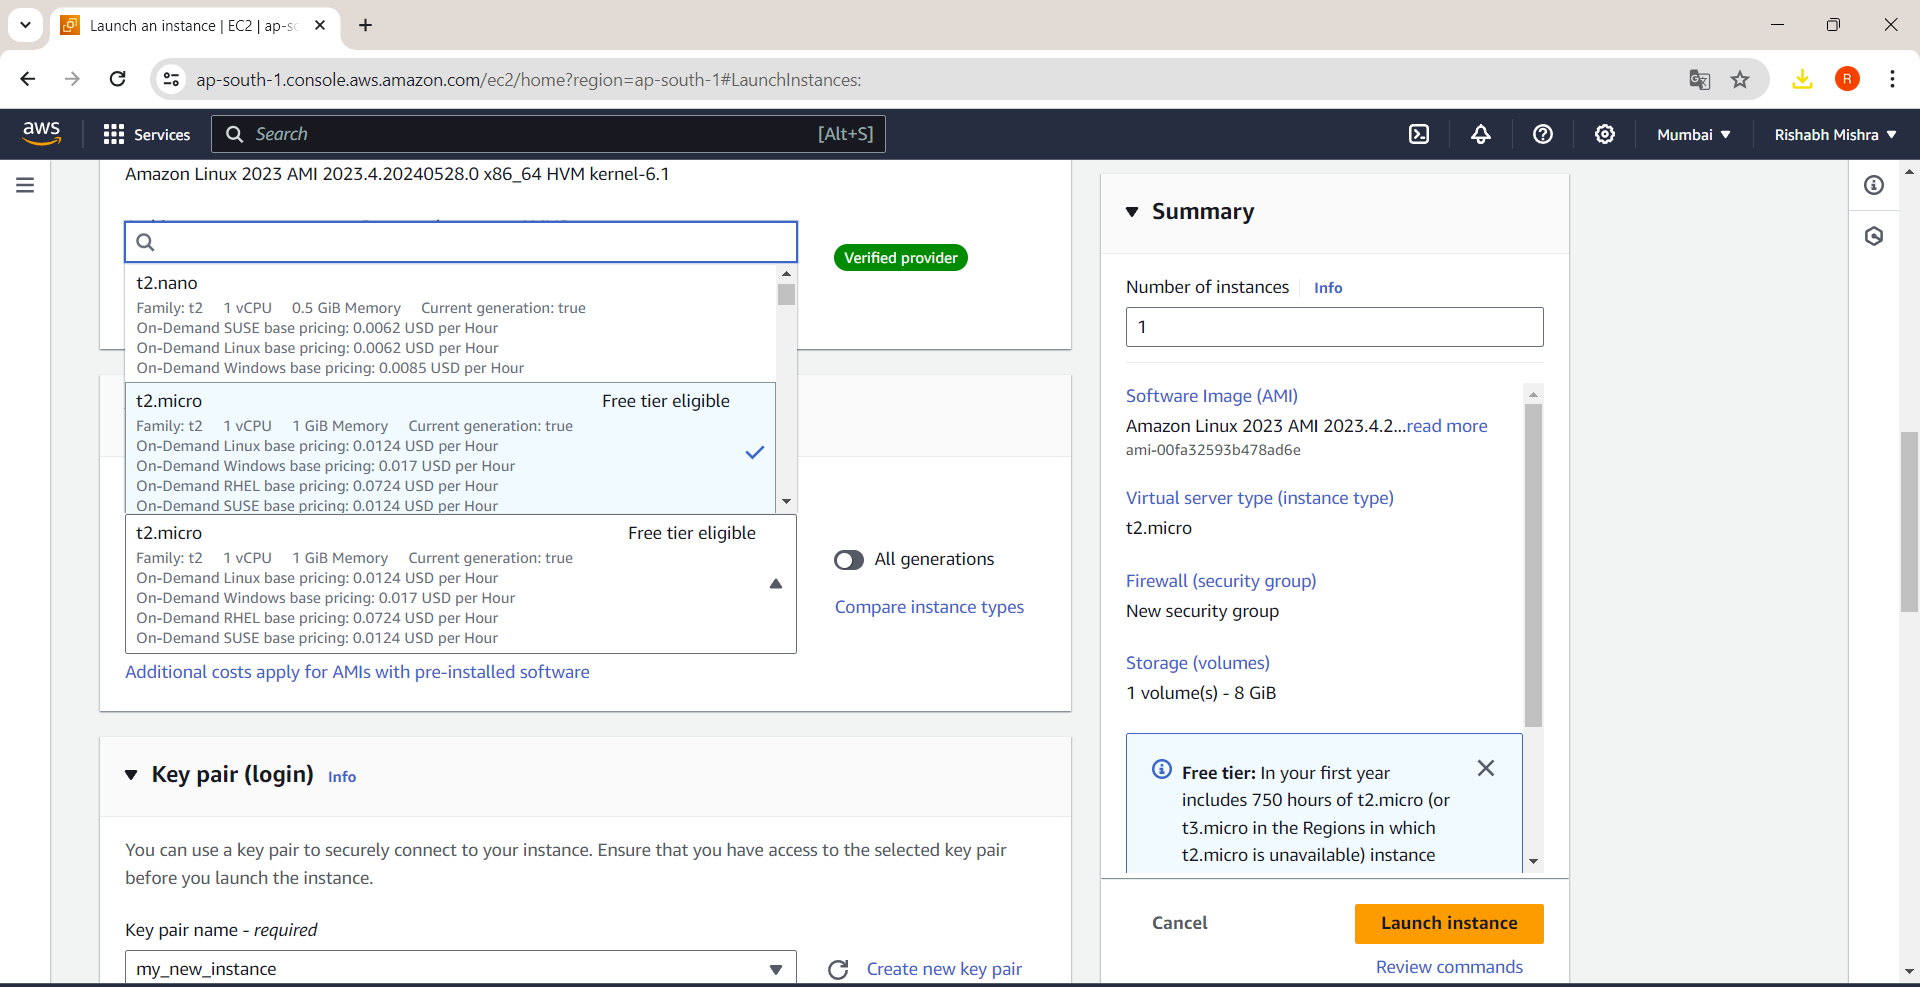
Select an AMI based on your needs. For this tutorial, we'll use the "Amazon Linux AMI".
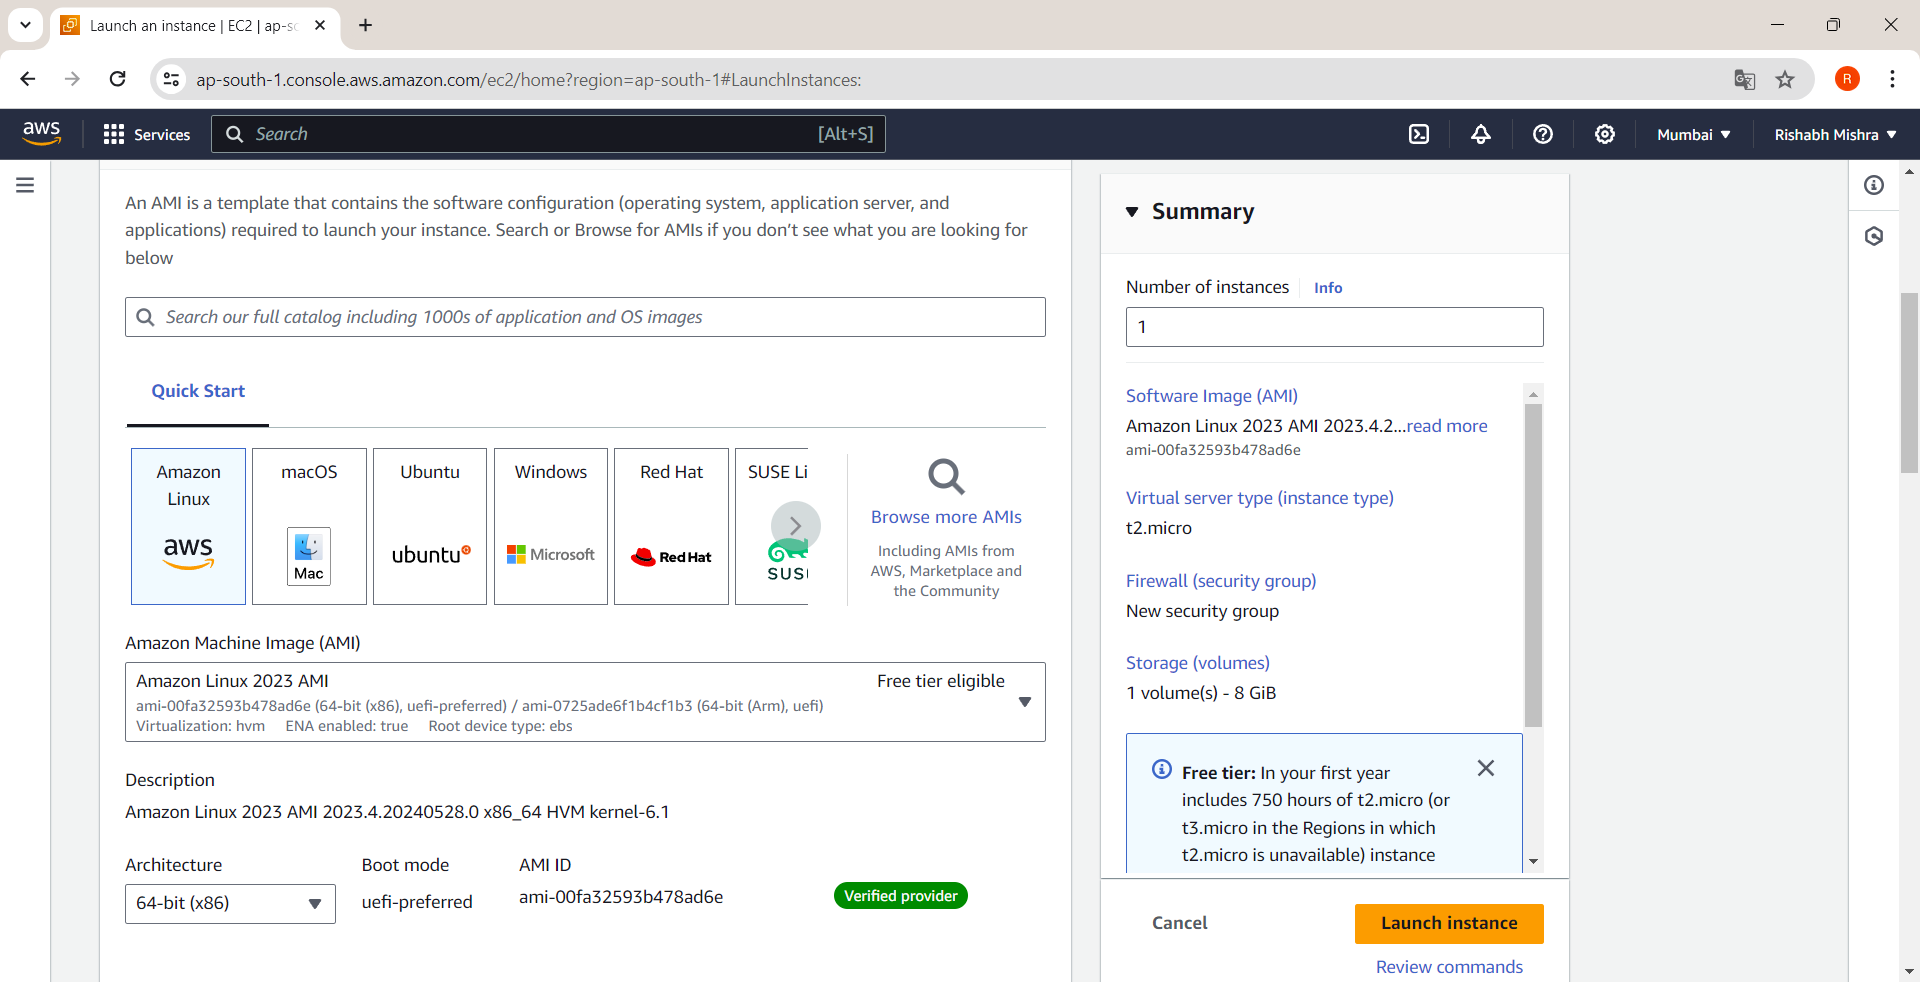
Step 5: Choose an Instance Type
Choose an instance type that suits your workload. The "t2.micro" instance is a good starting point as it is part of the free tier.
Step 6: Create a Key Pair
Before launching the instance, you need to create a key pair. This key pair will be used to securely connect to your instance.
In the "Key Pair" section, click on "Create a new key pair".
Enter a name for your key pair (e.g.,
my_new_instance).Choose the key pair type as "RSA".
Click "Create key pair".
Your browser will automatically download a
.pemfile. Save this file in a secure location, as you will need it to connect to your instance.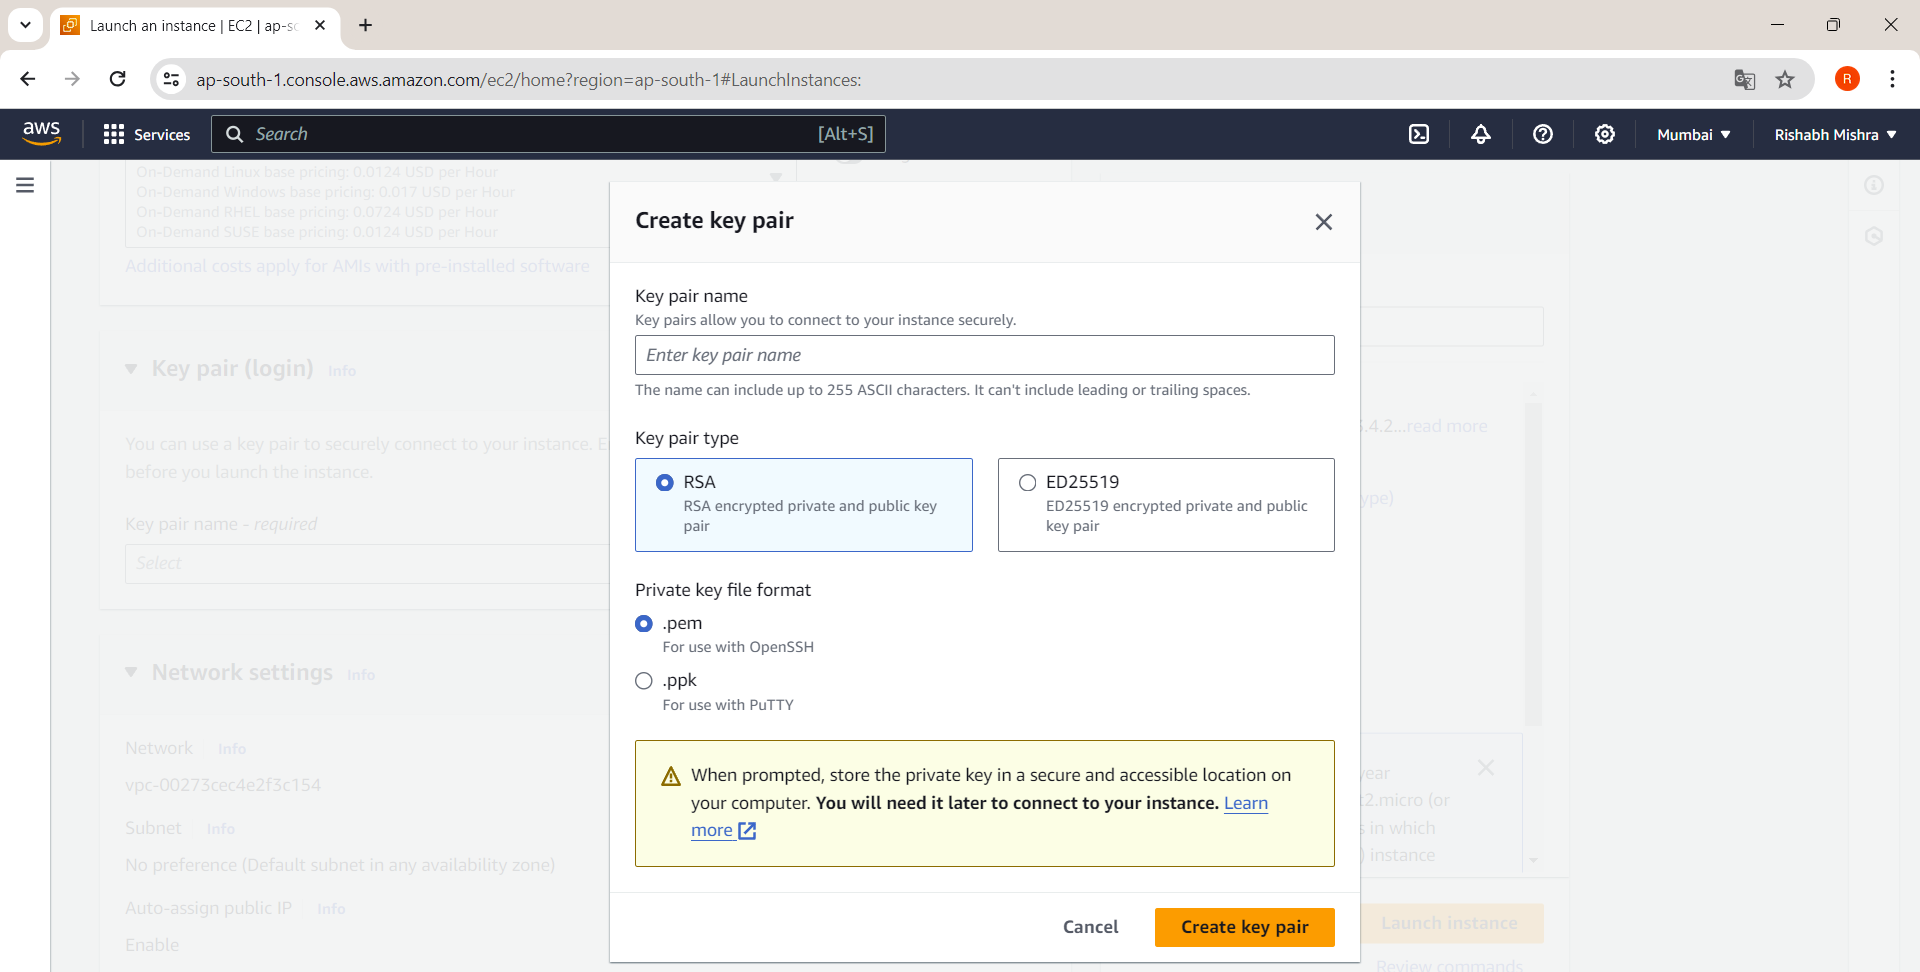
Step 7: Configure Instance
Configure the instance details like the number of instances, network settings, and more. For most users, the default settings are sufficient.
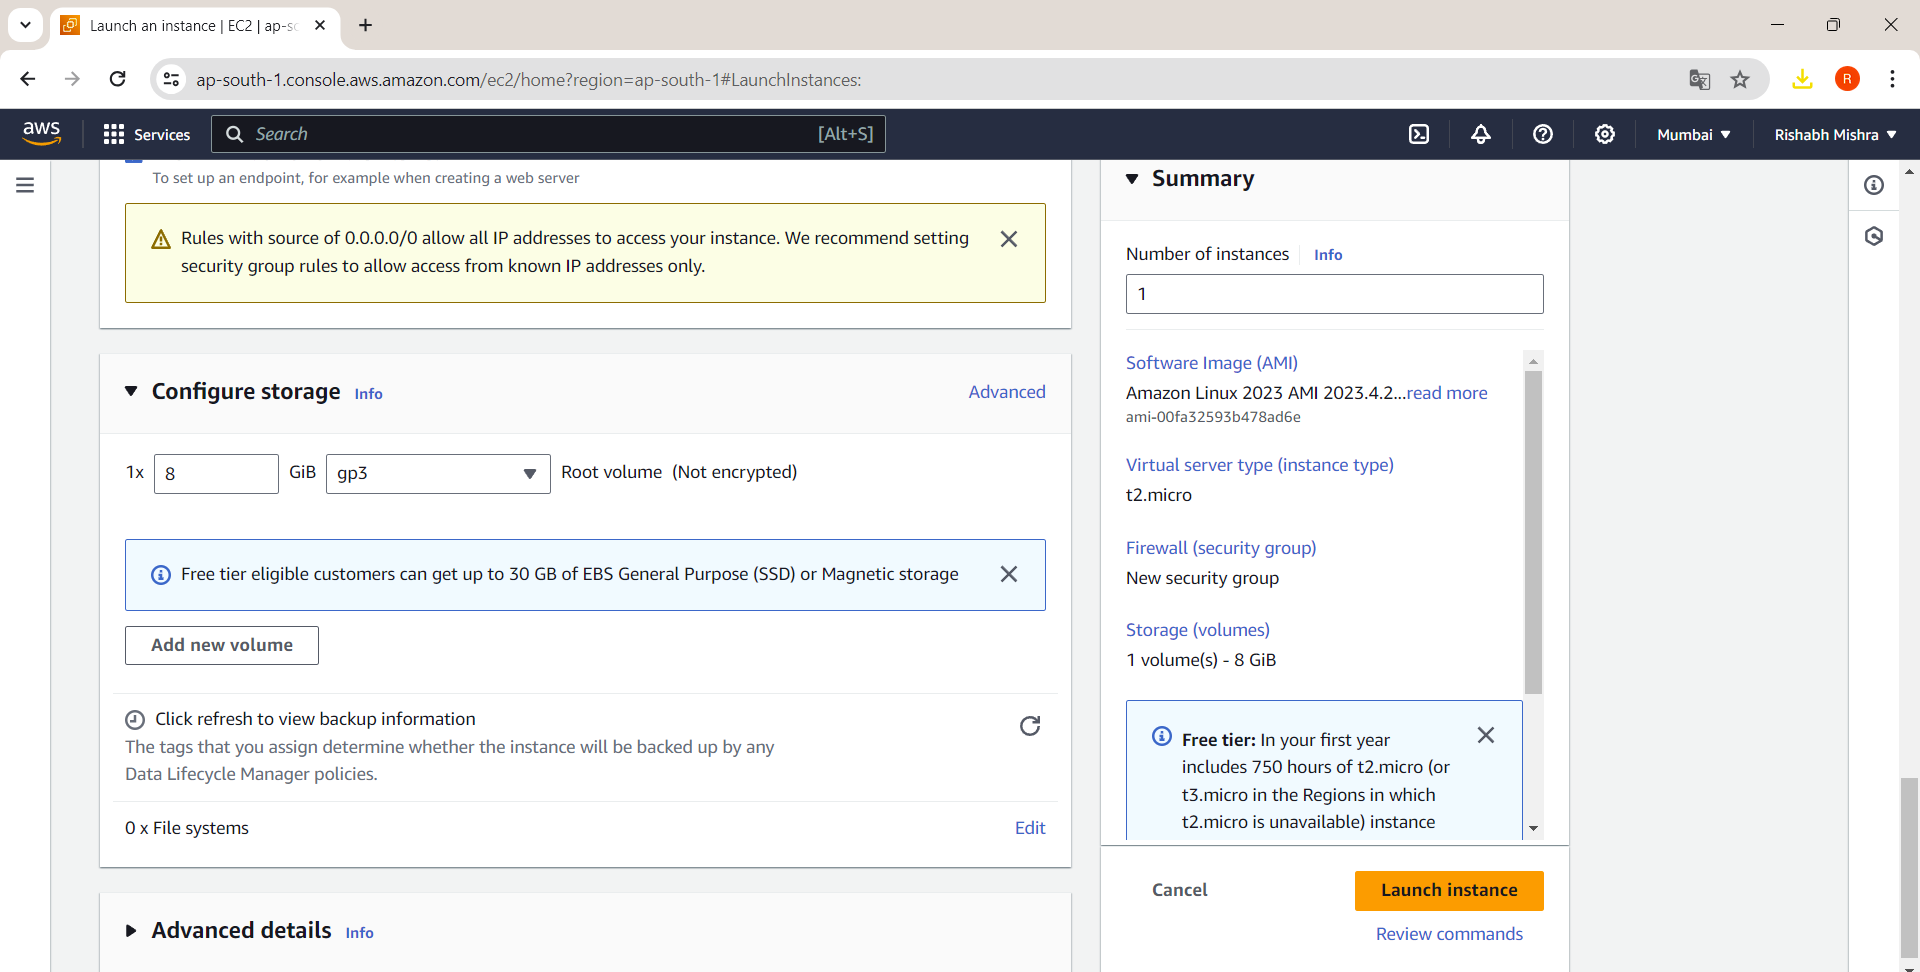
Step 8: Add Storage
Add storage to your instance. By default, an 8 GB root volume is attached. You can add more volumes if your application requires additional storage.
Step 9: Configure Security Group
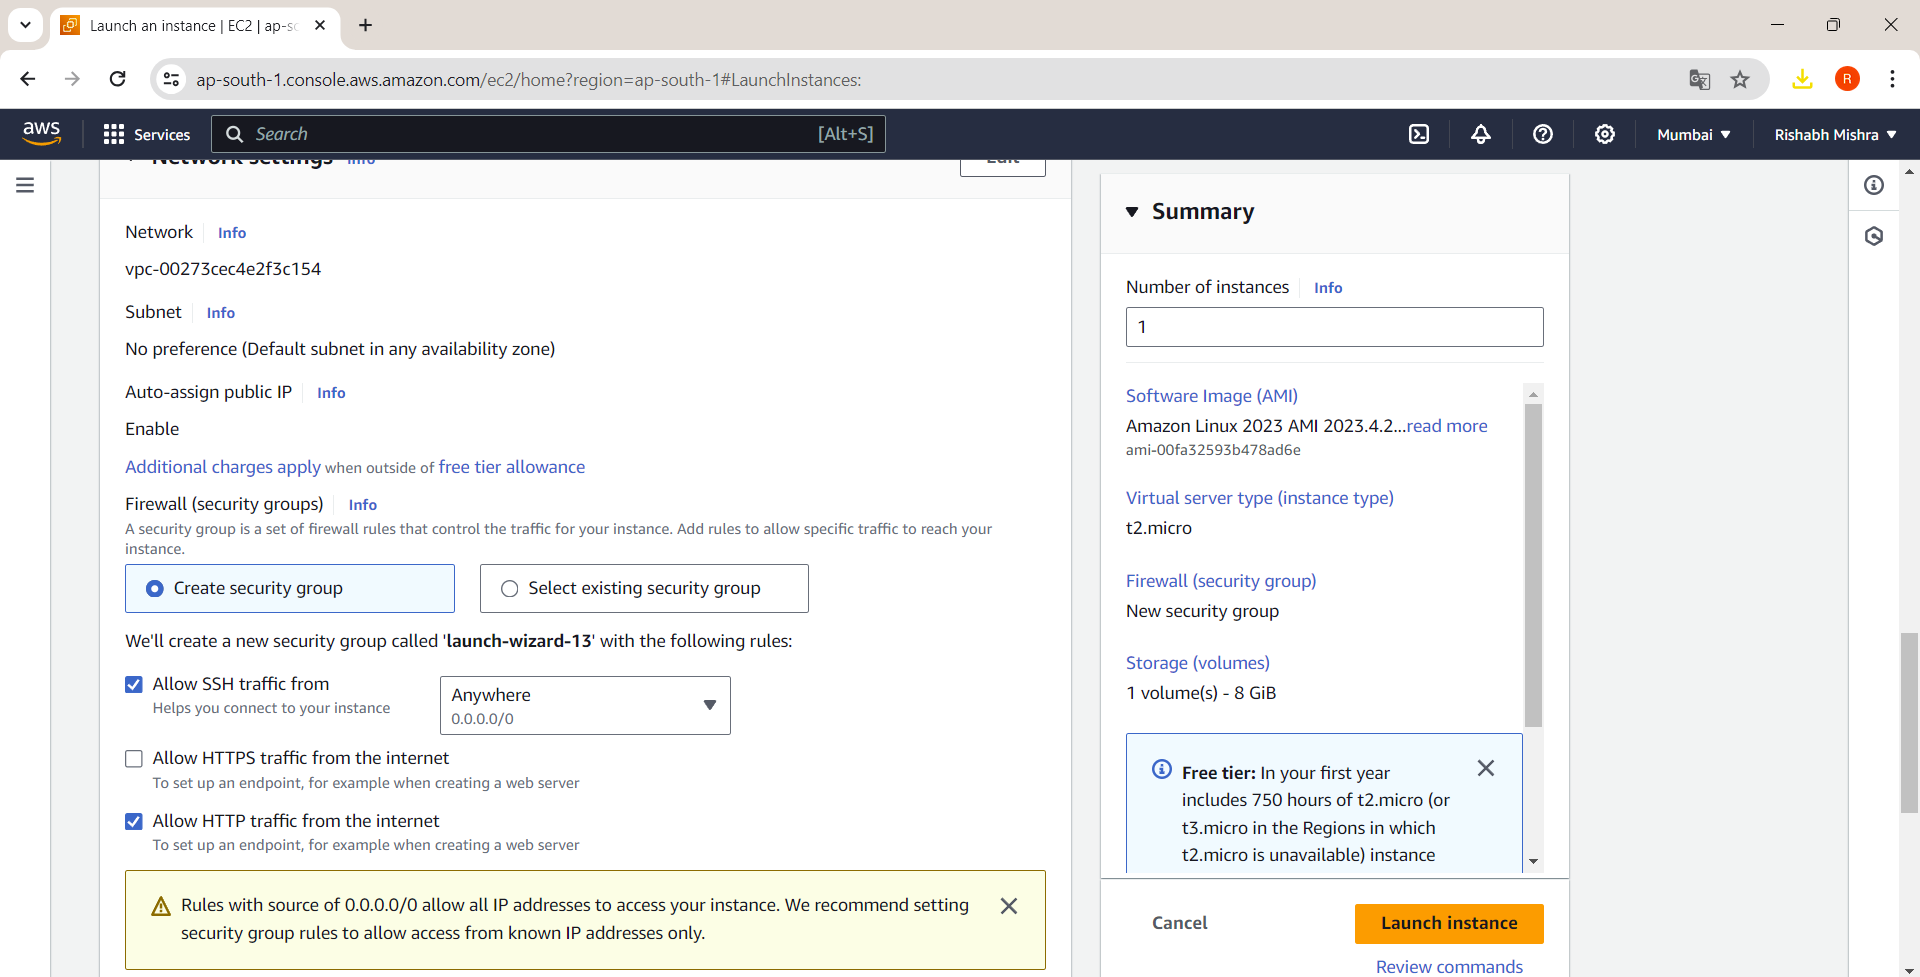
A security group acts as a virtual firewall. Create a new security group and add rules to allow SSH (port 22) access and HTTP (port 80) access. Ensure you restrict SSH access to your IP for security.
Step 10: Review and Launch
Review all the settings and click "Launch Instance".
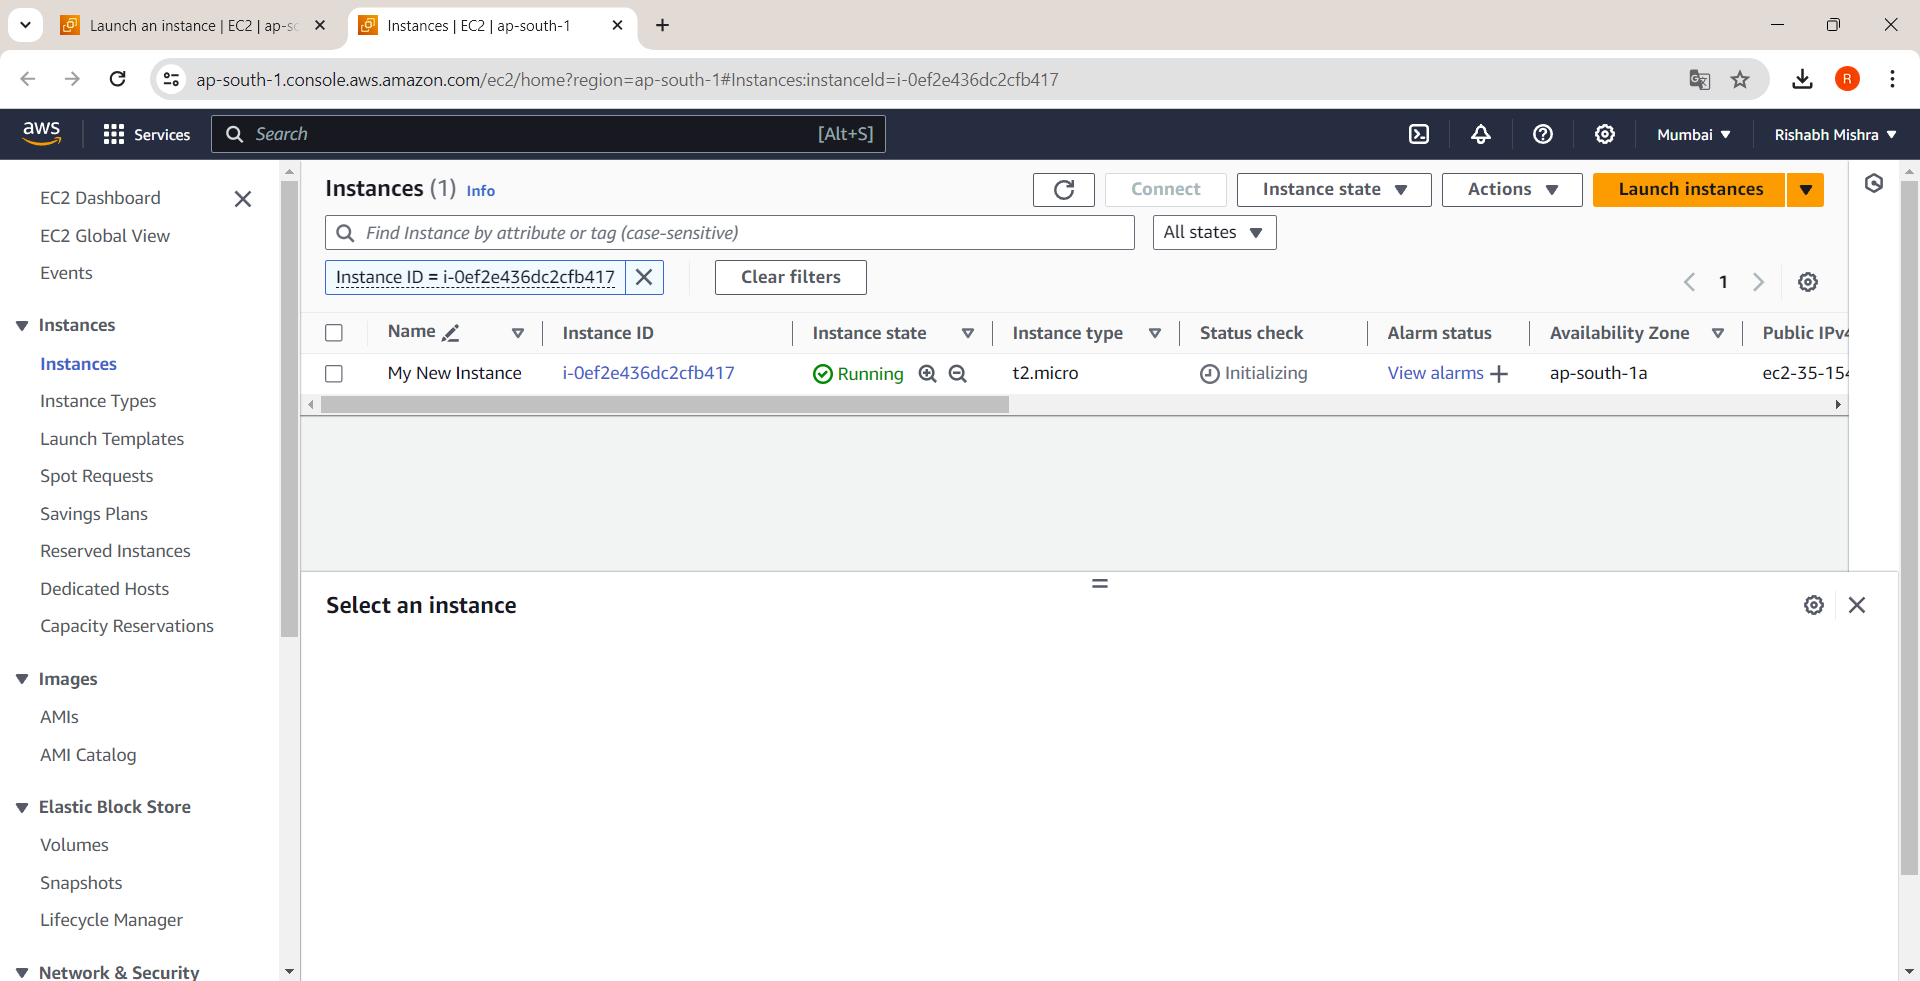
Step 11: EC2 instance is in running state
Go to the EC2 dashboard, and you will see that the instance has been launched and is running. If it is still pending, refresh the page after a few seconds, and it should be running.
Step 12: Connect to Your Instance
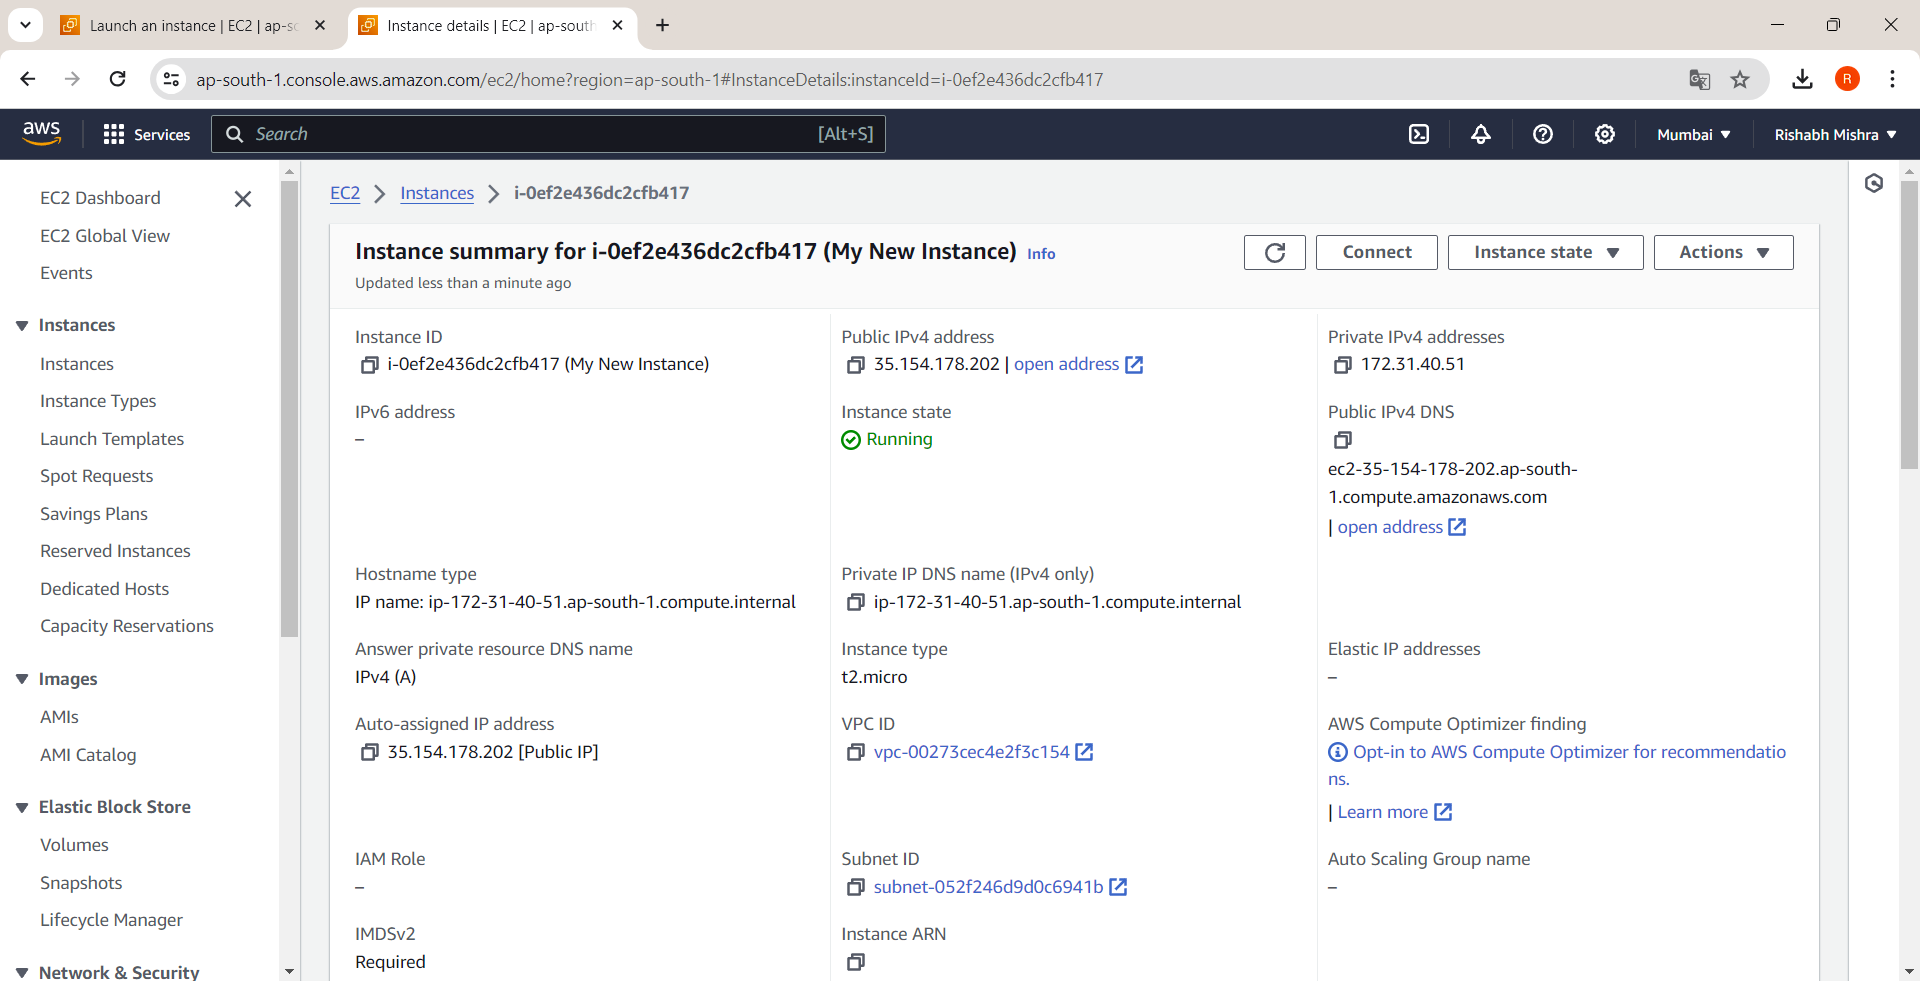
After the instance is launched, go back to the EC2 dashboard. Select your instance and click on "Connect". Follow the instructions to connect via SSH.
For SSH, open your terminal and run:
Step 13: Install Apache (httpd)
Once connected to your instance, update the package manager and install Apache:
- Switch to root user
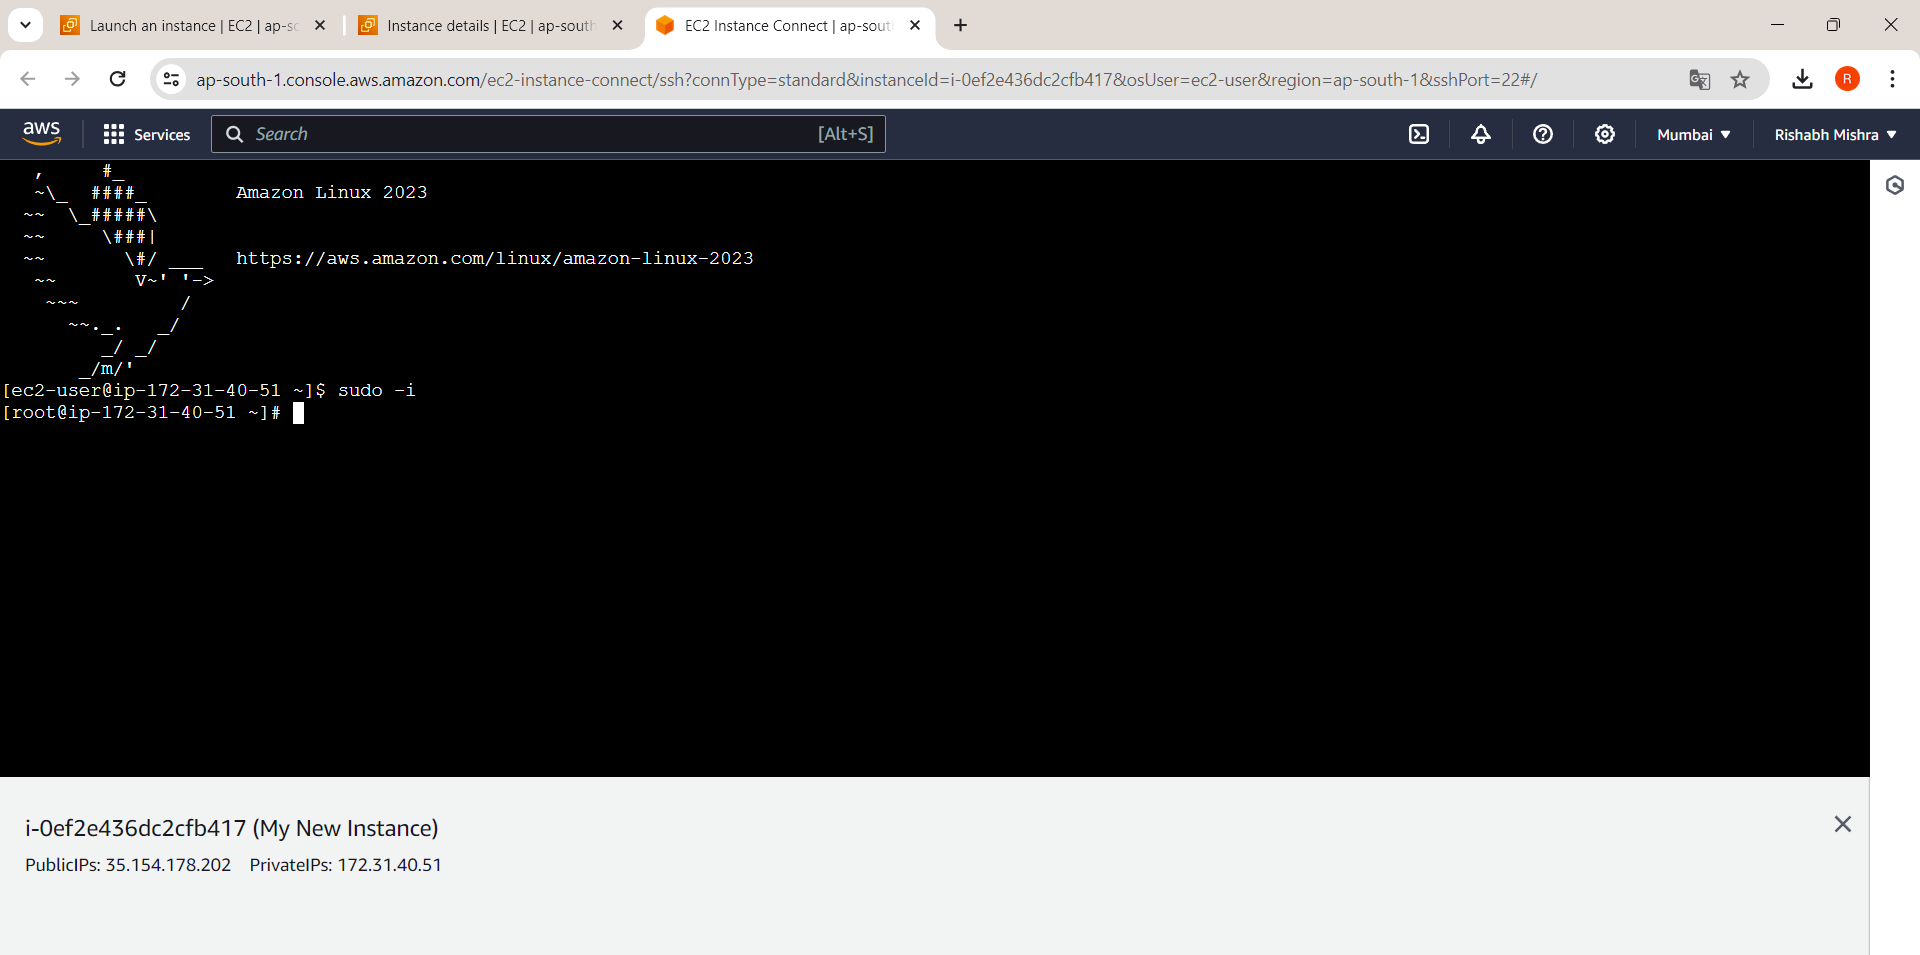
Run command
yum install httpd -y
Step 14: Start and Enable Apache
Start the service.
systemctl start httpd
Check if the service has started. It should show "active (running)" in front of Active.
systemctl status httpd

Step 15: Create a Web Page
Create a simple HTML file to serve as your web page:
Move to the folder
/var/www/html, which is created after installing Apache httpd, by running the command.cd /var/www/htmlCreate an empty file named index.html by running the command.
touch index.html
Write into the file using the vi editor by running the command and enter your HTML code in insert mode (by pressing i).
vi index.html
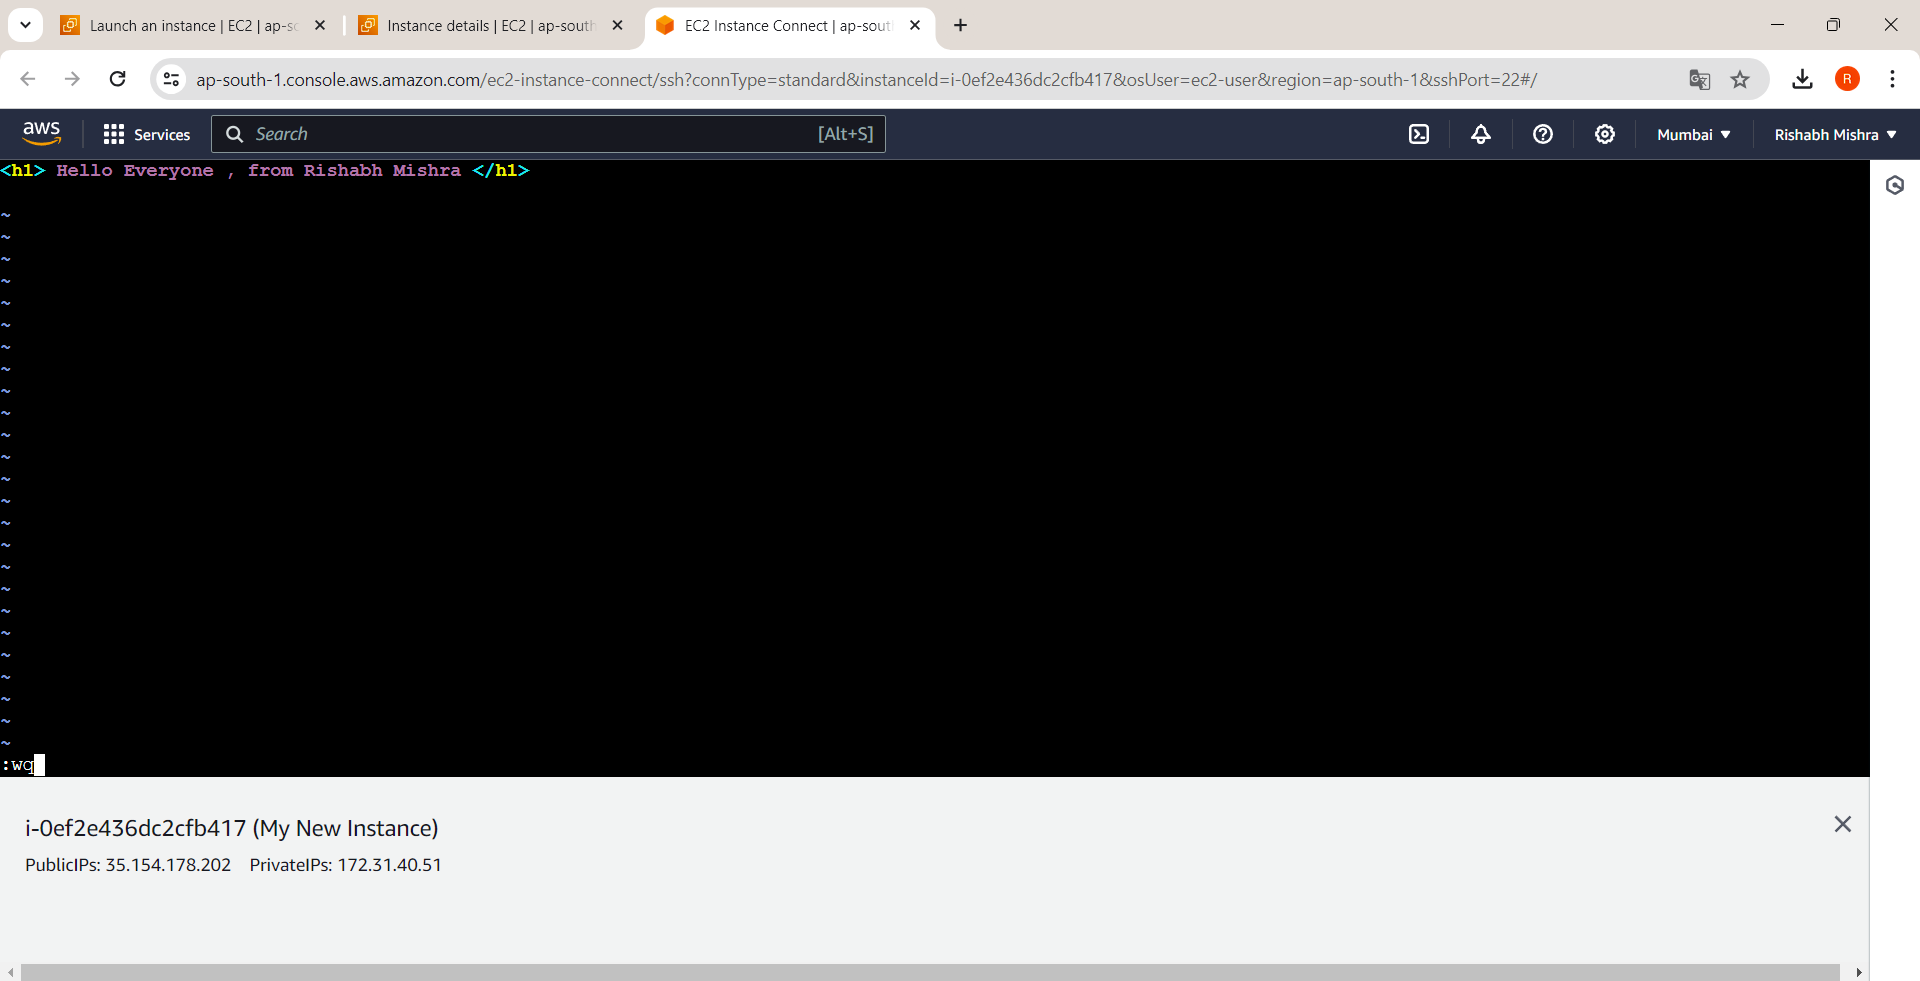
Here I have written a simple html code to display
<h1> Hello Everyone, from Rishabh Mishra </h1>
you can add your own html code here.
- Exit the editor by pressing
Escand then:wq.
Step 16: Access Your Web Page
Open a web browser and enter your instance's public IP address ( you can find this in the EC2 instance dashboard). You should see the "Hello, Everyone, from Rishabh Mishra" message.
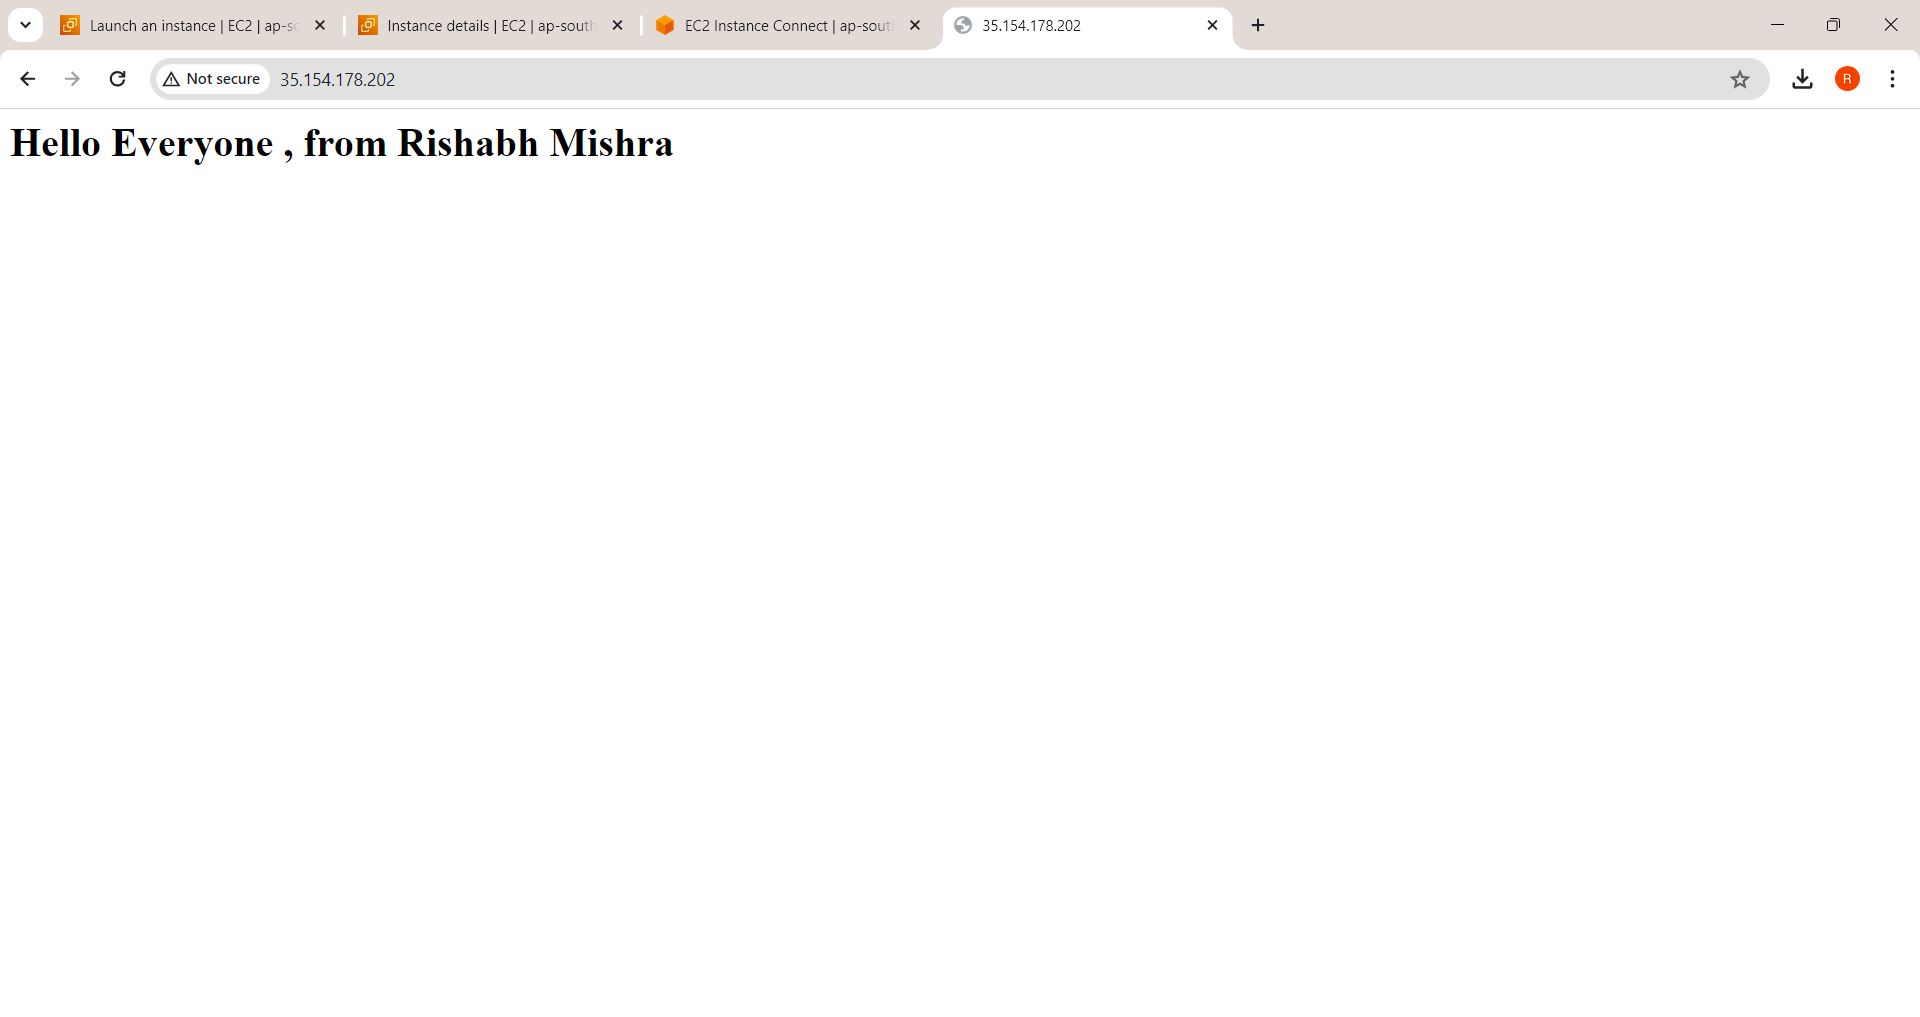
Make sure you type the IP address as http:// 35.154.178.202
Conclusion
Congratulations! You've successfully launched an EC2 instance, installed Apache, and hosted a simple web page. This is just the beginning—explore more configurations and services in AWS to enhance your cloud computing skills.
Thank you
Thank you for taking the time to read my blog. Your feedback is immensely valuable to me. Please feel free to share your thoughts and suggestions. Happy Computing !
Subscribe to my newsletter
Read articles from Rishabh Mishra directly inside your inbox. Subscribe to the newsletter, and don't miss out.
Written by

Rishabh Mishra
Rishabh Mishra
I'm Rishabh Mishra, an AWS Cloud and DevOps Engineer with a passion for automation and data analytics. I've honed my skills in AWS services, containerization, CI/CD pipelines, and infrastructure as code. Currently, I'm focused on leveraging my technical expertise to drive innovation and streamline processes. My goal is to share insights, learn from the community, and contribute to impactful projects in the DevOps and cloud domains. Let's connect and collaborate on Hashnode!