IAM: Unlocking AWS IAM- Your Key to Secure Cloud Computing
 vivek singh
What is IAM:
IAM manages AWS users and their access to AWS accounts and services.
It controls the level of access a user can have over an AWS account & set users, grant permission, and allows a user to use different features of an AWS account.
IAM is mainly used to manage users, groups, roles, and Access policies The account we created to sign in to AWS is known as the root account and it holds all the administrative rights and has access to all parts of the account.
The new user created an AWS account, by default they have no access to any services in the account & it is done with the help of IAM that the root account holder can implement access policies and grant permission to the user to access certain services.
How IAM works:
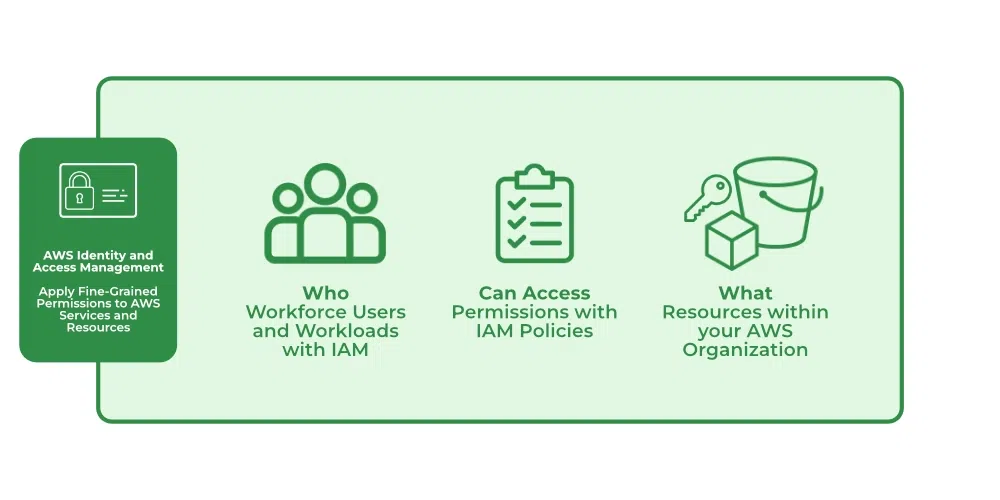
IAM verifies that a user or service has the necessary authorization to access a particular service in the AWS cloud. We can also use IAM to grant the right level of access to specific users, groups, or services. For example, we can use IAM to enable an EC2 instance to access S3 buckets by requesting fine-grained permissions.
What Does IAM Do?
With the help of IAM, we perform the following
IAM Identities: IAM Identities assists us in controlling which users can access which services and resources in the AWS Console and also we can assign policies to the users, groups, and roles. The IAM Identities can be created by using the Root user.
It classified as:
IAM users
IAM Groups
IAM Roles
Root User: The root user will automatically be created and granted unrestricted rights. We can create an admin user with fewer powers to control the entire Amazon account.
IAM Users: We can utilize IAM users to access the AWS Console and their administrative permissions differ from those of the Root user and if we can keep track of their login information.
IAM Groups: A group is a collection of users, and a single person can be a member of several groups. With the aid of groups, we can manage permissions for many users quickly and efficiently.
IAM Roles: While policies cannot be directly given to any of the services accessible through the Amazon dashboard, IAM roles are similar to IAM users in that they may be assumed by anybody who requires them. By using roles, we can provide AWS Services access rights to other AWS Services.
AWS Features:
Free of cost
Have centralised control over your account
Grant permission of users
Multi factor authentication (MFA)
Creating IAM Groups:
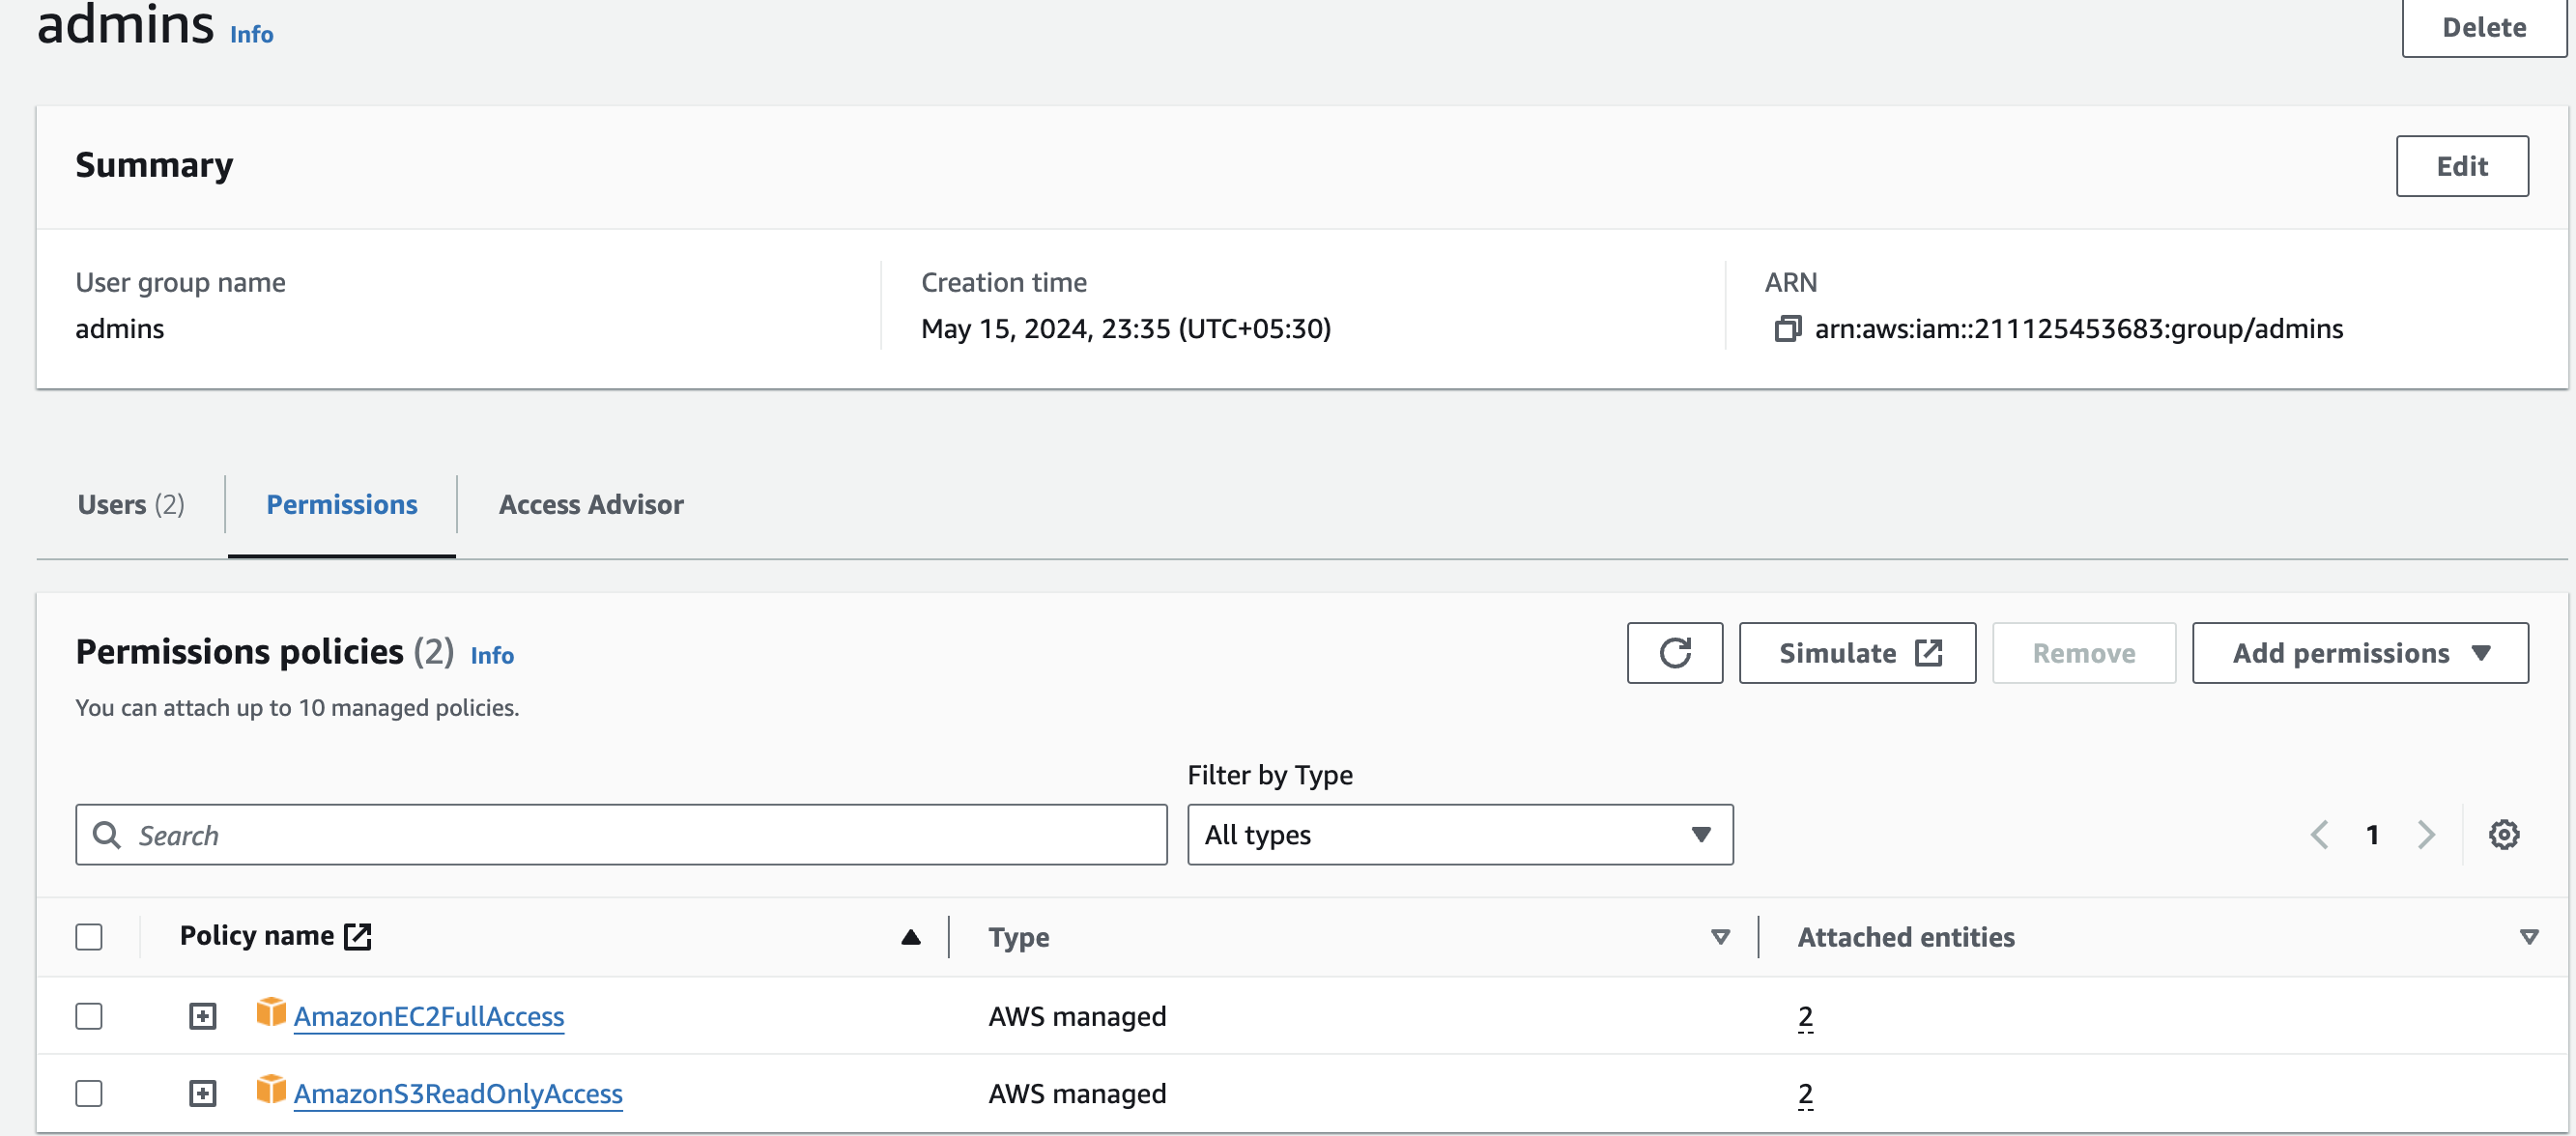
A group is a collection of users, and a user can also belong to multiple groups.
Groups cannot be nested, i.e., a group cannot contain another group.
No default group that automatically includes all the users in AWS account. If you want a group like this, create a group and then add the users in a group.
There is a limit to the number of groups that you can have and also have a limit to the number of groups that a user can belong to.
Steps:
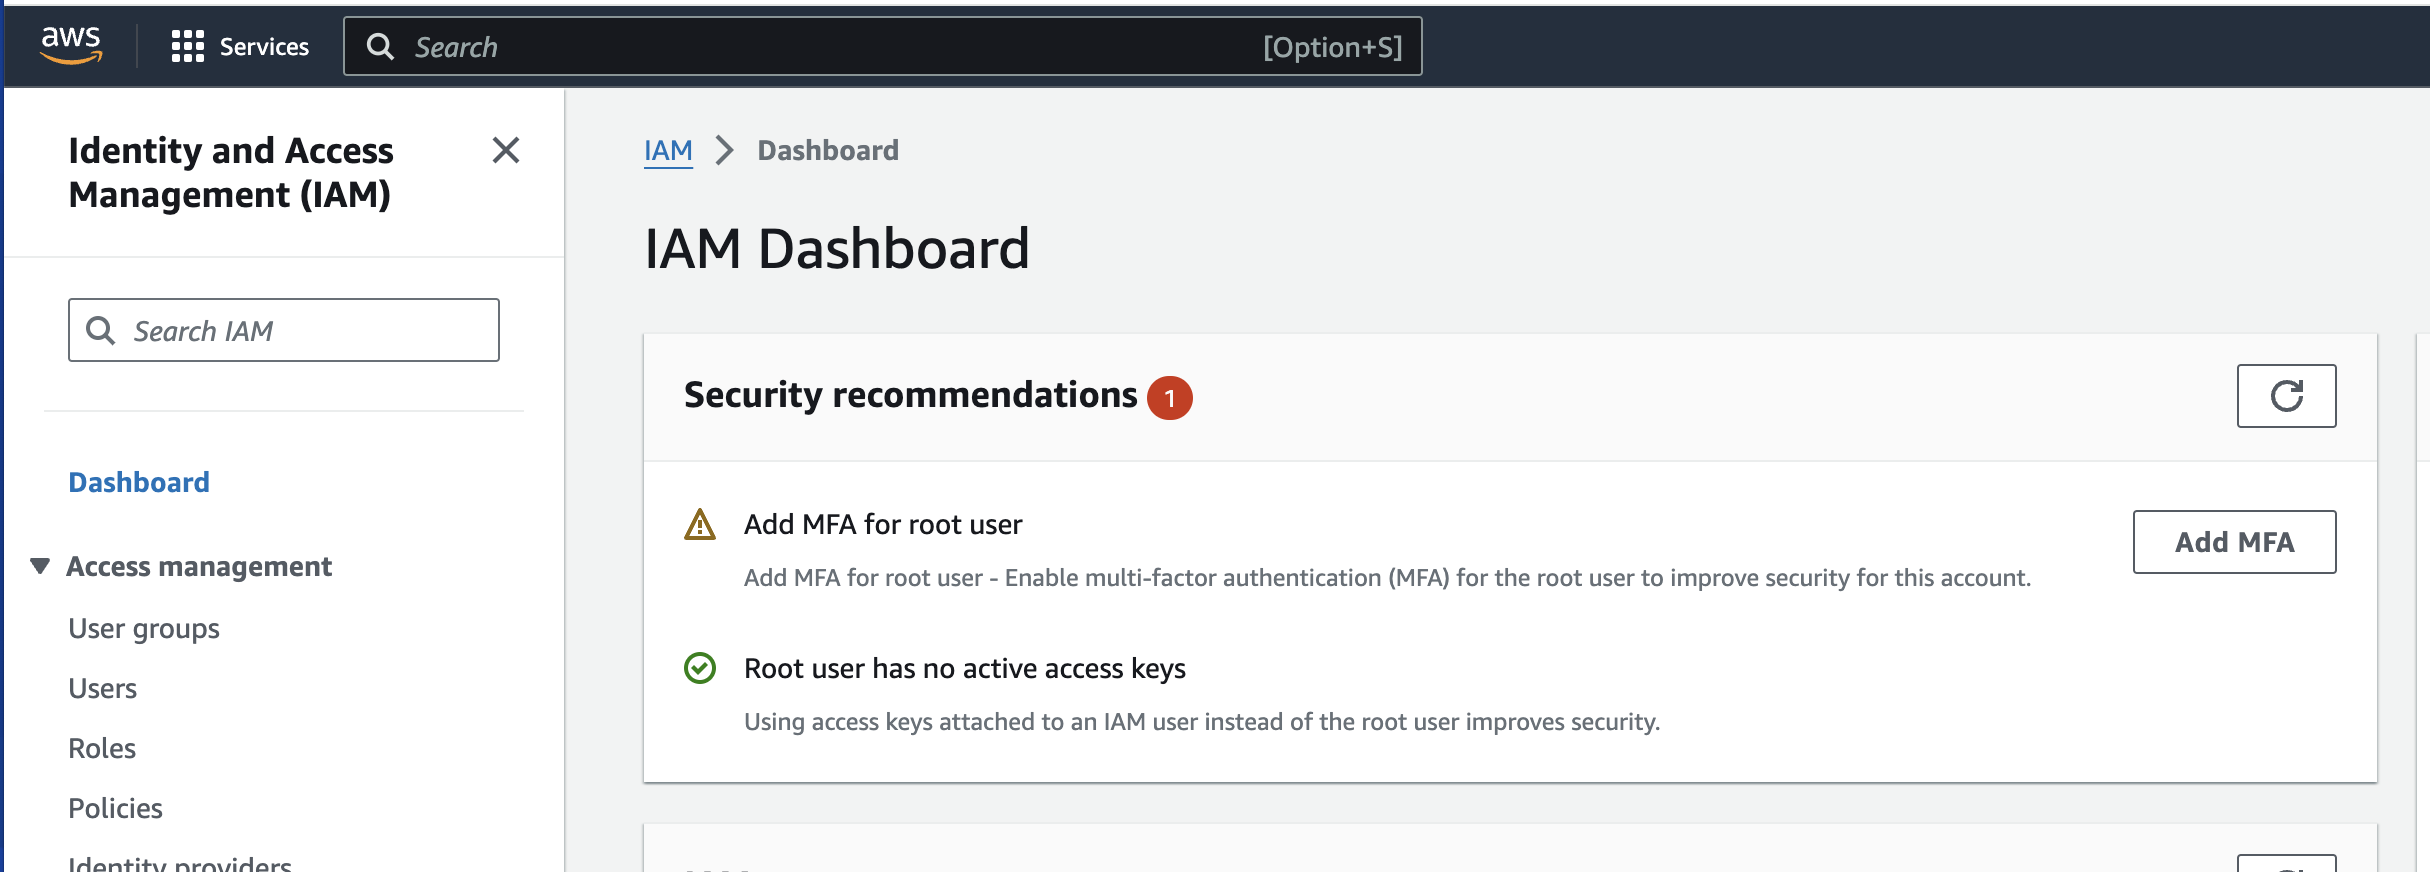
Sign in to aws console and search IAM

Create IAM Groups in AWS:
Sign in to AWS console > Search IAM > click on user group > create group > type group name > add users (optional) > attach permission policy (optional) > click on create user group

Creating IAM Users:
The main purpose of IAM Users is that they can sign in to the AWS Management Console and can make requests to the AWS services.
The newly created IAM users have no password and no access key. If a user wants to use the AWS resources using the AWS Management Console, we need to create the user password. If a user wants to interact using the AWS programmatically (using the CLI (Command Line Interface)), we need to create the access key for that user. The credentials created for IAM User are what exactly uniquely identify themselves to AWS.
The security of the user's credentials can be enhanced by using the feature, i.e., Multi-Factor Authentication (MFA).
The newly created IAM Users do not have permissions, i.e., they are not authorized to access the AWS resources.
An advantage of using individual IAM Users is that we can assign the permissions individually. We can even assign the administrative permissions, who can administer AWS resources and also administer other IAM Users.
Each IAM User is associated with one and only one AWS account.
Users are defined within root account, so users do not have to do payment. Any AWS activity performed by a user is billed to root account.
Steps to create IAM user:
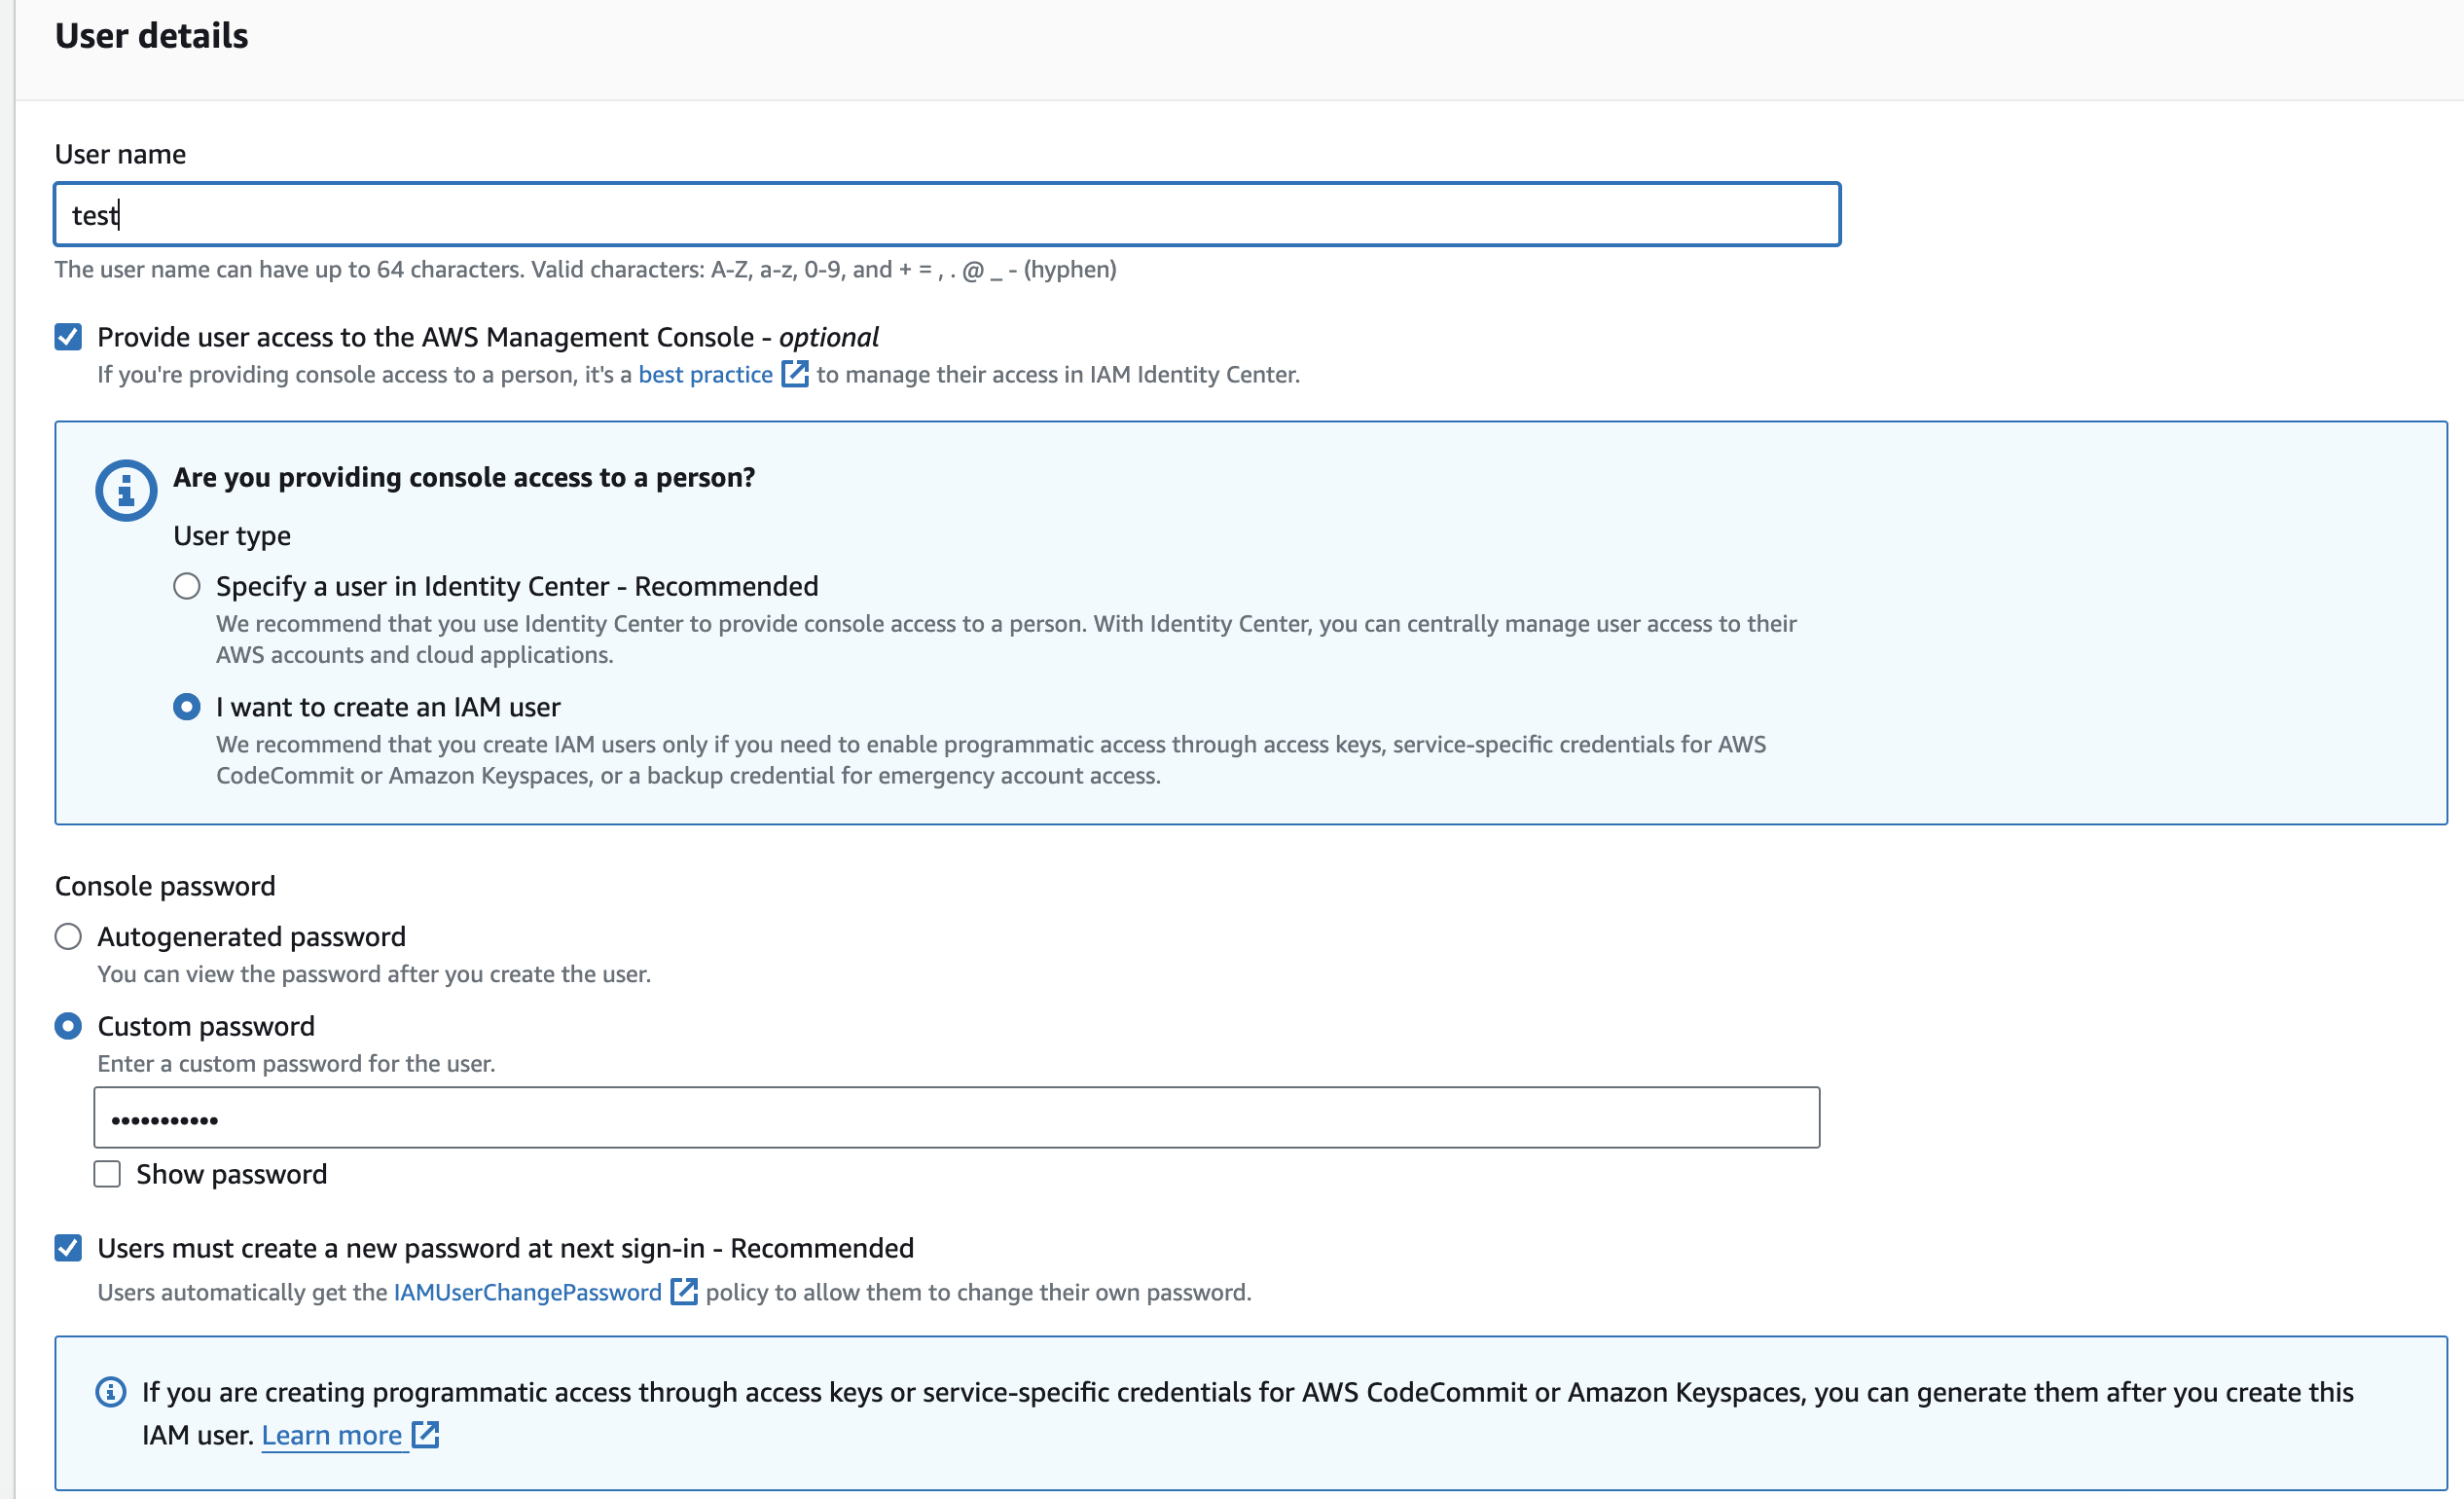
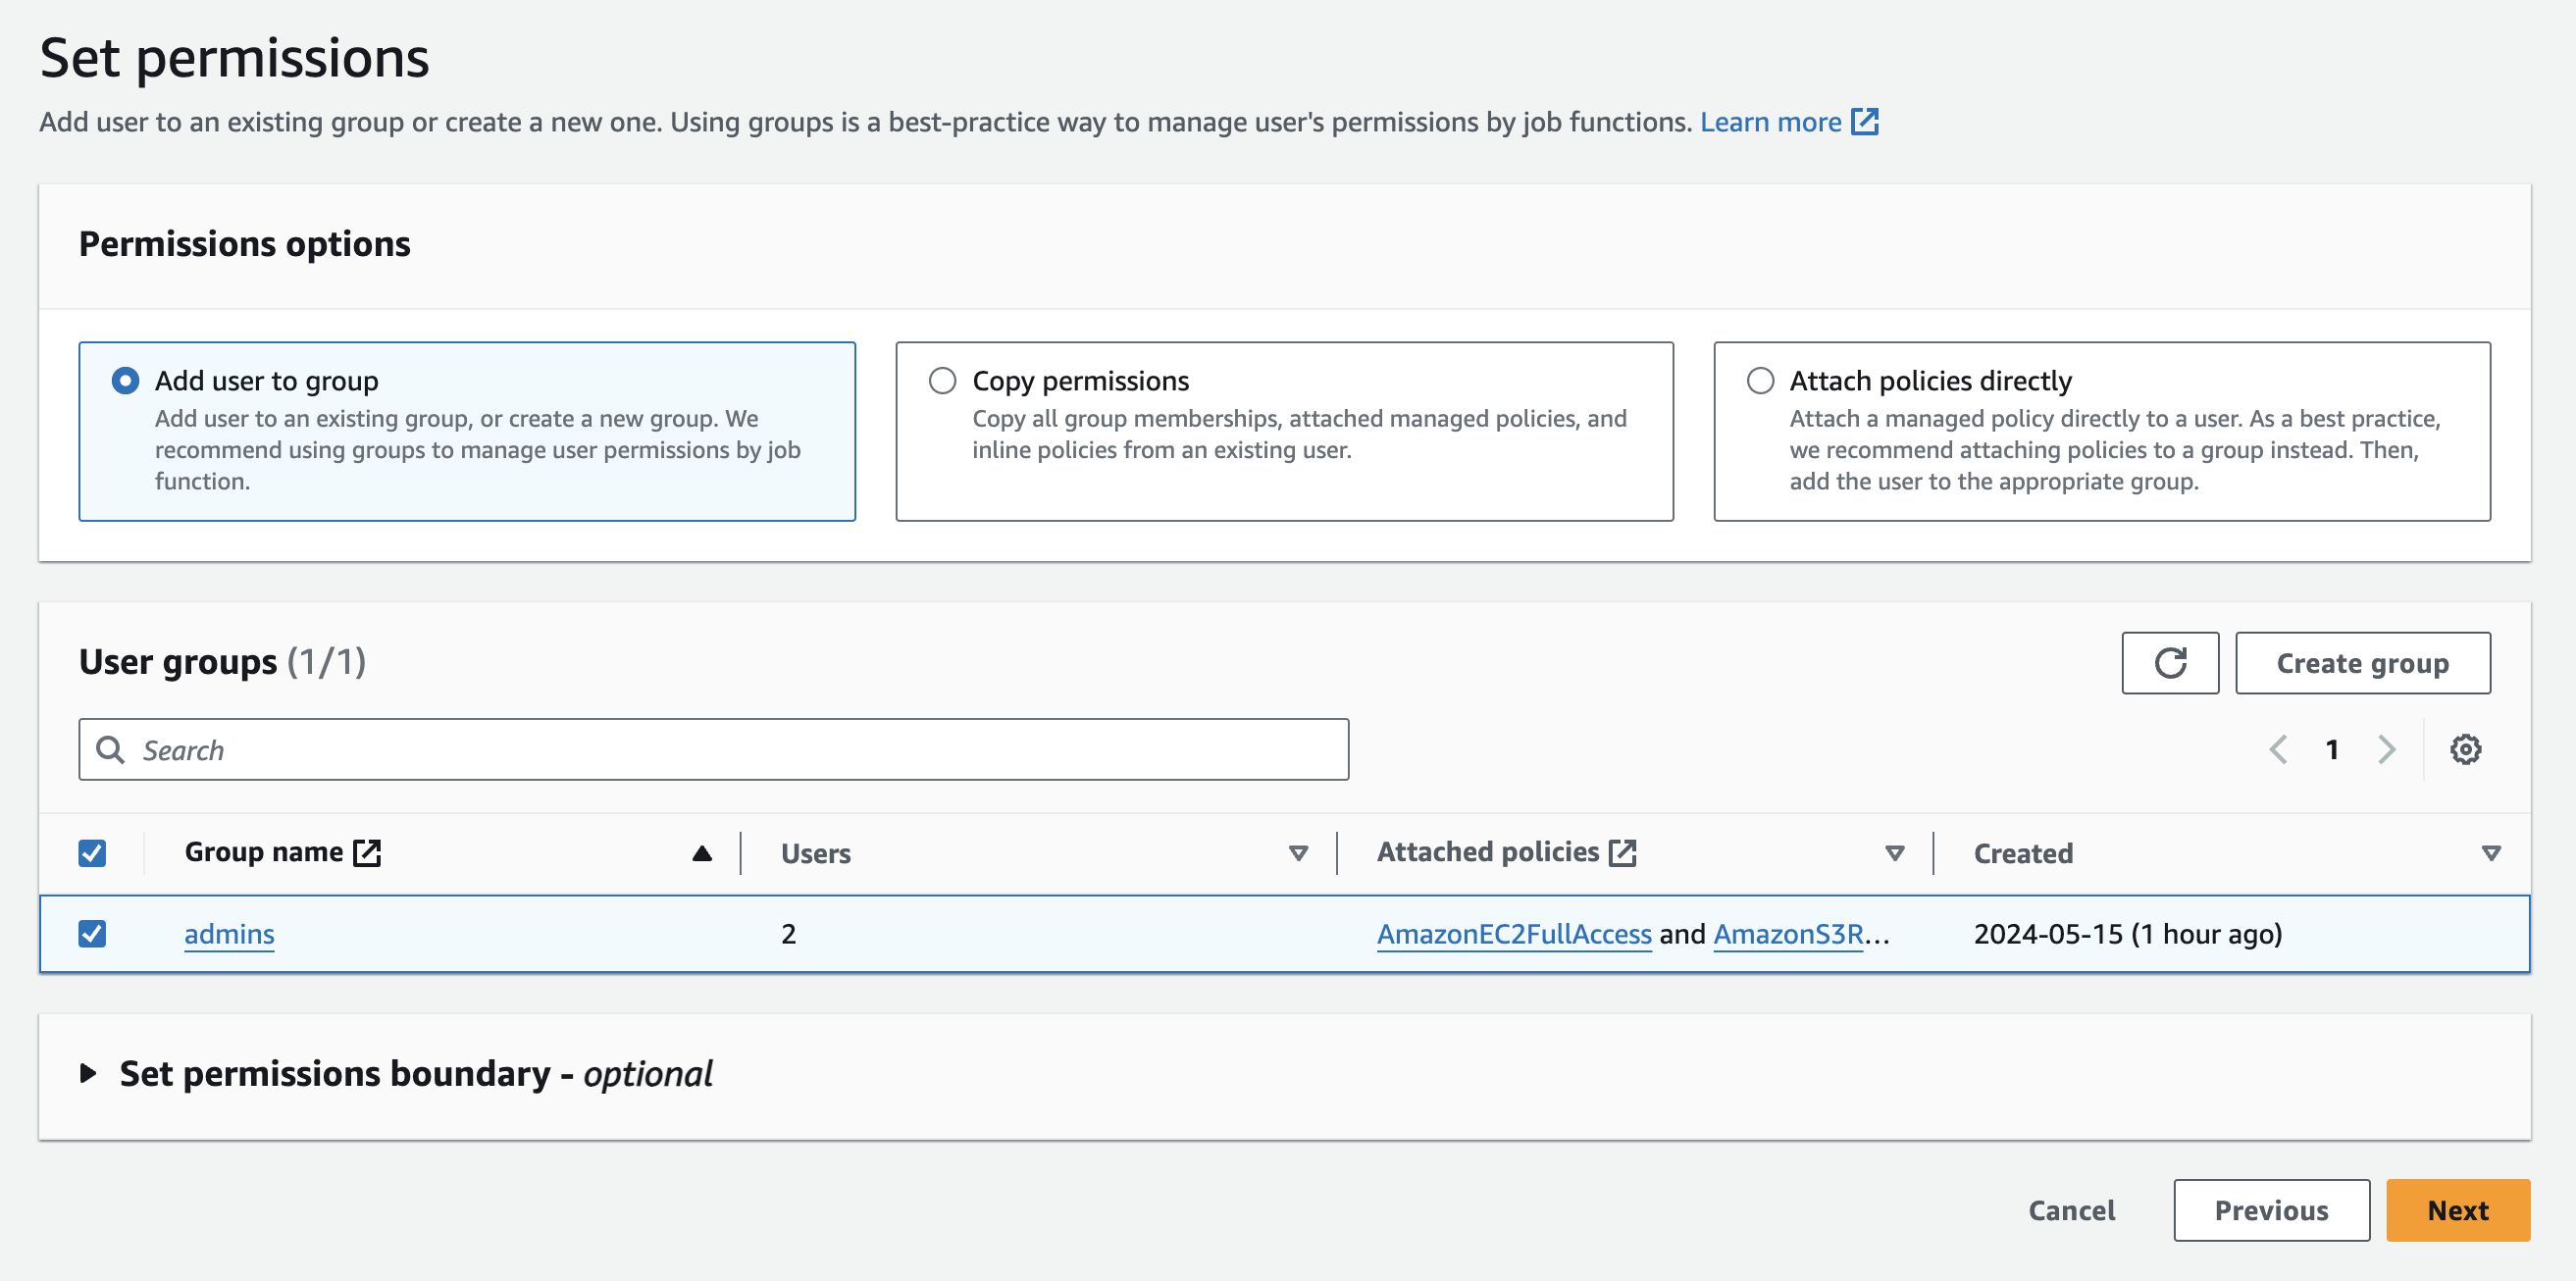
Sign in to AWS console > Search IAM > click on users > create user > type user name > Click on Provide user access to the AWS Management Console > select I want to create an IAM user > Set password (autogenerated or custom) > Set permissions (Here we can either user to group that already already have some permissions or even we can direct attach policy) > Review and create user.

AWS IAM Roles:
A role is a set of permissions that grant access to actions and resources in AWS. These permissions are attached to the role, not to an IAM User or a group.
A role is not uniquely associated with a single person; it can be used by anyone who needs it.
A role does not have long term security credential, i.e., password or security key. Instead, if the user uses a role, temporarily security credentials are created and provided to the user.
You can use the roles to delegate access to users, applications or services that generally do not have access to your AWS resources.
Creating IAM Roles:
1. Sign in to the AWS Management Console:
2. Navigate to the IAM Console:
3. Access the Roles Dashboard:
4. Create a New Role:
- Click on the "Create role" button to start the role creation process.
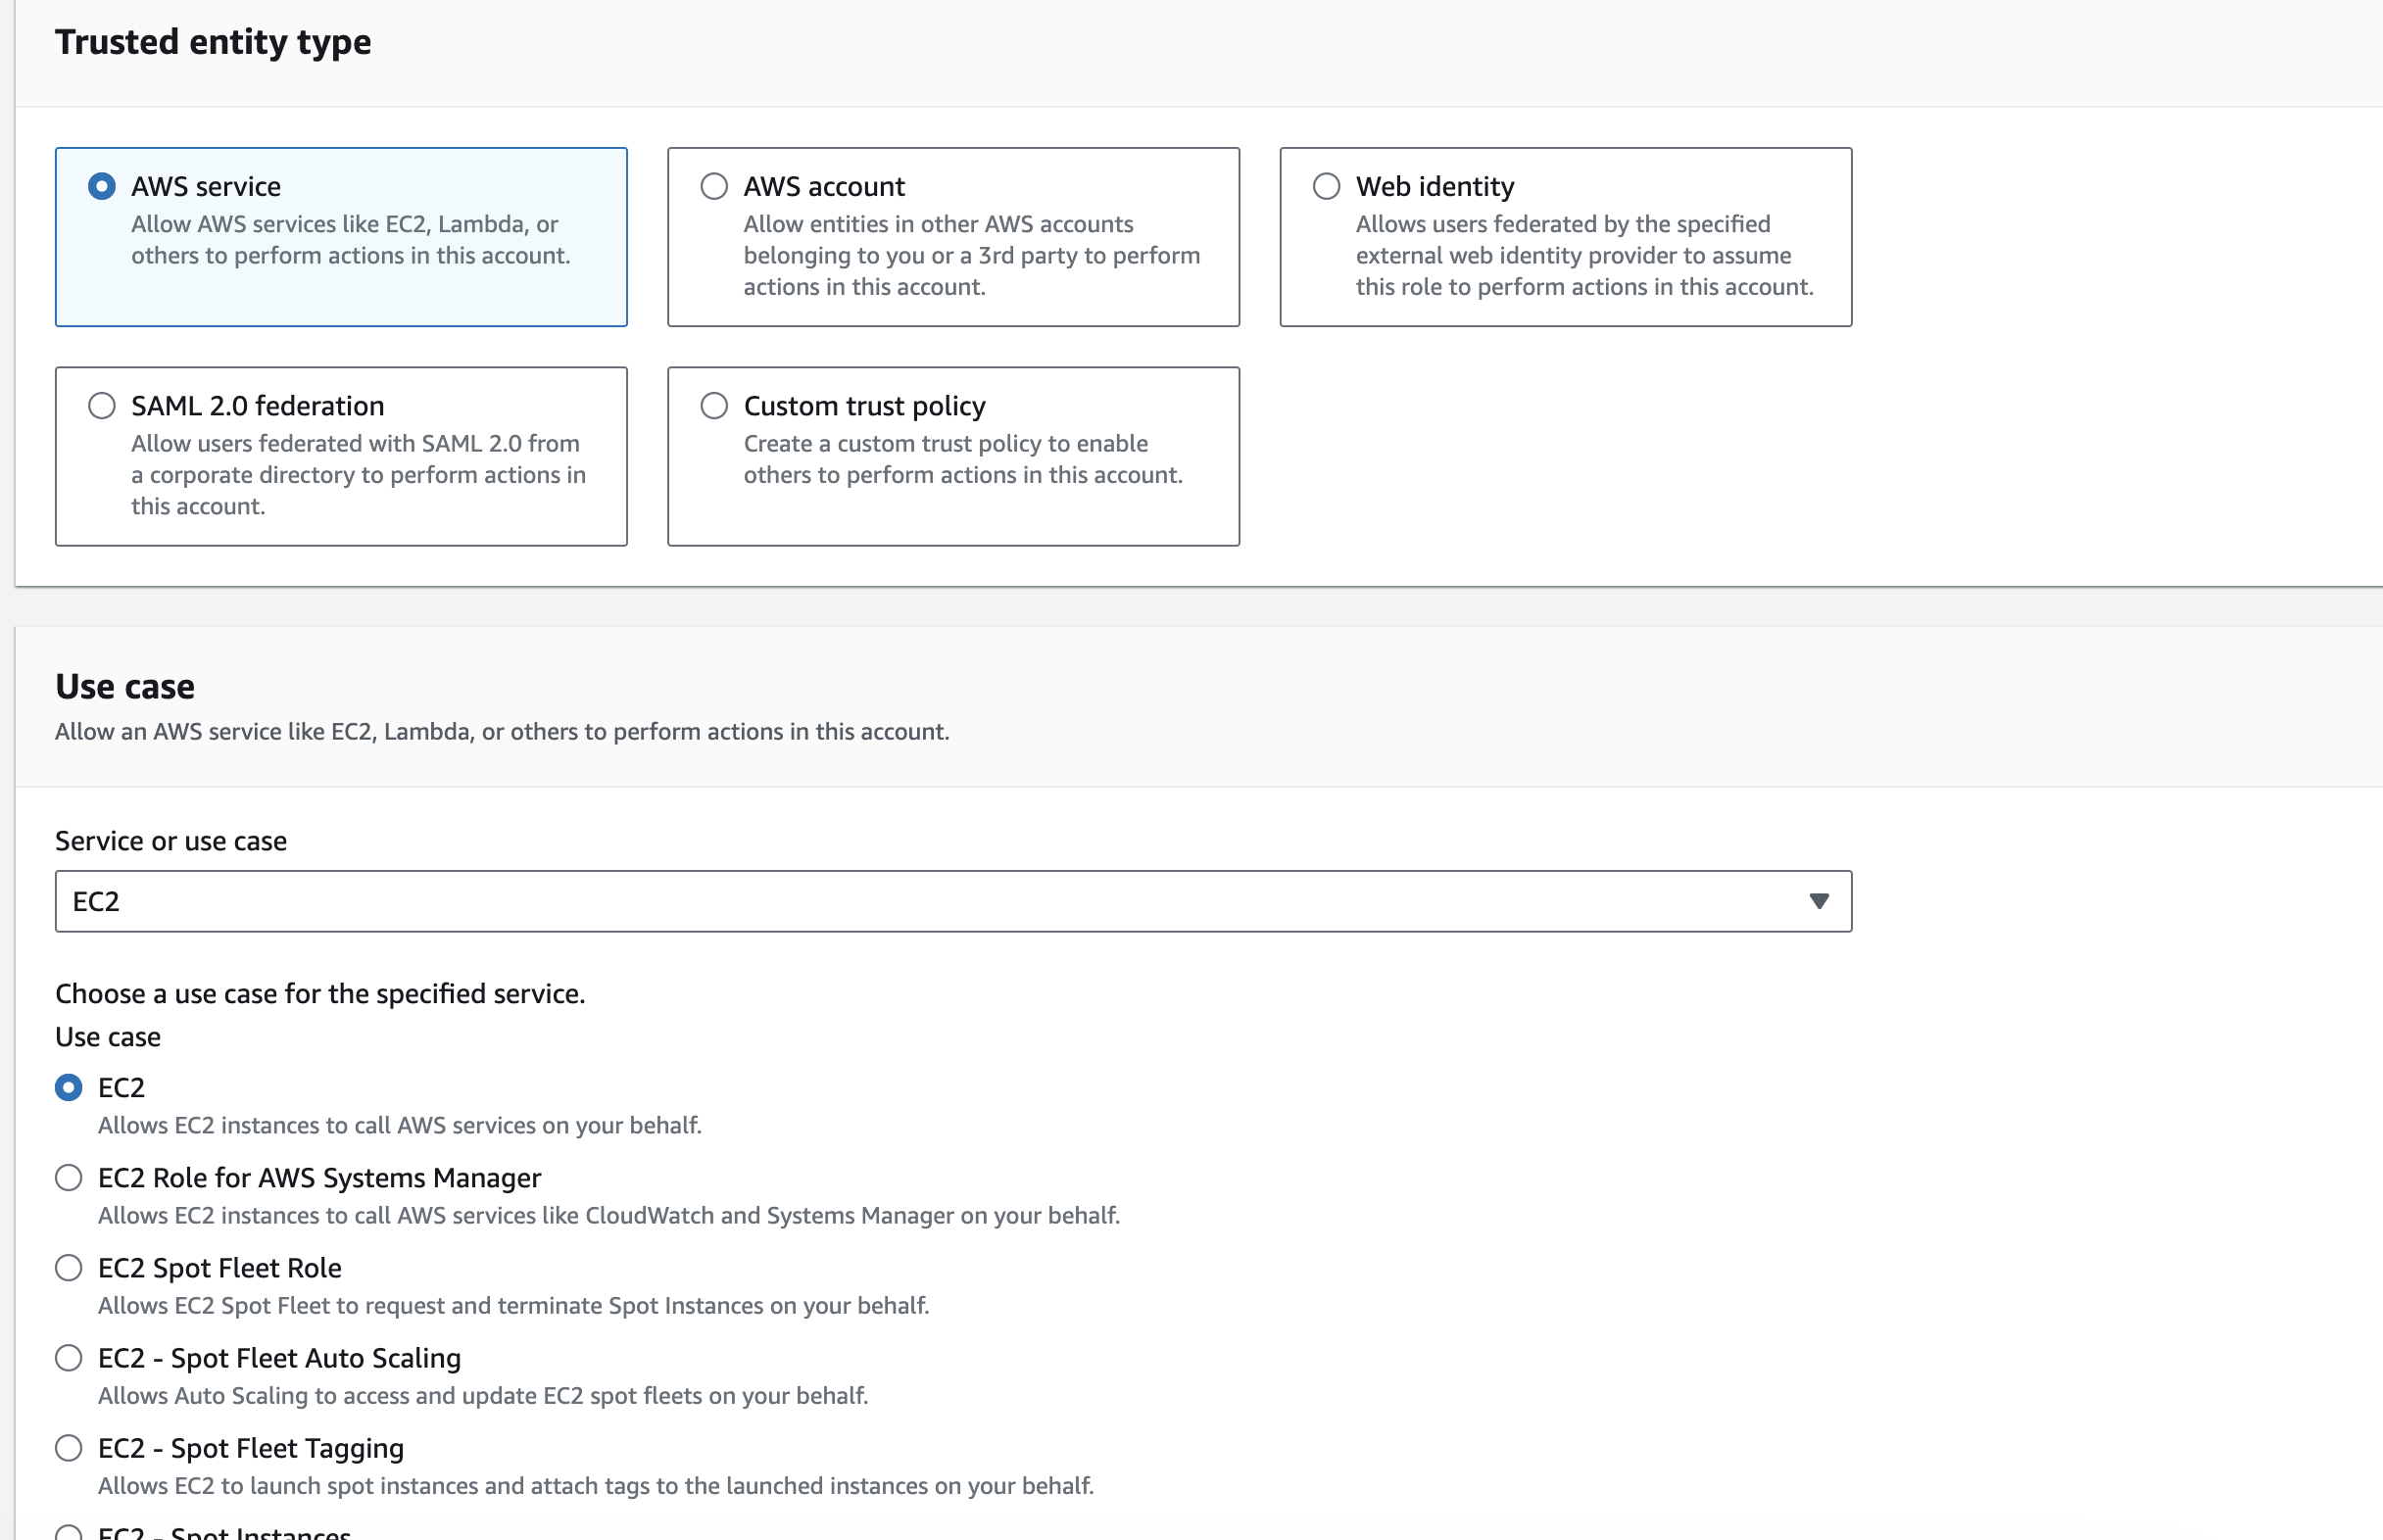
5. Select Trusted Entity:
Choose the type of trusted entity that will use the role:
AWS Service: Select this if the role will be used by an AWS service like EC2, Lambda, etc.
Another AWS Account: Choose this if you want to grant access to a different AWS account.
Web Identity: For web-based authentication via Amazon Cognito, Google, Facebook, etc.
SAML 2.0 Federation: For SAML-based authentication.
6. Select Use Case:
- Depending on the chosen trusted entity, select the specific use case for the role. For example, if you selected "AWS Service," you would then choose the specific service like EC2, Lambda, etc.
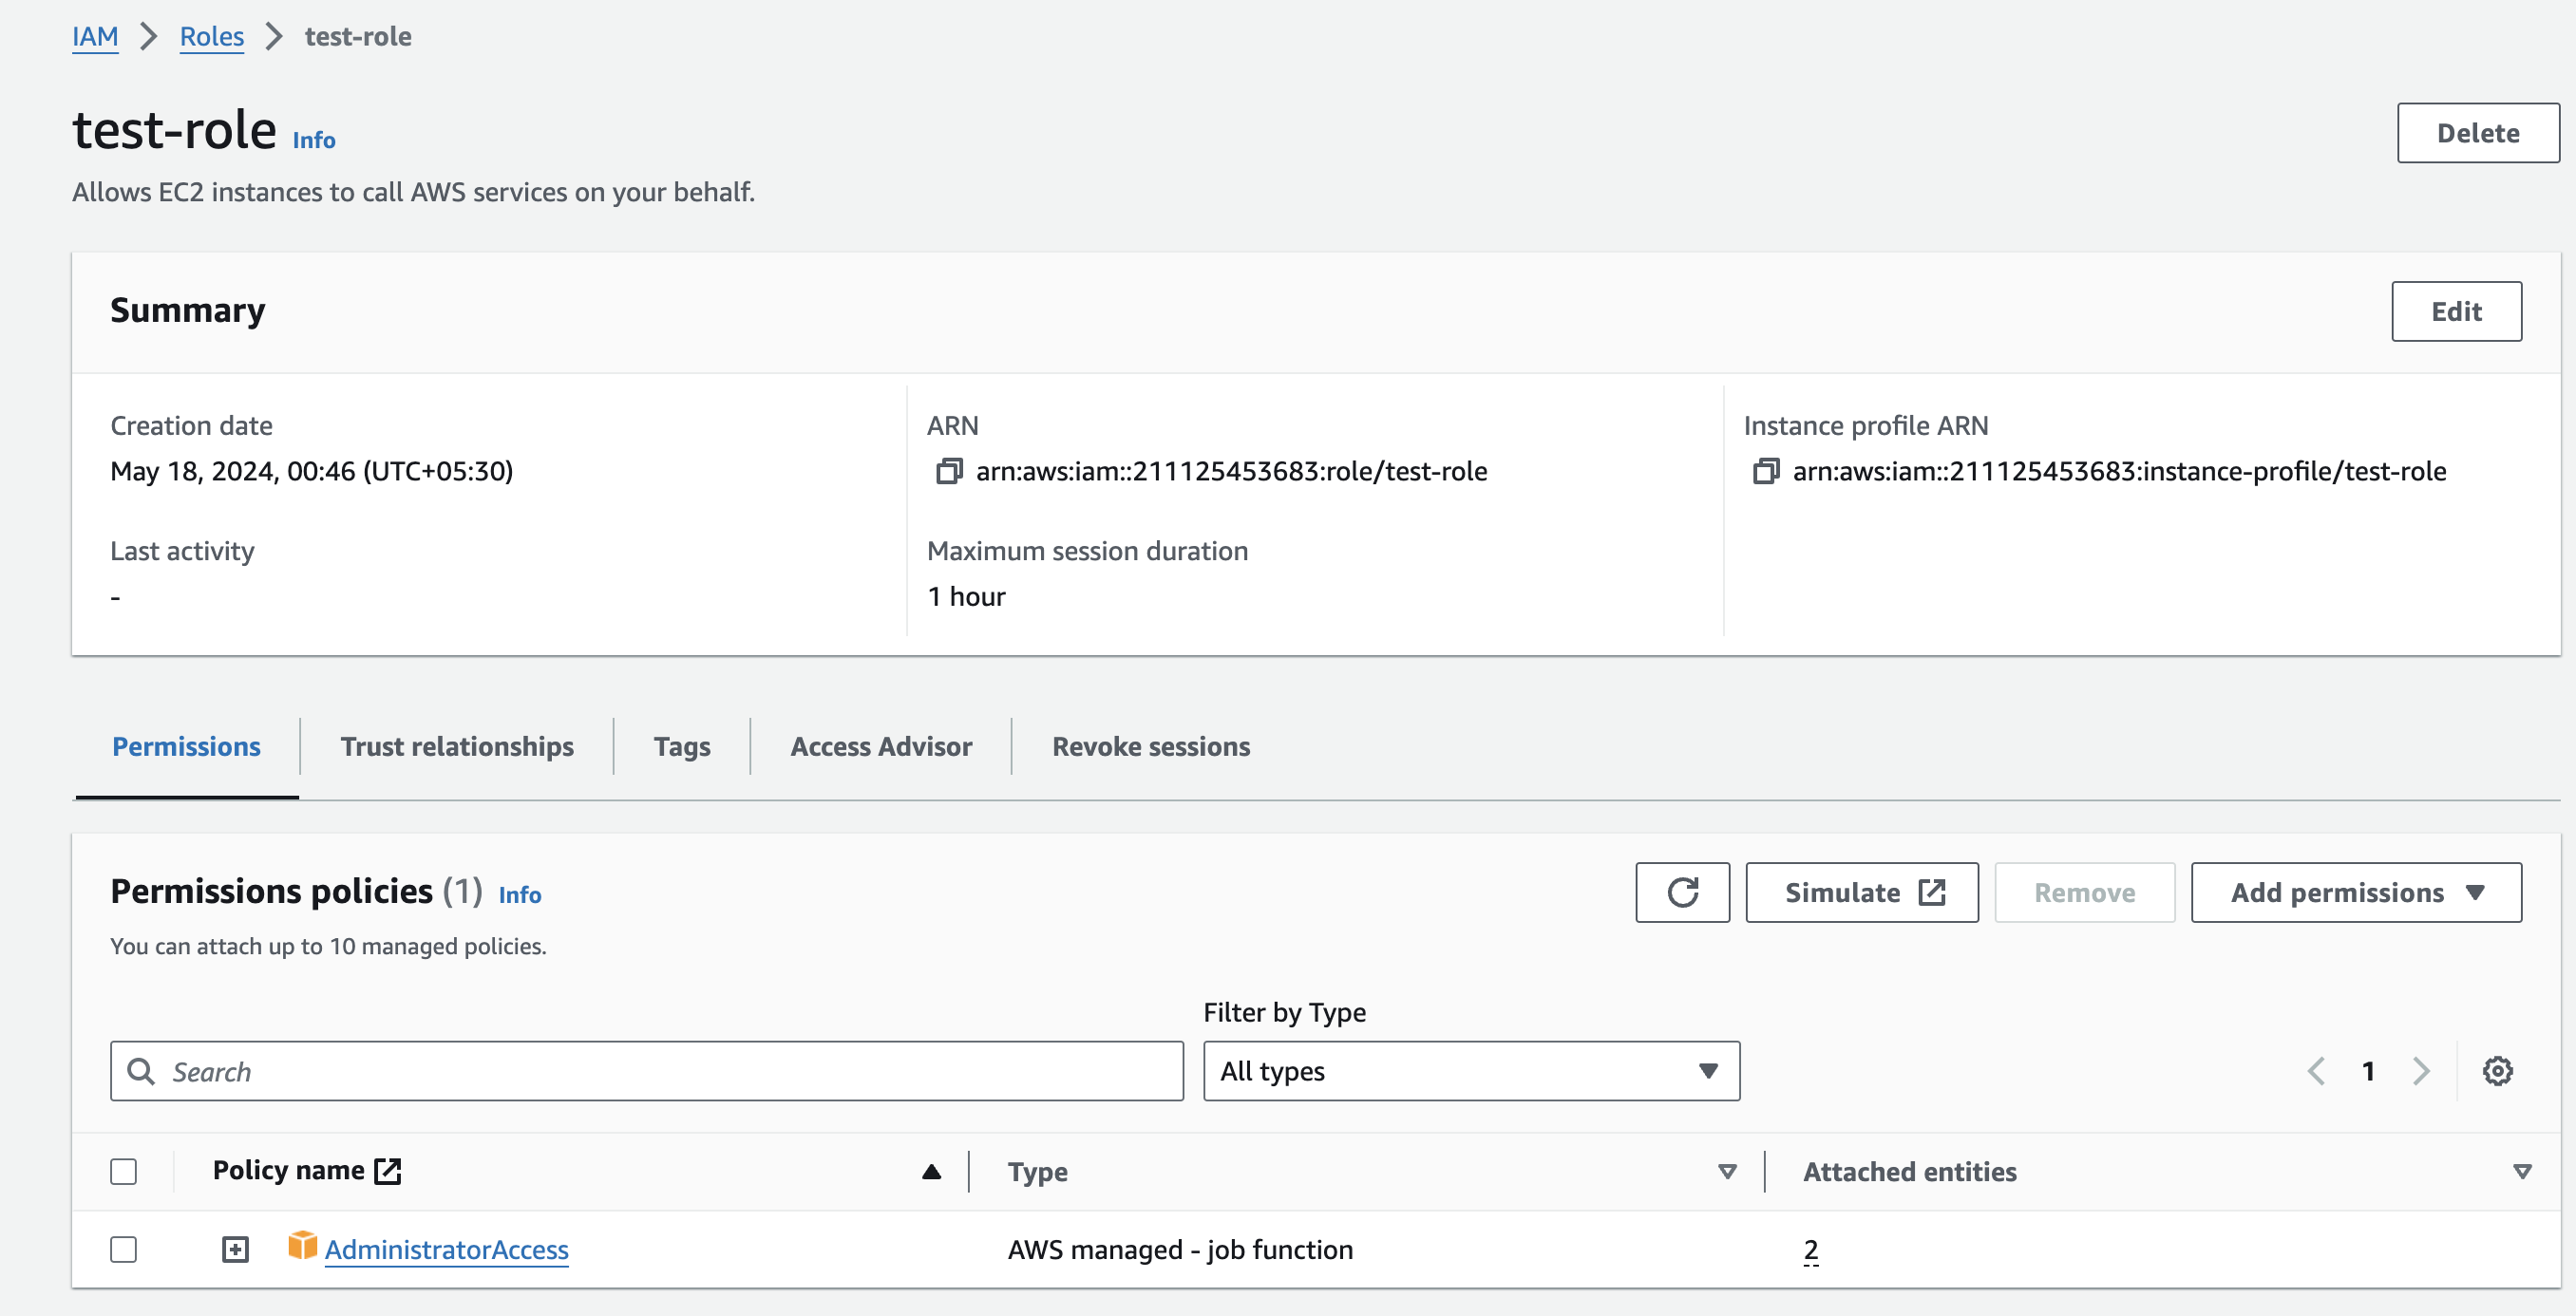
7. Attach Policies:
- Attach the necessary permissions policies to the role. You can choose from AWS managed policies or custom policies that you’ve created. These policies define what actions the role can perform and on which resources.
8. Add Tags (Optional):
- Add tags to help you manage and identify your roles. Tags are key-value pairs that can be useful for organizing and searching for IAM roles.
9. Review and Create:
- Review the role details, including the trusted entity, policies, and tags. Ensure everything is correct. Once reviewed, click on the "Create role" button.
10. Assign the Role:
Assign the role to an AWS service or entity. For example:
For an EC2 Instance: When launching an EC2 instance, you can assign the role during the instance configuration step.
For a Lambda Function: You can assign the role in the execution role settings when creating or configuring the Lambda function.
11. Verify Role Permissions:
- Test the role to ensure it has the appropriate permissions by performing actions allowed by the role policies.
12. Manage and Update Role:
As your requirements change, you may need to update the role. This can include:
Modifying the attached policies: Update, add, or remove policies to change the permissions.
Changing the trusted entities: Update which entities can assume the role.
Editing tags: Update or add new tags for better management.
Thank you for reading my blog:)
Subscribe to my newsletter
Read articles from vivek singh directly inside your inbox. Subscribe to the newsletter, and don't miss out.
Written by

vivek singh
vivek singh
5+ year of Experienced System admin with a demonstrated history of working in the outsourcing/offshoring industry. Skilled in Windows Server, Mac administration Networking,G-suit, o365, Red hat linux, okta admin ,jira , Slack admin, Asset, Servers. Strong information technology professional with a B.Tech (cs) focused in Computer Science from jaipur national university, jaipur.