Deploy ERC20 token on Starknet. 💸
 Lexy
LexyStarknet is the secure scaling technology bringing Ethereum’s benefits to the world. Starknet utilizes the power of STARK technology to ensure computational integrity. By validating off-chain transactions with advanced math and cryptography, Starknet overcomes Ethereum’s scalability limitations. Starknet is a Validity Rollup that provides unlimited scale while retaining Ethereum’s security and decentralization.
🧠 Getting Started
Before getting started directly into smart contract development using Cairo, you need to install few tools from Starknet Foundation:
💻 Setting up your environment:
Scarb: The build toolchain and package manager for Cairo and Starknet ecosystems. In Linux, you can use curl to download and install sacrb, but for Windows & Mac please refer to the original documentation.
curl --proto '=https' --tlsv1.2 -sSf https://docs.swmansion.com/scarb/install.sh | shStarkli: Starkli is a command line tool for interacting with Starknet, powered by starknet-rs. If you're on Linux/macOS/WSL/Android, you can install
stakrliupby running the following command:curl https://get.starkli.sh | sh
👛 Setting up your account:
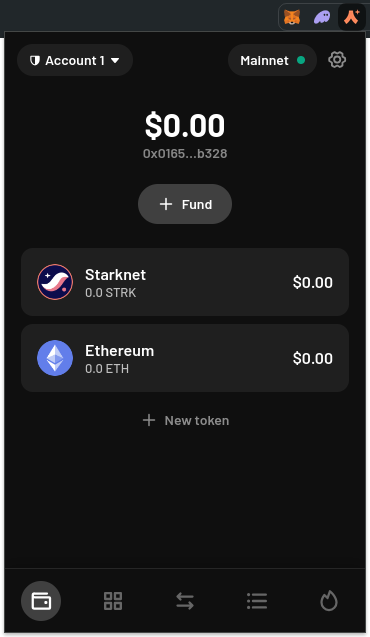
Wallet Installtion: I suggest you to install ArgentX not because it is better than Braavos wallet by any metrics.
Once it is installed, make sure you've setup correctly and it requires Smart Wallet to deploy smart contracts so better choose that one rather than Standard Wallet or MultiSig Wallet. After that, you should see something like this:

Redirect the network to Sepolia unless you intend to deploy the token on Starknet Mainnet and create an account on Sepolia. Additionally, you need to add testnet Sepolia ETH from the faucet for testing purposes. This can be achieved by redirecting to fund from the Sepolia token faucet.
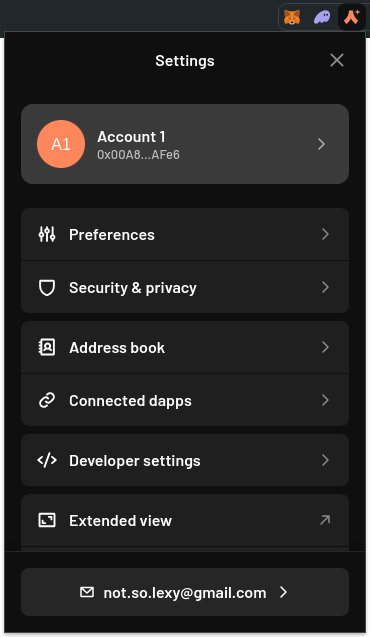
Now that the account is created, we need to deploy it. You can do so by navigating to the 'Account' section and clicking on 'Account 1' or whichever name you assigned to it. Subsequently, you should see the 'Deploy Account' button. If you haven't received ETH or Starknet Tokens, the account deployment might fail and be reverted.

🔩 Creating a keystore file
The following command creates a keystore file for a smart wallet in the default location in ~/.starkli-wallets/deployer:
Create a new directory:
mkdir -p ~/.starkli-wallets/deployer
Export the private key from your wallet
Next export the private key from your Argent X wallet:
Navigate to: Settings section → Select your AccoScaffolding projectunt → Export Private Key.
Create a keystore file within the directory:
starkli signer keystore from-key ~/.starkli-wallets/deployer/keystore.json
# output
Enter private key: #private key deployed account
Enter password: #set a new password for keystore
Created new encrypted keystore file: /home/parallels/.starkli-wallets/deployer/keystore.json
Public key: 0x0550…
Now, let's create an account descriptor, primarily utilized for deploying smart contracts using Cairo on Starknet.
starkli account fetch 0x00A8d501BD44711f1d6b4F9487BBE5FA45d0451aB94B19431F07aaDAa5b6AFe6 --output ~/.starkli-wallets/deployer/account.json --network=sepolia
The final output should resemble this. The official documentation typically utilizes RPC from Infura as it covers both the mainnet and Sepolia. However, in this instance, we used '--network=sepolia' to bypass that requirement. Additionally, the official setup documentation deploys the account later, but as I've already guided, this process can be visually simplified.
lexy@Lex-World:~/Documents/projects$ starkli signer keystore from-key ~/.starkli-wallets/deployer/keystore.json
Enter private key:
Enter password:
Created new encrypted keystore file: /home/lexy/.starkli-wallets/deployer/keystore.json
Public key: 0x06ab3c376b5d394a5a10d2cffa8025c7565db5b77ed60efbba281eaa5c4451f5
lexy@Lex-World:~/Documents/projects$ starkli account fetch 0x00A8d501BD44711f1d6b4F9487BBE5FA45d0451aB94B19431F07aaDAa5b6AFe6 --output ~/.starkli-wallets/deployer/account.json --network=sepolia
Account contract type identified as: Argent X
Description: Argent X official account (as of 5.13.1)
Downloaded new account config file: /home/lexy/.starkli-wallets/deployer/account.json
🪙 Scaffolding project for ERC20
That was tiring right? Now the interesting part comes. Lets start with our project with the package manager: Scarb
mkdir erc20 && cd erc20 && scarb init
# Output: Created package.

Now, you can see lib.cairo is created then replace the code with the ERC20 Contract from OpenZeppelin.
Dependencies can be install using scarb but I'll directly update the Scarb.toml and it should be like:
[package]
name = "erc20"
version = "0.1.0"
edition = "2023_11"

# See more keys and their definitions at https://docs.swmansion.com/scarb/docs/reference/manifest.html

[dependencies]
starknet = ">=2.2.0"
openzeppelin = { git = "https://github.com/OpenZeppelin/cairo-contracts.git", tag = "v0.13.0" }

[[target.starknet-contract]]
sierra = true
Simply build the project now using command:
scarb build
Output:
lexy@Lex-World:~/Documents/projects/erc20/erc20$ scarb build
Compiling erc20 v0.1.0 (/home/lexy/Documents/projects/erc20/erc20/Scarb.toml)
Finished release target(s) in 2 seconds
Before deploying the contract directly to Starknet you must declare the smart contract using starkli tool for Class Hash so it should be done like:
starkli declare target/dev/erc20_MingToken.contract_class.json --network=sepolia
Finally deploy the contract like:
starkli deploy class_hash [params] --network=sepolia
as we know the params for the erc20 token that we wrote is the owner address after token is minted. The build, declare, and deploy should look like this:

Kudos, you successfully deployed the ERC20 token. Using the contract address you can interact with smart contract through voyager. I'll always be happy to assist you if you face problem on this so hit me up on Discord: not.so.lexy. Happy Hacking! 🔥
Subscribe to my newsletter
Read articles from Lexy directly inside your inbox. Subscribe to the newsletter, and don't miss out.
Written by

Lexy
Lexy
Building a more open web, one block at a time. 📜