Turn your mailbox into a system
 Andrey Bazhin
As dedicated engineers, we love staying updated on new frameworks, methods, and productivity tips. We subscribe to newsletters and follow numerous channels across social media.
However, our inboxes often become a mess, and our "wanna read" list rarely matches our "actually read" one.
Today, I'm discussing a simple trick with Gmail that helped me narrow my focus: setting up filters and labels for all incoming newsletters and updates. (For those who prefer video format, I've created one. 👇)
https://www.youtube.com/watch?v=eNIjSRlWnjQ
Step One - Collect Your Favorite Sources
You might have gone through this step many times, subscribing to feeds from Substack or newsletters from "this guy cracking honest advice in X." It could even be something unrelated to engineering – recently, I was looking for a flat in Madrid and subscribed to many alerts from real estate agencies.
Just for your inspiration - these are my favorite newsletters (no affiliates):
Now once you have a solid portion of content in your inbox daily, let's organize it!
Step Two - Scaffolding Your Dedicated Data Streams via Labels
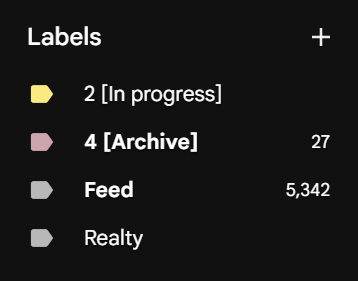
Each label represents one specified inbox. E.g. the one called "Realty" is specified on real estate agency alerts.
Steps to set up a new label:
Open Gmail and go to Settings (gear icon) > See all settings.
Navigate to the Labels tab and click Create a new label.
Name your label (e.g., "Newsletters" or "Realty").
Or just hit "+" near the labels on the sidebar.

The settings view gives more of what labels you have and which are shown, but the Gmail UI here is quite outdated.
Step Three - Organizing Messages by Your Streams
No, you don't have to organize it every day! Not anymore.
You are about to set up an organizing automation that will be doing it for you - every time you get something to your inbox the automation will redirect it under the label it should be.
Steps to set up a filter:
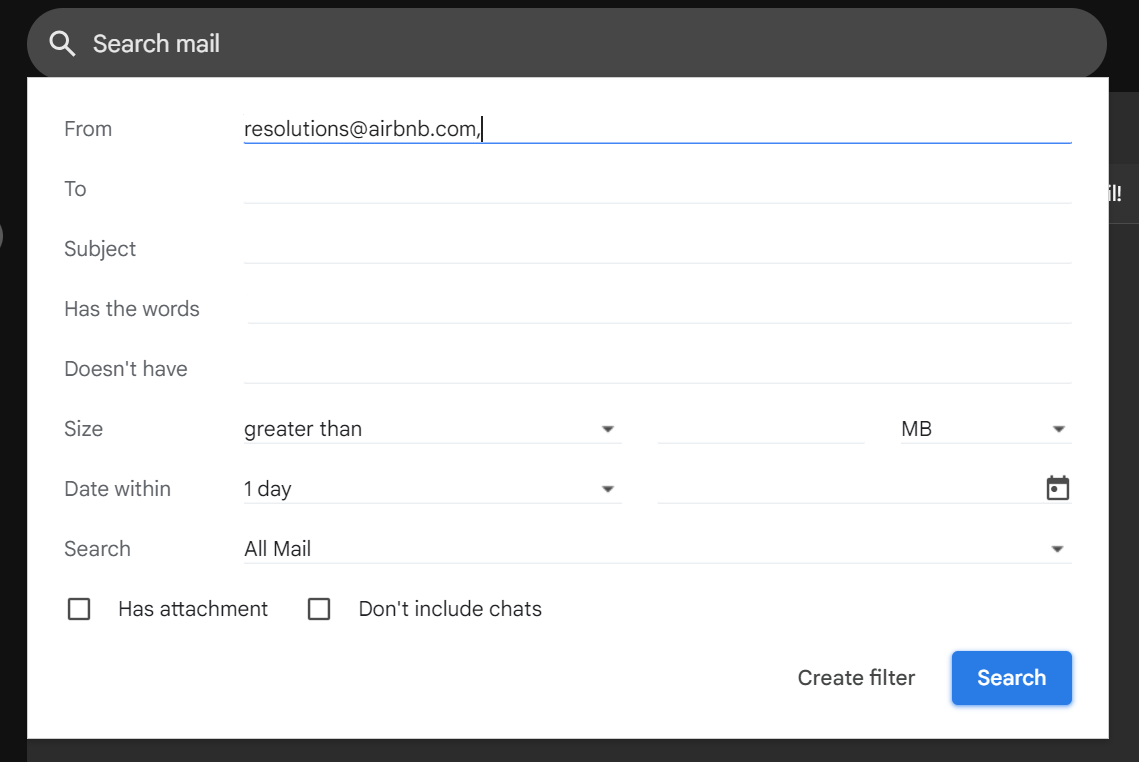
Click on the "Adjustments" icon in the search bar

Add the email to From you want to filter out, then click on "Create filter"

Select "Skip the inbox" to not see it in your common inbox, and "Apply the label" to make it go to a specific label of yours. Then just hit "Save filter" and that's it.
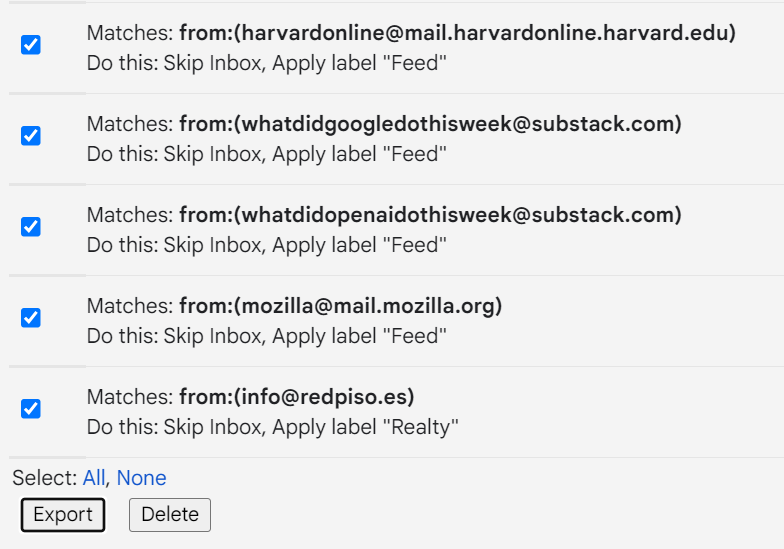
You can do it from settings as well, just go to Settings > Filters and Blocked Addresses, and all your filters-related settings are over there.
Step Four - Exploit the System You Just Built
Each of the labels you set up is dedicated to a specific activity you're striving to do.
Developer newsletters are great to skim through in your spare time – now you're up to date with "this new fancy framework/tool" and can share them with your work chat to discuss with your colleagues.
For example, once a day, I go through my "realty" label and bookmark flats I like to call later.
No fancy apps are needed. No distractions from the rest of your busy inbox.
Step Five - Your Filters, Your Data
Say you built a decent filters library but suddenly need to change your email or create a new one.
Or maybe you want to share your setup with a friend/community? Fear not, all your filters are just a few clicks away from being an XML file that you can use any way ever you want.
Steps to export/import filters:
Go to Settings > Filters and Blocked Addresses > Export.

Save the .xml file.
On your new email account, go to the same settings and click Import to upload the .xmlfile.
You can create your own automations and tools based on the filters you've just got. No limits for a programmer.
Typical Workflow
Let's wrap up how you will be working with your label-filter system:
You've got an email in your common inbox. It's a recurrent alert or newsletter, and you want it to be organized under a specific topic.
You create a label for it. Say it will be "React updates."
You set up a filter for the sender.
All new "React updates" will go there and never to your common inbox anymore unless the sender address changes – in that case, you just need to go through the process one more time.
Bonus Step - Going Beyond
You've built a system, and it grows with you, getting populated with more sources and labels. Say you are getting tens, if not hundreds, of emails a day, but you're actually interested in maybe 10% of them. At some point, you might think – can someone else can filter those I'm not interested in? Like one more level of curation.
We're targeting exactly this problem at Feedster – we're building an AI automation that uses your learning goals against your feed and boils it down to the essence that you are most interested in.
Stay up to date with our story in that blog.
Subscribe to my newsletter
Read articles from Andrey Bazhin directly inside your inbox. Subscribe to the newsletter, and don't miss out.
Written by
