On-Premises vs Cloud : Navigating Servers and Creating VM's on AWS
 Deep Patel
📍 Introduction
In the world of IT infrastructure, organizations can host their applications and services using either on-premises servers or cloud servers. Each option has it's own pros and cons and choosing the right one can affect an organization's efficiency, scalability and costs.
In this blog post, we'll cover the differences between on-premises and cloud servers, the role of hypervisors & how to create and connect virtual machines (VM's) on AWS.
What is a Server ?
A server is a powerful computer designed to process requests and deliver data to other computers over a network (the internet). Servers can host websites, run applications, manage databases, and perform various other tasks.
How Virtualization came into existence ?
Imagine a company called example.com bought 5 physical servers to run or host their applications inside it. Each server capacity is 100GB RAM and 100 CPU/Core and managed by individual teams (total 5 teams).
Problem: Now, say, the application running inside the Server-1 needs only 20GB RAM and 20 CPU/Core, so 80% of the resources are not utilized efficiently (80GB wasted), same goes with other servers as well.
Solution: As you already know that DevOps is all about improving the efficiency i.e. resources should be utilized correctly and hence concept of virtualization came into existence which addressed this problem (using hypervisor) to a great extent.
On-Premises vs Cloud
Physical Server :
An on-premises server is a physical server that is kept within an organization's own data center or office.
A physical server is a standalone hardware unit with its own CPU, memory, storage and network resources.
Pros: High performance, full control over hardware, and dedicated resources.
Cons: High upfront cost, underutilization of resources, and limited scalability.
Real-World Example:
- A financial institution with strict data security requirements uses on-premises servers to host its critical applications and sensitive data, ensuring full control and compliance with regulatory standards.
Virtual Server :
A cloud server is a virtual server hosted in a cloud computing environment, provided by third-party cloud service providers such as AWS, Azure, or Google Cloud.
A virtual server is a environment that can be imitate as a virtual machine, running on a physical server using a hypervisor.
Virtual machines are nothing but they are virtual environments which function as a virtual computer systems. And, this virtual computer systems has their own CPU, Memory and Hardware and are independent of each other.
Pros: Cost-effective, efficient resource utilization, easy scalability, and quick provisioning, Works on "Pay as you go" model.
Cons: Performance can be lower than dedicated hardware, depends on the physical server's health, Internet connection is must.
Real-World Example :
- A startup uses AWS to host its web applications, benefiting from the ability to scale resources as needed without significant upfront investment in hardware.
Hypervisor and Virtualization
Hypervisor :
A hypervisor is a software layer that :
Enables the creation and management of virtual machines on a physical host.
It allows multiple virtual machines (VM's) to run on a single physical server (by sharing it's resources to VM's).
Basically, a hypervisor directly interacts with the physical computer and extract physical resources like CPU, Memory, etc and distribute them amongst the VM's running on this host.
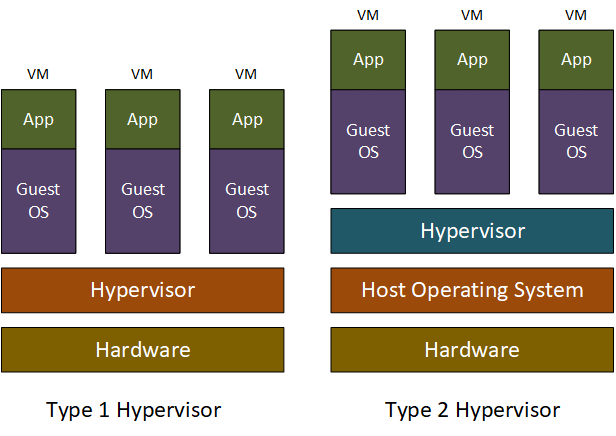
Types of Hypervisors :
Type 1 (Bare-Metal): Runs directly on the physical server hardware.
eg. VMware ESXi, Microsoft Hyper-V
Real-World Example: A data center uses VMware ESXi to host numerous virtual servers, maximizing hardware utilization and simplifying management.
Type 2 (Hosted): Runs on top of an existing operating system.
eg. VMware Workstation, Oracle VirtualBox.
Real-World Example: A developer uses Oracle VirtualBox on their laptop to run different operating systems for testing applications.
Virtualization :
Virtualization is the process of creating virtual versions of physical components, such as servers, storage devices and networks. This is the technique of splitting a physical resources into as many logical resources as we want.
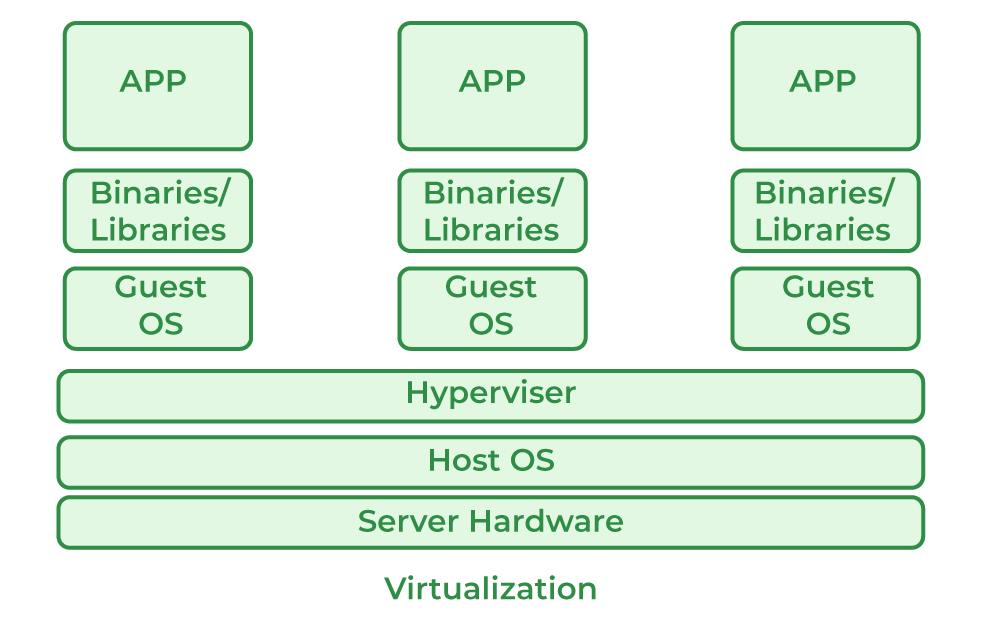
Benefits of Virtualization :
Resource Efficiency: Better utilization of physical hardware.
Cost Savings: Reduced hardware and maintenance costs.
Scalability: Easy to scale up or down as needed.
Logical Isolation: VM's are isolated and independent from each other, improving security and stability.
Real-World Example:
- An IT company uses virtualization to run multiple isolated environments on a single physical server, allowing different development teams to work on separate projects without interference.
How to create and connect VM on AWS
Creating a Virtual Machine (VM) on AWS involves several steps. Here’s a simplified guide to help you get started:
Steps to Create a VM on AWS
Sign In to AWS Management Console :
Log in with your AWS account credentials.
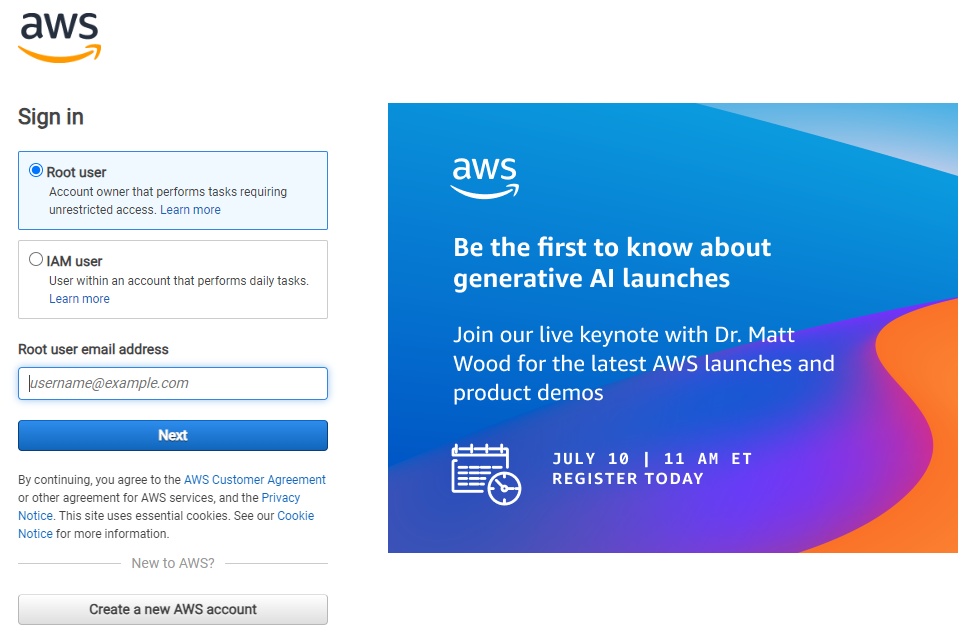
Launch EC2 Instance :
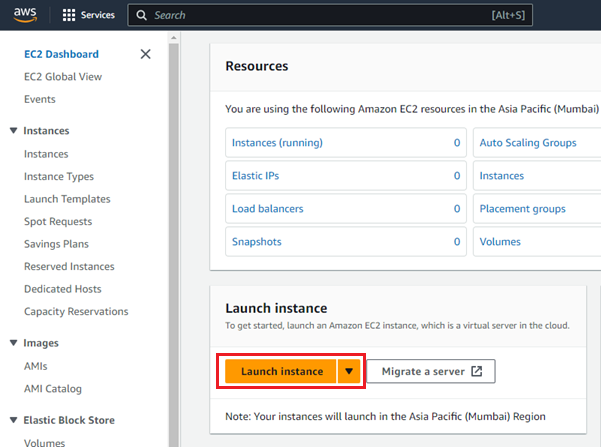
From the AWS Management Console, navigate to the EC2 Dashboard.
Click on "Launch Instance."
Add Tags :
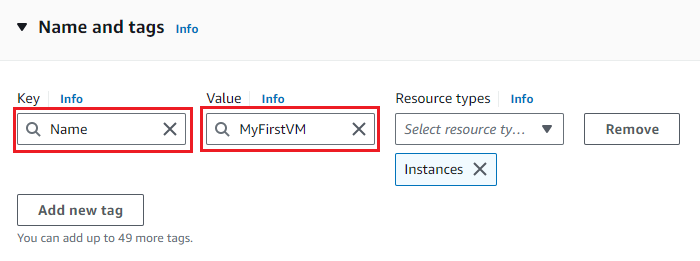
Tags are key-value pairs that help you identify your instances.
I've added a tag with the key "Name" and value "MyFirstVM."
Choose an Amazon Machine Image (AMI)*:*
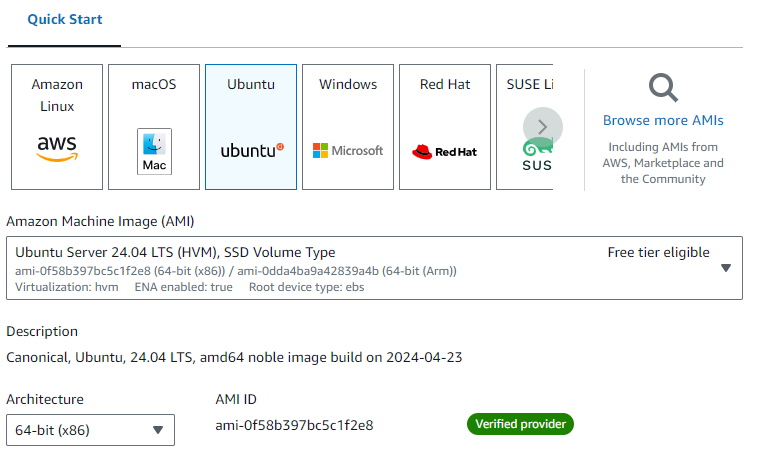
Select an AMI based on the operating system you need (eg. Amazon Linux 2023, Ubuntu, Windows).
Personally using Ubuntu for my Hands-on labs.
Choose an Instance Type :
Select the instance type that fits your requirements. Common types are
t2.microfor general-purpose use and testing.Kept it as it is (by default).

Select or Create a Key Pair :
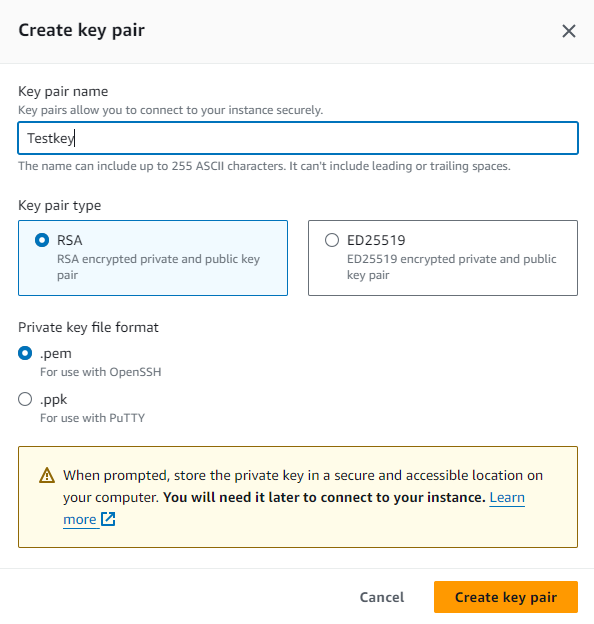
AWS uses key pairs to securely connect to your instance.
Select an existing key pair or create a new one.
Download the private key file (
.pem) and keep it secure (useful for login to EC2 instance). Very important one.I've created new key pair as shown below:

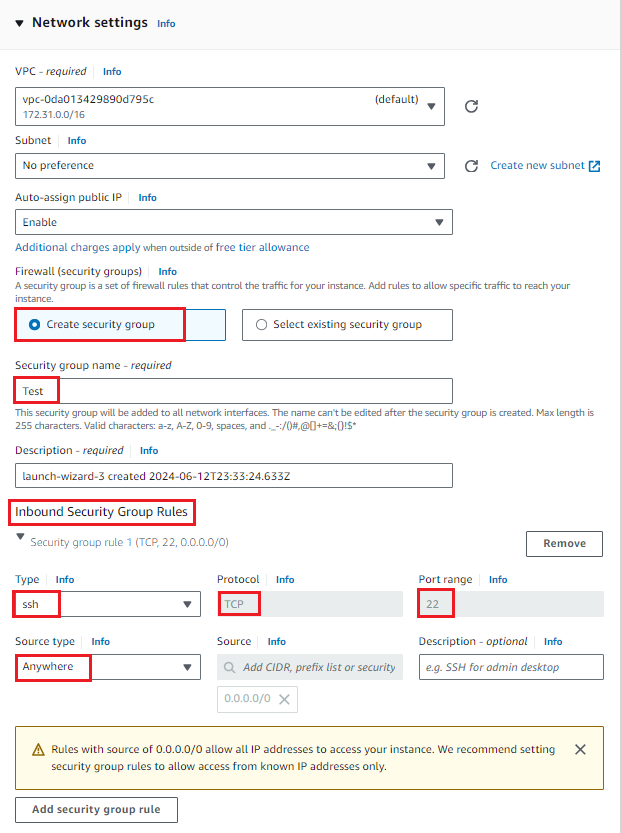
Configure Security Group :
Configure network settings, such as VPC and subnet (kept it as it is, default).
A security group acts as a virtual firewall for your instance to control inbound and outbound traffic.
Add rules to allow specific types of traffic (eg. SSH for Linux, RDP for Windows).
I've created a security group and added Inbound rules as shown below:
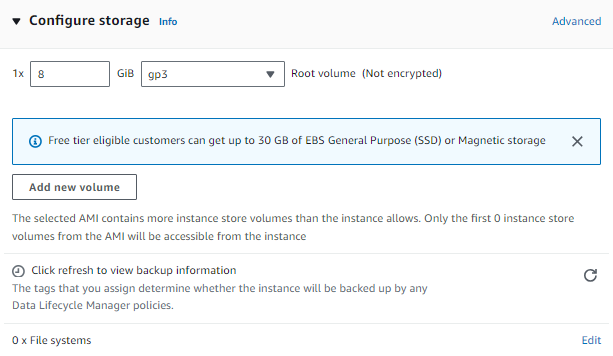
Configure Storage :
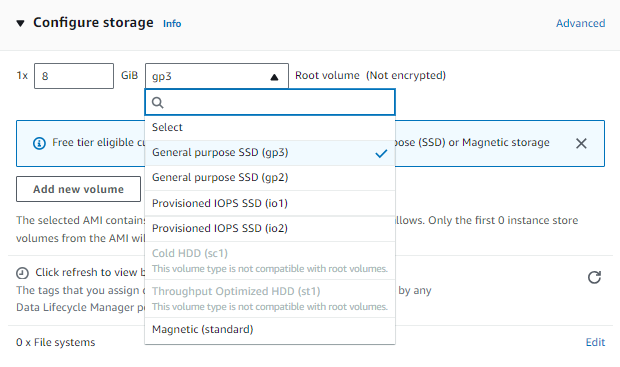
Define the storage size and type (e.g., General Purpose SSD).
You can add additional volumes if necessary.
Kept it as it is (by default).
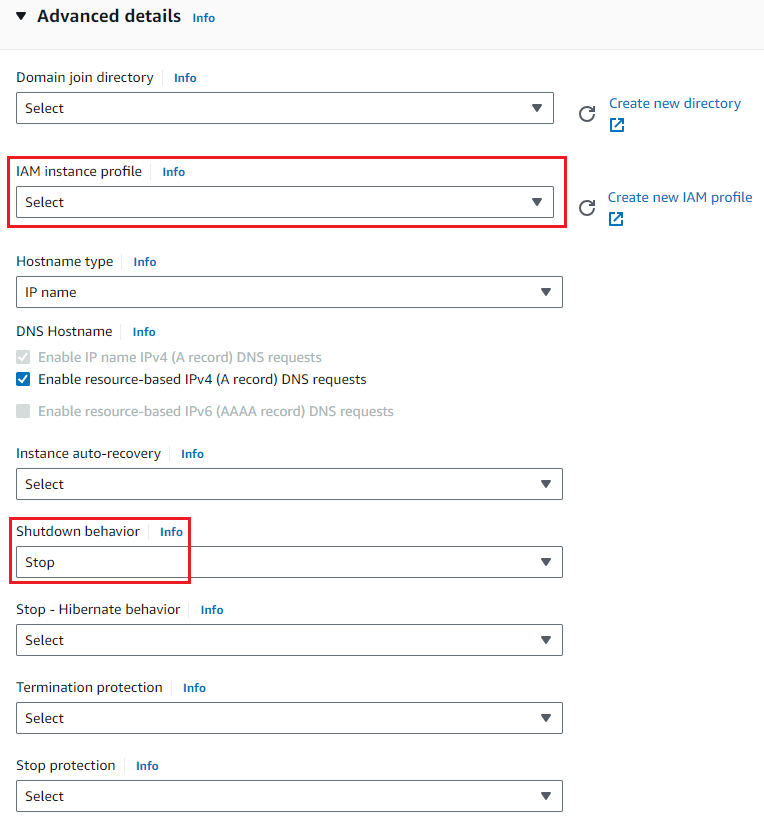
- Advanced details:
Set additional options like IAM roles, shutdown behaviour, if needed.
Kept is as it is (by default).
Configure Instance Details :
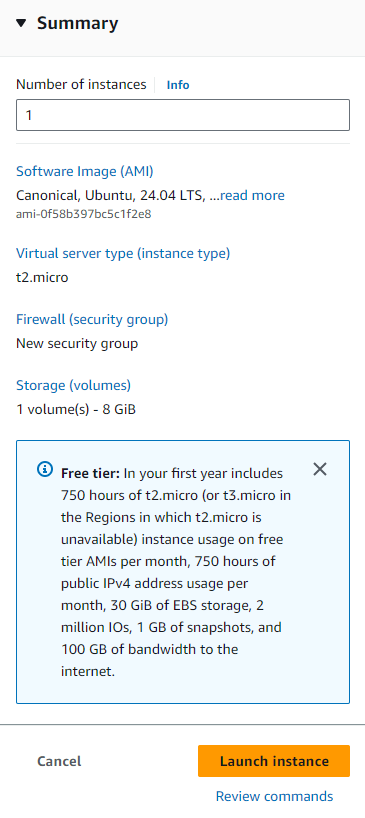
- Specify the number of instances.
Review and Launch :
Review your instance configuration details.
Click "Launch instance"
Access Your VM :
- Once the instance is launched, navigate to the EC2 Dashboard.

- Select your instance and click "Connect."

Follow the instructions to connect to your AWS VM/EC2 instance :
✦ Using EC2 Instance Connect as shown below OR
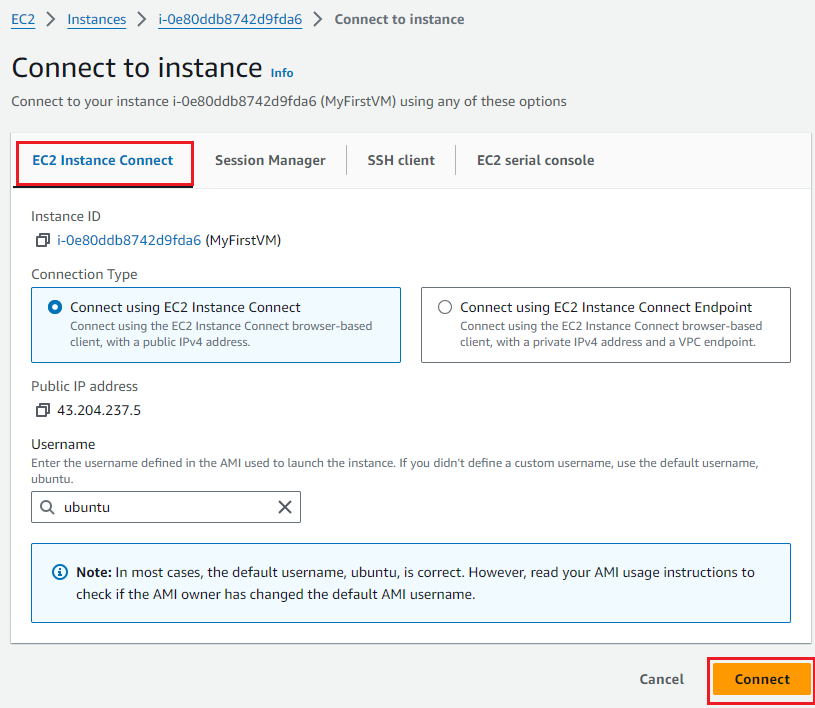
✦ My preferred way to easily connect to your VM is via SSH Client option using Git Bash. You can also use other tools like Puttygen, Putty, MobaXterm, etc
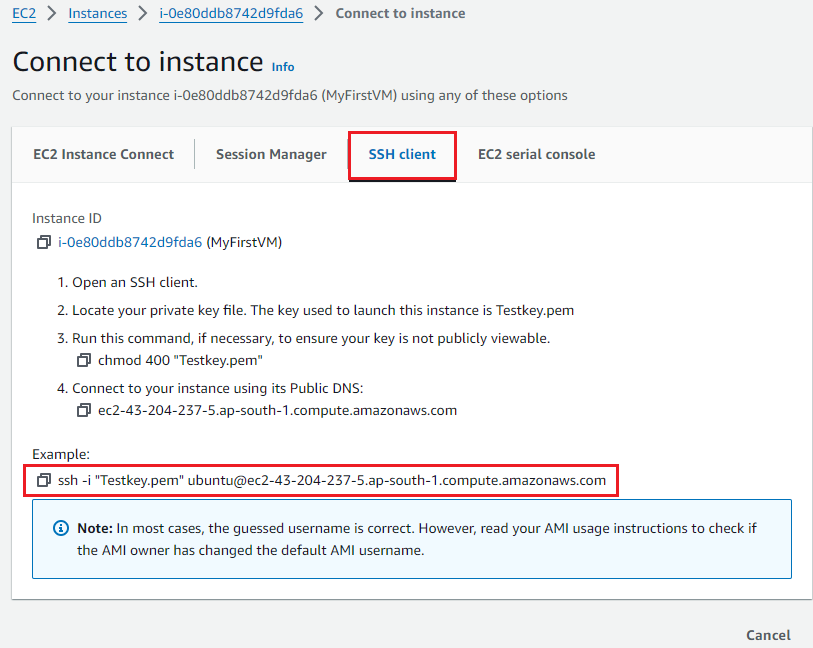
Firstly, Download the Git bash on your computer from the URL https://git-scm.com/downloads. Then, install and restart your computer for the complete installation.
Secondly, find the private key file (Testkey.pem) location which will be used to launch this instance. Once you get the location (eg. C:\Users\Downloads\), then right click your mouse and click "Open Git Bash here".
Thirdly, copy the above highlighted command, paste it in Git Bash terminal and enter yes when prompted as shown below:
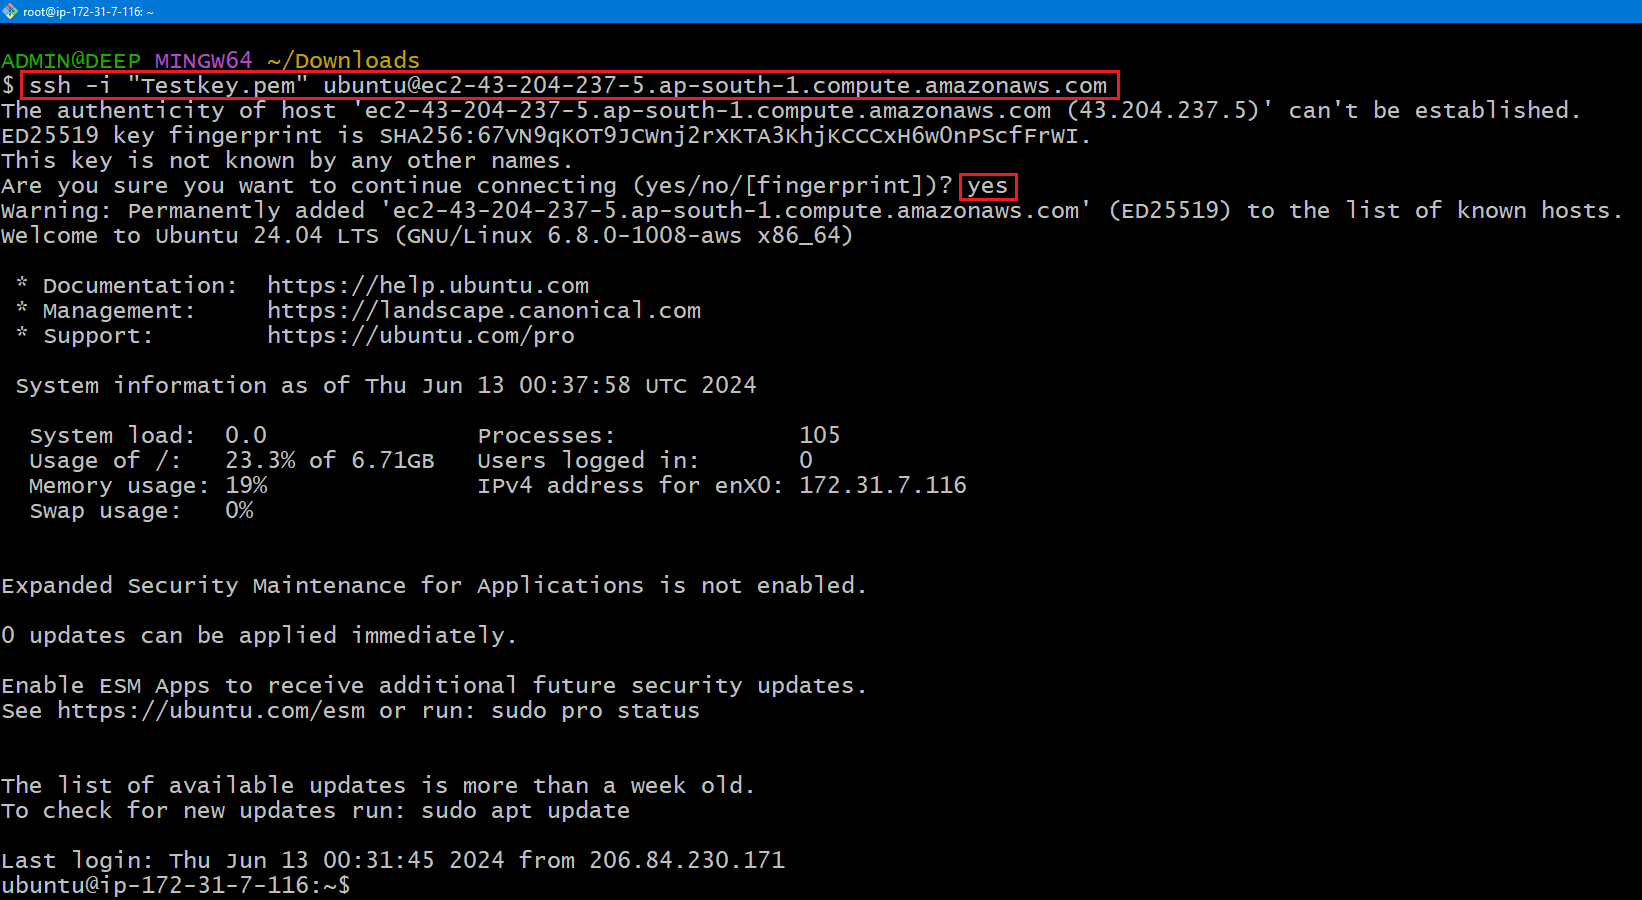
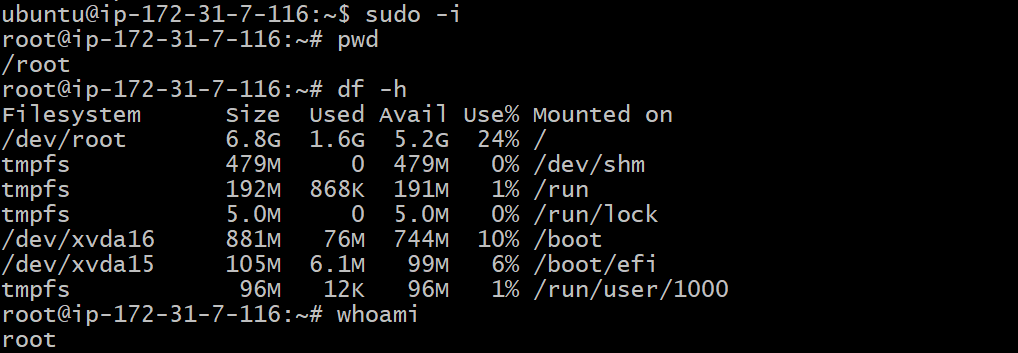

Yay !! You're finally now logged into the instance successfully. Don't forget to "Stop" or "Terminate" the instance once your work is completed/no longer needed.
- By following these steps, you can quickly setup a secure and scalable development environment in the cloud.
📍 Conclusion
Understanding servers and their types is fundamental in modern DevOps practices. Physical servers offer dedicated resources and high performance but at a higher cost and lower scalability. Virtual servers facilitated by hypervisors, provide flexibility, cost efficiency, and better resource utilization.
Knowing how to create and manage VM's is a crucial skill for DevOps professionals, enabling them to efficiently handle development, testing, and deployment tasks.
By leveraging both physical and virtual servers, DevOps teams can optimize their infrastructure, improve scalability, and enhance their overall operational efficiency.
Let's connect on LinkedIn: linkedin.com/in/pateldeep34
Subscribe to my newsletter
Read articles from Deep Patel directly inside your inbox. Subscribe to the newsletter, and don't miss out.
Written by

Deep Patel
Deep Patel
Hey there! 👋 Myself Deep Patel and I'm passionate about Tech & Servers. I'm super excited to dive into the DevOps and Cloud space. As I go on this adventure, I'll be sharing my learnings and discoveries about DevOps and Cloud technologies on my Hashnode blog. So, come along and let's explore the amazing world of DevOps and Cloud together! Don't forget to connect and share your own experiences too! 😊