Setting up Full Stack NodeJs and ReactJs project in AWS EC2. (Guide)
 Ronaj Pradhan
Table of contents
- a. Create an AWS account and head over to EC2
- b. Create an new instance
- c. Connect to the instance
- d. Install Node Version Manager (NVM), Node.js, YARN, Git, NGINX
- e. Clone ReactJs App to EC2 , install dependencies and create .env files (optional).
- f. Build the project
- g. Making Directory to host static files in Nginx
- h. Install PM2 (Keeps application alive forever)
You have finally finished building your project. Now you want to host it on a remote server so potential clients, followers, and recruiters can interact with the application. This guide will help you create an AWS EC2 instance and assist you with any obstacles that arise during the setup.
For this, you will need an AWS account, GitHub, and MobaXterm (you can use the default command line tool, but MobaXterm will be helpful later).
a. Create an AWS account and head over to EC2
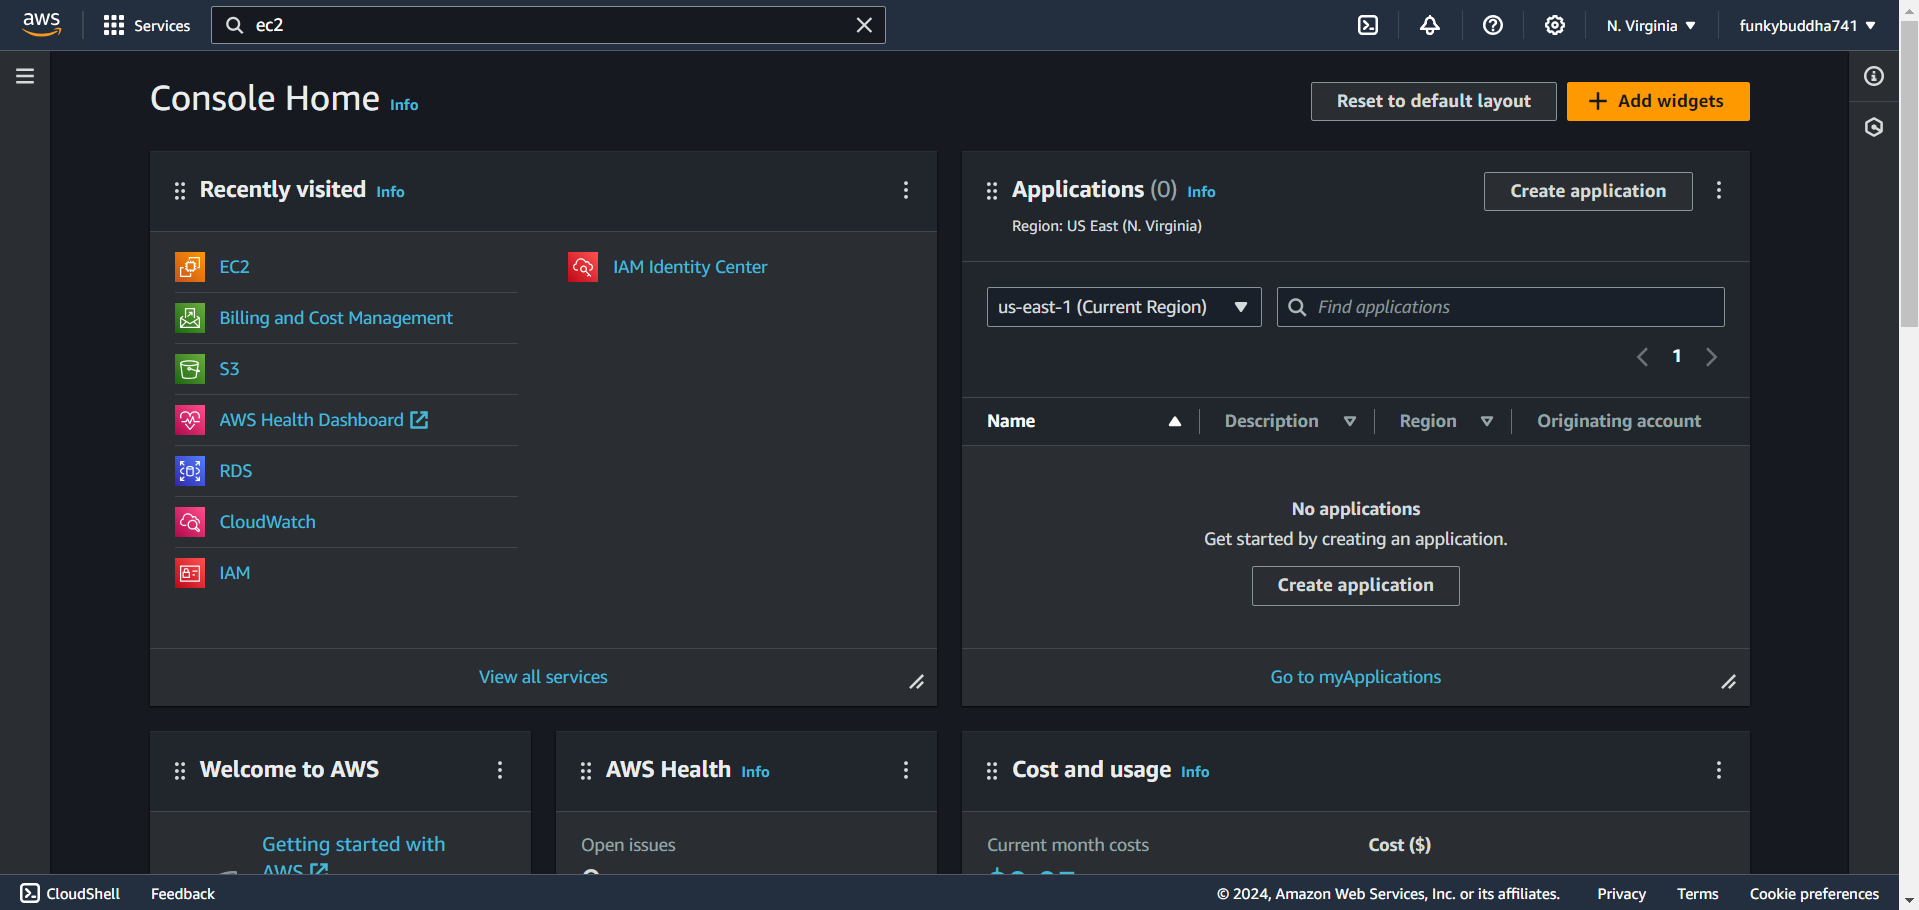
If you haven't created one, create an AWS account and log in as the root user to the AWS dashboard. You might feel overwhelmed by the many options, but look for a service called EC2 (Virtual Servers in the Cloud). Note: You can use the search bar to find it quickly.
b. Create an new instance
After going to the EC2 page, click on the button that says "Launch an instance." This will take you to a page where you can configure your instance.
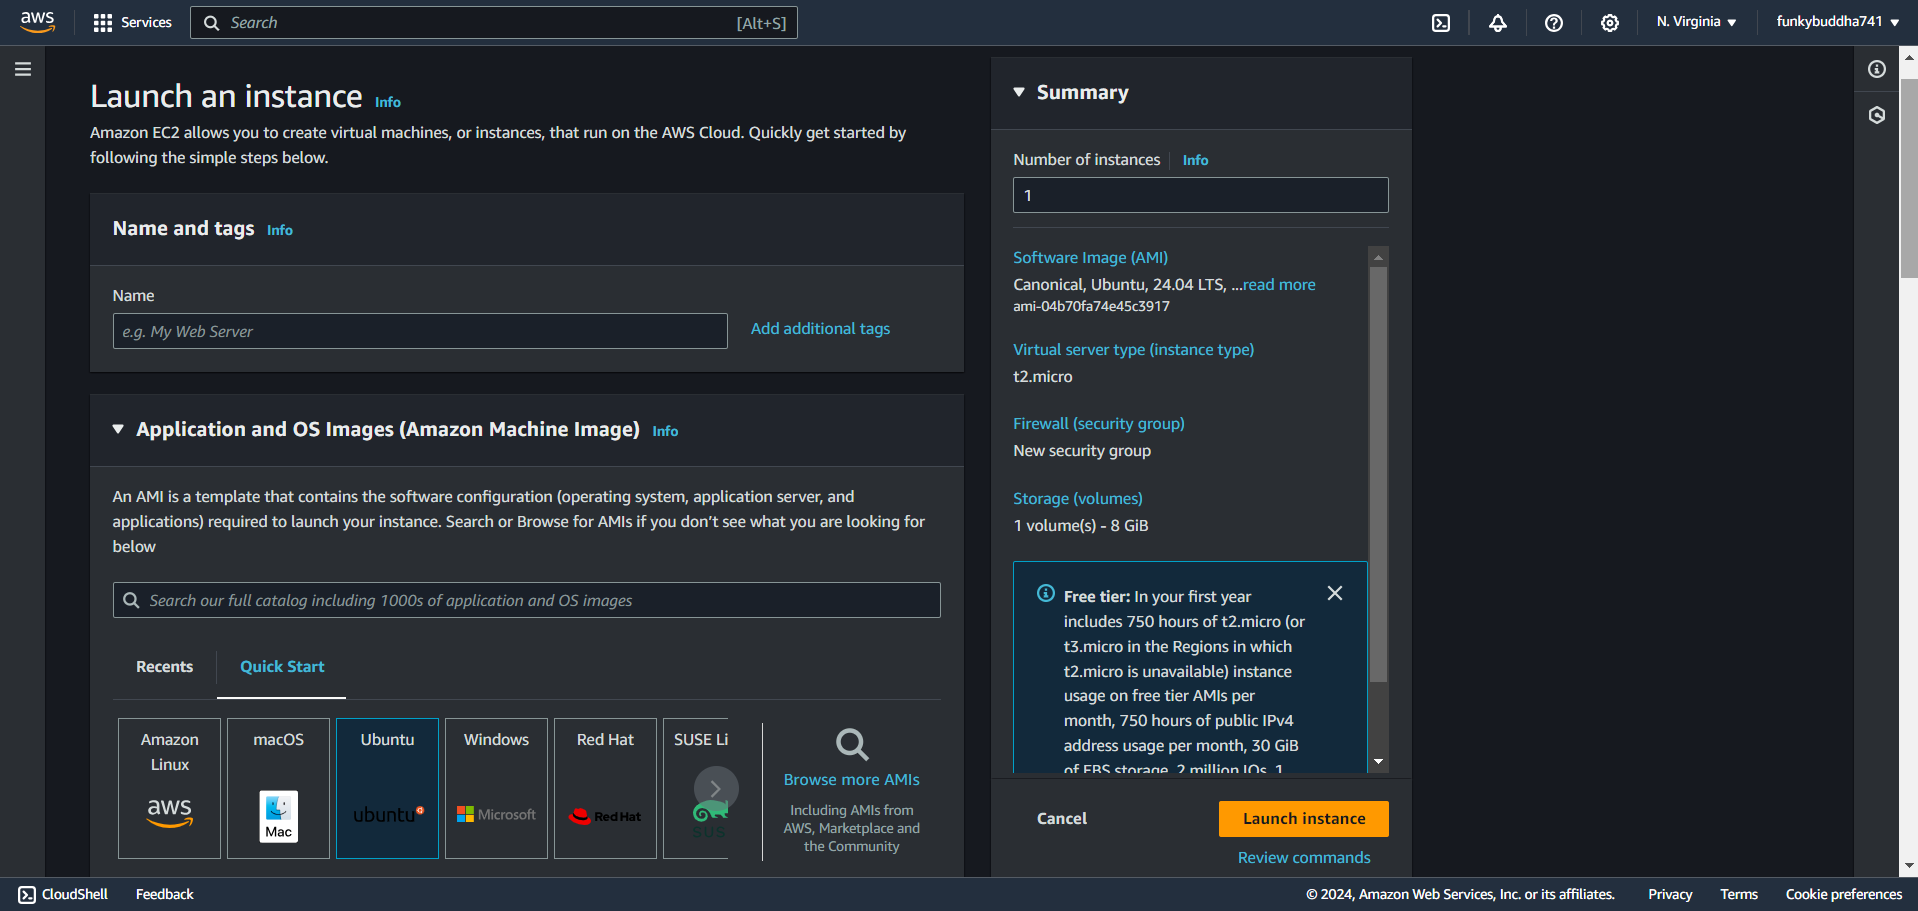
Choose a name for the web server.
Choose Instance type: The instance type will provide us with computing, memory, networking, or storage needs. We choose the one that has the "Free tier eligible" version for free usage.
Generate Key Pair Login: Generating a Key Pair Login is essential to connect securely with the AWS remote server from your local machine. You need to generate and store a key on your local machine. Click on "Create new key pair," enter a key pair name, select RSA as the key pair type, and choose .pem as the private key file format (since we will use SSH to connect later). A .pem file will be downloaded to your local machine, which will help us connect to the instance.
Update Network Settings: This section will help you set up your instance to be reachable from internet traffic. For now, don't change anything except check "Allow HTTPS traffic from the internet" and "Allow HTTP traffic from the internet."
You don't need to change any options in Configure Storage, Advanced details, and Summary. You can proceed by clicking on "Launch instance."
c. Connect to the instance
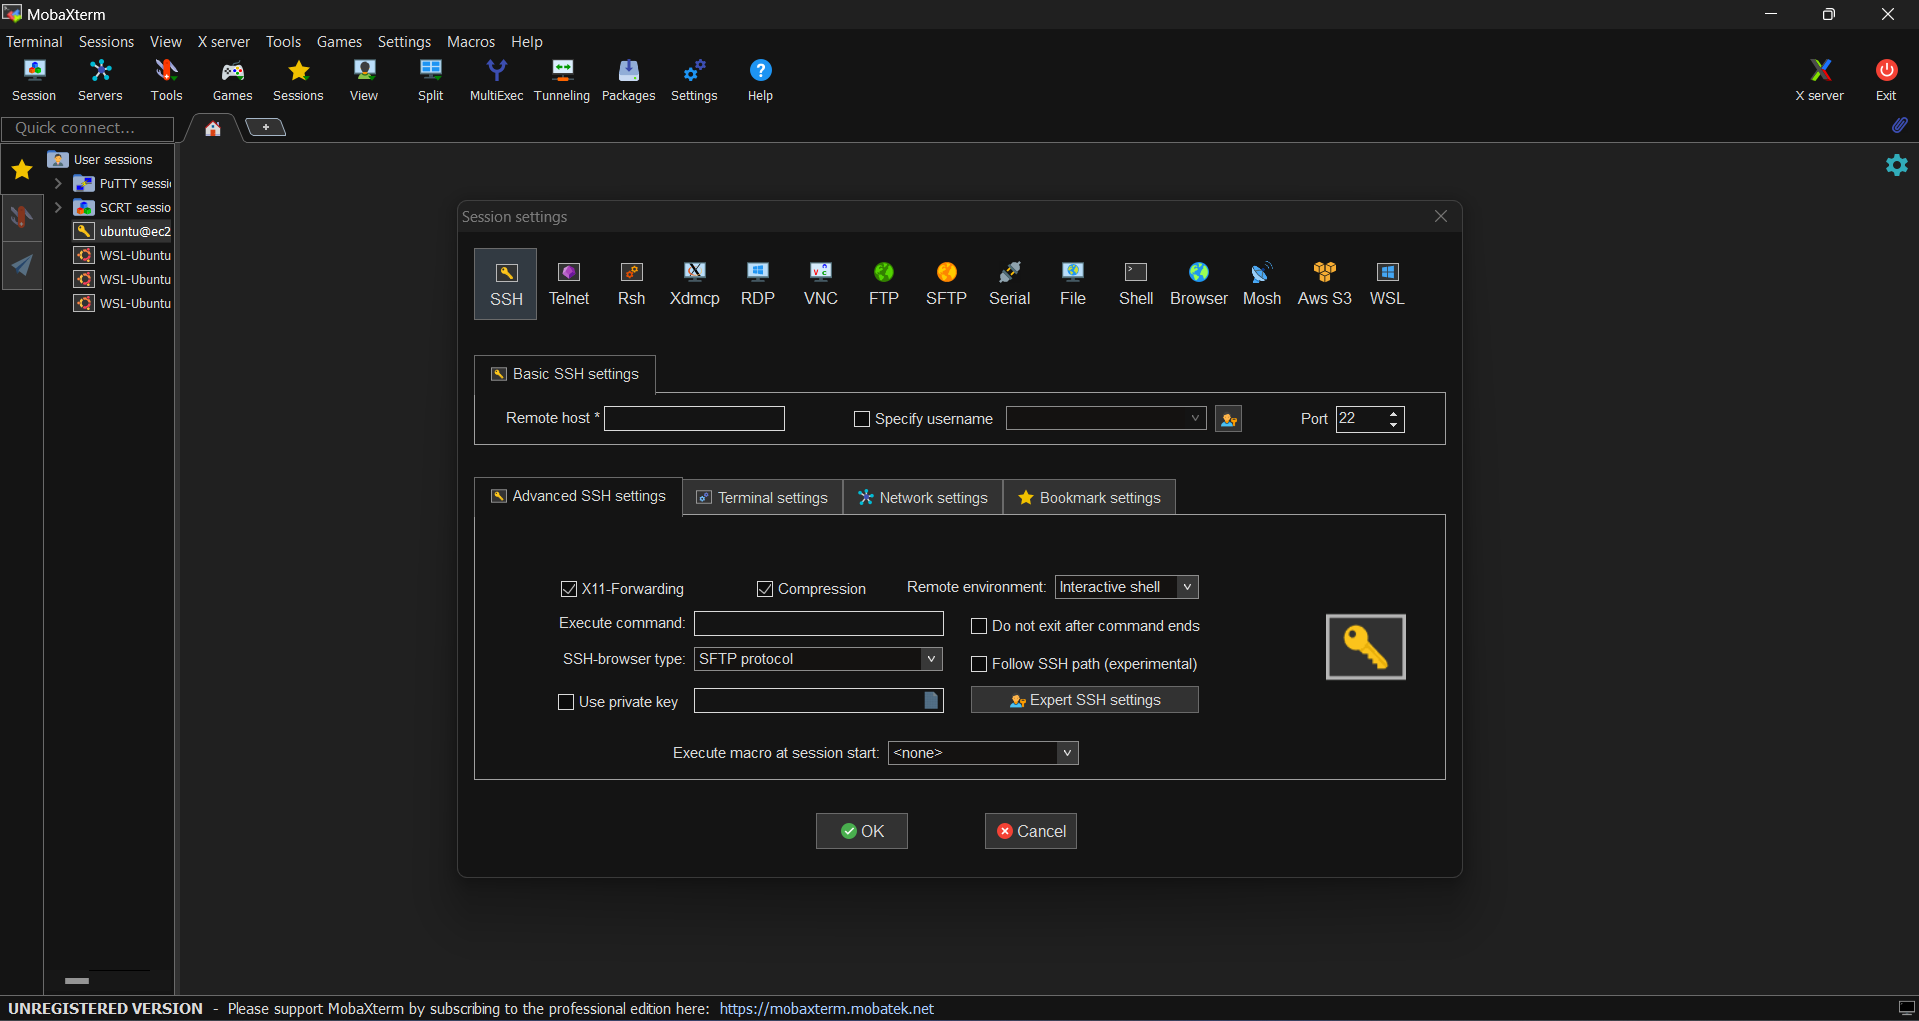
You will now find steps to connect to the instance from your local machine. We use MobaXterm to connect through SSH. Launch the application, select Session, and choose SSH as the session type. In the Basic SSH settings, enter the Remote host and specify the username.
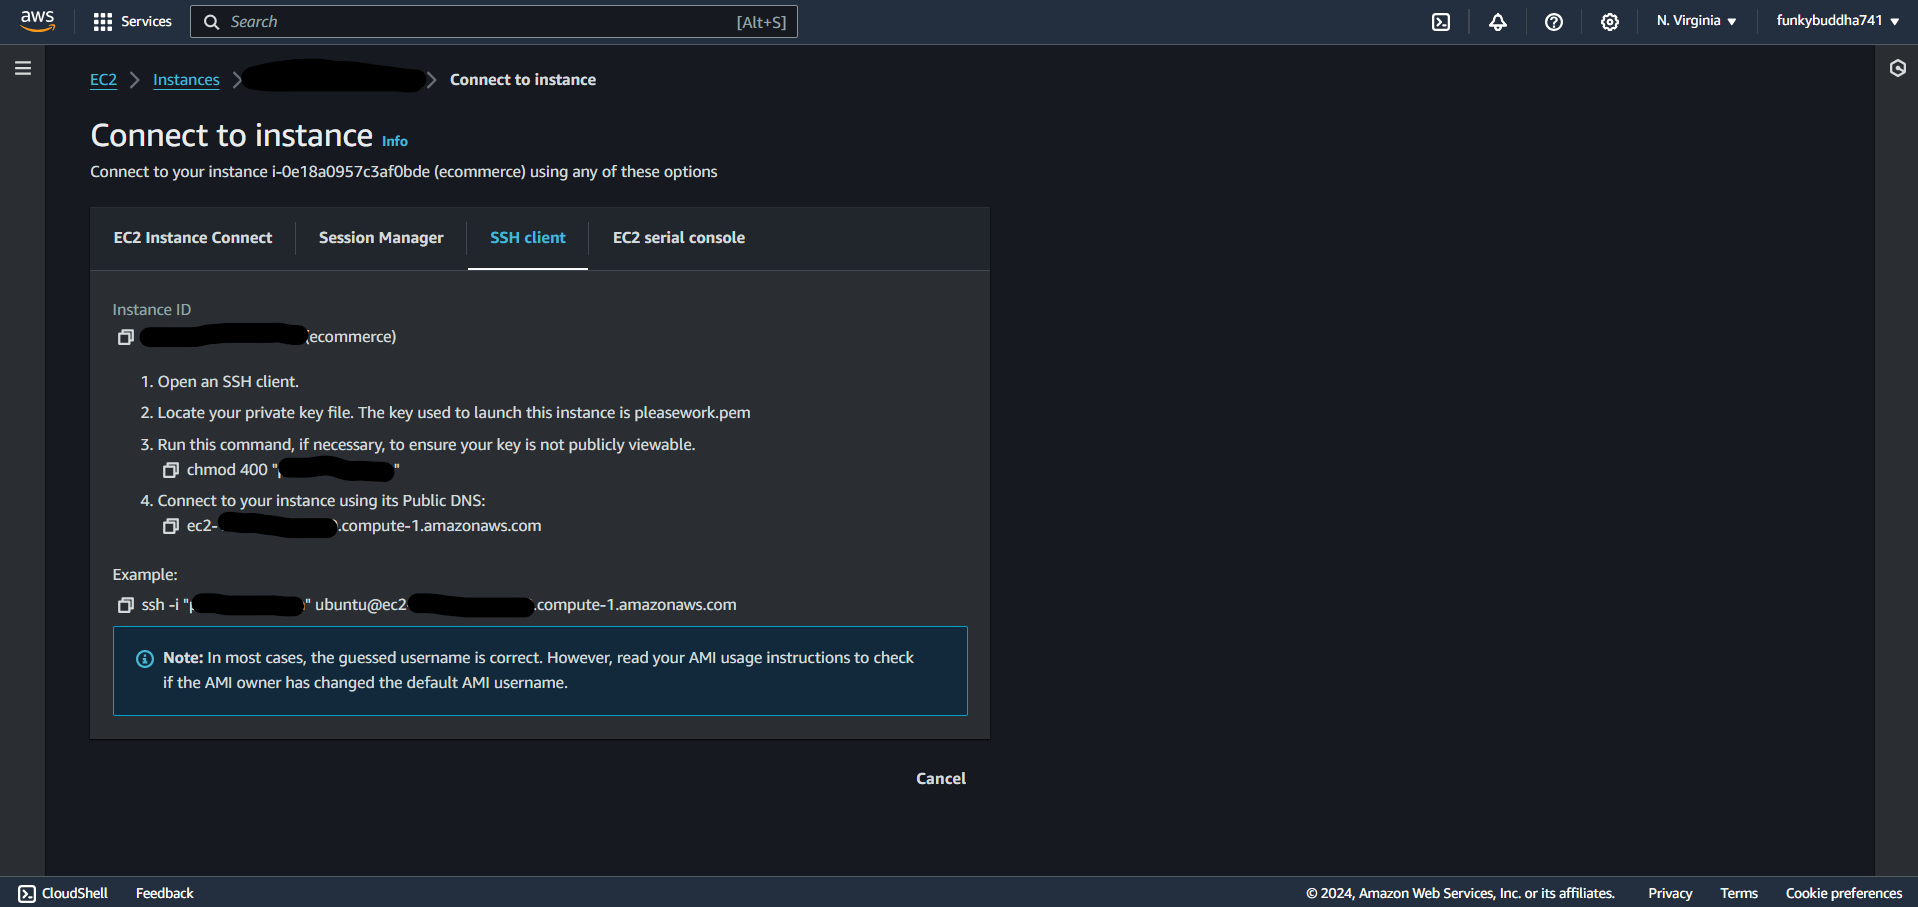
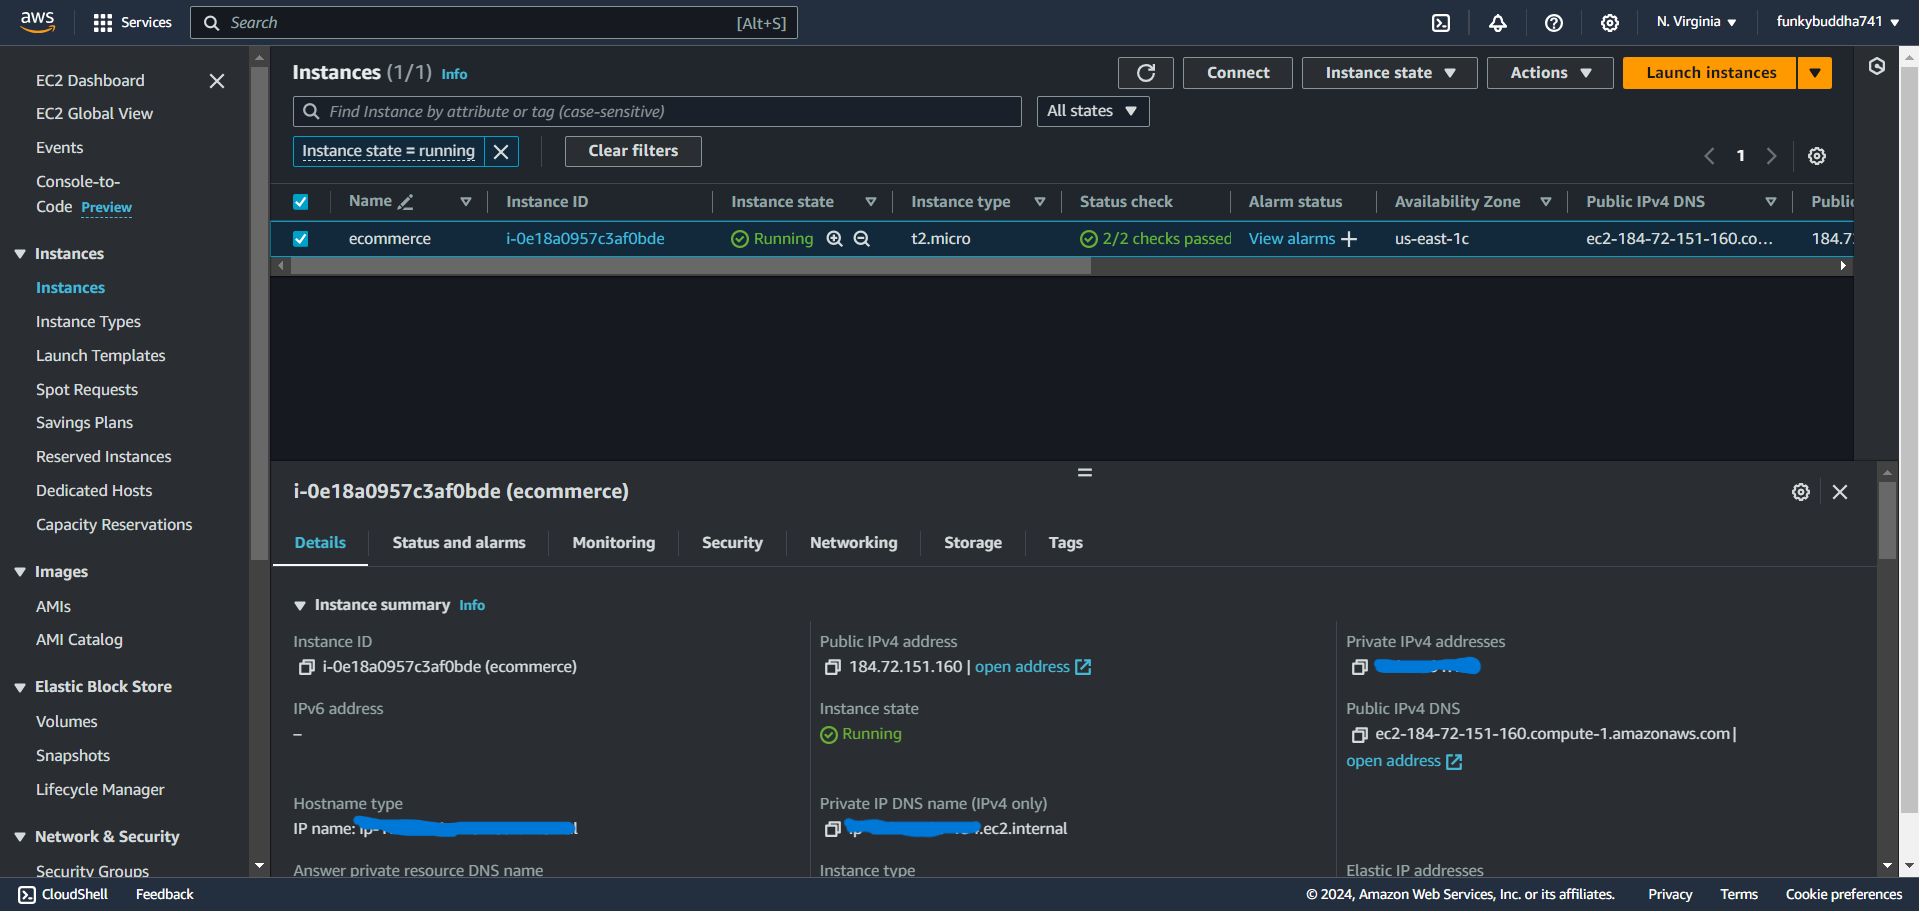
Find the Remote host name from the instance dashboard and click connect to get the information. At the bottom, you will see an example like this: ssh -i "yourPemFile.pem" [ubuntu@ec2-xxx-xx-xxx-xxx.compute-1.amazonaws.com]
Your remote host will be [ubuntu@ec2-xxx-xx-xxx-xxx.compute-1.amazonaws.com]
Copy this to the remote host text box. Check the "Specify username" checkbox and enter "ubuntu" as the username.
Next, go to Advanced SSH settings, check "Use private key," and enter the path of the .pem file you downloaded when creating your instance. After this, click OK, and you will be logged into your AWS instance from your local machine.
d. Install Node Version Manager (NVM), Node.js, YARN, Git, NGINX
Update Package Repository
sudo apt-get updateInstall Prerequisites
sudo apt install curlDownload and install NVM
curl -o- https://raw.githubusercontent.com/nvm-sh/nvm/v0.39.1/install.sh | bashInstall Node.js version using NVM
nvm install 20.0.0Installing YARN
Add Yarn Repository
curl -sS https://dl.yarnpkg.com/debian/pubkey.gpg | sudo apt-key add -echo "deb https://dl.yarnpkg.com/debian/ stable main" | sudo tee /etc/apt/sources.list.d/yarn.listInstall YARN
sudo apt install -g yarn
Install Git
sudo apt install gitInstall NGINX
sudo apt install nginx
e. Clone ReactJs App to EC2 , install dependencies and create .env files (optional).
Now, clone your app to the Ubuntu server. We have used an open-source React app from GitHub:
git clone https://github.com/RonajPradhan/clothing-ecommerce-app.git
Now, go to the project directory and install the dependencies using either NPM or YARN.
cd clothing-ecommerce-app
yarn install
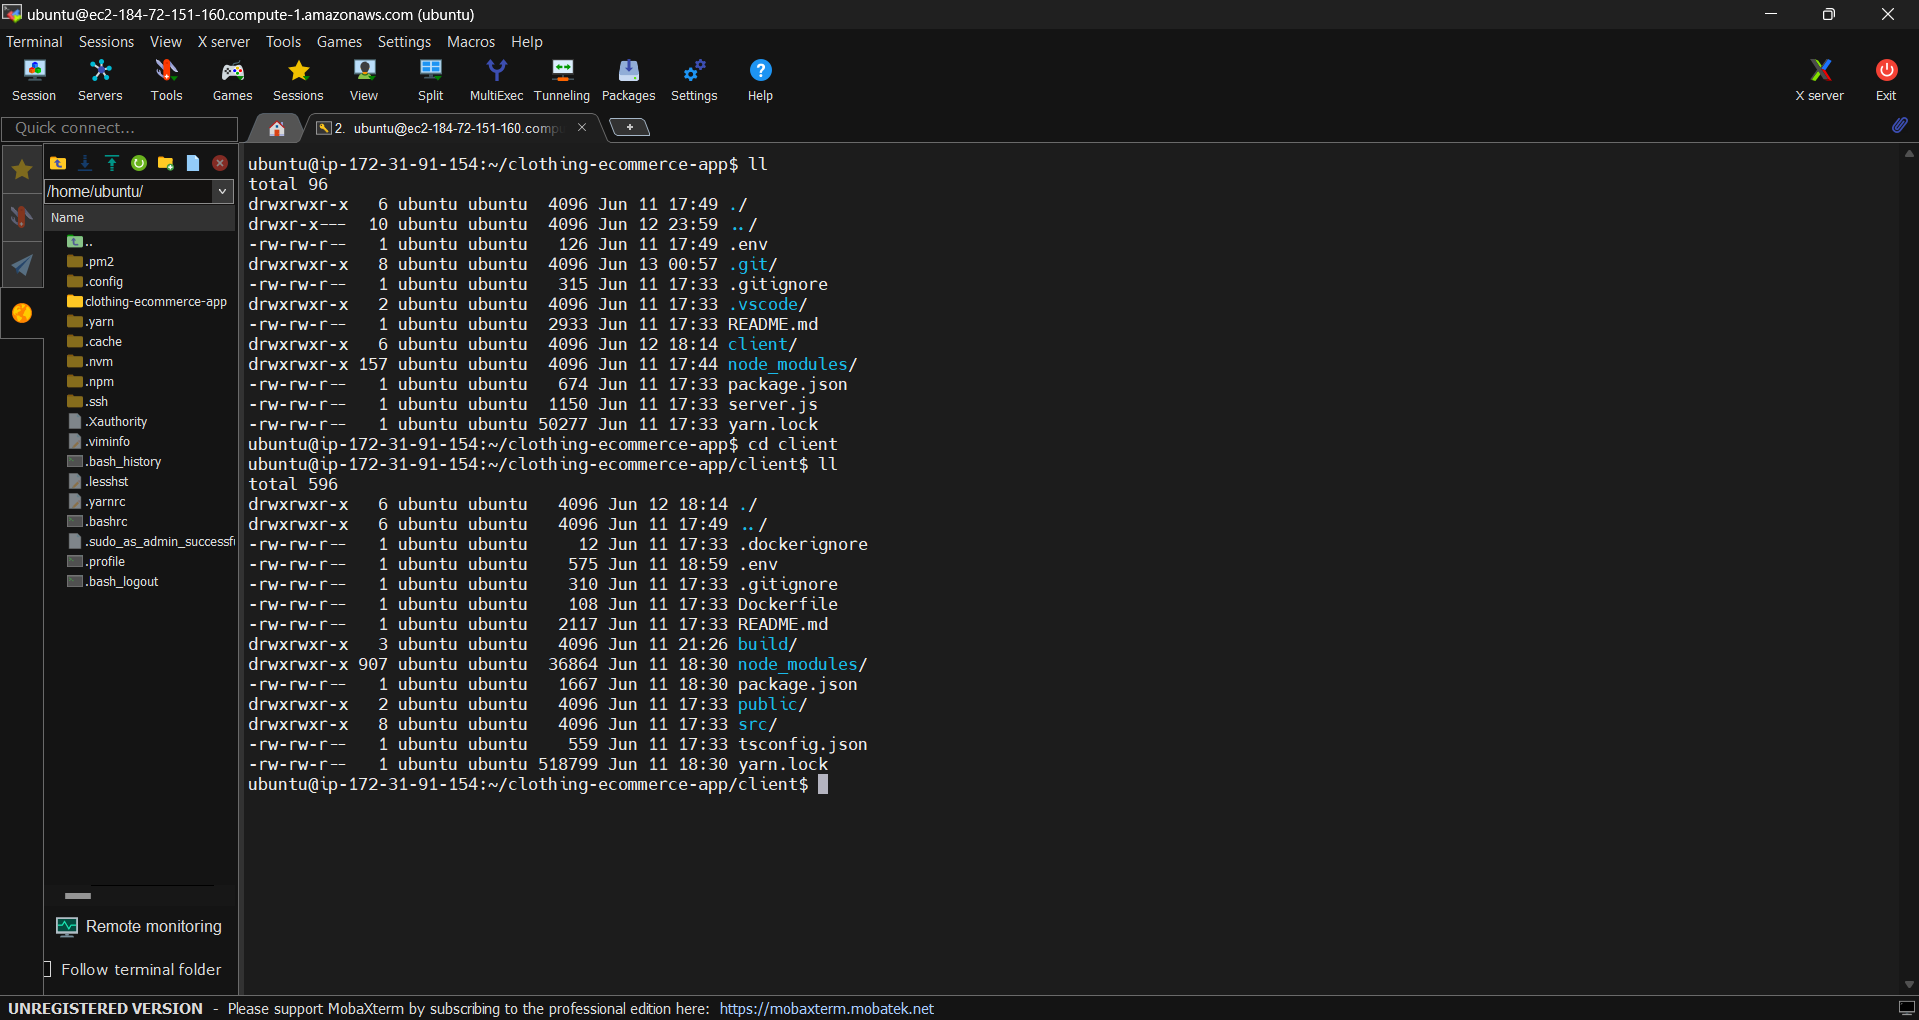
If your project requires environment variables, create .env files, edit them to your specifications, and save the files.
touch .env //creating new .env file in your project directory
vim .env //edit .env file and save it
You can check if the server is running by going to the EC2 instance, finding the Public IPv4 address, and opening it in a browser. You should see a welcome page for the Nginx server.
f. Build the project
Now go to the project directory and build the project using npm or yarn.
yarn run build
g. Making Directory to host static files in Nginx
We have to create a directory next to html directory that nginx has to host the static files from our build.
sudo mkdir /var/www/clothing-ecomm
We also need to own this as USER so that we can operate anything on that directory.
sudo chown -R $USER:$USER /var/www/clothing-ecomm
Now move all the static files from our build folder to this new directory.
cp -r build/* /var/www/clothing-ecomm
Now we need to edit the nginx configuration.
cd /etc/nginx/sites-available
sudo vim default
In the configuration file point the default html to the directory where we have copied our build files.
root /var/www/clothing-ecomm;
Inside the location block replace the $uri/ =404 into /index.html;
location / {
    try_files $uri /index.html;
}
Create a new location block create server proxy_pass for routes like this:
location ~ /payment{
    proxy_pass http://localhost:5000;
    proxy_http_version 1.1;
    proxy_set_header Updrage $http_upgrade;
    proxy_set_header Connection "upgrade";
}
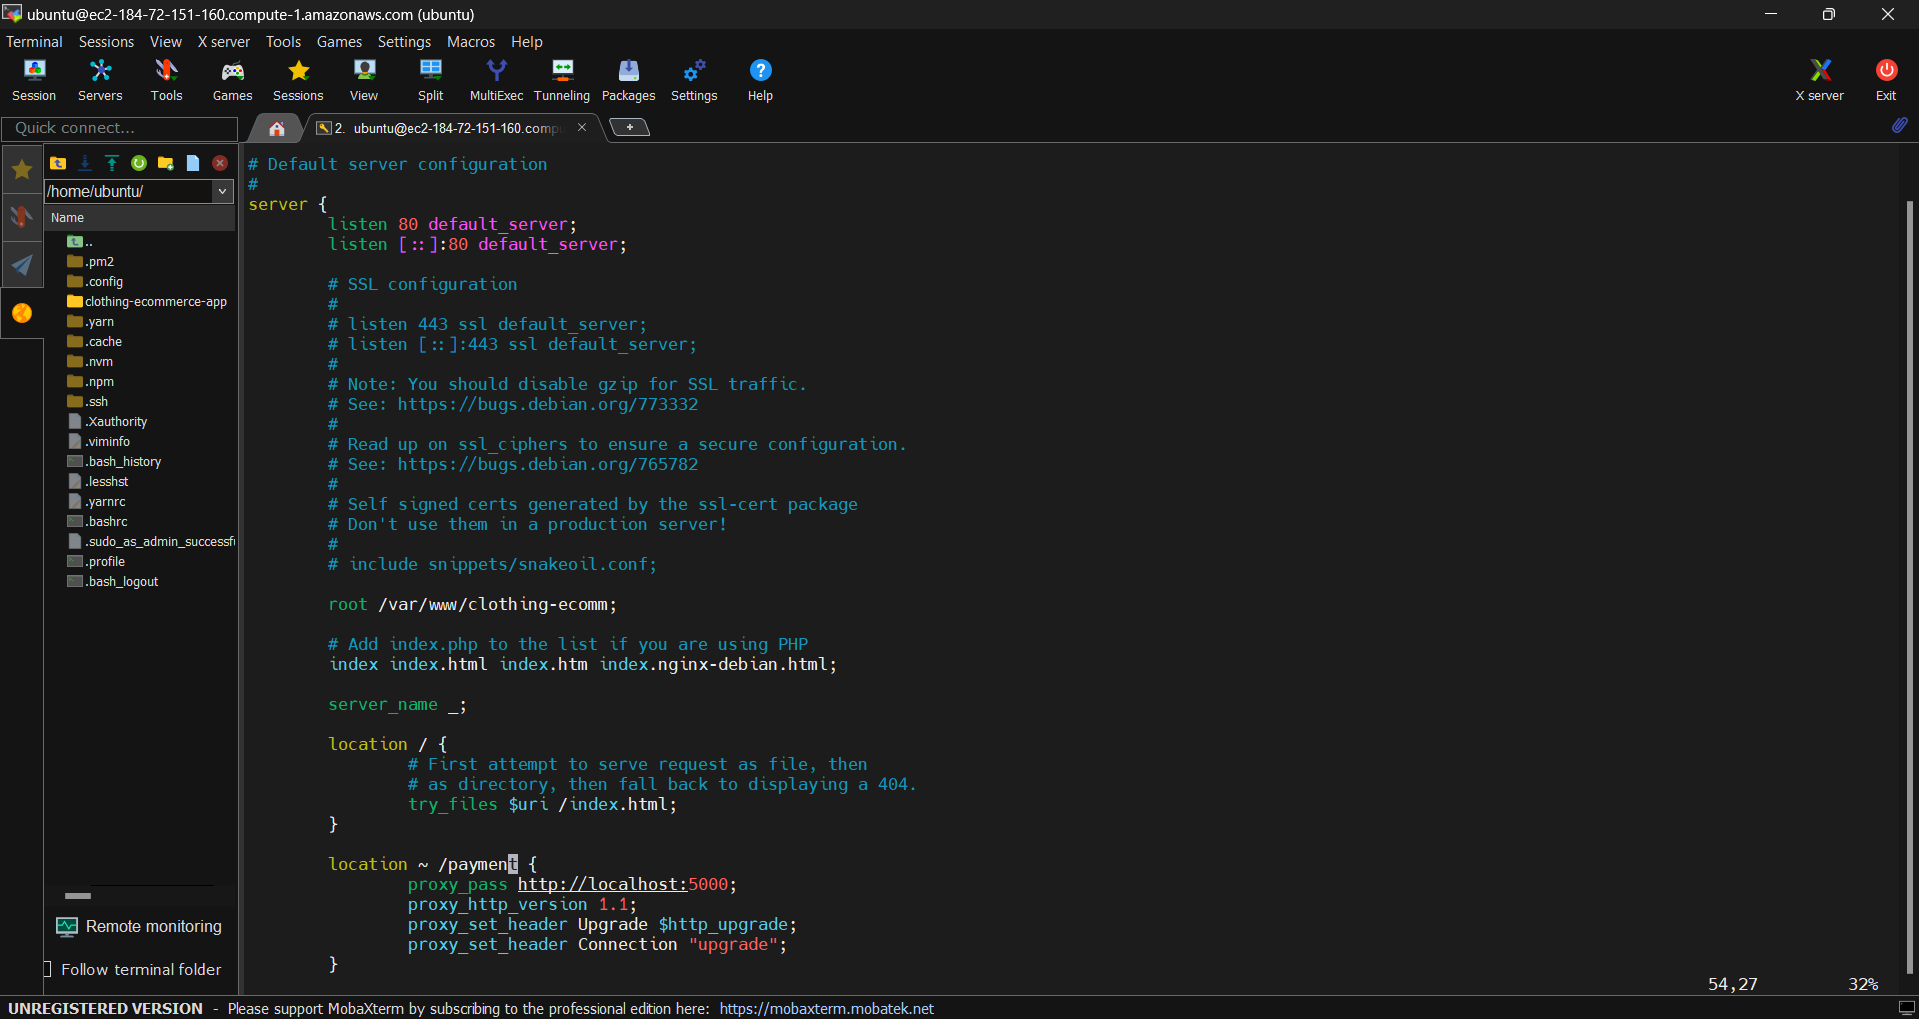
Save the file then restart Nginx server.
sudo systemctl restart nginx
h. Install PM2 (Keeps application alive forever)
After we are finished with configuring, loading our build files in the server and setting up reverse proxy through nginx. We install PM2 using:
yarn global add pm2
Finally navigate to the project directory and run the server.js file using pm2:
pm2 start server.js --name "server"

That's all there is. This way we can host application in AWS EC2 instance and keep it up and running using PM2. If you enjoyed this tutorial and would like to see more project explanation and integration with other resources, let me know by dropping a comment!
Until next time, Happy Coding 🦦
Subscribe to my newsletter
Read articles from Ronaj Pradhan directly inside your inbox. Subscribe to the newsletter, and don't miss out.
Written by
