Deployment of a Django application on AWS ElasticBeanstalk using AWS CLI
 Ugochi Ukaegbu

Introduction
AWS Elastic Beanstalk is a fully managed platform for hosting web applications. It is a Platform as a Service (PaaS) offering from Amazon.
Elastic Beanstalk (EB) is an AWS service that uses Amazon EC2 and S3. This service was designed to simplify the process of deploying, managing, and scaling web applications and services.
This article shows in detail how to dockerize a voting application, push it to Amazon Elastic Container Registry, and deploy it to Elastic Beanstalk
Pre-requisites
Create an Amazon AWS Account
Install AWS CLI on your local terminal
Install Elastic Beanstalk CLI
Install Docker
Source code of the application.
Create a GitHub Account
Process of deploying an application on AWS Elastic Beanstalk
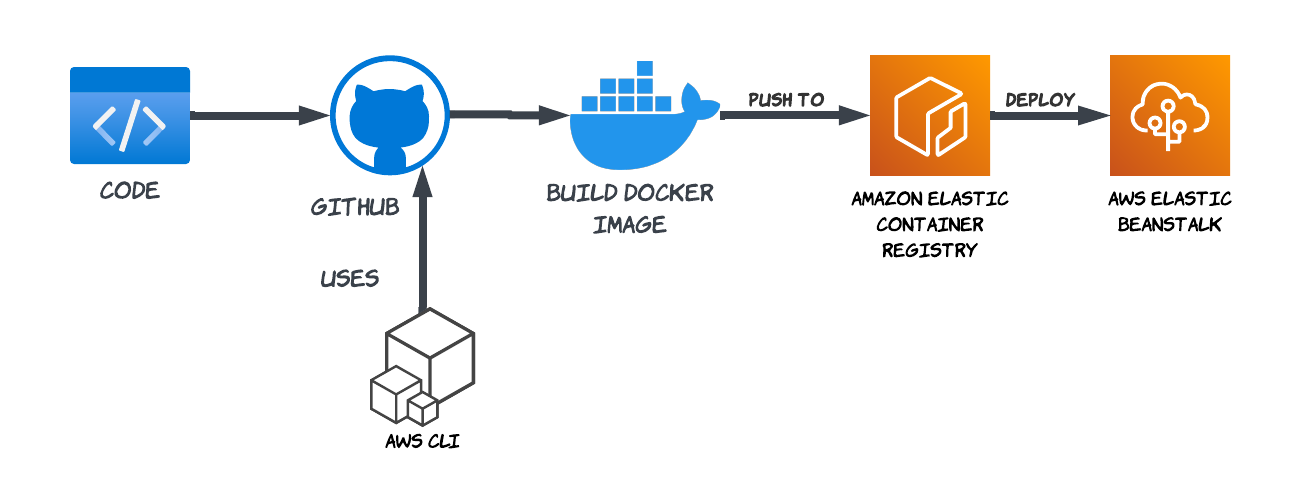
Step 1: Visualize your project
You are expected to develop an architectural diagram at this stage to determine the steps required to bring the project to life.
Step 2: Dockerise and test your application locally
At this stage, you should first clone the application on your local machine using the command git clone <repo link where the application code is saved>The next thing to do is to dockerize the application.
Dockerizing the application involves building a docker image and creating a docker container to hold the docker image.
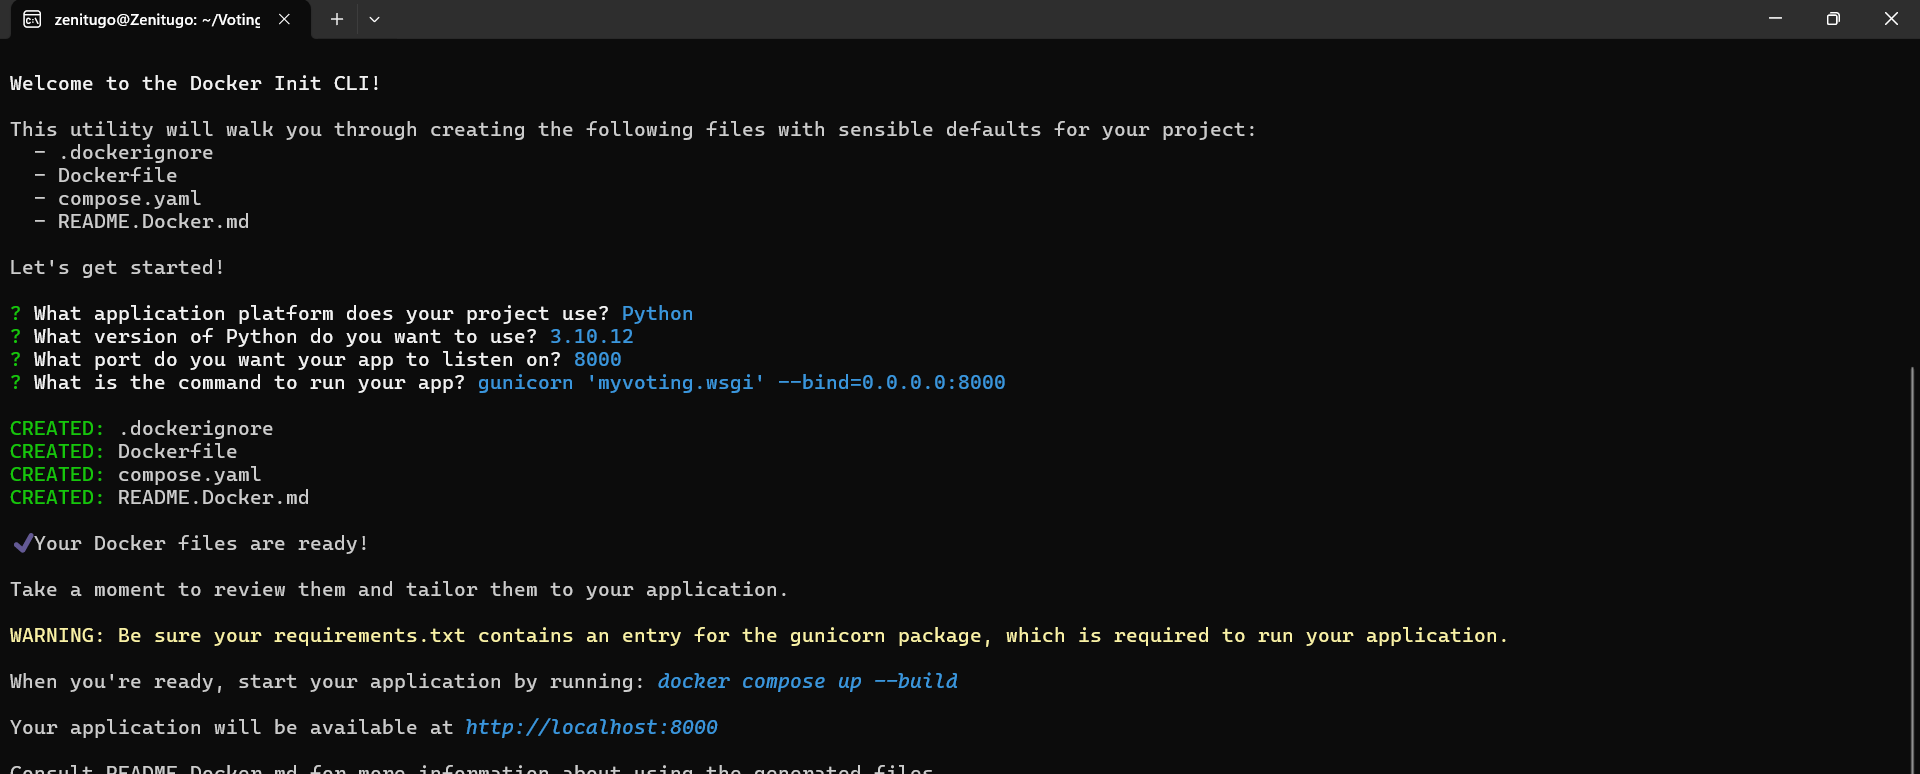
Take note of the installation process in the readme file of the repo. You can start by using the docker init command and edit it based on the installation process highlighted by the developer.
When using the docker init command, you will be prompted with questions and the answers will be used to create the Dockerfile and compose.yml file
Then you build your Dockerfile with the command docker compose up --build -d. This command builds the docker image and creates a docker container to hold the image.
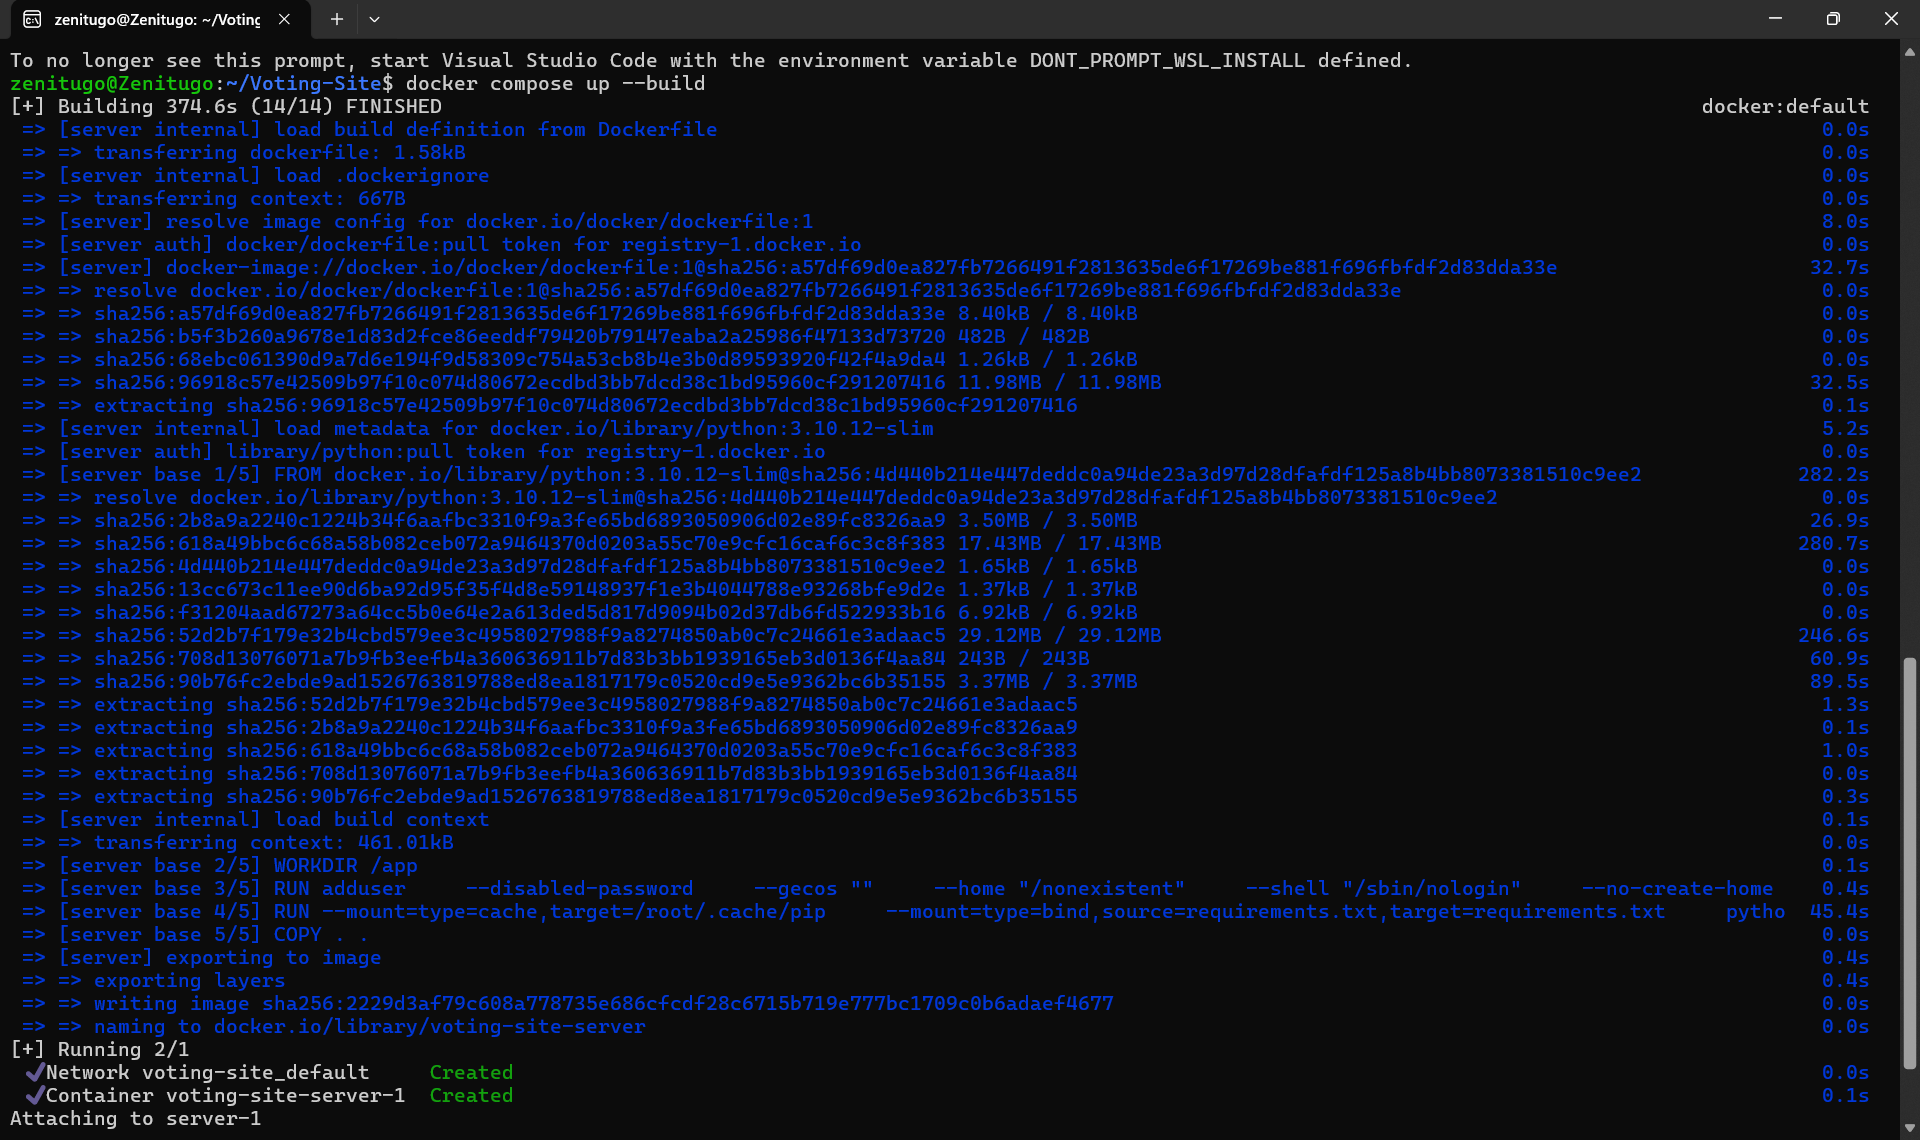
The reason for going through this process is to identify if there's anything wrong with the application before including the docker file in your pipeline. If you test it locally and the application is good, there's a huge chance it will remain the same when you include it in your pipeline.
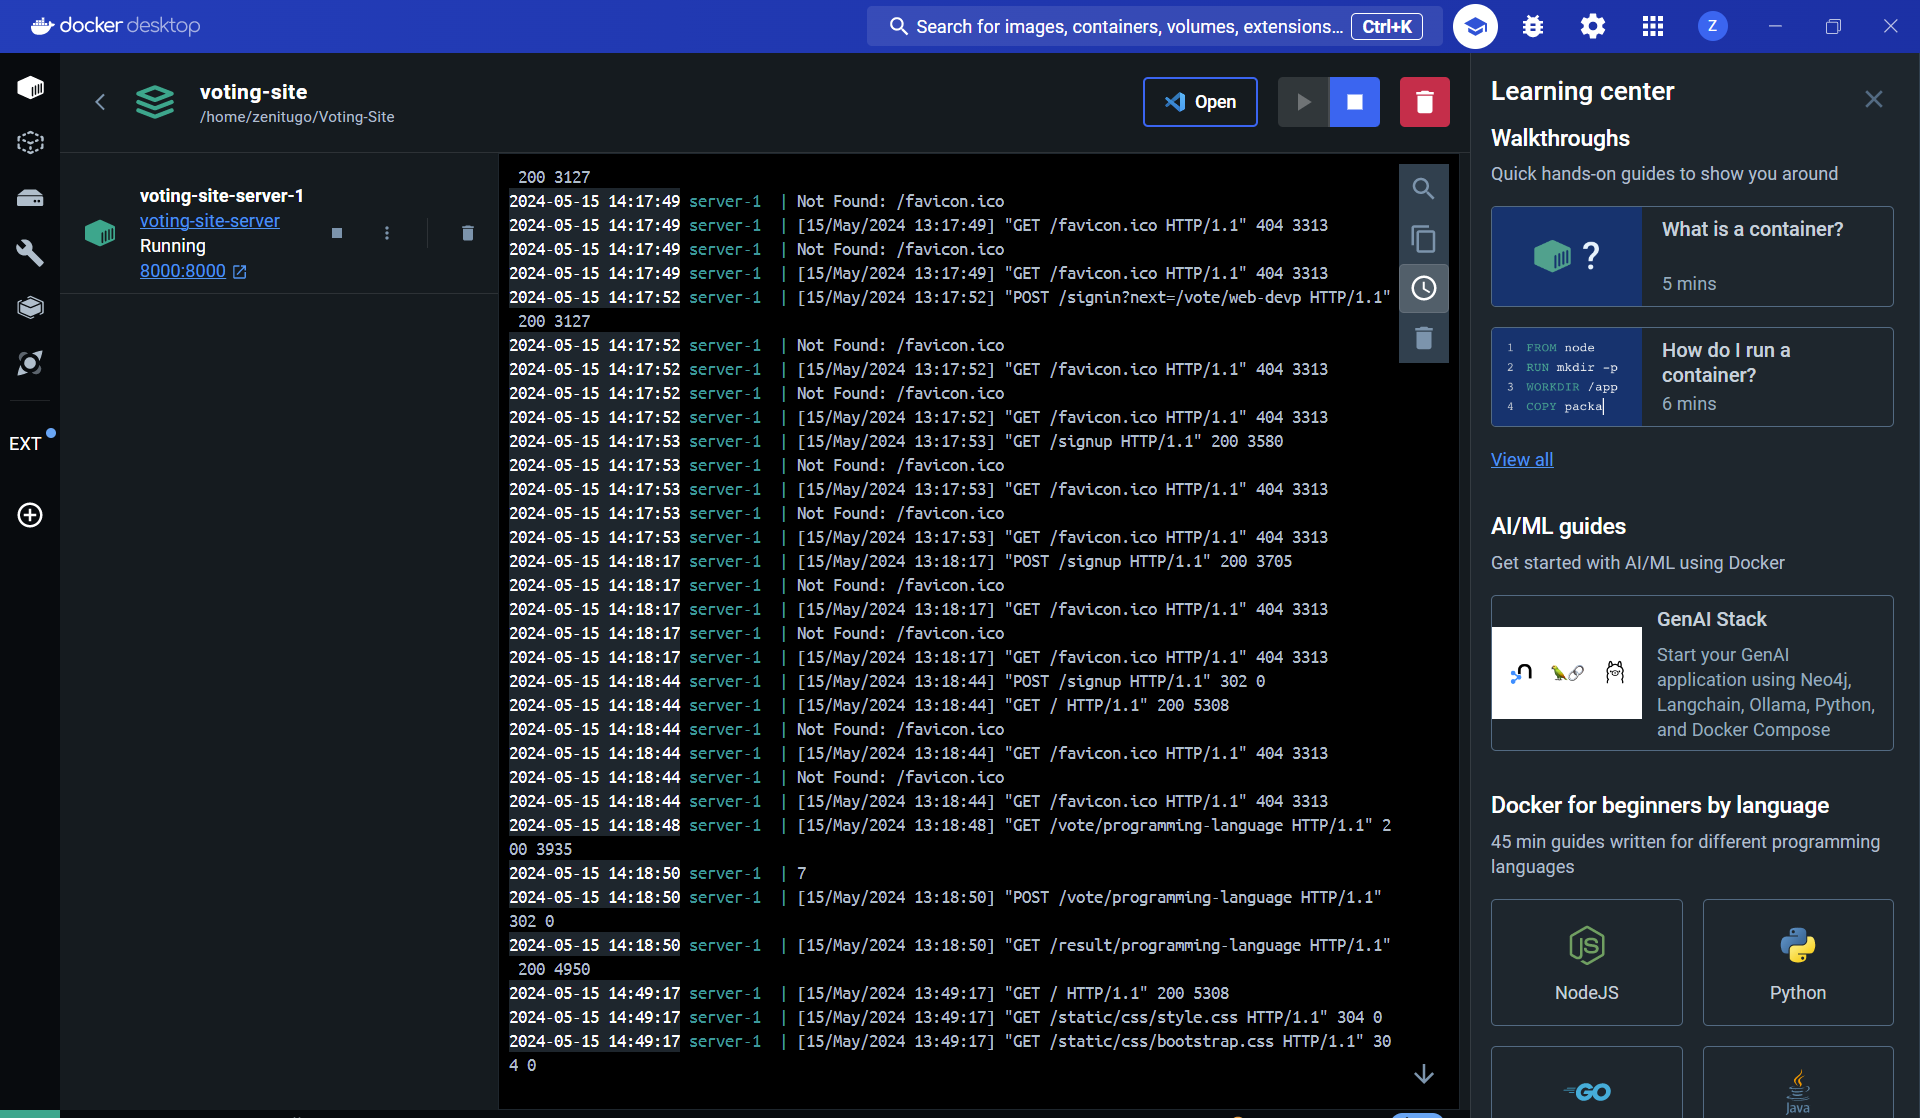
Proof of application running on the docker desktop
Proof of the application on the browser
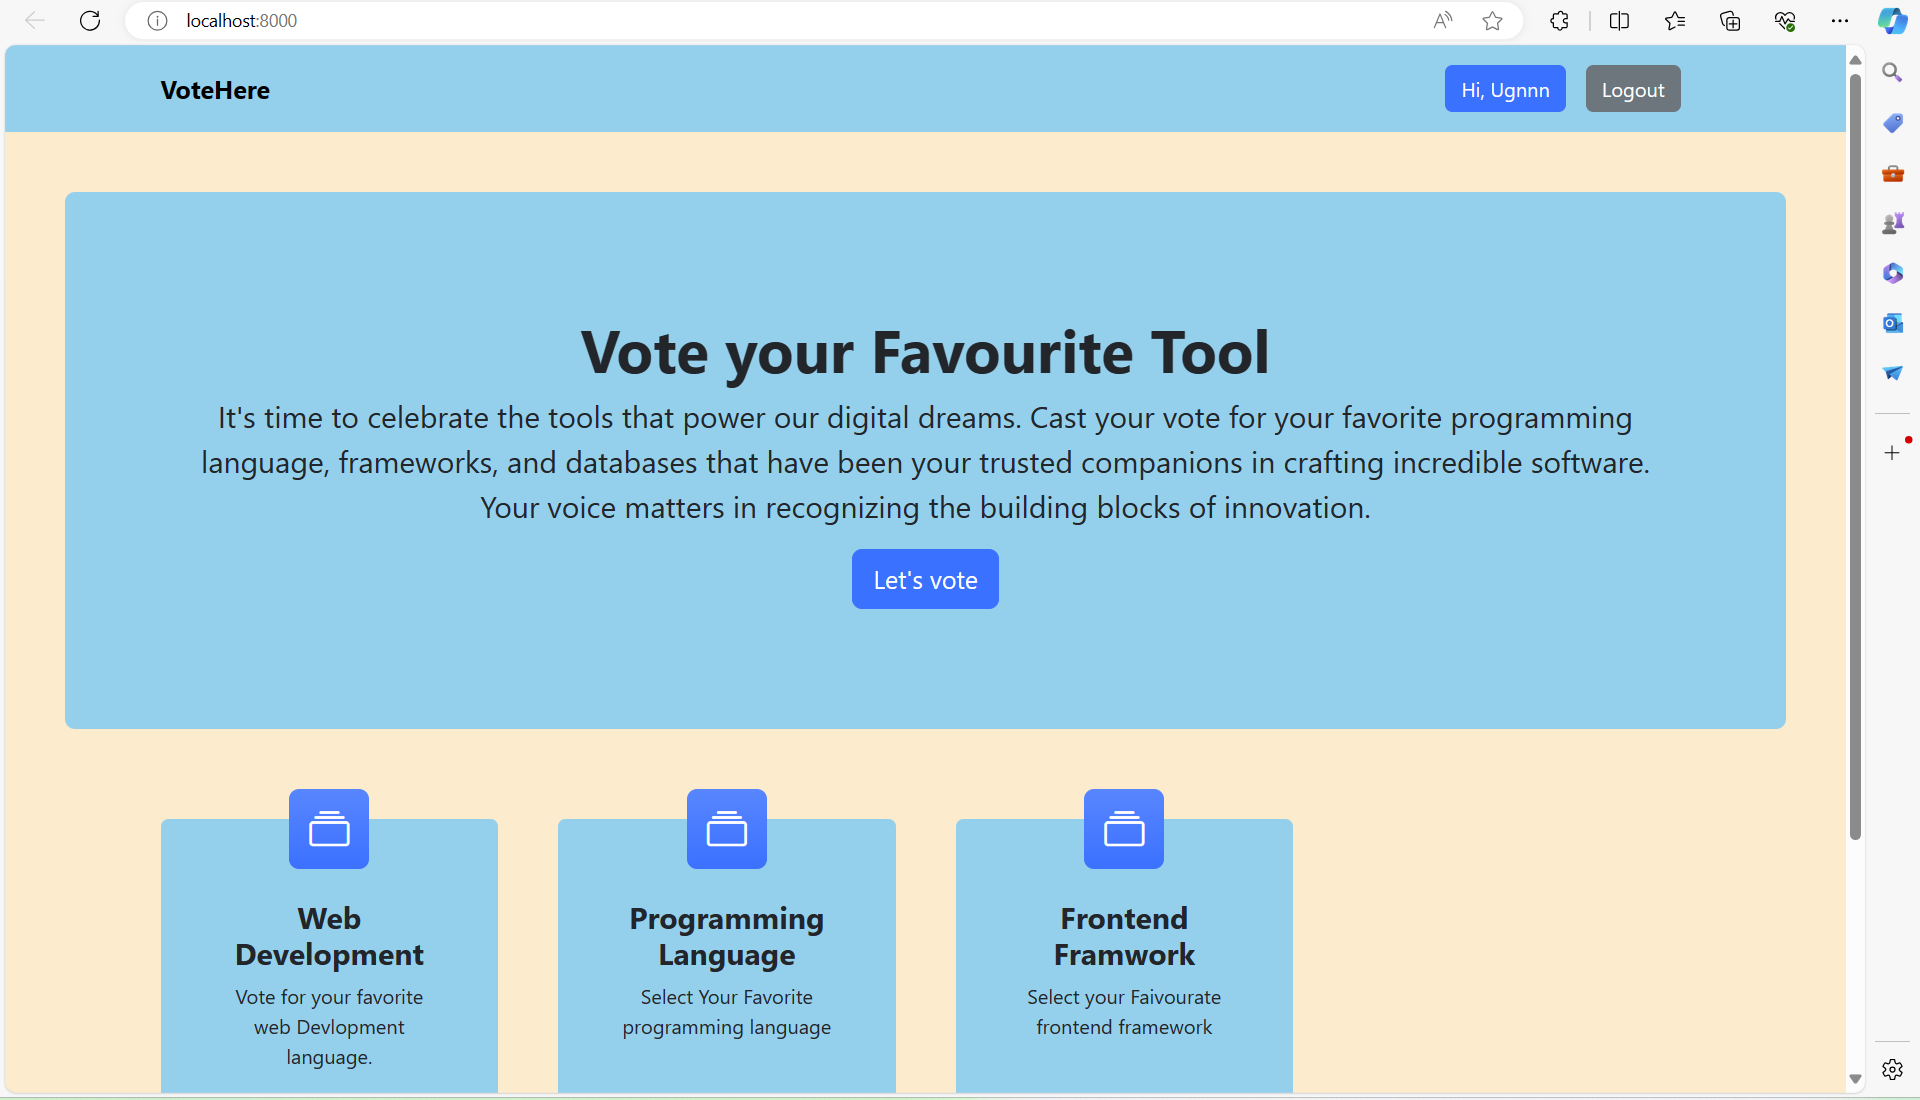
Application successfully tested
Step 3: Configure your AWS CLI
The next step is to configure your AWS CLI so you can access your AWS account from your local terminal
Click on your profile name at the top right corner
Click on security credentials
Click on Create New Access Keys
Download the CSV file to your local machine.
# Next is to input this command on your terminal
# and answer the propmt questions based on the details in the CSV file
$ aws configure
AWS Access Key ID [*******************]:
AWS Secret Access Key [*******************]:
Default region name [eu-west-1]:
Default output format [json]:
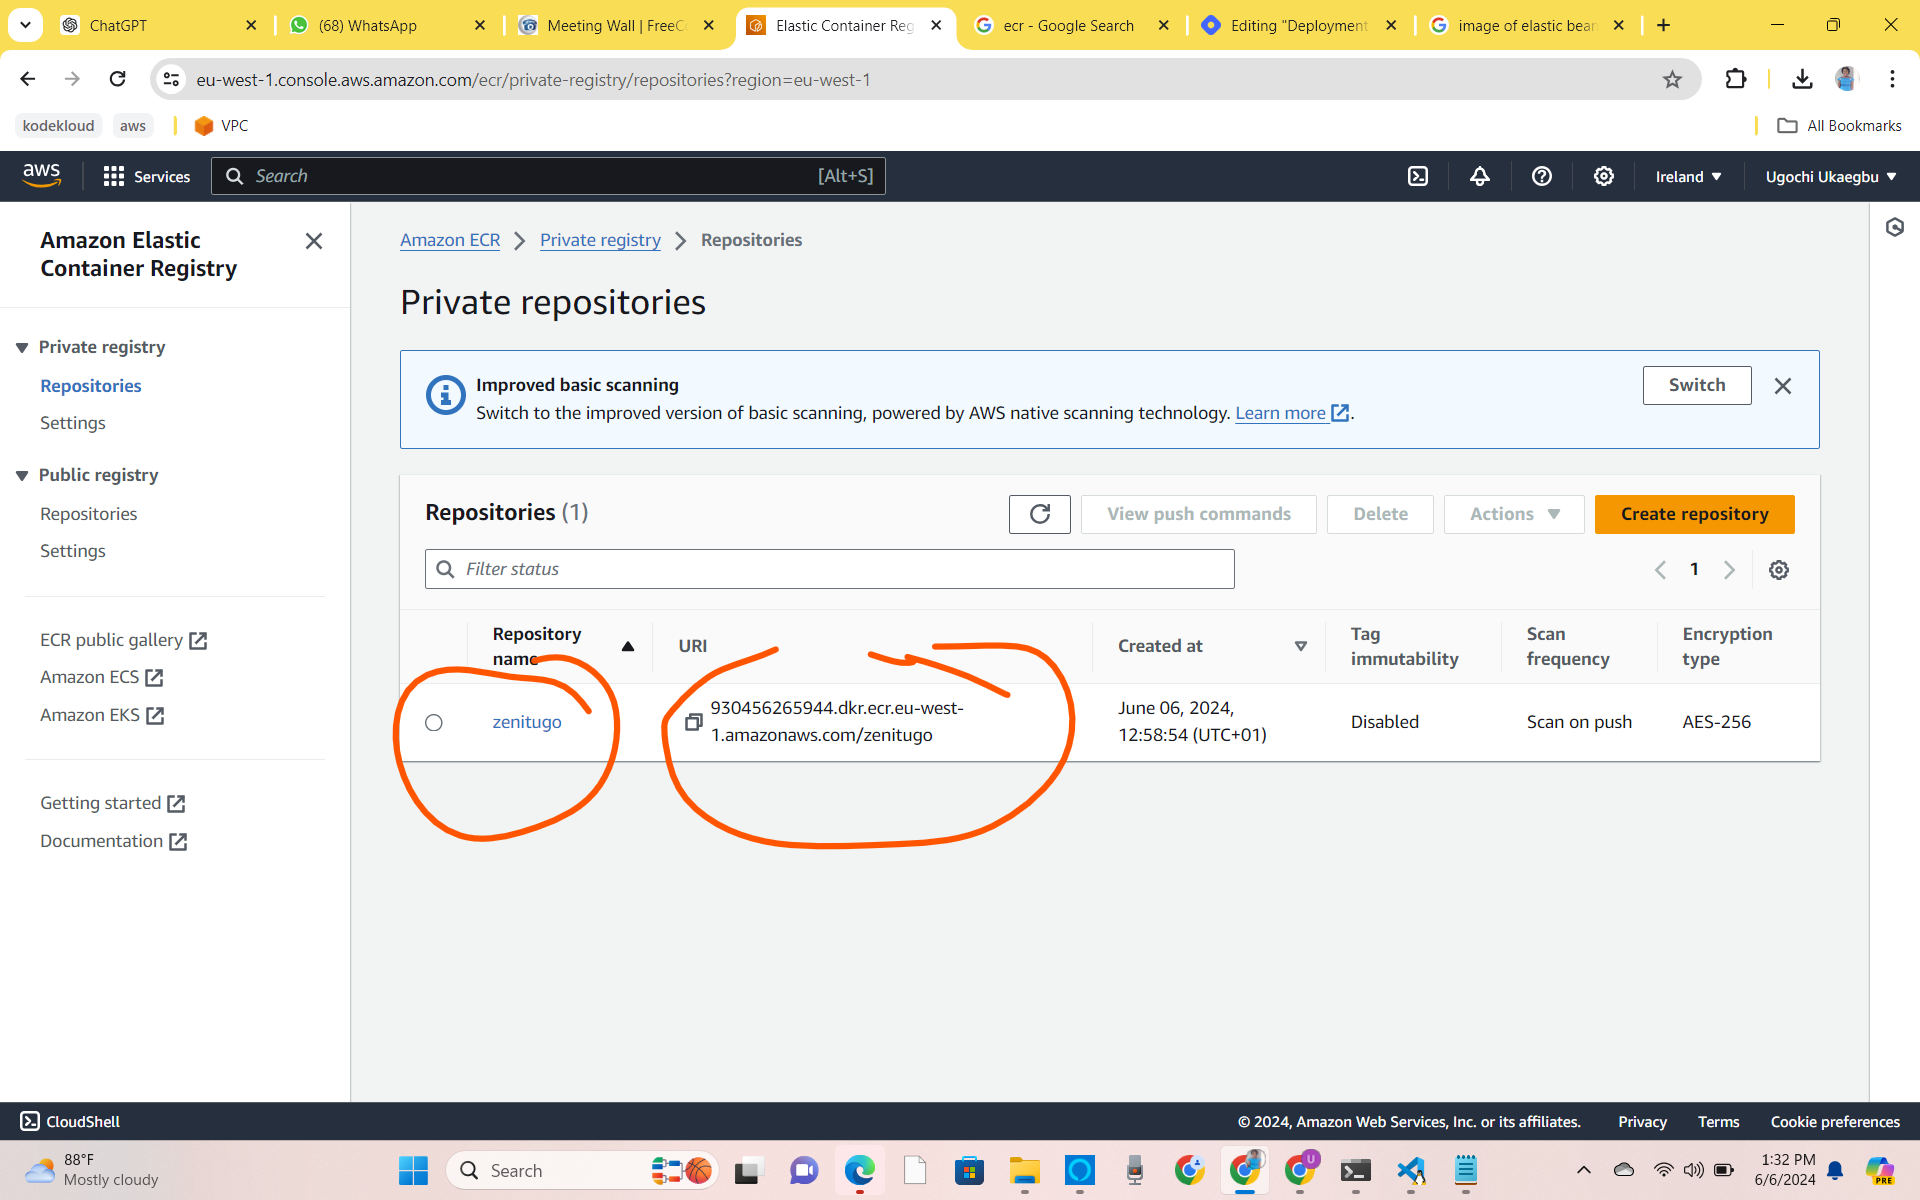
Step 4: Create a private repository in the Amazon Elastic Container Registry
$ aws ecr create-repository \
    --repository-name <name-of-repo> \
    --image-scanning-configuration scanOnPush=true  #This is optional.

# Store the repo url in your notepad. If have celeared your terminal,
# check your AWS Account

# To delete repository
$ aws ecr delete-repository \
     --repository-name <name-of-repo> \
     --force  #Use this option if the repo contains images
Proof of the creation of the ECR repo
Step 5: Push docker image to Elastic Container Registry
- Authenticate your Docker credentials with AWS
$ aws ecr get-login-password --region <region>
# You will get an encrypted token, store it in your notepad
- Login to your ECR from your terminal
$ aws ecr --region <region> | docker login -u AWS -p <encrypted_token> <repo_uri>
- Tag docker image to ECR repo URI
$ docker tag <source_image_tag> <ecr_repo_url>
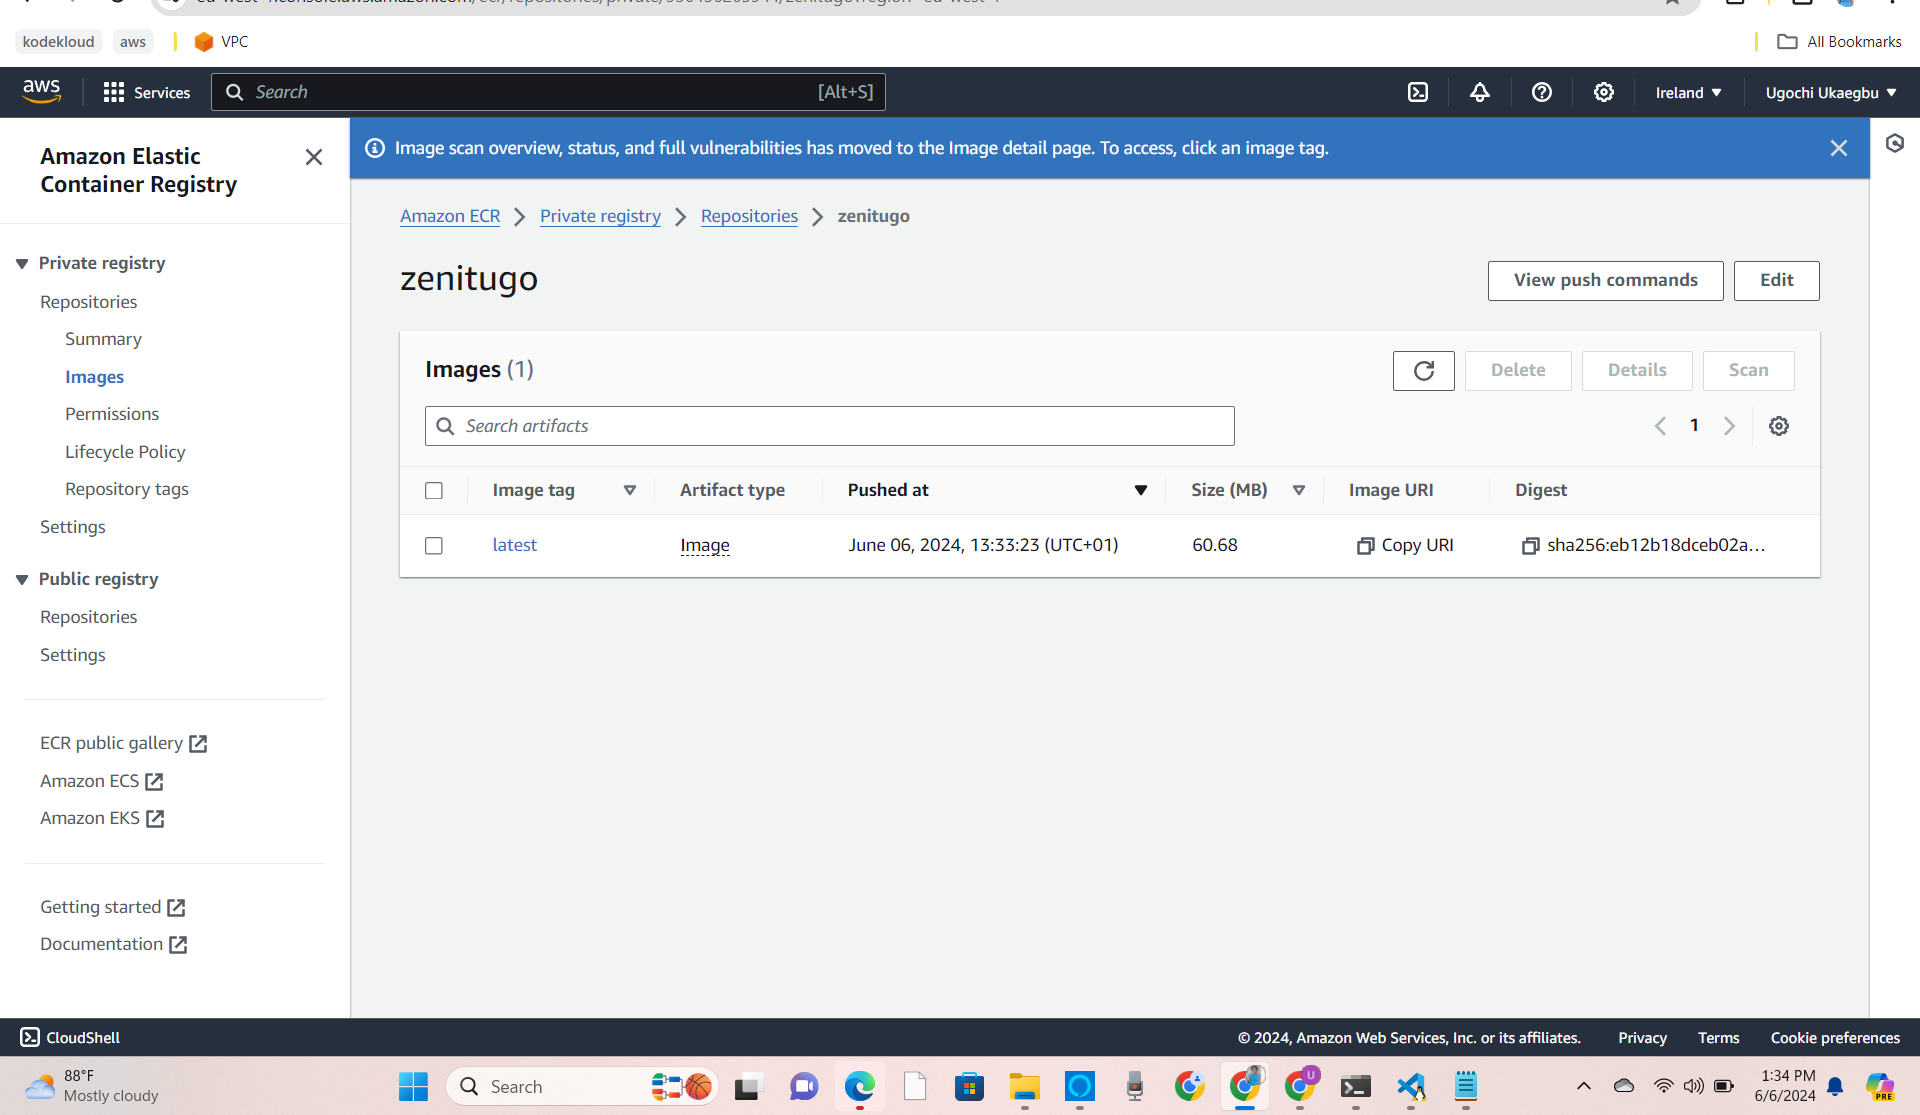
- Push image to ECR
$ docker push <image_ecr_repo_uri>
Proof of image pushed to repo
Step 6: Docker run configuration
Create a file called Dockerrun.aws.json file. This file will be used to configure the properties of the docker container.
{
    "AWSEBDockerrunVersion": "1",
    "Image": {
        "Name": "<image-name>",
        "Update": "true"
    },
    "Ports": [
        {
            "ContainerPort": 8000,
            "HostPort": 80
        }
    ],
    "Volumes": [
        {
          "HostDirectory": "/var/app/current",
          "ContainerDirectory": "/var/www/html"
        }
      ],
      "Logging": "/var/log/nginx"
}
version 3 is for docker images built with docker compose. For images built without docker compose use version 1
Step 7: Zip your Docker run file
$ zip Dockerrun.aws.json.zip Dockerrun.aws.json
Step 8: Create an Elastic Beanstalk Application
Set up an Elastic Beanstalk environment with the command
$ eb init
You will be prompted with the following questions
Select a default region
1) us-east-1 : US East (N. Virginia)
2) us-west-1 : US West (N. California)
3) us-west-2 : US West (Oregon)
4) eu-west-1 : EU (Ireland)
5) eu-central-1 : EU (Frankfurt)
6) ap-south-1 : Asia Pacific (Mumbai)
7) ap-southeast-1 : Asia Pacific (Singapore)
8) ap-southeast-2 : Asia Pacific (Sydney)
9) ap-northeast-1 : Asia Pacific (Tokyo)
10) ap-northeast-2 : Asia Pacific (Seoul)
11) sa-east-1 : South America (Sao Paulo)
12) cn-north-1 : China (Beijing)
13) cn-northwest-1 : China (Ningxia)
14) us-east-2 : US East (Ohio)
15) ca-central-1 : Canada (Central)
16) eu-west-2 : EU (London)
17) eu-west-3 : EU (Paris)
18) eu-north-1 : EU (Stockholm)
19) eu-south-1 : EU (Milano)
20) ap-east-1 : Asia Pacific (Hong Kong)
21) me-south-1 : Middle East (Bahrain)
22) il-central-1 : Middle East (Israel)
23) af-south-1 : Africa (Cape Town)
24) ap-southeast-3 : Asia Pacific (Jakarta)
25) ap-northeast-3 : Asia Pacific (Osaka)
(default is 3):

Enter Application Name
(default is "Voting-Site"): voting-app
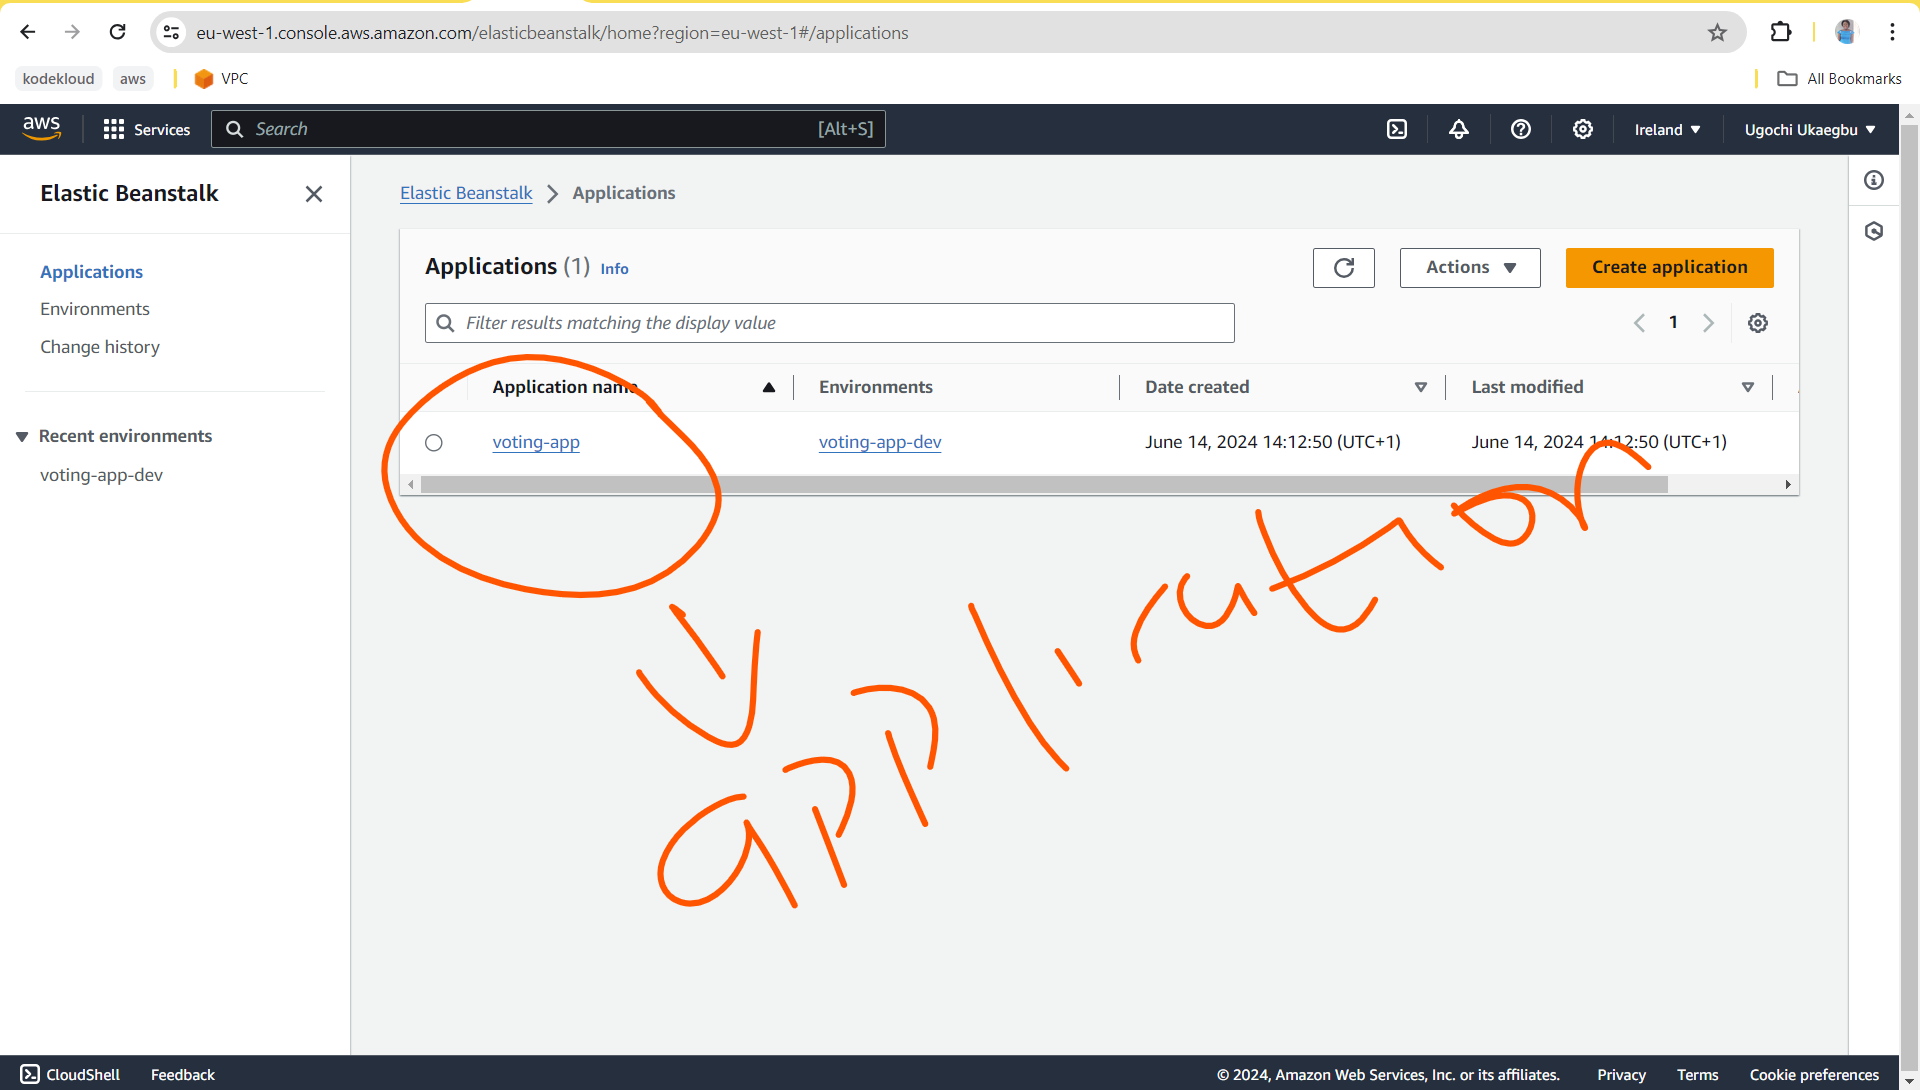
Application voting-app has been created.
You will get this error message You have not yet set up your credentials or your credentials are incorrect You must provide your credentials.
#Input your credentials
(aws-access-id):
(aws-secret-key):
You will also be asked these questions
It appears you are using Docker. Is this correct?
(Y/n): y
Select a platform branch.
1) Docker running on 64bit Amazon Linux 2023
2) ECS running on 64bit Amazon Linux 2023
3) Docker running on 64bit Amazon Linux 2
4) ECS running on 64bit Amazon Linux 2
(default is 1):

Do you wish to continue with CodeCommit? (Y/n): n
Do you want to set up SSH for you instance? (Y/n):n
Proof of the creation of the beanstalk application
Step 9: Edit the config.yml file
use command
ls -alto see all filescd into the .elasticbeanstalk directory
open the
config.ymlfile and add the environmental variable, the instruction to deploy the Dockerrun.aws.json file
branch-defaults:
  main:
    environment: voting-app-dev
    group_suffix: null

global:
  application_name: voting-app
  branch: null
  default_ec2_keyname: null
  default_platform: Docker running on 64bit Amazon Linux 2023
  default_region: eu-west-1
  include_git_submodules: true
  instance_profile: null
  platform_name: null
  platform_version: null
  profile: eb-cli
  repository: null
  sc: git
  workspace_type: Application

environment-defaults:
  voting-app-dev:
    branch: null
    repository: null
    platform: Docker
    instance_profile: null
    service_role: null
    tier: WebServer
    health_check_url: /
    environment_variables:
      DJANGO_SETTINGS_MODULE: my_app.settings
      PYTHONPATH: /opt/python/current/app/my_app
    option_settings:
      aws:elasticbeanstalk:application:environment:
        DJANGO_SETTINGS_MODULE: my_app.settings
        PYTHONPATH: /opt/python/current/app/my_app
    solution_stack_name: Docker running on 64bit Amazon Linux 2023
    instance_type: t3.xlarge


deploy:
  artifact: Dockerrun.aws.json.zip
Step 10: Creation of the Beanstalk Environment & Deployment of the Voting application
- Create an AWS resource needed to run the application
$ eb create
You will be prompted with this question
Enter Environment Name
(default is voting-app-dev):
Enter DNS CNAME prefix
(default is voting-app-dev): vote-123

Select a load balancer type
1) classic
2) application
3) network
(default is 2): 1


Would you like to enable Spot Fleet requests for this environment? (y/N): N

2.0+ Platforms require a service role. We will attempt to create one for you. You can specify your own role using the --service-role option.
Type "view" to see the policy, or just press ENTER to continue:
If you get an error saying beanstalk is unable to authenticate to ECR.
You can do this by:
clicking on the aws-elasticbeanstalk-ec2-role
under Add Permissions, click attach policy
search for AmazonEC2ContainerRegistryReadOnly
click add permissions.
redeploy the app with
eb deploy
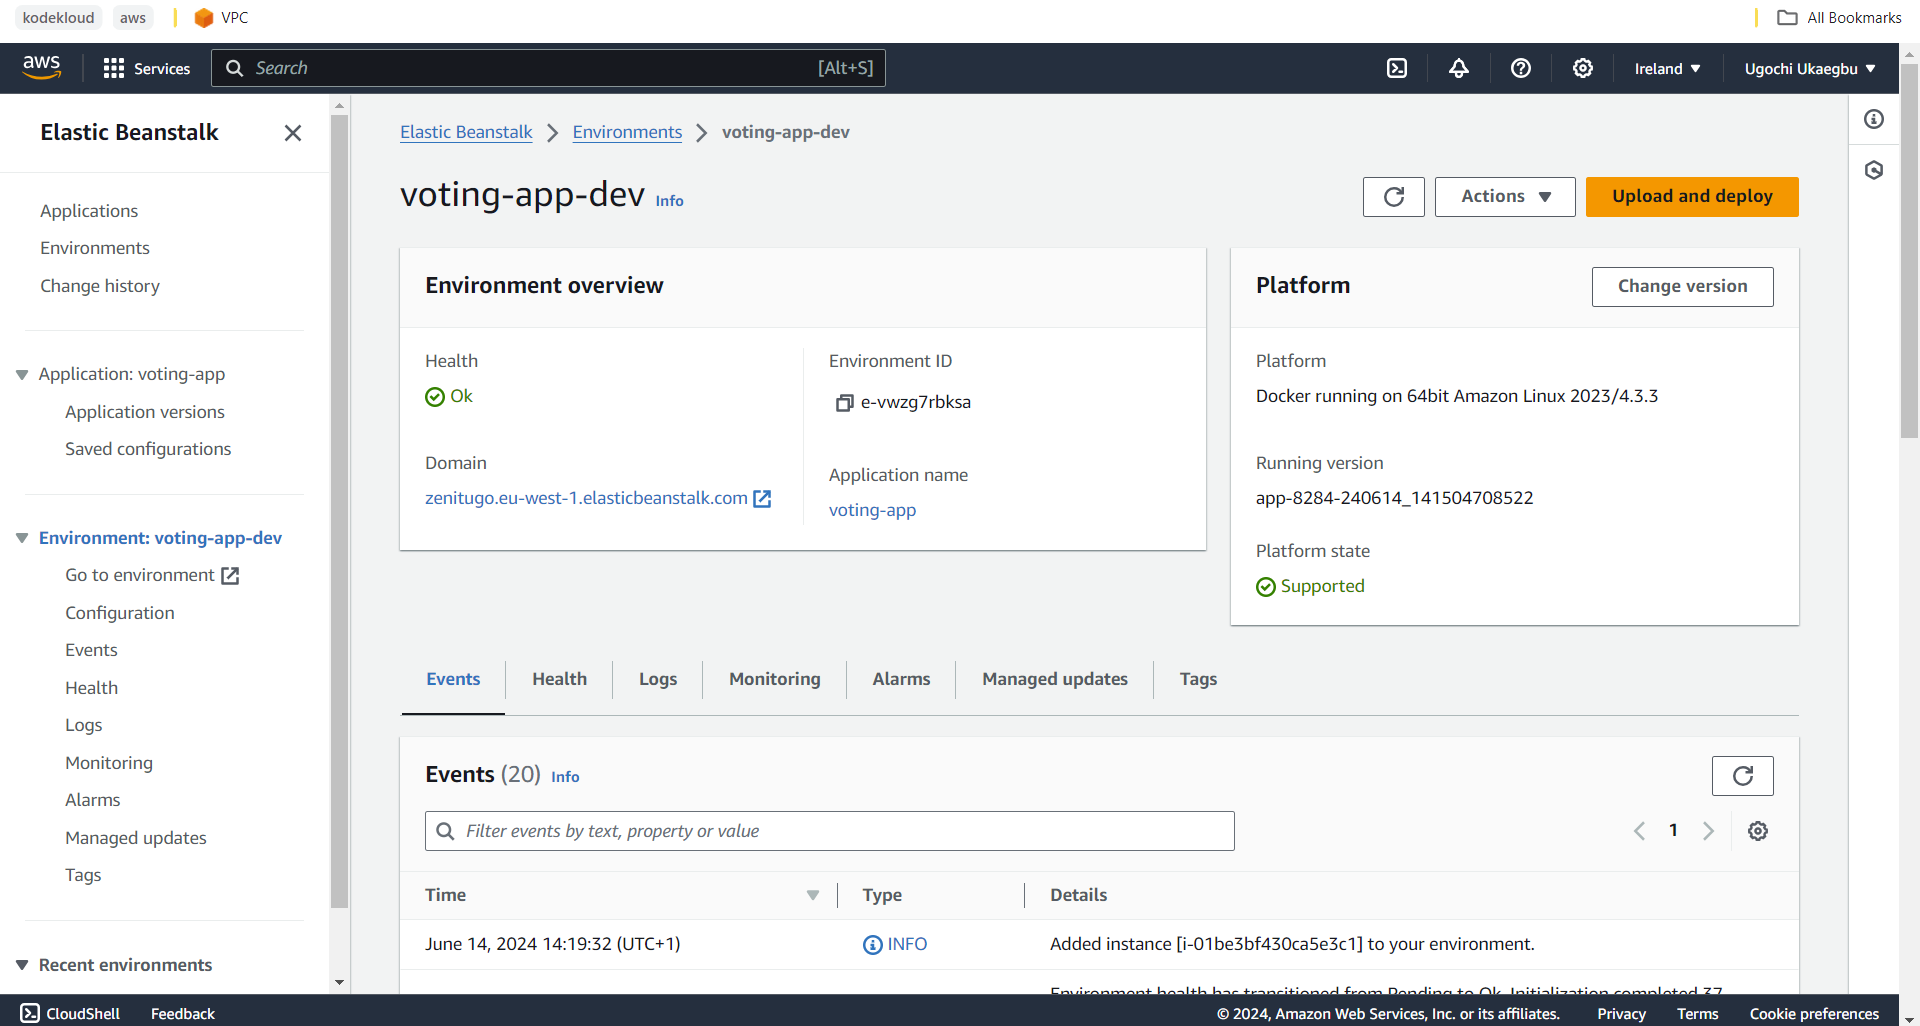
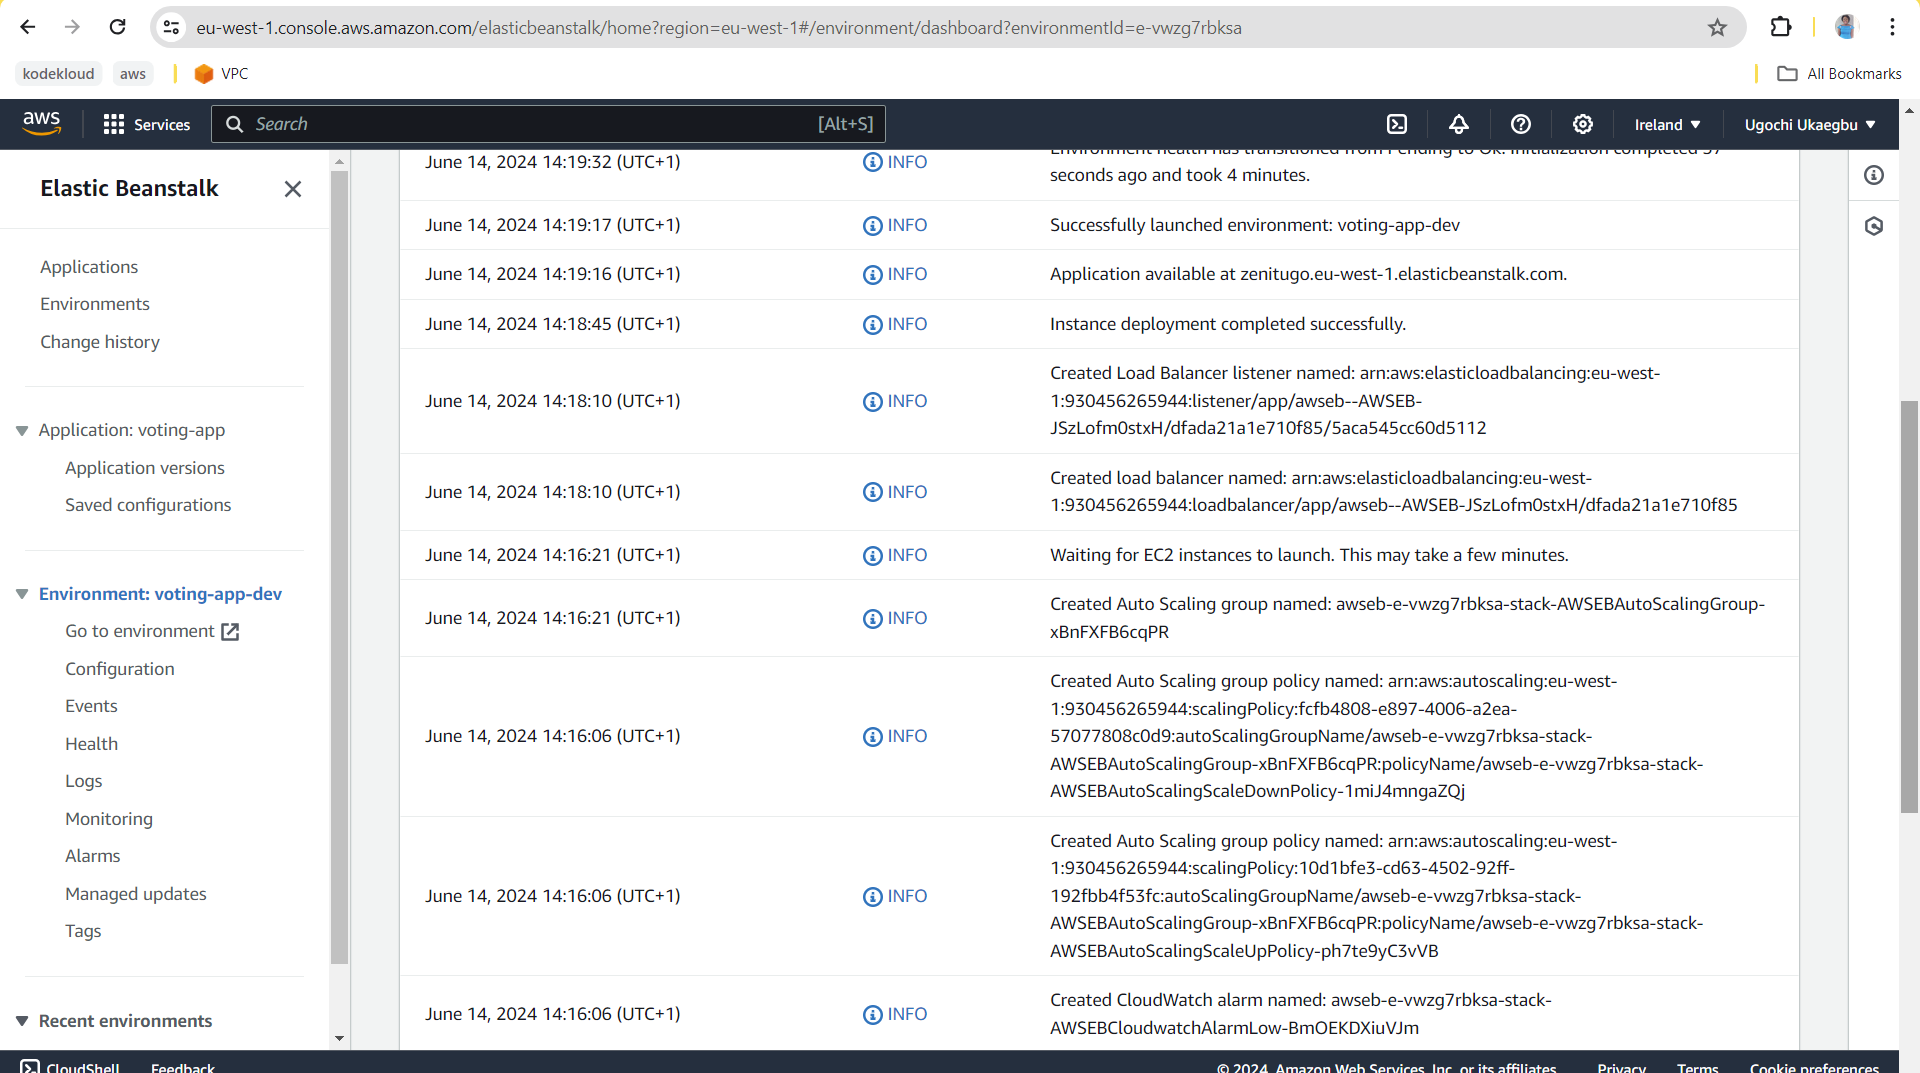
Proof of the creation of the beanstalk environment
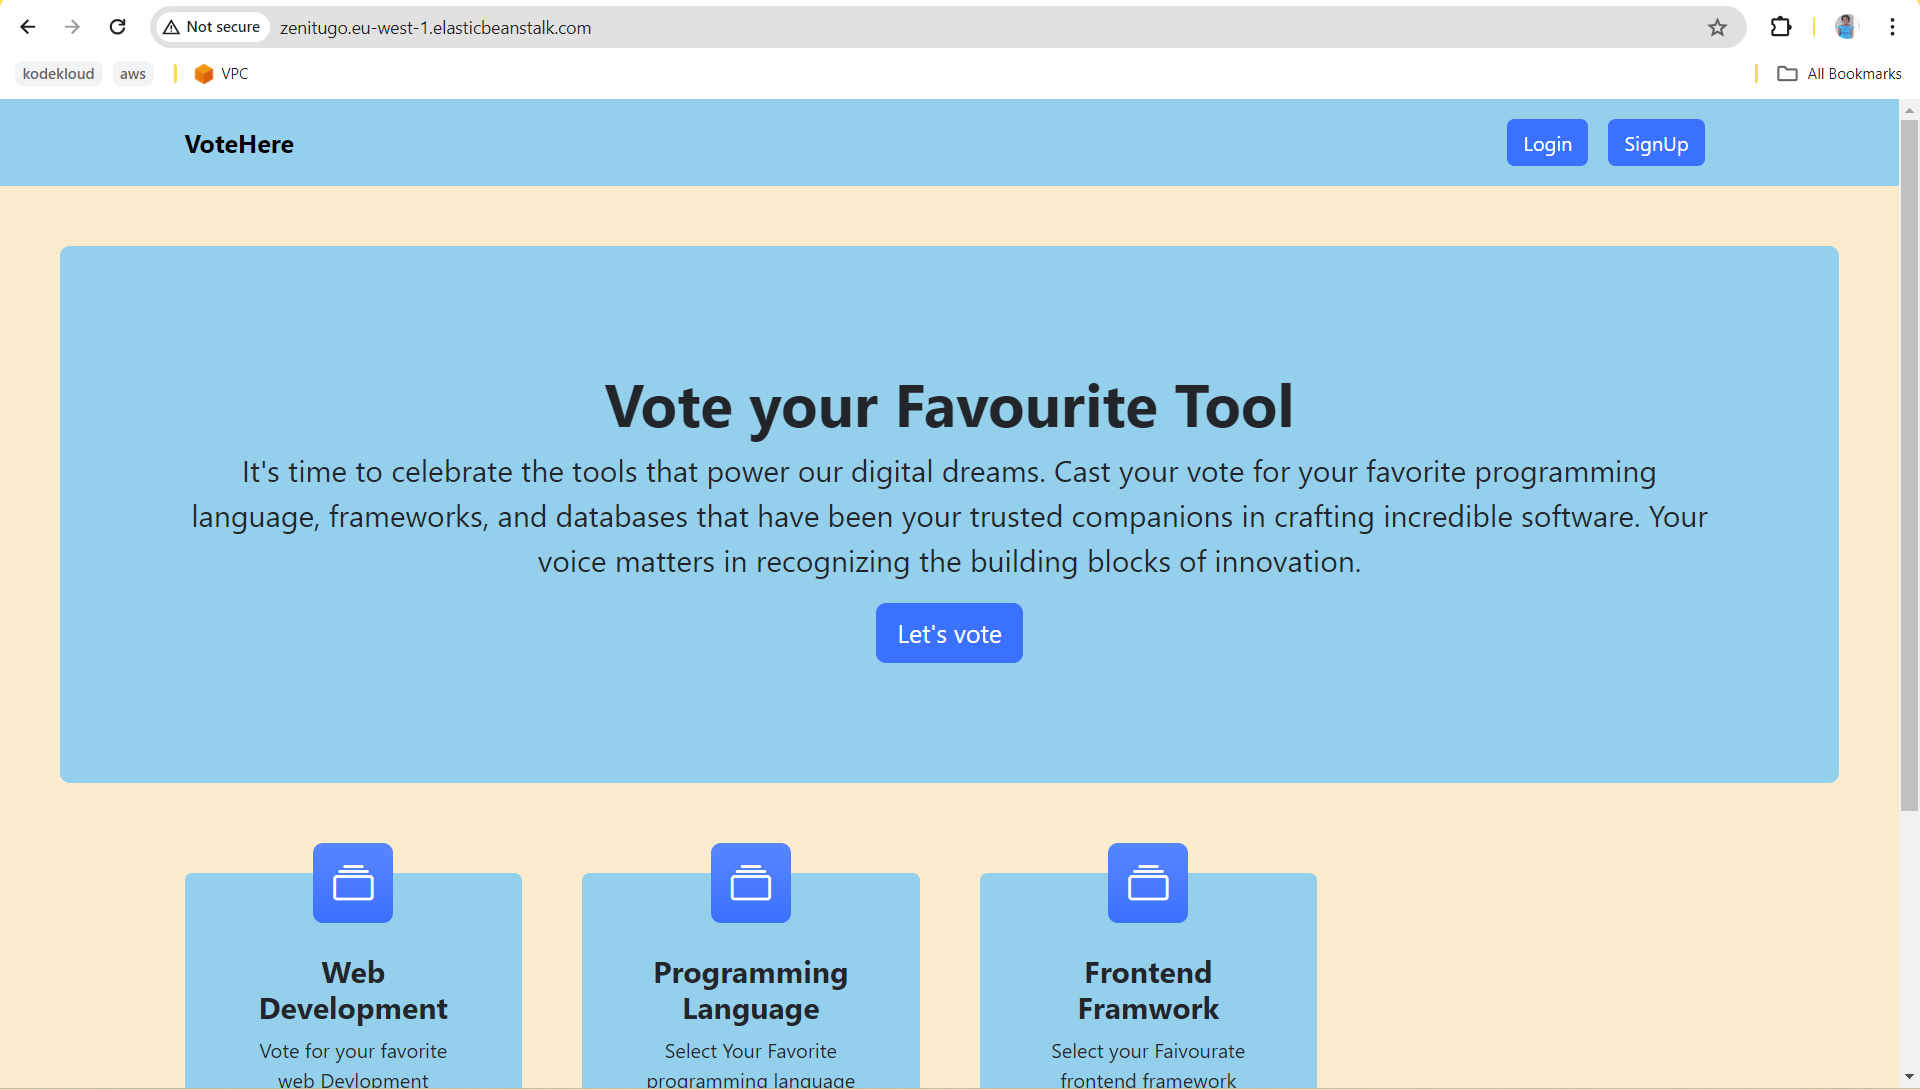
Proof of the deployment of the application on Beanstalk
To terminate all the resources use the command eb terminate --all
Challenges I faced while deploying this project
Since the source code was not originally written by me and had not been previously deployed to AWS Elastic Beanstalk, I encountered several challenges during the deployment process. Here are the key issues and how I addressed them:
Debug Mode Enabled in Production
The first challenge was that the
DEBUGsetting in Django was set toTrue, which is suitable for development but not for production. This setting can expose sensitive information and lead to security vulnerabilities.Solution: I changed the
DEBUGsetting toFalsein thesettings.pyfile. This required ensuring that all necessary configurations, such as proper handling of static files and error pages, were correctly set up to work withDEBUG=FalseMisconfigured ALLOWED_HOSTS
The second challenge was that the
ALLOWED_HOSTSwas an empty array. This setting restricts which host/domain names the Django site can serve, and an empty array would prevent the application from running correctly in production.Solution: I updated the
ALLOWED_HOSTSsetting with a wildcard*sign so that it can allow the domain name from which the application would be served, ensuring that the application could respond to requests from the intended hosts.Handling Static Files in Production
Another significant challenge was ensuring that static files, such as the CSS files, were served correctly in the production environment. During local development, the built-in server handled these files seamlessly, but in production, the styling broke due to MIME-type issues.
Solution: I resolved this by configuring WhiteNoise to serve static files directly from the application. The steps I used to achieve this were:
Made white noise a requirement to be installed
Made sure the static files were properly configured in the
settings.pyfileThese settings wwre not there STATIC_ROOT = BASE_DIR / 'templatefiles' This is the folder that will receive the static files when it is collected by python STATICFILES_DIRS = [ BASE_DIR / 'voteapp' # This settng describes were to see the static folder ]- Made sure to input a command to collect static files in the Dockerfile
Additionally, I added a custom Nginx configuration in a directory called .ebextensions to handle static file serving properly, ensuring that the CSS files were delivered with the correct MIME types, and restoring the application's styling.
    files:
      "/etc/nginx/conf.d/static.conf":
        mode: "000644"
        owner: root
        group: root
        content: |
          location /static/ {
              alias /var/app/current/staticfiles/;
          }

    container_commands:
      01_collectstatic:
        command: "source /var/app/venv/*/bin/activate && python manage.py collectstatic --noinput"
        leader_only: true
    option_settings:
      aws:elasticbeanstalk:environment:proxy:staticfiles:
        /static: static
Subscribe to my newsletter
Read articles from Ugochi Ukaegbu directly inside your inbox. Subscribe to the newsletter, and don't miss out.
Written by

Ugochi Ukaegbu
Ugochi Ukaegbu
DevOps/Cloud Engineer who loves learning, sharing knowledge and enjoys engaging with others on various topics. Welcome to my Universe of Learning, where I transform complex ideas into simple forms. My passion for sharing knowledge fuels my writing, making it accessible and fun.