Docker for Beginners: Practical Steps to Start
 Yash Dalal
One of the most frustrating issues in software development is the "It works on my machine" problem. This happens when a developer creates an application that runs perfectly on their local machine but fails to work properly when deployed to other environments.

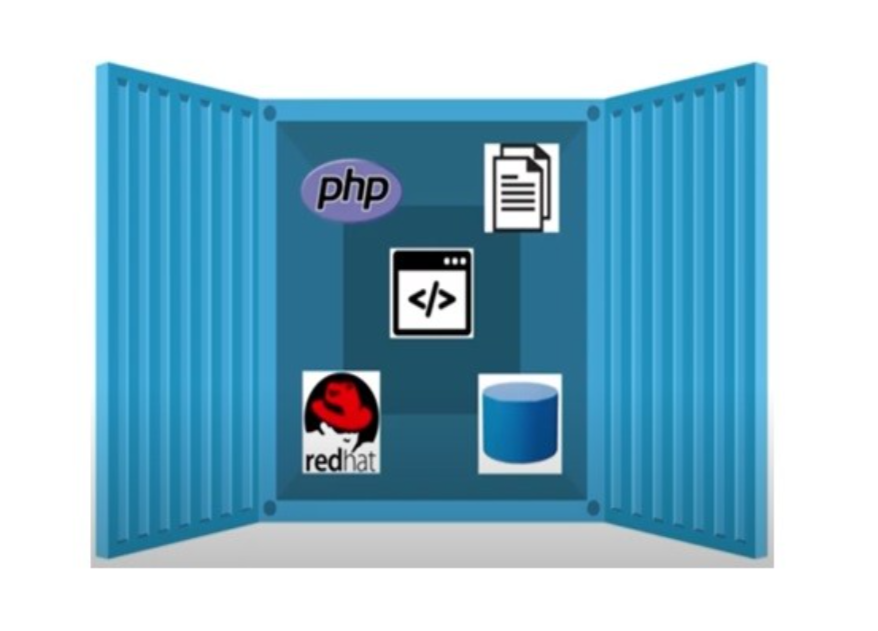
This problem is solved using the containerization technique, Containerization is a type of virtualization that allows developers to package/bundle an application and its dependencies into a single container image that can run on any system.
Developers can easily create a container that is loosely isolated from the host environment and includes all the necessary application dependencies and configurations. This container can then be shared with other developers or deployed to different environments without worrying about compatibility issues. This ensures the application runs consistently across various environments, eliminating the "It works on my machine" problem.
While containerization is a technique to solve this problem, Docker is a tool that helps in performing containerization in a better way.
But how is it different from virtualization?

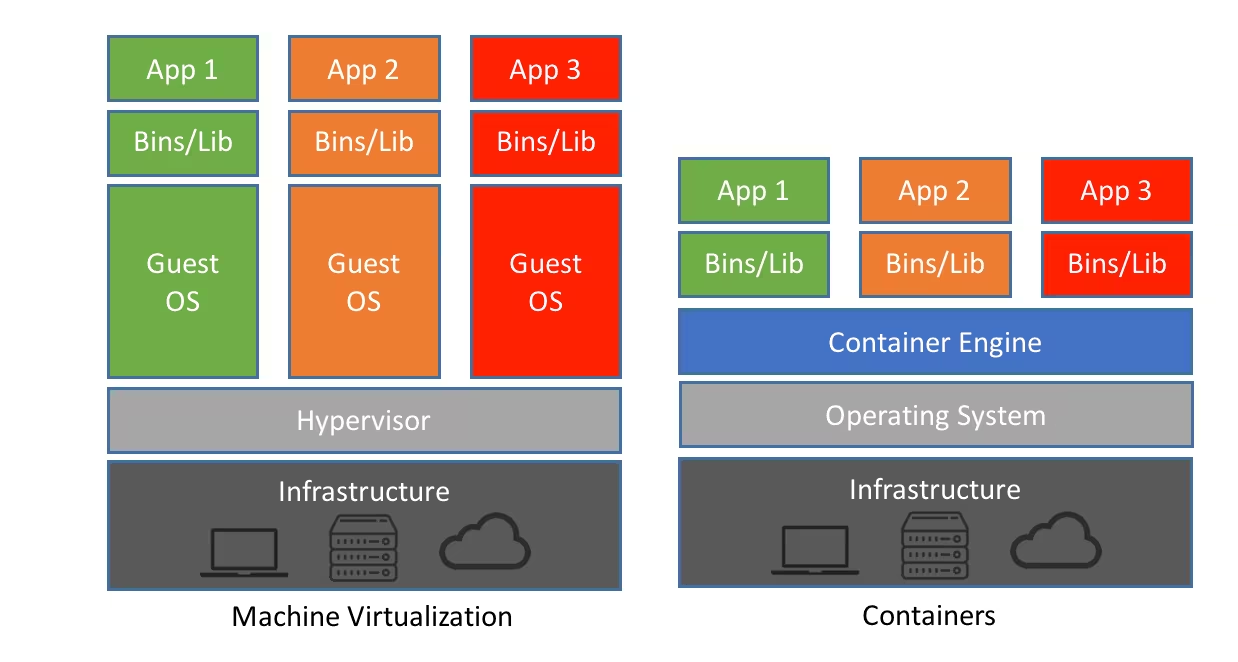
Virtualization allows you to split that computer into several virtual machines(VMs), each acting like a separate computer with its operating system and applications. Each virtual machine is isolated from the others, meaning issues in one virtual machine won’t affect others. This allows you to optimize resource utilization, run multiple applications on a single machine, and improve scalability by easily adding or removing virtual machines as needed.
Containerization is a lightweight form of virtualization that allows you to run applications and their dependencies in isolated containers. Each container shares the same operating system kernel but is isolated from other containers, providing a portable and consistent runtime environment for applications.
Now Let's see how can we package the application and its dependencies in containers.
Firstly, We need to install docker, for windows install docker desktop which is GUI (Graphical User Interface) that lets you manage your containers, applications, and images directly from your machine.
Now we need the project to which we have to dockerized. For the demo, I have created a small backend project in Django which you can use for learning.
Note: It doesn't require any pre-knowledge of Django, you can use any of your projects may be in Nodejs.
git clone https://github.com/YashDalal11/Docker_demo.gitCreate a Dockerfile in the root directory of the project and paste the below line of instruction in it.
 FROM python:latest
 RUN mkdir /code
 WORKDIR /code
 COPY requirements.txt /code/
 RUN pip install -r requirements.txt
 COPY . /code/
 CMD  ["python", "manage.py", "runserver", "0.0.0.0:8000"]
In the Dockerfile, we list a set of instructions that we have to perform when we want to start the service.
FROM python:latest :- This line installs python in the container as we need it to run our Django project, If you have any Nodejs project you need to install nodejs.
RUN mkdir /code :- This line runs a command in a container to create a code folder in it.
WORKDIR /code :- This line sets the working directory to code.
COPY requirements.txt /code/ :- This line copies the requirements.txt file from the root directory to the code folder in the container.
Note: requirements.txt file contains application package dependencies similar to the package.json file in nodejsRUN pip install -r requirements.txt :- This line installs all the dependencies listed in it.
COPY . /code/ :- This line copies our code from the root directory to the code folder in the container.
CMD ["python", "manage.py", "runserver", "0.0.0.0:8000"] :- This line starts the server in the container
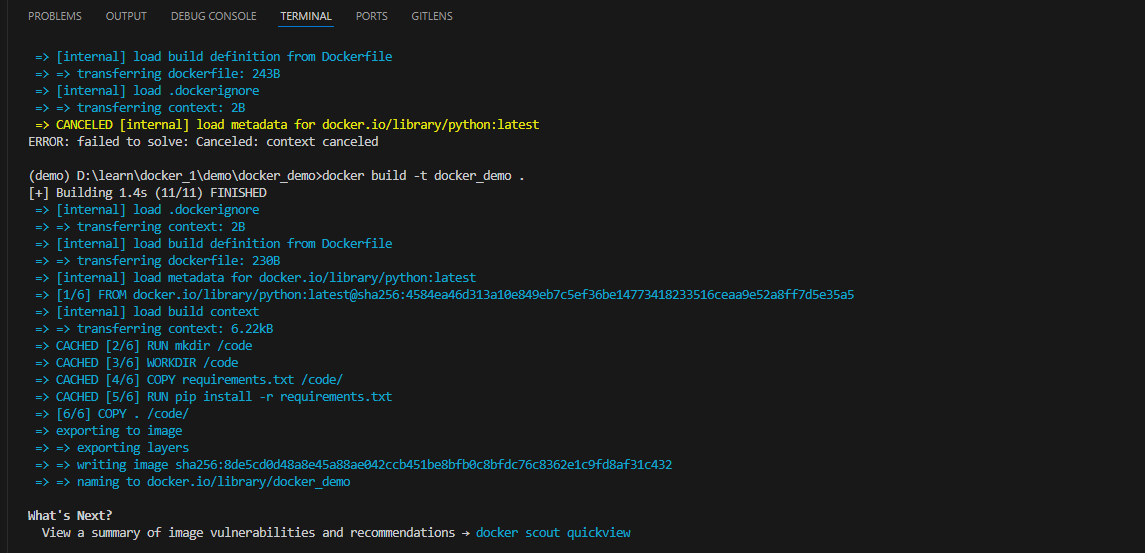
Now create an image from the docker file
Open the command prompt and cd to the project directory in which dockerfile is present.
Paste the below command.
docker build -t docker_demo .This creates an image from our project with the name docker demo
Note: "." in the last indicates to take the dockerfile from the current directory, so make sure you are in the project directory that contains the dockerfile.
Now create a container using the below command
docker run -dp 8000:8000 docker_demoHere
docker run:- indicate to create a container from the image
-dp 8000:8000:- it is divided into 2 parts
-d:- indicates to run the container in detach mode,
-p 8000:8000:- As our container is isolated from the outside environment to access the server running inside the container we need to publish the port.
Here 8000 before the semicolon indicates the port on which we make a request and 8000 after the semicolon indicates the port on which we have to redirect the request inside the container.
Note: We can change the port which is before the semicolon according to our requirement for eg: 8001:8000. so now we have to make a request on 8001 which will redirect to 8000 inside the container.
docker_demo:- It's the name of the image from which we have to create a container.

Now our project is containerized, to test it open the browser and make a request on the below URL.
http://localhost:8000
you will see the output.

You can share the image of your project with anybody and they can run your application just using the docker run command mentioned in step 5. they don't need to install any dependencies, But make sure they have docker installed.
In the next blog, we will go more deeply into docker, docker image, docker container, and many more things.
Thanks for reading the blog till last, Don't forget to like and comment on the blog, share with your friends, and follow me for more such content.
Happy Coding!
Subscribe to my newsletter
Read articles from Yash Dalal directly inside your inbox. Subscribe to the newsletter, and don't miss out.
Written by
