Game Development with Python: Creating Simple Games with Pygame
 ByteScrum Technologies
Game development is an exciting and rewarding aspect of programming that allows you to bring your creative ideas to life. Python, with its simplicity and readability, is an excellent language for beginners to get started with game development. Pygame, a popular library for creating games in Python, provides all the tools you need to build simple games. In this blog post, we'll walk through the basics of Pygame and create a simple game to demonstrate its capabilities.
What is Pygame?
Pygame is a set of Python modules designed for writing video games. It includes computer graphics and sound libraries to make game development easier and more accessible. Pygame is built on top of the SDL (Simple DirectMedia Layer) library, which is widely used in the industry for creating games and multimedia applications.
Why Use Pygame?
Beginner-Friendly: Pygame is easy to learn and use, making it perfect for beginners.
Comprehensive: It provides a wide range of functionalities, including graphics, sound, and input handling.
Cross-Platform: Pygame works on various platforms, including Windows, macOS, and Linux.
Setting Up Pygame
Before we start coding, we need to install Pygame. Make sure you have Python installed on your system, then run the following command to install Pygame:
pip install pygame
Creating a Simple Game
Let's create a simple game where a player controls a character to avoid obstacles. We'll start with the basic structure and build on it step by step.
Step 1: Initialize Pygame and Create a Window
First, we need to initialize Pygame and create a game window. Create a new file named game.py and add the following code:
import pygame
import sys

# Initialize Pygame
pygame.init()

# Set up the game window
screen = pygame.display.set_mode((800, 600))
pygame.display.set_caption("Simple Game with Pygame")

# Main game loop
while True:
    for event in pygame.event.get():
        if event.type == pygame.QUIT:
            pygame.quit()
            sys.exit()

    # Fill the screen with a color (black)
    screen.fill((0, 0, 0))

    # Update the display
    pygame.display.flip()
This code initializes Pygame, sets up a game window of size 800x600 pixels, and runs a main game loop that listens for the quit event to close the window.
Step 2: Adding a Player Character
Next, we'll add a player character that can move left and right using the arrow keys. Define a player class and add it to the game loop:
import pygame
import sys

# Initialize Pygame
pygame.init()

# Set up the game window
screen = pygame.display.set_mode((800, 600))
pygame.display.set_caption("Simple Game with Pygame")

# Player class
class Player(pygame.sprite.Sprite):
    def __init__(self):
        super().__init__()
        self.image = pygame.Surface((50, 50))
        self.image.fill((0, 255, 0))
        self.rect = self.image.get_rect()
        self.rect.center = (400, 550)
        self.speed = 5

    def update(self):
        keys = pygame.key.get_pressed()
        if keys[pygame.K_LEFT]:
            self.rect.x -= self.speed
        if keys[pygame.K_RIGHT]:
            self.rect.x += self.speed

# Create a player instance
player = Player()
all_sprites = pygame.sprite.Group()
all_sprites.add(player)

# Main game loop
while True:
    for event in pygame.event.get():
        if event.type == pygame.QUIT:
            pygame.quit()
            sys.exit()

    # Update all sprites
    all_sprites.update()

    # Fill the screen with a color (black)
    screen.fill((0, 0, 0))

    # Draw all sprites
    all_sprites.draw(screen)

    # Update the display
    pygame.display.flip()
In this code, we define a Player class that inherits from pygame.sprite.Sprite. The player is represented by a green square that can move left and right. We use the pygame.sprite.Group to manage and update the player sprite.
Step 3: Adding Obstacles
Now, let's add obstacles that the player needs to avoid. We'll create an Obstacle class and add instances of it to the game loop:
import pygame
import sys
import random

# Initialize Pygame
pygame.init()

# Set up the game window
screen = pygame.display.set_mode((800, 600))
pygame.display.set_caption("Simple Game with Pygame")

# Set up the clock for managing the frame rate
clock = pygame.time.Clock()

# Define colors
BLACK = (0, 0, 0)
GREEN = (0, 255, 0)
RED = (255, 0, 0)
WHITE = (255, 255, 255)
BLUE = (0, 0, 255)

# Player class


class Player(pygame.sprite.Sprite):
    def __init__(self):
        super().__init__()
        self.image = pygame.Surface((50, 50))
        self.image.fill(GREEN)
        self.rect = self.image.get_rect()
        self.rect.center = (400, 550)
        self.speed = 5

    def update(self):
        keys = pygame.key.get_pressed()
        if keys[pygame.K_LEFT]:
            self.rect.x -= self.speed
        if keys[pygame.K_RIGHT]:
            self.rect.x += self.speed

        # Prevent the player from moving out of the window
        if self.rect.left < 0:
            self.rect.left = 0
        if self.rect.right > 800:
            self.rect.right = 800

# Obstacle class


class Obstacle(pygame.sprite.Sprite):
    def __init__(self):
        super().__init__()
        self.image = pygame.Surface((50, 50))
        self.image.fill(RED)
        self.rect = self.image.get_rect()
        self.rect.x = random.randint(0, 750)
        self.rect.y = random.randint(-100, -40)
        self.speed = random.randint(2, 6)

    def update(self):
        self.rect.y += self.speed
        if self.rect.top > 600:
            self.rect.x = random.randint(0, 750)
            self.rect.y = random.randint(-100, -40)
            self.speed = random.randint(2, 6)

# Button class


class Button:
    def __init__(self, text, pos, font, bg="black", feedback=""):
        self.x, self.y = pos
        self.font = pygame.font.SysFont("Arial", font)
        if feedback == "":
            self.feedback = "text"
        else:
            self.feedback = feedback
        self.change_text(text, bg)

    def change_text(self, text, bg="black"):
        self.text = self.font.render(text, True, WHITE)
        self.size = self.text.get_size()
        self.surface = pygame.Surface(self.size)
        self.surface.fill(bg)
        self.surface.blit(self.text, (0, 0))
        self.rect = pygame.Rect(self.x, self.y, self.size[0], self.size[1])

    def show(self):
        screen.blit(self.surface, (self.x, self.y))

    def click(self, event):
        x, y = pygame.mouse.get_pos()
        if event.type == pygame.MOUSEBUTTONDOWN:
            if pygame.mouse.get_pressed()[0]:
                if self.rect.collidepoint(x, y):
                    return True
        return False


# Create a player instance
player = Player()
all_sprites = pygame.sprite.Group()
all_sprites.add(player)

# Create obstacle group
obstacles = pygame.sprite.Group()
for _ in range(10):
    obstacle = Obstacle()
    all_sprites.add(obstacle)
    obstacles.add(obstacle)

# Initialize score
score = 0
font = pygame.font.SysFont(None, 36)


def display_score():
    text = font.render(f"Score: {score}", True, WHITE)
    screen.blit(text, (10, 10))


# Initialize start button
start_button = Button("Start Game", (350, 275), 36,
                      bg=BLUE, feedback="Start Game")

# Game state
game_started = False
game_over = False

# Main game loop
while True:
    for event in pygame.event.get():
        if event.type == pygame.QUIT:
            pygame.quit()
            sys.exit()
        if event.type == pygame.MOUSEBUTTONDOWN and not game_started:
            if start_button.click(event):
                game_started = True
                game_over = False
                score = 0

    if game_started and not game_over:
        # Update all sprites
        all_sprites.update()

        # Check for collisions
        if pygame.sprite.spritecollide(player, obstacles, False):
            game_over = True

        # Increase score
        score += 1

    # Fill the screen with a color (black)
    screen.fill(BLACK)

    if game_started:
        # Draw all sprites
        all_sprites.draw(screen)

        # Display the score
        display_score()

        if game_over:
            game_over_text = font.render("Game Over", True, WHITE)
            screen.blit(game_over_text, (350, 300))
    else:
        start_button.show()

    # Update the display
    pygame.display.flip()

    # Cap the frame rate
    clock.tick(60)

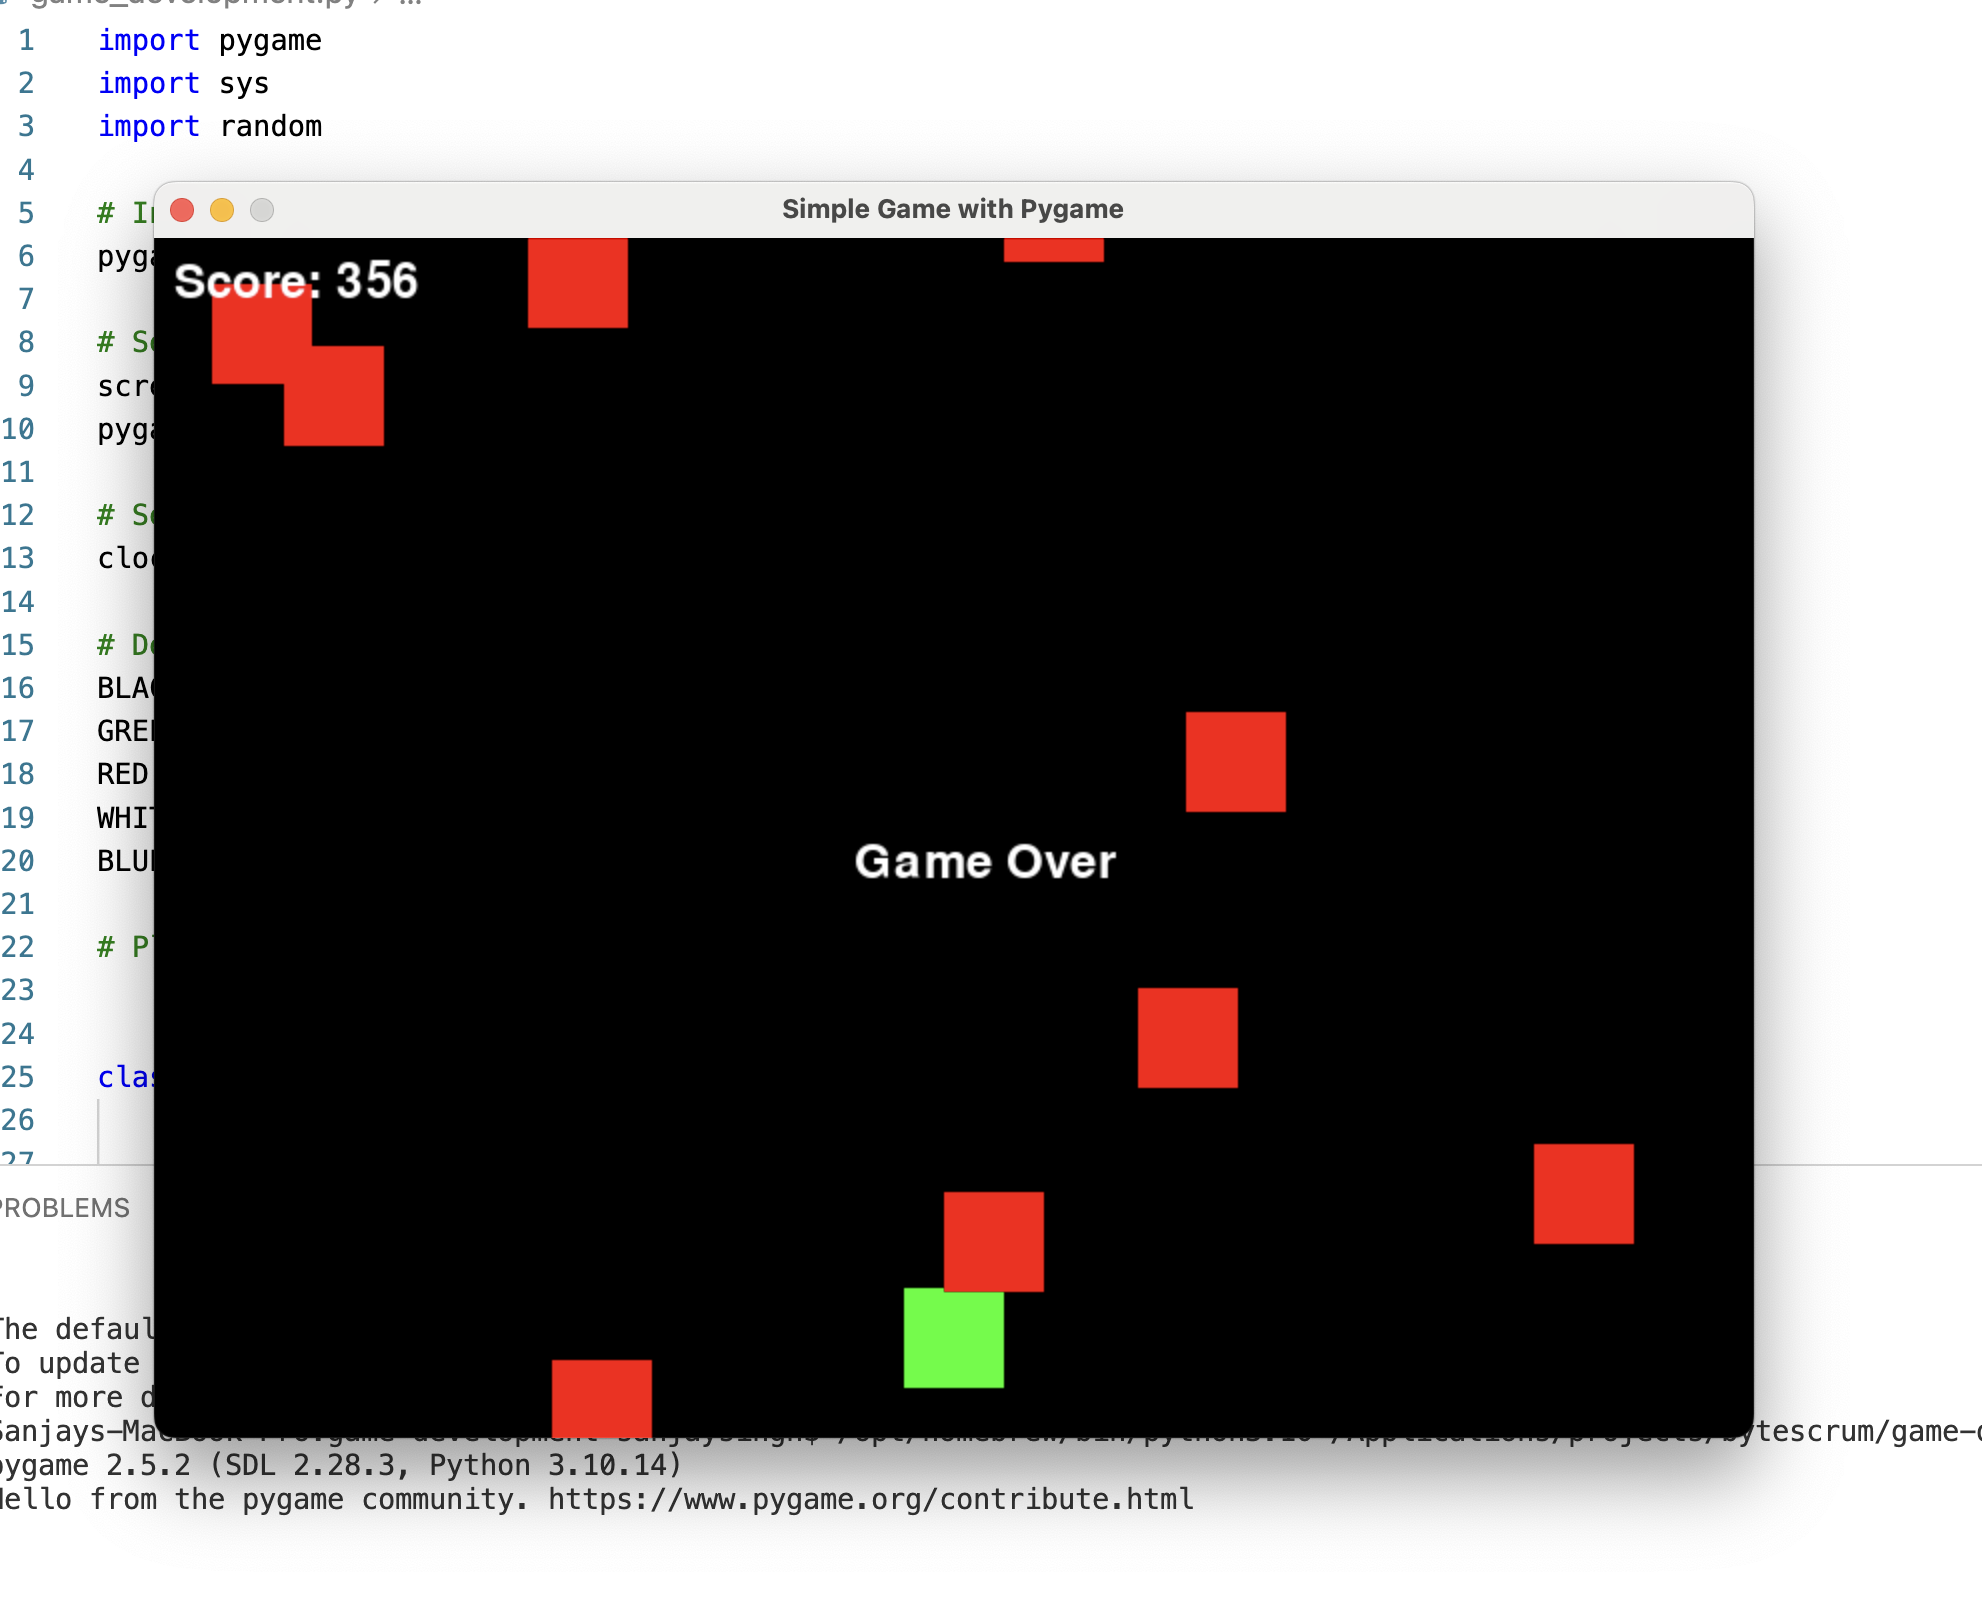
In this code, we define an Obstacle class that inherits from pygame.sprite.Sprite. Obstacles are represented by red squares that move down the screen. If an obstacle reaches the bottom, it reappears at the top with a new random position and speed. We also check for collisions between the player and obstacles, ending the game if a collision occurs.
Conclusion
Whether you're a beginner or an experienced programmer, game development with Pygame is a fun and rewarding experience. So, go ahead and start building your own games with Python and Pygame!
Subscribe to my newsletter
Read articles from ByteScrum Technologies directly inside your inbox. Subscribe to the newsletter, and don't miss out.
Written by

ByteScrum Technologies
ByteScrum Technologies
Our company comprises seasoned professionals, each an expert in their field. Customer satisfaction is our top priority, exceeding clients' needs. We ensure competitive pricing and quality in web and mobile development without compromise.