Instructions to Create an S3 Bucket and Upload an Image on AWS Management Console ☁️🚀
 Pranavan Sudhahar
🔐 Log into AWS Management Console.
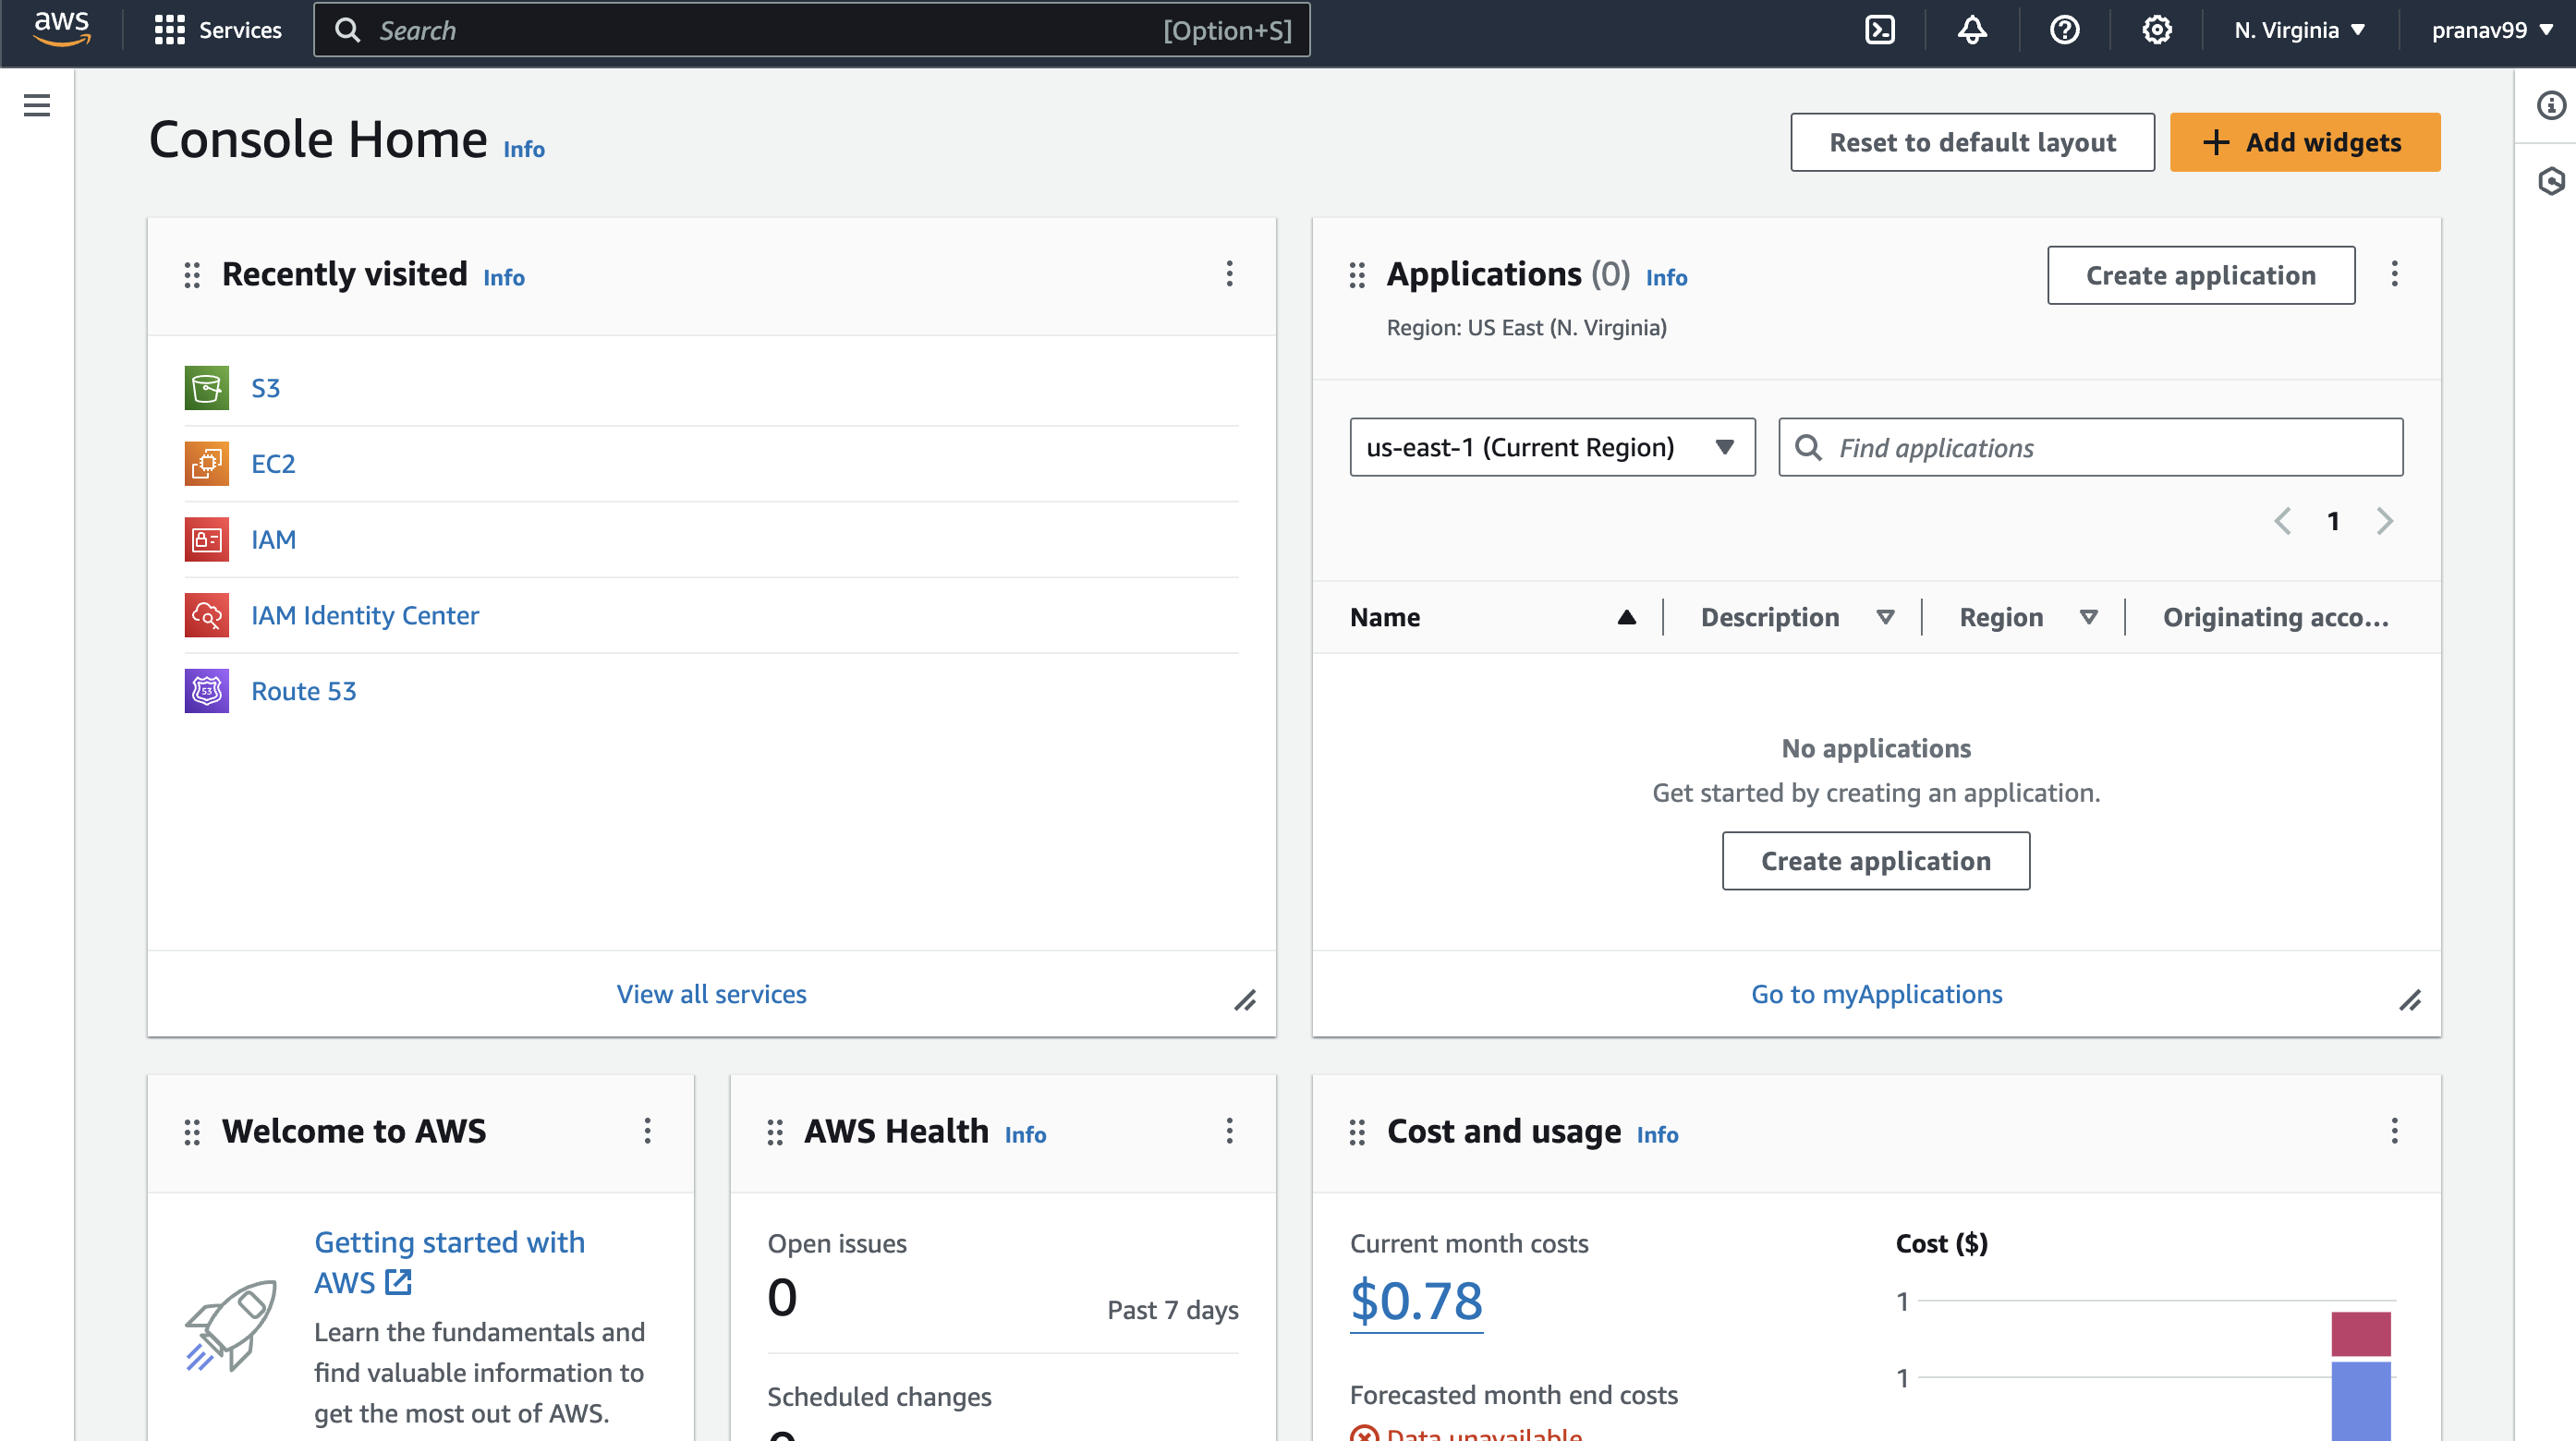
🔍 Search for S3:
In the search bar at the top, type S3 bucket.
Click on the first link that appears.
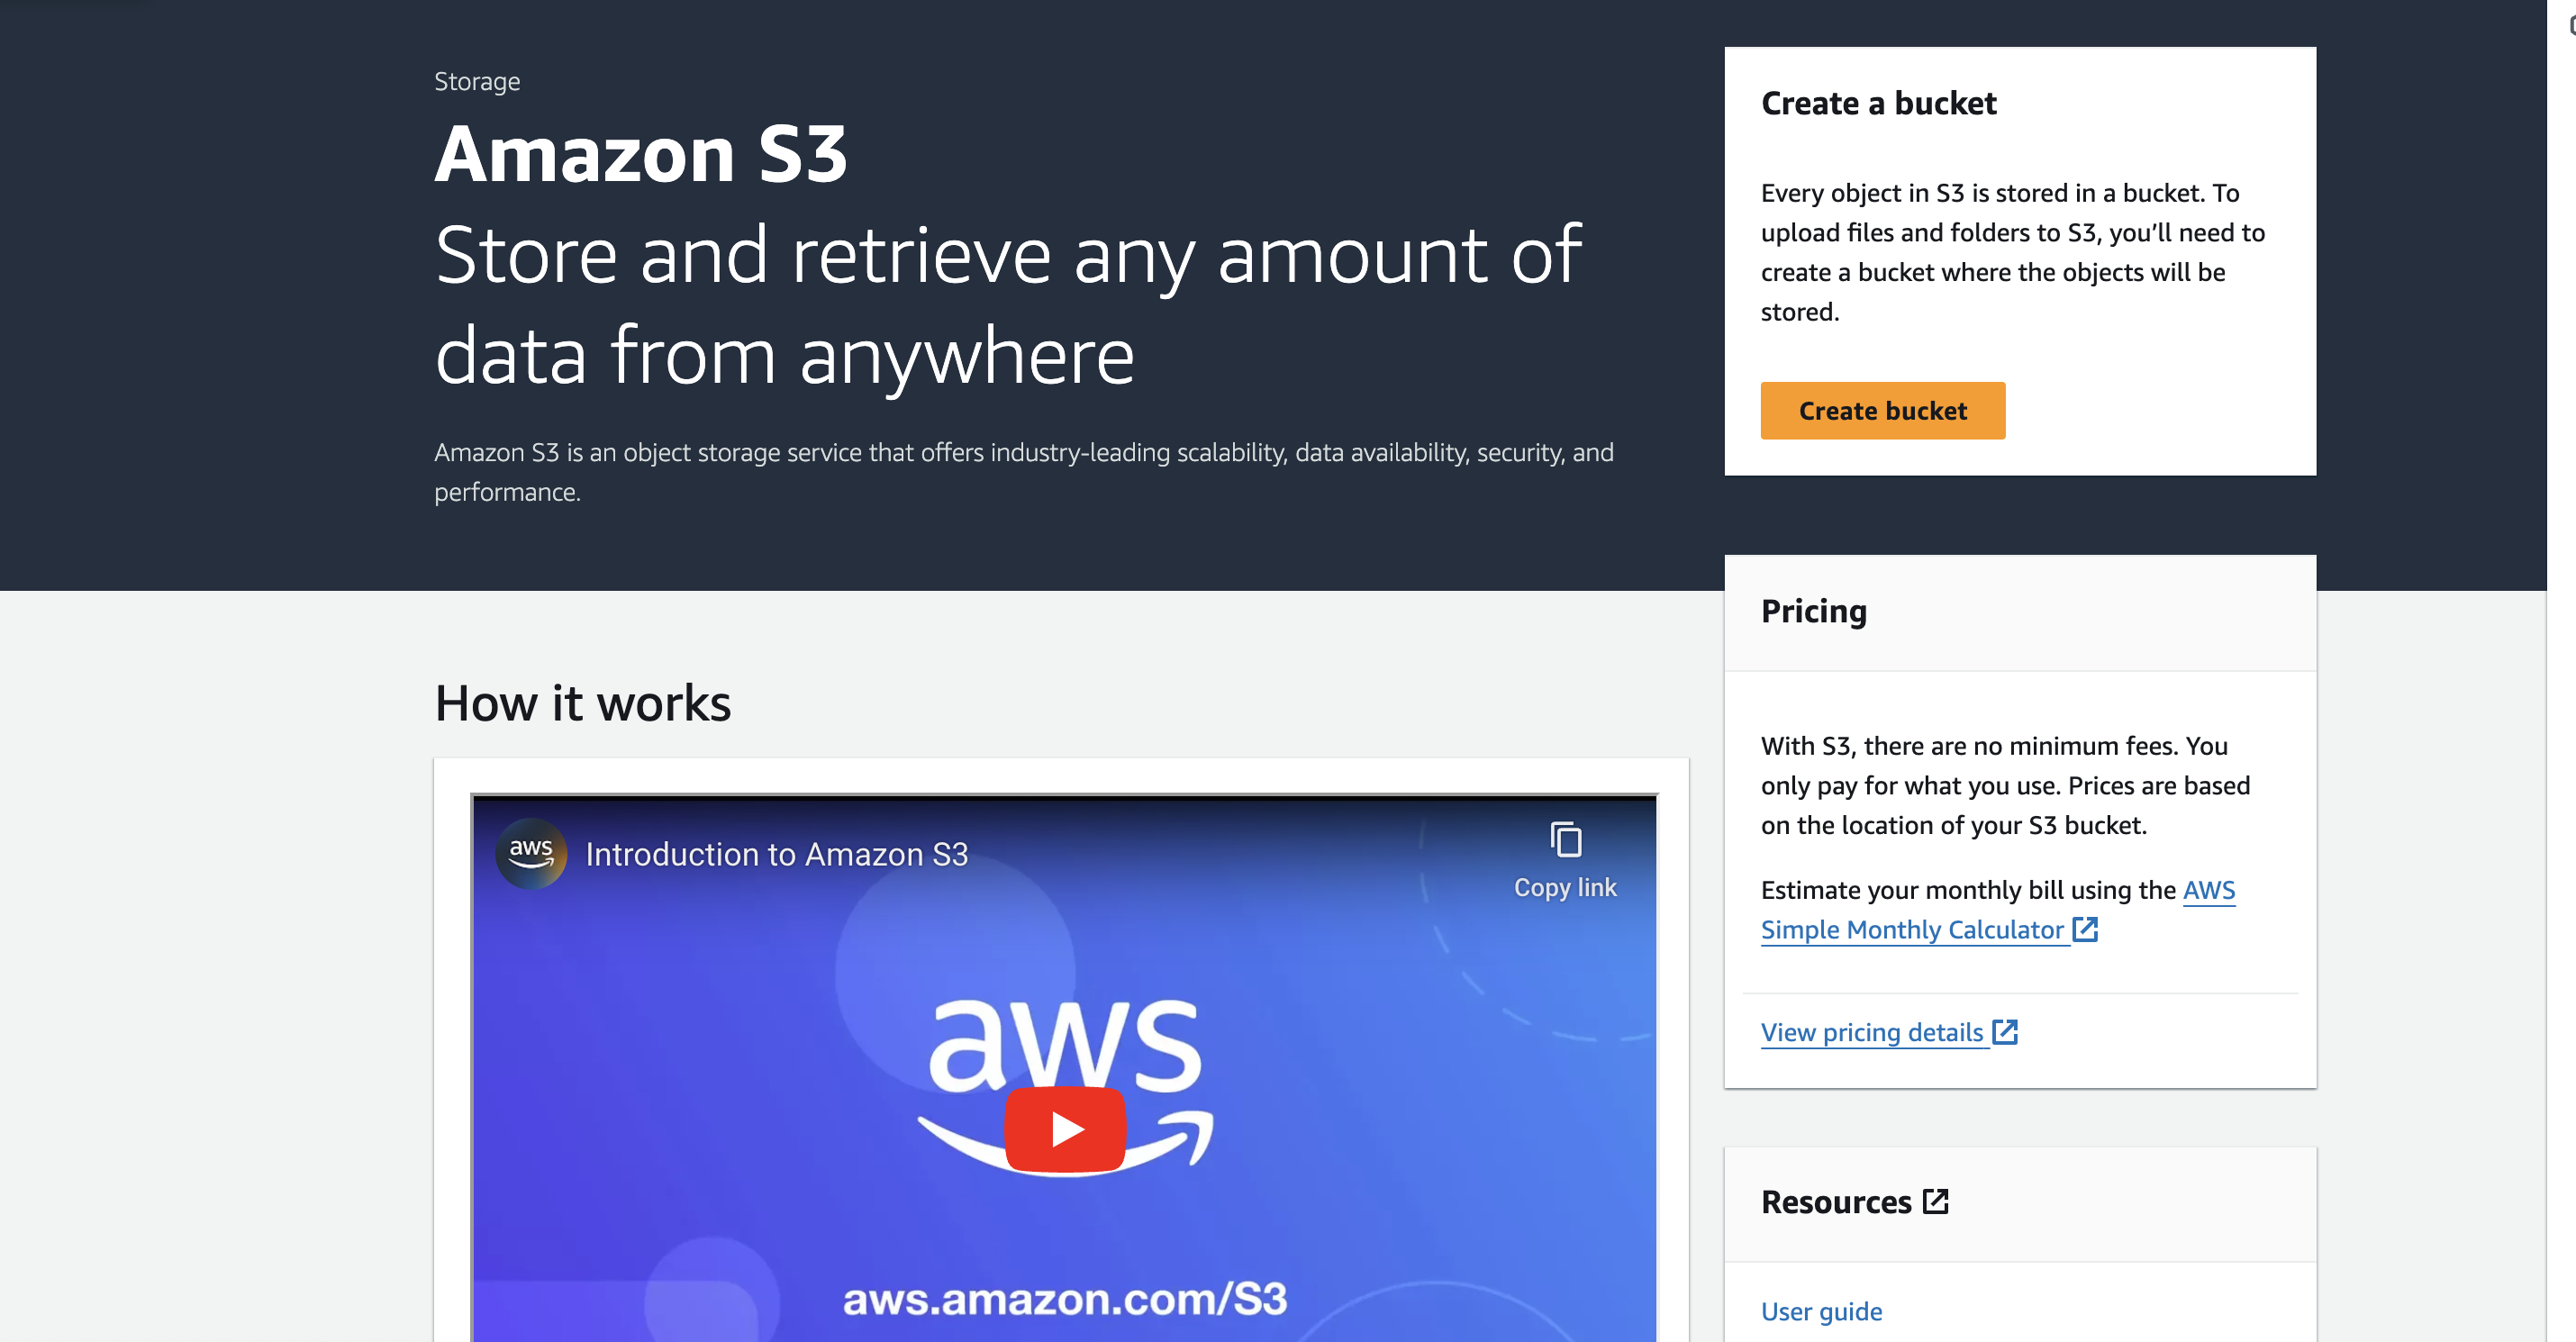
🆕 Create a New Bucket:
In the top right corner, click on Create bucket.
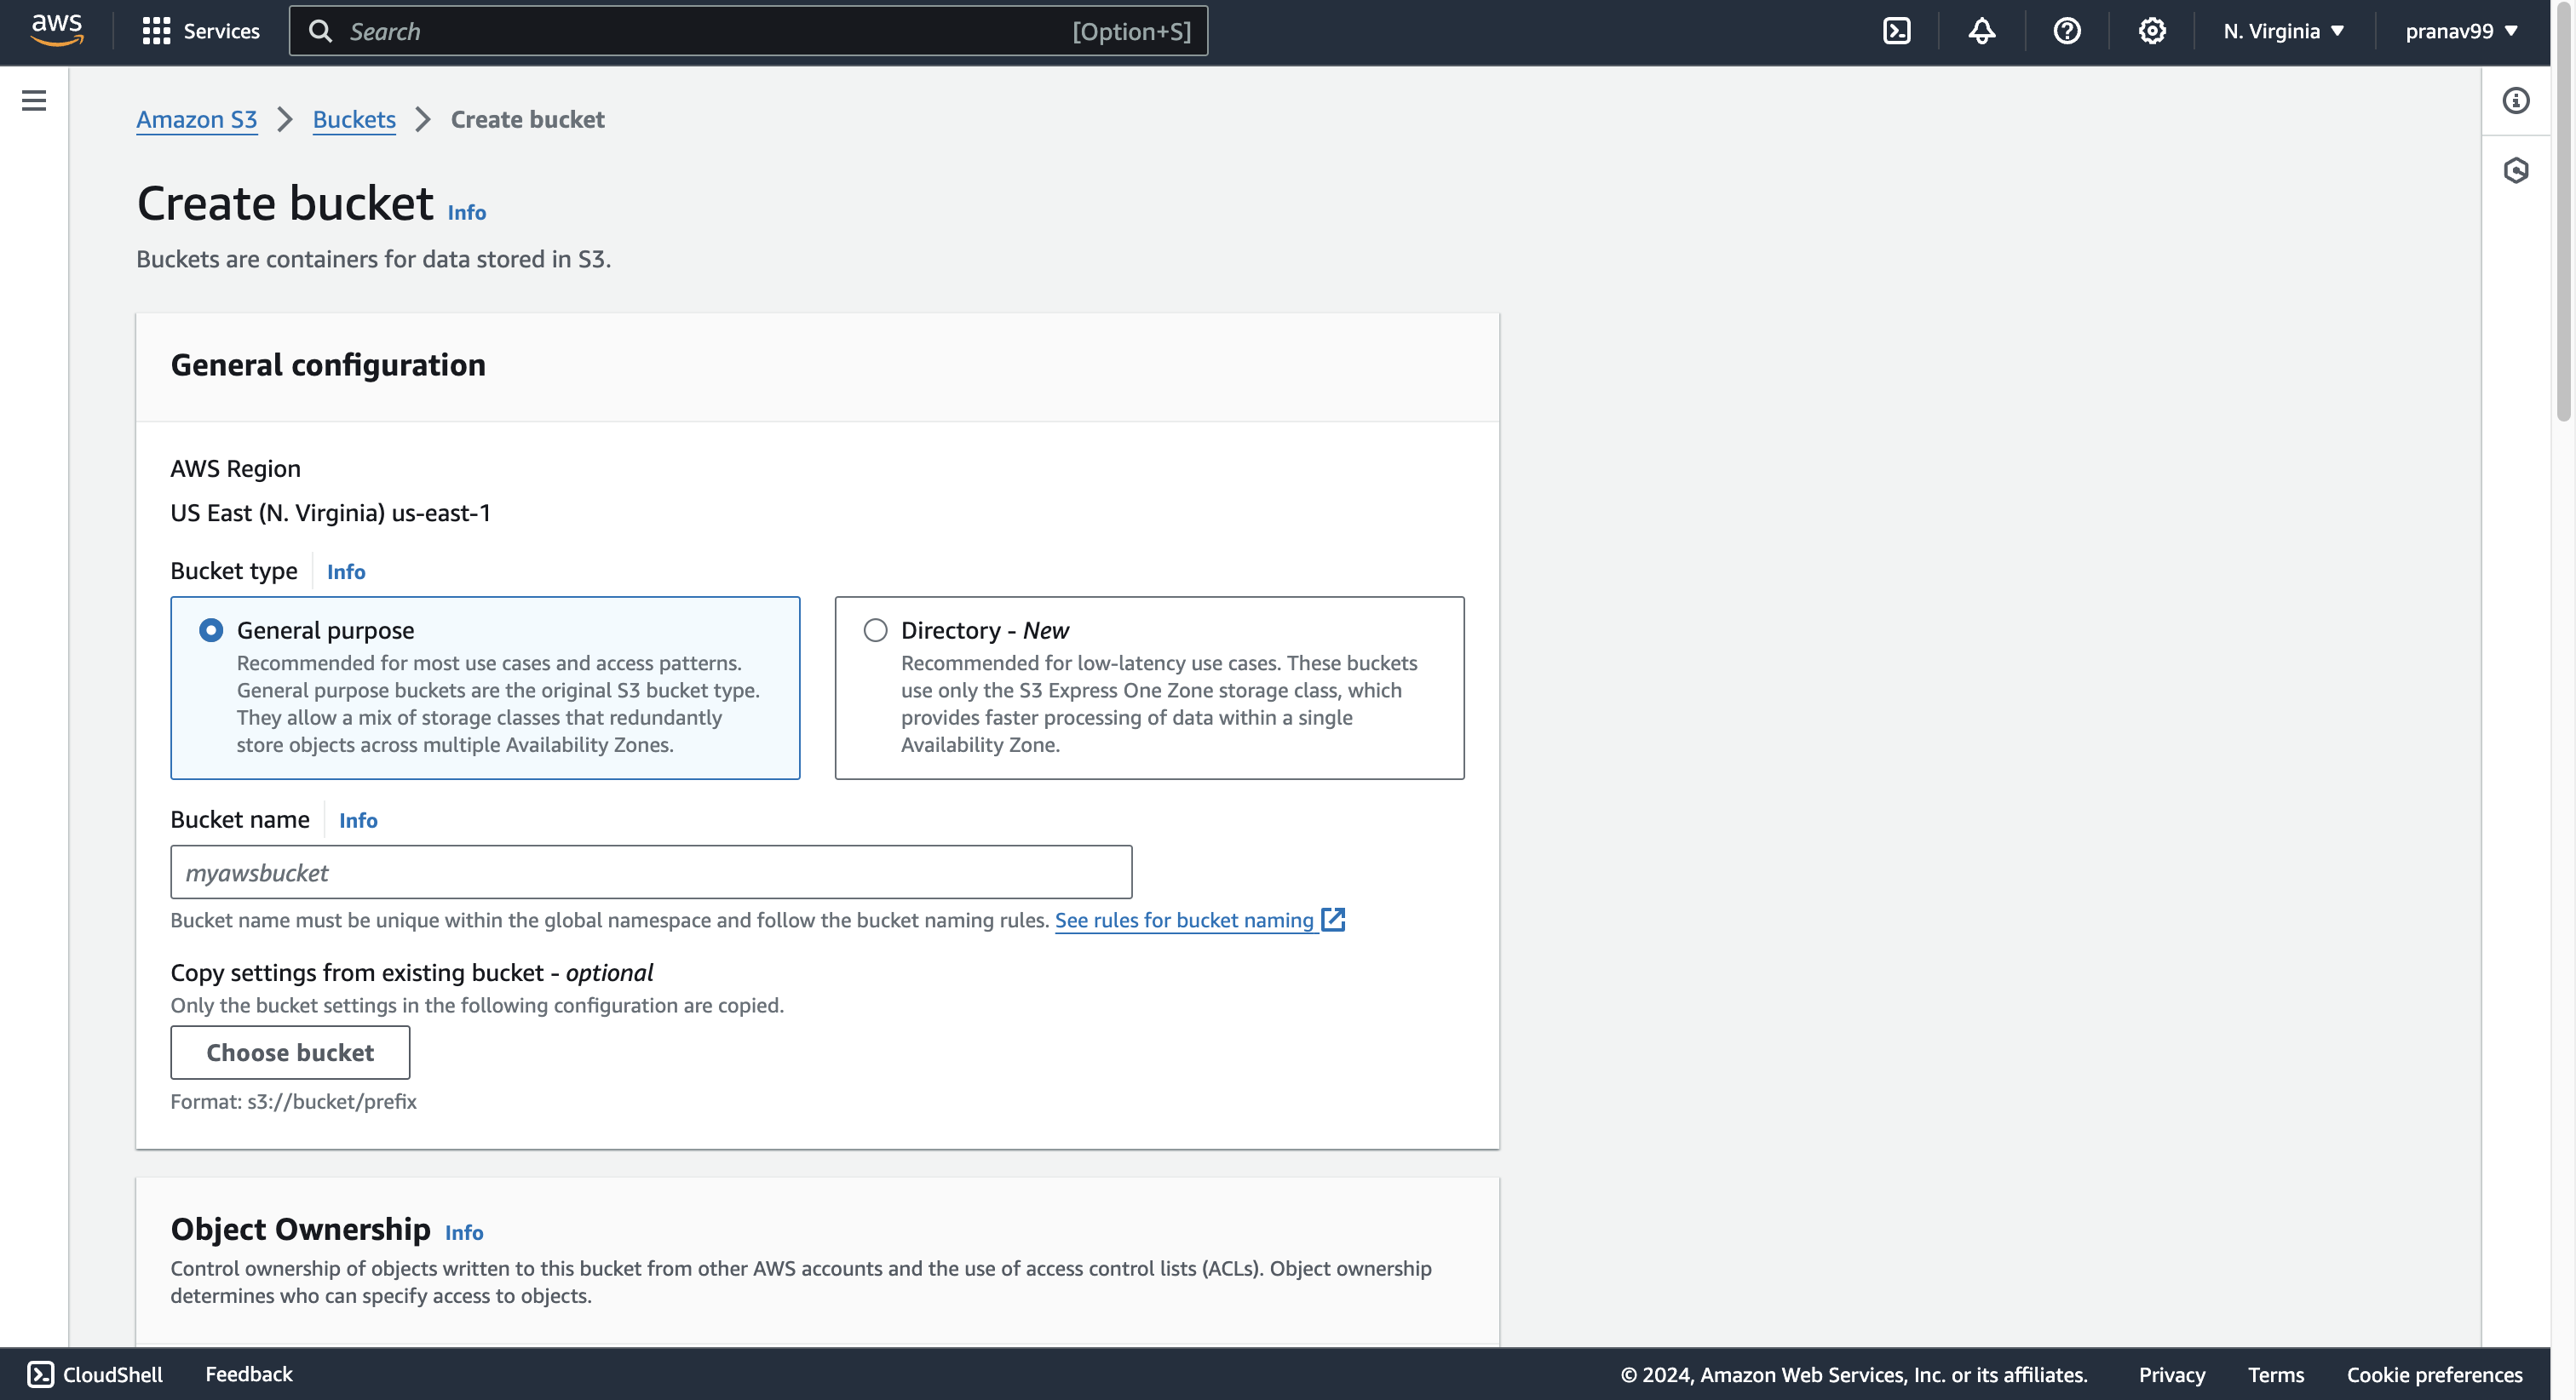
🛠️ Configure the Bucket:
Bucket name: Enter your desired bucket name. For naming conventions, refer to the naming convention guide.
Bucket type: Select General purpose.
📦 Bucket Types and Storage Classes:
General Purpose: Suitable for a wide range of use cases, from simple storage and backups to more complex data processing. Most users will find this option adequate for their needs.
Other Options:
🤖 Intelligent-Tiering: Automatically moves data to the most cost-effective access tier based on usage patterns.
📁 Standard-IA (Infrequent Access): Ideal for data that is accessed less frequently but requires rapid access when needed.
🏢 One Zone-IA: Similar to Standard-IA but stored in a single availability zone, offering lower cost with less redundancy.
❄️ Glacier: For long-term data archiving with retrieval times ranging from minutes to hours.
📦 Glacier Deep Archive: Lowest-cost storage for long-term archiving with retrieval times of up to 12 hours.
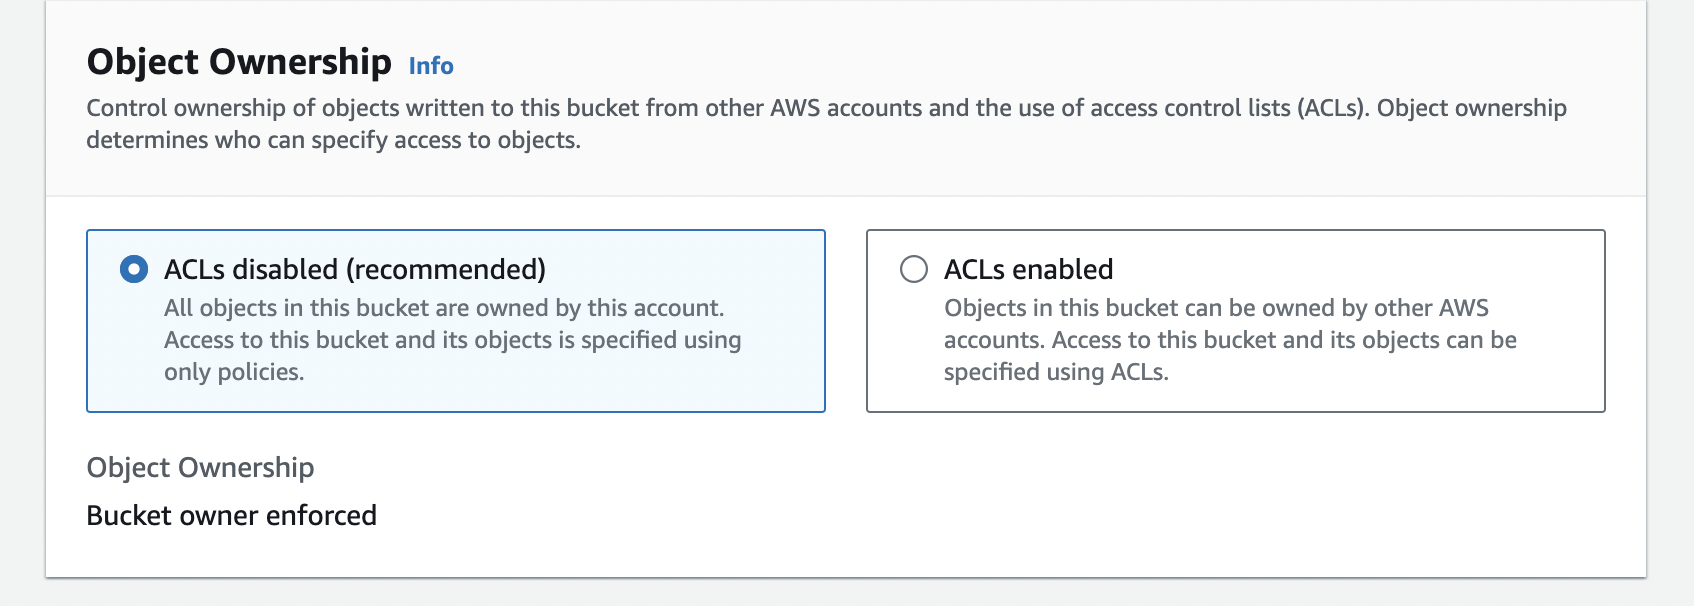
🔒 Object Ownership:
Select ACLs disabled.
Description: Access control lists (ACLs) are disabled to simplify permissions management.
Benefit: Simplifies bucket permissions by using bucket policies and IAM roles instead.
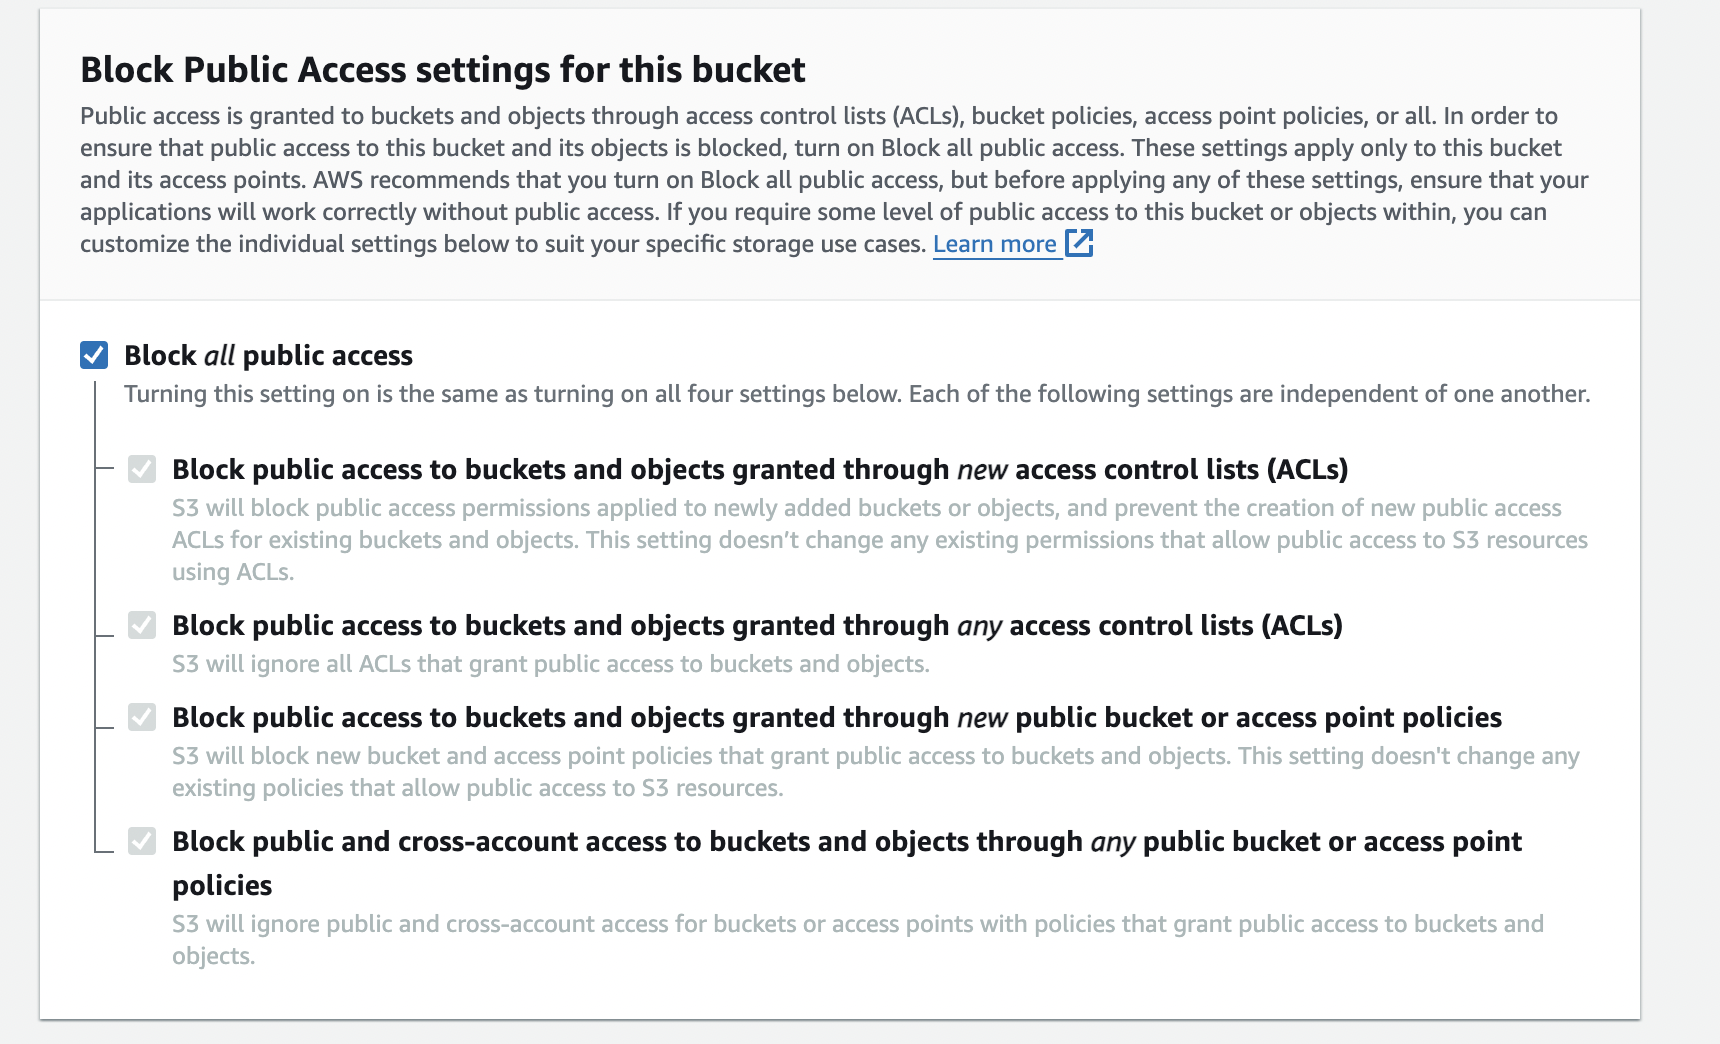
🚫 Block Public Access Settings:
Leave the default settings.
Default Settings: Prevents public access to your bucket and objects, ensuring data privacy and security.
Benefit: Protects your data from unintended public exposure.
🚫 Bucket Versioning:
Disable this option.
Disabled: Prevents maintaining multiple versions of objects.
Benefit: Reduces storage costs by not storing multiple versions of the same object.

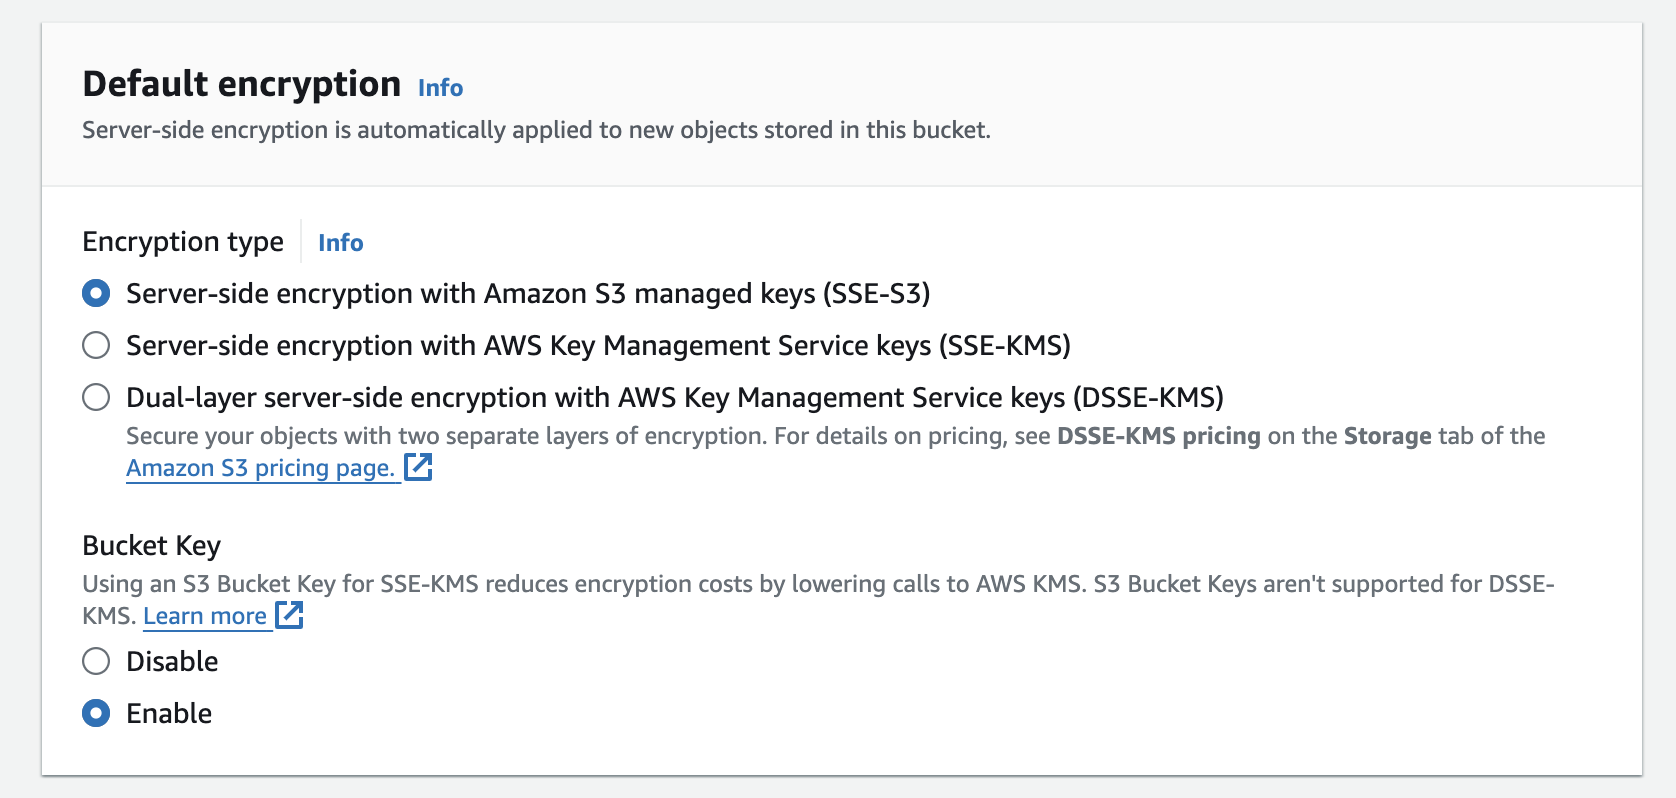
🔒 Default Encryption:
Leave the default settings.
Default Settings: Keeps encryption options at their default values, meaning data is stored without additional encryption unless specified.
Benefit: Simplifies the setup process while still allowing you to enable encryption later if needed.
🆕 Create the Bucket:
Click on Create bucket.

📤 Upload an Image:
You will be directed to the Upload page where you can upload an image or folder.
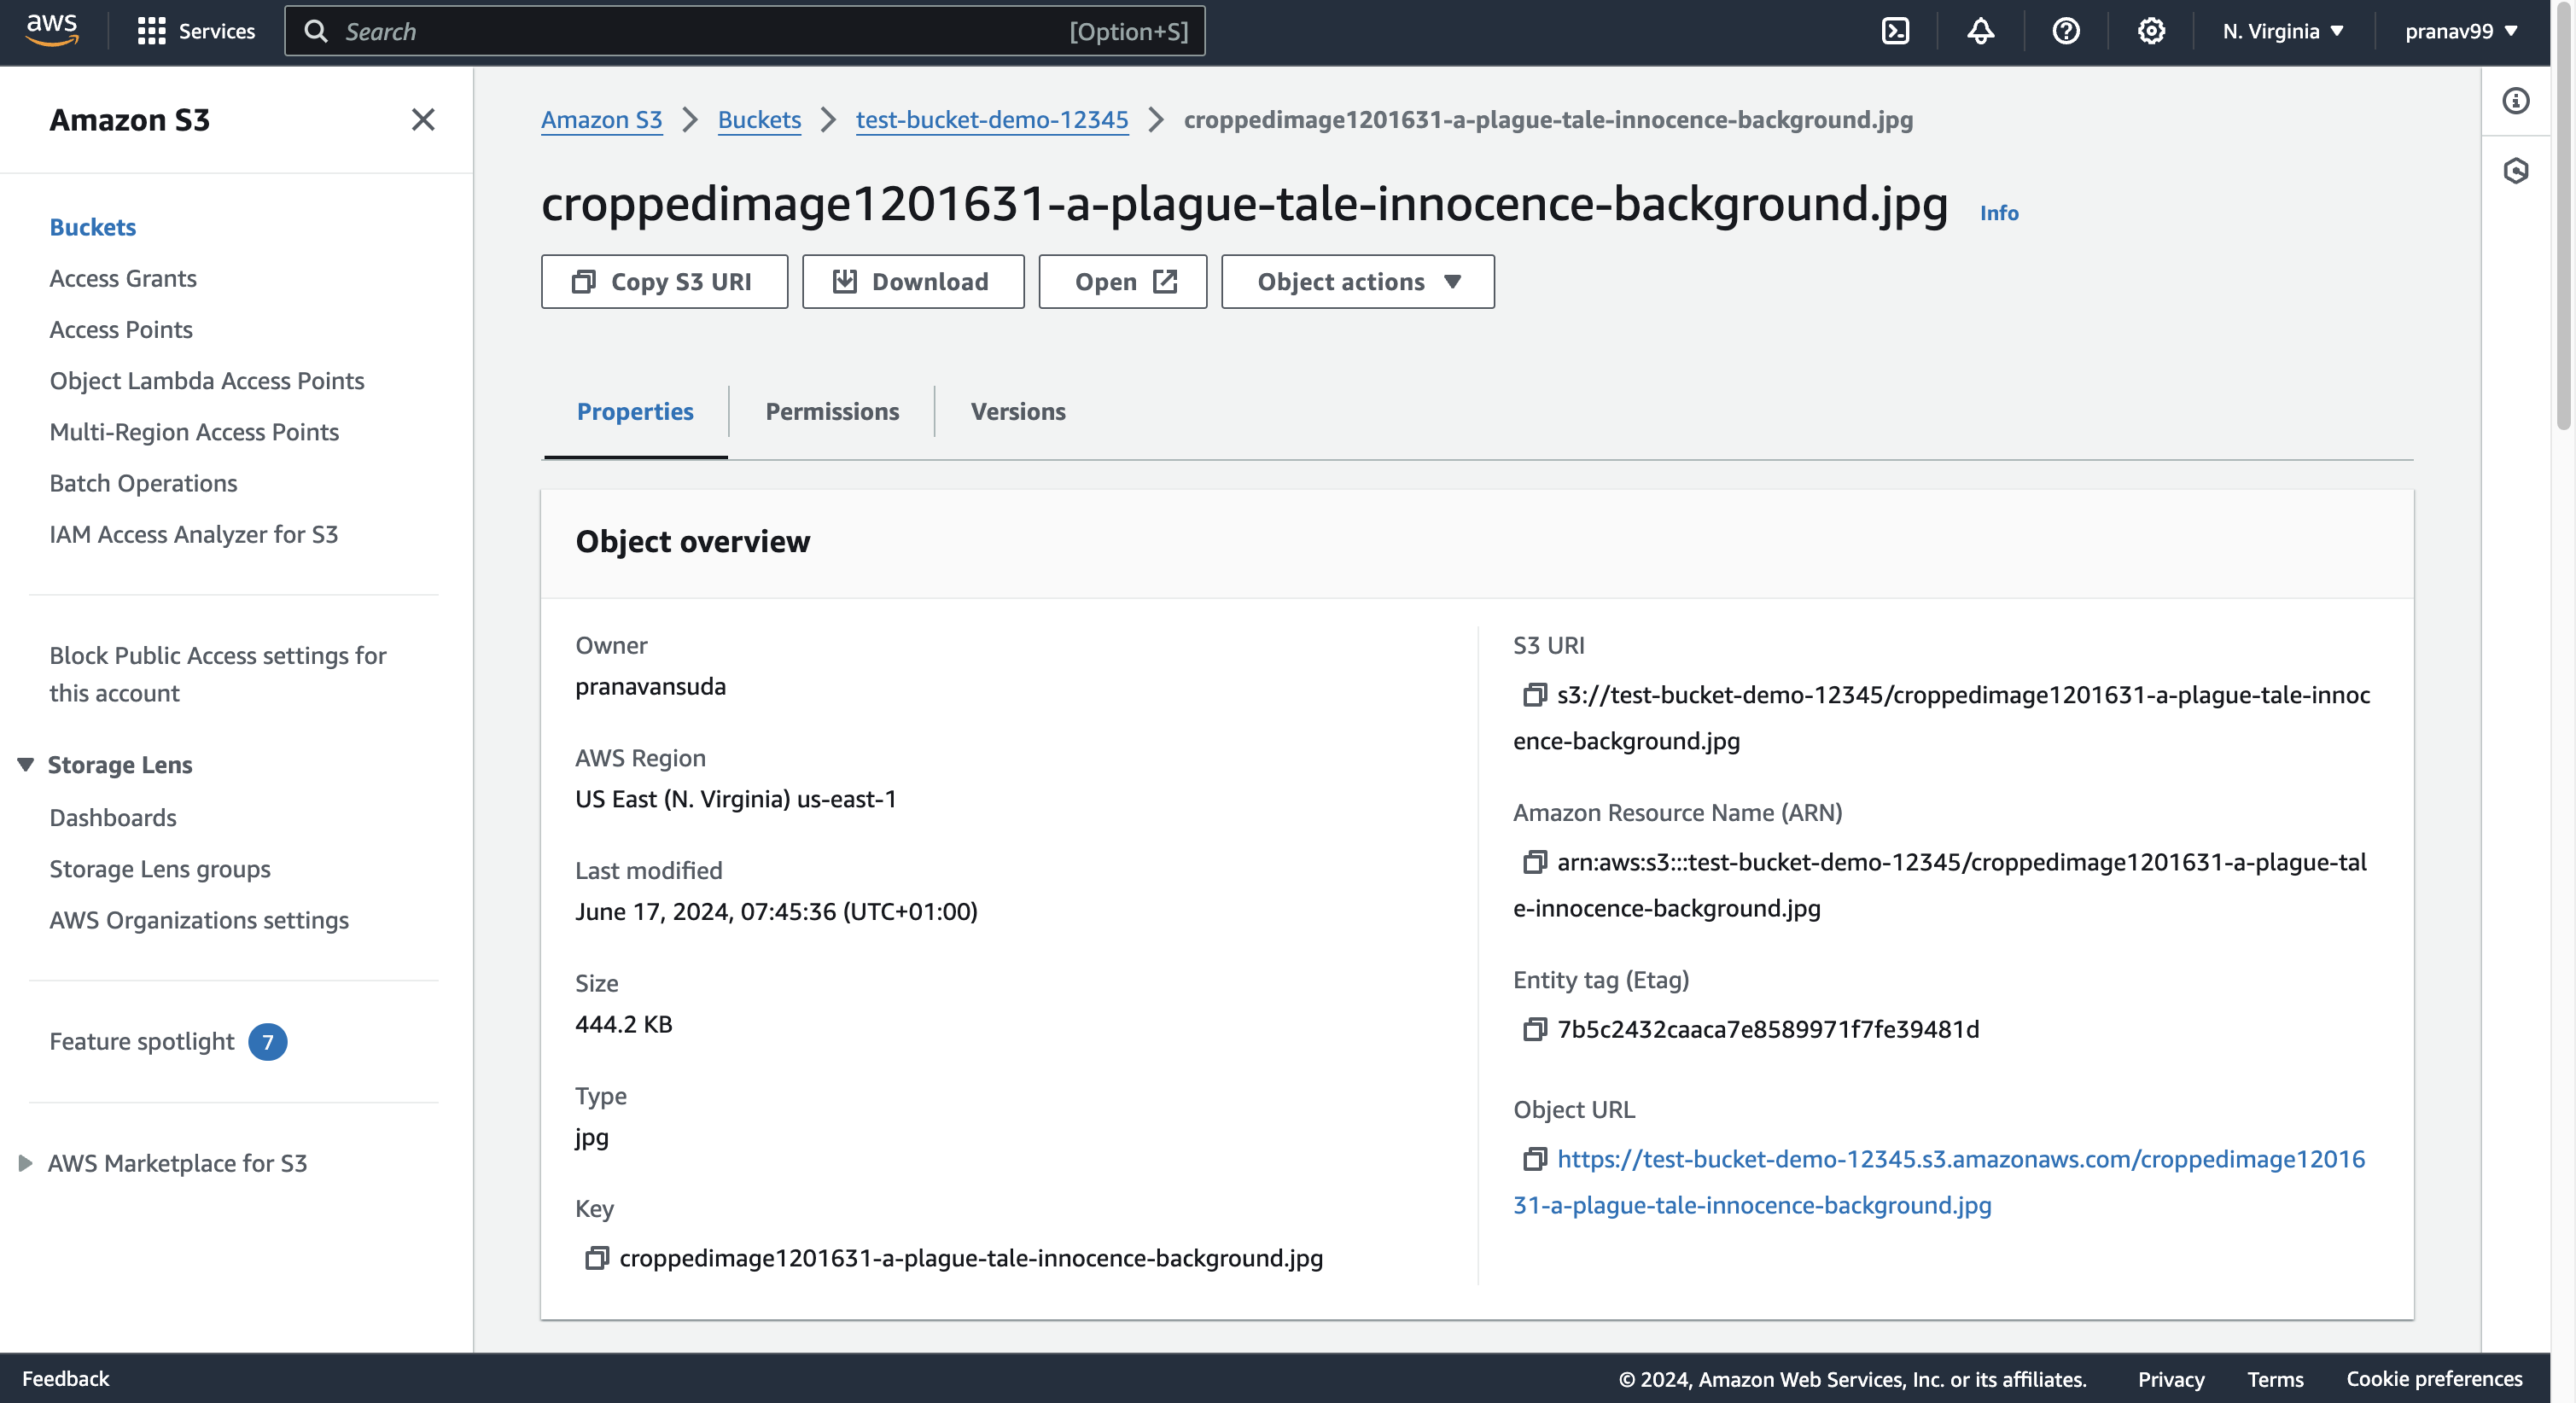
After uploading the image, click on the image.

In the top right, select the open option.
🖼️ View the Image:
You can view the image after clicking the open option.
Note: If you try to open the object URL option, it won't open because the bucket is not set to public. The reason why the open link works is that it makes a request to the server using your private security credentials.
By following these steps, you will successfully create an S3 bucket, upload an image, and view it within the AWS Management Console. Configuring public access and other settings can be done later as needed.
Subscribe to my newsletter
Read articles from Pranavan Sudhahar directly inside your inbox. Subscribe to the newsletter, and don't miss out.
Written by
