How to Build Your Own VPN for Free Using AWS
 Bhanu Teja

Setting up your own Virtual Private Network (VPN) can be a great way to secure your online activity without relying on third-party services. In this guide, we will walk you through building a VPN using Amazon Web Services (AWS) at no cost, assuming you have a free-tier AWS account. This tutorial is tailored for both Windows and macOS users.
What is a VPN?
A VPN (Virtual Private Network) creates a secure connection between your device and the internet. It masks your IP address, encrypts your internet traffic, and allows you to browse the web securely and privately. VPNs are commonly used to protect sensitive data, access geo-restricted content, and maintain privacy.
Prerequisites
AWS Account: You need an AWS account with free-tier access. If you don’t have one, sign up at AWS Free Tier.
Windows or macOS Computer: The instructions below will cover steps for both operating systems.
Step-by-Step Guide to Building Your VPN
Step 1: Log In to Your AWS Account
Go to the AWS Management Console and log in using your credentials.
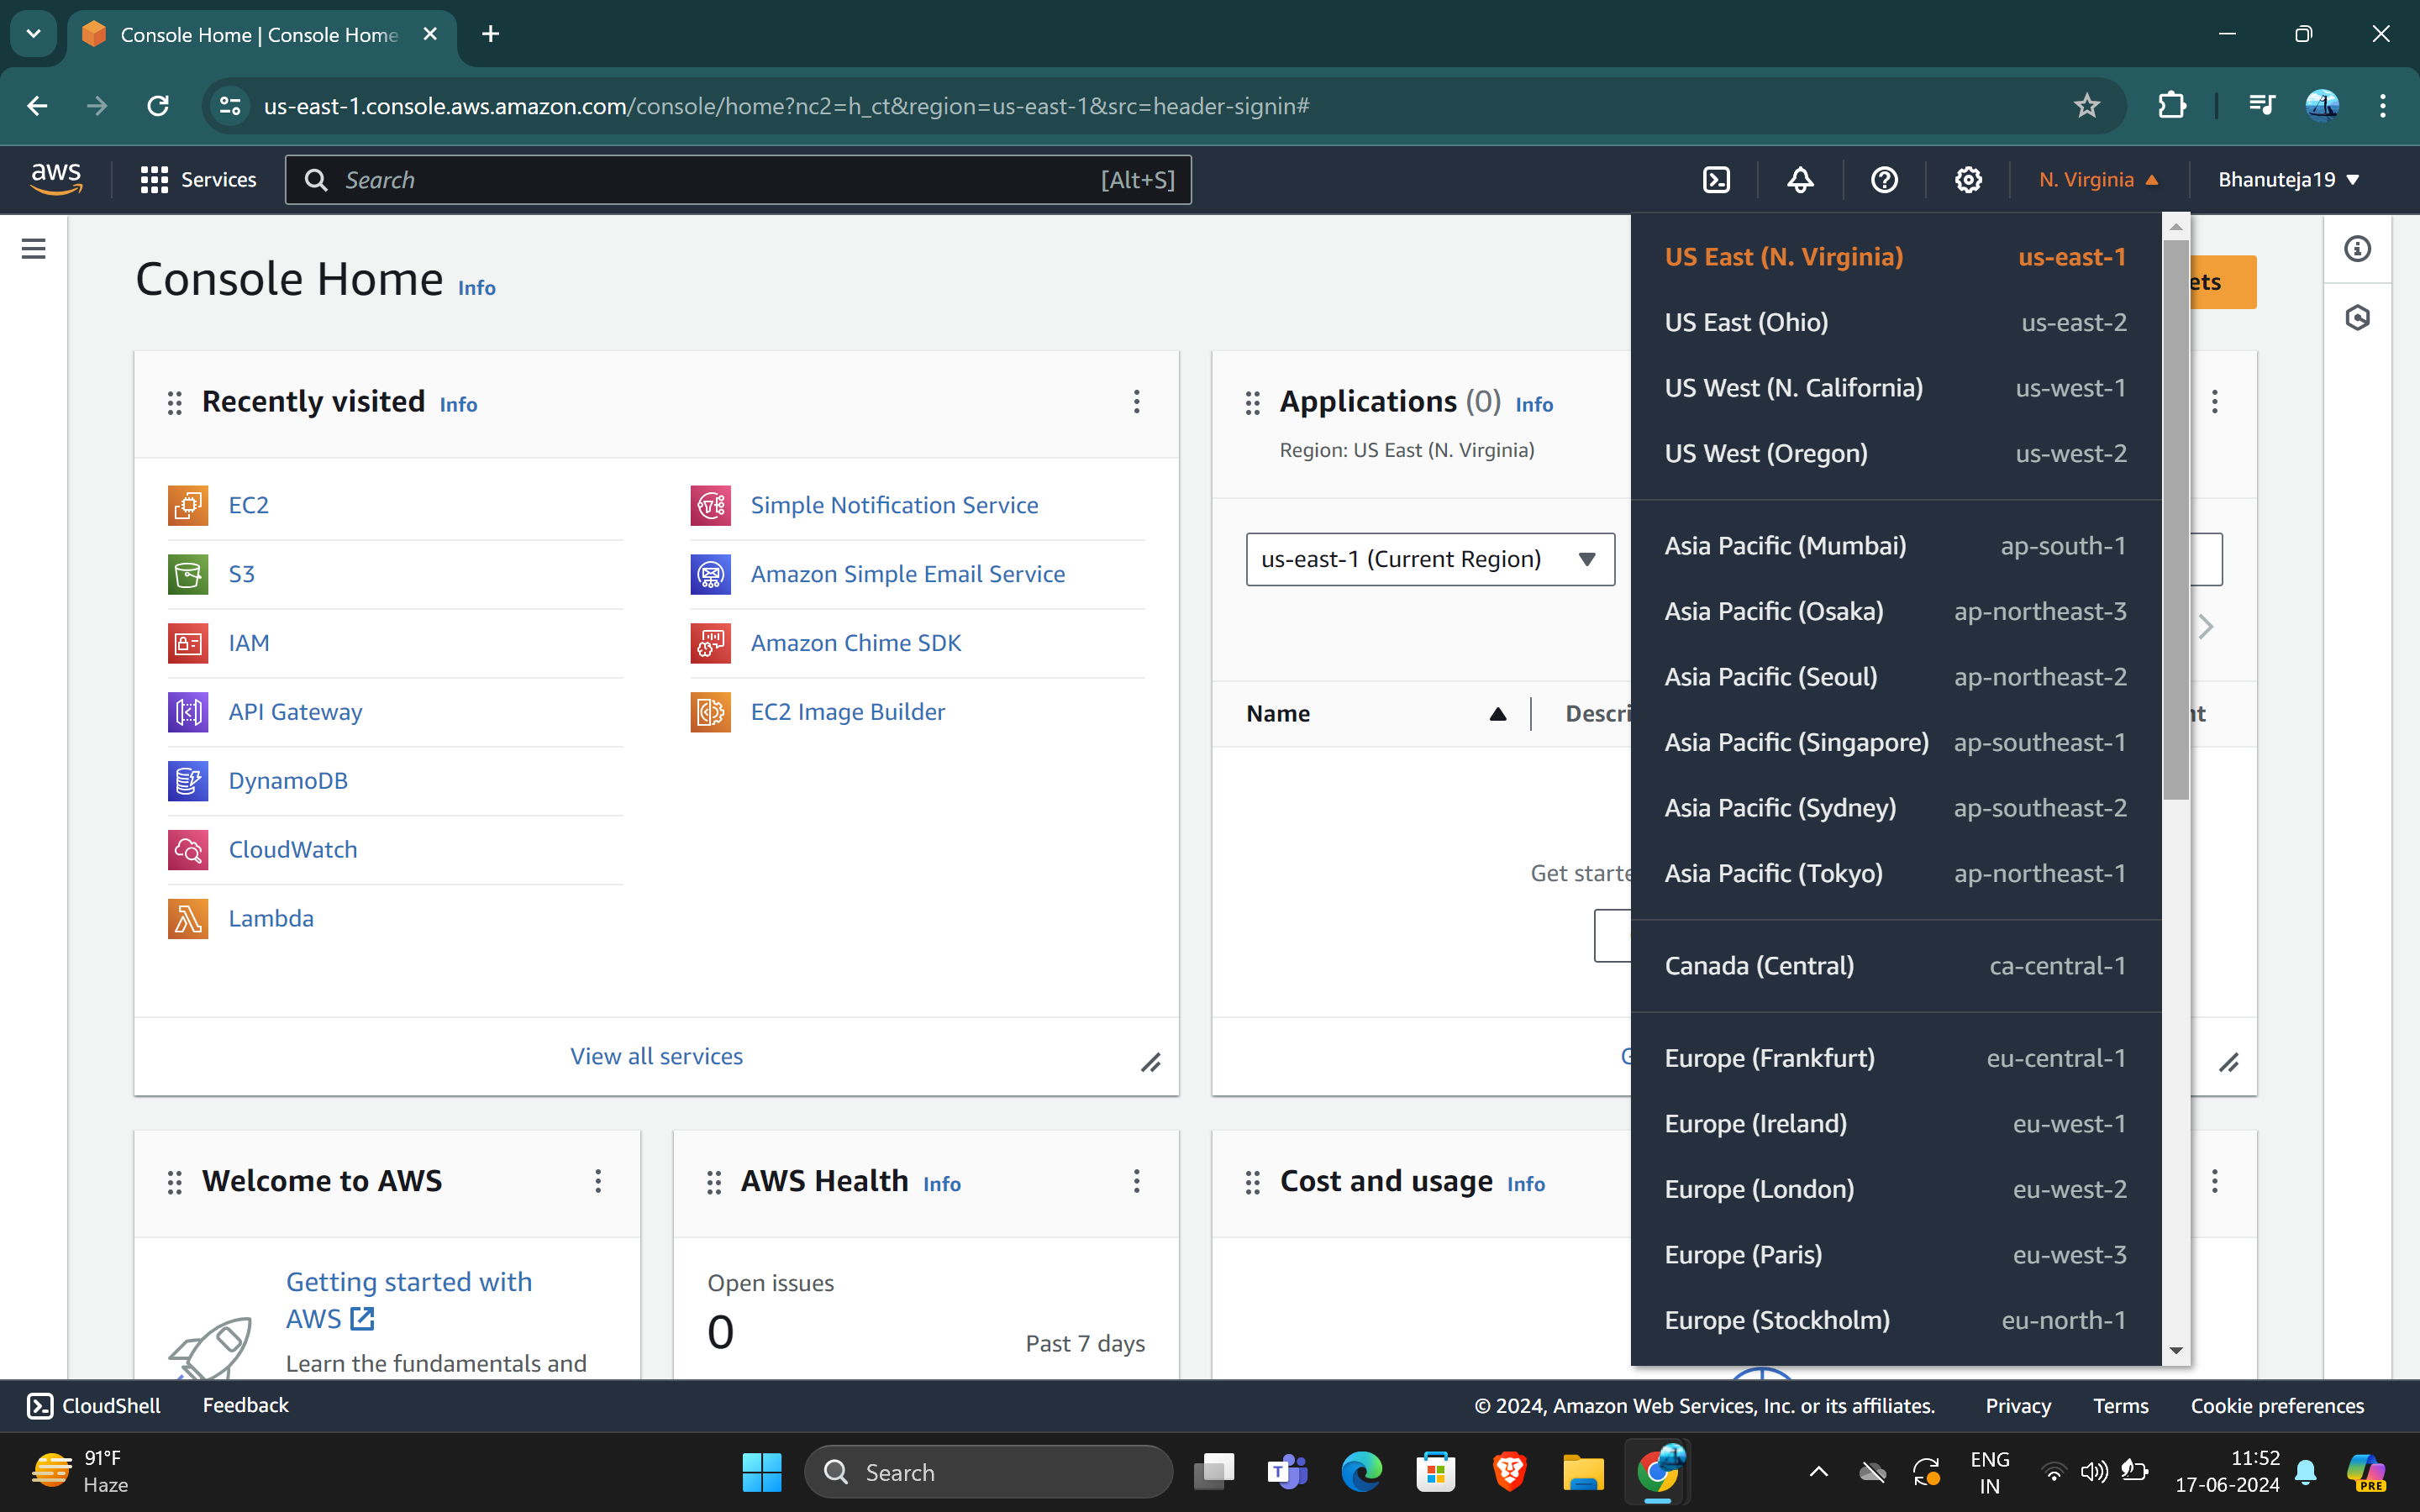
Change the AWS Region: Select the region where you want to host your VPN server. This can be done from the drop-down menu in the top-right corner of the console.
Step 2: Create an EC2 Instance
Navigate to EC2: In the AWS Management Console, click on "EC2" under the "Services" tab.
Launch Instance: Click on "Launch Instances".
Name Your Instance: Give your instance a meaningful name, like “MyVPN”.
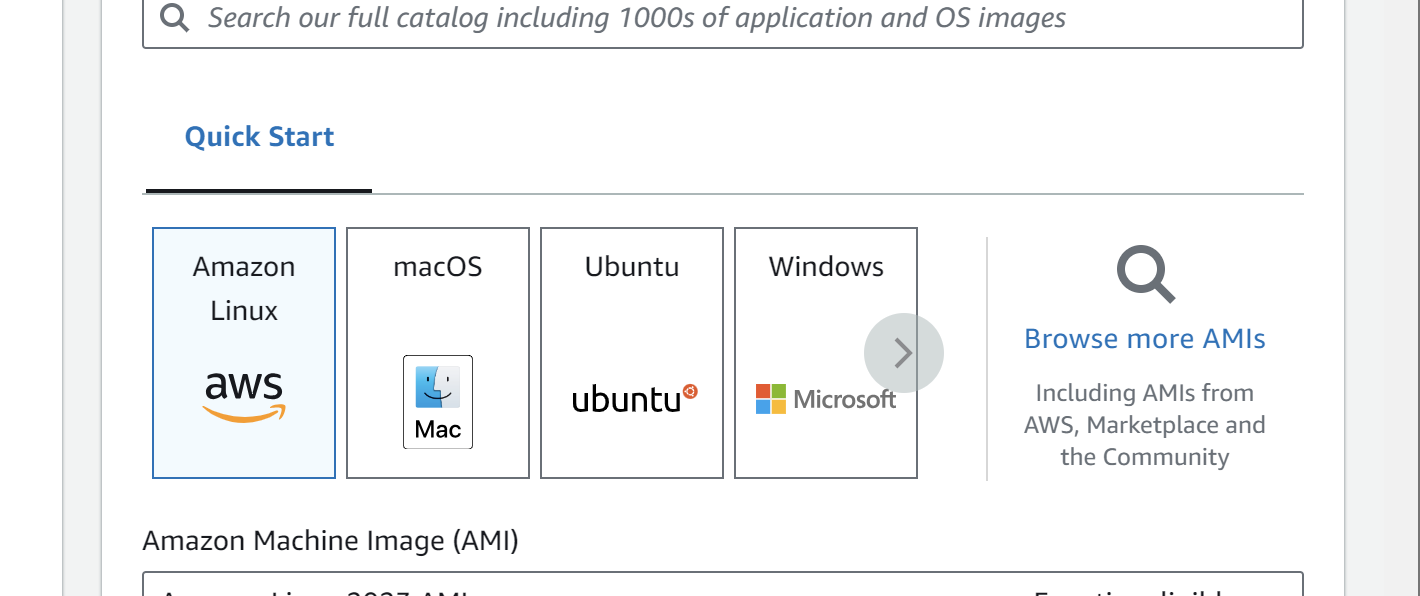
Choose an AMI (Amazon Machine Image):
Click on "Browse more AMIs".
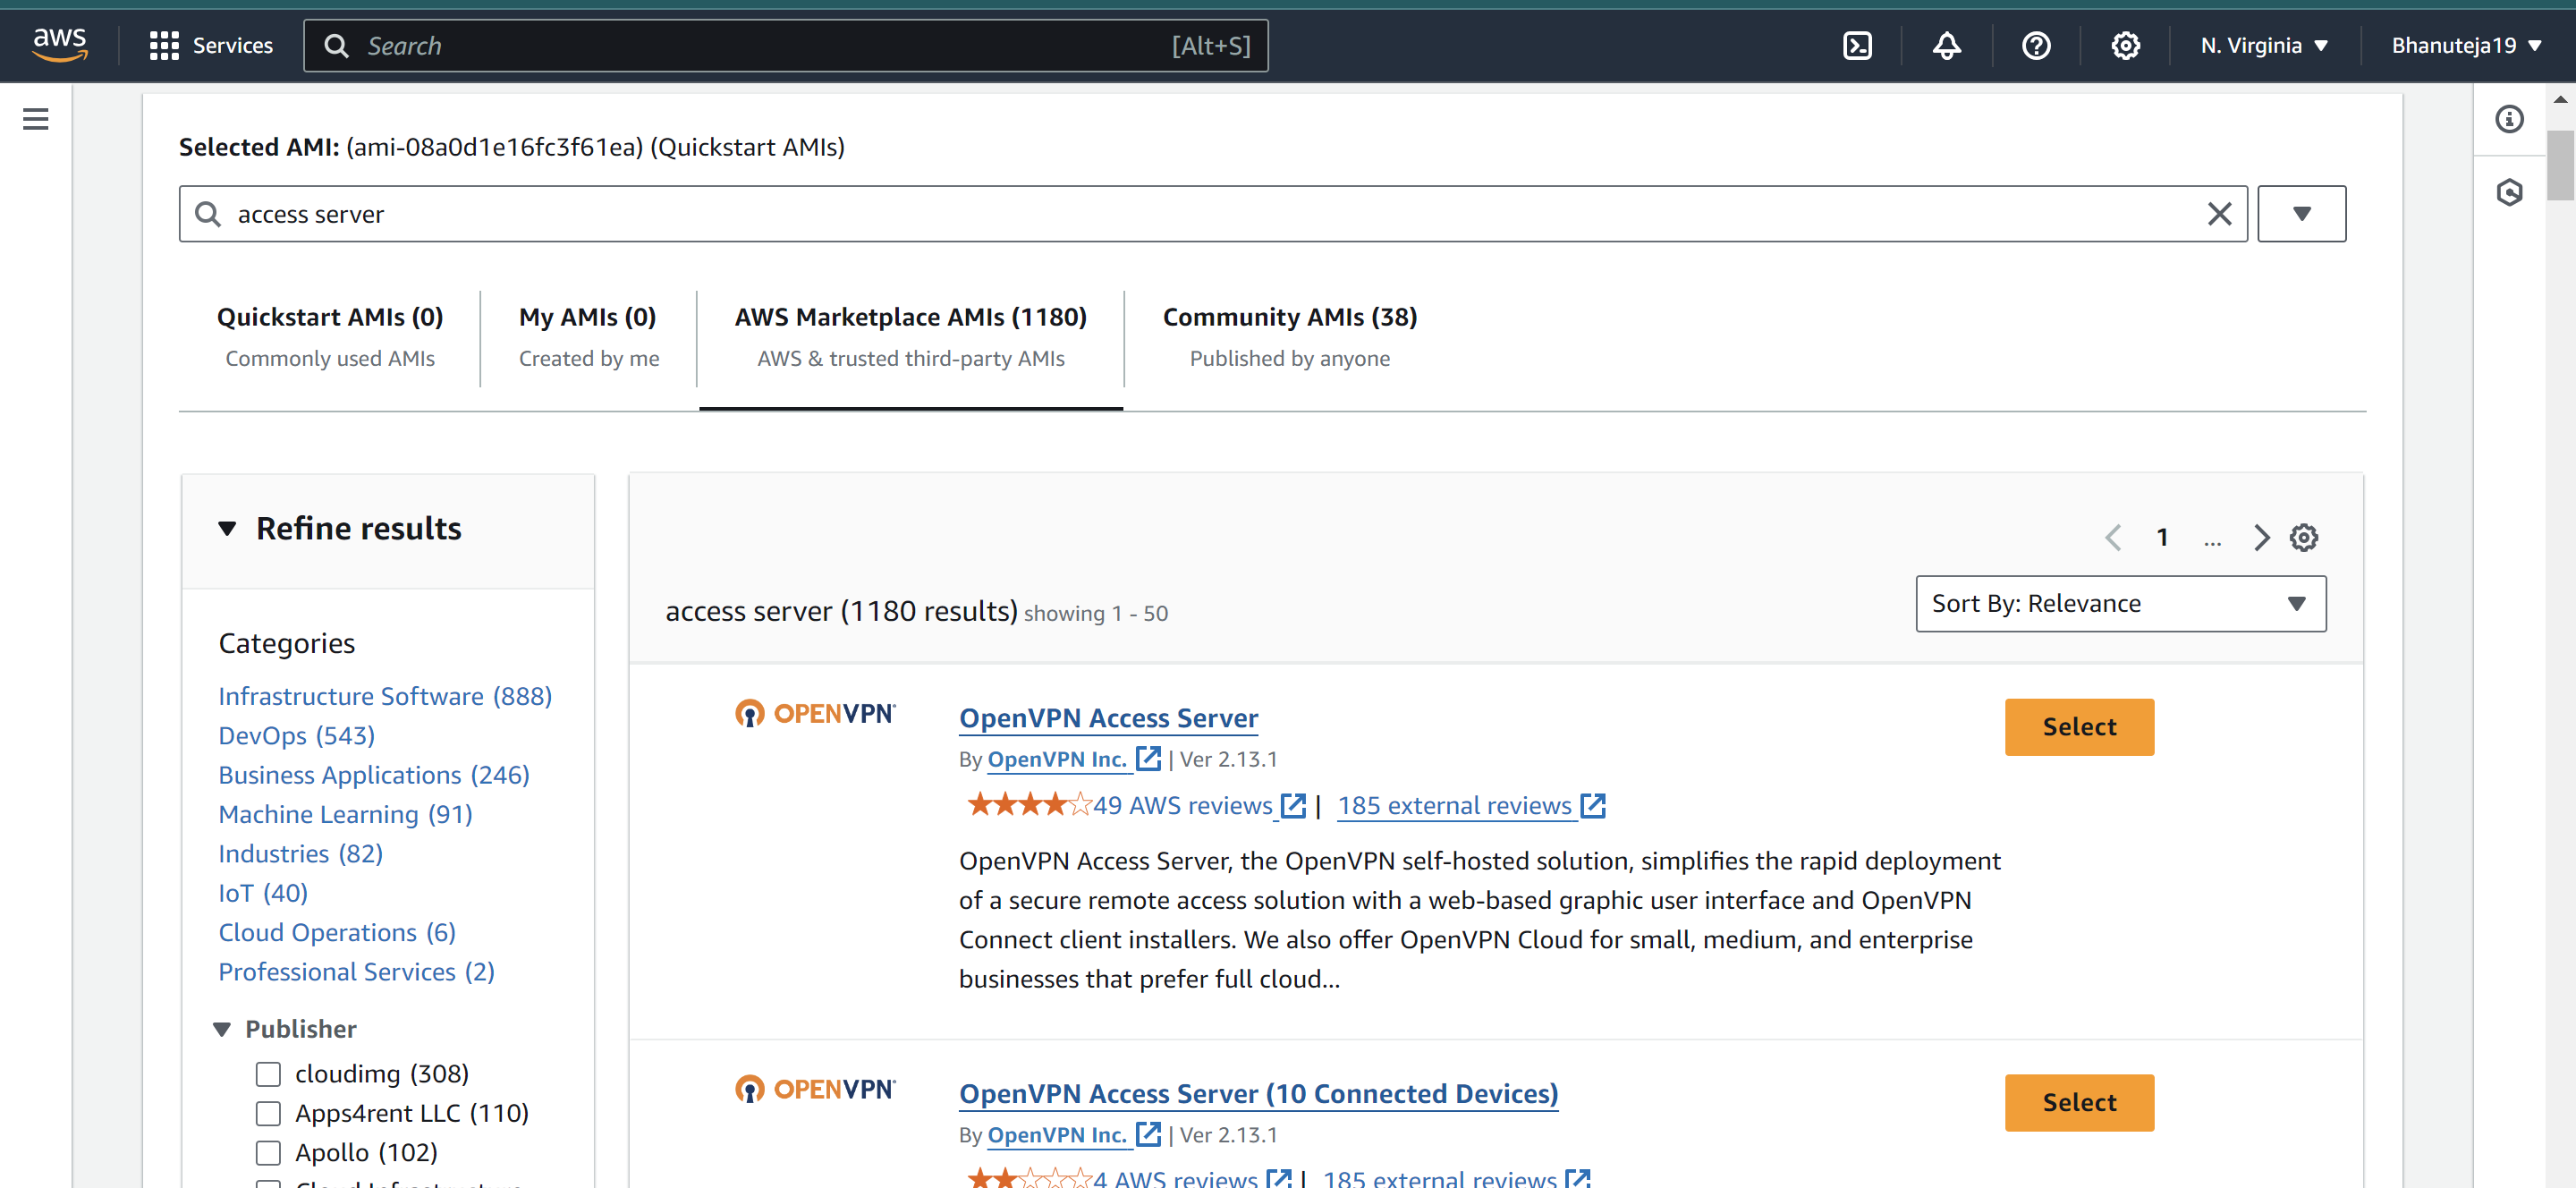
In the search bar, type "Access Server" and hit enter.
Select the OpenVPN Access Server image from the Amazon Marketplace AMIs.
Step 3: Subscribe and Configure the Instance
Subscribe to OpenVPN: Click on "Continue to Subscribe" for the OpenVPN image.
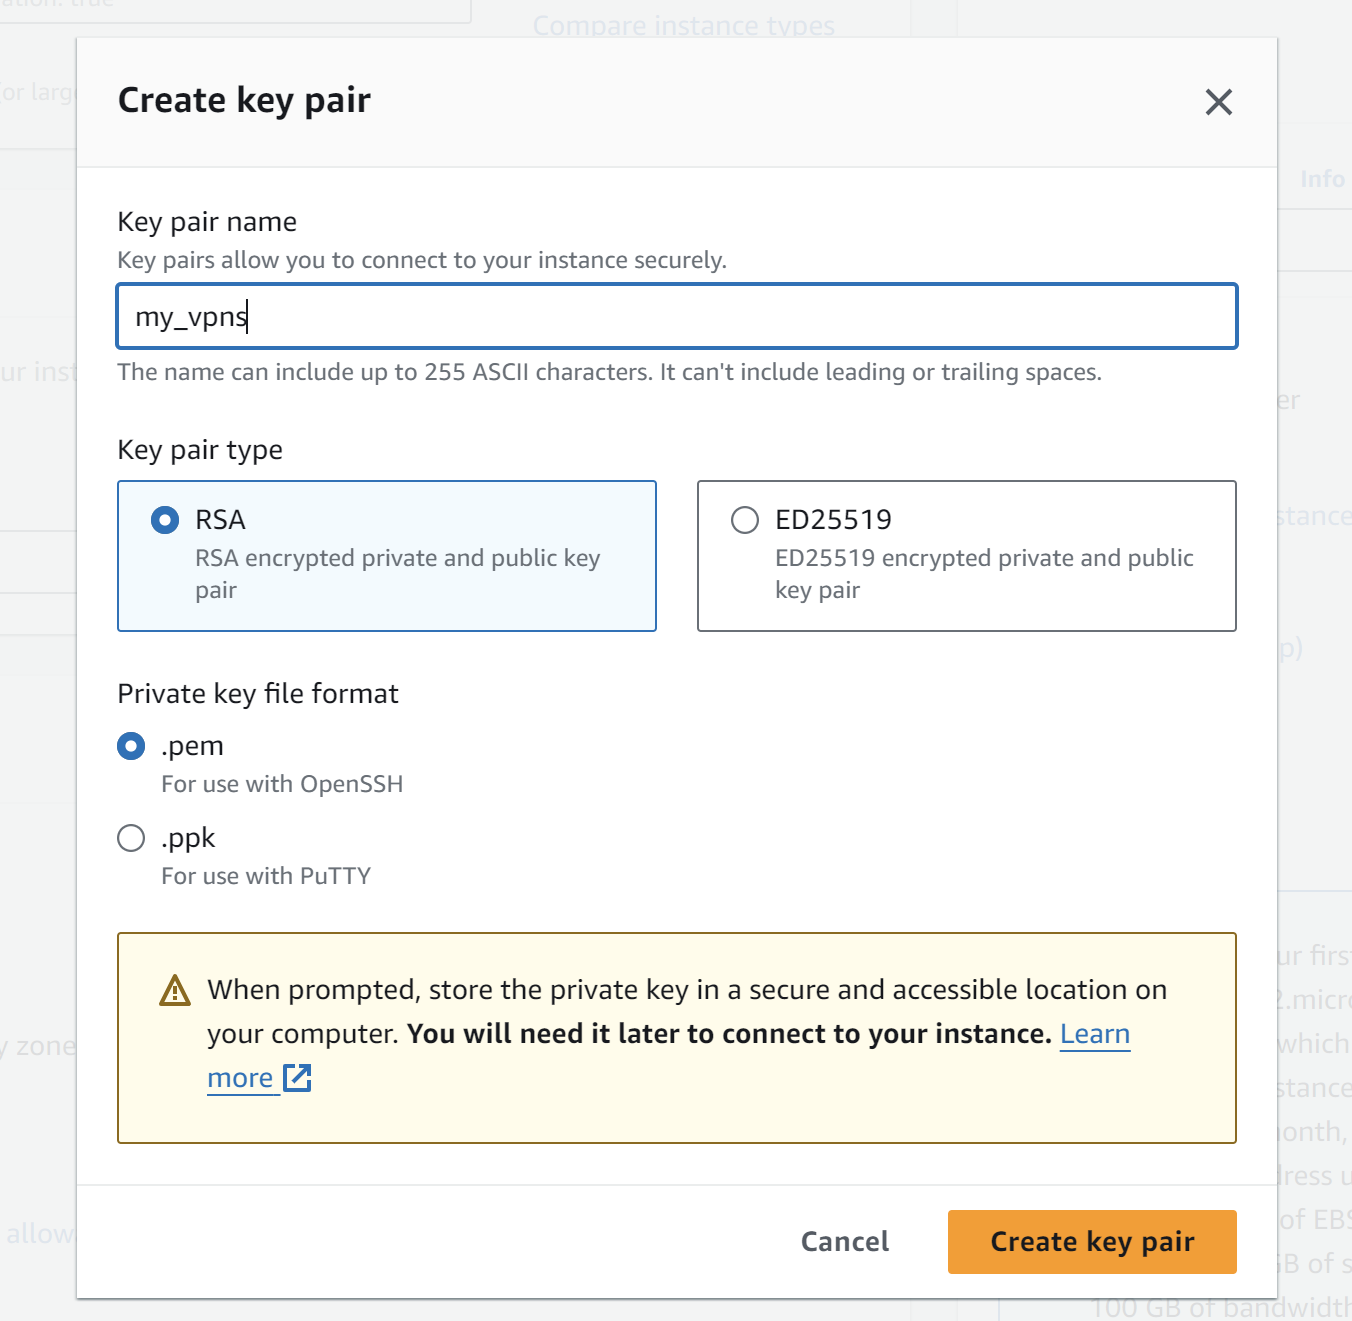
Create Key Pair:
Click "Create a new key pair".
Give your key pair a name and download the
.pemfile. Store it securely as you will need it to connect to your instance.
Network Settings: Leave the default network settings unchanged.
Launch the Instance: Click on "Launch Instance".
Step 4: Connect to the Instance
Depending on your operating system, choose one of the following methods to connect to your instance:
For Windows Users:
EC2 Instance Connect:
Go to the "Instances" page in the EC2 Dashboard.
Select your instance and click on "Connect".
Choose "EC2 Instance Connect" and click "Connect" again.
For macOS Users:
Using SSH Client:
Open the Terminal application.
Use the SSH command to connect to your instance:
bashCopy codessh -i /path/to/key-pair-name.pem openvpnas@instance-public-ipv4-addressReplace
/path/to/key-pair-name.pemwith the path to your downloaded key pair file, andinstance-public-ipv4-addresswith your instance's public IPv4 address, which you can find in the EC2 Console.Exmaple:
ssh -i /my_vpn.pem openvpnas@ec2-34-230-1-102.compute-1.amazonaws.com
Step 5: Configure OpenVPN Access Server
Ini**tial Setup Questions:**
- After connecting, you will be prompted to answer a few setup questions. Press Enter to accept the default answers.
Set Admin Password:
- You will be asked to create a password for the OpenVPN Admin account. Enter your desired password.
Step 6: Access OpenVPN Admin and Client URLs
Admin URL: Note down the Admin URL provided in the terminal. This is typically
https://instance-public-ipv4-address:943/admin.Client URL: Note down the Client URL, typically
https://instance-public-ipv4-address:943/.
Step 7: Log In to OpenVPN Admin Interface
Open a Web Browser: Go to the Admin URL.
Login: Enter the username
openvpnasand the password you created.Dashboard: You will see the OpenVPN Admin dashboard, where you can manage your VPN settings.

Step 8: Connect Using OpenVPN Client
Go to Client URL: Open the Client URL in your browser.
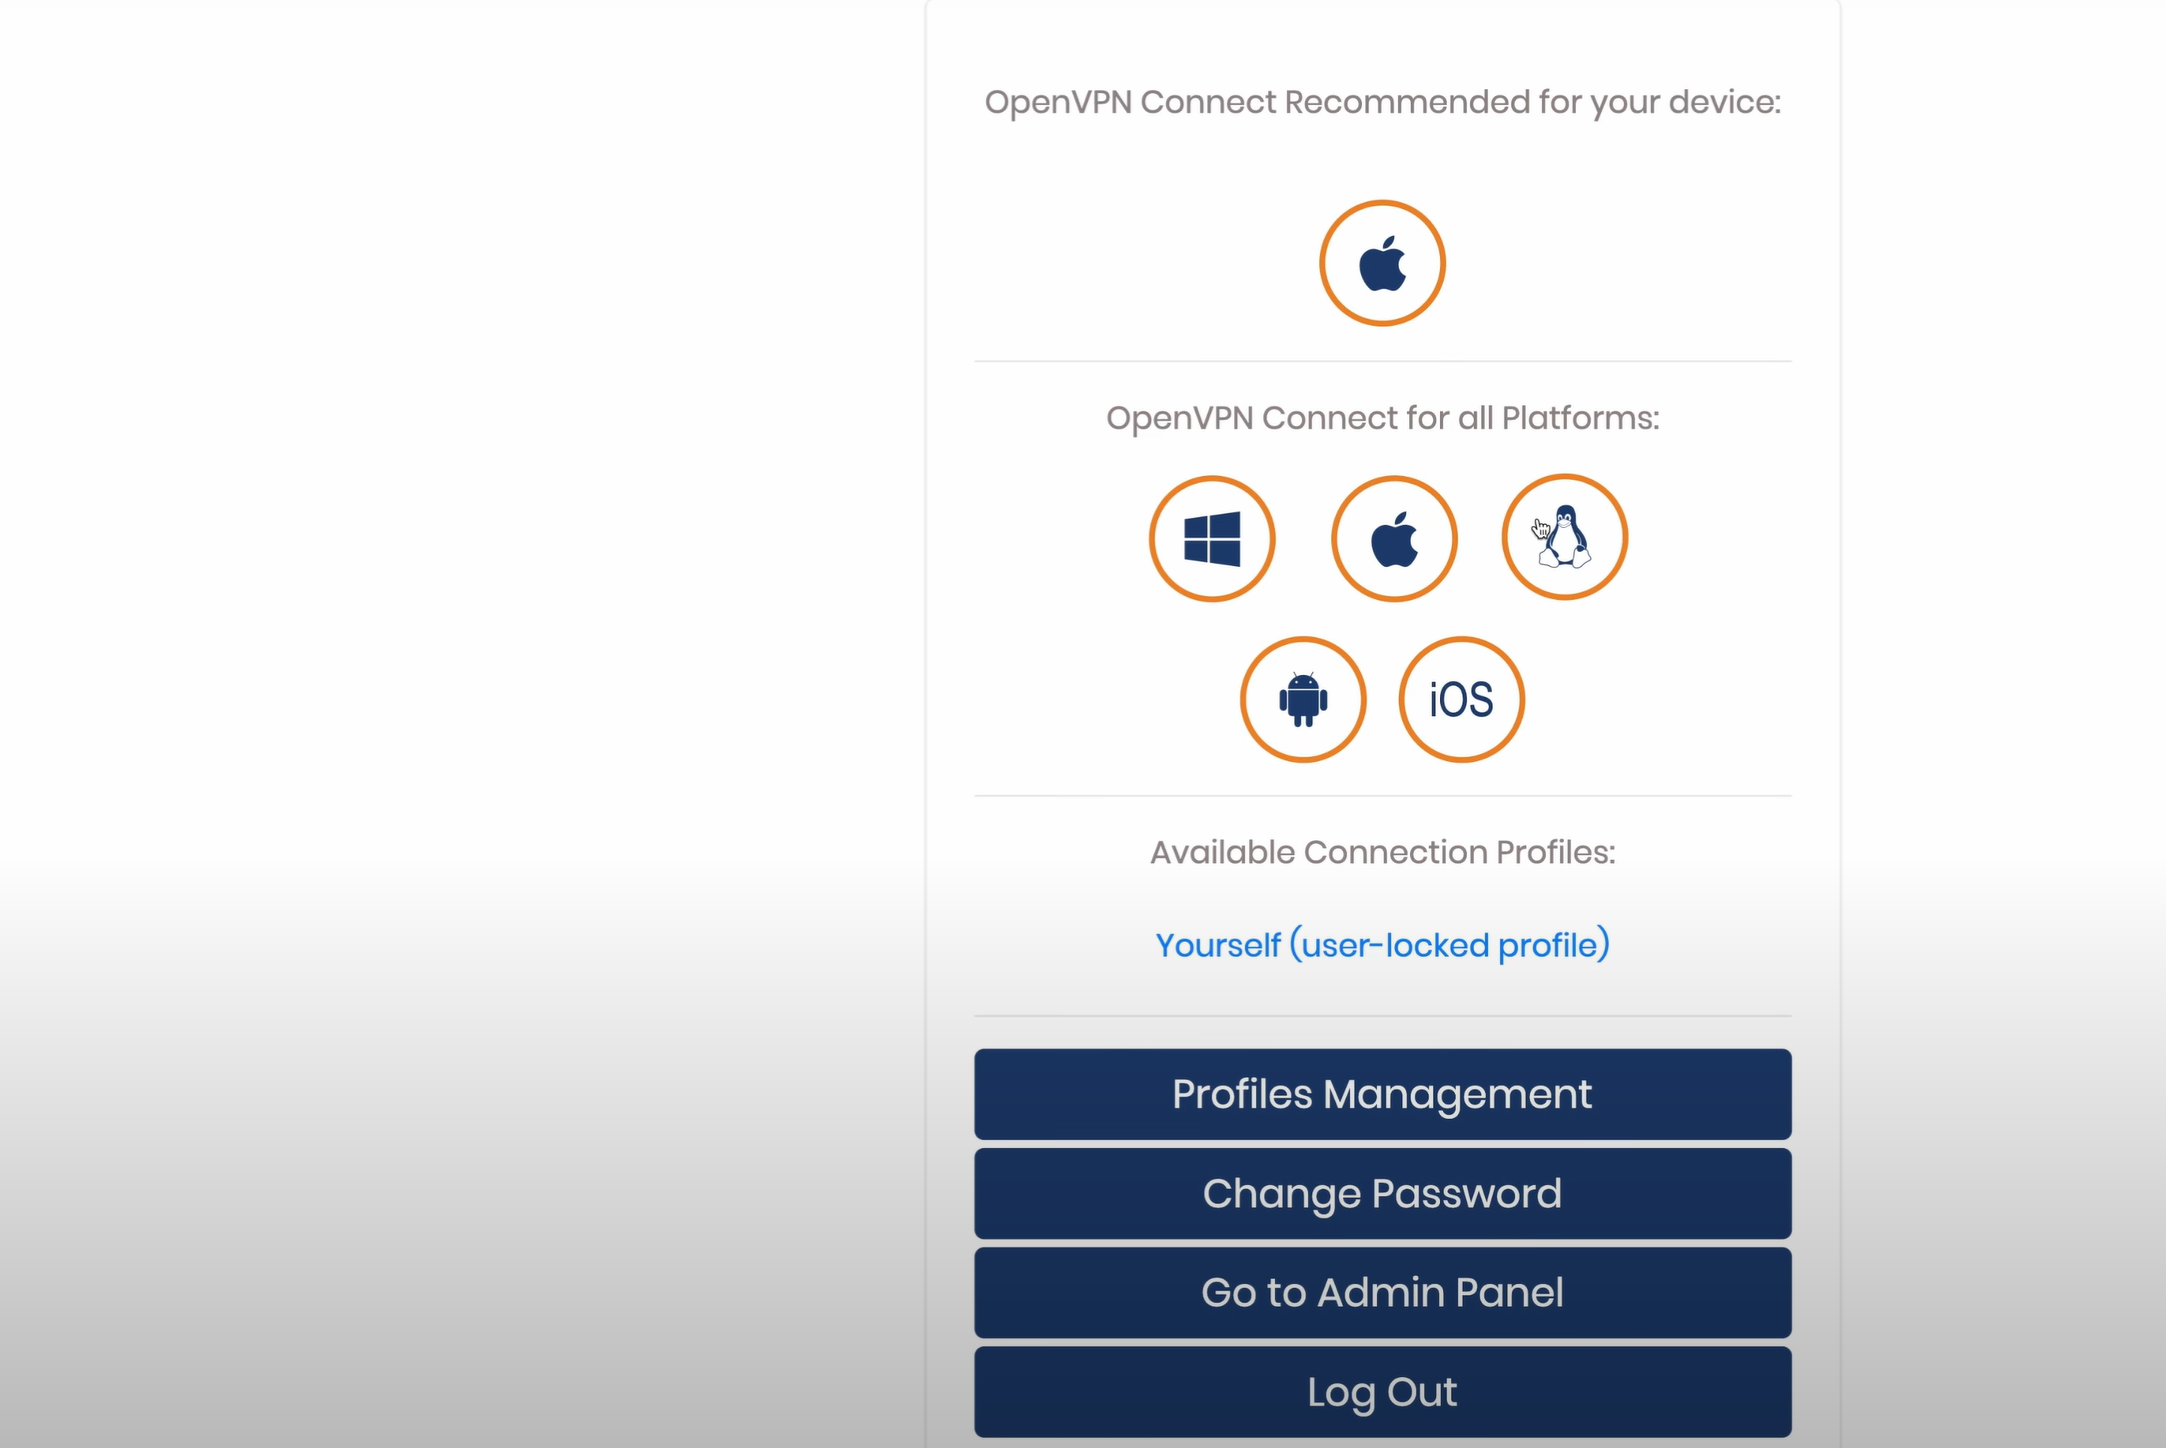
Download the OpenVPN Client: Choose the appropriate version for your device (Windows, macOS, etc.) and install it.
Connect to VPN:
Open the OpenVPN client application.
Enter your VPN server credentials and connect.
Step 9: Verify Your VPN Connection
Check IP Address:
Go to Google and search “where is my IP” or visit WhatIsMyIP.com.
Confirm that your IP address reflects the location of your VPN server.
Step 10: Terminate the EC2 Instance
Navigate to EC2 Instances: Go back to the AWS EC2 Dashboard.
Terminate Instance:
Select your VPN instance.
Click "Instance State" and then "Terminate Instance".
By following these steps, you’ve successfully set up your own VPN using AWS for free. Remember to terminate your instance to avoid unnecessary charges. Enjoy a secure and private browsing experience with your self-hosted VPN!
Subscribe to my newsletter
Read articles from Bhanu Teja directly inside your inbox. Subscribe to the newsletter, and don't miss out.
Written by
