Deploying an Image and Facial Analysis App on AWS EC2
 Sri Durgesh V
Creating an application that leverages the power of deep learning for image and facial analysis can be an exciting and rewarding project. By utilizing AWS EC2 and its robust set of tools and services, you can set up a scalable and efficient environment to deploy your app. This guide will walk you through the entire process, from launching an EC2 instance to deploying your Node.js application.
Steps to Build the App
Step 1: Create an EC2 instance and an IAM role
Go to AWS Console and log in to your account.
Navigate to EC2:
- Select
EC2from the service's dropdown.
- Select
Click on “Launch Instance”
Click on "Launch Instance".
Choose "Amazon Linux 2023" as the AMI.
- Select "t3.micro" as the instance type.
In the "Network settings" field, tick the checkbox beside
Allow HTTP traffic from the internetfor allowing traffic from HTTP requests.Now click on "Edit" button in this network settings section. In the "Inbound Security Group Rules" section. Click on "Add security group rule"(The new rule is going to allow us to access the EC2 instance from anywhere. We would be using the port number 3000 to host our application, but you can use any port number greater than 1024.), and now enter these details :-
Type : Custom TCP
Port range : 3000
Source Type : Custom
Source :
0.0.0.0/0,::/0
Create and Assign IAM Role:
Toggle "Advanced details."
Click "Create new IAM role" to open the IAM Roles page.
Click "Create Role" and select "EC2" under "Common use cases." Click "Next."
Search for
AmazonRekognitionFullAccessand select it. Click "Next."Optionally, add tags and click "Next."
Assign a name (e.g., "aws-rekog") and click "Create Role."
Return to the previous tab and refresh the IAM role list.
Select the created role ("aws-rekog").
Navigate to the previous tab, and click on the refresh button near “Create new IAM role”
Select the role that you just created. In my case, it is
aws-rekog. Now, the IAM role field should look like this.
Now review your configuration and click on Launch Instance.

Return to the Instances tab to see the instance you've just created.
[NOTE] You can also proceed without creating a key pair for this demo.
Step 2: Connect to the EC2 Instance
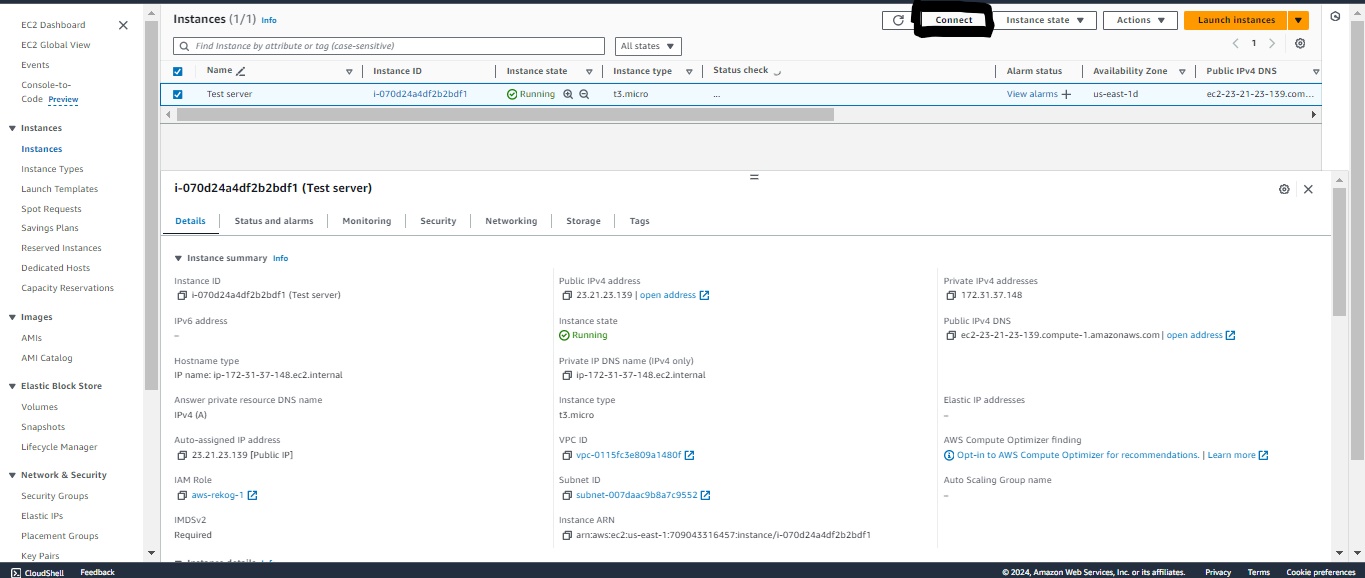
Upon the creation of the EC2 instance, initiate a connection by selecting the "Connect" option. This action establishes an SSH link to the EC2 instance.

Subsequently, a terminal window will display, as illustrated below.

Step 3: Install Node.js and Setup the Application
Install Node.js:
- Execute the following commands in the terminal:
    curl -o- https://raw.githubusercontent.com/nvm-sh/nvm/v0.39.0/install.sh | bash

    export NVM_DIR="$HOME/.nvm"
    [ -s "$NVM_DIR/nvm.sh" ] && \. "$NVM_DIR/nvm.sh"
    [ -s "$NVM_DIR/bash_completion" ] && \. "$NVM_DIR/bash_completion"

    nvm –version

    nvm install node
Clone and Setup the Application:
- Run these commands:
    git clone https://github.com/Sric0/AI.git

    cd app/server

    npm install
Start the server:
node server.jsExecuting the command initiates the server, and the terminal interface should resemble the example provided below.

Step 4: Finish
To determine the Public IP address of your EC2 Instance, you have two options:
Locate the Public IP address in the bottom left corner of the terminal window.
Alternatively, retrieve the Public IP address through the EC2 Management Console. By selecting the recently created instance, the public IP address will be displayed within the instance's properties section.
Access the Application:
- Open a web browser and navigate to
http://<IP_ADDRESS>:3000(replace<IP_ADDRESS>with your instance's public IP).
- Open a web browser and navigate to
http://<IP_ADDDRESS>:3000
[NOTE] The <IP_ADDDRESS> will be the IP address that you found in the previous step. Example: http://3.81.219.5:3000
Congratulations
Subscribe to my newsletter
Read articles from Sri Durgesh V directly inside your inbox. Subscribe to the newsletter, and don't miss out.
Written by

Sri Durgesh V
Sri Durgesh V
As a Cloud Enthusiast, this blog documents my journey with Amazon Web Services (AWS), sharing insights and project developments. Discover my experiences and learn useful information about different AWS cloud services.