How do we configure AWS WAF to block or allow web requests.
 Utkarsh Gupta
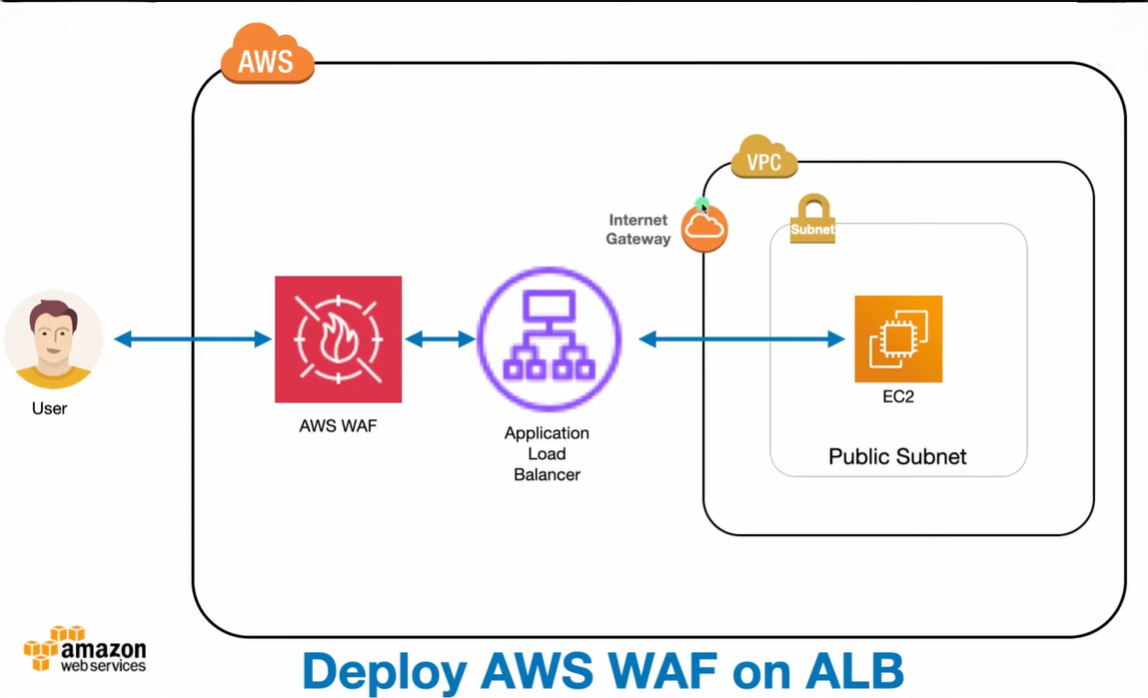
AWS WAF is a web application firewall that lets you monitor the HTTP and HTTPS requests that are forwarded to your protected web application resources. In this blog, we can protect the resource by- Application Load Balancer
AWS WAF lets you control access to your content. Based on criteria that you specify, such as the IP addresses
Web ACLs – You use a web access control list (ACL) to protect a set of AWS resources. You create a web ACL and define its protection strategy by adding rules. Rules define criteria for inspecting web requests and they specify the action to take on requests that match their criteria.
Step-by-Step Implementation
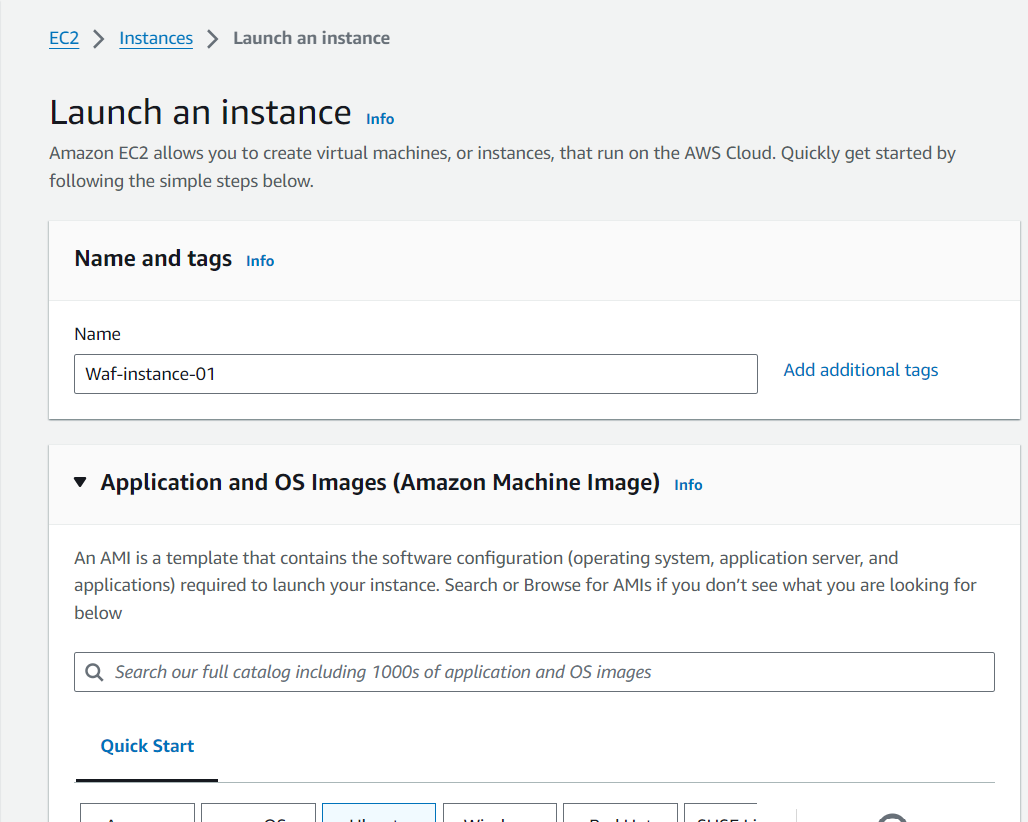
Step 1: Create an EC2 instance
I have already explained in my previous blog how to create VPC, use this link to learn how to create a VPC: https://utkarsh80.hashnode.dev/create-custom-virtual-private-cloud
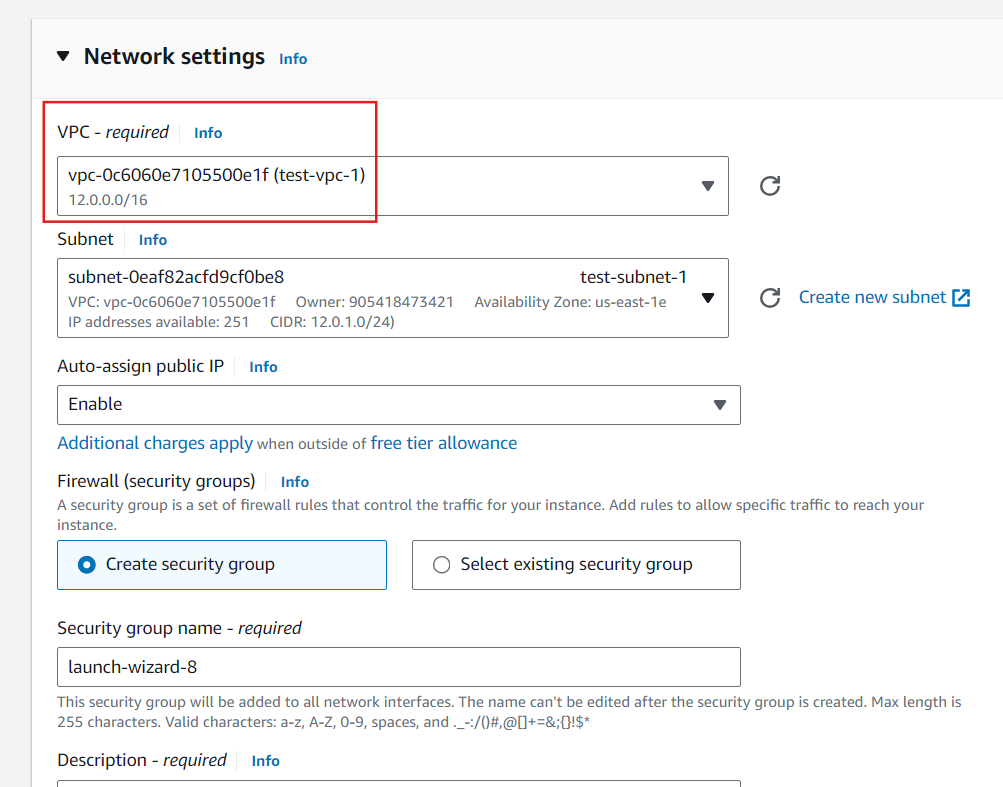
VPC we already created:

We use test-vpc-1 for launch Ec2 instance:
Now, your instance is running state:

We set Up Apache Web Server in EC2 Linux (Ubuntu) Instance and accessible from public IP address

Step 2: According above diagram, we need to create a application load balancer
Click on "Create Load Balancer" and select "Application Load Balancer".
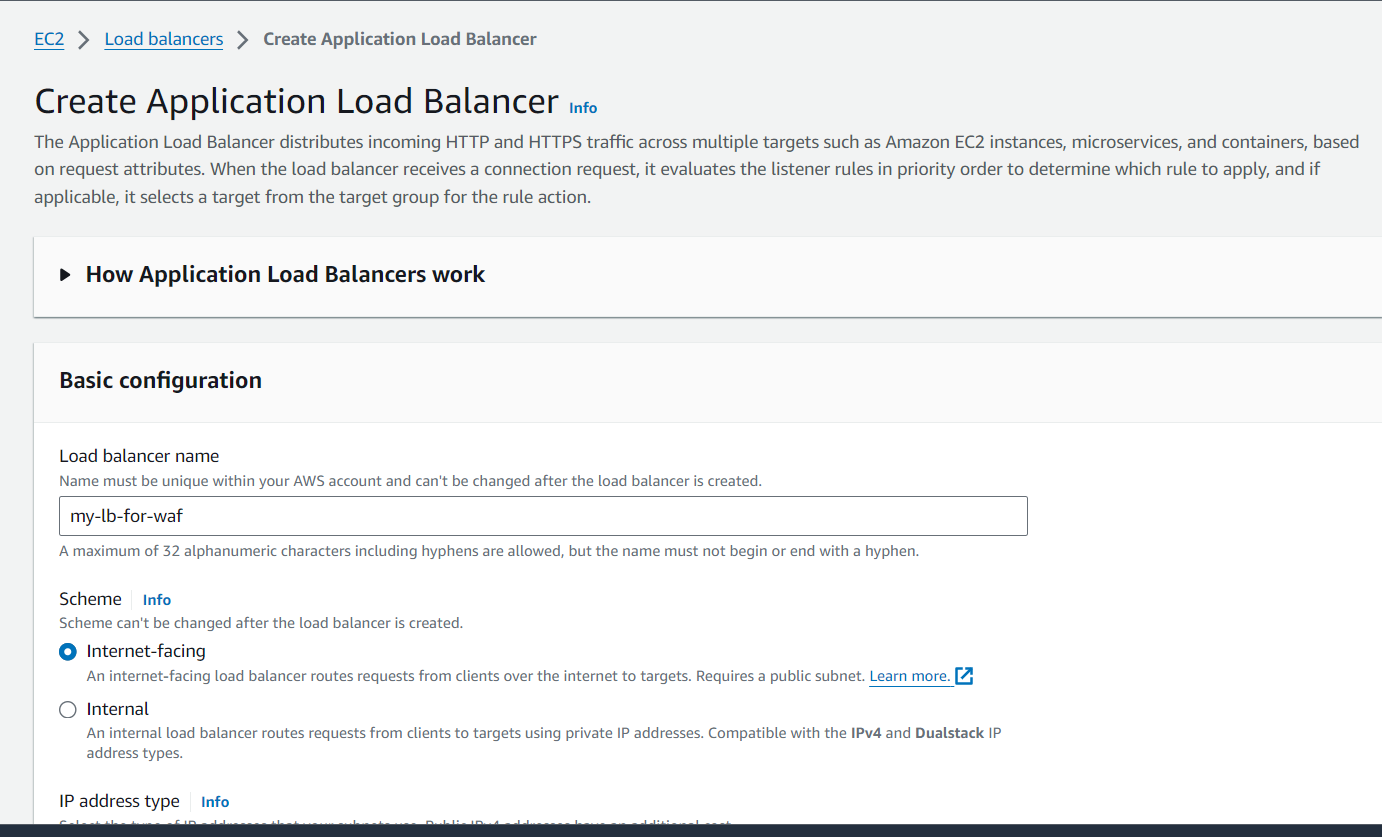
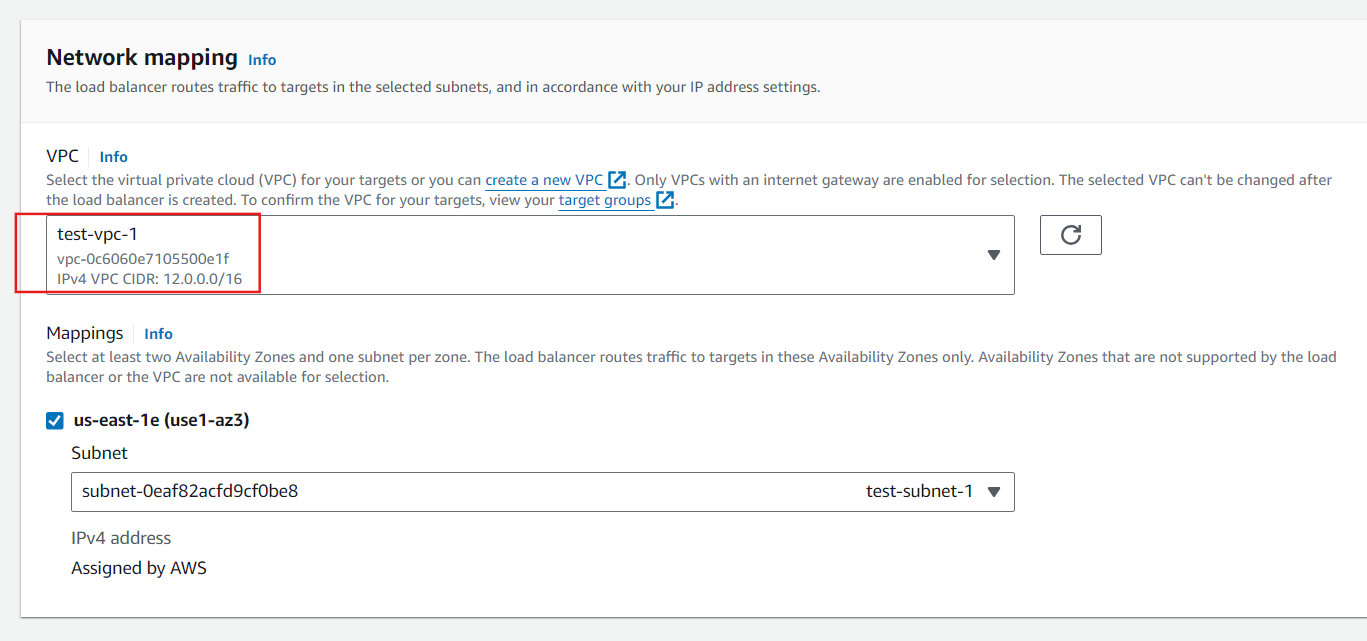
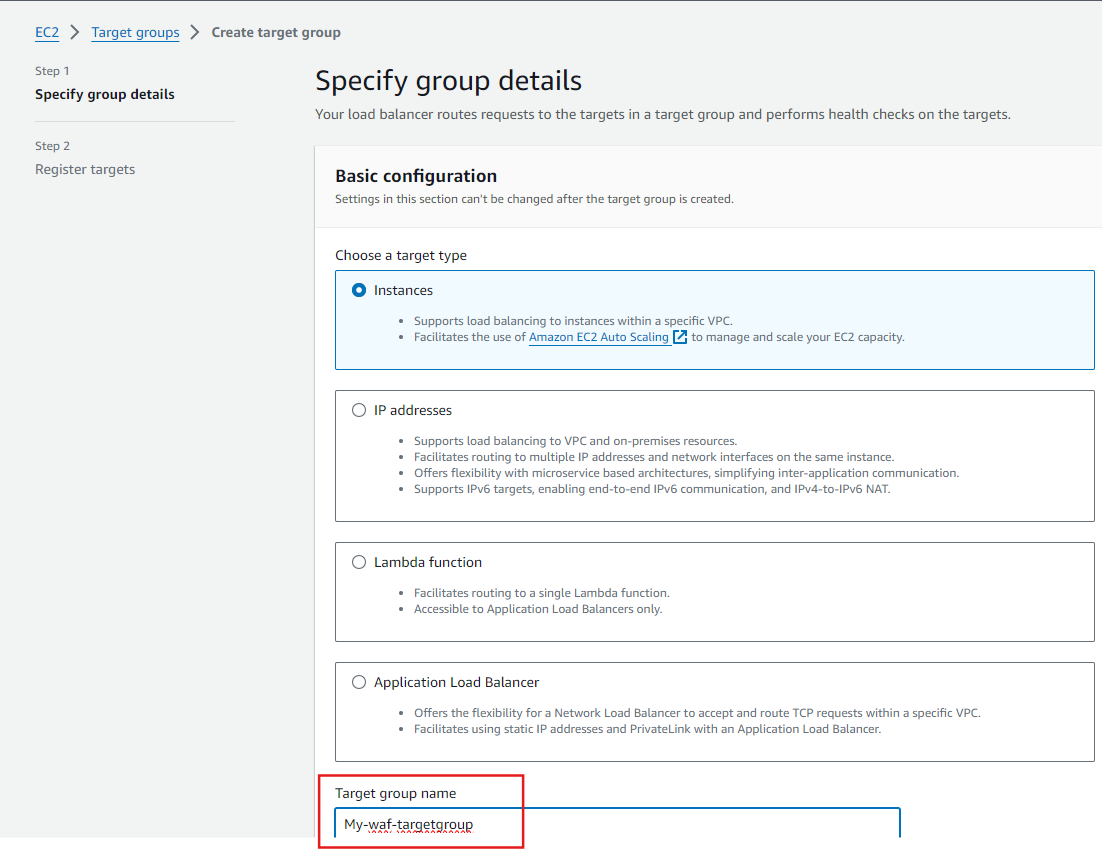
Now in Listeners and routing Section there you find the select target group but we don't have the Target group So we click on Create Target Group and it will take you to a new browser. Now you have to Select Target Type as a Instance Because we use our Ec2 instance for load balancing. Now enter the Target group name.
Now, we can see that the target group is created but load balancer not associated
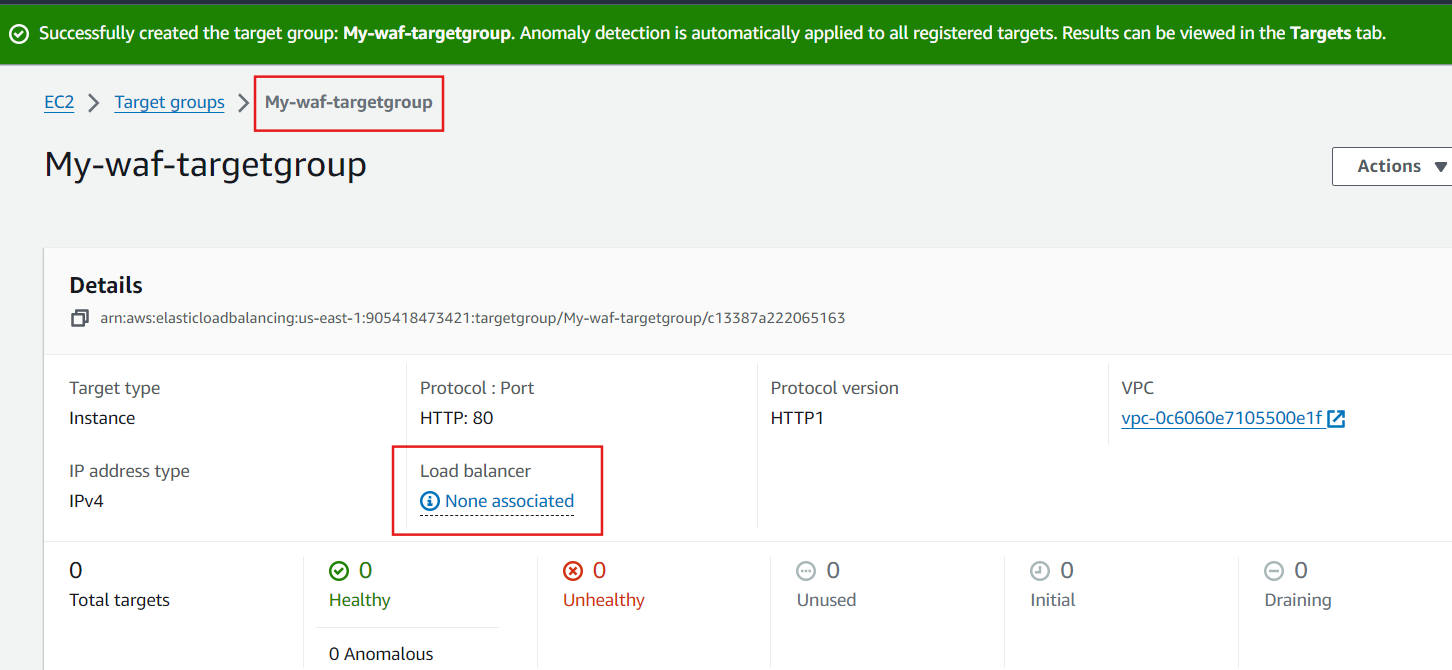
Associate your load balancer, now you see There is your all running instance so you have to select instance for load balancing And click on Include as pending below now you have a option to review targets review and click on create Target Group.
Come back go to the browsers Load Balancer tab and refresh the target group section and there you will find your target group that you created now select that.
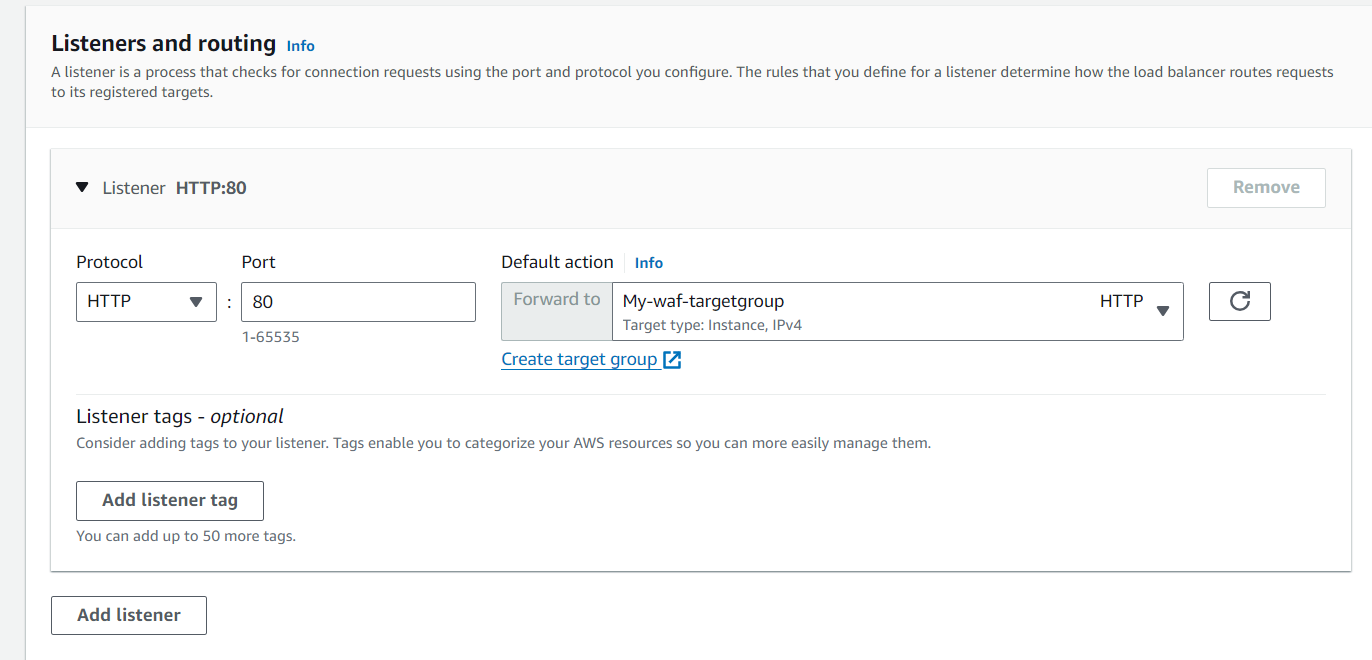
Now, Load balancer is created successfully
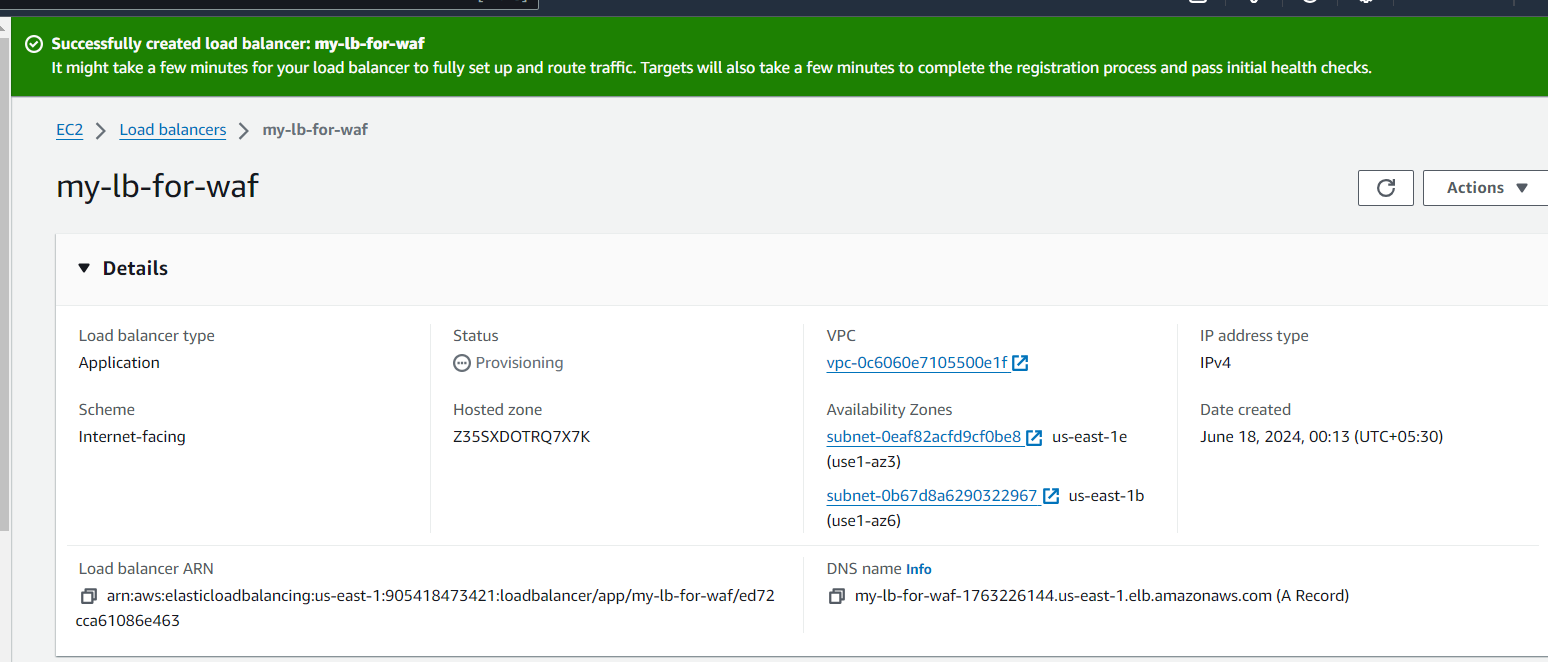
Now Its Time to test your Load Balancer. Copy the DNS name from Load balancer Description and paste in new browser tab and refresh it again and again you will see

Step 3: Create AWS WAF

- Configure AWS WAF
Search for WAF in the AWS Management Console.
Select WAF & Shield.
Click on Create web ACL.
Choose the region and provide a name for the web ACL.
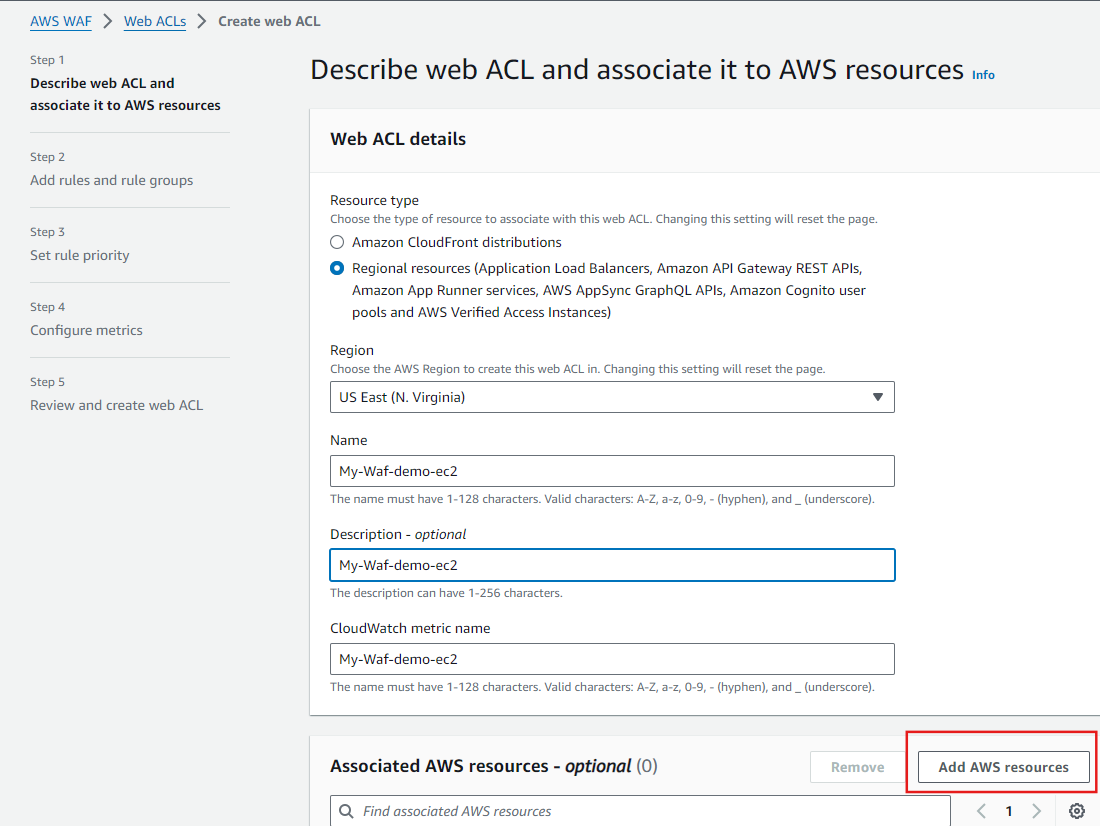
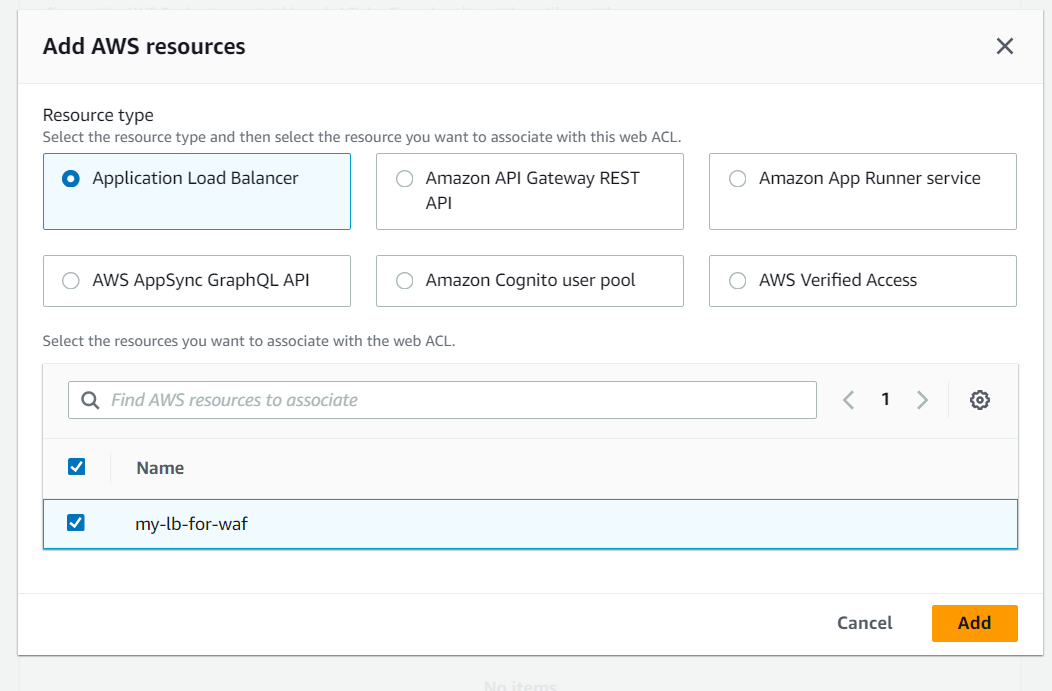
In Associated AWS resources, click Add AWS resources.
Select your Application Load Balancer and click Add.
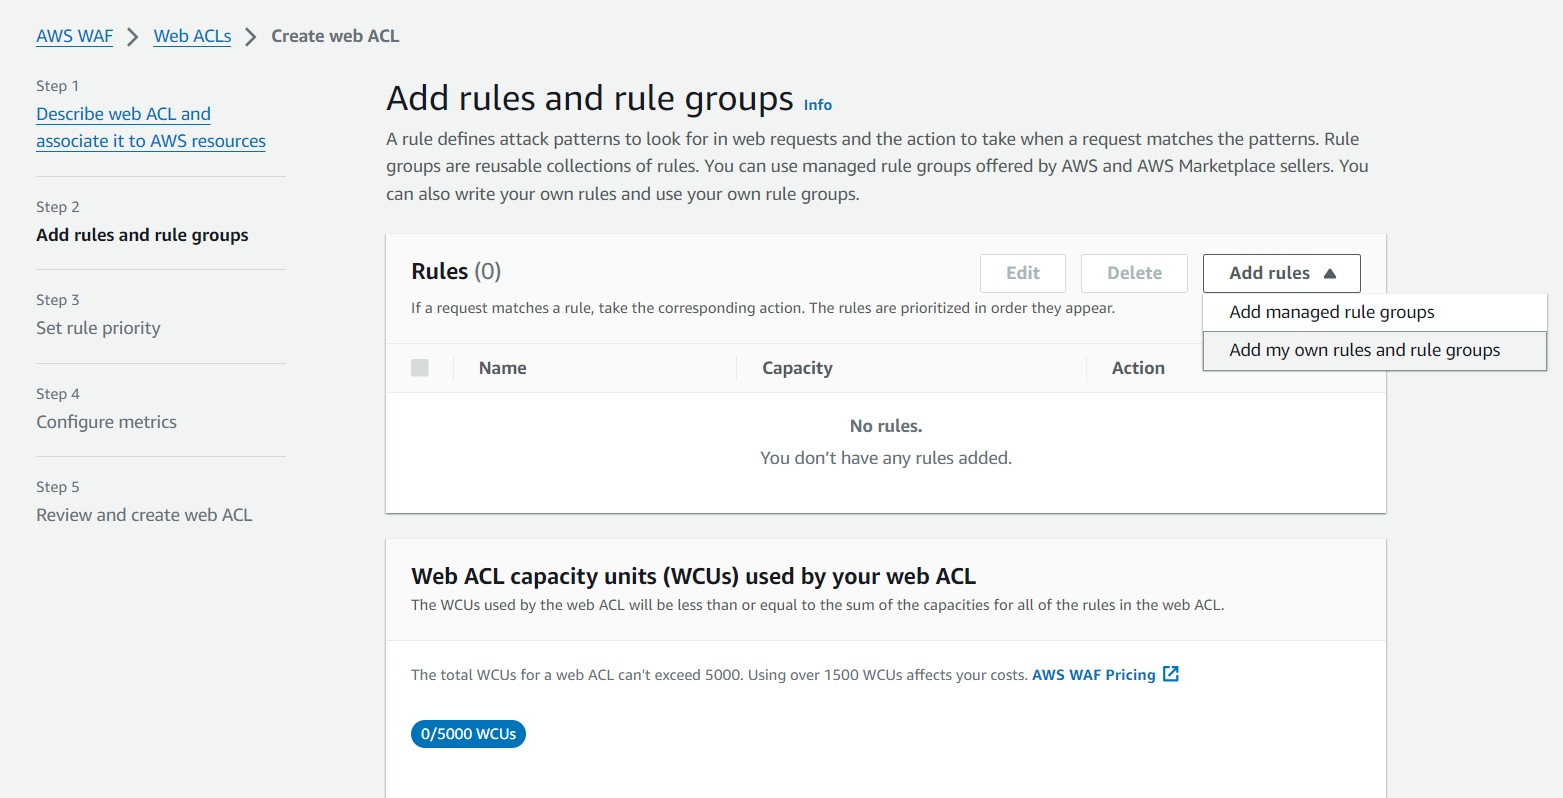
2.Add Rules to Web ACL
Choose to add my own rules and rule groups.
3. In AWS WAF console
Click on IP sets

We put my IP Address here
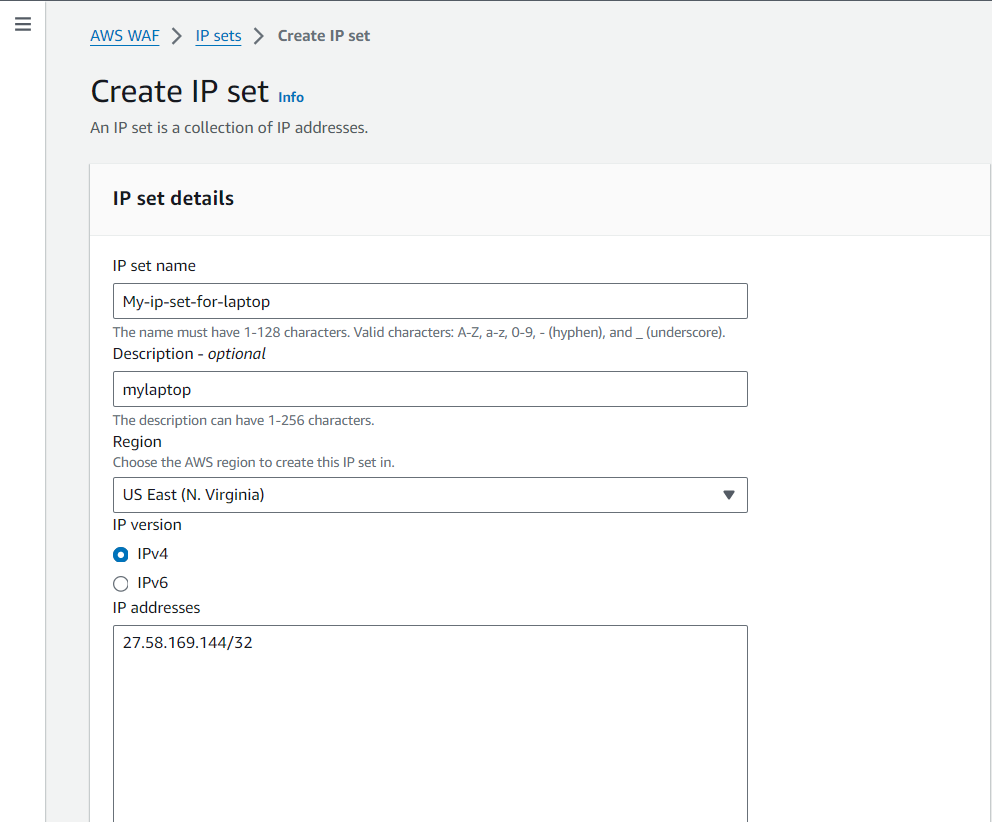
4.Add my own rules and rule groups
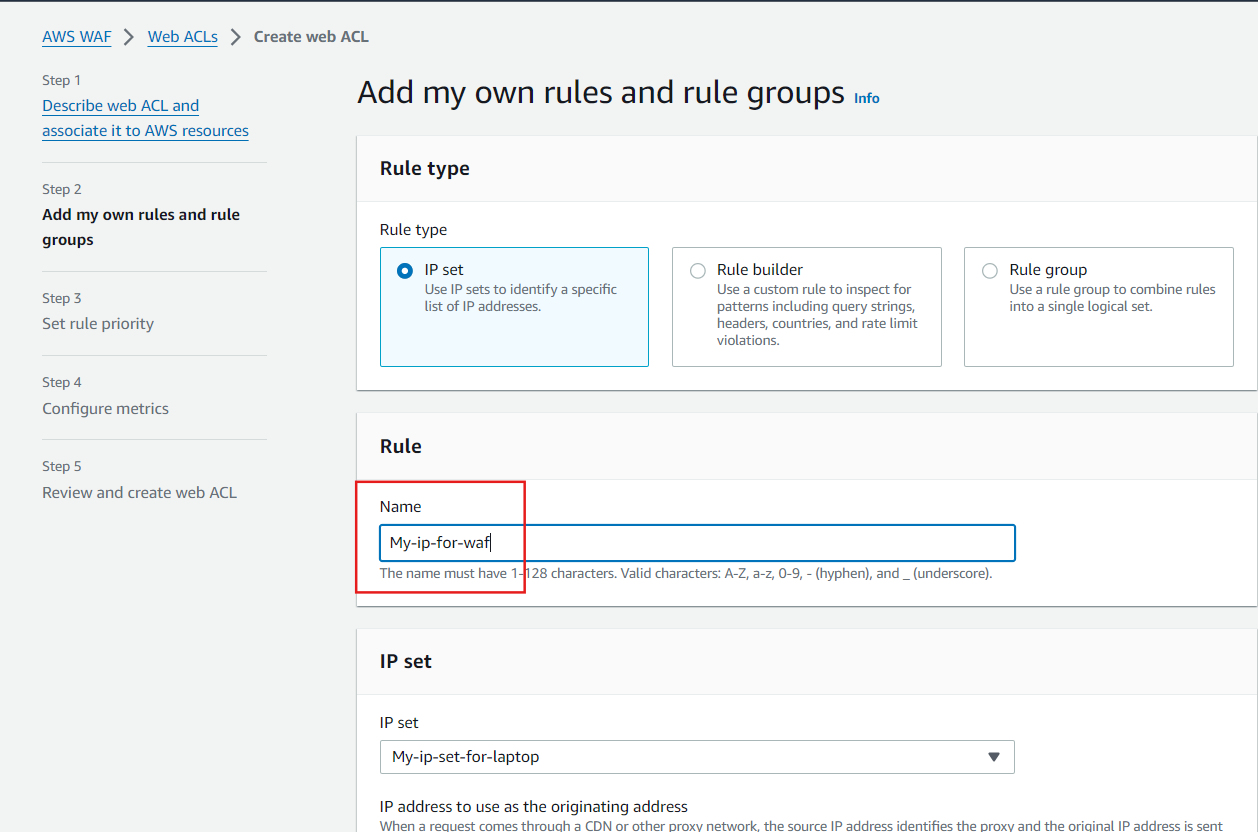
Select the IP set name and in action want to block my IP address which we added in creating the IP set
Click on "Add rule"
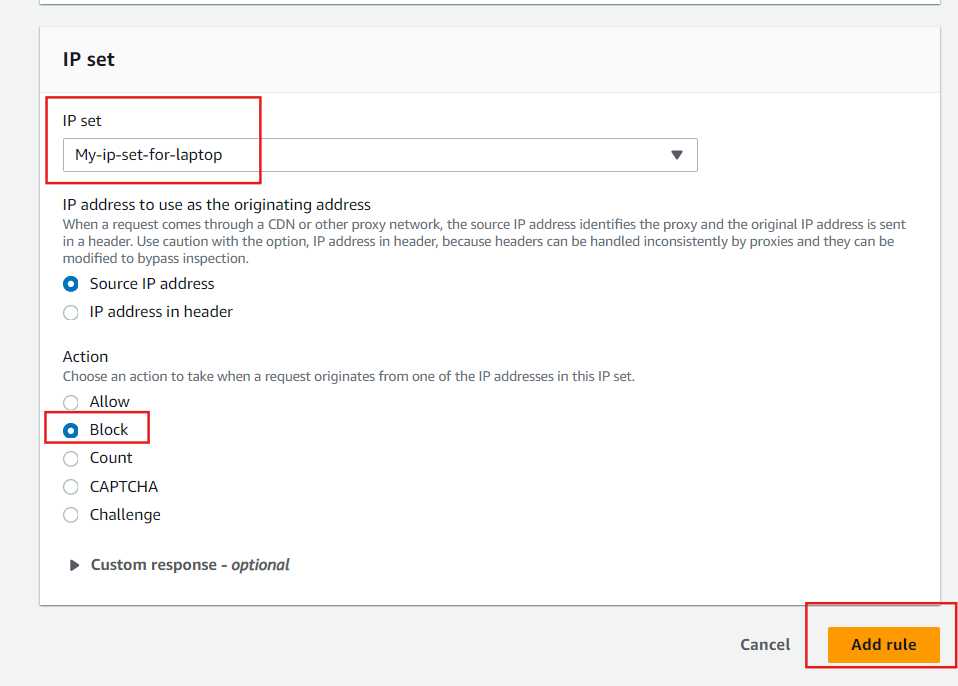
Select the add rule
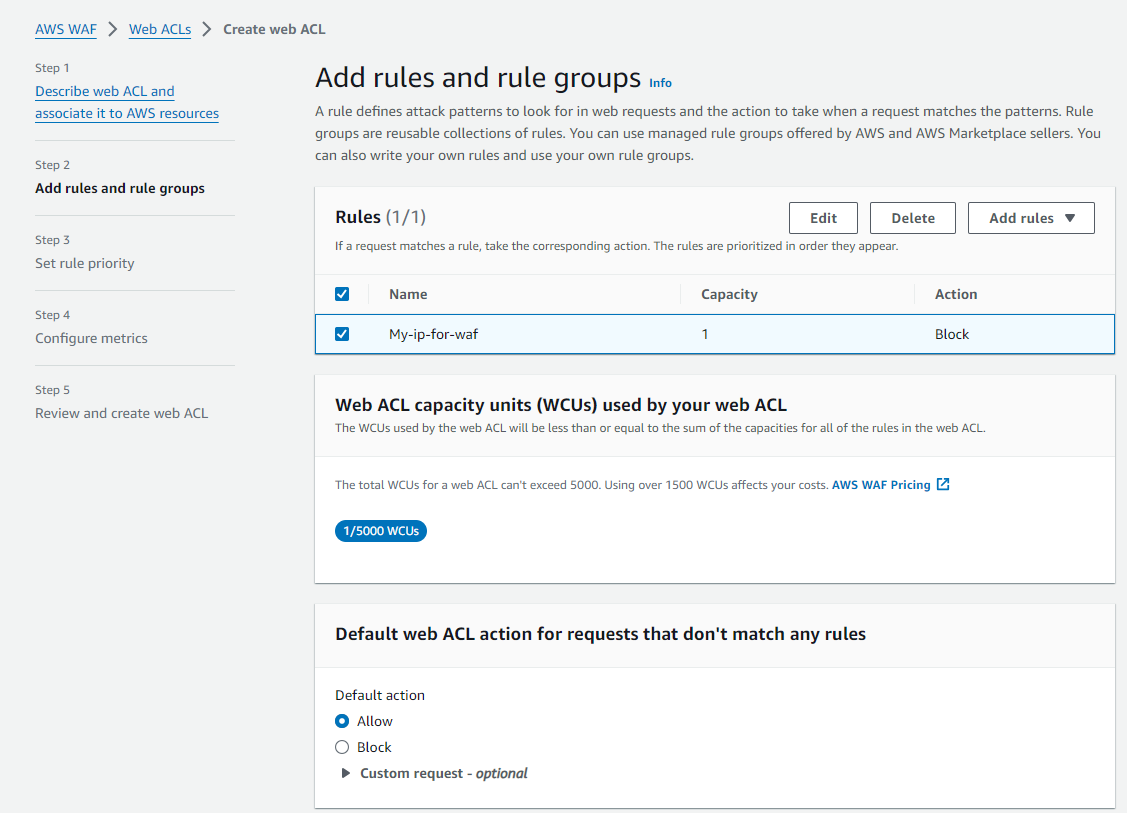
Set rule priority, select the rule name
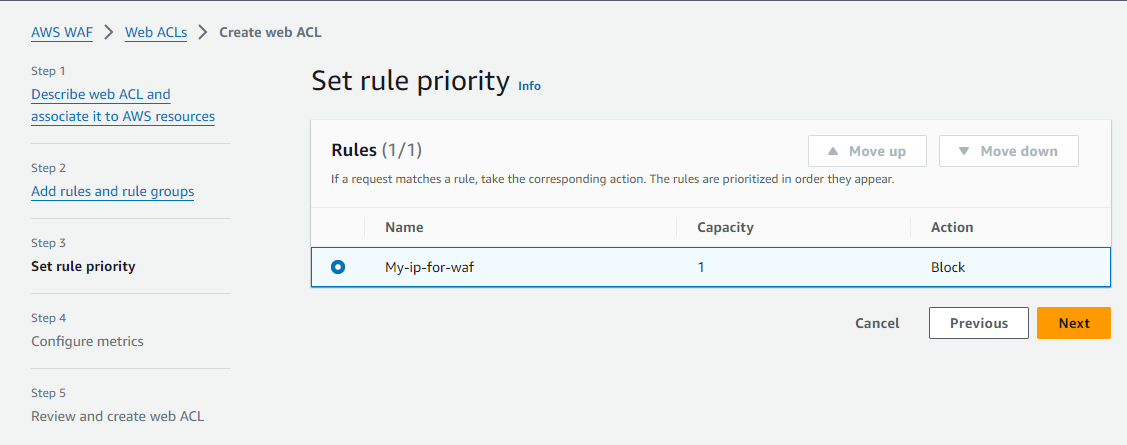
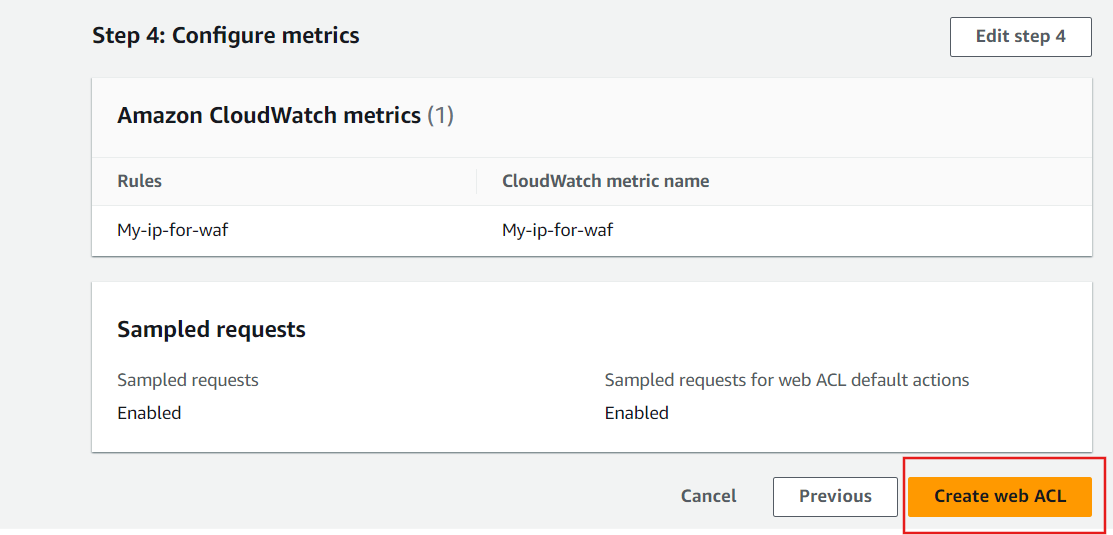
Create Web ACL
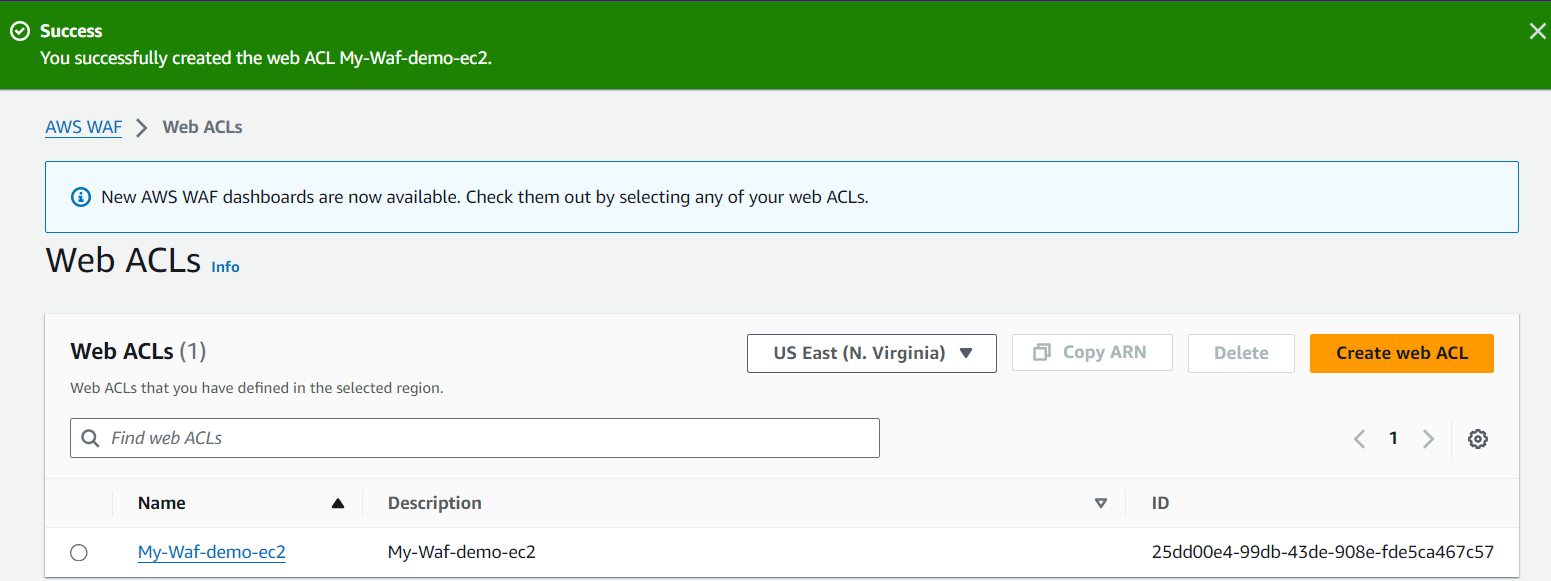
Created successfully the web ACL
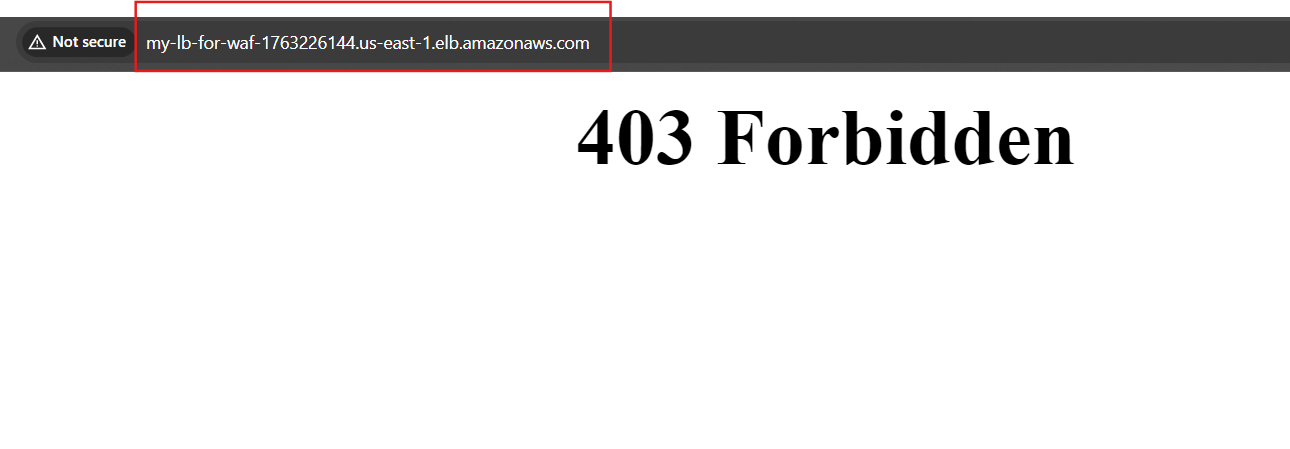
Now Its Time to test your AWS WAF. Copy the DNS name from Load balancer Description and paste in new browser tab, your protected resource responds to requests, with an HTTP 403 status code (Forbidden),
Now, Edit your "rule" in AWS WAF
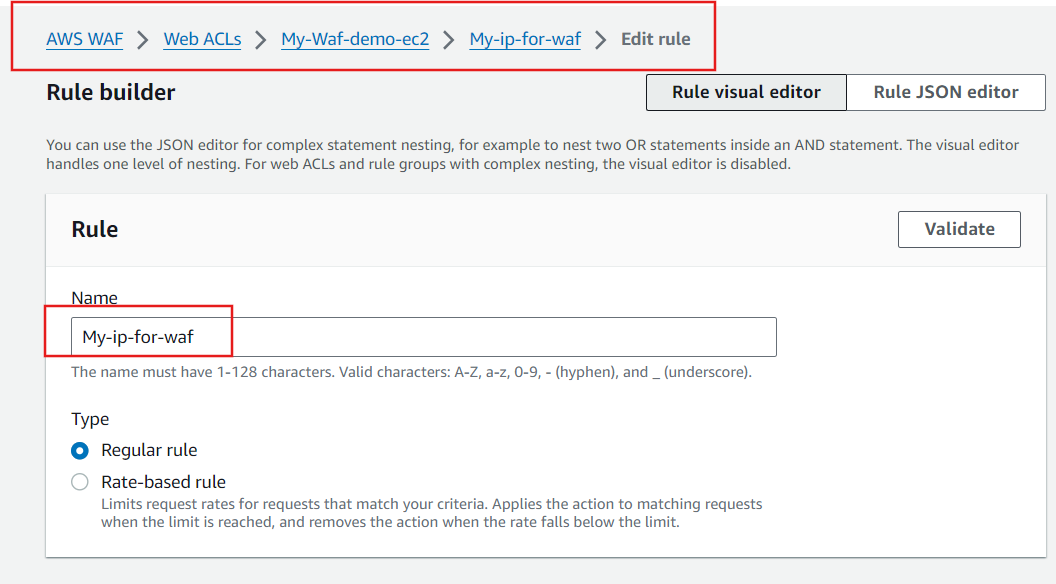
In action want to Allow my IP address which we added in creating the IP set
Click on "Save rule"
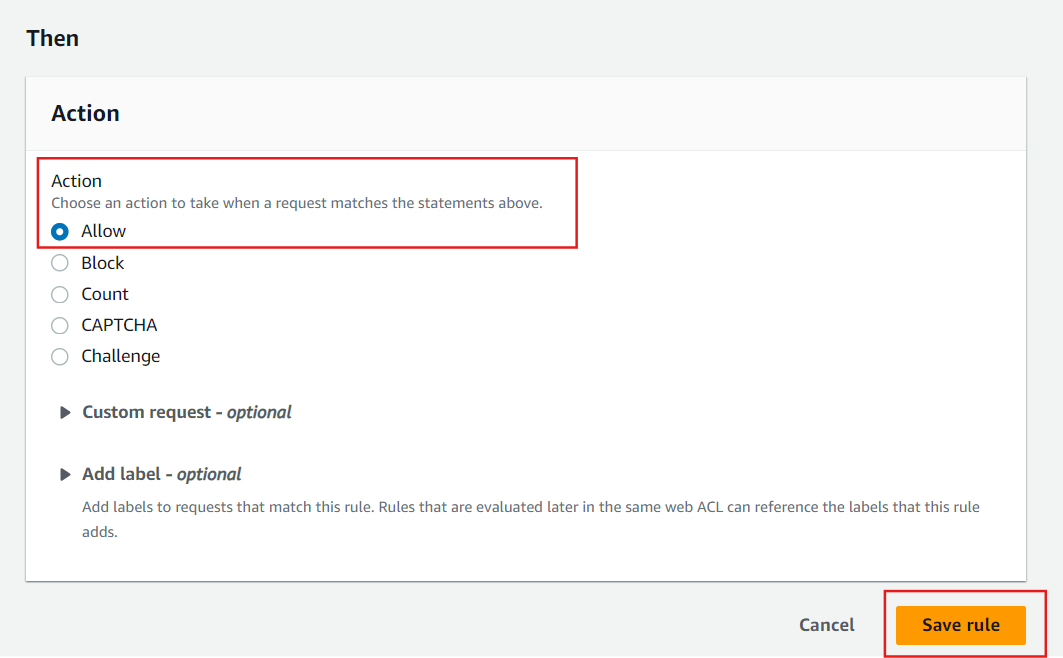
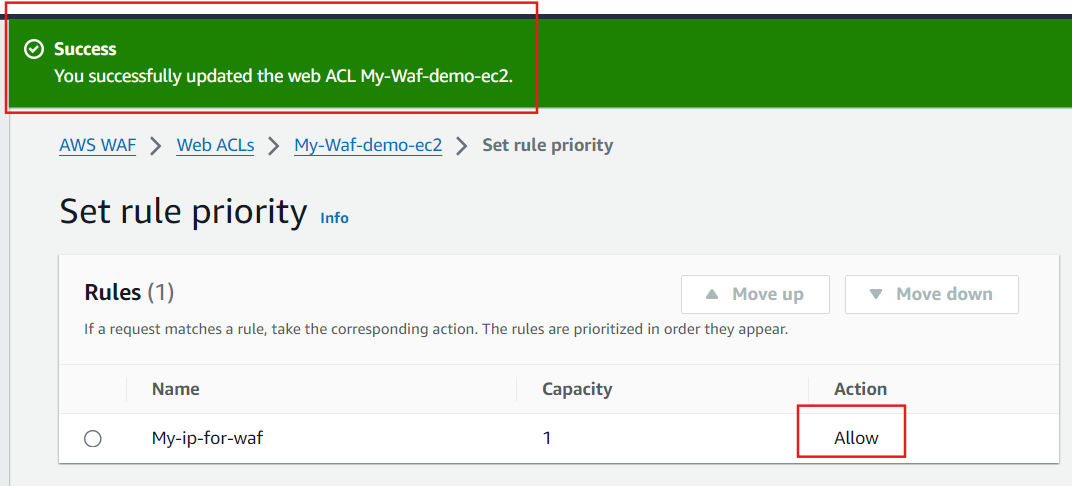
Now, the Web ACL has been updated successfully, we can see the Action part is showing “Allow”
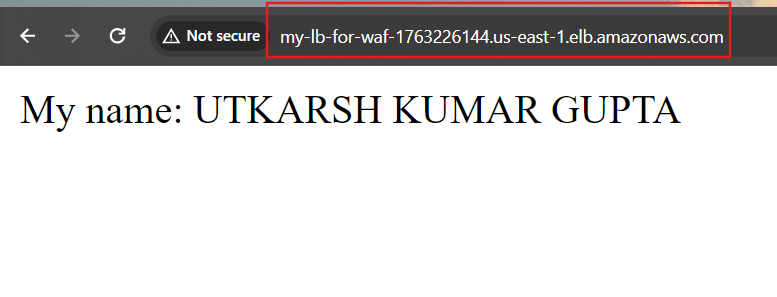
Now again test your AWS WAF. Copy the DNS name from Load balancer Description and paste in new browser tab,
Thank you for taking the time to read…….
Subscribe to my newsletter
Read articles from Utkarsh Gupta directly inside your inbox. Subscribe to the newsletter, and don't miss out.
Written by

Utkarsh Gupta
Utkarsh Gupta
🚀 Hi everyone! I'm Utkarsh Gupta, IAM Consultant. I am very passionate for all things DevOps. Right now, I'm learning and working on some cool projects and I can't wait to share what I'm learning with you all! 🛠️ Here's what's in my toolbox: Linux Docker Kubernetes Jenkins AWS Python Prometheus Grafana Ansible Terraform Join me as we explore AWS DevOps together. Let's learn and grow together in this ever-changing field! 🤝 Feel free to connect with me for: Sharing experiences Friendly chats Learning together Follow my journey on Hashnode and LinkedIn for daily updates. Let's dive into the world of DevOps together! 🚀 #DevOps #AWS #DevOpsJourney #90DaysOfDevOps