Step-by-Step guide to Resolving Merge Conflicts in GIT
 ferozekhan
When working on a coding project, there might be times where team members, end up making changes to the same file with different contents. This may result in creating conflicting changes on the two feature branches, and then attempting a merge, will result in a merge conflict that needs to resolved manually before committing the code changes to the current branch. Here is a step-by-step guide to resolving a merge conflict in Git.
Step 1: Set Up Your Repository
Initialize a Git Repository
 mkdir merge-conflict-demo
 cd merge-conflict-demo
 git init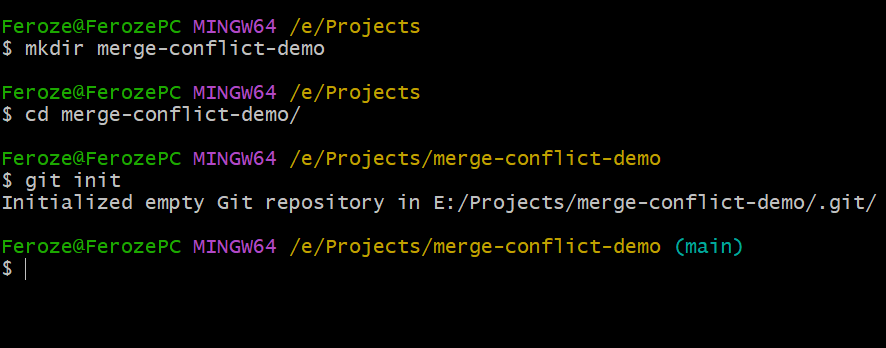
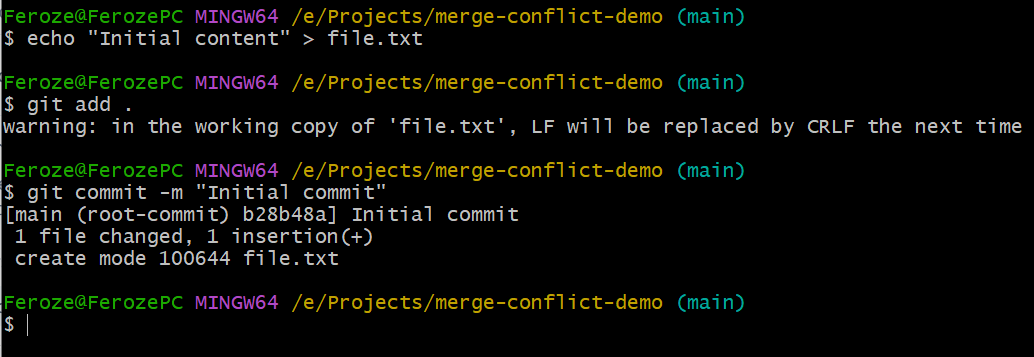
Create a File and Make an Initial Commit
 echo "Initial content" > file.txt
 git add .
 git commit -m "Initial commit"
Step 2: Create a Branch and Make Changes
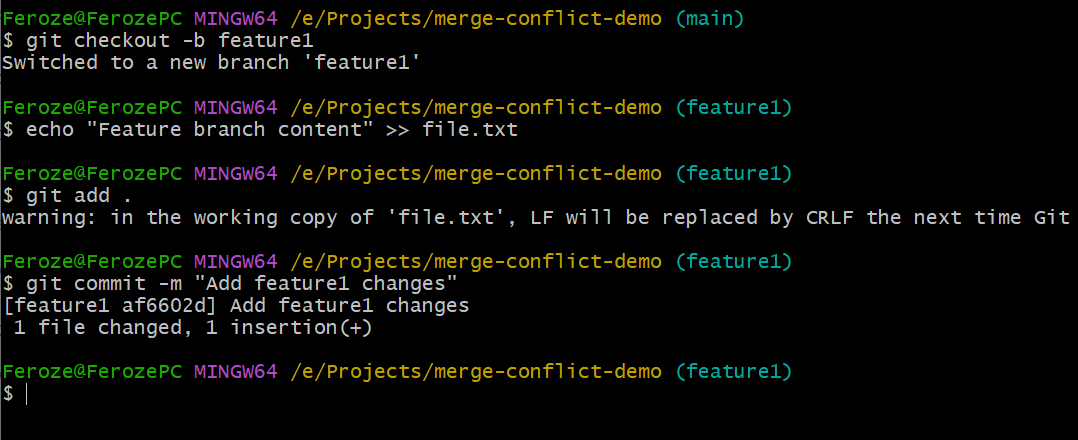
Create a New Branch
git checkout -b feature1Modify the File and Commit on Feature Branch
 echo "Feature branch content" >> file.txt
 git add .
 git commit -m "Add feature1 changes"
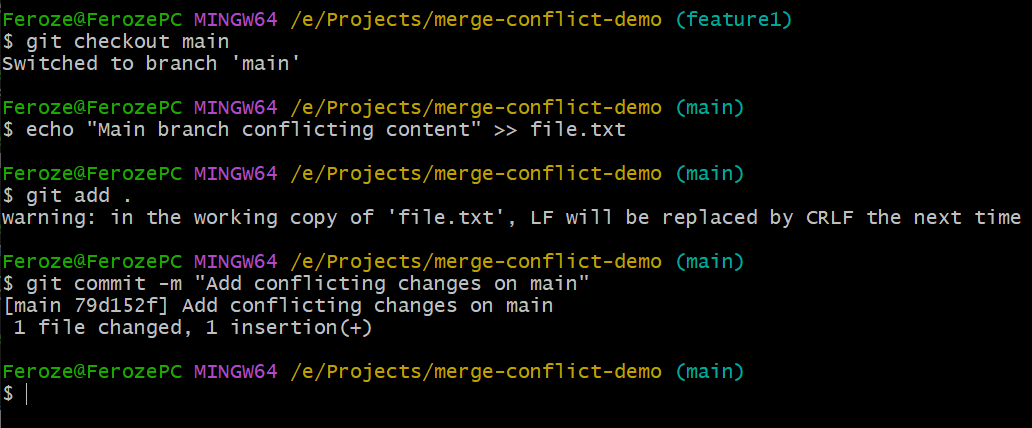
Step 3: Make Conflicting Changes on Main Branch
Switch Back to the Main Branch
git checkout mainModify the File in a Conflicting Way and Commit
 echo "Main branch conflicting content" >> file.txt
 git add .
 git commit -m "Add conflicting changes on main"
Step 4: Merge Feature Branch into Main Branch
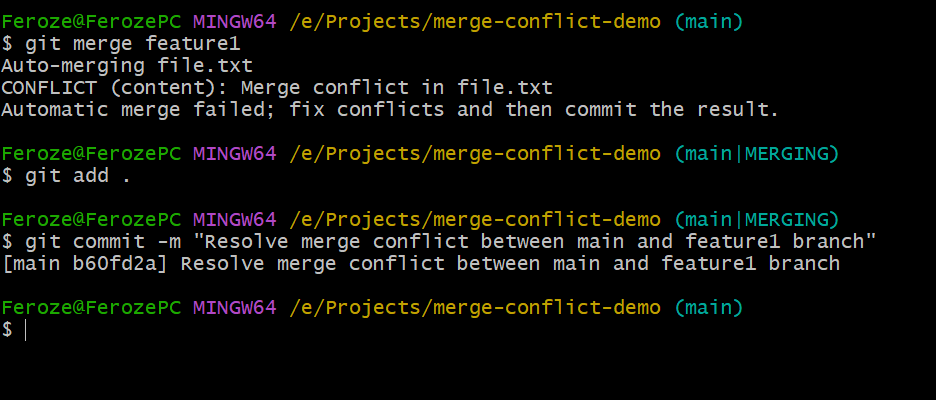
Attempt to Merge the Feature Branch
git merge feature1
Step 5: Resolve the Merge Conflict
Identify the Conflict
- Git will output something like:

Open the Conflicted File
- The conflicted file (
file.txt) will have conflict markers:
- The conflicted file (
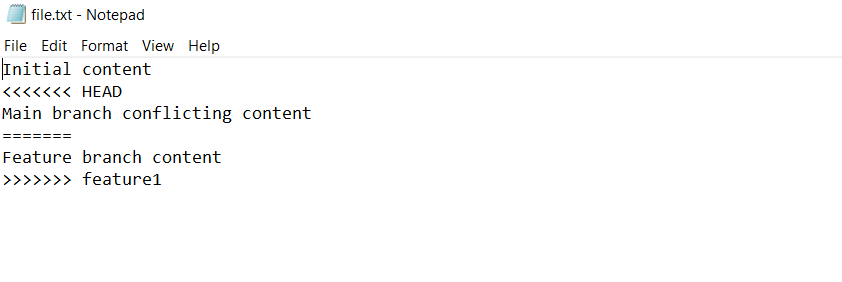
Everything between the lesser than (<<<<<<<) and equals signs (=======) is the change in the current branch (the branch you're merging into). Everything between the equals (=======) and greater than () signs is the incoming change from the feature branch you want to merge to the current branch.
You may now remove those unwanted annotations and make changes to the file contents as desired.
Manually Resolve the Conflict
- Edit the file to resolve the conflict. For example, you might change it to:

Add the Resolved File
git add .Commit the Merge
git commit -m "Resolve merge conflict between main and feature-branch"
Step 6: Verify the Merge
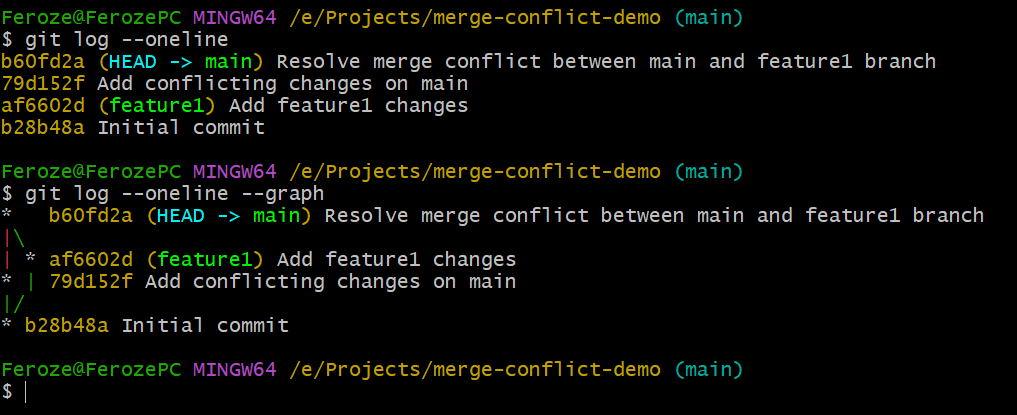
Check the Commit History
git log --oneline git log --oneline --graph- You should see the merge commit with both branches converging.
Additional Tips on Avoiding Merge Conflicts
Merge conflicts aren’t exactly fun, so here are some tips to avoid them:
Communicate with your team members and collaborators often to avoid working on the same files at the same time! Let each other know who is working on what.
Commit often with small changes.
Try pulling before committing.
Summary
You've successfully resolved a merge conflict. This process ensures that changes from both branches are correctly integrated into the project.
That's all for today. Kindly share with the community. Until I see you next time. Cheers !
Subscribe to my newsletter
Read articles from ferozekhan directly inside your inbox. Subscribe to the newsletter, and don't miss out.
Written by
