How to Build Your First AWS Continuous Delivery Pipeline: From Code to Deployment - Part 1
 Rishabh Mishra
Introduction
Welcome to our tutorial on building your first continuous delivery pipeline using Amazon Web Services (AWS). This step-by-step guide will help you set up a Git repository, deploy a sample web app, and create a continuous delivery pipeline to streamline your development workflow.
Overview
In this tutorial, you will learn how to create a continuous delivery pipeline for a simple web application. We will start by using a version control system to store your source code. Then, we will guide you through creating a continuous delivery pipeline that will automatically deploy your web application whenever your source code is updated.
What You Will Accomplish
By the end of this tutorial, you will be able to:
Set up a GitHub repository for your application code.
Create an AWS Elastic Beanstalk environment to deploy your application.
Configure AWS CodeBuild to build the source code from GitHub.
Use AWS CodePipeline to set up a continuous delivery pipeline with source, build, and deploy stages.
Prerequisites
Before starting, make sure you have:
An AWS account
A GitHub account
Git installed on your computer
A text editor (e.g., Atom, Notepad++, Sublime, Vim, Visual Studio Code)
Services Used
AWS Elastic Beanstalk
AWS CodeBuild
AWS CodePipeline
Application Architecture
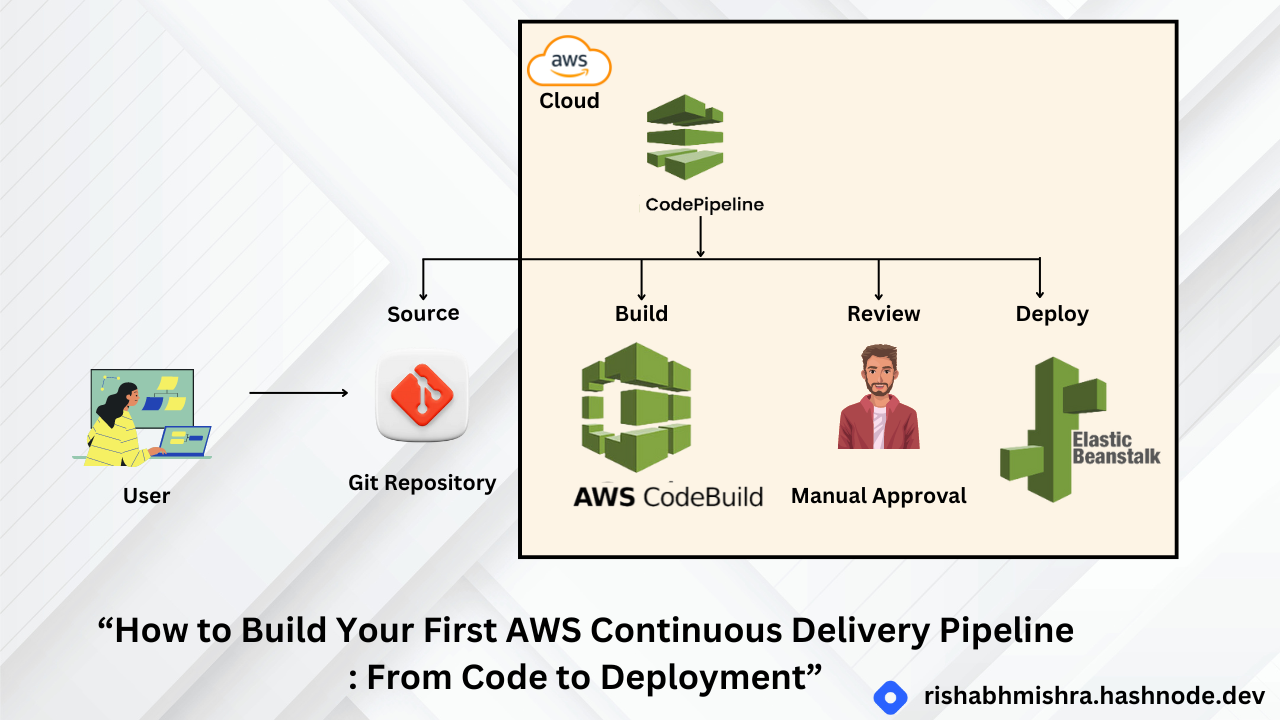
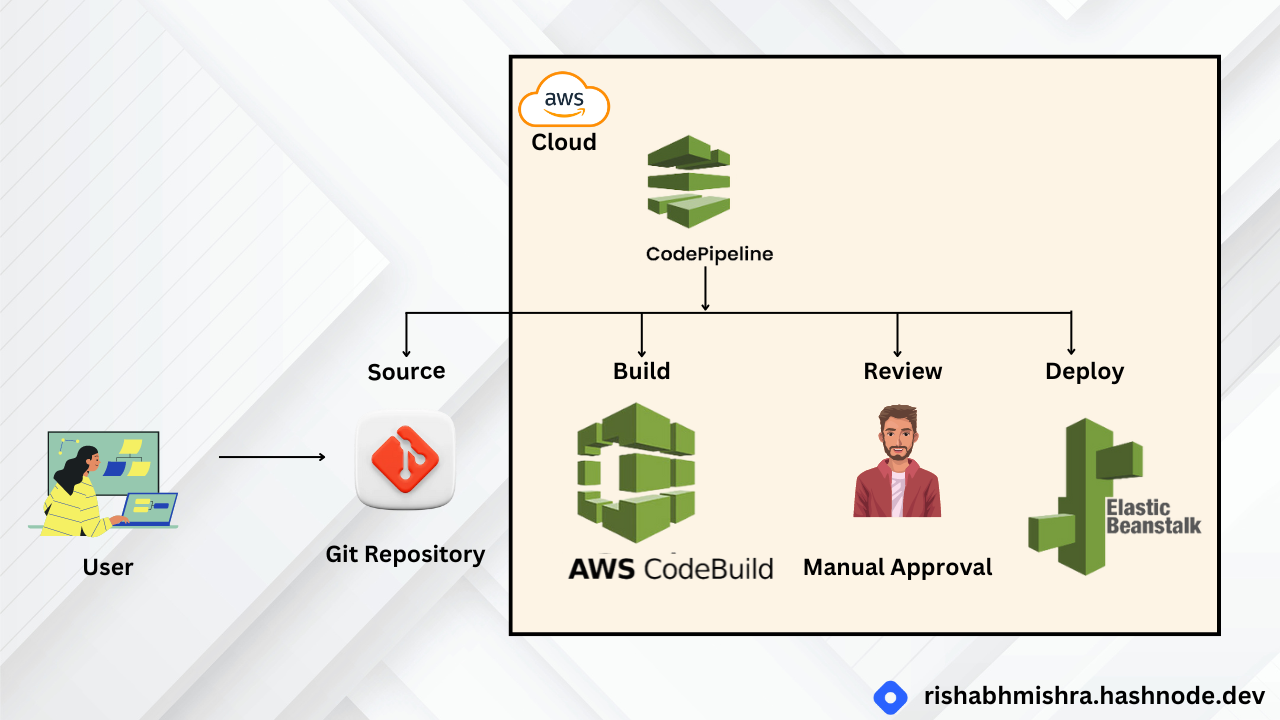
The diagram below shows how the services used in this tutorial are connected. This application uses GitHub, AWS Elastic Beanstalk, AWS CodeBuild, and AWS CodePipeline. As we go along, we will explain each service in detail and provide resources to help you understand them better.
This tutorial is divided into five short steps. Complete each step in order before moving on to the next one:
Set Up Git Repo: Set up a GitHub repository to store your application code.
Deploy Web App: Create the environment for your web application using AWS Elastic Beanstalk.
Create Build Project: Configure and start the build process for your application using AWS CodeBuild.
Create Delivery Pipeline: Create a pipeline to automatically build and deploy your application using AWS CodePipeline.
Finalize Pipeline and Test: Add a review stage to the pipeline and test it.
Step 1 : Set Up Git Repository for Your AWS Continuous Delivery Pipeline
Setting up a Git repository is a crucial first step in building your continuous delivery pipeline. In this example, we'll use GitHub, but you can also use other Git-compatible options like AWS CodeCommit.
Key Concepts
Version Control: A system for storing source code and tracking changes, allowing developers to compare versions or revert to older ones.
Git: An open-source version control tool for managing source code changes.
Git Repository (Repo): All files and directories tracked by the version control system, including metadata.
Git Commit: The method for adding changes to a Git repository.
Pushing to a Repository: Copying changes from a local repository to a hosted one.
Forking a Repository: Creating a copy of an existing repository.
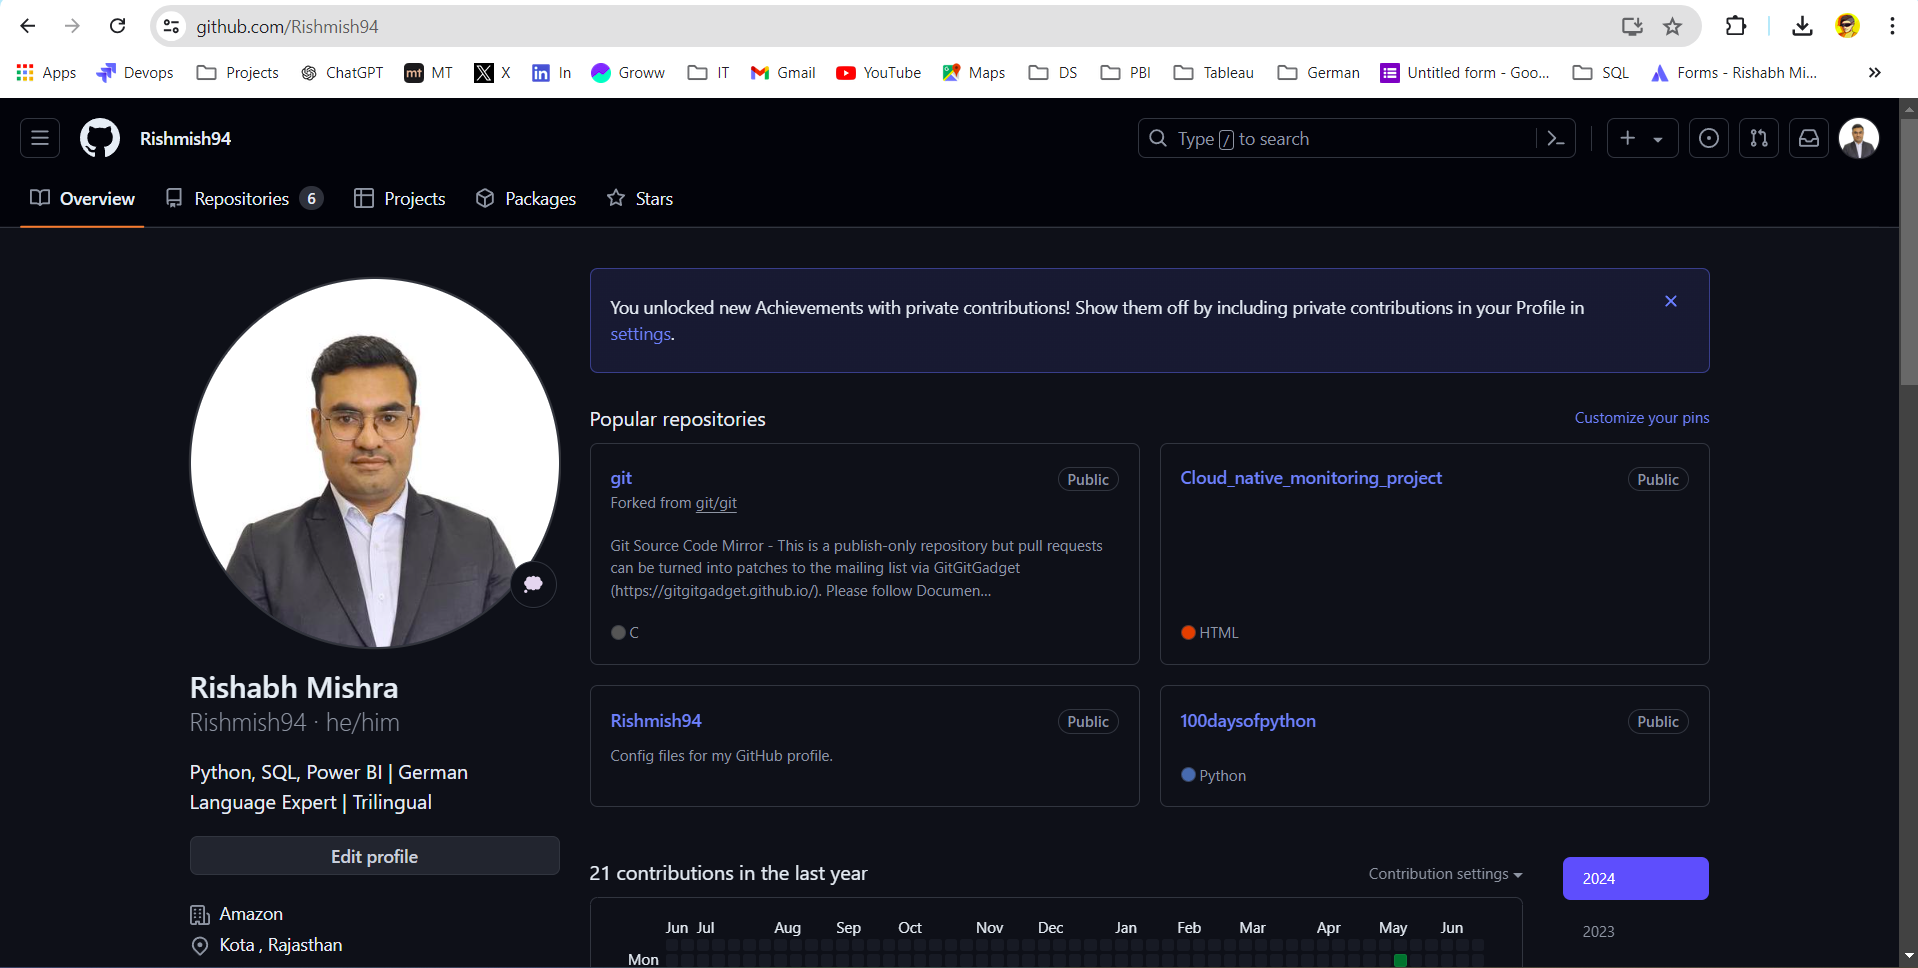
Log in to GitHub:
Open a new browser tab, navigate to GitHub, and log into your account.
Fork the Repository:
In the same tab, open the aws-elastic-beanstalk-express-js-sample repo.
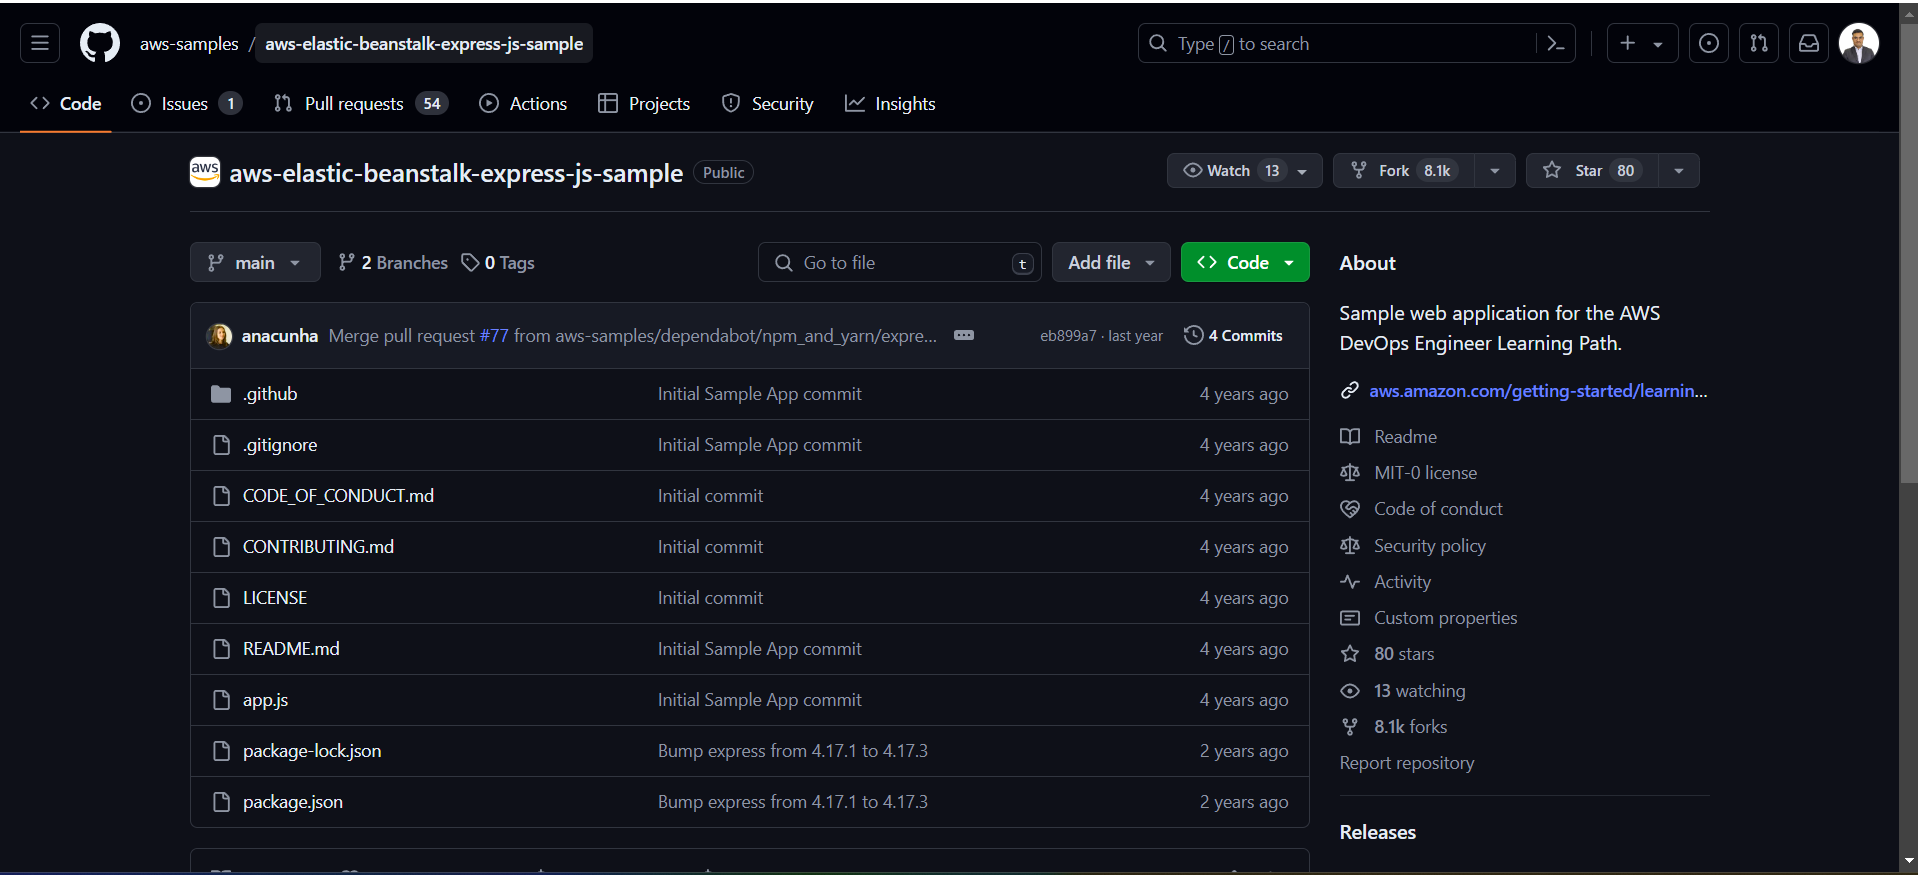
Click the white “Fork” button on the top right corner of the screen.
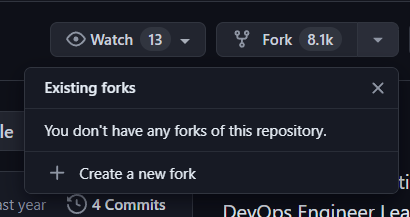
A window will pop up asking where you want to fork the repo. Verify it shows your account and click “Create a fork.”
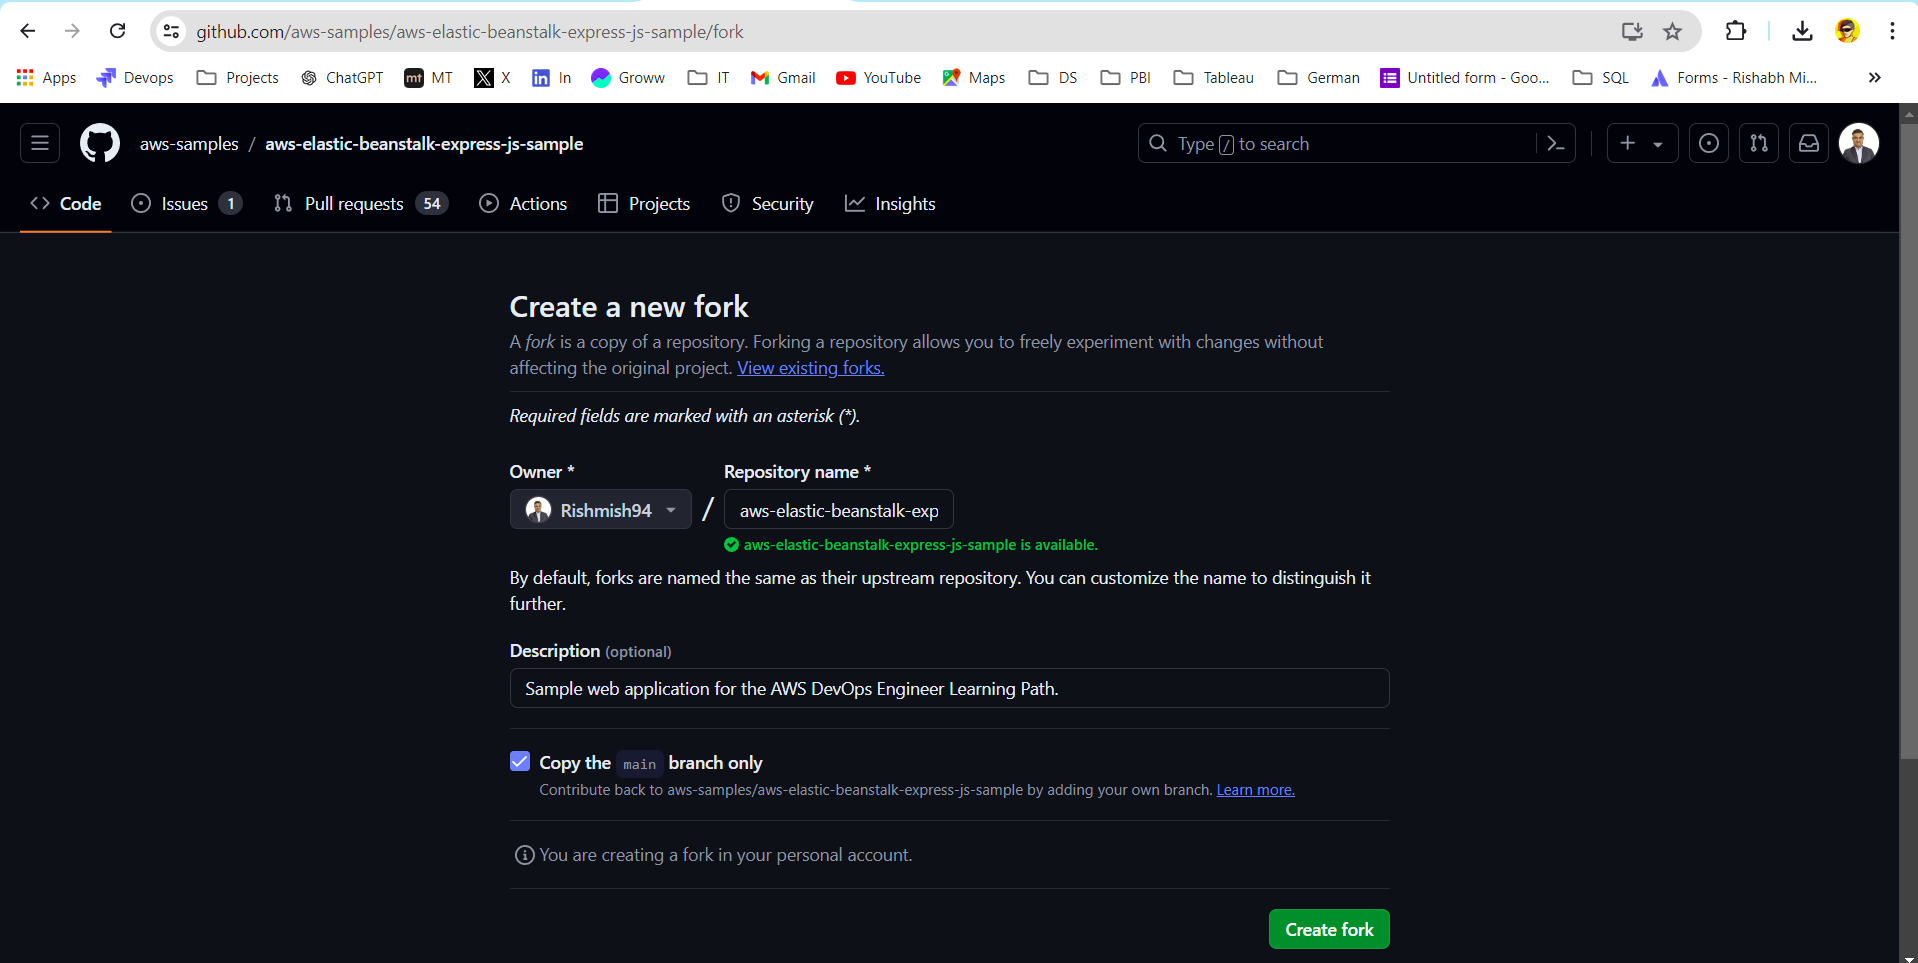
Verify Your Forked Repository:
After a few seconds, your browser will display a copy of the repo under your account in the Repositories section.
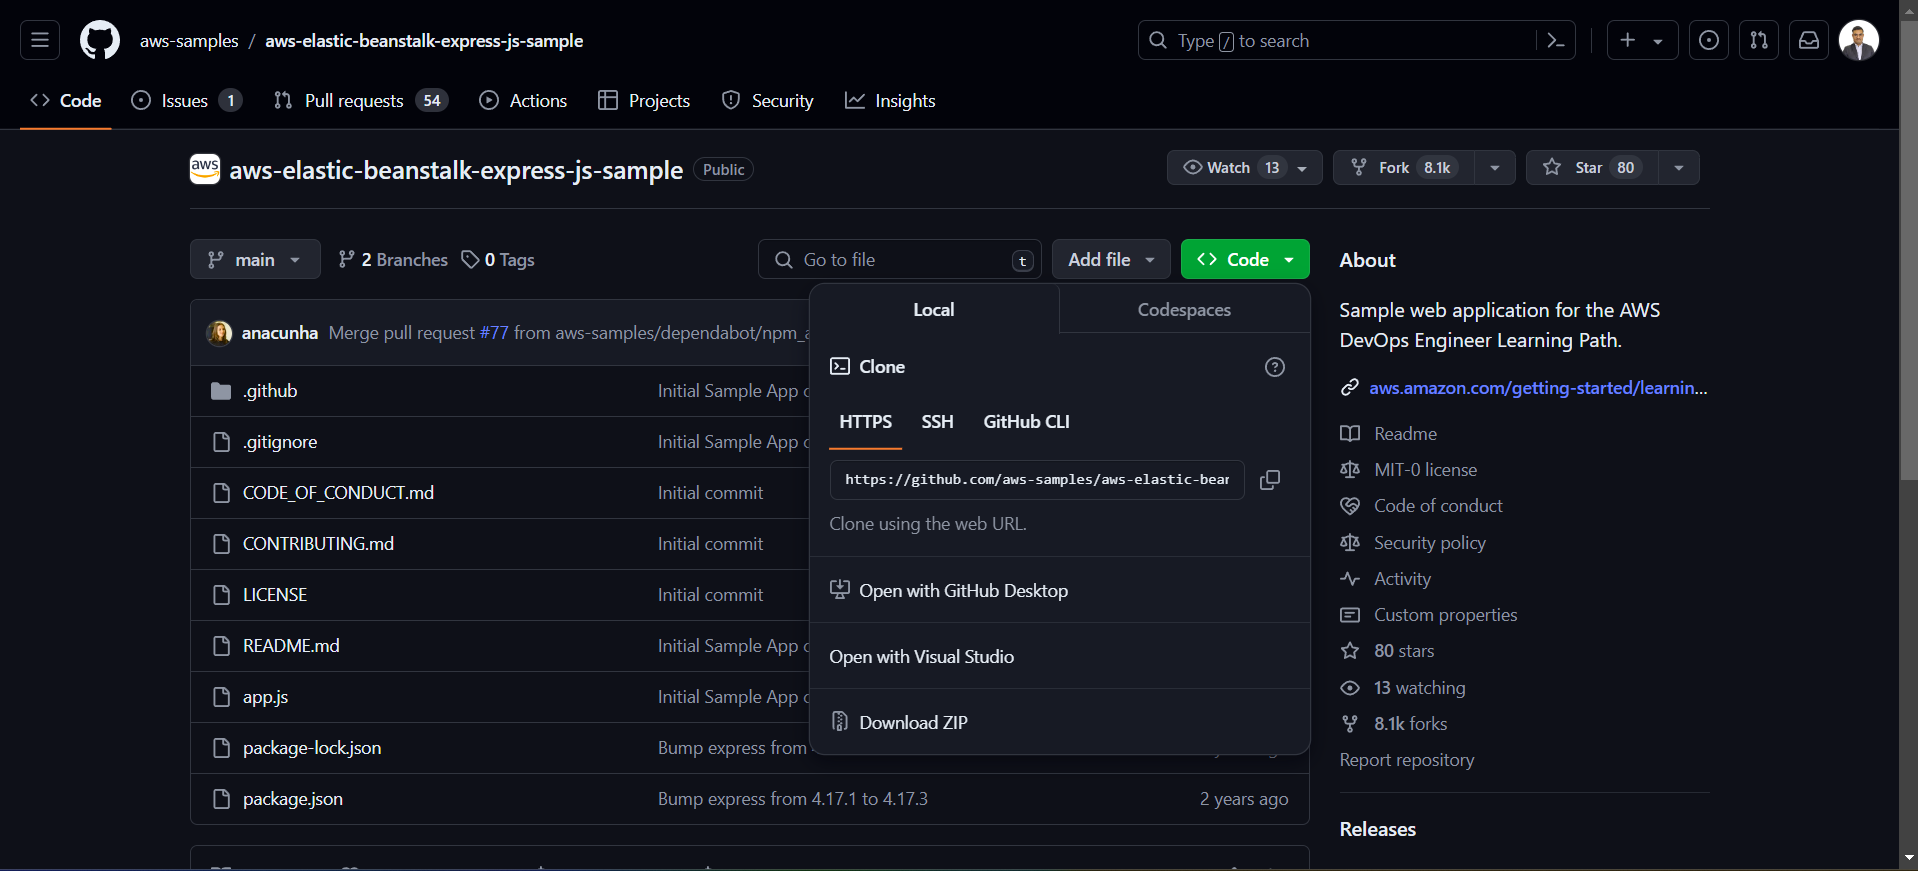
Clone the Repository Locally:
Open your terminal.
Use the following command to clone the repository to your local machine:
git clone https://github.com/your-github-username/aws-elastic-beanstalk-express-js-sample.git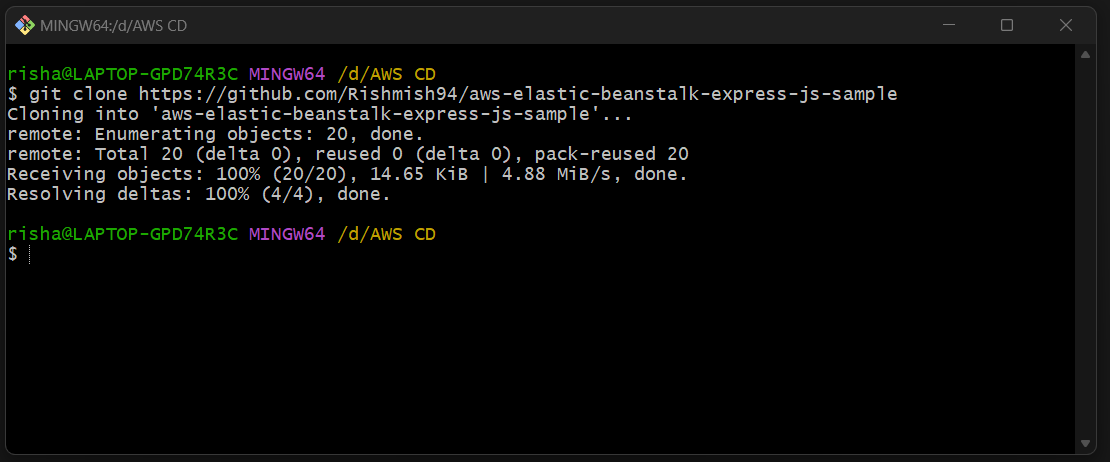
Navigate to the Repository Directory:
Change to the directory where the repository was cloned:
cd aws-elastic-beanstalk-express-js-sample
Make some changes in app.js file ,for example , I have made following change:
In place of "Hello World !" , I have written "Hello Everyone , we have completed first step of our task"
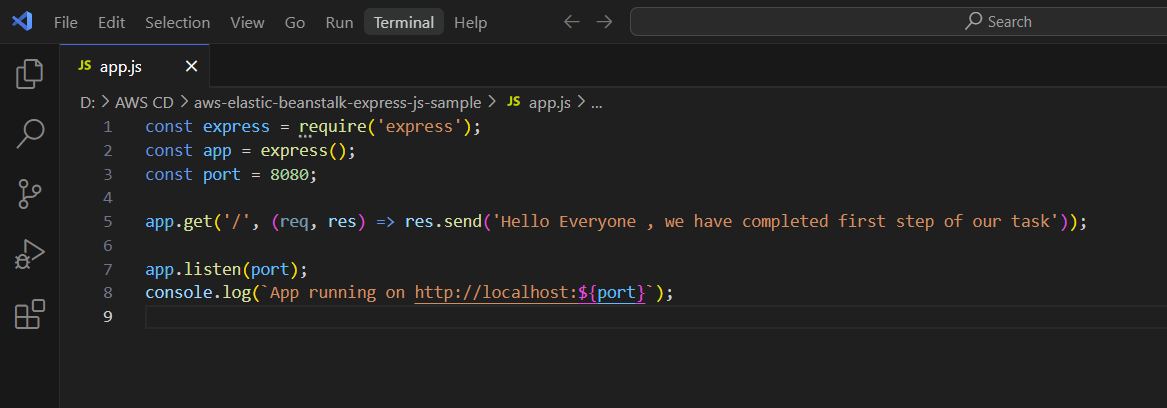
After making changes type following git command to add the file in staging area
git add app.js
Then commit the file with a commit message using the following command:
git commit -m "Your commit message here"
Finally, push your code to the GitHub repository by typing the following command:
git push
Verify Repository Content
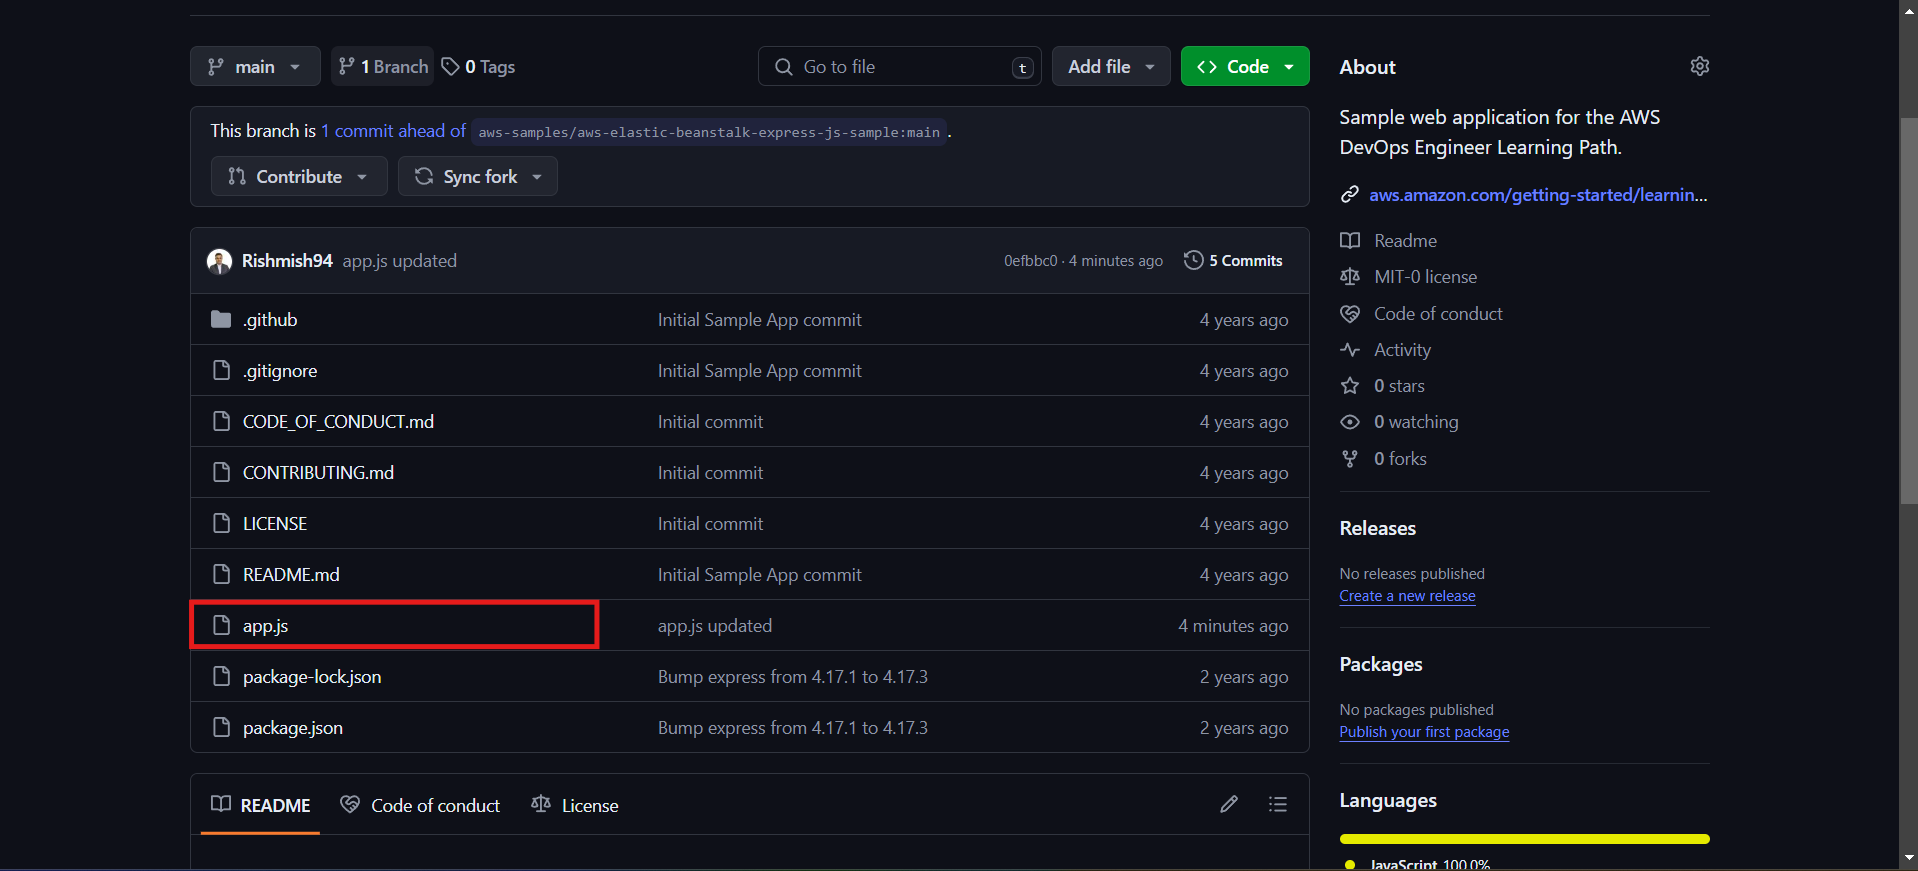
As we can see our changes are reflecting in git hub repository .

Application Architecture
Here's what our architecture looks like right now:
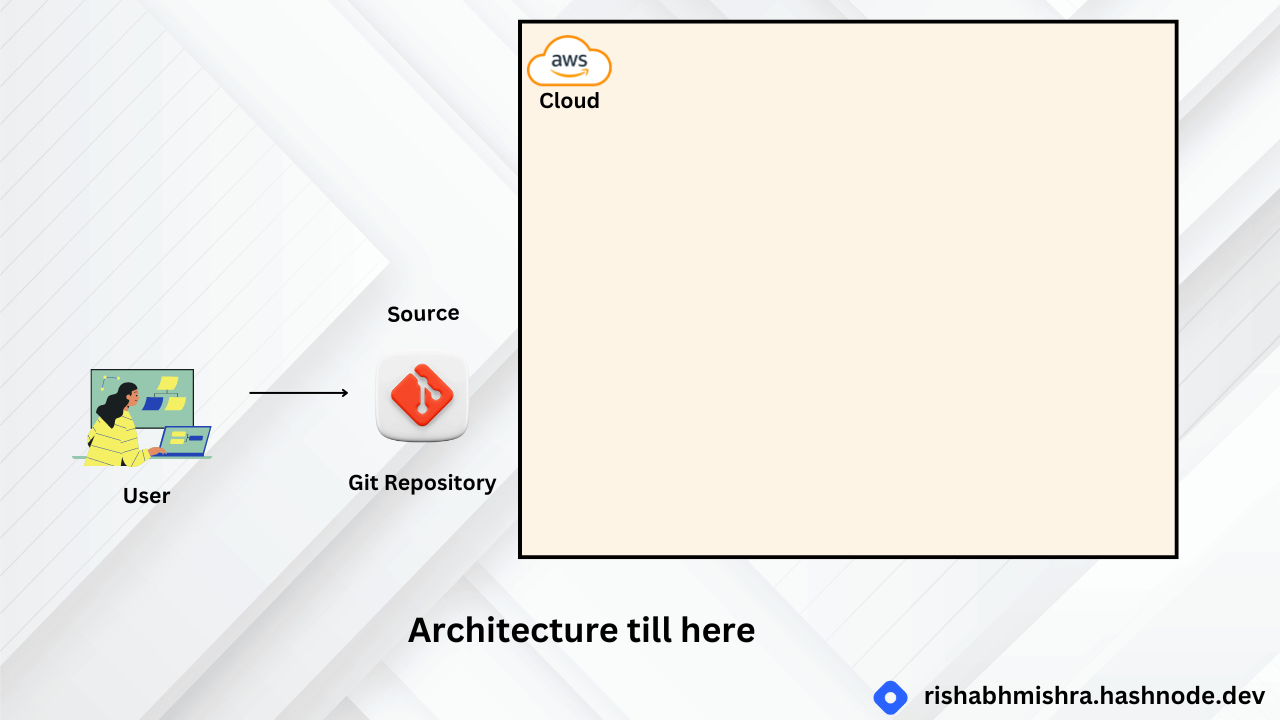
We have created a code repository containing a simple web app. We will use this repository to start our continuous delivery pipeline. It's important to set it up properly so we can push code to it seamlessly.
Step 2 : Deploy Web App using AWS Elastic Beanstalk
Overview
In this step, you will use the AWS Elastic Beanstalk console to create and deploy a web application. AWS Elastic Beanstalk allows you to focus on writing code rather than managing the infrastructure. By the end of this module, you'll have a sample web app deployed and running on AWS.
Key Concepts
AWS Elastic Beanstalk: A service that makes it easy to deploy your application on AWS. You simply upload your code, and Elastic Beanstalk handles the deployment, management, and scaling of your application.
Environment: A collection of AWS resources provisioned by Elastic Beanstalk to run your application.
EC2 Instance: A virtual server in the cloud. Elastic Beanstalk provisions one or more Amazon EC2 instances when creating an environment.
Web Server: Software that uses the HTTP protocol to serve content over the Internet. It stores, processes, and delivers web pages.
Platform: A combination of the operating system, programming language runtime, web server, application server, and Elastic Beanstalk components that your application runs on.
Services Used
- AWS Elastic Beanstalk
Implementation Steps
Open the AWS Elastic Beanstalk Console
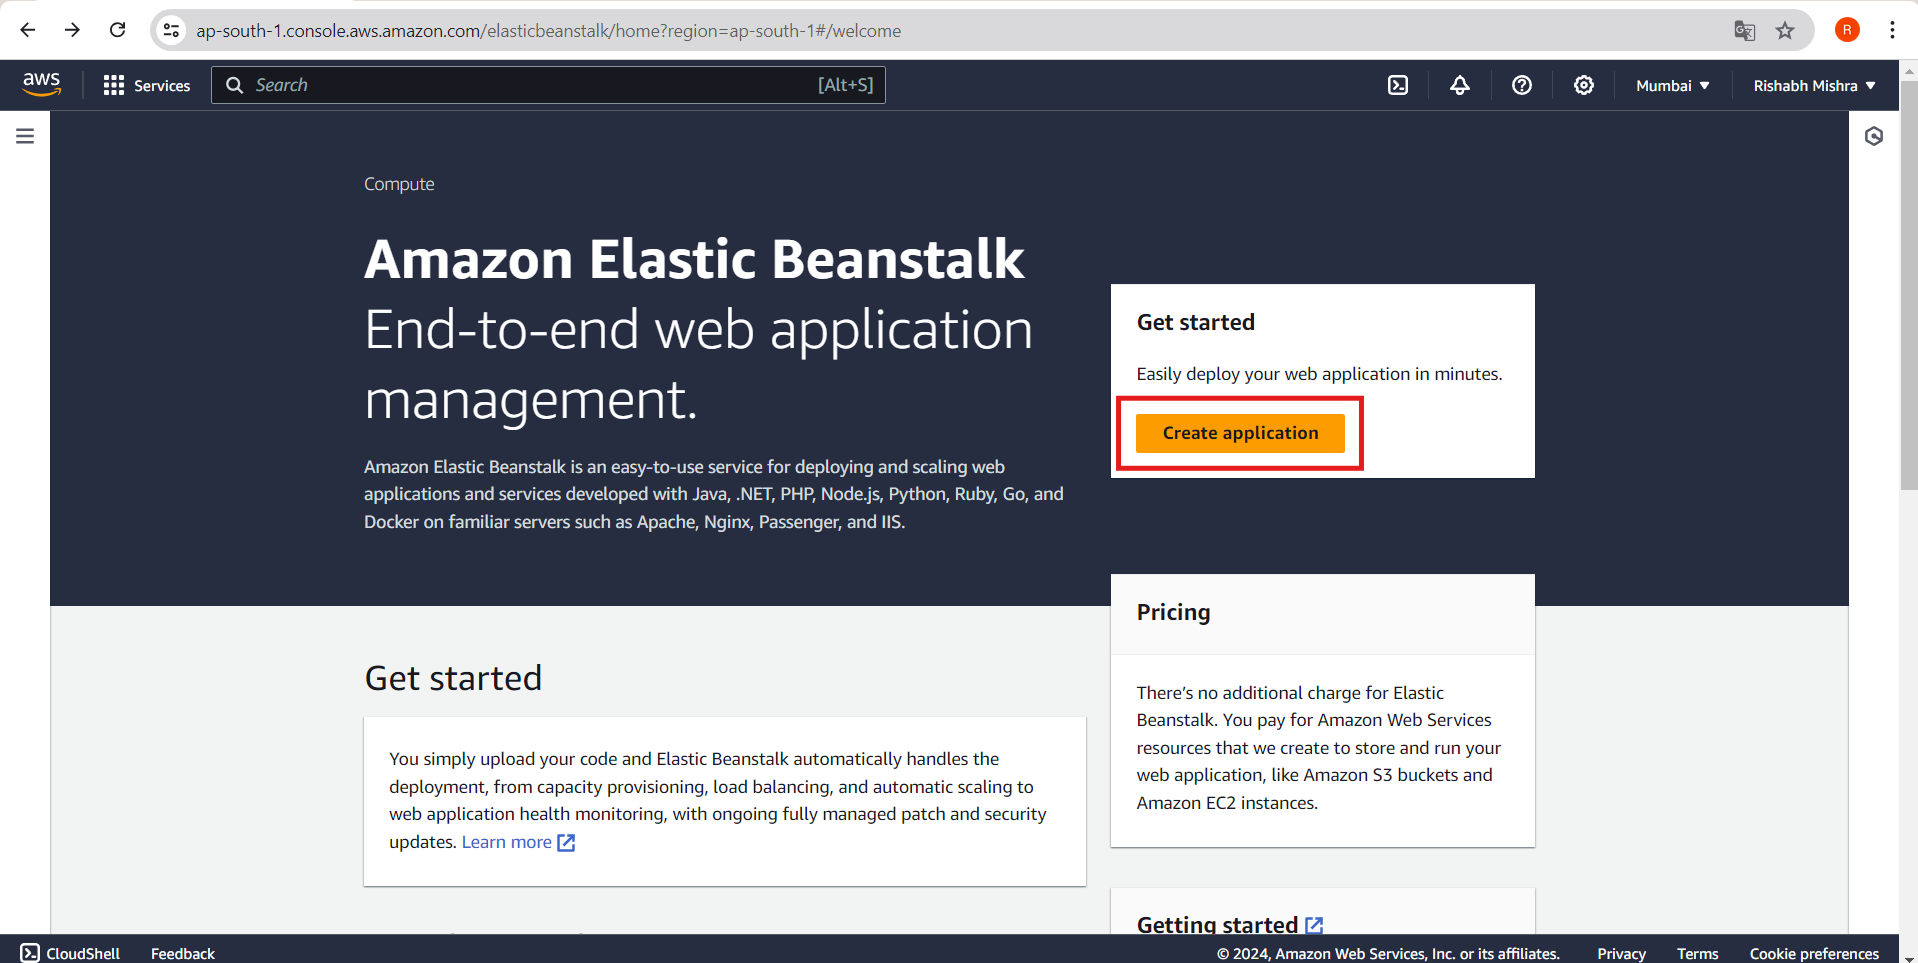
In a new browser tab, open the AWS Elastic Beanstalk console.
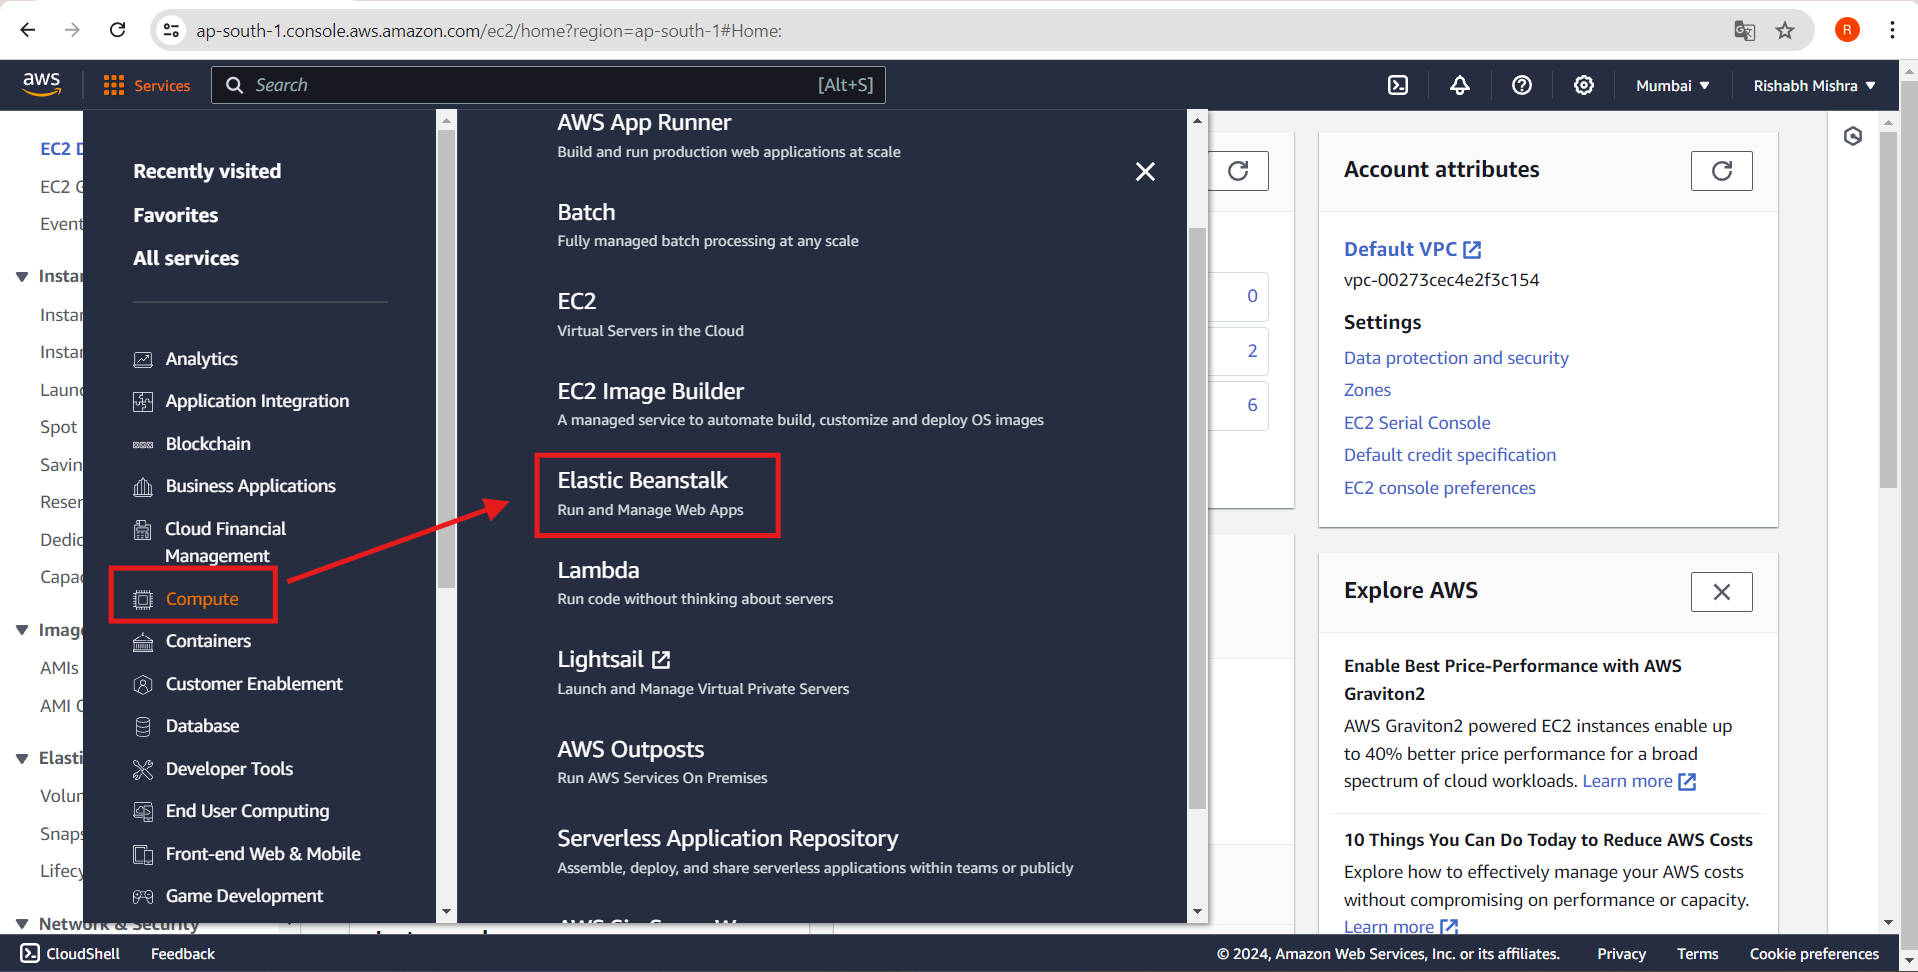
Create a New Application
Click the "Create Application" button.
Configure the Environment
Under the "Configure environment" heading, select "Web server environment."
In the text box under the heading "Application name," enter
DevOpsGettingStarted.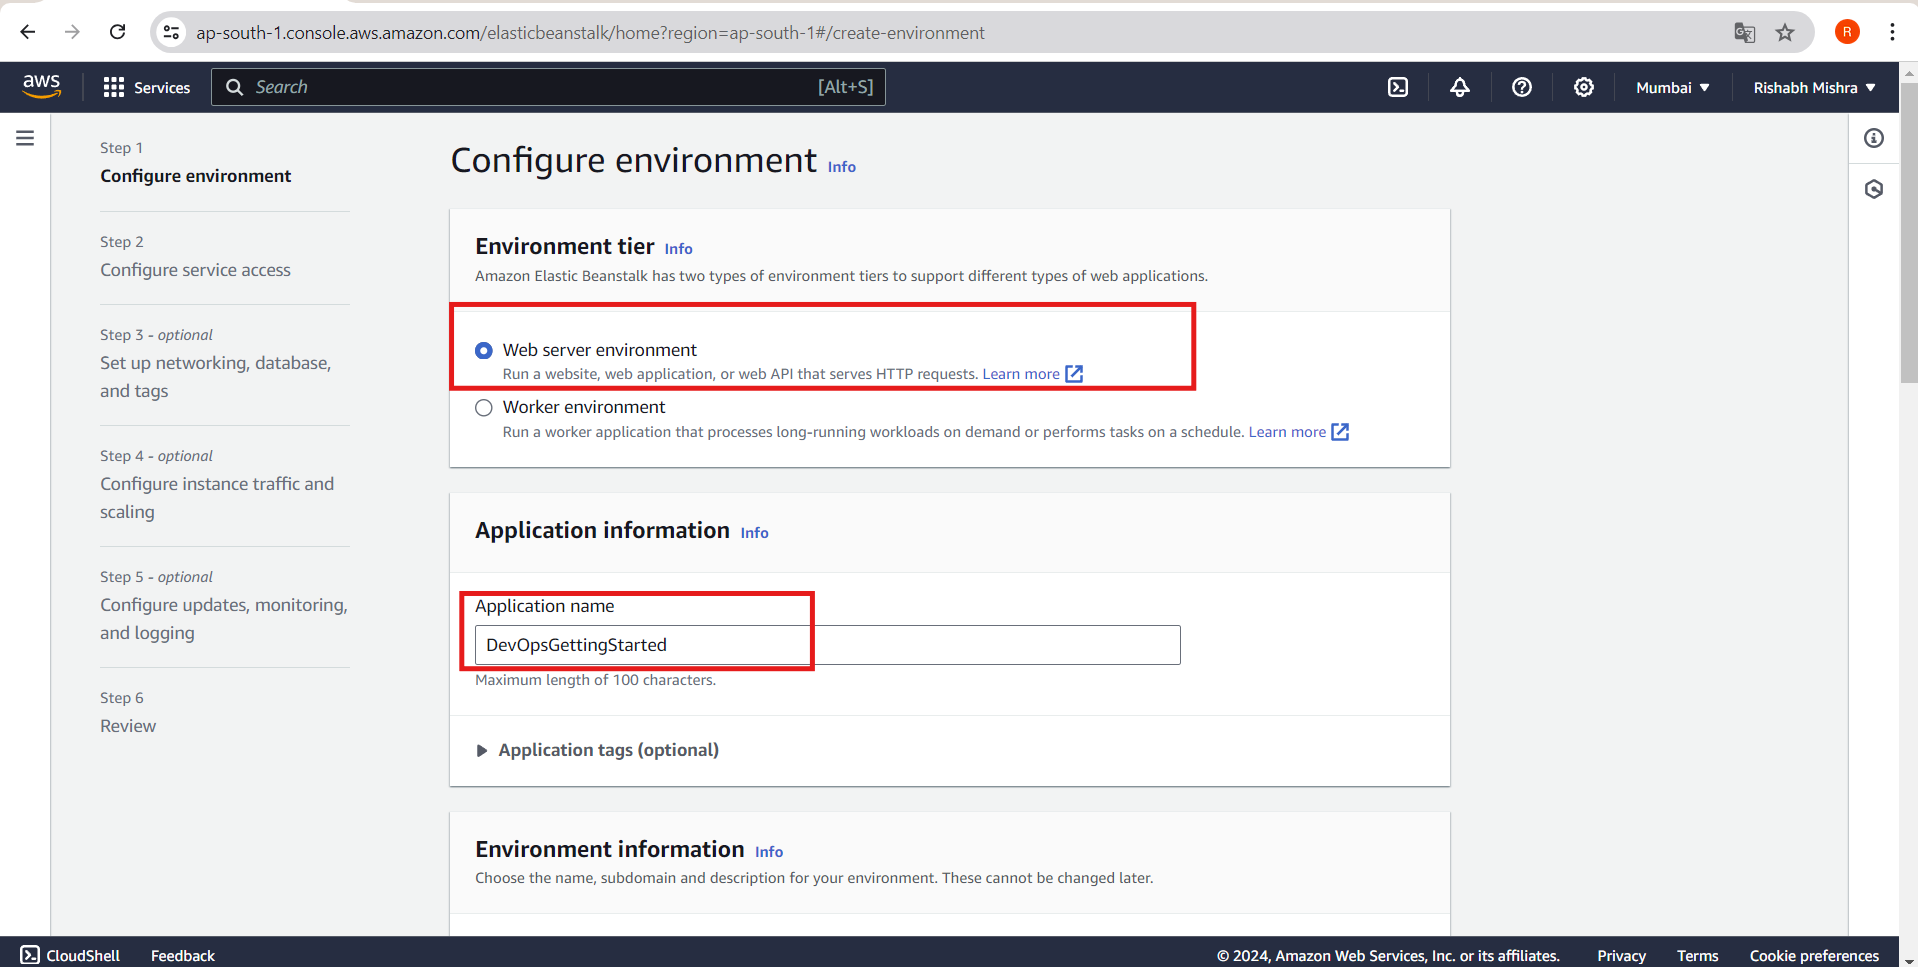
Select the Platform
In the "Platform" dropdown menu, select
Node.js. The Platform branch and Platform version will automatically populate with default selections.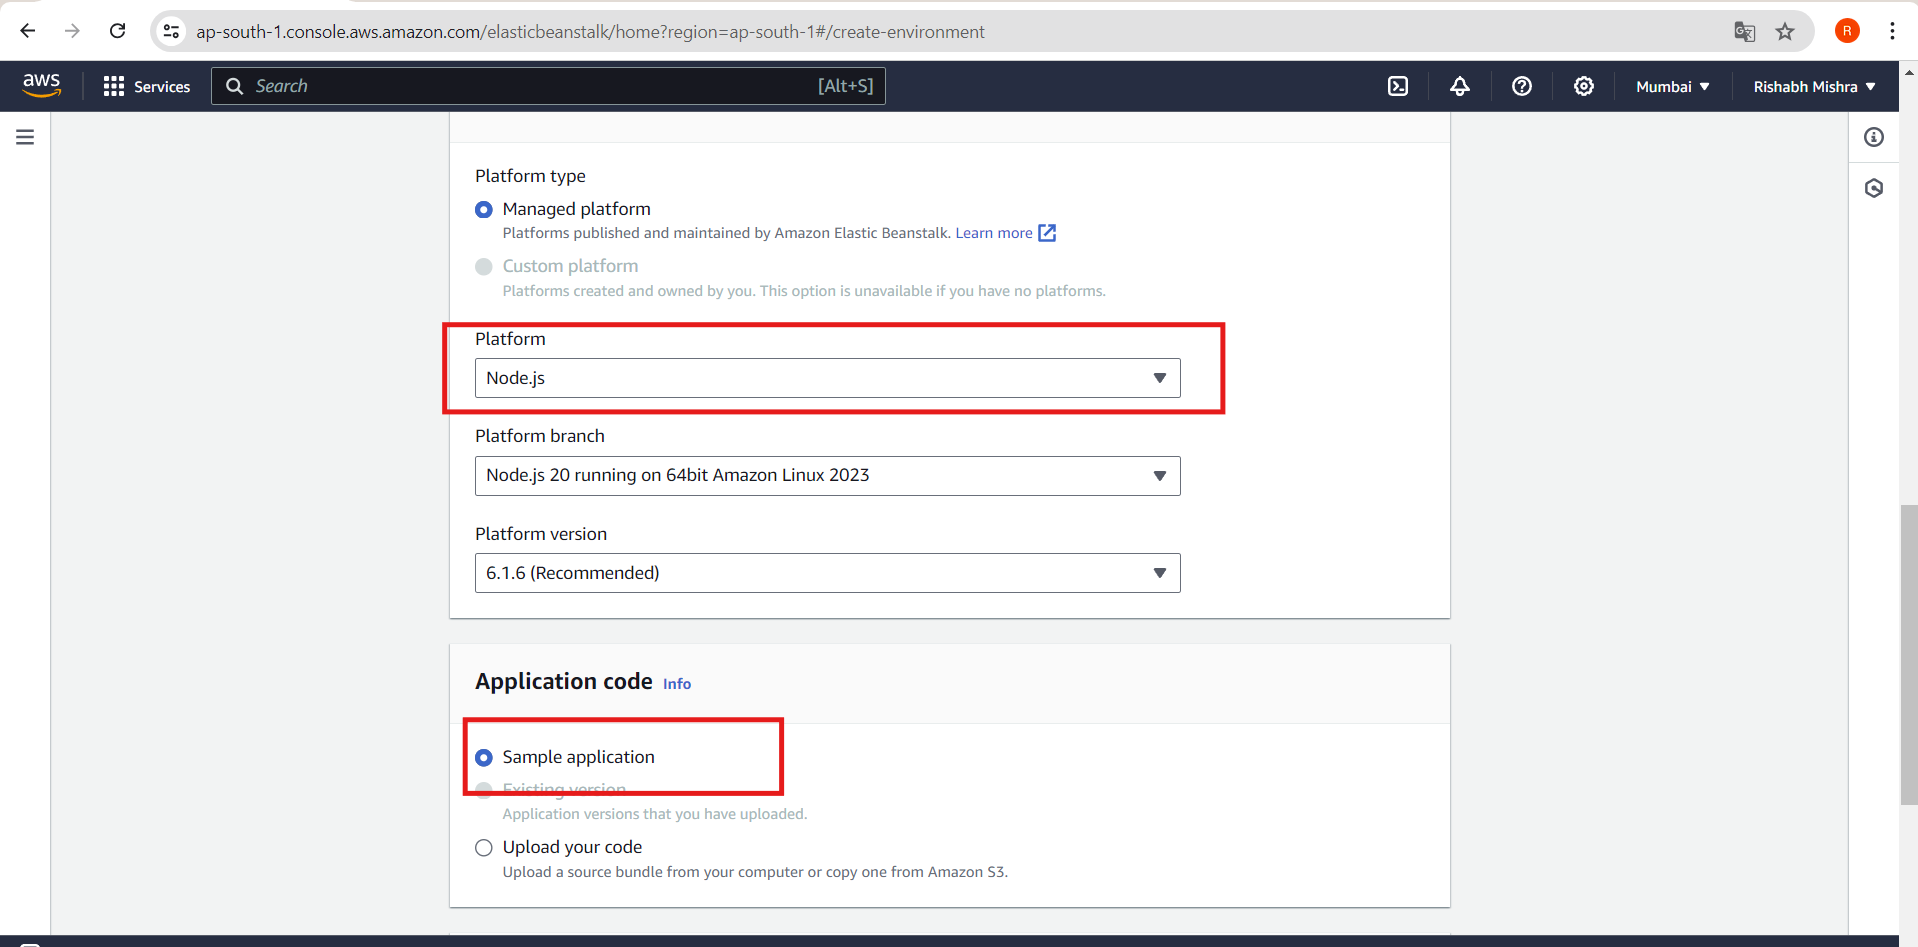
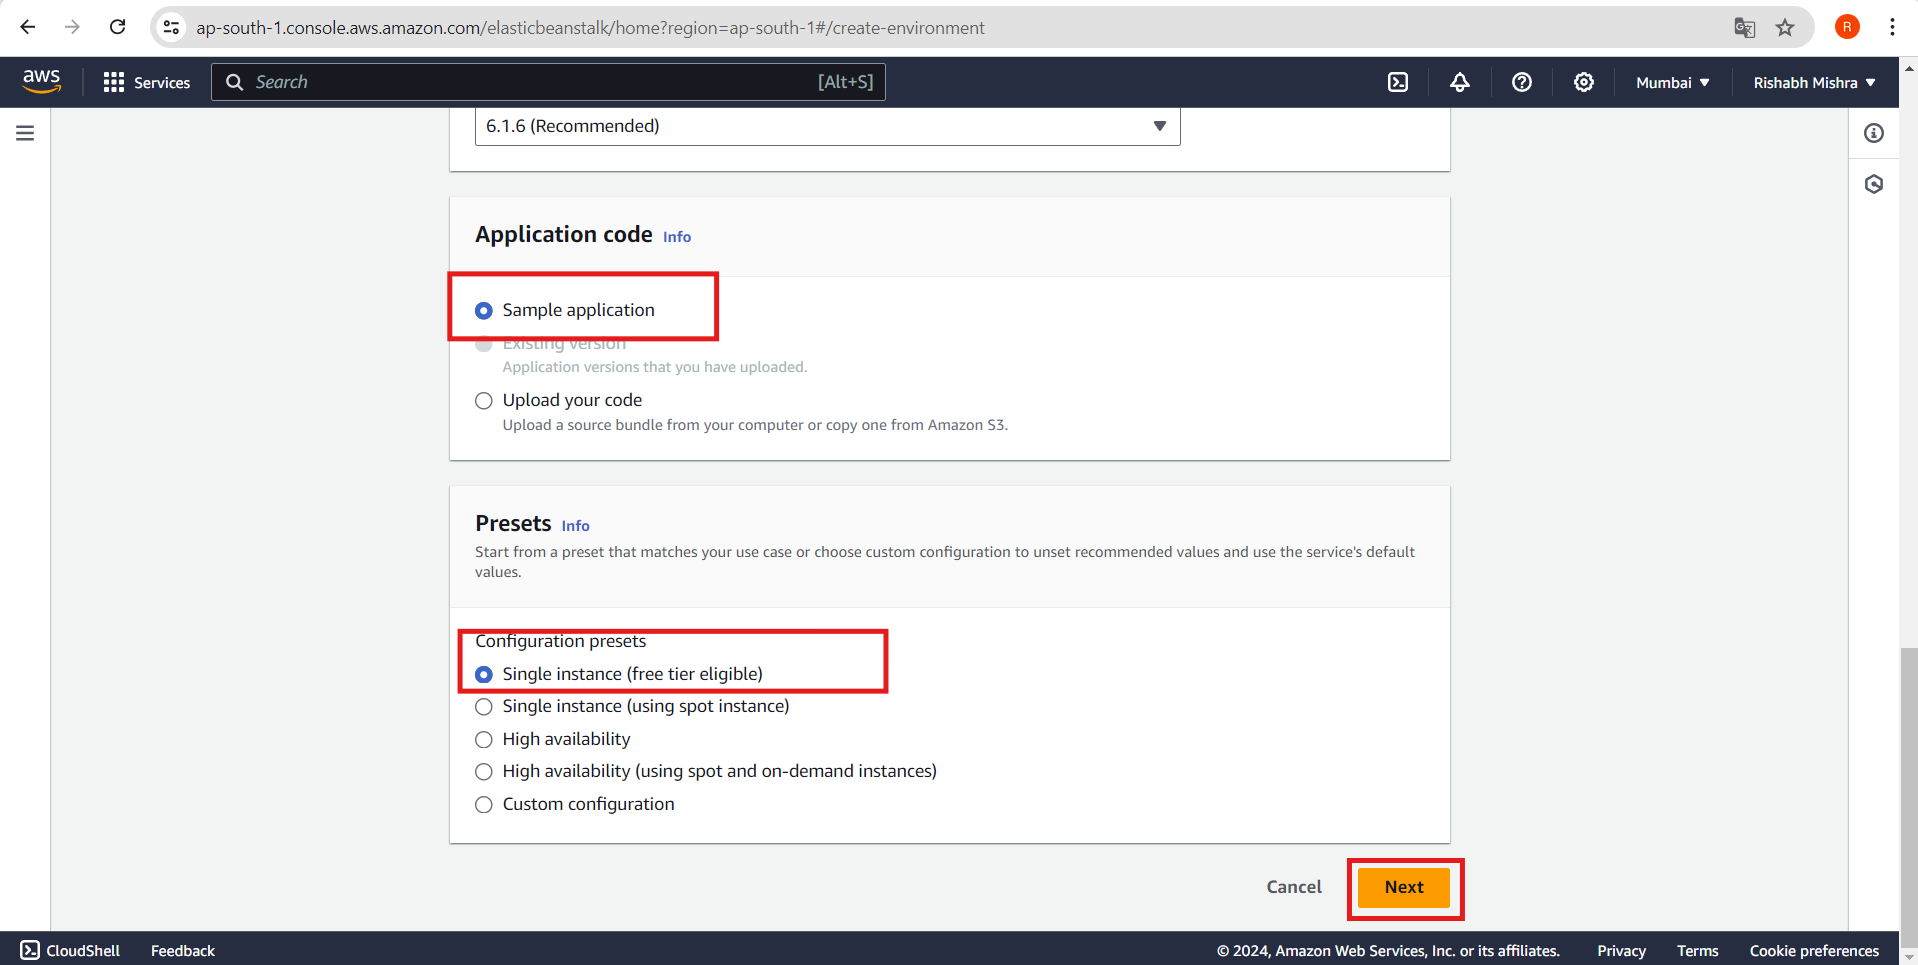
Choose the Sample Application
- Confirm that the radio button next to "Sample application" under the "Application code" heading is selected.
Select the Preset Configuration
Confirm that the radio button next to "Single instance (free tier eligible)" under the "Presets" heading is selected.
Click "Next."
Configure Service Access
On the "Configure service access" screen, choose "Use an existing service role" for the Service Role.
For the EC2 instance profile dropdown list:
If
aws-elasticbeanstalk-ec2-roledisplays, select it.If another default EC2 instance profile appears, select it. In my case, I chose a demo role that was previously created.
If no values are listed, then there is a need to create an IAM Role for the EC2 instance profile, then return to this step and select the newly created role.
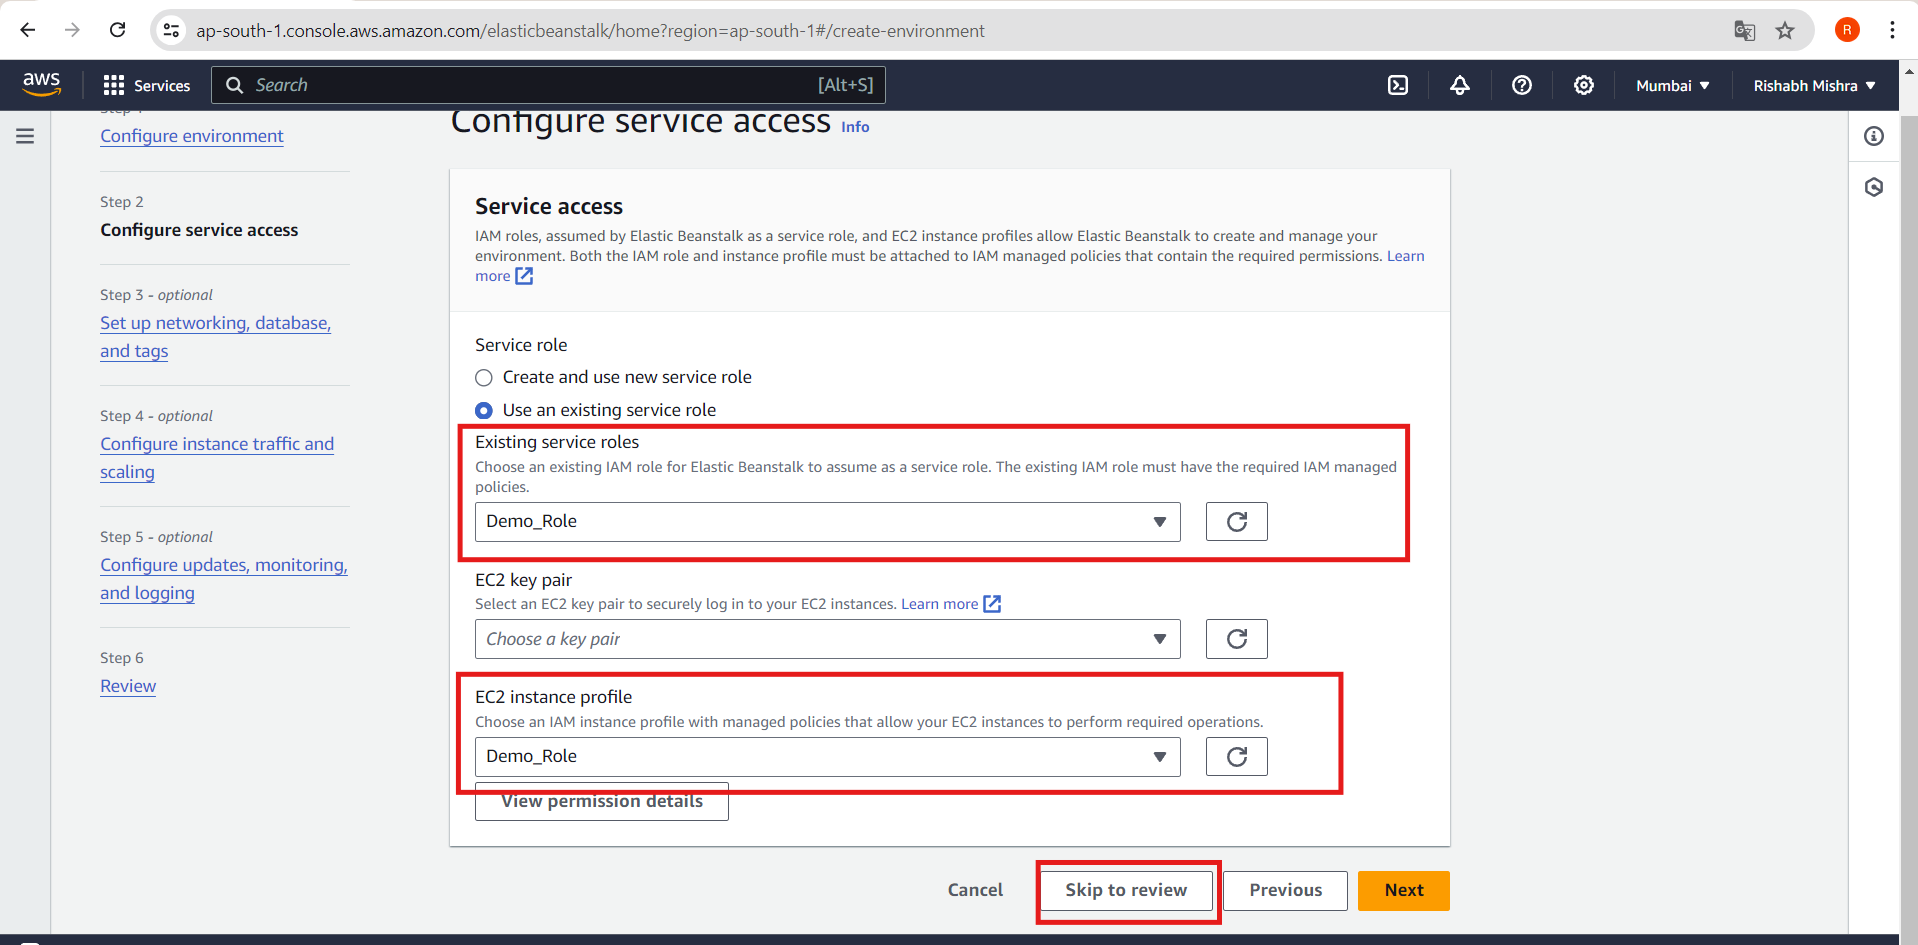
Skip to Review
- Choose "Skip to Review" on the "Configure service access" page. This will select the default values for this step and skip the optional steps.
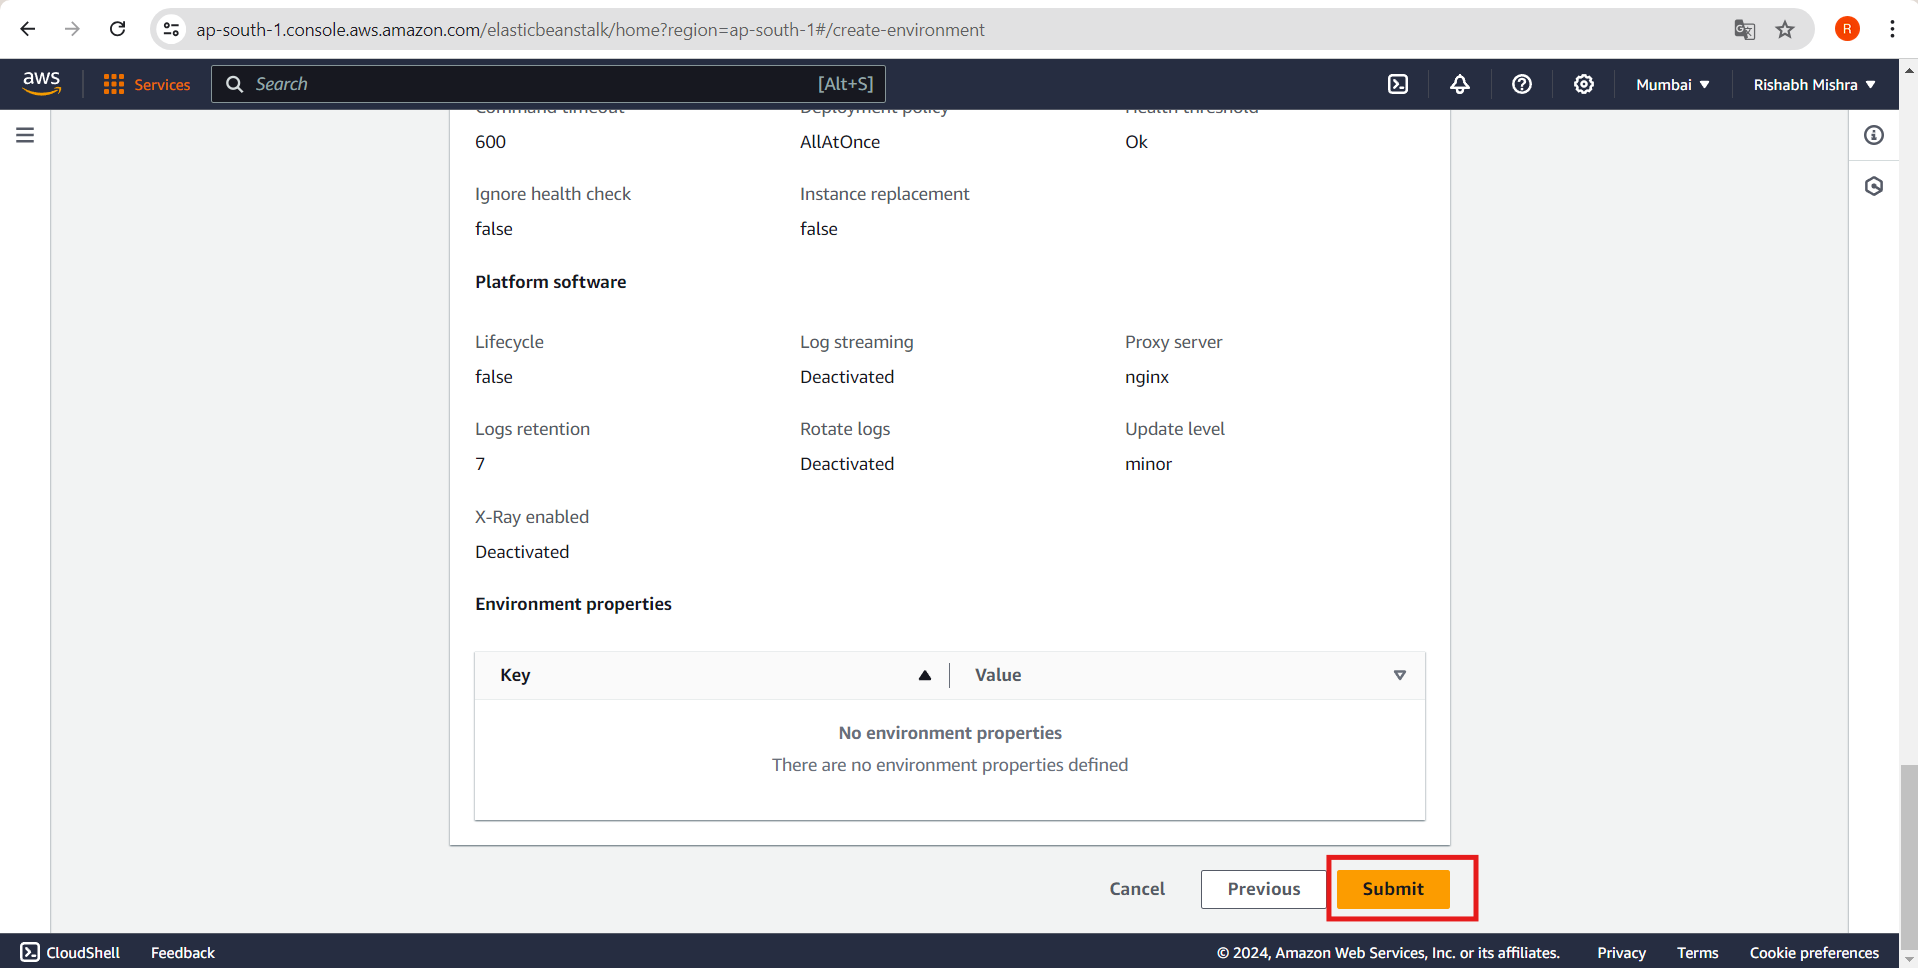
Review and Submit
The Review page displays a summary of all your choices.
Choose "Submit" at the bottom of the page to initialize the creation of your new environment.
Monitor Deployment
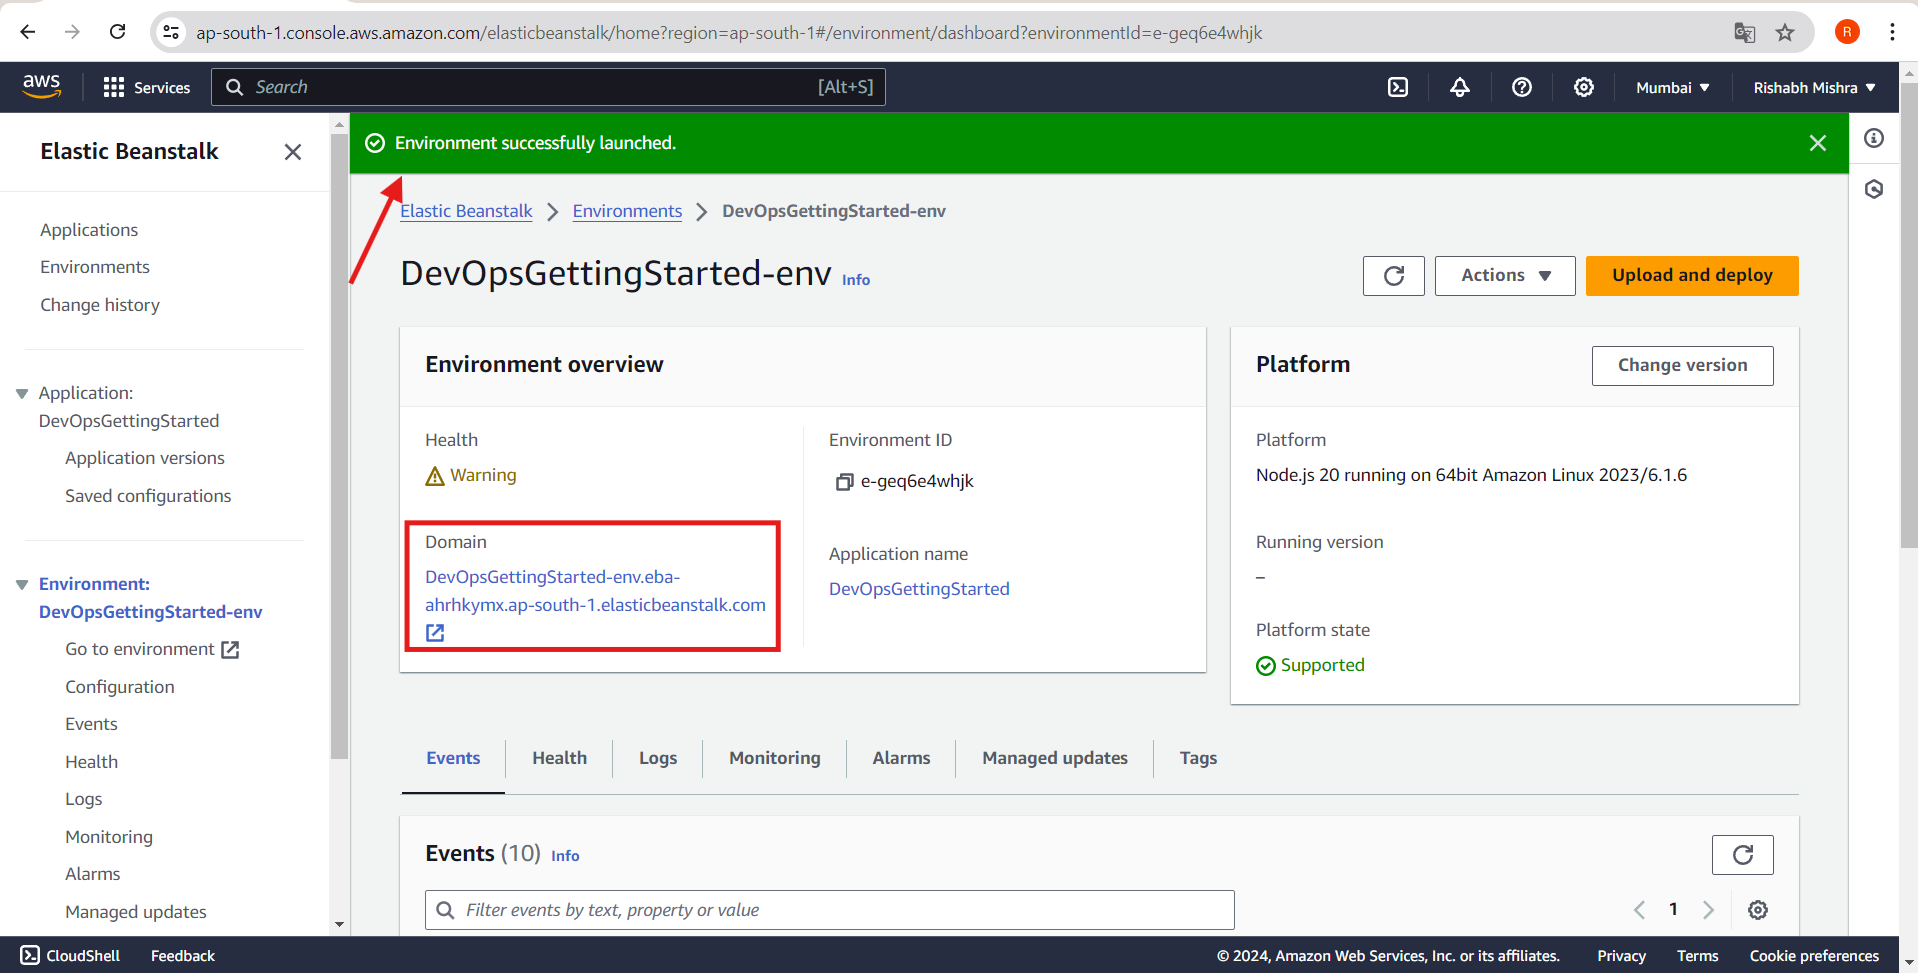
While waiting for deployment, monitor the status messages for your environment.
After a few minutes, a green banner with a checkmark will appear at the top of the environment screen, indicating successful deployment.
Test Your Application
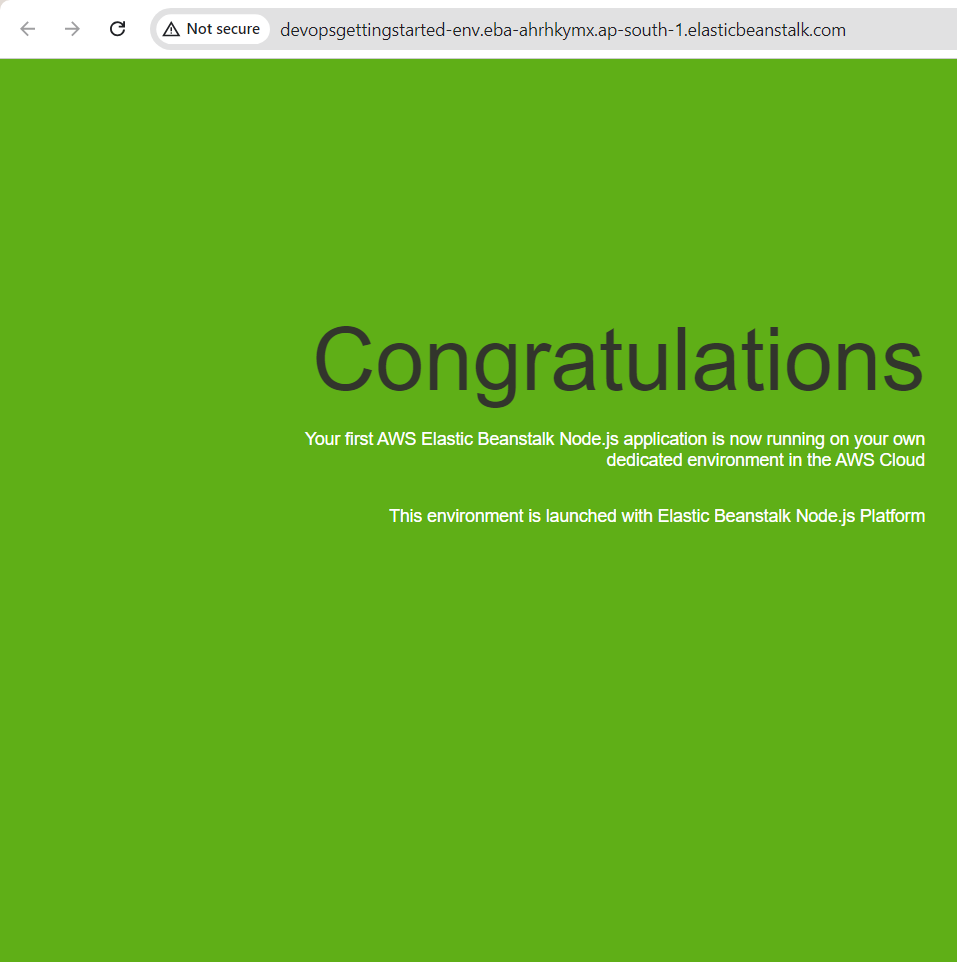
Once the environment status is "Ready," click the URL link provided under your environment's name.
A new browser tab should open, displaying your sample web app with a congratulatory page.
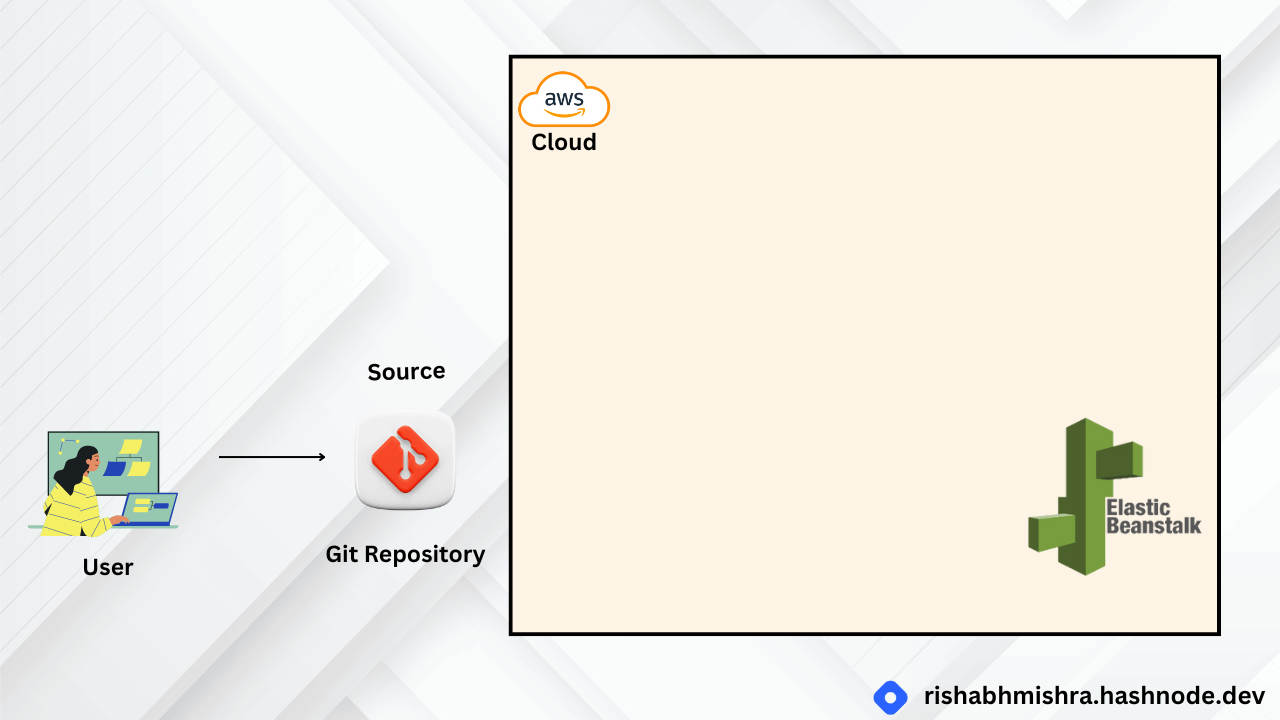
Application Architecture
Here's what our architecture looks like right now:
For Part 2 of this blog, visit the website.
https://rishabhmishra.hashnode.dev/how-to-build-your-first-aws-continuous-delivery-pipeline-from-code-to-deployment-part-2
Subscribe to my newsletter
Read articles from Rishabh Mishra directly inside your inbox. Subscribe to the newsletter, and don't miss out.
Written by

Rishabh Mishra
Rishabh Mishra
I'm Rishabh Mishra, an AWS Cloud and DevOps Engineer with a passion for automation and data analytics. I've honed my skills in AWS services, containerization, CI/CD pipelines, and infrastructure as code. Currently, I'm focused on leveraging my technical expertise to drive innovation and streamline processes. My goal is to share insights, learn from the community, and contribute to impactful projects in the DevOps and cloud domains. Let's connect and collaborate on Hashnode!