Understanding JavaScript Events: A Complete Guide
 Aditya Gadhave
What Is JavaScript Events ?
The change in the state of an object is known as an Event.
In html, there are various events which represents that some activity is performed by the user or by the browser.
When javascript code is included in HTML, js react over these events and allow the execution.
This process of reacting over the events is called Event Handling. Thus, js handles the HTML events via Event Handlers.
For example, when a user clicks over the browser, add js code, which will execute the task to be performed on the event
Some of the HTML events and their event handlers are:
Mouse events:
| Event Performed | Event Handler | Description |
| click | onclick | When mouse click on an element |
| mouseover | onmouseover | When the cursor of the mouse comes over the element |
| mouseout | onmouseout | When the cursor of the mouse leaves an element |
| mousedown | onmousedown | When the mouse button is pressed over the element |
| mouseup | onmouseup | When the mouse button is released over the element |
| mousemove | onmousemove | When the mouse movement takes place. |
Keyboard events:
| Event Performed | Event Handler | Description |
| Keydown & Keyup | onkeydown & onkeyup | When the user press and then release the key |
Form events:
| Event Performed | Event Handler | Description |
| focus | onfocus | When the user focuses on an element |
| submit | onsubmit | When the user submits the form |
| blur | onblur | When the focus is away from a form element |
| change | onchange | When the user modifies or changes the value of a form element |
Window/Document events
| Event Performed | Event Handler | Description |
| load | onload | When the browser finishes the loading of the page |
| unload | onunload | When the visitor leaves the current webpage, the browser unloads it |
| resize | onresize | When the visitor resizes the window of the browser |
Example Of Click Event:
<html>
<head> Javascript Events </head>
<body>
<script language="Javascript" type="text/Javascript">
    <!--
    function clickevent()
    {
        document.write("Aditya Rajendra Gadhave");
    }
    //-->
</script>
<form>
<input type="button" onclick="clickevent()" value="Who's this?"/>
</form>
</body>
</html>
JavaScript addEventListener() :
The addEventListener() method is used to attach an event handler to a particular element.
It does not override the existing event handlers.
Events are said to be an essential part of the JavaScript.
A web page responds according to the event that occurred.
Events can be user-generated or generated by API's.
An event listener is a JavaScript's procedure that waits for the occurrence of an event.
The addEventListener() method is an inbuilt function of JavaScript.
We can add multiple event handlers to a particular element without overwriting the existing event handlers.
Syntax
- element.addEventListener(event, function, useCapture);
lthough it has three parameters, the parameters event and function are widely used. The third parameter is optional to define. The values of this function are defined as follows.
Parameter Values
event: It is a required parameter. It can be defined as a string that specifies the event's name.
function: It is also a required parameter. It is a JavaScript function which responds to the event occur.
useCapture: It is an optional parameter. It is a Boolean type value that specifies whether the event is executed in the bubbling or capturing phase. Its possible values are true and false. When it is set to true, the event handler executes in the capturing phase. When it is set to false, the handler executes in the bubbling phase. Its default value is false.
Example:
<!DOCTYPE html>
<html>
<body>
<p> Example of the addEventListener() method. </p>
<p> Click the following button to see the effect. </p>
<button id = "btn"> Click me </button>
<p id = "para"></p>
<script>
document.getElementById("btn").addEventListener("click", fun);
function fun() {
document.getElementById("para").innerHTML = "Hello World" + "<br>" + "Welcome to the Aditya Gadhave Blogs";
}
</script>
</body>
</html>
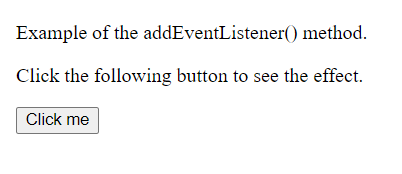
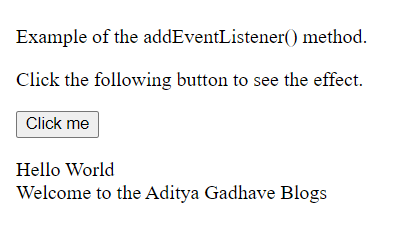
Output:

After clicking the given HTML button, the output will be -

JavaScript onclick event :
The onclick event generally occurs when the user clicks on an element.
It allows the programmer to execute a JavaScript's function when an element gets clicked.
This event can be used for validating a form, warning messages and many more.
Using JavaScript, this event can be dynamically added to any element.
It supports all HTML elements except <html>, <head>, <title>, <style>, <script>, <base>, <iframe>, <bdo>, <br>, <meta>, and <param>.
It means we cannot apply the onclick event on the given tags.
In HTML, we can use the onclick attribute and assign a JavaScript function to it.
We can also use the JavaScript's addEventListener() method and pass a click event to it for greater flexibility.
Syntax :
Now, we see the syntax of using the onclick event in HTML and in javascript (without addEventListener() method or by using the addEventListener() method).
In HTML
- <element onclick = "fun()">
In JavaScript
- object.onclick = function() { myScript };
In JavaScript by using the addEventListener() method
- object.addEventListener("click", myScript);
Let's see how to use onclick event by using some illustrations. Now, we will see the examples of using the onclick event in HTML, and in JavaScript.
<!DOCTYPE html>
<html>
<head>
<script>
function fun() {
alert("Welcome to the Aditya Gadhave Blog");
}
</script>
</head>
<body>
<h3> This is an example of using onclick attribute in HTML. </h3>
<p> Click the following button to see the effect. </p>
<button onclick = "fun()">Click me</button>
</body>
</html>
Output:

After clicking the given button, the output will be -
One Alert Disply Which value Is Welcome to the Aditya Gadhave Blog
JavaScript onload :
n JavaScript, this event can apply to launch a particular function when the page is fully displayed.
It can also be used to verify the type and version of the visitor's browser.
We can check what cookies a page uses by using the onload attribute.
In HTML, the onload attribute fires when an object has been loaded
The purpose of this attribute is to execute a script when the associated element loads.
In HTML, the onload attribute is generally used with the <body> element to execute a script once the content (including CSS files, images, scripts, etc.) of the webpage is completely loaded.
It is not necessary to use it only with <body> tag, as it can be used with other HTML elements.
The difference between the document.onload and window.onload is: document.onload triggers before the loading of images and other external content. It is fired before the window.onload.
While the window.onload triggers when the entire page loads, including CSS files, script files, images, etc.
Syntax :
- window.onload = fun()
JavaScript dblclick event :
The dblclick event generates an event on double click the element.
The event fires when an element is clicked twice in a very short span of time.
We can also use the JavaScript's addEventListener() method to fire the double click event.
In HTML, we can use the ondblclick attribute to create a double click event.
Syntax :
Now, we see the syntax of creating double click event in HTML and in javascript (without using addEventListener() method or by using the addEventListener() method).
In HTML
- <element ondblclick = "fun()">
In JavaScript
- object.ondblclick = function() { myScript };
In JavaScript by using the addEventListener() method
- object.addEventListener("dblclick", myScript);
Example:
<!DOCTYPE html>
<html>
<head>
</head>

<body>
<h1 id = "heading" ondblclick = "fun()"> Hello world :):) </h1>
<h2> Double Click the text "Hello world" to see the effect. </h2>
<p> This is an example of using the <b> ondblclick </b> attribute. </p>
<script>
function fun() {
document.getElementById("heading").innerHTML = " Welcome to the javaTpoint.com ";
}
</script>
</body>
</html>
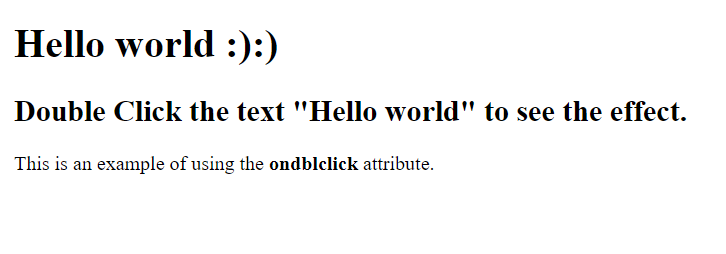
Output:
After the execution of the above code, the output will be -

After double-clicking the text "Hello world", the output will be -

Whats Next ?
JavaScript Cookies
Subscribe to my newsletter
Read articles from Aditya Gadhave directly inside your inbox. Subscribe to the newsletter, and don't miss out.
Written by

Aditya Gadhave
Aditya Gadhave
👋 Hello! I'm Aditya Gadhave, an enthusiastic Computer Engineering Undergraduate Student. My passion for technology has led me on an exciting journey where I'm honing my skills and making meaningful contributions.