Deploying WordPress application on Kubernetes using ConfigMaps and Secrets.
 Gaurav Kumar
ConfigMaps:
ConfigMaps in Kubernetes is a resource object which allow us to store non-sensitive configuration data related to application in key-value pair. Suppose we are running an application which requires some environment variables, command-line argument or any configuration details that type of details we are providing to the application via ConfigMaps instead of directly providing this data in application.
Secrets:
Secrets in Kubernetes is also a resource object which store configuration related data but the only key difference is here we store sensitive data in base64 encoded format. Suppose our application requires some password, SSH keys or any confidential data which we don't want to disclose directly we can store that in secret file in base64 encoded format.
Step-by-Step Process to Deploy WordPress on Kubernetes using ConfigMaps and Secrets.
Step-1: (Creating ConfigMap)
Here we need to create configmap.yaml file and store below code in that.
apiVersion: v1
kind: ConfigMap
metadata:
  name: wordpress-config
data:
  WORDPRESS_DB_NAME: wordpress
  WORDPRESS_TABLE_PREFIX: wp_
Here we are storing non-sensitive data for WordPress such as DB Name and Table Prefix name.
Step-2:
Apply this file by using below command.
kubectl apply -f configmap.yaml
Step-3: (Creating Secrets file)
Here I am creating secret.yaml file which will store MySQL credentials, since it includes sensitive information so we are storing it in secret file in base64 encoded format.
apiVersion: v1
kind: Secret
metadata:
  name: mysql-secret
type: Opaque
data:
  mysql-root-password: cm9vdHBhc3M=  #base64 encoded value of "rootpass"
  mysql-user: d3B1c2Vy #base64 encoded value of "wpuser"
  mysql-password: d3BwYXNz #base64 encoded value of "wppass"
Here we have stored MySQL user, password and root-password which WordPress will use to connect to MySQL containers and then store login information of users.
Step-4:
We need to apply this file by below command.
kubectl apply -f secret.yaml
Step-5: (Creating Deployment and Service files)
We need to create two deployments here first will be WordPress deployment and other is MySQL deployment because we need MySQL container as a backend to store user data and we need two services for both the container
- Deploying WordPress container with Service
Below is the code to create WordPress deployment and service as a NodePort to expose it to external world. We need to first create wordpress-dep-svc.yaml file and paste the below code into that.
apiVersion: apps/v1
kind: Deployment
metadata:
  name: wordpress-deployment
spec:
  replicas: 1
  selector:
    matchLabels:
      app: wordpress
  template:
    metadata:
      labels:
        app: wordpress
    spec:
      containers:
      - name: wordpress
        image: wordpress:latest
        ports:
        - containerPort: 80
        env:
        - name: WORDPRESS_DB_HOST
          value: mysql
        - name: WORDPRESS_DB_NAME
          valueFrom:
            configMapKeyRef:
              name: wordpress-config
              key: WORDPRESS_DB_NAME
        - name: WORDPRESS_TABLE_PREFIX
          valueFrom:
            configMapKeyRef:
              name: wordpress-config
              key: WORDPRESS_TABLE_PREFIX
        - name: WORDPRESS_DB_USER
          valueFrom:
            secretKeyRef:
              name: mysql-secret
              key: mysql-user
        - name: WORDPRESS_DB_PASSWORD
          valueFrom:
            secretKeyRef:
              name: mysql-secret
              key: mysql-password
      volumes:
      - name: wordpress-config-volume
        configMap:
          name: wordpress-config
---
apiVersion: v1
kind: Service
metadata:
  name: wordpress-service
spec:
  type: NodePort
  ports:
  - port: 80
    targetPort: 80
  selector:
    app: wordpress
Here in above file we have created deployment and service for WordPress container, in this deployment we have injected WORDPRESS_DB_NAME & WORDPRESS_TABLE_PREFIX from ConfigMaps and given the reference of our ConfigMaps ( wordpress-config) which we have created earlier so that it can fetch the value from ConfigMaps and we have injected mysql-user & mysql-password from Secret file and mentioned the reference (mysql-secret) of Secret created earlier.
We can apply this file by below command.
kubectl apply -f wordpress-dep-svc.yaml
- Creating Deployment and Service for MySQL container.
We have to create mysql-dep-svc.yaml file and need to paste below code.
apiVersion: apps/v1
kind: Deployment
metadata:
  name: mysql-deployment
spec:
  replicas: 1
  selector:
    matchLabels:
      app: mysql
  template:
    metadata:
      labels:
        app: mysql
    spec:
      containers:
      - name: mysql
        image: mysql:5.7
        ports:
        - containerPort: 3306
        env:
        - name: MYSQL_ROOT_PASSWORD
          valueFrom:
            secretKeyRef:
              name: mysql-secret
              key: mysql-root-password
        - name: MYSQL_DATABASE
          value: wordpress
        - name: MYSQL_USER
          valueFrom:
            secretKeyRef:
              name: mysql-secret
              key: mysql-user
        - name: MYSQL_PASSWORD
          valueFrom:
            secretKeyRef:
              name: mysql-secret
              key: mysql-password
---
apiVersion: v1
kind: Service
metadata:
  name: mysql
spec:
  ports:
  - port: 3306
  selector:
    app: mysql
Here from Secrets we have injected value of mysql-root-password, mysql-password & mysql-user and referenced the name (mysql-secret).
We can apply this file by below command.
kubectl apply -f mysql-dep-svc.yaml
Step-6: (Accessing WordPress application)
Now we have deployed both MySQL, WordPress container and their services along with ConfigMaps and Secrets so now its time to access them by below command.
kubectl get services
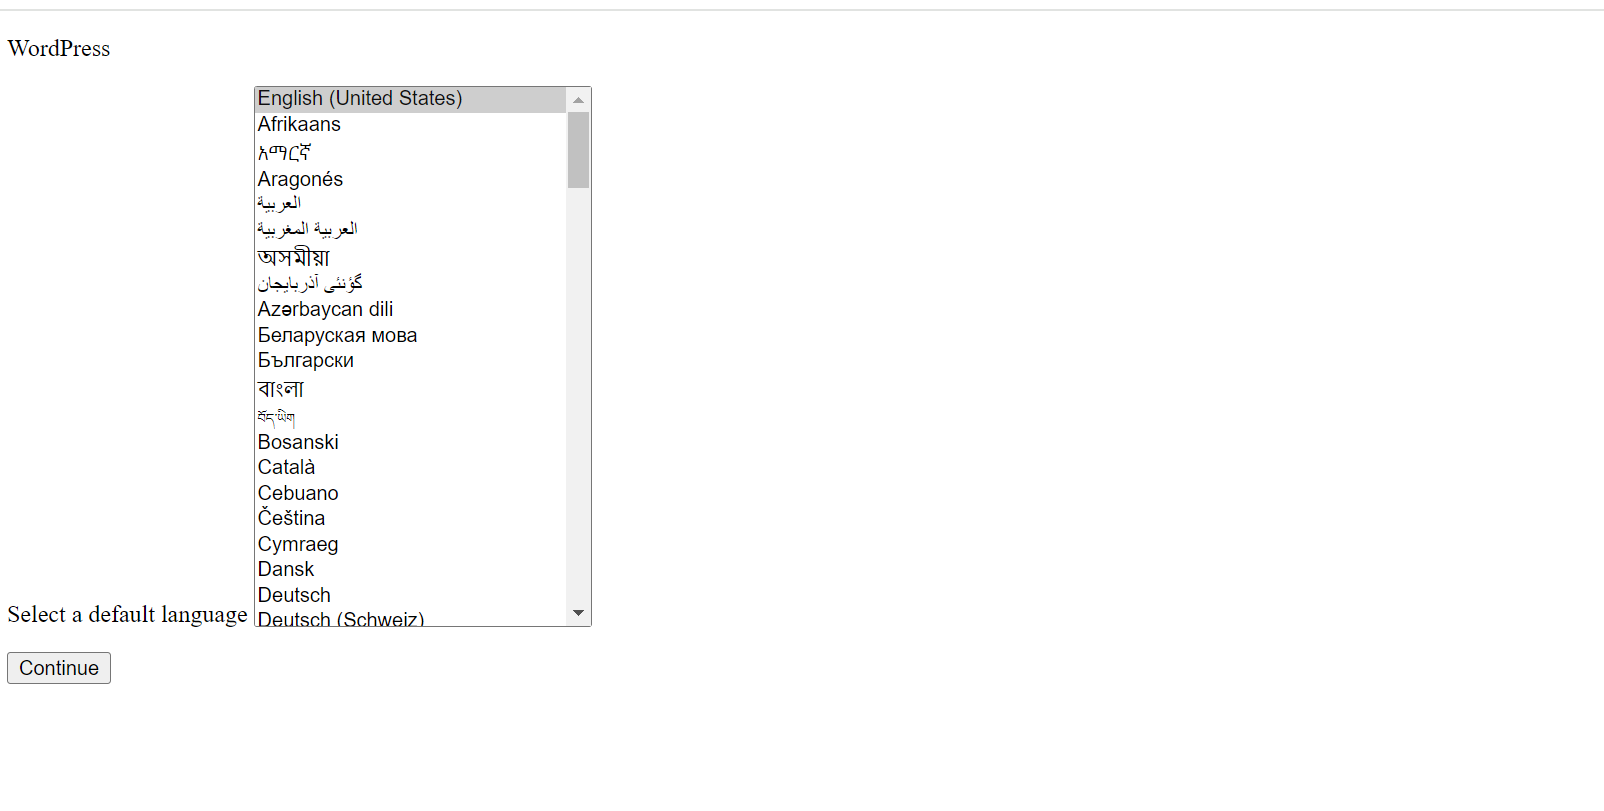
Above command will show both MySQL and WordPress application services and their NodePort IP, we need to copy NodePort IP of WordPress application and in our browser we need to put "http://EXTERNAL-IP:NODEPORT". This will open WordPress application and we will see application shown as below.

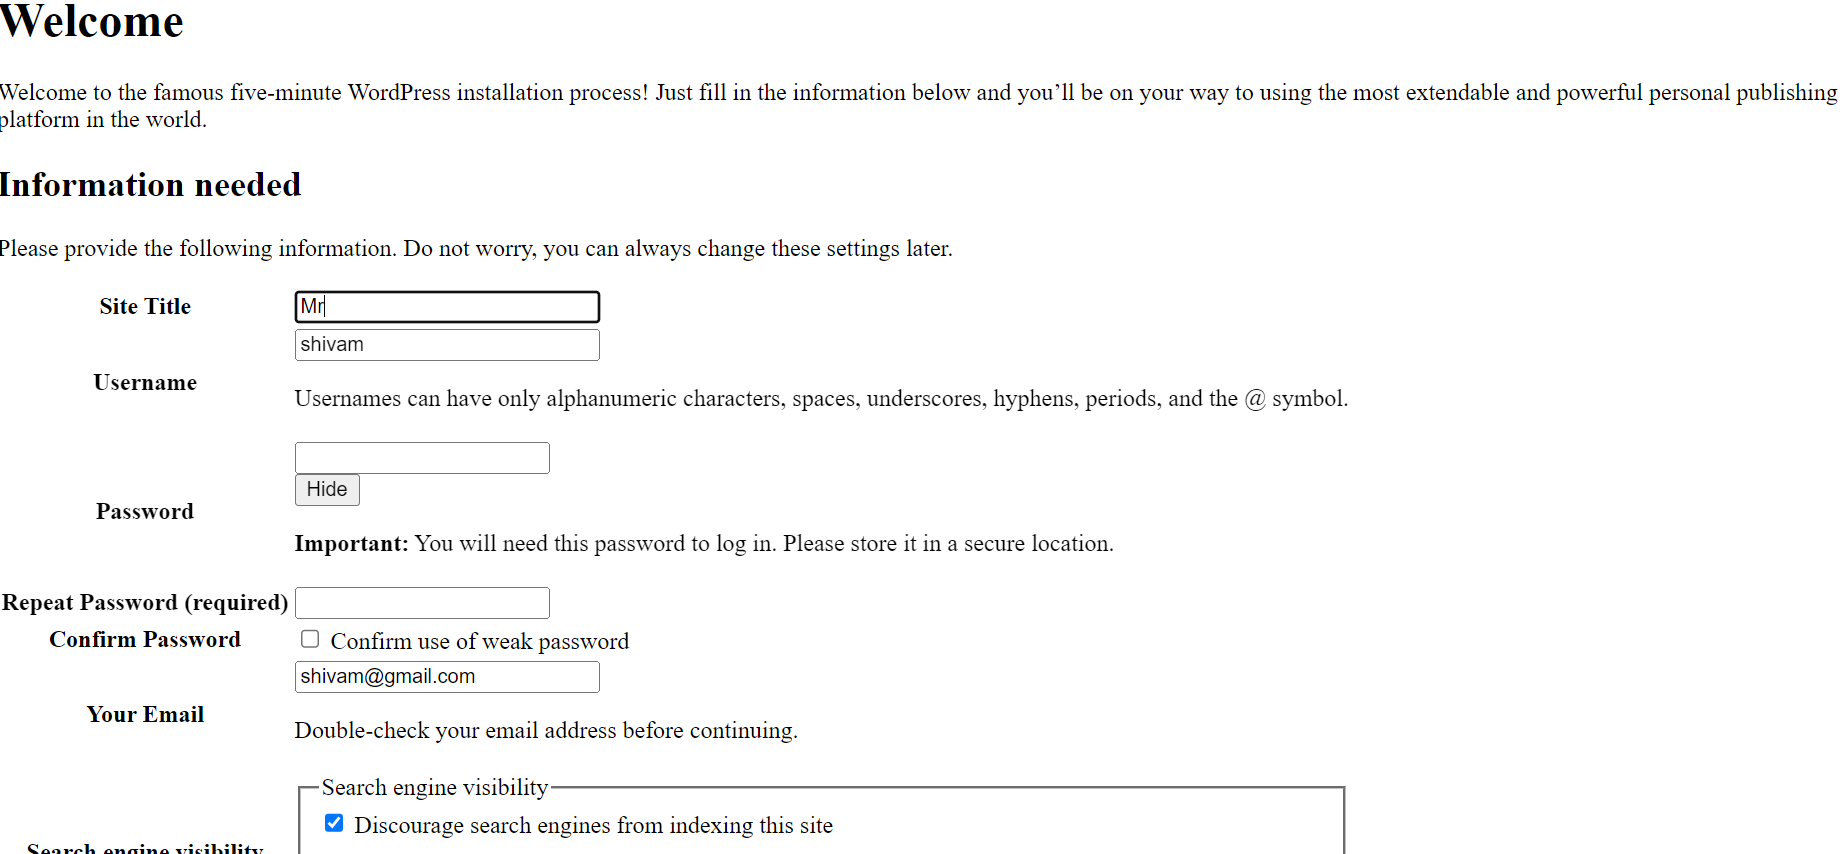
After this we need to choose language and click on continue and it will open below screen where we can fill the details which will be stored in MySQL DB and we can verify that from MySQL DB container.

Step-7: (Verifying the details from MySQL Container)
Now we will get into MySQL running container by typing below command.
kubectl exec -it <mysql-pod-name> -- /bin/bash
After getting into running container we will connect to MySQL database using MySQL client by below command in password we will fill rootpass.
mysql -u root -p
Now we are connected to MySQL, we need to put below listed command to check all WordPress related tables.
SHOW DATABASES;
USE wordpress;
SHOW TABLES;
Above command will open all WordPress related tables but we need to open wp_users tables to get the details by typing below command.
SELECT * FROM wp_users
After typing above we will get output shown as below which we can see have all the details which we have provided during WordPress login.

Subscribe to my newsletter
Read articles from Gaurav Kumar directly inside your inbox. Subscribe to the newsletter, and don't miss out.
Written by

Gaurav Kumar
Gaurav Kumar
I am working as a full time DevOps Engineer at Tata Consultancy Services from past 2.7 yrs, I have very good experience of containerization tools Docker, Kubernetes, OpenShift. I have good experience of using Ansible, Terraform and others.