Installation of kubeadm
 Lalita Kashyap
1 min read

Step 1: Create 2 EC2 instances
- Give name&tag > Select "Ubuntu" AMI
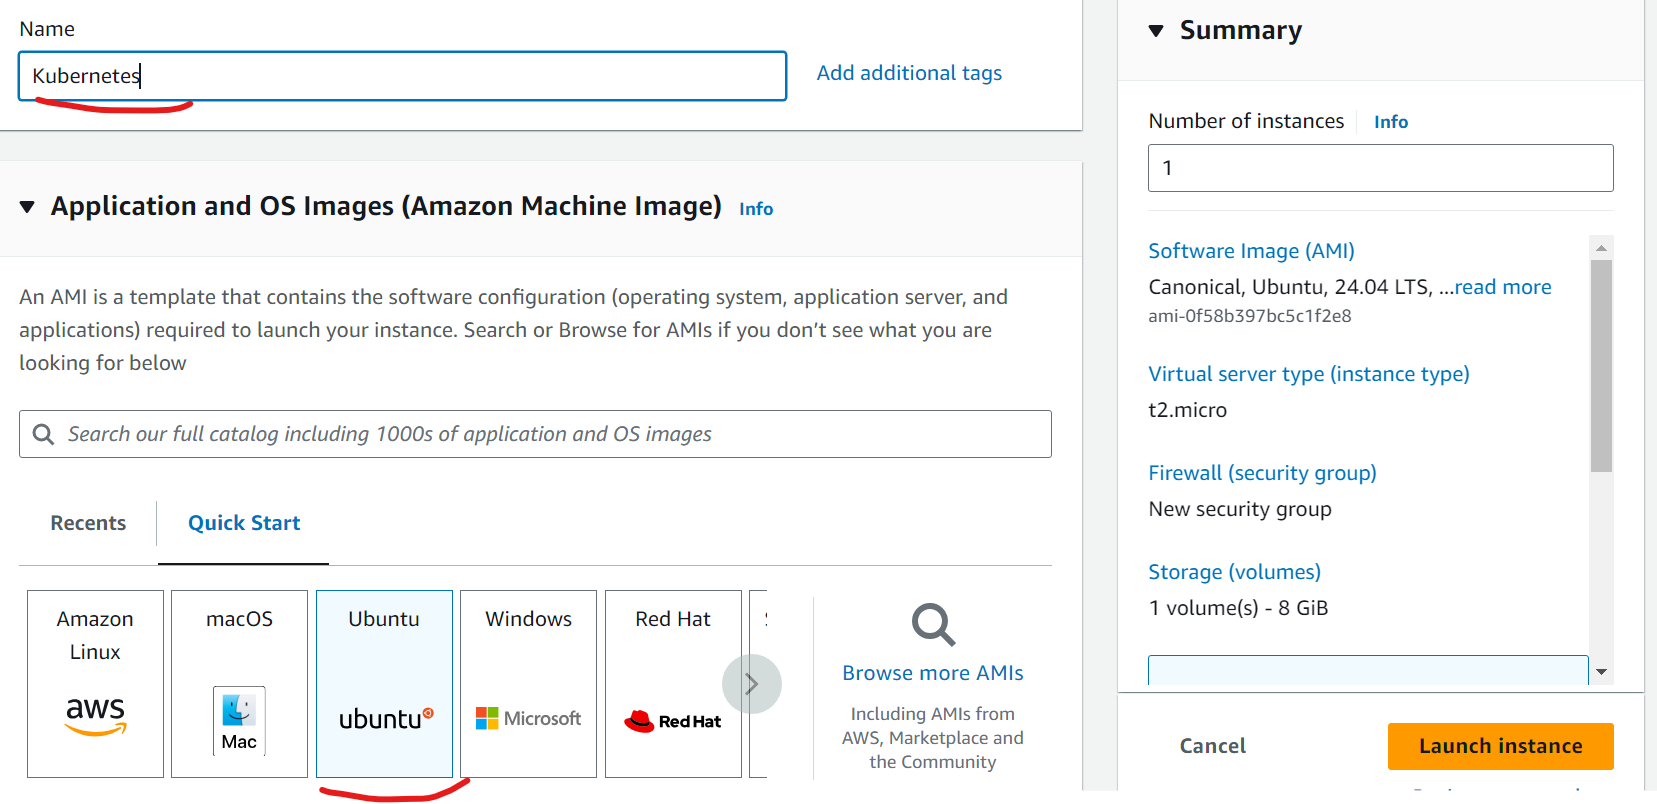
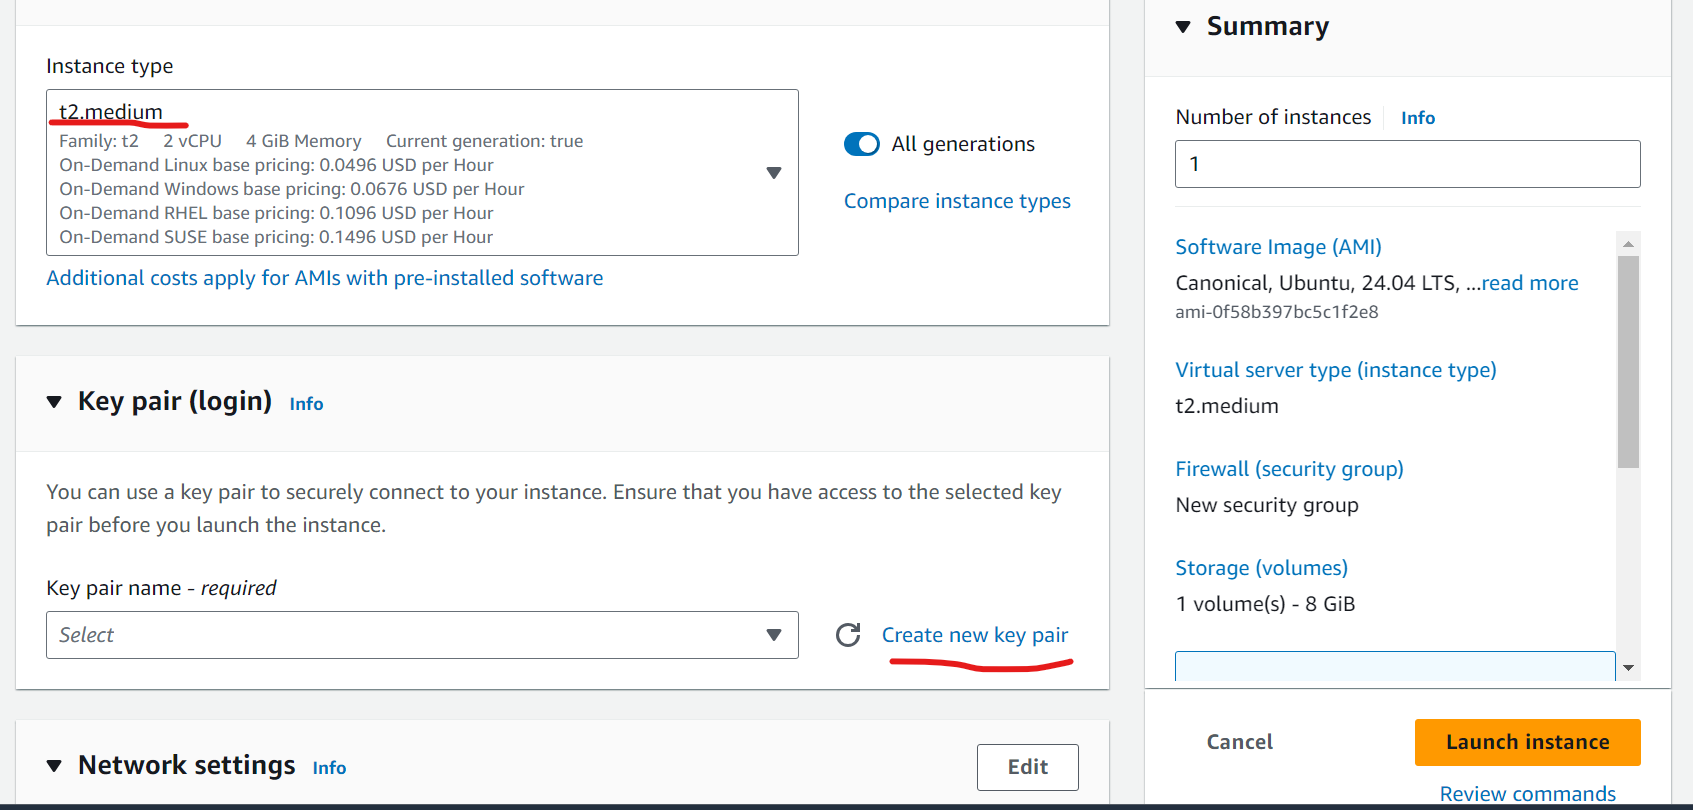
- Select instance type "t2.medium" > Create new key-pair
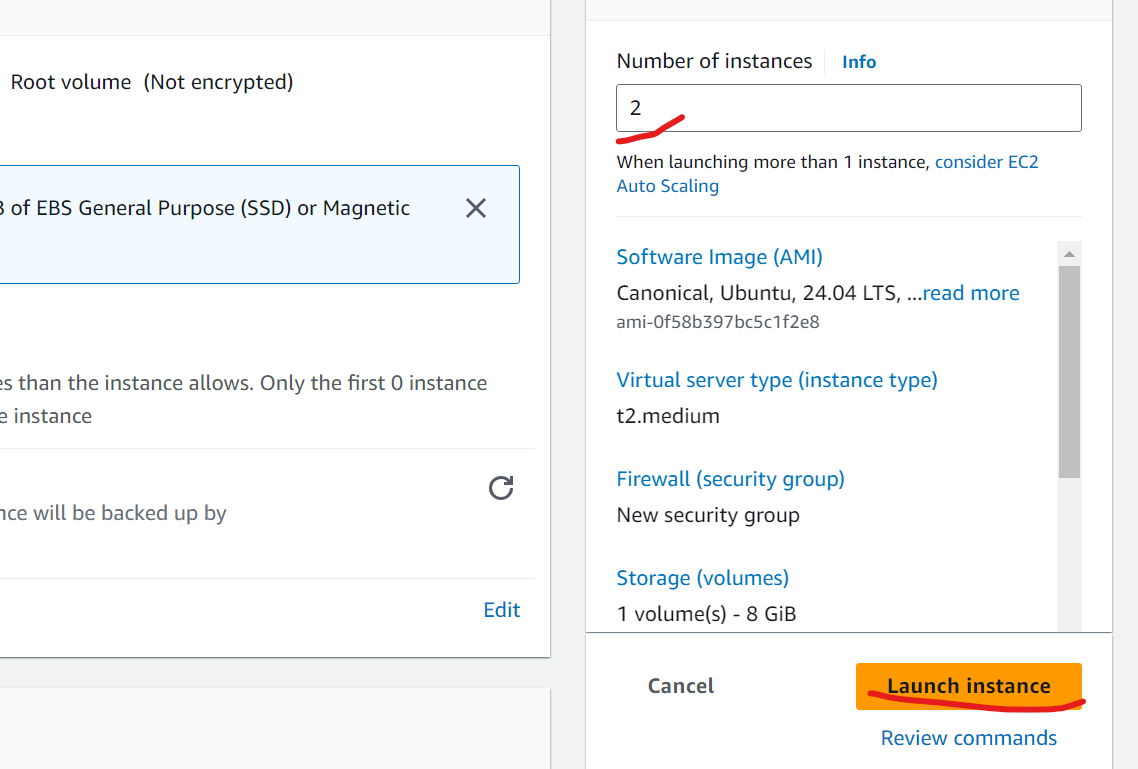
- Select "2" number of instance > Click on "Launch instance"
Step 2: Check 2 instances created on EC2 dashboard

Step 3: Change name as "k8s-master & k8s-worker" and save

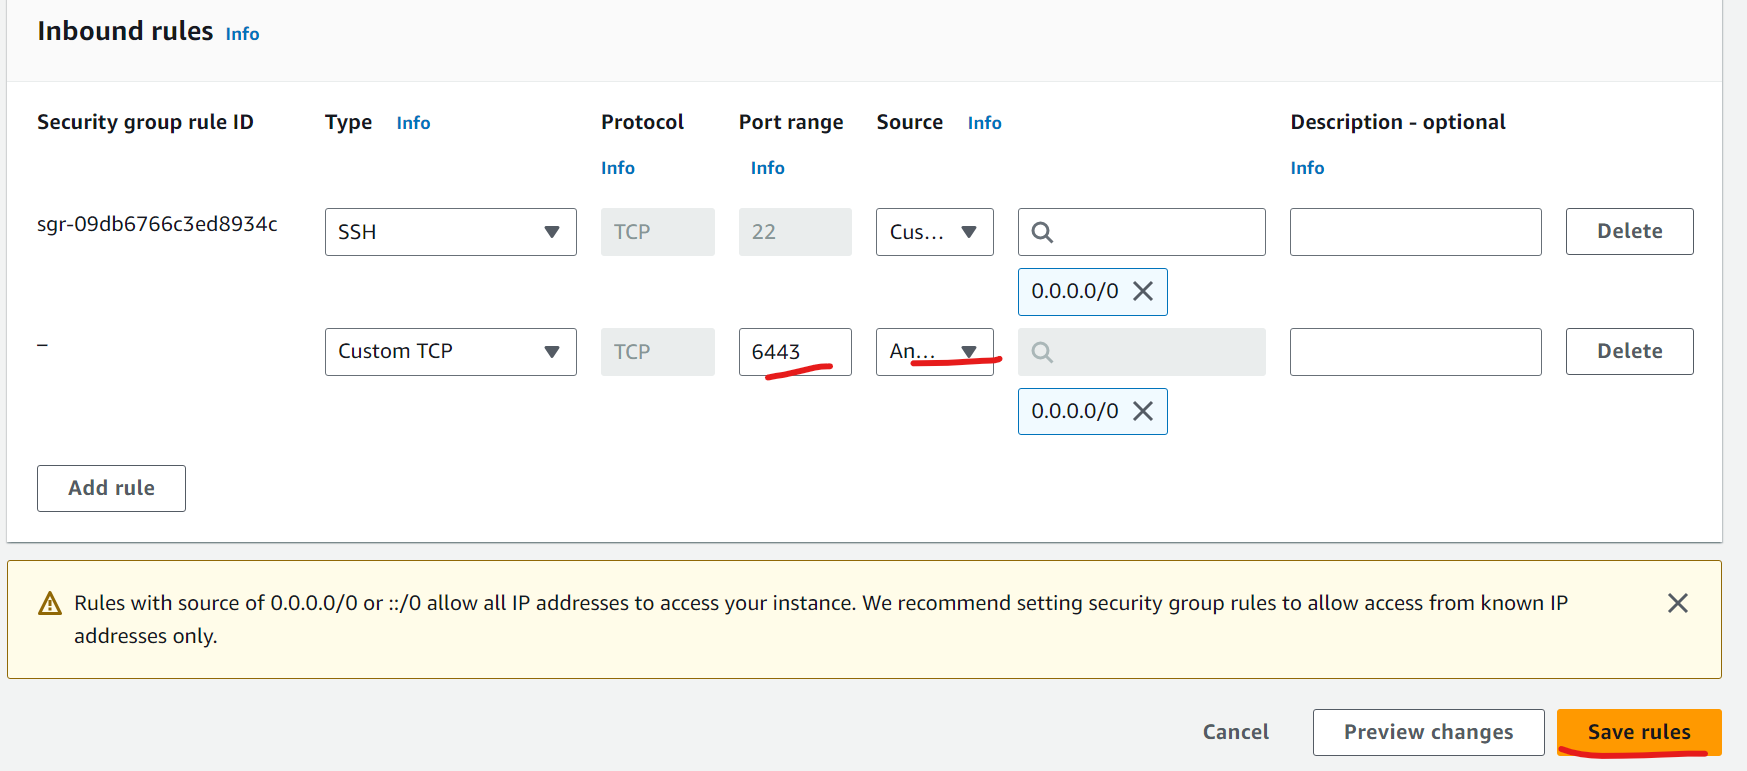
Step 4: Give permission to instance for port "6443"
- Go to security group in instance & click SG link

- Click on "edit inbound rules"

- Click on "Add rules"
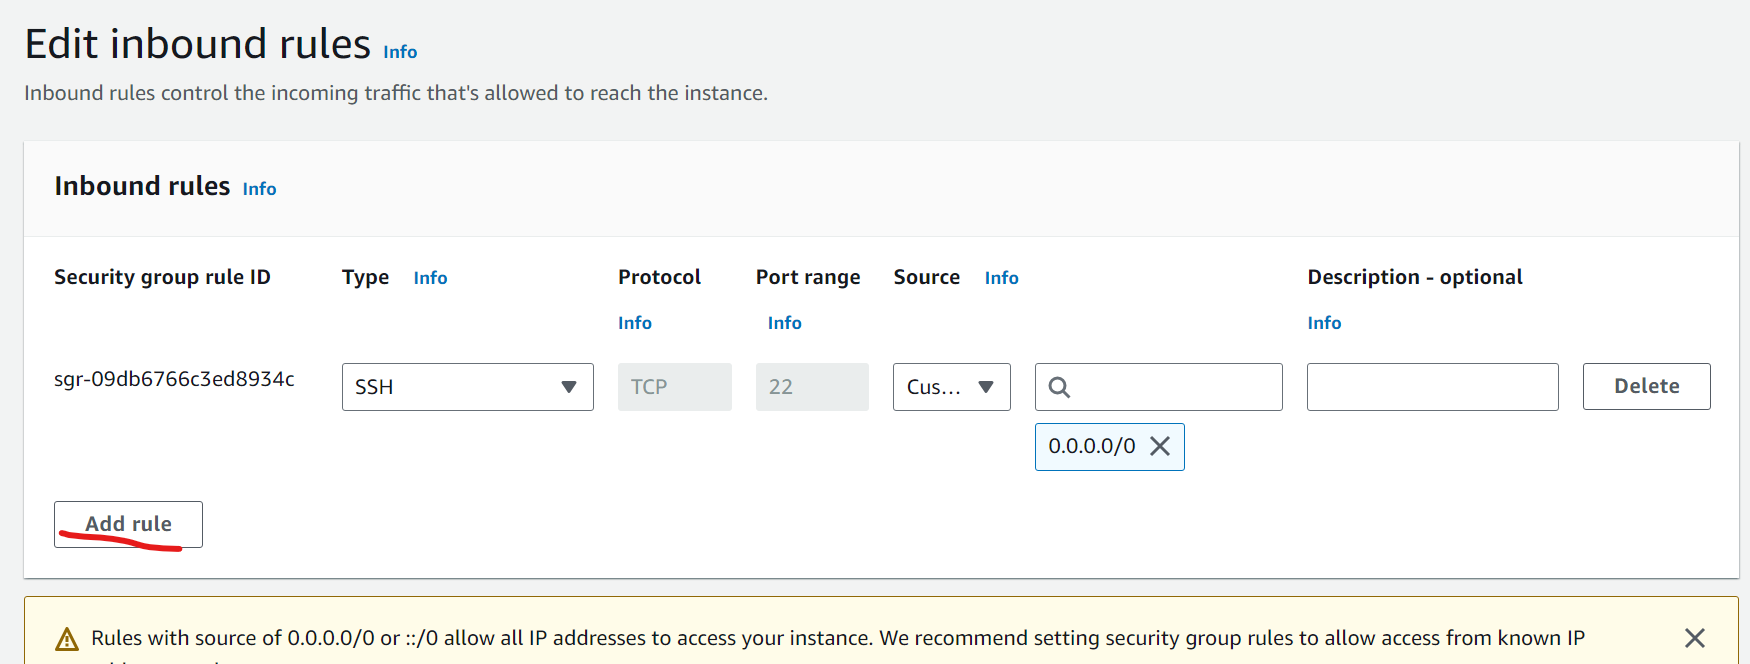
- Give "6443" in port range and select "Anywhere" in source and click Save
- Copy public dns from instance in networking

- Now go to browser and paste public ip of instance(for now it shows "This page not found or any error")
Step 5: Connect both of instance through "SSH" or "EC2 instance connect"
Follow this repository for installation: https://github.com/LondheShubham153/kubestarter/blob/main/kubeadm_installation.md
Step 6: Run on master
kubectl run nginx --image=nginx:latest
Step 7: Check pod created or not
kubectl get pods
By following these steps, you can create and manage multiple pods in a Kubernetes cluster initialized using kubeadm.
Thank you🙏
Keep Learning..
0
Subscribe to my newsletter
Read articles from Lalita Kashyap directly inside your inbox. Subscribe to the newsletter, and don't miss out.
Written by
