Liveness and Readiness Probes in Kubernetes with example.
 Gaurav Kumar
Liveness Probe
Readiness Probe
Note:
- If the Liveness probe succeeds but Readiness probe failed then pod is kept live means kubelet will not restart the container because liveness probe succeeded but due to readiness probe failed it will not receive any traffic.
Terms Associated with Liveness and Readiness Probes
Initial Delay Seconds
Period Seconds
Timeout Seconds
Success Threshold
Failure Threshold
Deployment of HTTPD Container and Verifying Liveness and Readiness Probe
Step-1: (Creating Deployment File)
We need to create httpd-dep.yaml file and put below code into that.
apiVersion: apps/v1
kind: Deployment
metadata:
  name: httpd-deployment
  labels:
    app: httpd
spec:
  replicas: 1
  selector:
    matchLabels:
      app: httpd
  template:
    metadata:
      labels:
        app: httpd
    spec:
      containers:
      - name: httpd
        image: httpd:latest
        ports:
        - containerPort: 80
        livenessProbe:
          httpGet:
            path: /
            port: 80
          initialDelaySeconds: 5
          periodSeconds: 10
        readinessProbe:
          httpGet:
            path: /
            port: 80
          initialDelaySeconds: 5
          periodSeconds: 10
Here in code we have some new terms under Liveness and Readiness Probe section, Let's understand those.
httpGet
path
port
Step-2:
Apply this file to Kubernetes by typing below command.
kubectl apply -f httpd-dep.yaml
Step-3: (Creating Service for the HTTPD deployment).
We need to create httpd-svc.yaml file and need to put below code into that.
apiVersion: v1
kind: Service
metadata:
  name: httpd-service
  labels:
    app: httpd
spec:
  selector:
    app: httpd
  ports:
    - protocol: TCP
      port: 80
      targetPort: 80
  type: NodePort
Step-4:
We need to apply this service file by typing below command.
kubectl apply -f httpd-svc.yaml
Understanding the Deployment
When we will apply the Deployment & Service file it will start the HTTPD container and after 5 seconds of wait time as we have mentioned initialDelaySeconds of 5 it will start checking Liveness and Readiness probe. For Liveness probe it will sent a httpGet request to / (root) path on port 80 and if it will get a response back of 200 then it will consider it as a success otherwise it will consider it as failure. We have mentioned periodSeconds of 10 so it will start another probe check after 10 seconds after first will get failed. As failureThreshold has a default value of 3 so after 3 consecutive failure it will restart the container and it continues to restart the container until probe get succeeded. It will test the Readiness probe also by same process which I have mentioned for Liveness.
Testing the Probes
Step-1:
We will first check the pod status by below command which we have deployed earlier.
kubectl get pods
After typing the above command we will show below output which is showing that pod is running without any error.

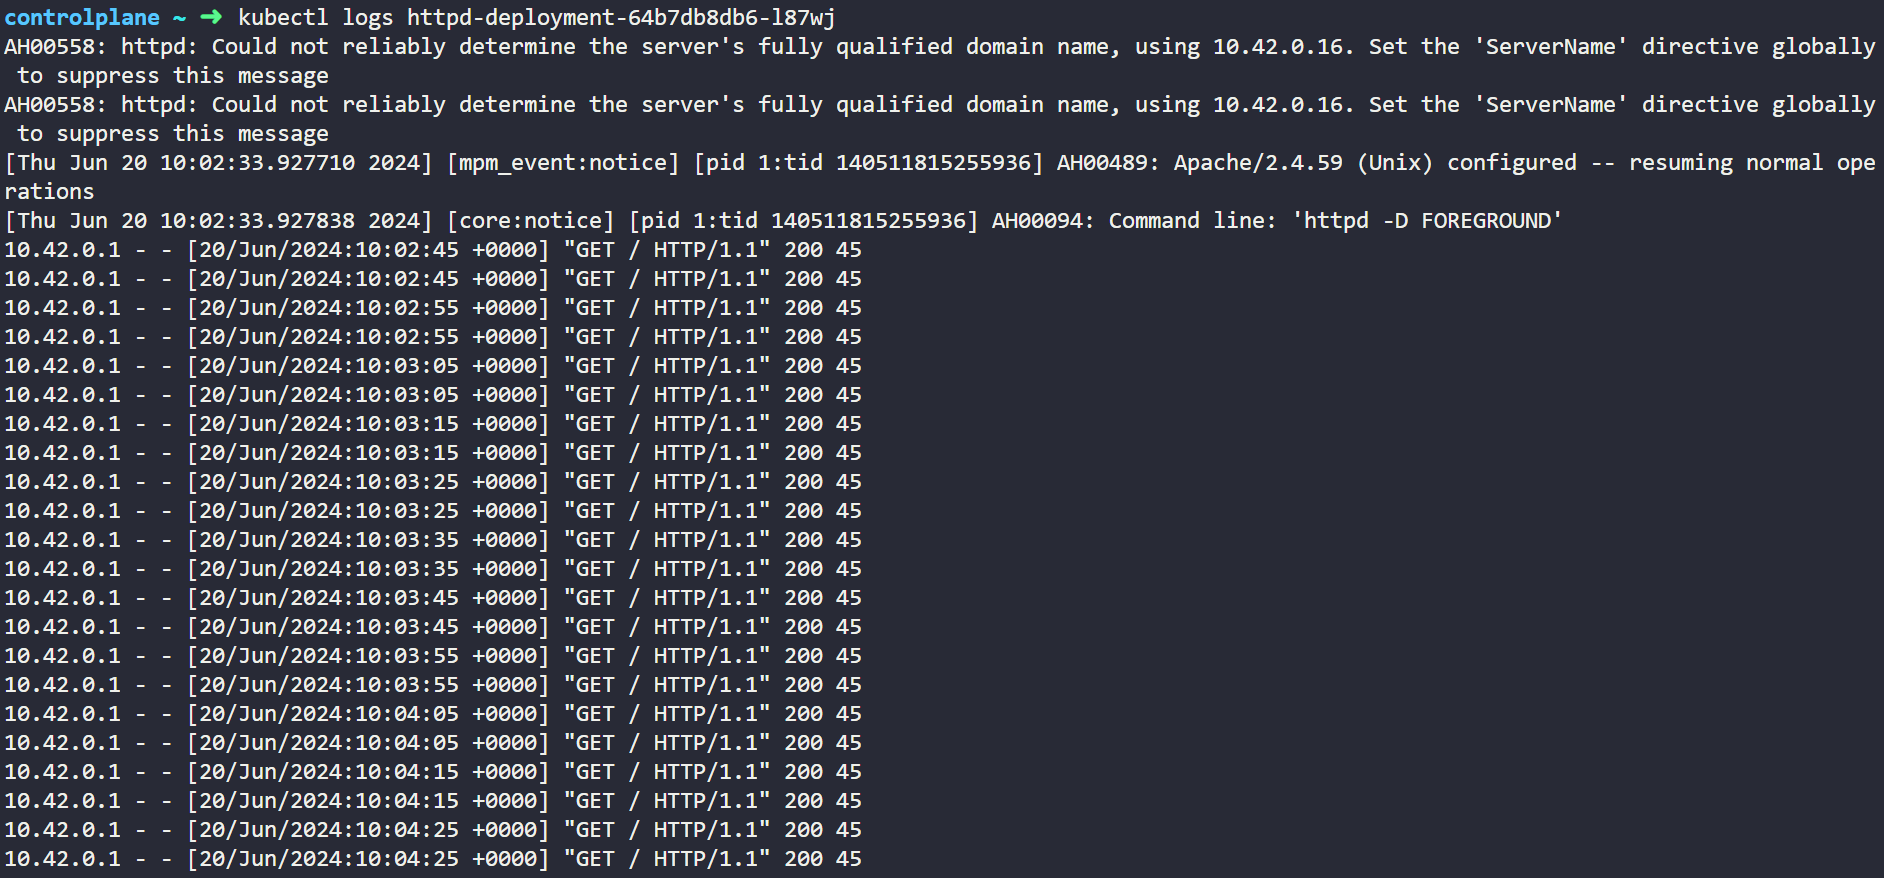
If we will check the logs of the pod by below command then we can clearly see that it is sending httpGet request after every 10 seconds and getting 200 success.
kubectl logs <pod-name>
Here in below output it can be seen that it is sending httpGet request after every 10 seconds and getting 200 success as a response.

Now Let's introduce some error in Liveness probe and then we will verify Probe is failing and container is restarting after 3 consecutive failed or not.
For that we are modifying few codes from our deployment by editing the deployment. Type below command and modify the path name.
kubectl edit deployment <deployment-name>
After typing above command we need to replace path section from / (root) to /invalid-path and save the file.
livenessProbe:
          httpGet:
            path: /invalid-path
            port: 80
          initialDelaySeconds: 5
          periodSeconds: 10
After changing the configuration let's check the pod status again we will see pod is not in ready state, and it will continue to restart indefinite time until probe succeeded. We can verify these from below screenshot.
kubectl get pods
Output of above code

Now Let's check the pod log now, we can see in below output as we just have introduced error in Liveness so it is sending now request to invalid-path endpoint and it is getting 404 failed as a response but in Readiness probe it is able to send Get request and getting 200 success response because it has no error.

Now Let's introduce some error in Readiness probe and then we will verify Probe is failing and container is restarting after 3 consecutive failed or not.
For that we are modifying few codes from our deployment by editing the deployment. Type below command and modify the path name.
kubectl edit deployment <deployment-name>
After typing above command we need to replace path section from / (root) to /invalid-path and save the file.
  readinessProbe:
          httpGet:
            path: /invalid-path
            port: 80
          initialDelaySeconds: 5
          periodSeconds: 10
After changing the configuration let's check the pod status again we will see pod is not in ready state, and it will continue to restart indefinite time until probe succeeded. We can verify these from below screenshot.
kubectl get pods
Output of above code

Now Let's check the pod log now, we can see in below output as we have now introduced error in both Liveness and Readiness probe and now both are sending request to invalid-path endpoint and it is getting 404 failed as a response.

Now if we will change path to previous one we will get the 200 success response in both and container will successfully run and ready to serve traffic also.
That's all from my side from now, we have successfully understand the Liveness and Readiness Probe in Kubernetes and also we have verified it's usage in Deployments.
Subscribe to my newsletter
Read articles from Gaurav Kumar directly inside your inbox. Subscribe to the newsletter, and don't miss out.
Written by

Gaurav Kumar
Gaurav Kumar
I am working as a full time DevOps Engineer at Tata Consultancy Services from past 2.7 yrs, I have very good experience of containerization tools Docker, Kubernetes, OpenShift. I have good experience of using Ansible, Terraform and others.