End-to-End CI/CD Pipeline on AWS for a Flask Application
 Nishank Koul
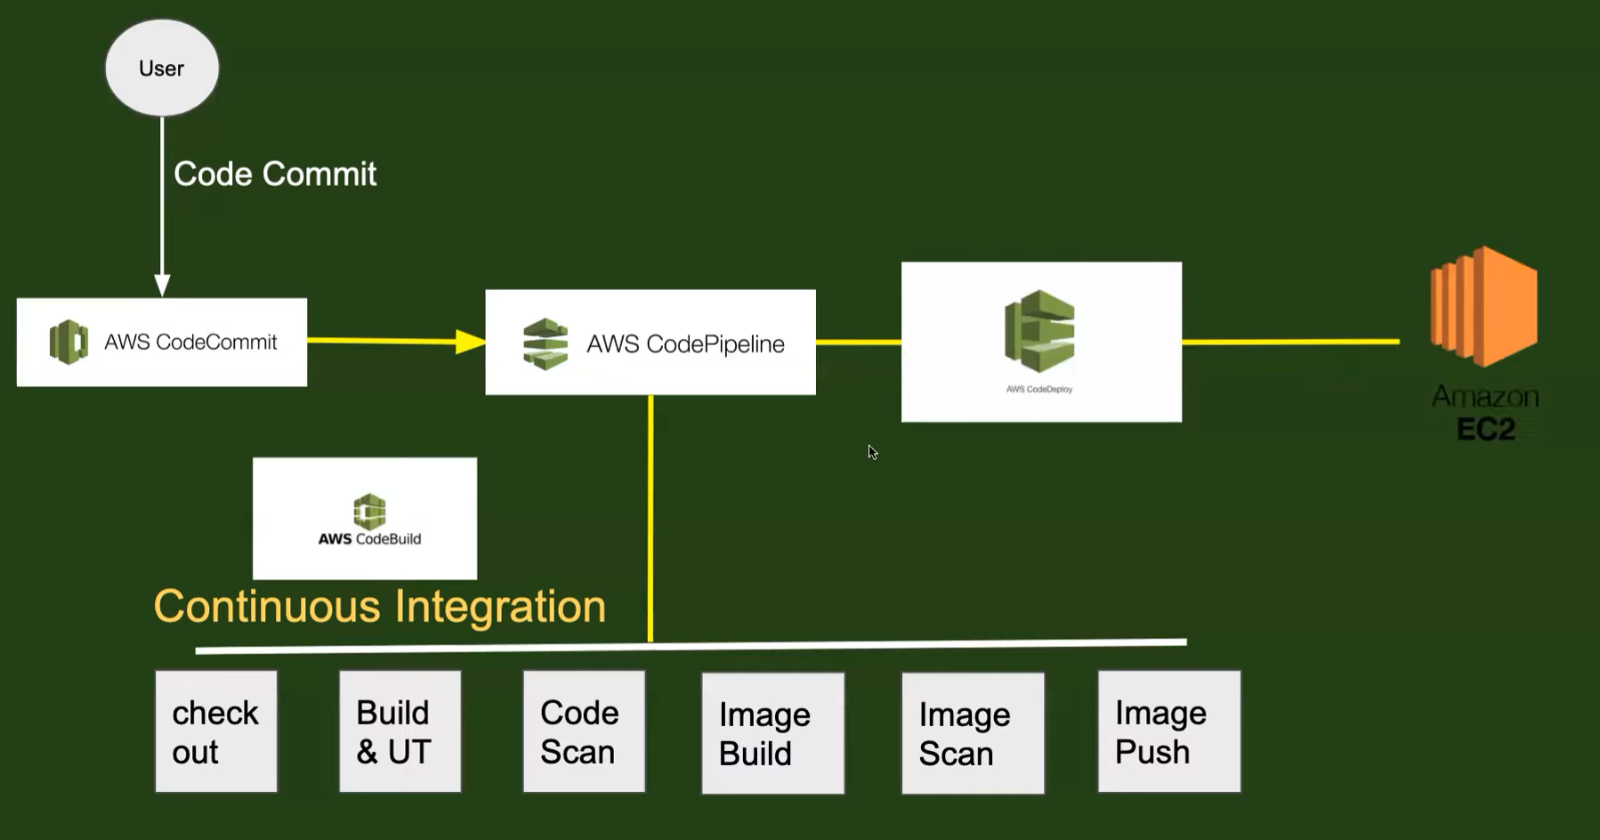
Creating a robust Continuous Integration and Continuous Deployment (CI/CD) pipeline is crucial for modern software development. This blog outlines a detailed step-by-step process to set up an end-to-end CI/CD pipeline for a Python-based Flask application using AWS-managed services like AWS CodePipeline, CodeBuild, and CodeDeploy.
Project Architecture
The project architecture involves integrating various AWS services to streamline the CI/CD process. The key components include:
AWS CodeCommit: A source control service that hosts secure Git-based repositories. In this project, we will use GitHub to store the source code instead of CodeCommit.
AWS CodeBuild: Compiles and tests the source code.
AWS CodePipeline: Orchestrates the CI/CD workflow.
AWS CodeDeploy: Automates the deployment process to EC2 instances.
Step-by-Step Guide
Step 1: Configuring AWS CodeBuild
Create a Project:
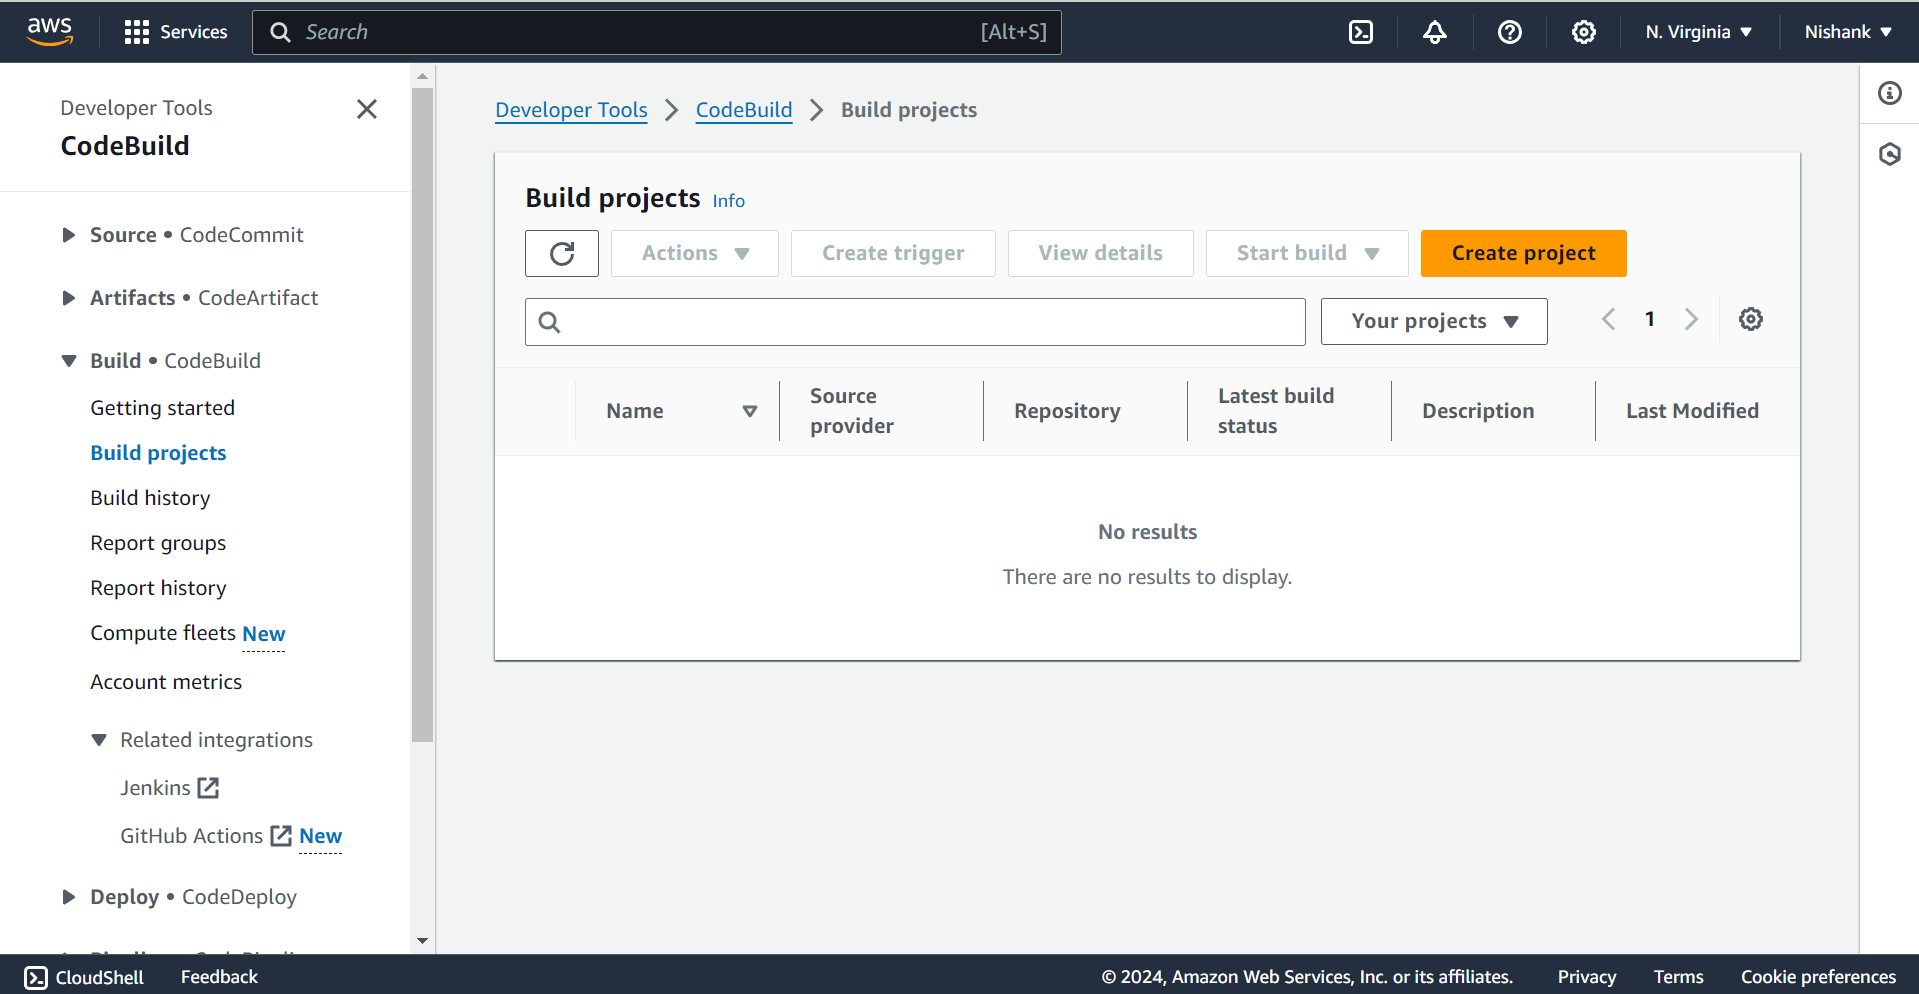
Go to AWS Console, search for CodeBuild, and click "Create Project".
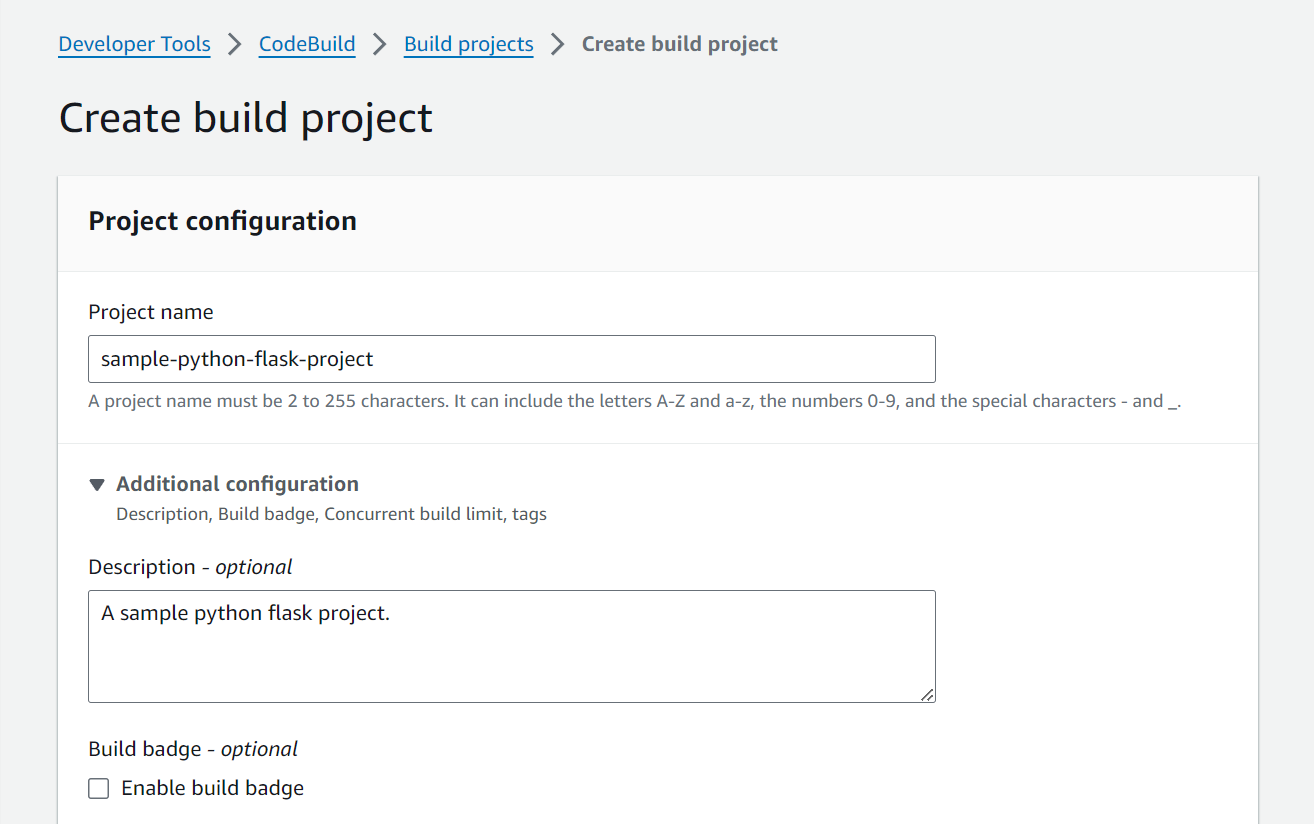
Set the project name and description.
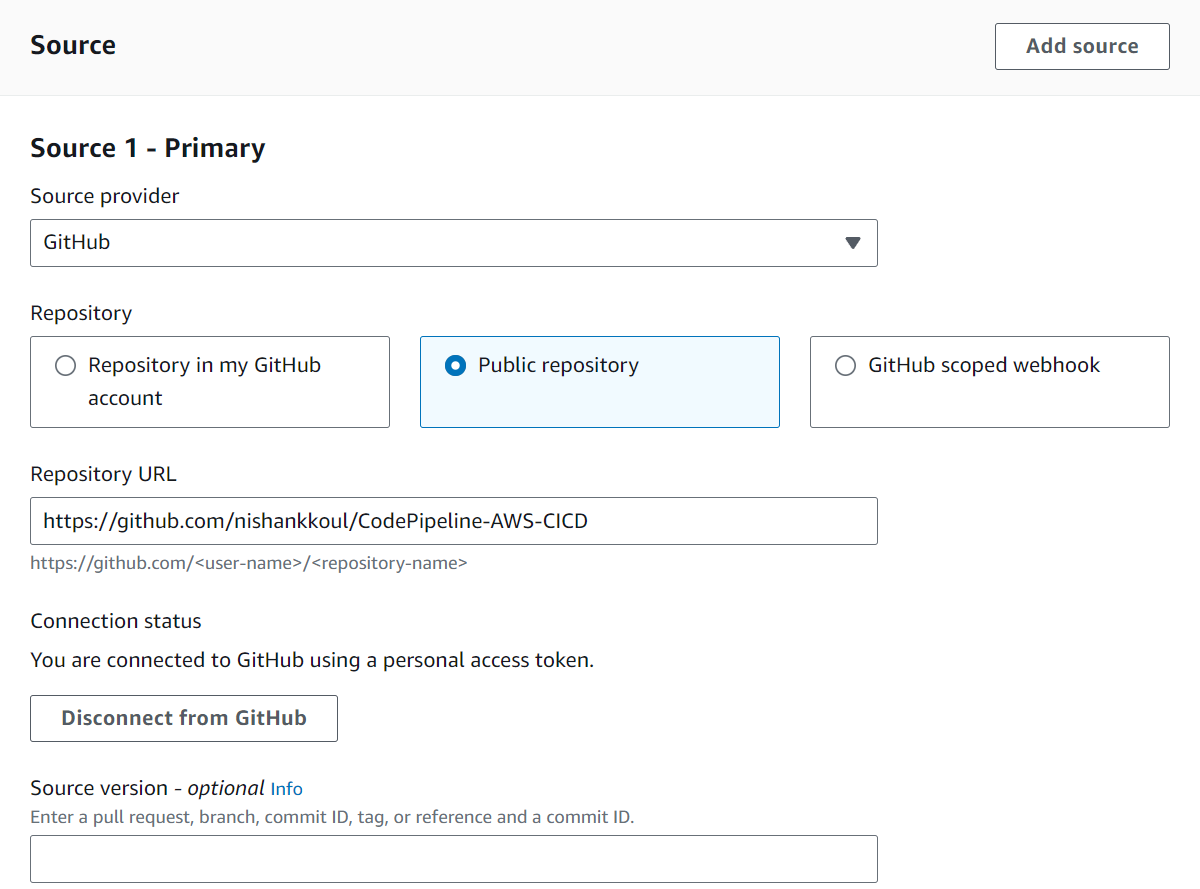
Specify Source Repository:
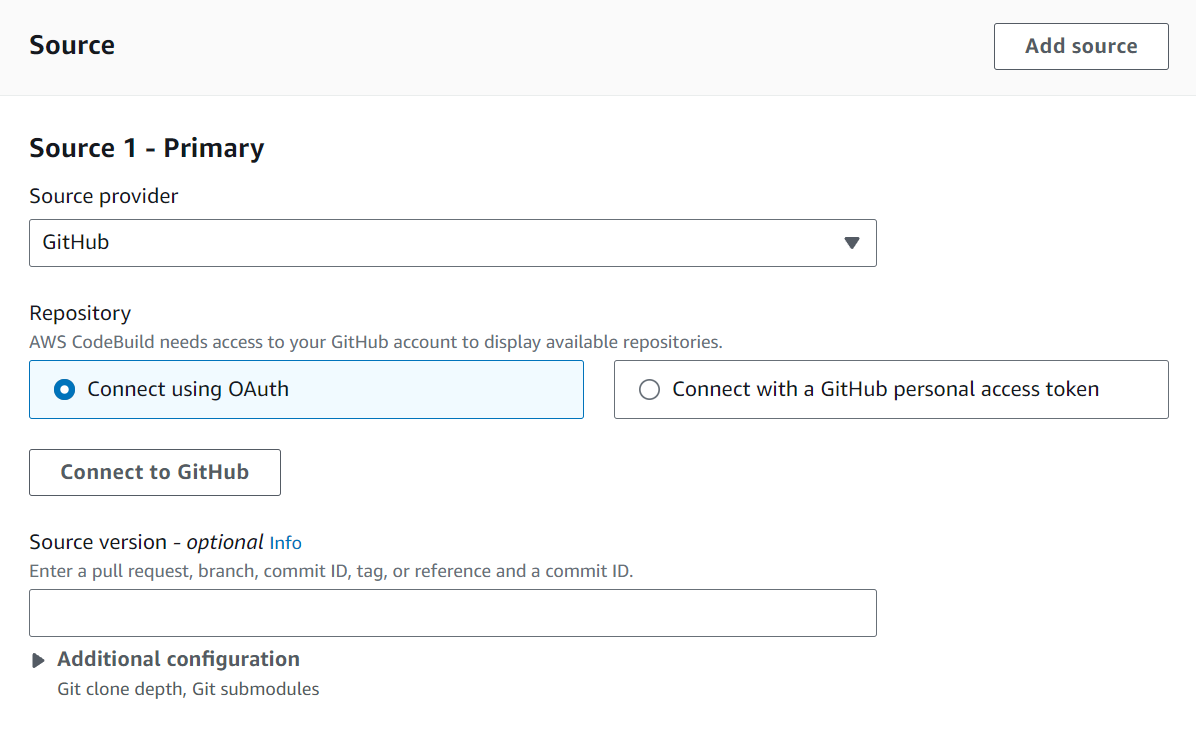
Connect to GitHub using OAuth or Personal Access Token.
Specify the repository URL: https://github.com/nishankkoul/CodePipeline-AWS-CICD (Either clone or fork this repository on your system)
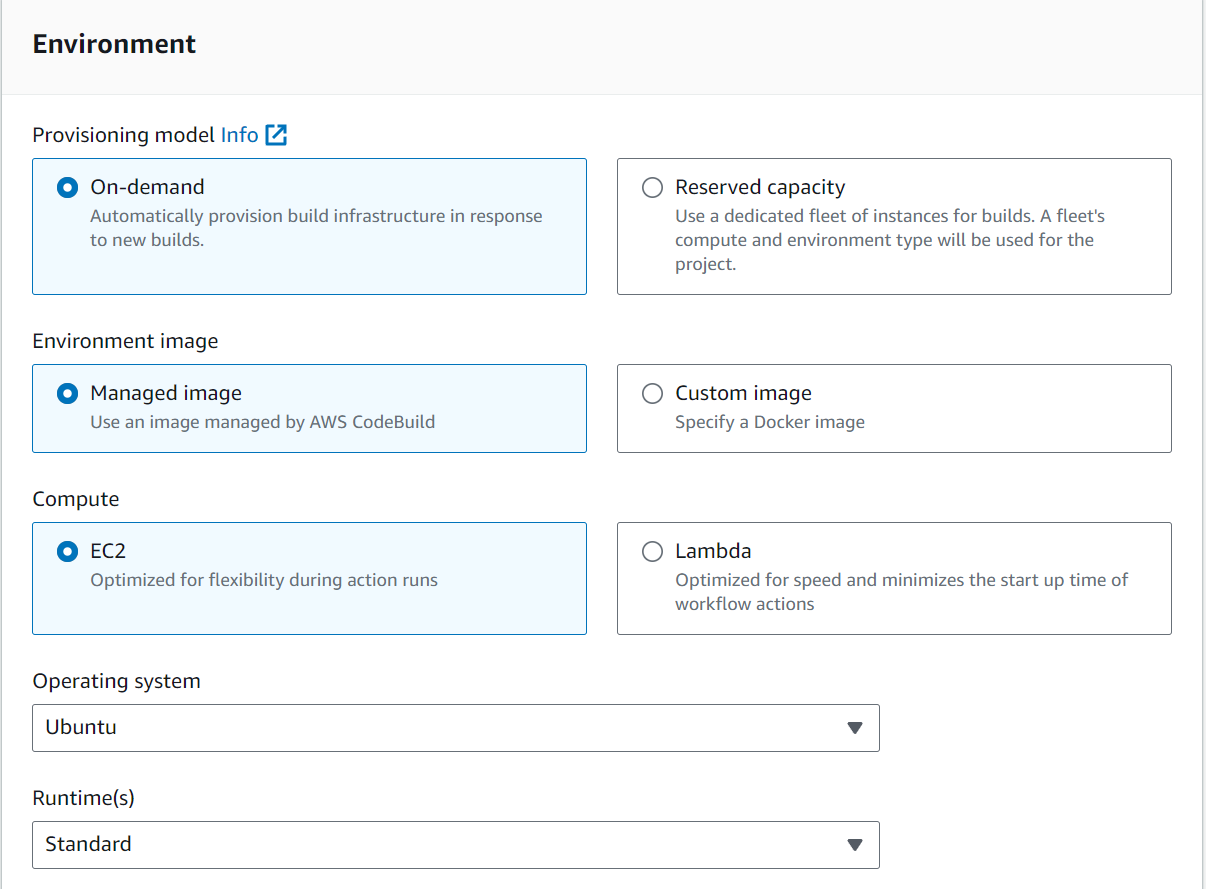
Configure Environment:
Set the Provisioning model as “On Demand”.
Select “Managed Image” under Compute, “EC2” under Runtime, and the latest image version.
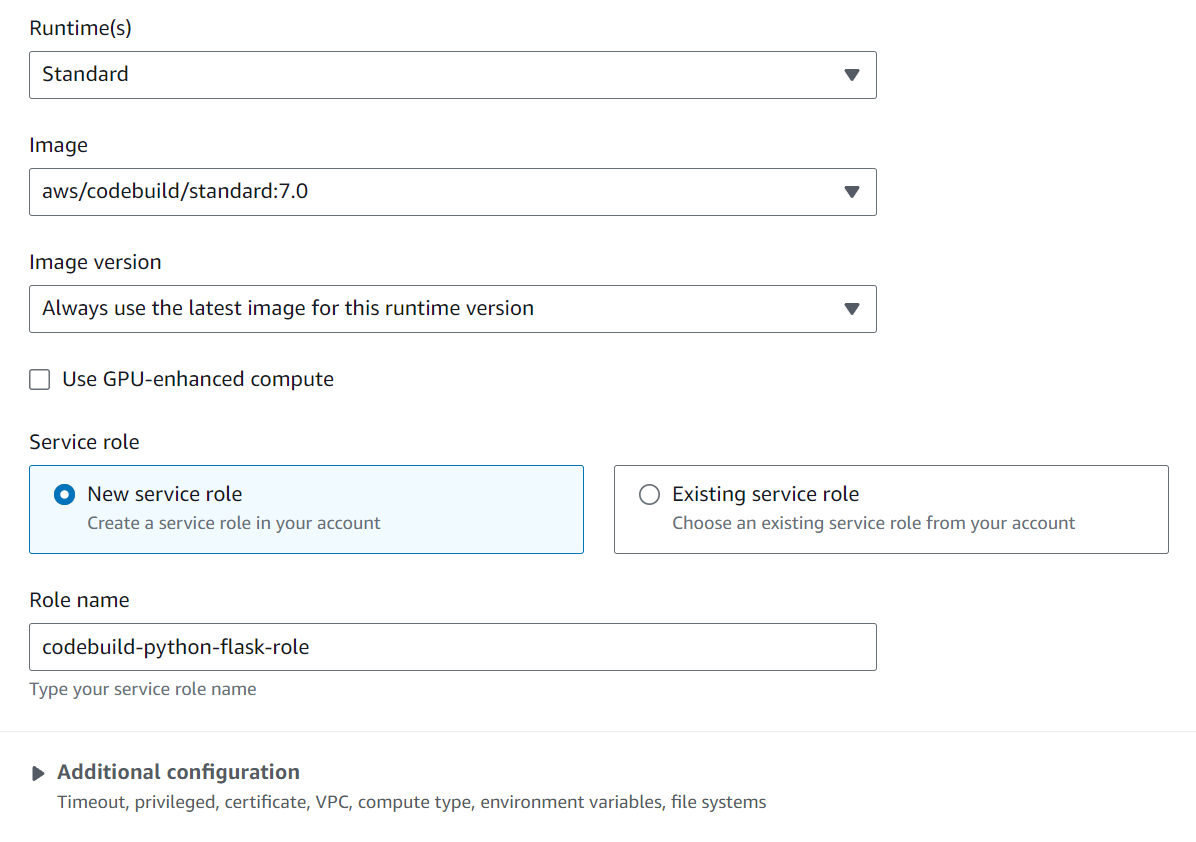
Create Service Role:
Create a new service role for CodeBuild, such as
codebuild-python-flask-role.Attach necessary permissions (SSMFullAccess) for accessing AWS resources.
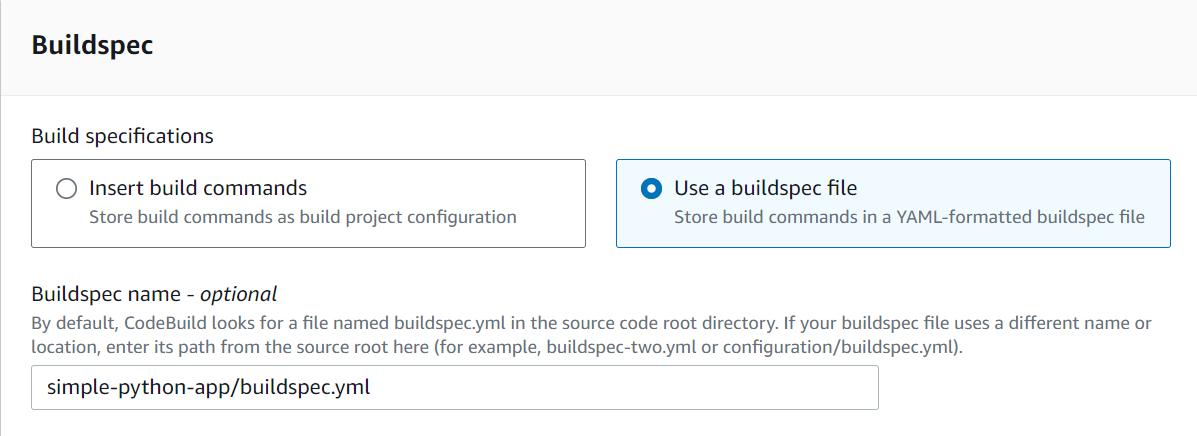
Buildspec File:
- Use a
buildspec.ymlfile to define build instructions.
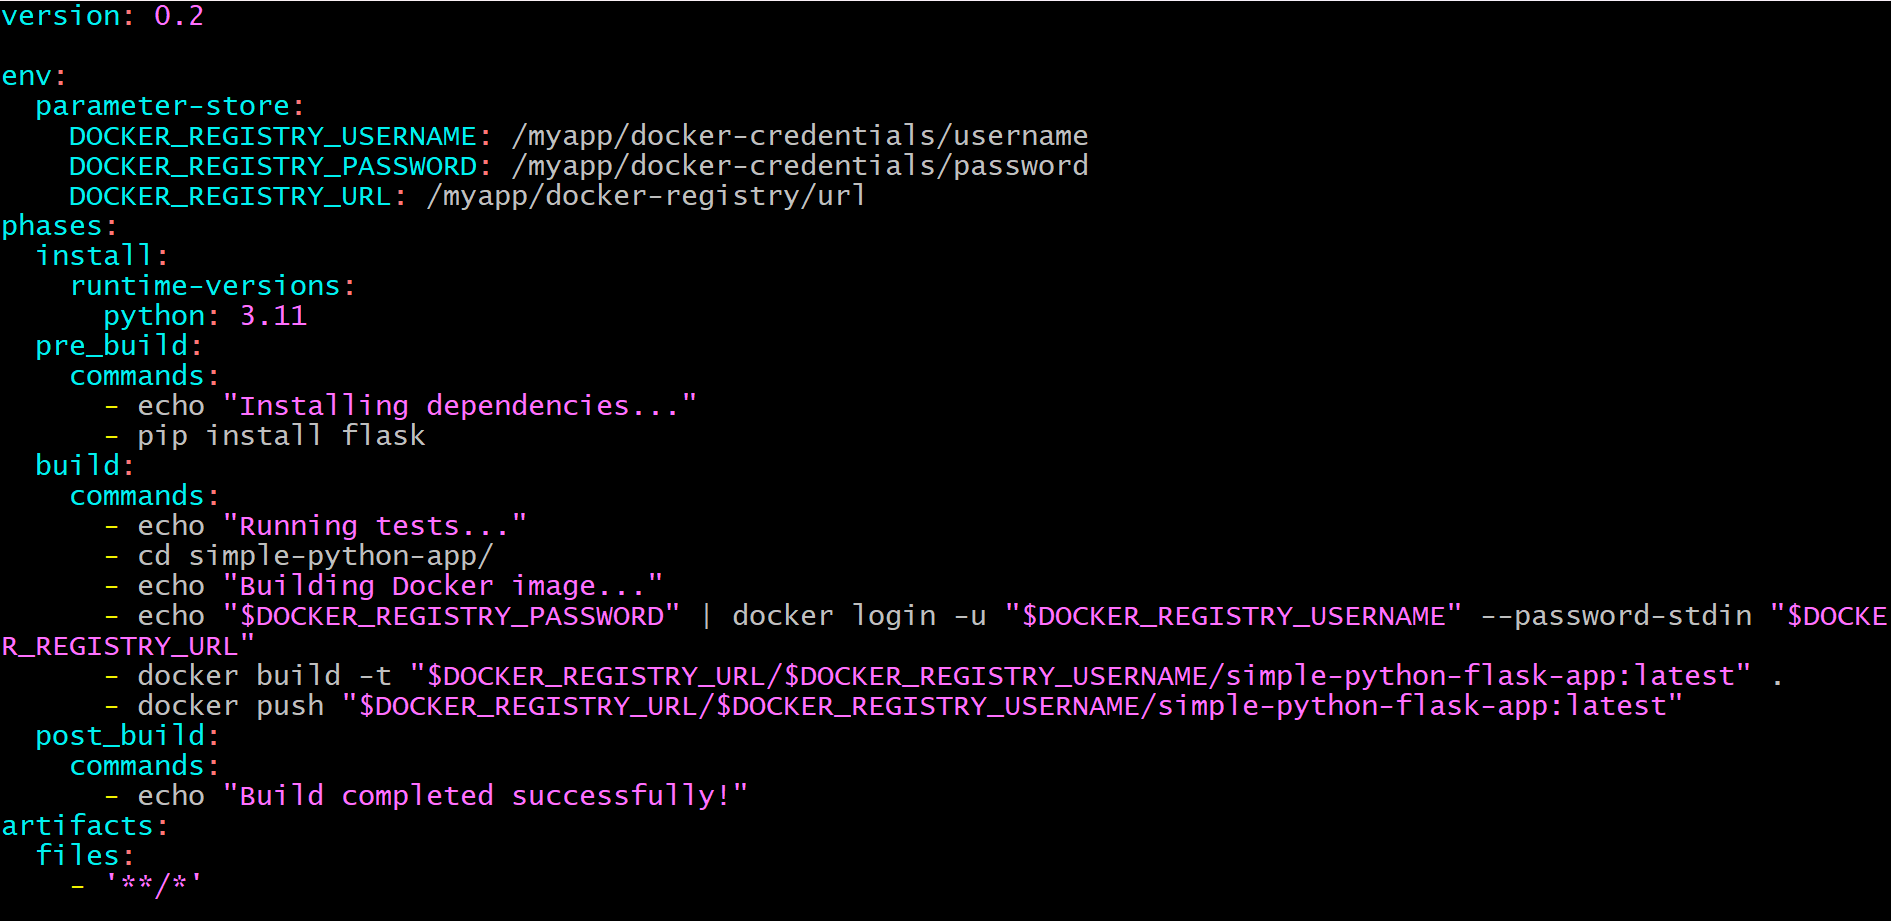
version: 0.2

env:
  parameter-store:
    DOCKER_REGISTRY_USERNAME: /myapp/docker-credentials/username
    DOCKER_REGISTRY_PASSWORD: /myapp/docker-credentials/password
    DOCKER_REGISTRY_URL: /myapp/docker-registry/url
phases:
  install:
    runtime-versions:
      python: 3.11
  pre_build:
    commands:
      - echo "Installing dependencies..."
      - pip install flask
  build:
    commands:
      - echo "Running tests..."
      - cd simple-python-app/
      - echo "Building Docker image..."
      - echo "$DOCKER_REGISTRY_PASSWORD" | docker login -u "$DOCKER_REGISTRY_USERNAME" --password-stdin "$DOCKER_REGISTRY_URL"
      - docker build -t "$DOCKER_REGISTRY_URL/$DOCKER_REGISTRY_USERNAME/simple-python-flask-app:latest" .
      - docker push "$DOCKER_REGISTRY_URL/$DOCKER_REGISTRY_USERNAME/simple-python-flask-app:latest"
  post_build:
    commands:
      - echo "Build completed successfully!"
artifacts:
  files:
    - '**/*'
Copy the buildspec.yml file given above.
Build the Project
- After specifying the buildspec.yml file, click on Create Build Project.
The build project is successfully created!
Step 2: Setting Up AWS Systems Manager
Store Sensitive Information:
Navigate to Systems Manager > Parameter Store.
Create parameters for Docker credentials and URLs with
SecureStringtype.
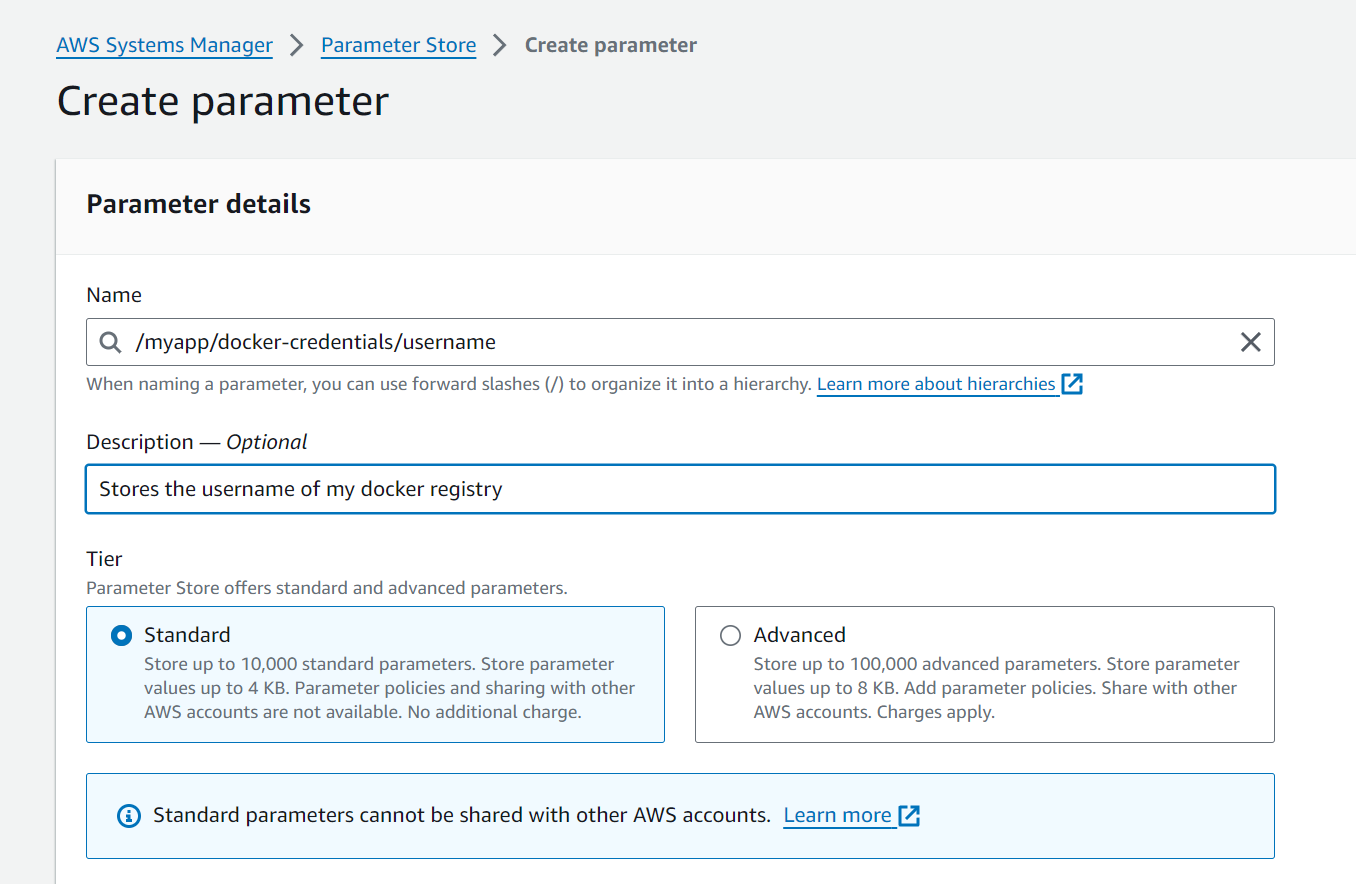
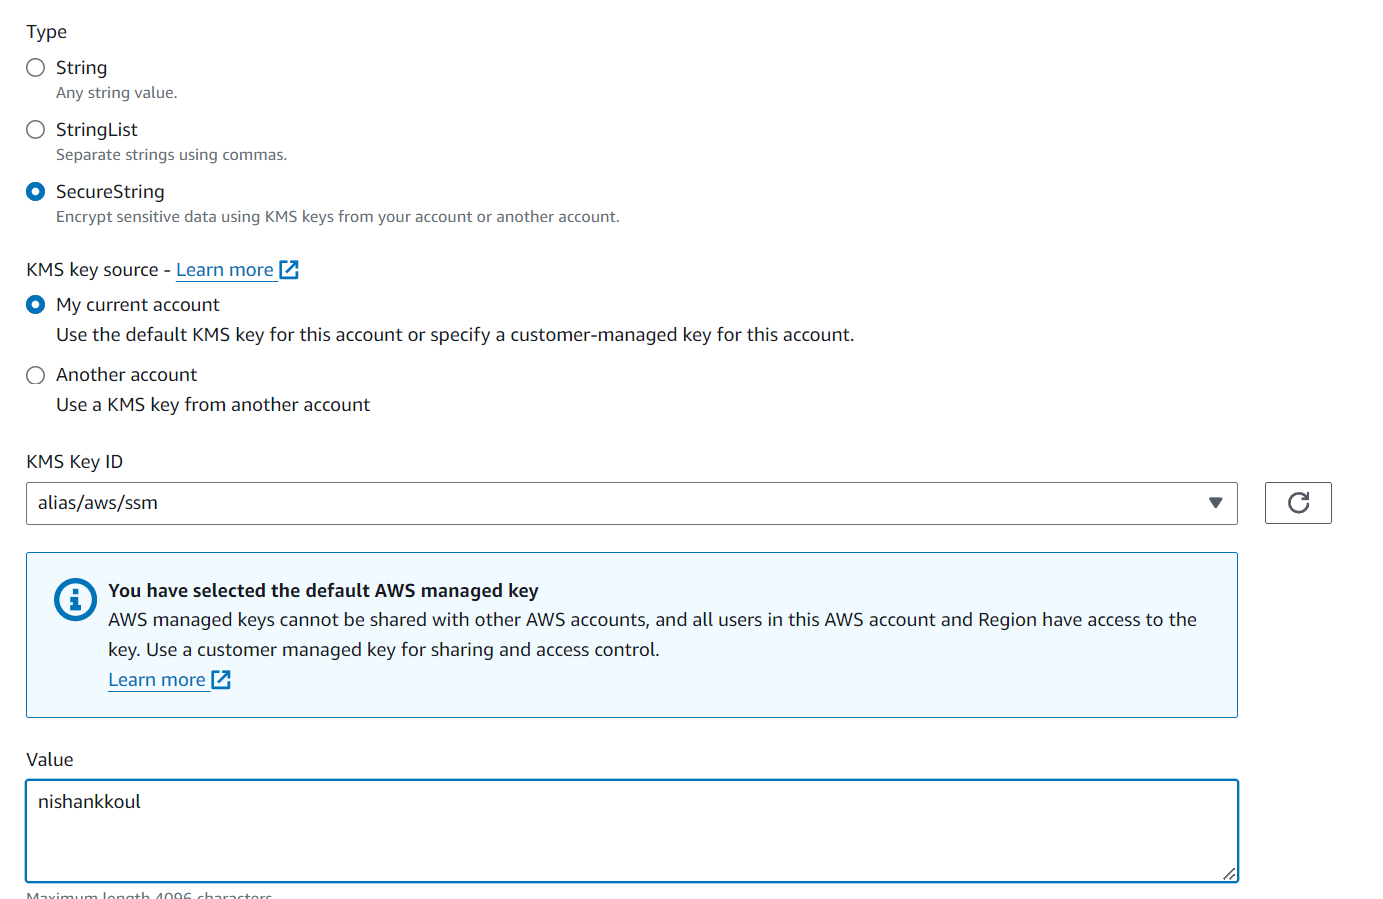
Store all the 3 environment variables specified in the buildspec.yml file. For DOCKER_REGISTRY_URL variable, use "docker.io" as the value.

Step 3: Integrating CodeBuild with CodePipeline
Create a Pipeline:
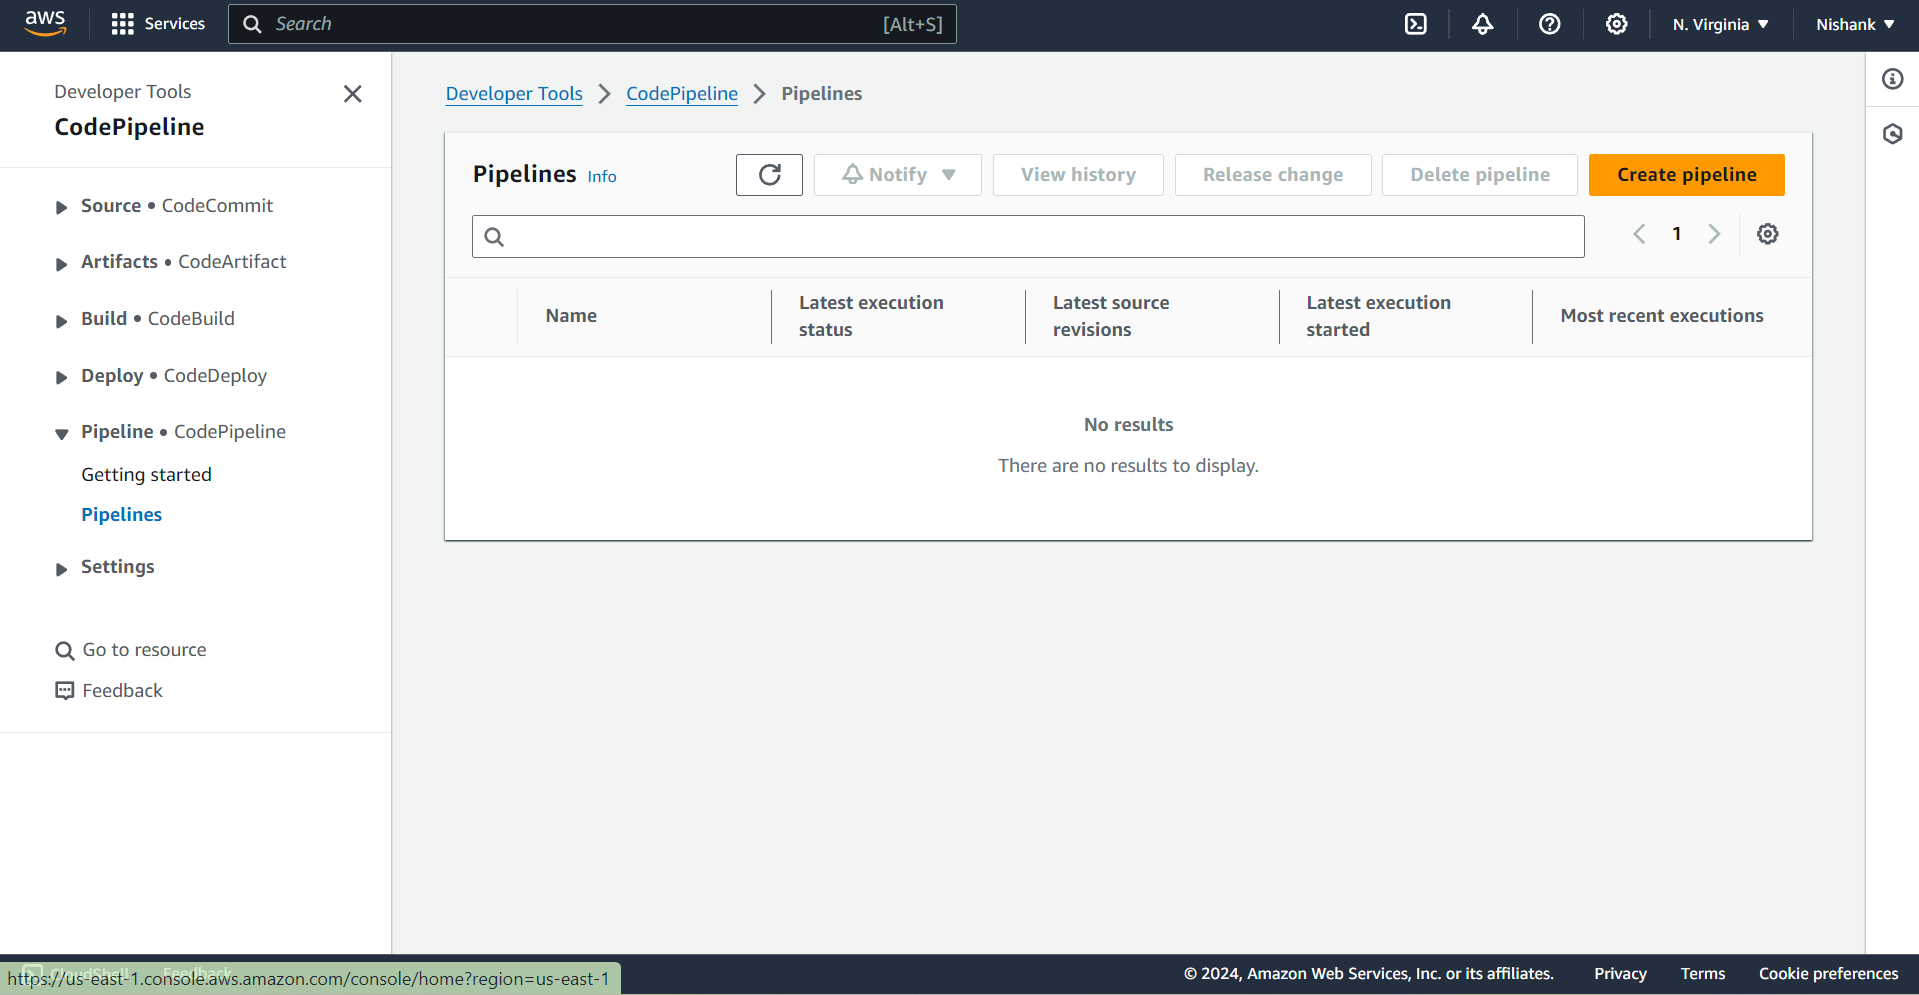
Go to CodePipeline, and click on "Create Pipeline".
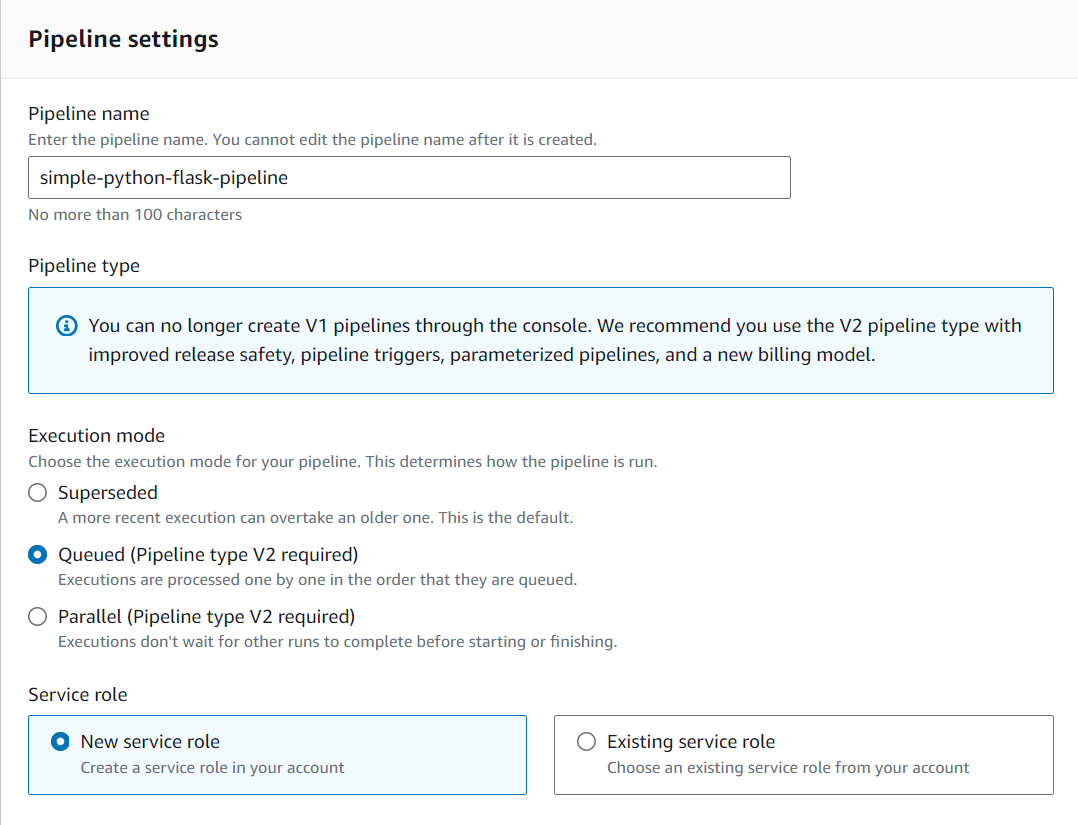
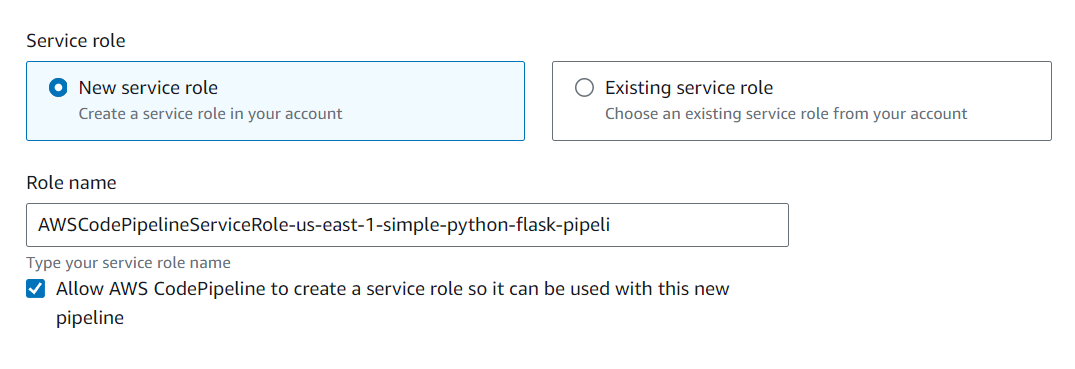
Configure the pipeline with a new service role.
Add the source stage from GitHub (Version 2).
Set the default branch as main:

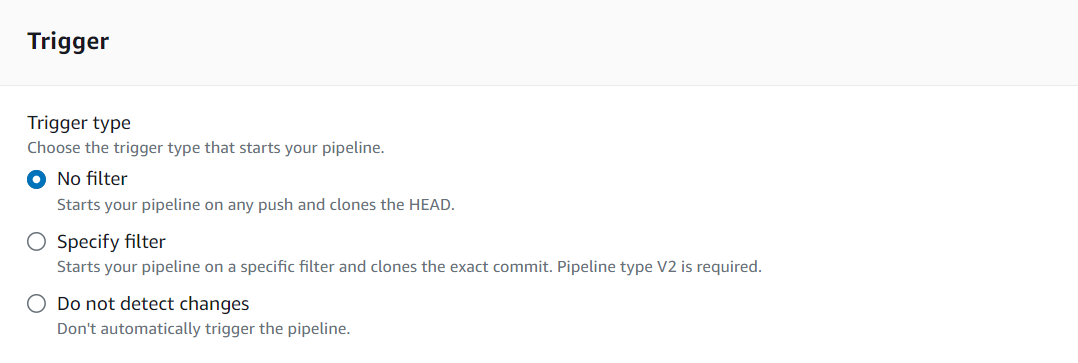
Configure Trigger:
Set the trigger type to automatically initiate the pipeline on any push.
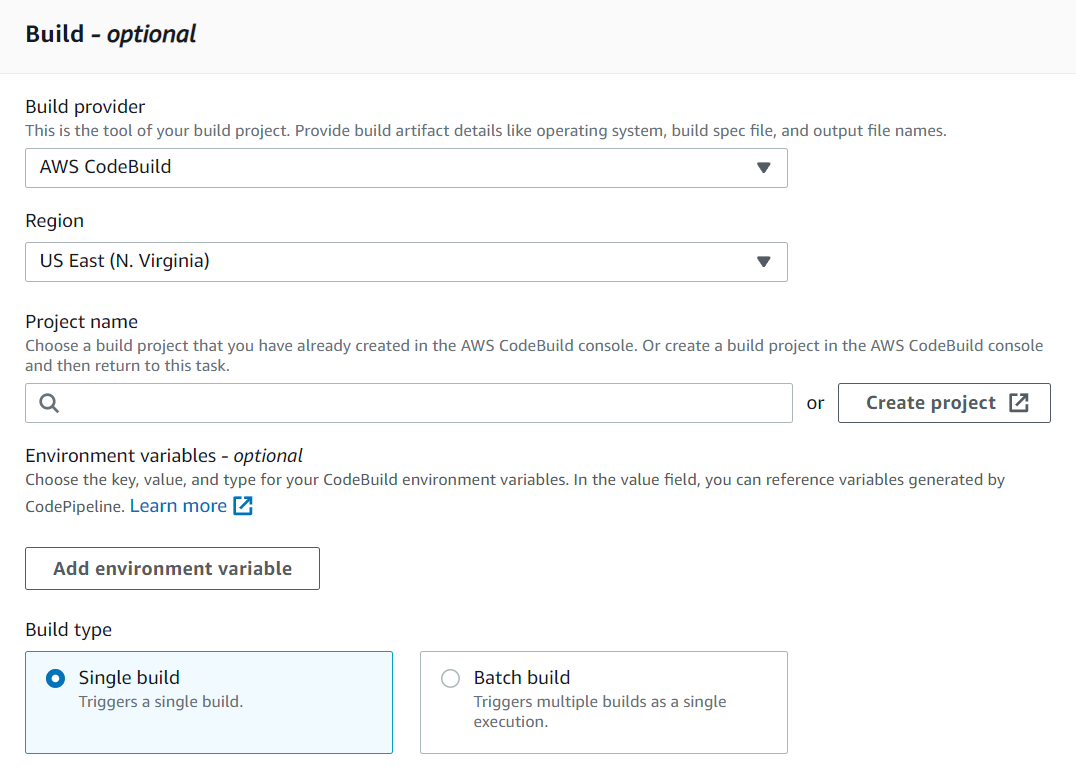
Specify AWS CodeBuild as the build provider.
Deploy Stage:
- Skip the deploy stage for now and complete the pipeline creation.
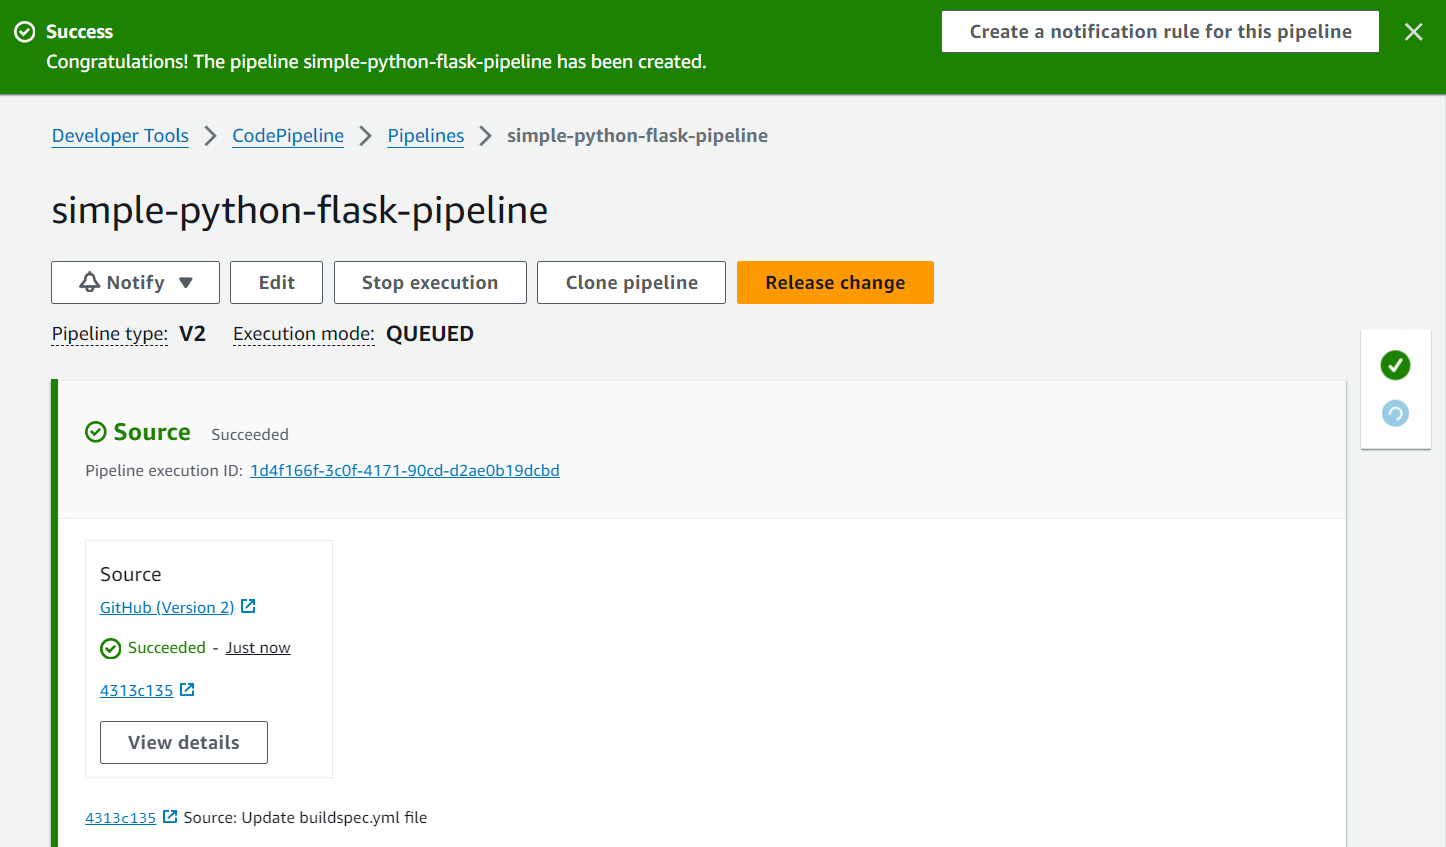
The CodePipeline has been successfully created!
Step 4: Test the CodePipeline:
Now make some changes to the code, commit, and push them to the repository. Like adding a comment...
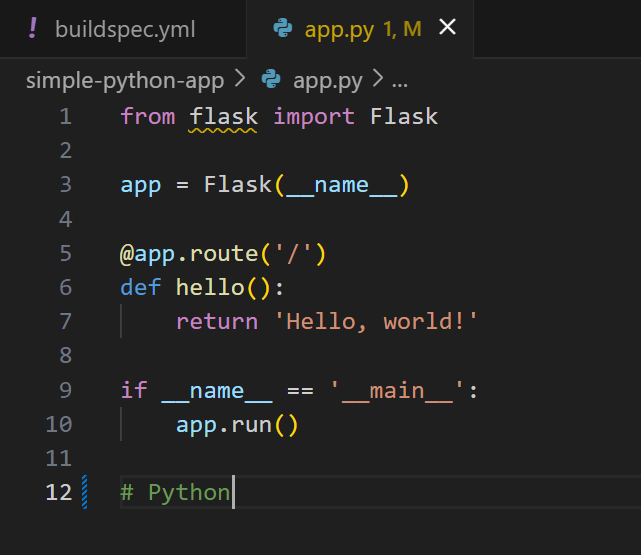
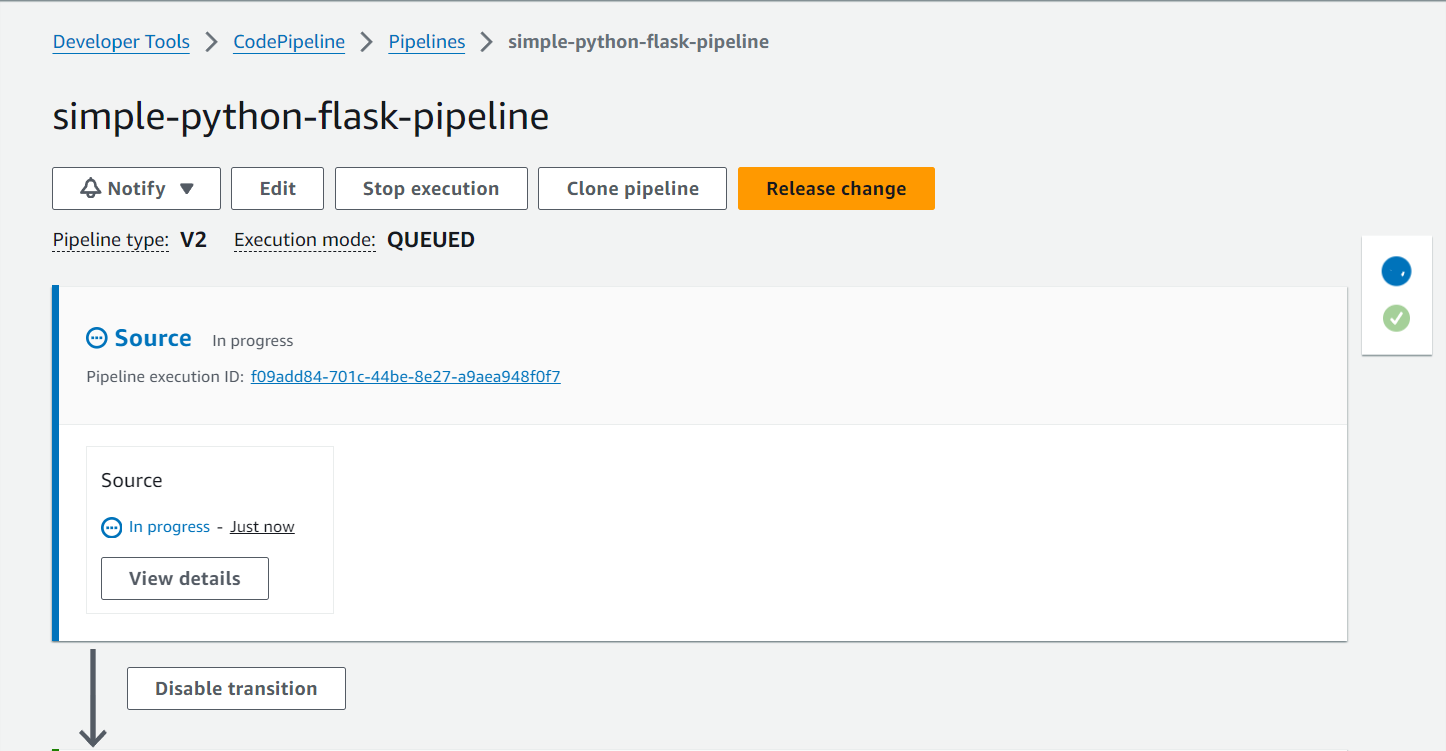
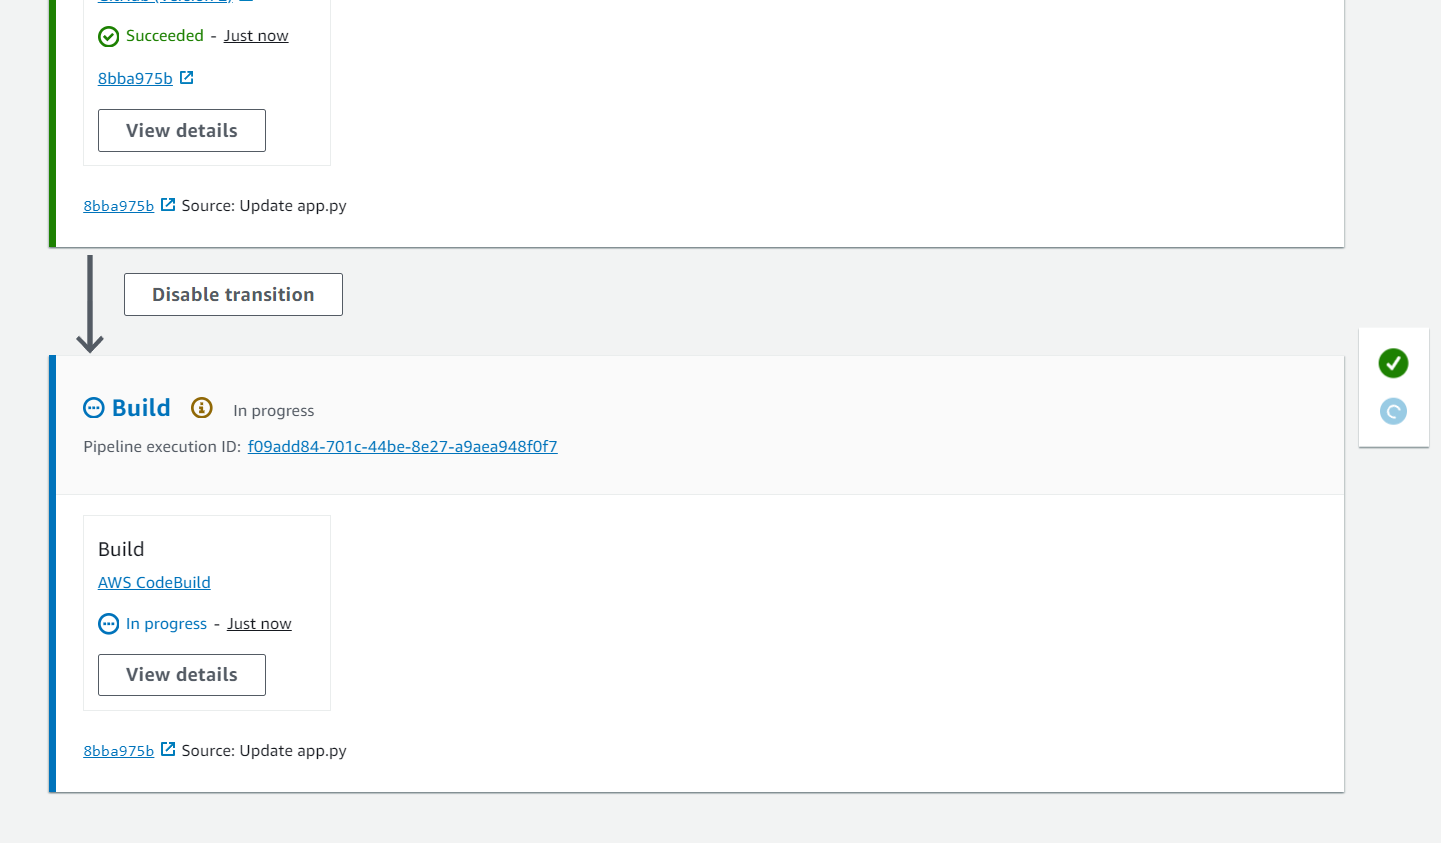
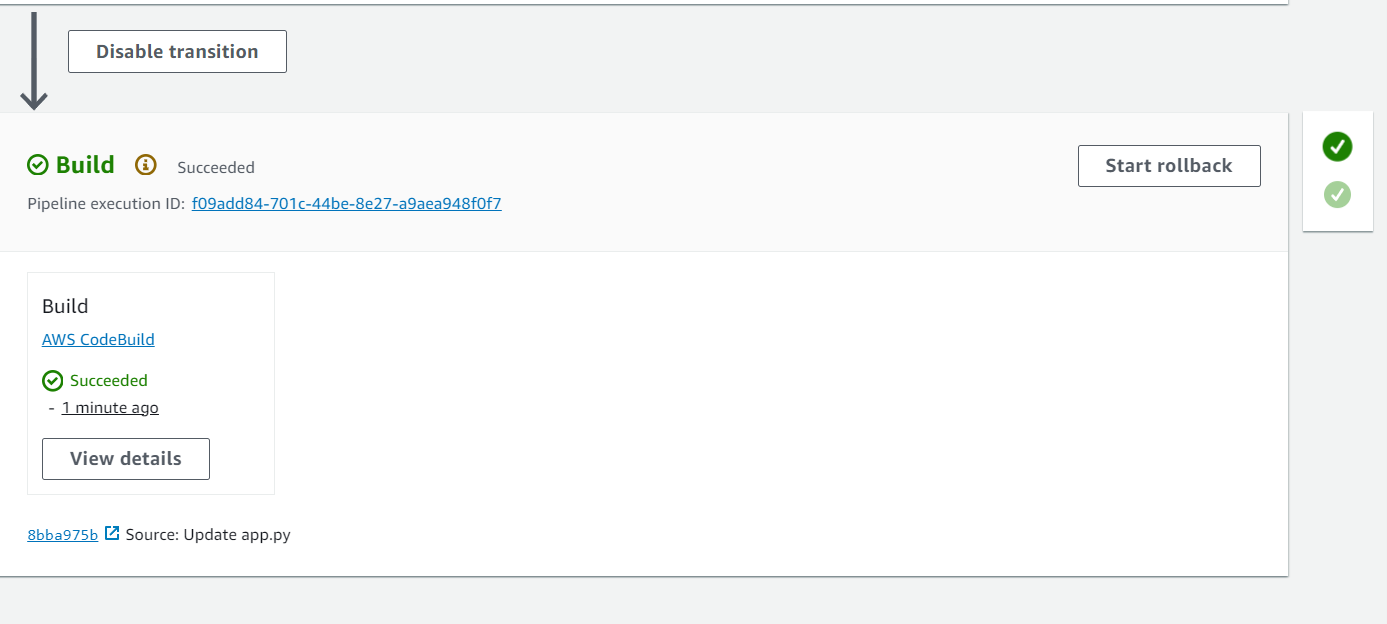
Now as soon as the changes are pushed, the pipeline is triggered, and the pipeline along with the build process goes into the “In progress” phase.
If we now go to our Docker Hub account, we can see the updated image:
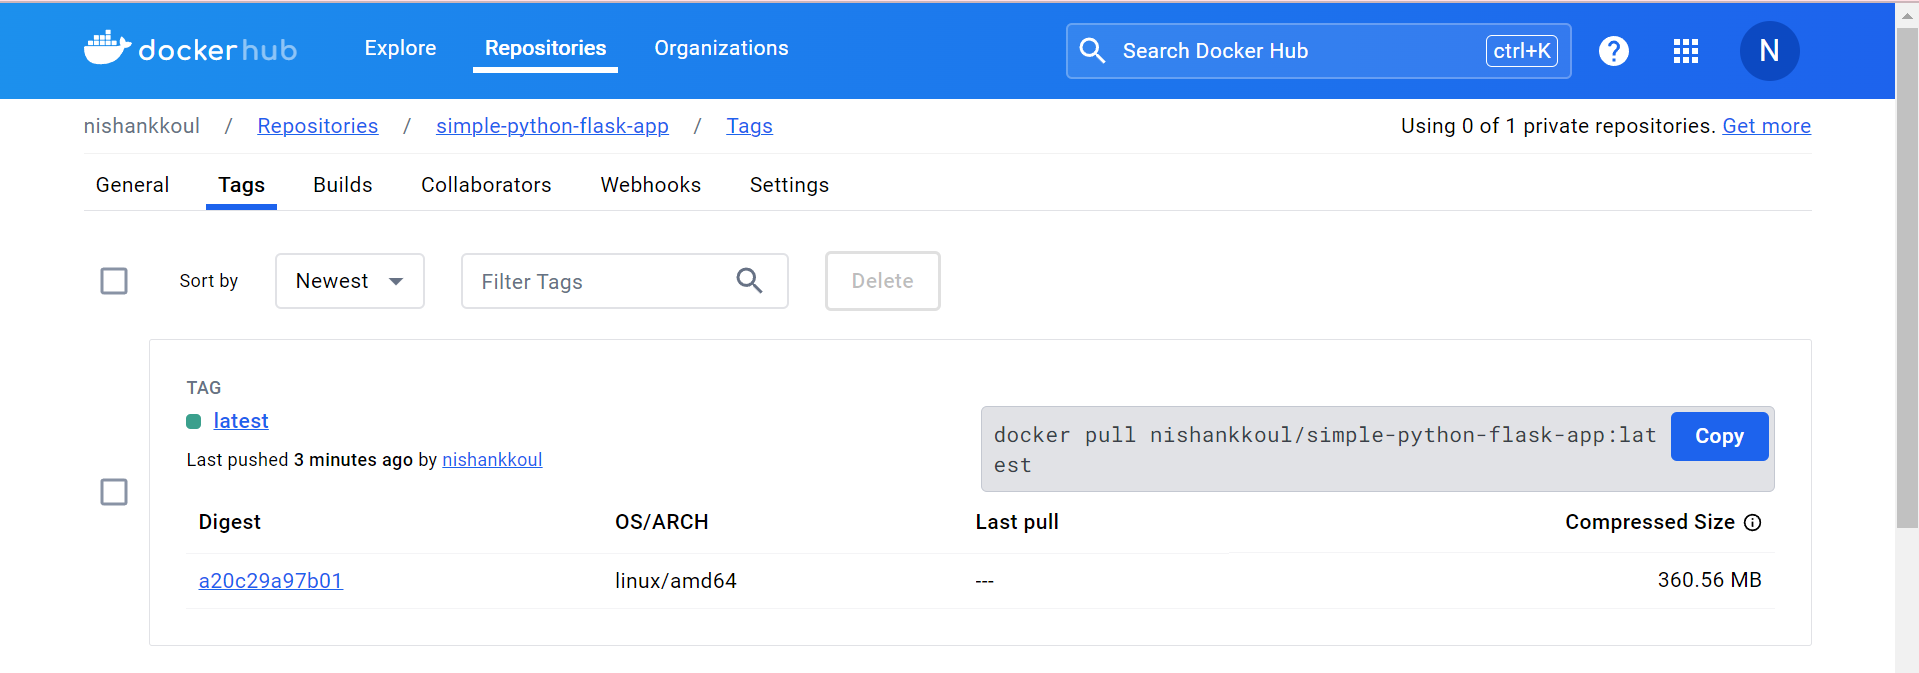
This completes our Continuous Integration part of the entire CI/CD Pipeline.
Step 5: Deploying with CodeDeploy
Create Application in CodeDeploy:
Go to CodeDeploy and create a new application.
Set the application name and compute platform (EC2).
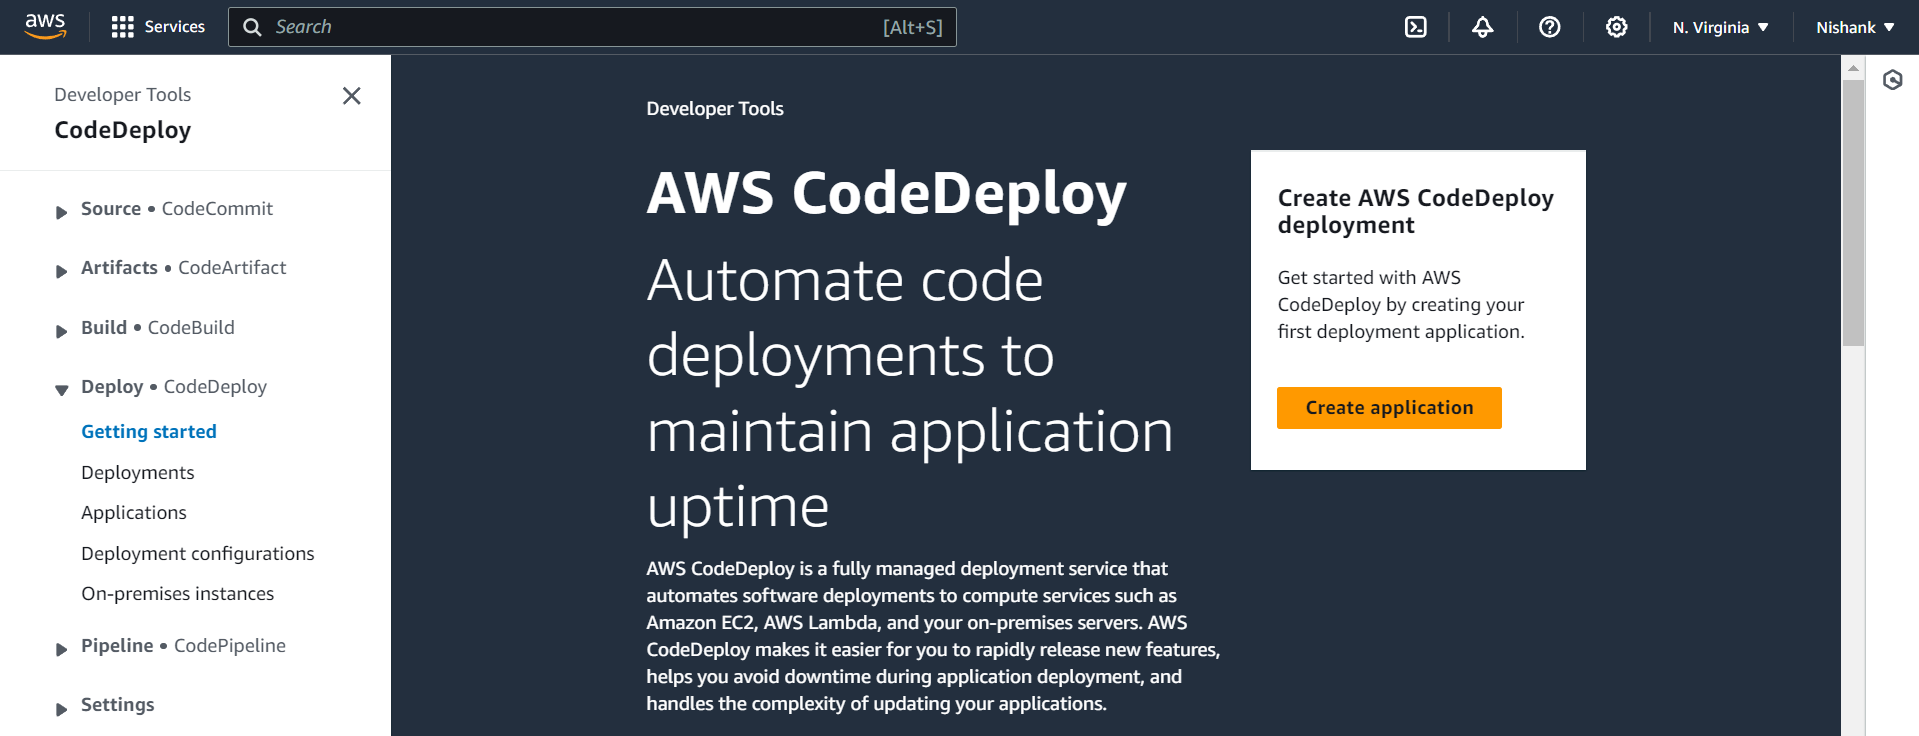
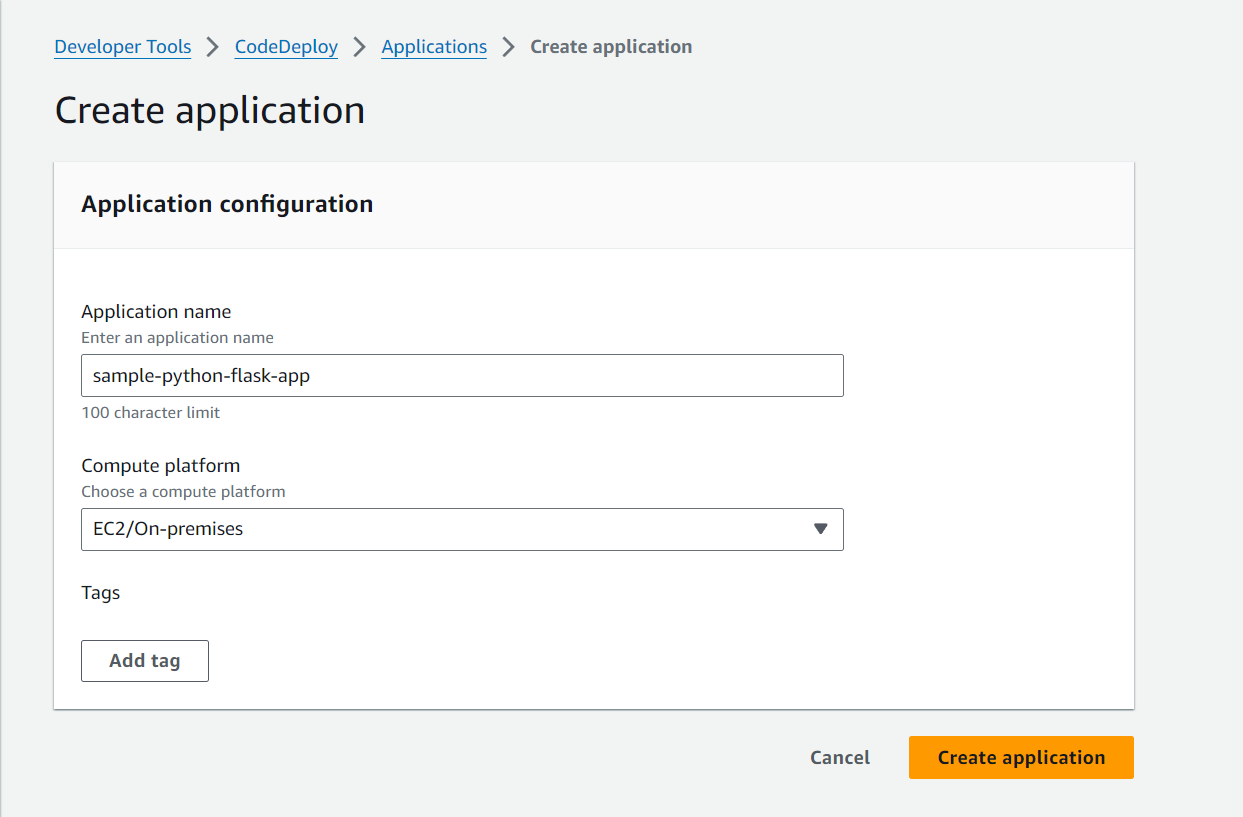
Click on Create Application.
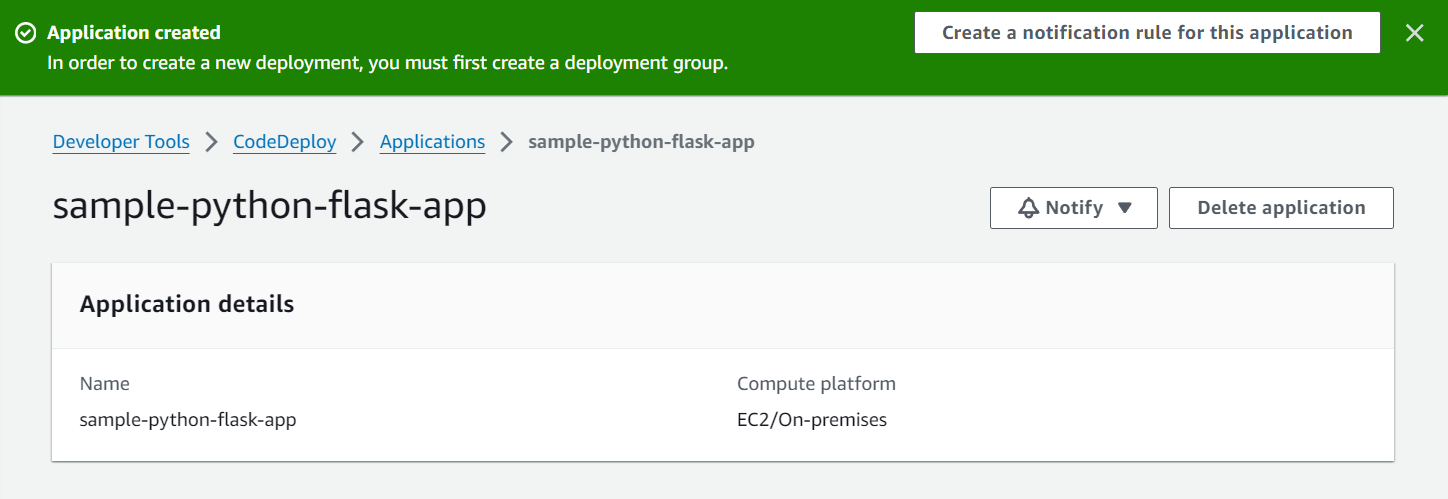
The application has been successfully created!
Launch EC2 Instance:
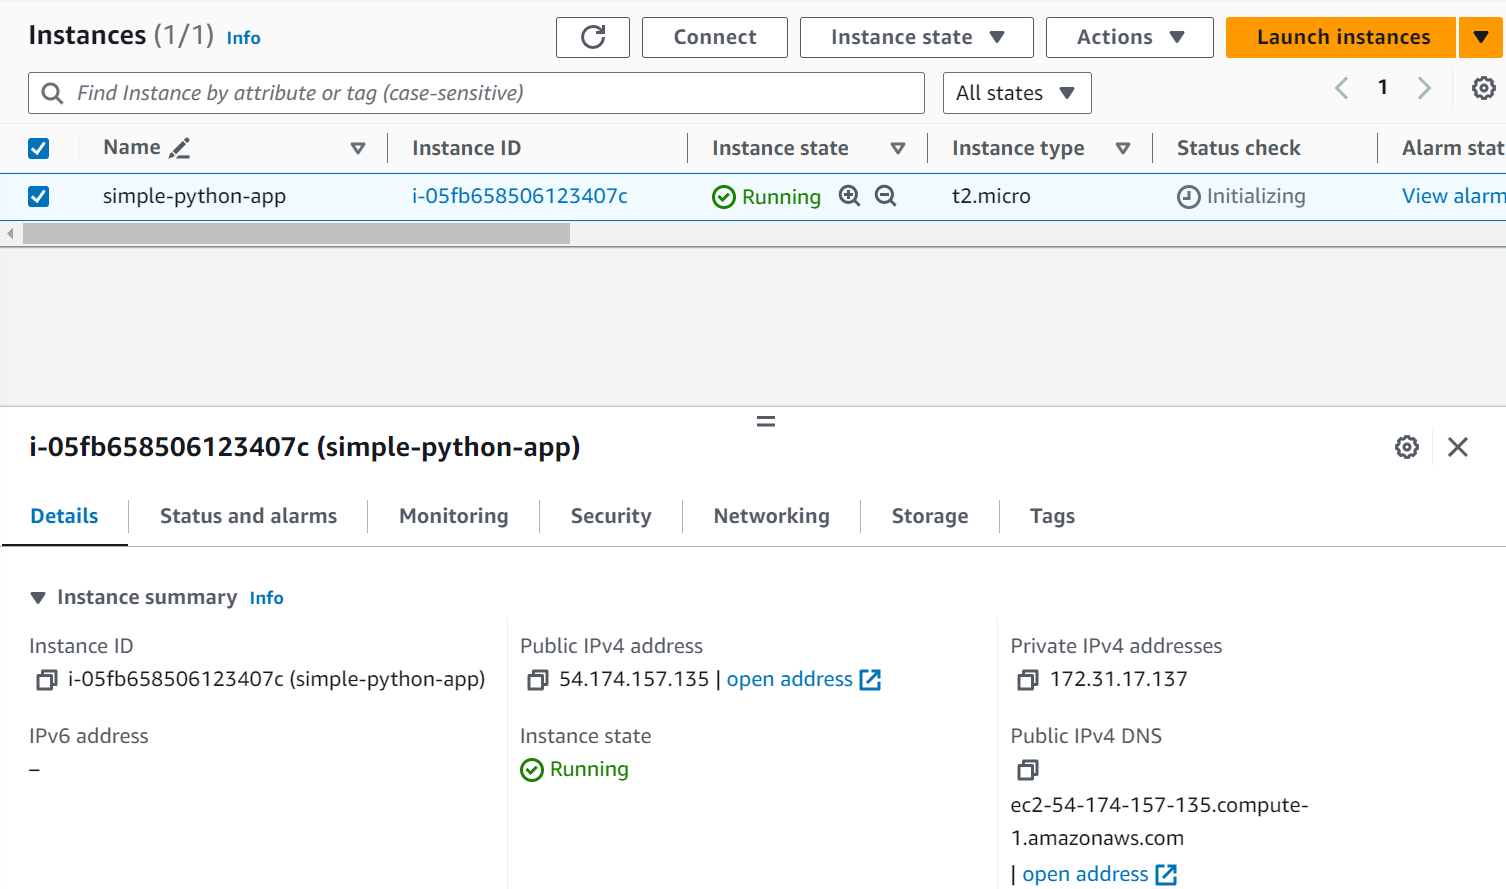
Create an EC2 instance with the necessary configurations (e.g.,
t2.microinstance type, Ubuntu 24.04 AMI). Configure the key-pair file along with the security group (Make sure SSH is enabled at Port 22).Click on Launch Instance.
Install CodeDeploy Agent:
SSH into the EC2 instance and install the CodeDeploy agent using the appropriate commands for Ubuntu.
When using CodeDeploy, we need to install the CodeDeploy agent inside the EC2 instance. The CodeDeploy agent is a software package that ensures communication between the CodeDeploy service and the EC2 instance. It polls the CodeDeploy service for deployment instructions and executes them on the instance
The agent runs the deployment scripts defined in the appspec.yml file, including hooks such as BeforeInstall, AfterInstall, ApplicationStart, etc. These scripts manage the application’s deployment lifecycle on the instance, including tasks like downloading the application bundle, installing dependencies, and starting services.
Now, connect to the EC2 instance using your terminal.
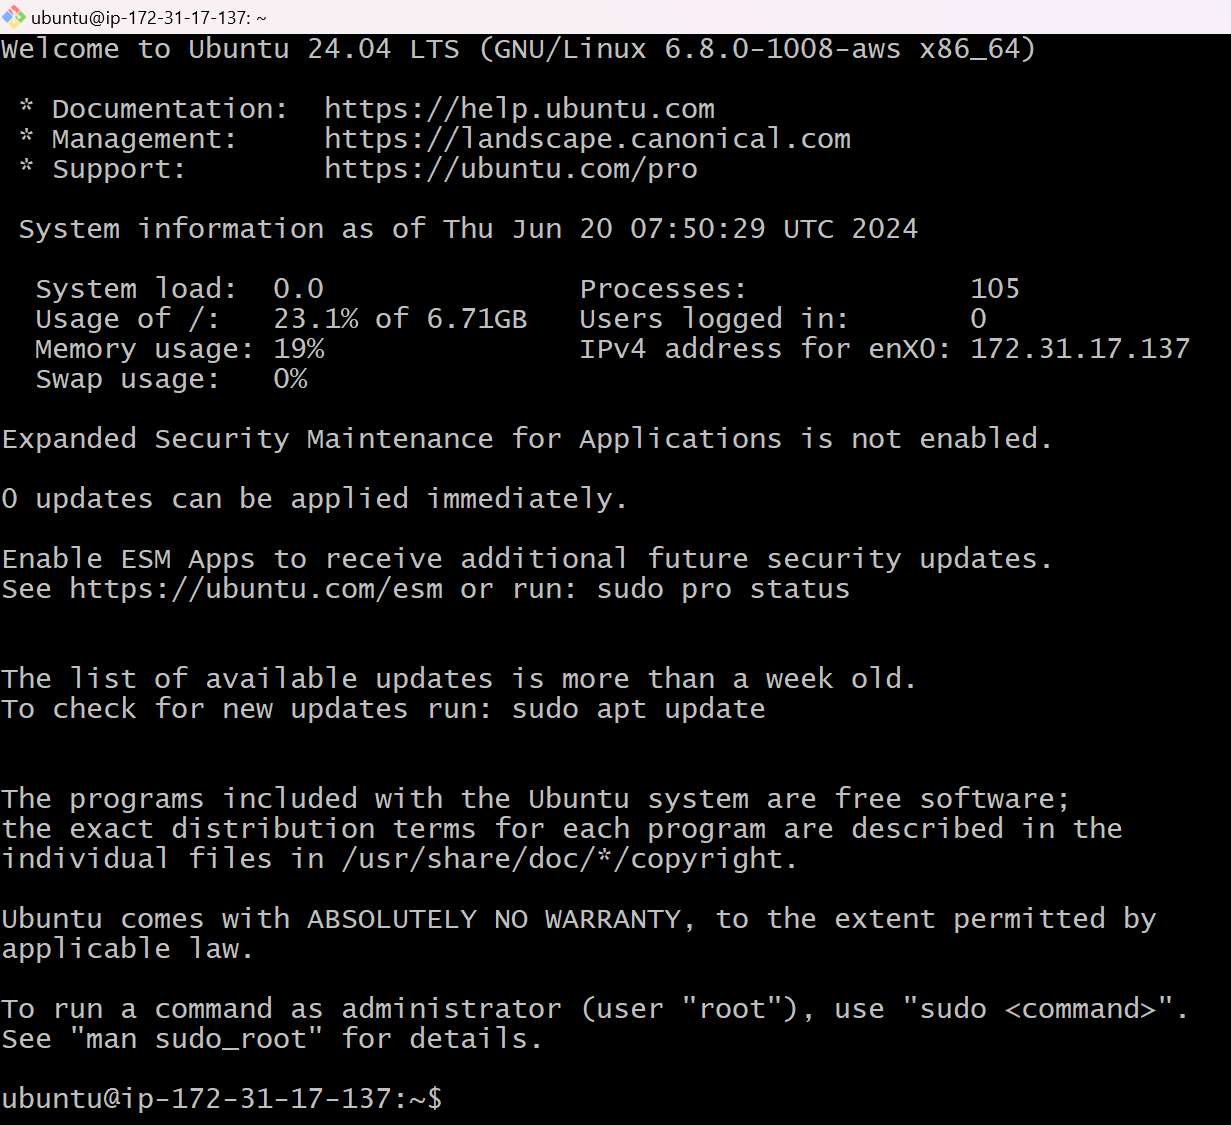
For installing the CodeDeploy agent on the Ubuntu server, refer: https://docs.aws.amazon.com/codedeploy/latest/userguide/codedeploy-agent-operations-install-ubuntu.html
After installing the CodeDeploy agent, make sure it is active and running

Create IAM Service Role:
Now, we need to create an IAM service role for EC2 that will allow access to both EC2 and CodeDeploy services. Either we can create 2 different service roles for both EC2 and CodeDeploy for them to interact and give the required permissions or we can create a single role and give for both the services and give permissions for both of them (EC2FullAccess and CodeDeployFullAccess).
We will go with the latter in this case. So after creating the service role and attaching the required permissions, we need to assign this role to the EC2 instance. Come to the EC2 instances dashboard, click on the instance-id of the running instance, click on Actions -> Security -> Modify IAM role
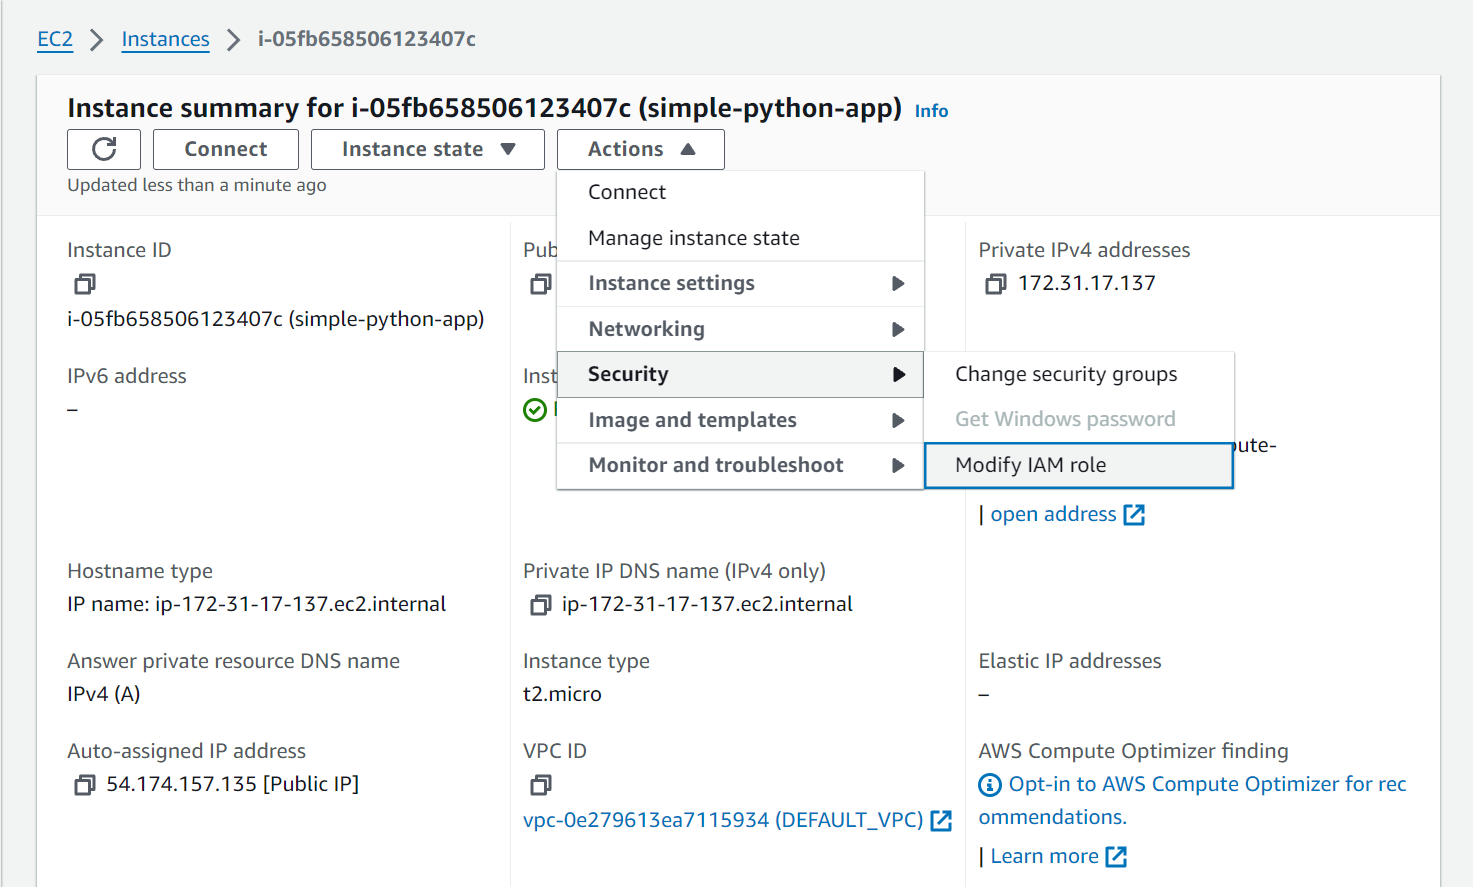
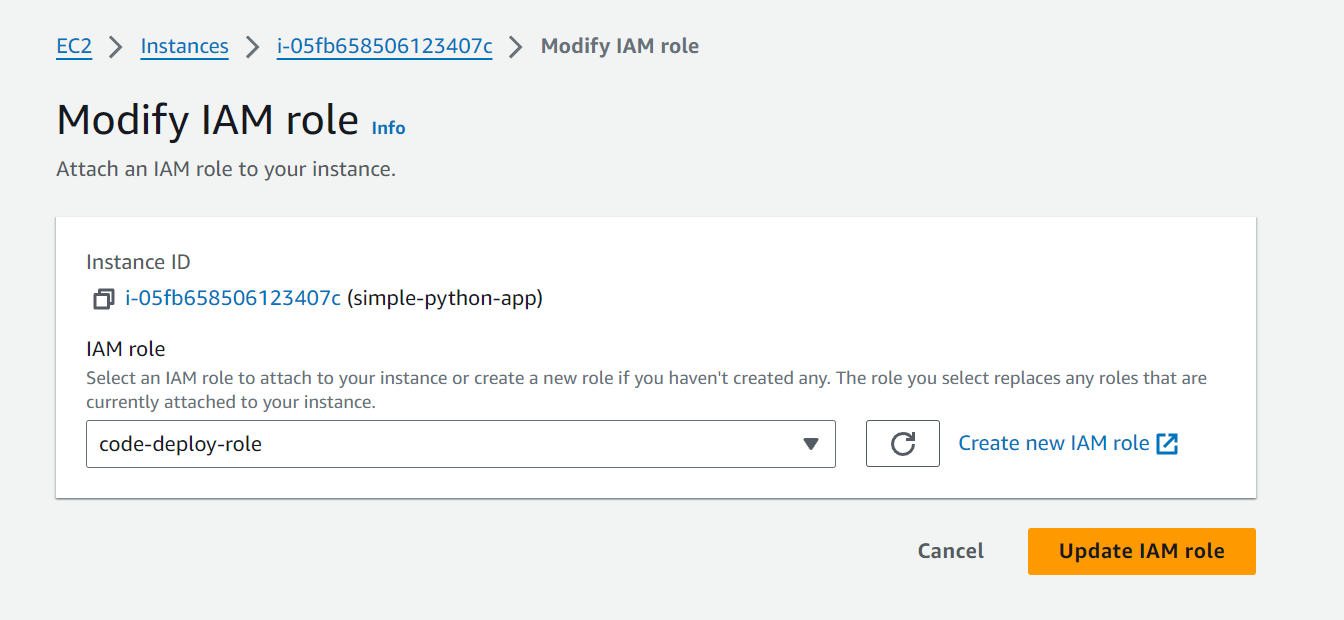
Click on Update IAM role. Now go to the terminal and restart the CodeDeploy agent once again using the command:
sudo systemctl restart codedeploy-agent
Create Deployment Group:
Now we will create a Deployment Group inside the CodeDeploy service. Head over to CodeDeploy service -> Applications -> Click on the Application name we created and then click on Create Deployment Group.
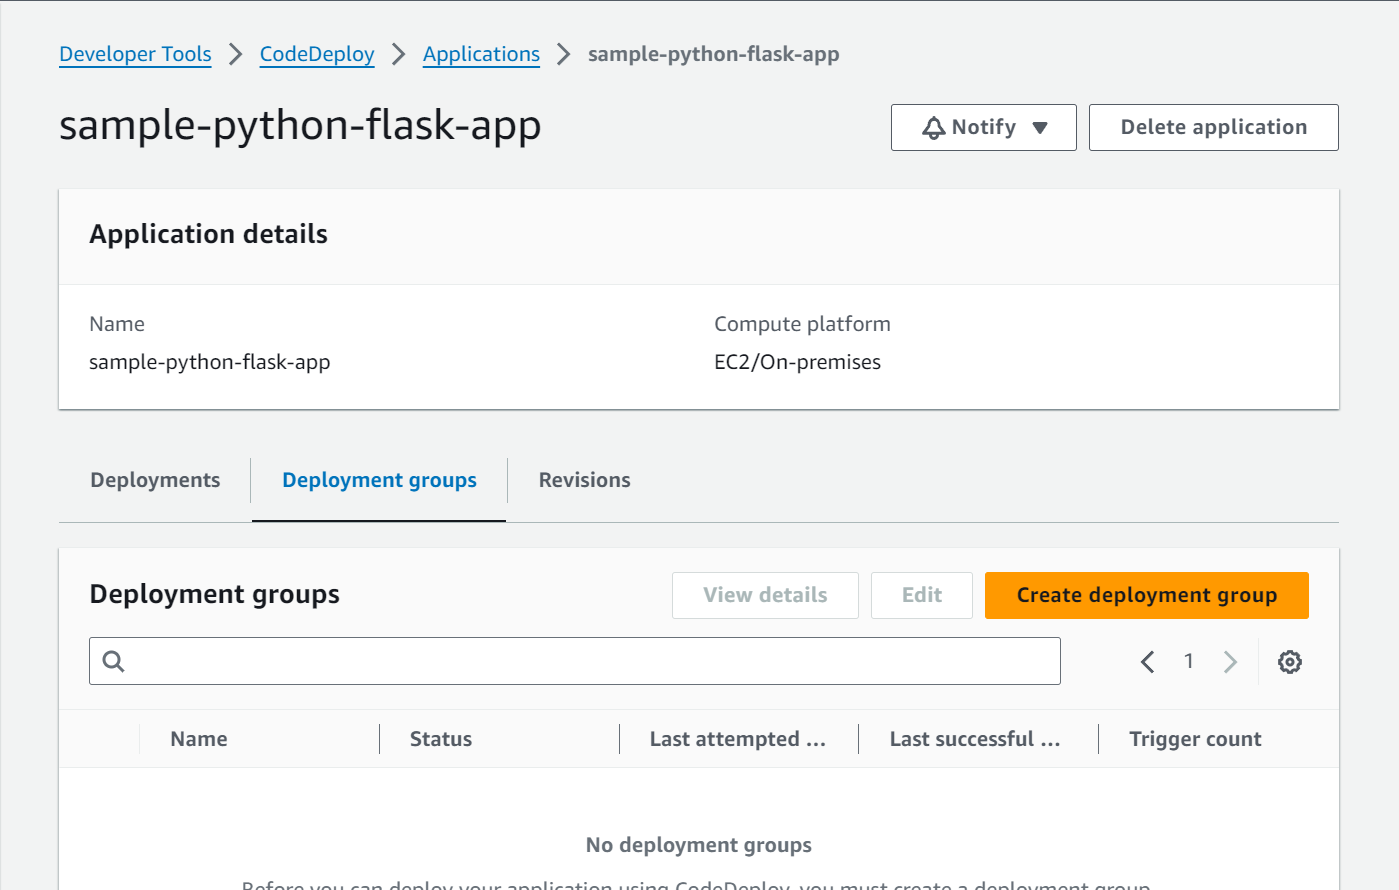
Next, enter the deployment group name and the ARN of the service role “code-deploy-role”. Select the Deployment type as “In place”.

Inside the Environment Configuration group, select EC2 instances and enter the Tag group key-value pair.
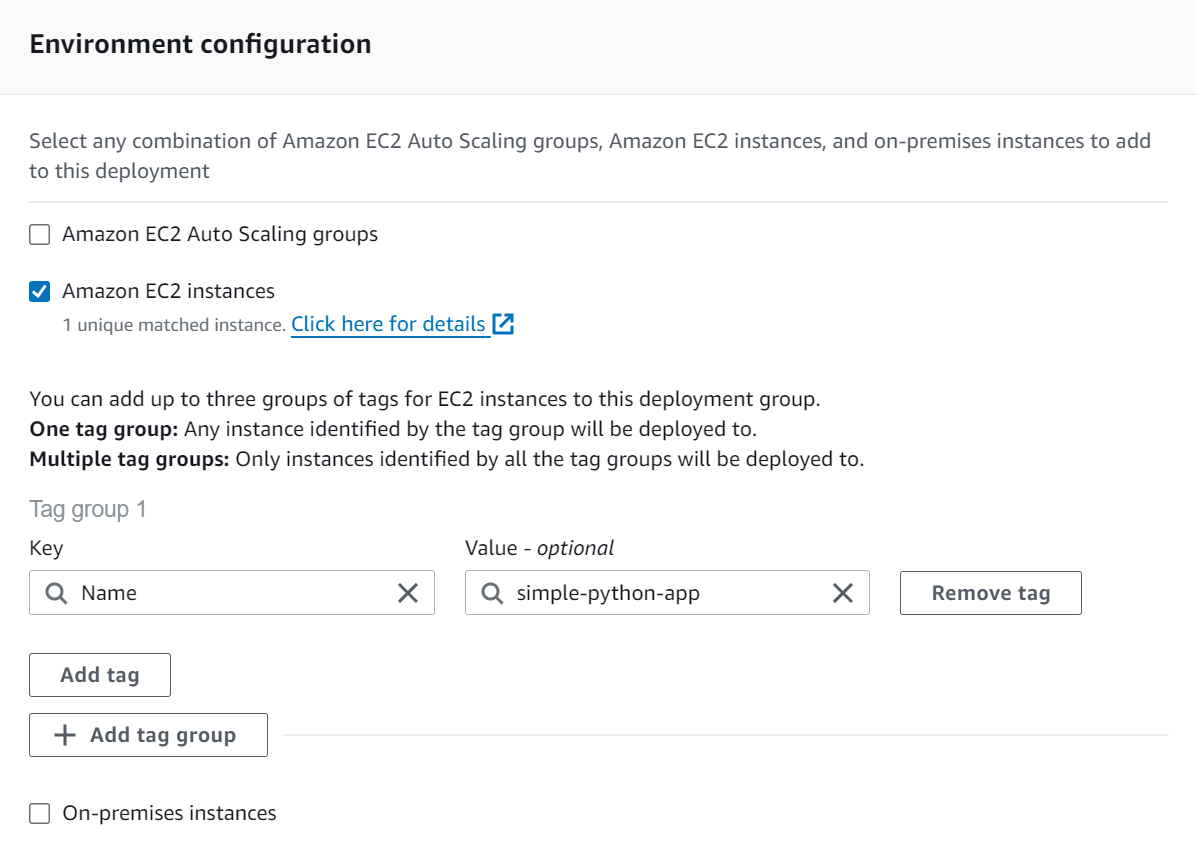
Uncheck “Enable Load Balancer” and click on Create Deployment Group. If there is an error like this:

Modify the trust relationship of the role to allow access to both services.
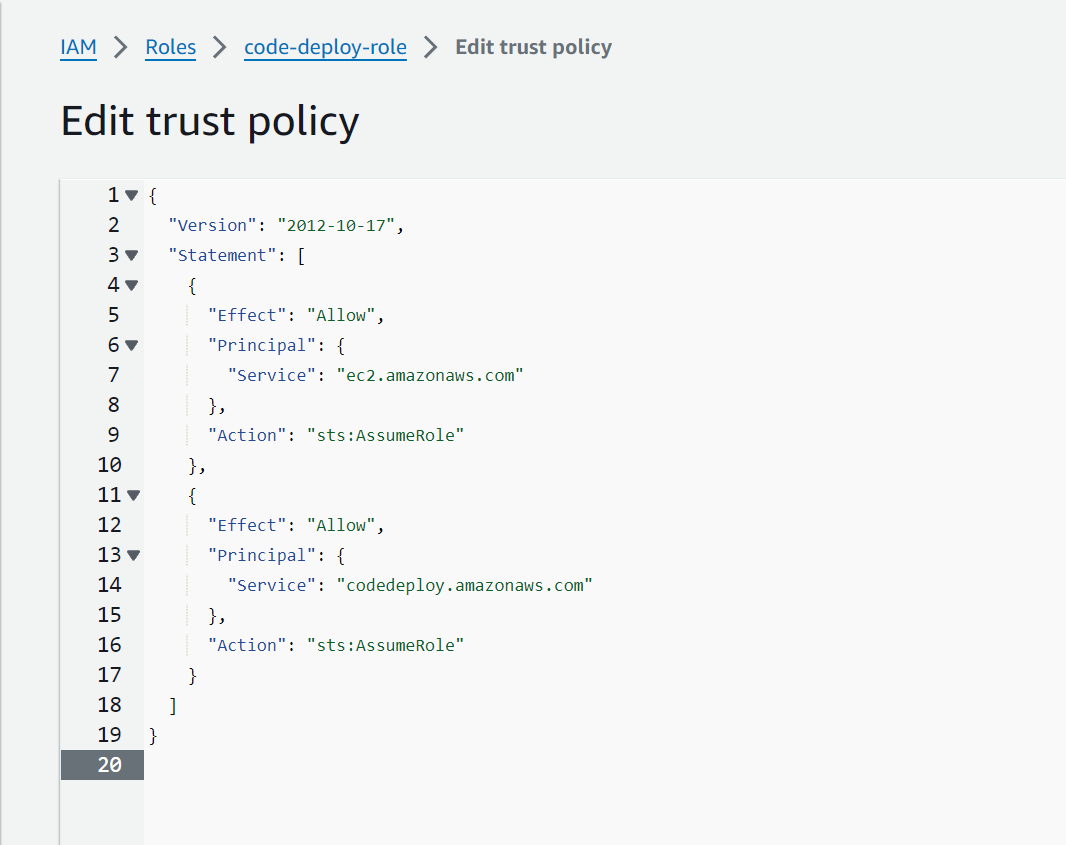
Now attach the same ARN again and click on Create Deployment Group.
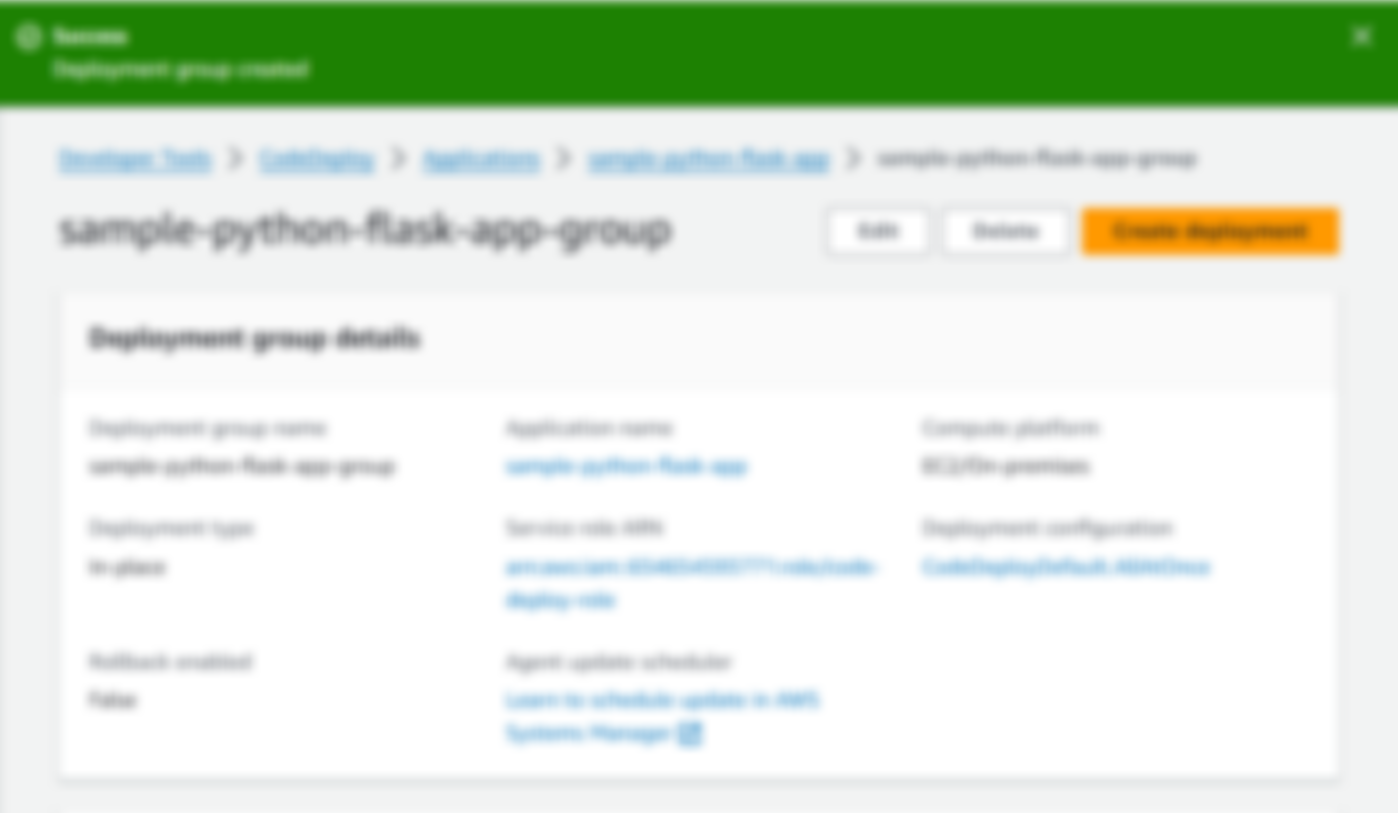
Create a Deployment
Now, we have to deploy the application and for that, we need to create appspec.yml This appspec.yml will exist inside our repo. We will now create a Deployment that will execute the appspec.yml To create a Deployment: CodeDeploy service -> Applications -> Click on Application name -> Deployments - > Create Deployment
version: 0.0
os: linux

hooks:
  ApplicationStop:
    - location: scripts/stop_container.sh
      timeout: 300
      runas: root
  AfterInstall:
    - location: scripts/start_container.sh
      timeout: 300
      runas: root
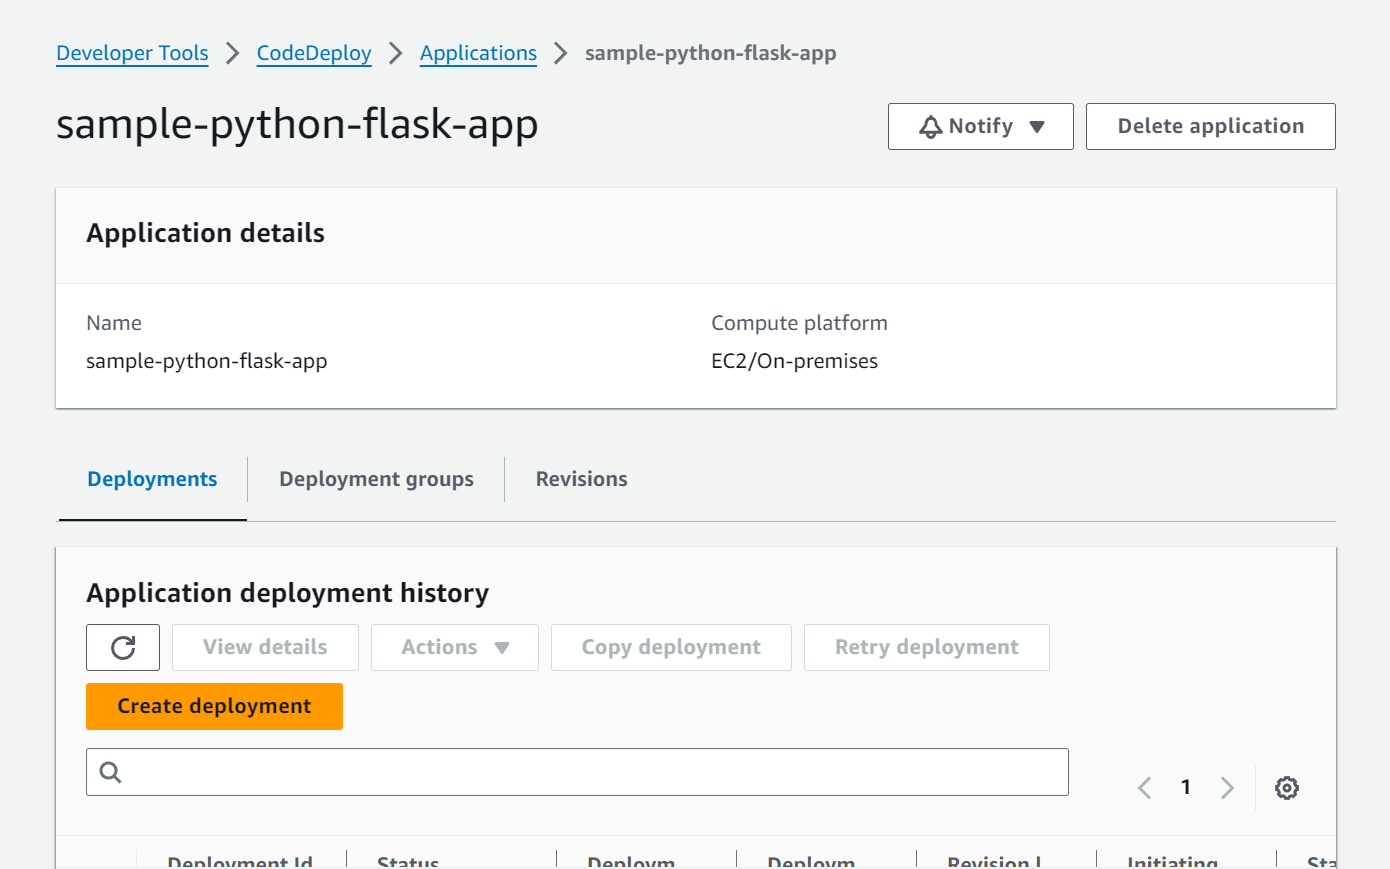
Mention the Deployment group:
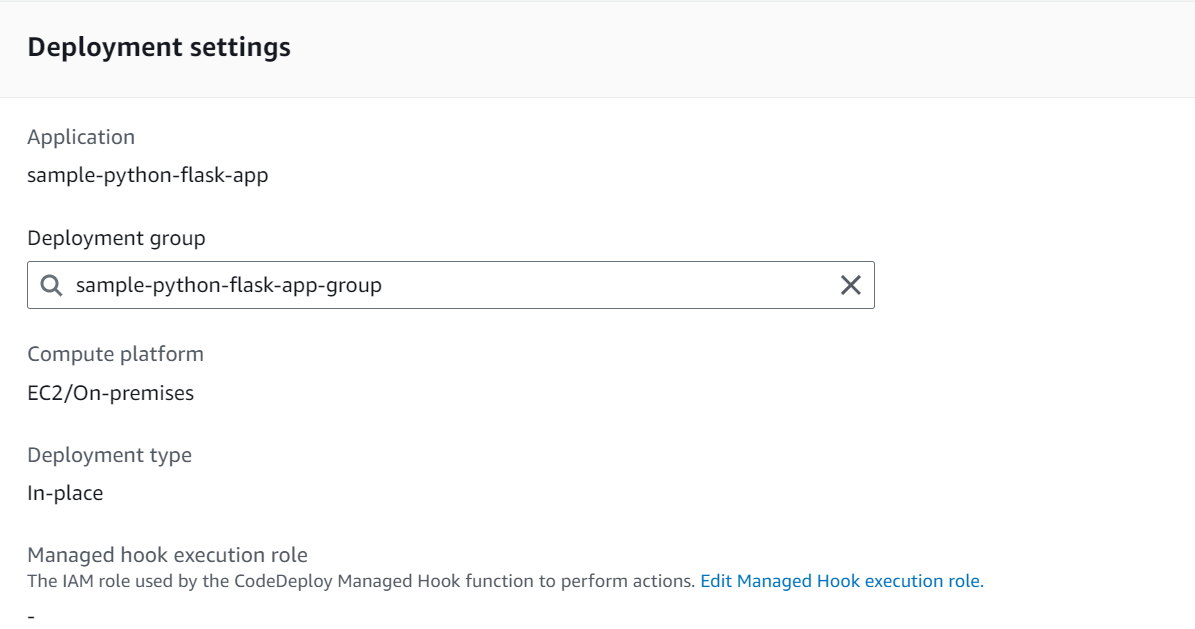
Next, select GitHub as the platform where your code is stored, connect to GitHub, and then mention the repository name along with the recent commit ID. (We are attaching the commit ID because we will first manually check that CodeDeploy working and then after integrating with CodePipeline, we won’t need to fill the commit ID)
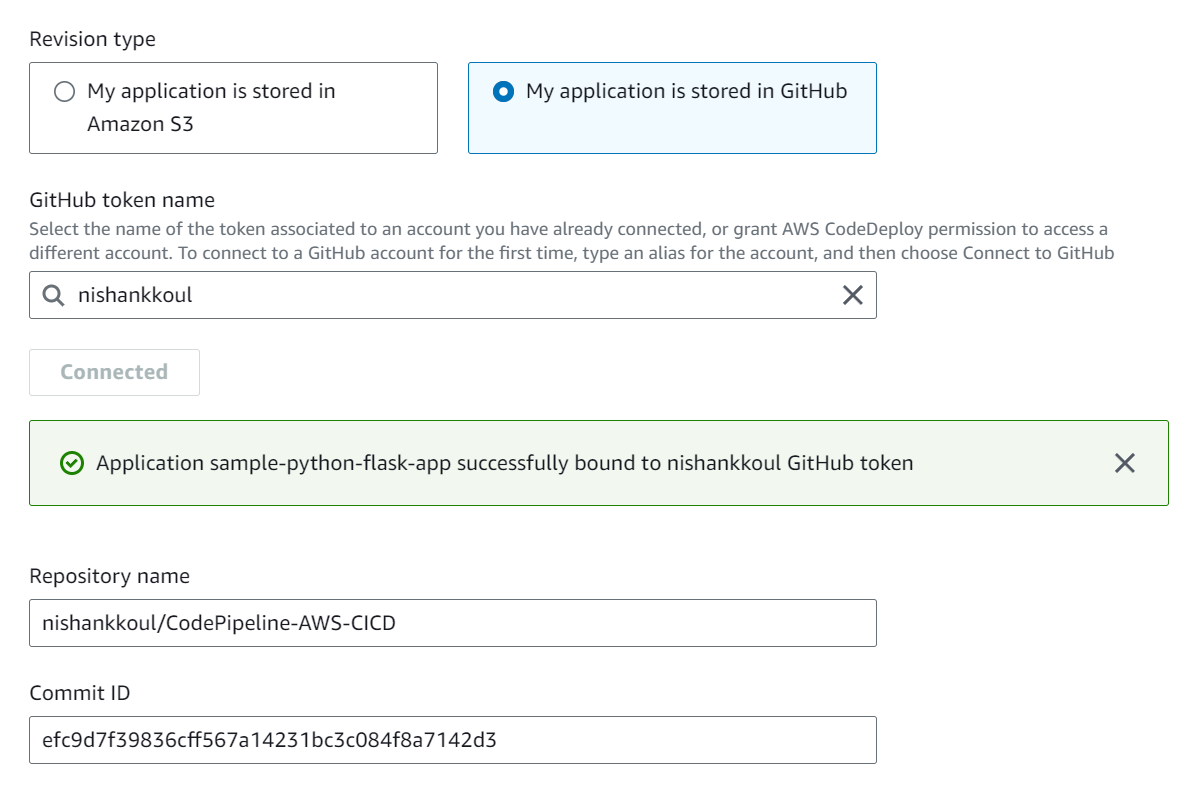
Click on Create Deployment.
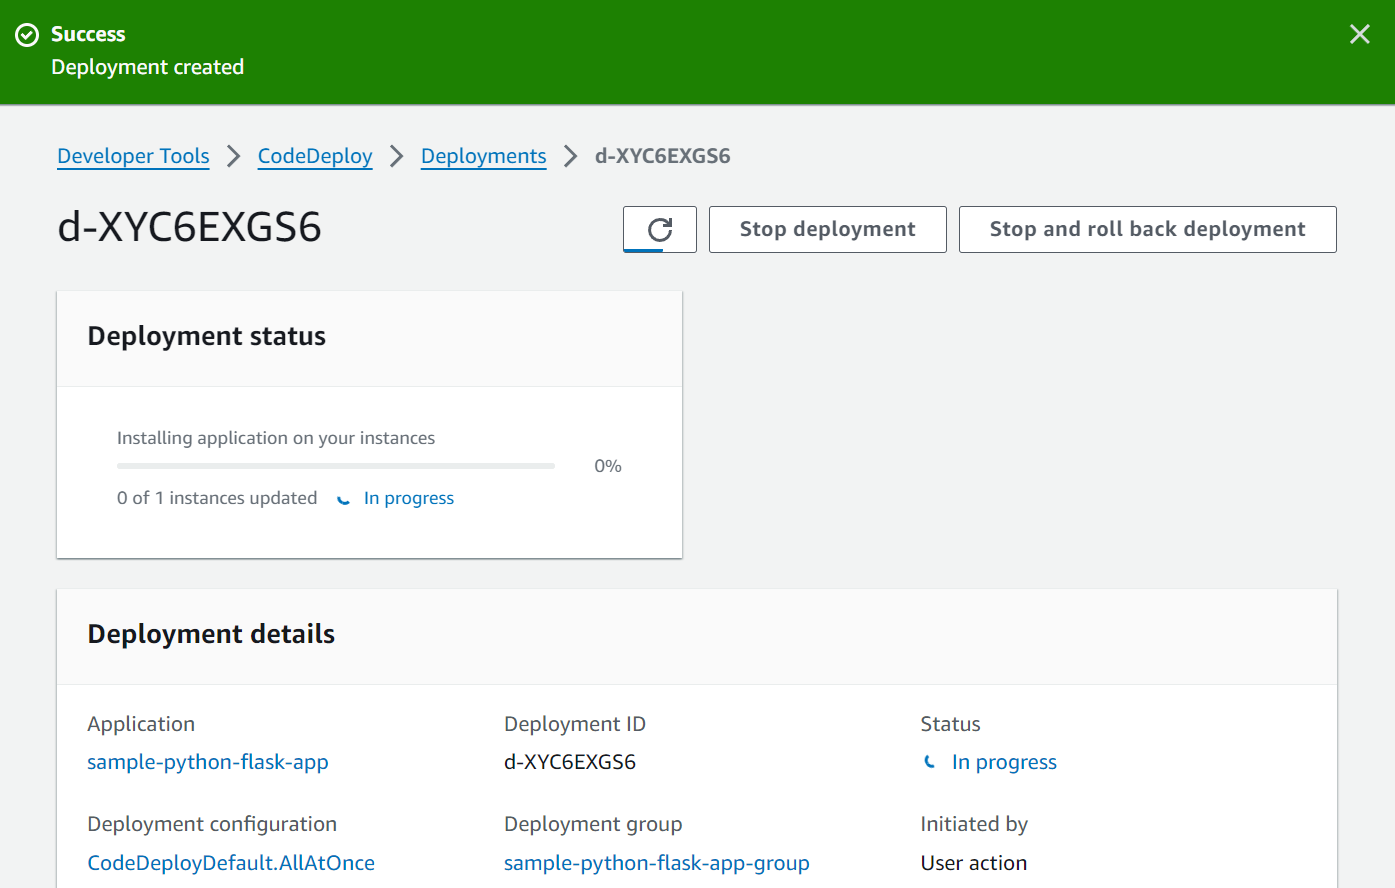
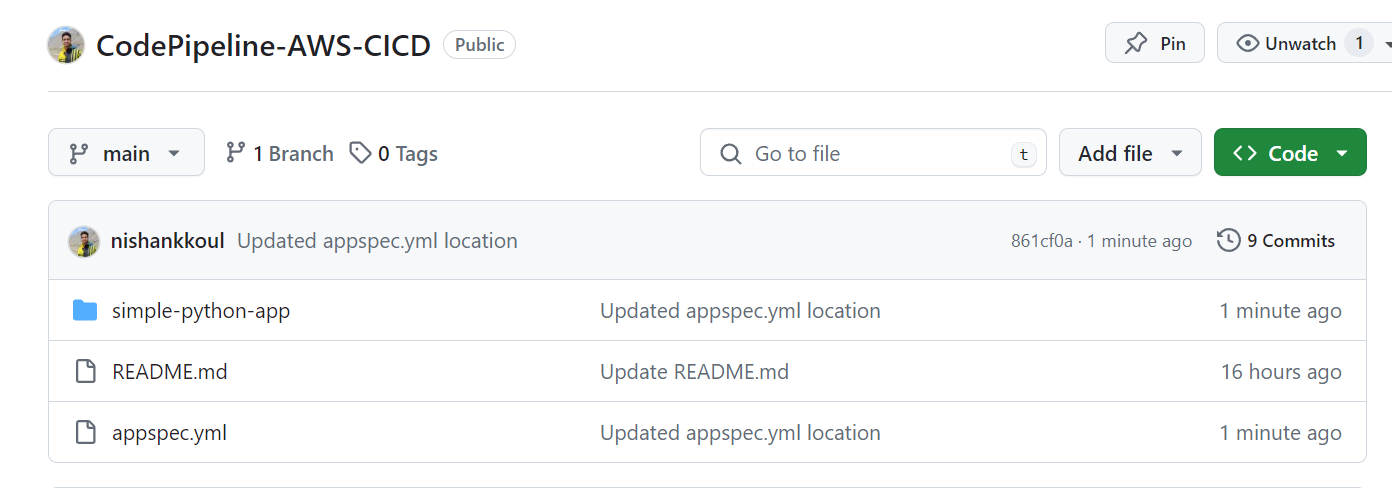
We need to provide appspec.yml at the root level of the repository because we have not defined the exact path of the file anywhere while creating the Deployment. If we click on “View Events” in the Deployments section, we can see that the GitHub connection is established but after that, the appspec.yml couldn’t be located so the rest of the process failed.
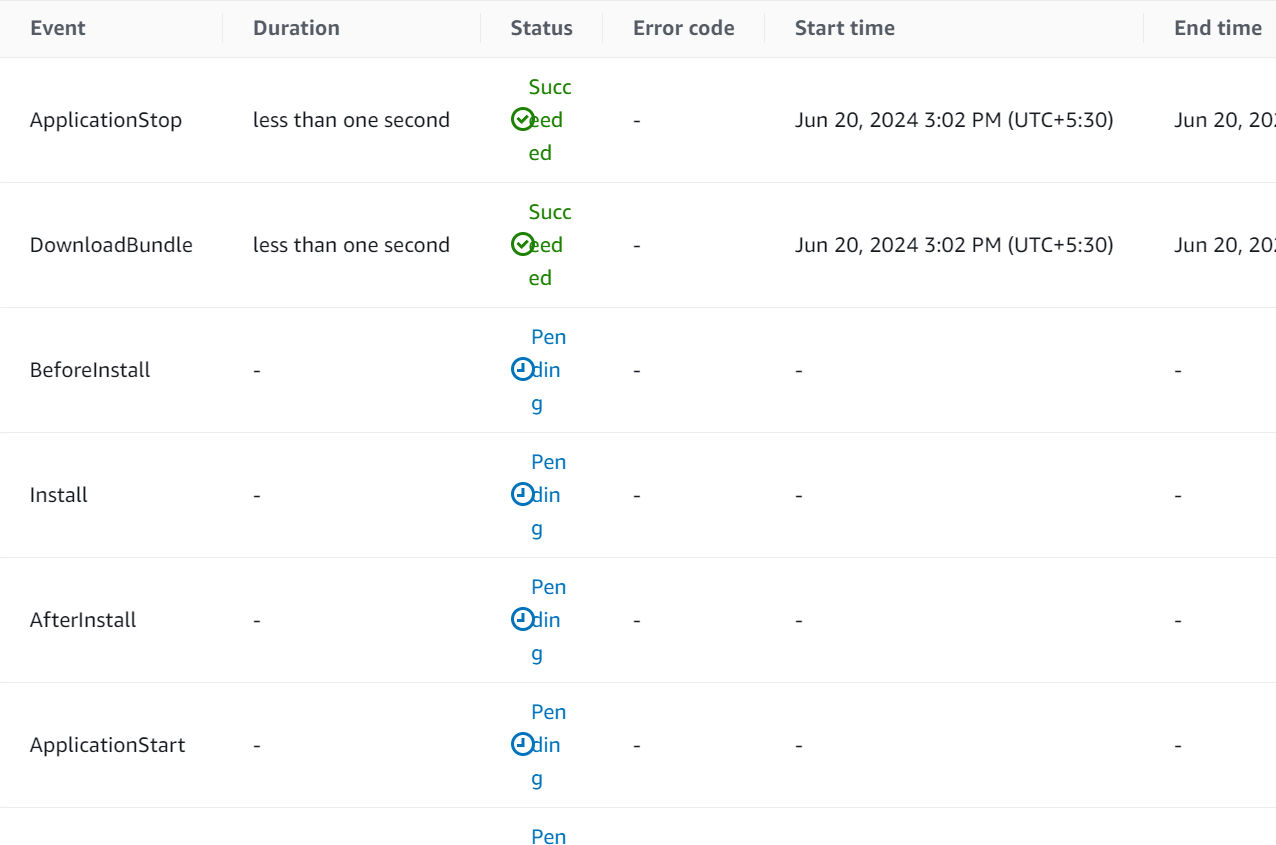
So now bring the appspec.yml file to the root level and the repository now looks like this...
Install Docker on EC2:
Since the scripts start_container.sh and stop_container.sh use docker commands, we need to install Docker on our EC2 Instance.
# Script for start_container.sh

#!/bin/bash
set -e

# Pull the Docker image from Docker Hub
docker pull nishankkoul/simple-python-flask-app

# Run the Docker image as a container
docker run -d -p 8000:5000 nishankkoul/simple-python-flask-app
# Script for stop_container.sh

#!/bin/bash
set -e

# Stop and remove the running container (if any)
containerID=$(docker ps -q --filter "name=simple-python-flask-app")
if [ -n "$containerID" ]; then
  echo "Stopping and removing container $containerID"
  docker stop "$containerID"
  docker rm "$containerID"
else
  echo "No running container found with the name simple-python-flask-app"
fi
Execute this command to install docker:
sudo apt install docker.io -y
Now delete the previous deployment and create a new deployment with the same configurations.
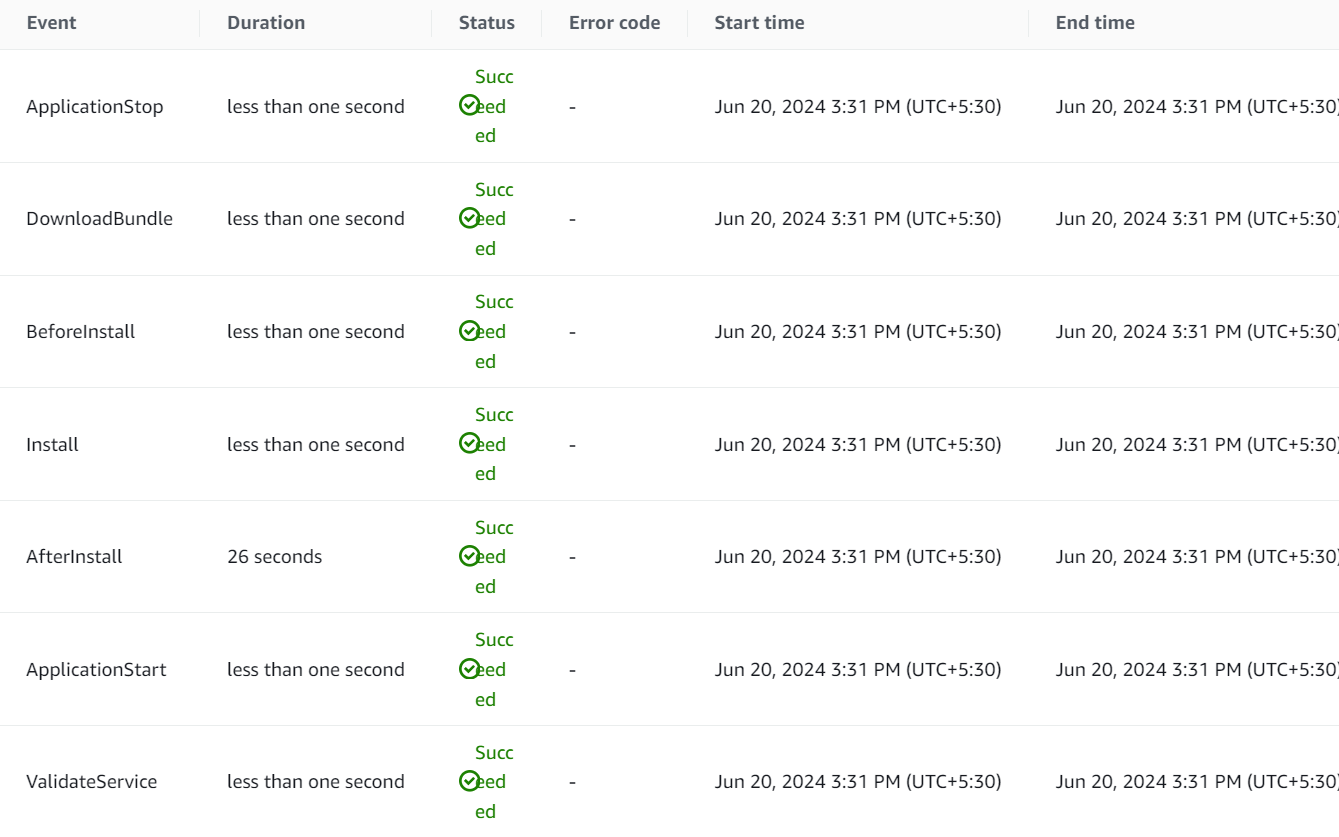
And the deployment is finally successful!
Step 6: Finalizing the Pipeline
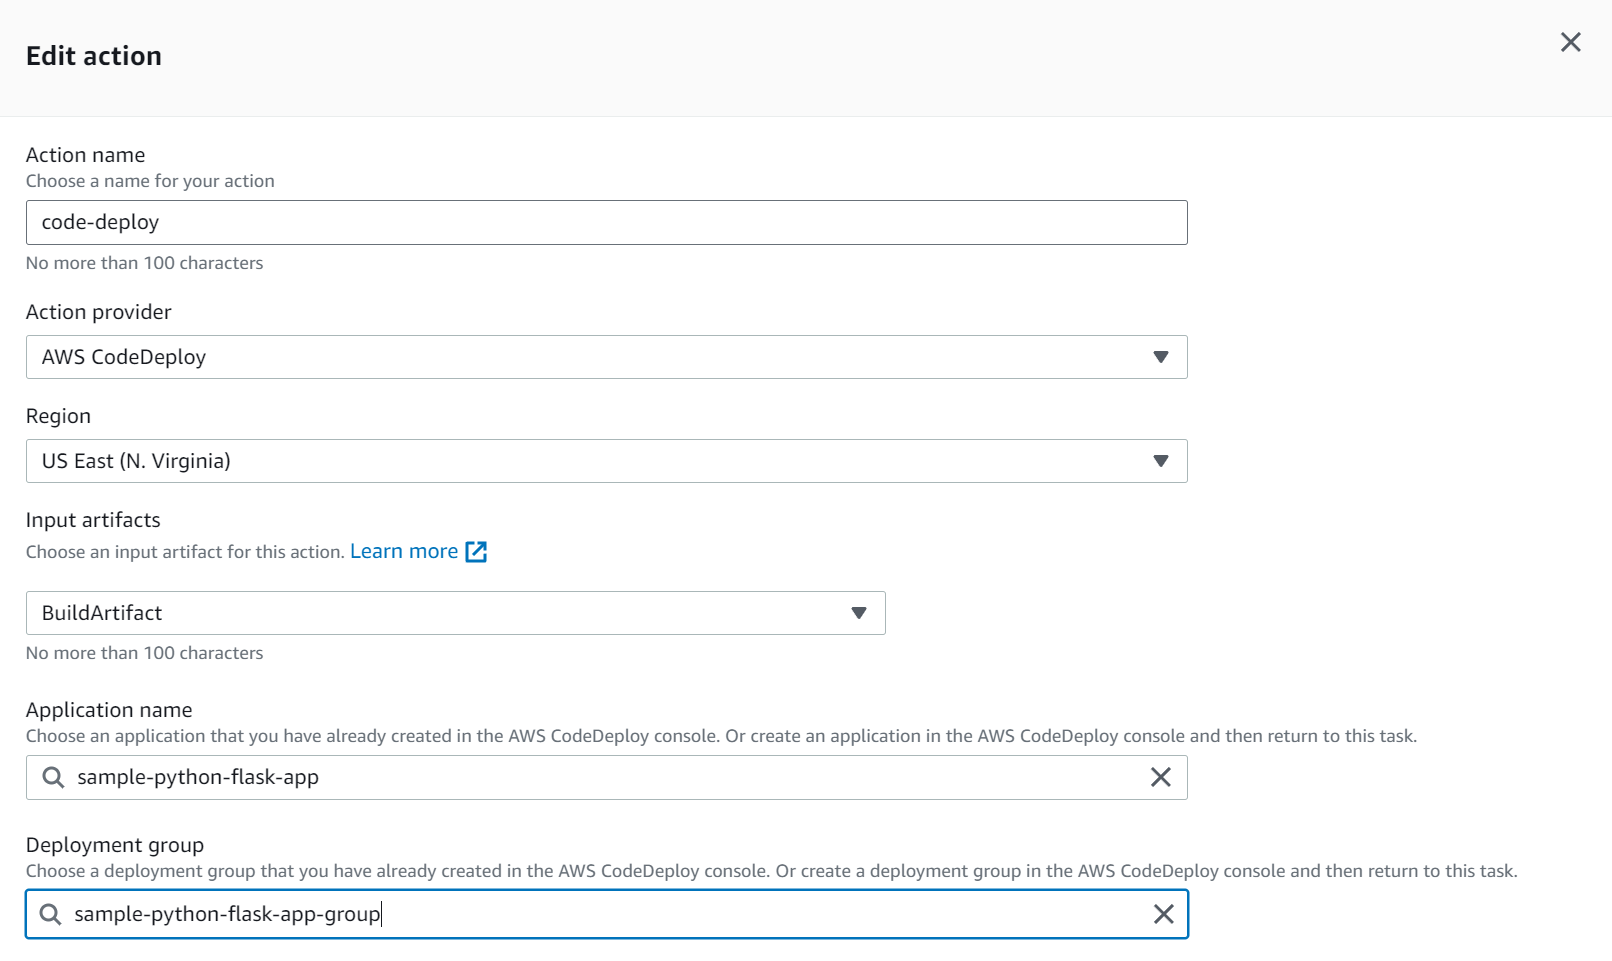
Integrate CodeDeploy with CodePipeline:
Edit the existing pipeline and add a new stage for CodeDeploy.
Configure the action group with the necessary settings.
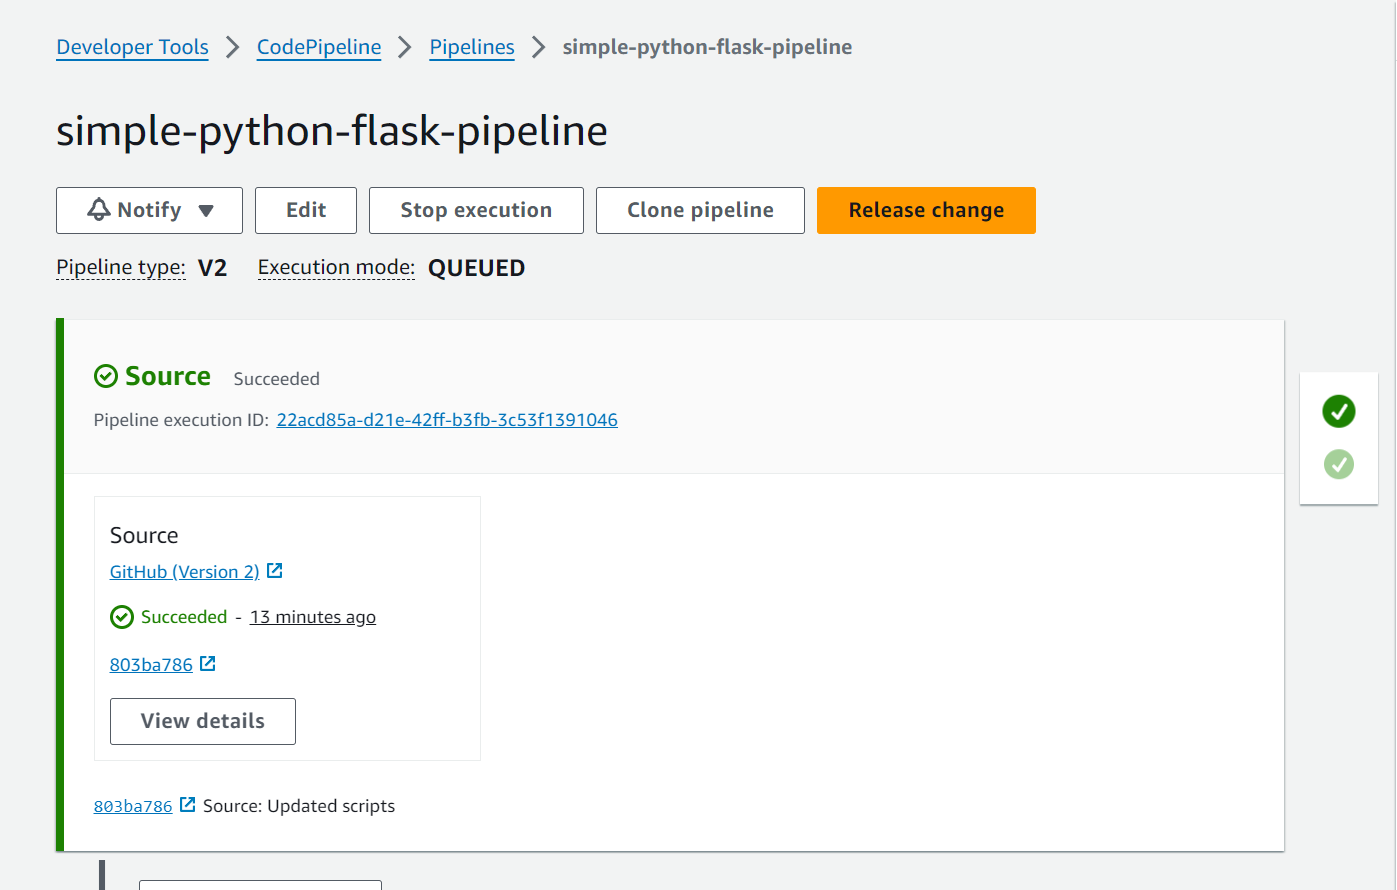
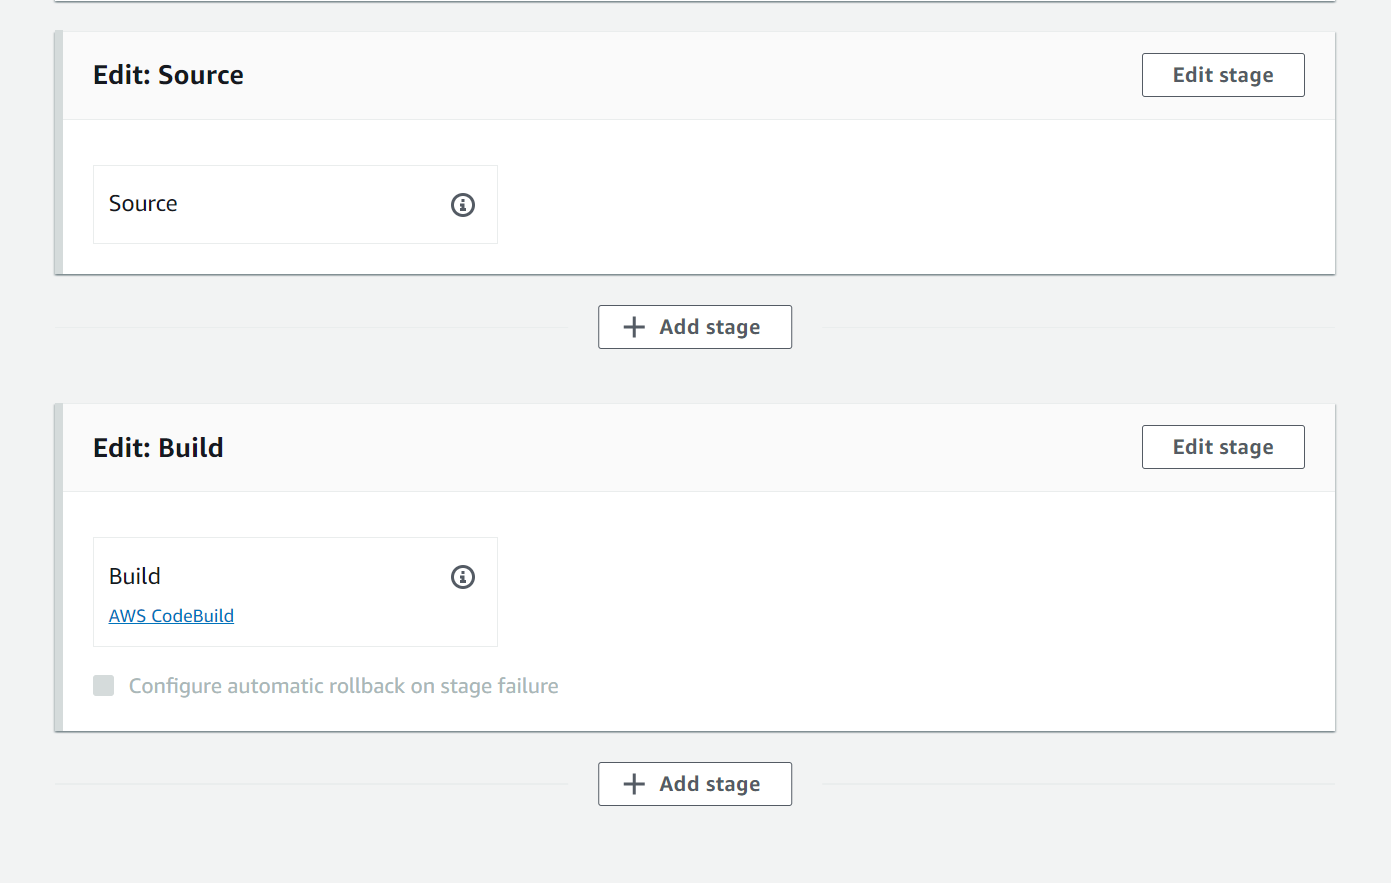
Add the stage name “code-deploy” and click on Add Action group.
Test the Pipeline:
Make changes to the repository and push them to trigger the pipeline.
Ensure that the pipeline stages, including CodeDeploy, execute successfully.
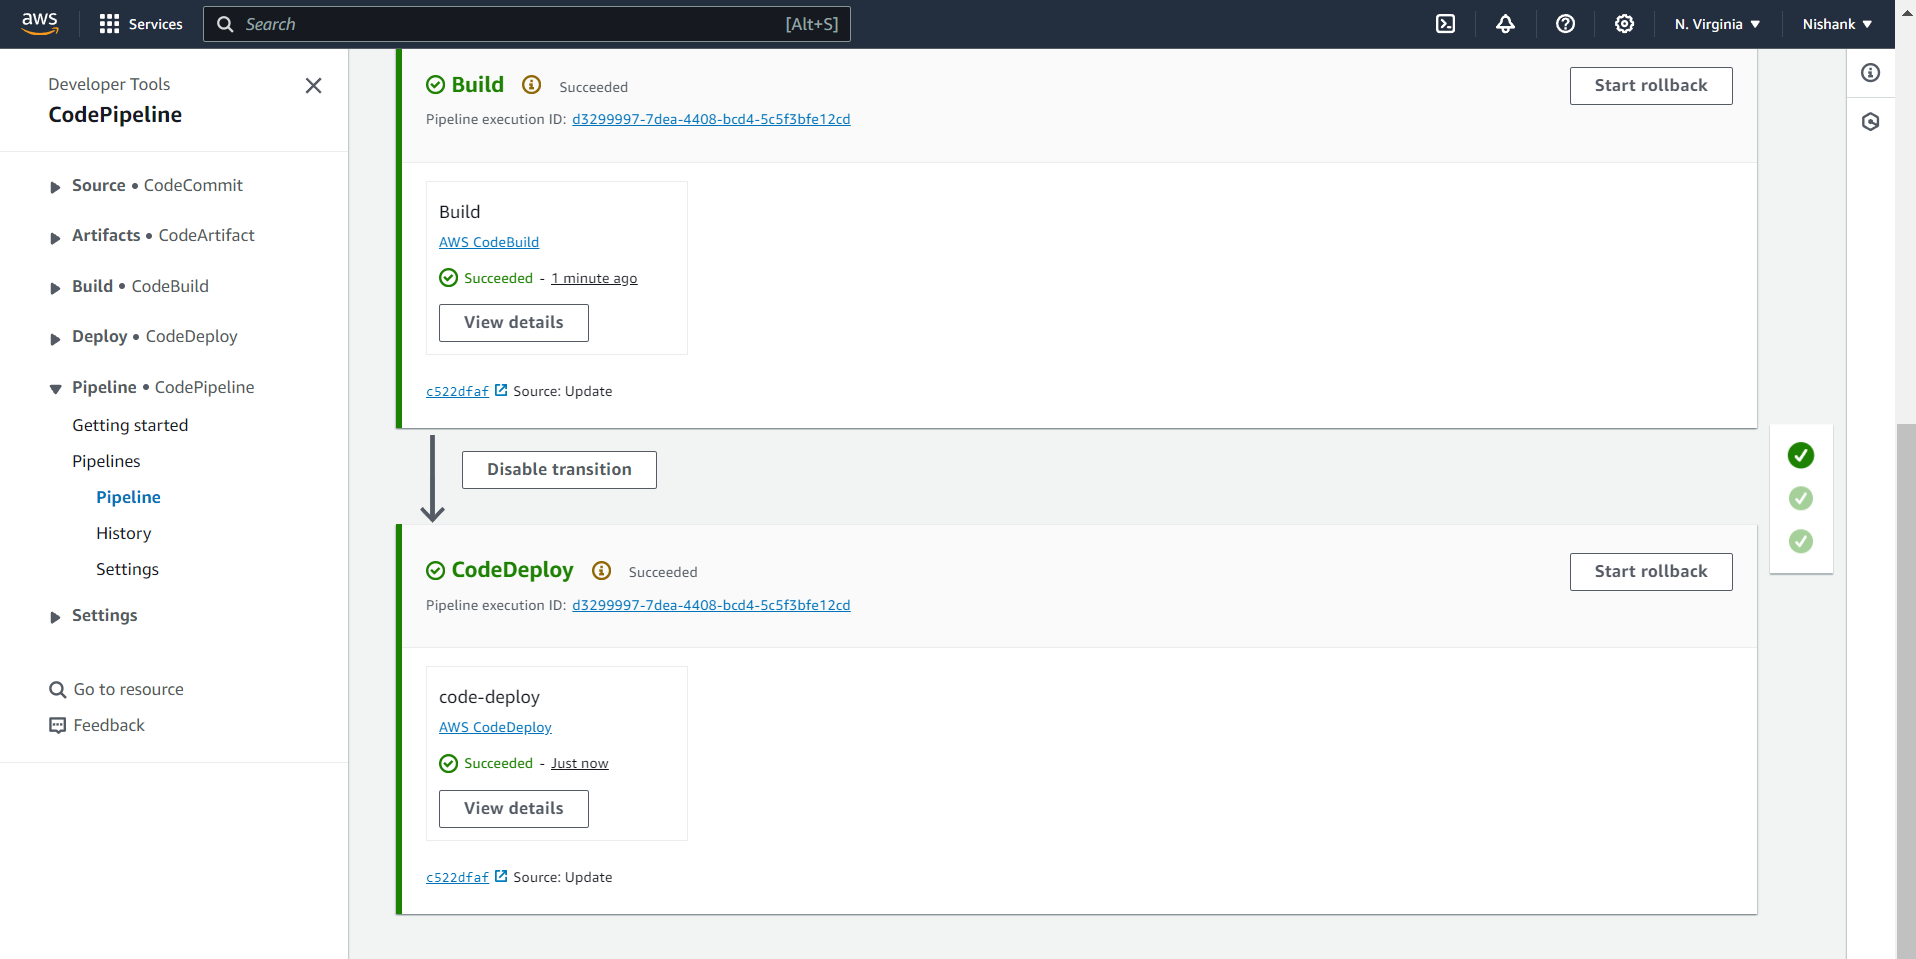
This completes our entire AWS End-to-End CI/CD project
Conclusion
This comprehensive guide has covered every detail necessary to set up an end-to-end CI/CD pipeline for a Python-based Flask application using AWS services. By following these steps, you can ensure a seamless integration and deployment process, enhancing your software development workflow.
Subscribe to my newsletter
Read articles from Nishank Koul directly inside your inbox. Subscribe to the newsletter, and don't miss out.
Written by
