How To Create A Simple Web APP Using Azure CLI
 lolade ogundijo

Azure offers a robust set of tools and services that empower developers to create and deploy applications with ease. In this blog, we will explore the process of building a simple web application using the Azure Command-Line Interface (CLI), a powerful command-line tool that enables developers to interact with Azure resources directly from their preferred environment. One of the key advantages of leveraging the Azure CLI is the ability to automate the deployment and management of infrastructure as code (IaC).
Prerequisite
a. Install Azure CLI on your desktop
b. Create your Web Application Repository in your GitHub account.
c. Create a directory for your file. Click here to know how to create index file on Git bash and push it to Github.
Log In To Your Azure Account On Azure CLI
a. Open Powershell on your desktop
b. To log in to Azure account, run the command az login.
c. You will be redirected to a web browser to sign in to your Azure account and click on your account.

Note: This could be a challenging task sometimes. If you experience any blockers, copy the error message and search for it on Google to get the solution.
Create Your Resource Group
a. To create your webapp and App service plan, you need to create a resource group.
b. Run the command: az group create --name (name your resource) --location (input the location you want your resource to be).
[Note: Press "enter" at the end of every command]

Create Your App Service Plan
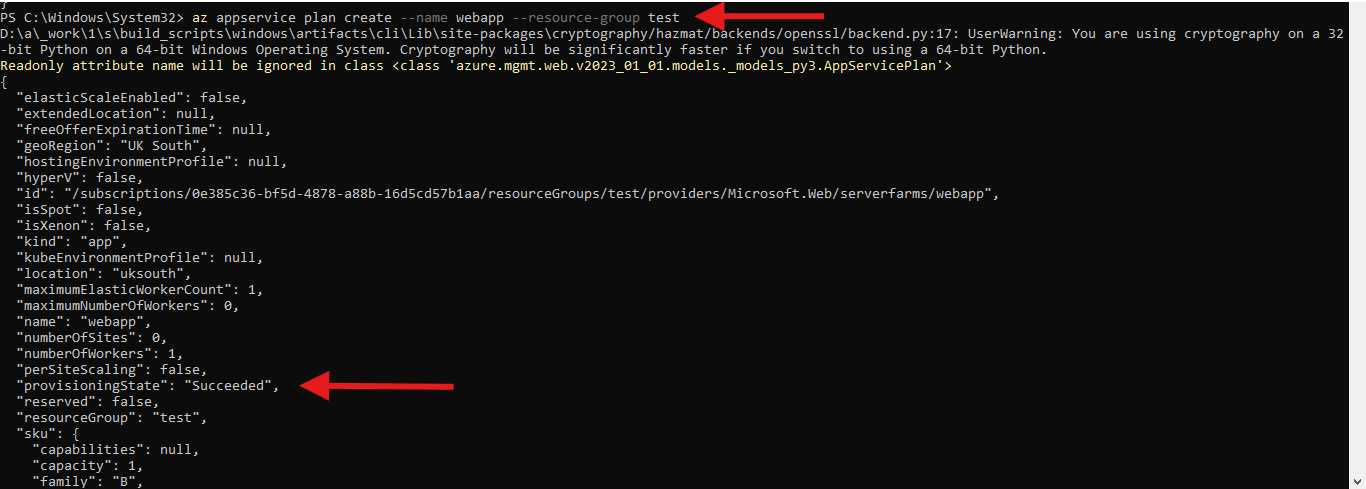
The App Service plan is a fully managed platform for hosting web applications. To create your App service plan run the following command:
az appservice plan create --name <name your plan> --resource-group <name of your resource group>
Create Your Web Application
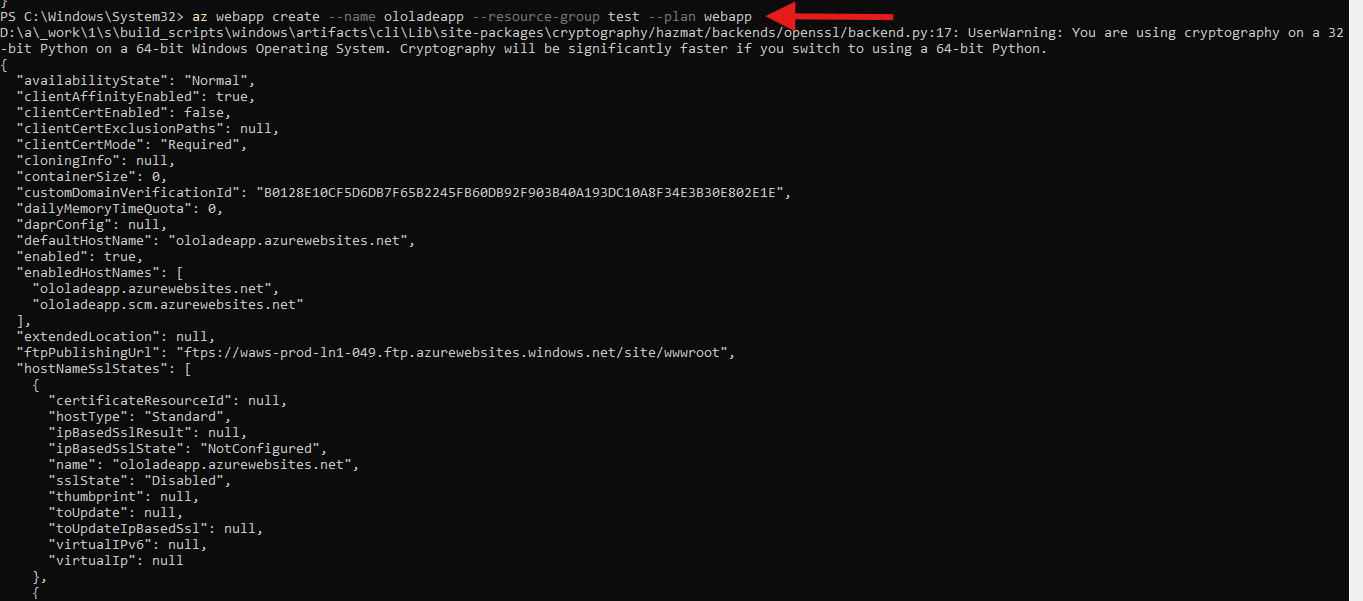
a. Once the App service plan has been created successfully, the next command to input is to create our web application itself.
b. To create your webapp run the command: az webapp create --name <name your web app> --resource-group <resource group name> --plan <name of your plan>
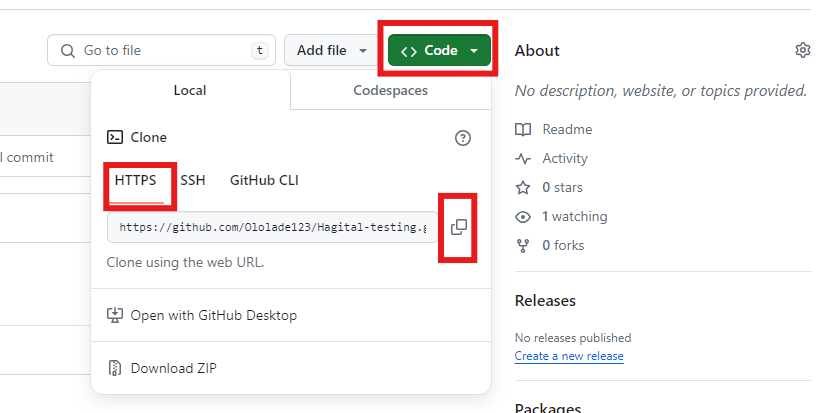
Copy the HTTPS URL of Your Web App Repository in GitHub
a. To copy the URL, go to your Github account.
b. Navigate to the right on your Web App repository page and right-click on the green Code button. Copy the HTTPS link as shown below.
Configure The Deployment Source of Your Web Application
Now that we've successfully copied the Web App Repository URL, the next step is to configure the deployment source of our web app.
a. Run the command:
az webapp deployment source config --name <name of your web app> --resource-group <name of your resource group> --repo-url <the HTTPS URL of the web app repo that contains your index file> --branch master --manual-integration
b. Voila! We have successfully deployed our webapp.

c. To view our Web App, navigate to the App Services on the Azure portal, there you have your Web App. Click on your App to see the overview

d. Click on the default domain link to view your domain
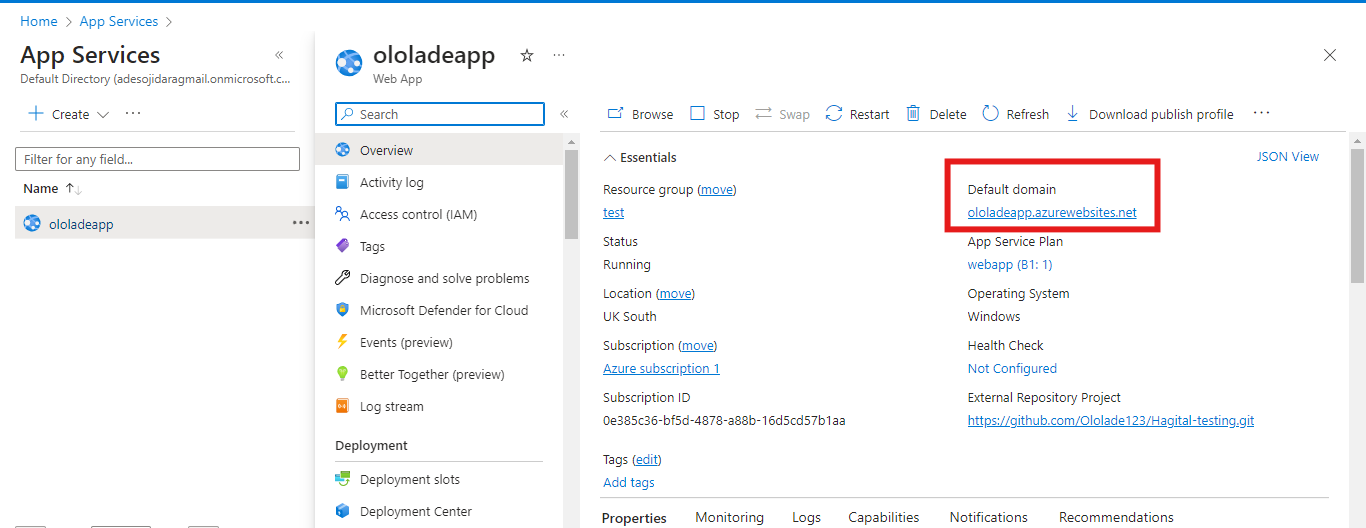
e. There you have your default domain reflecting your index.html file!
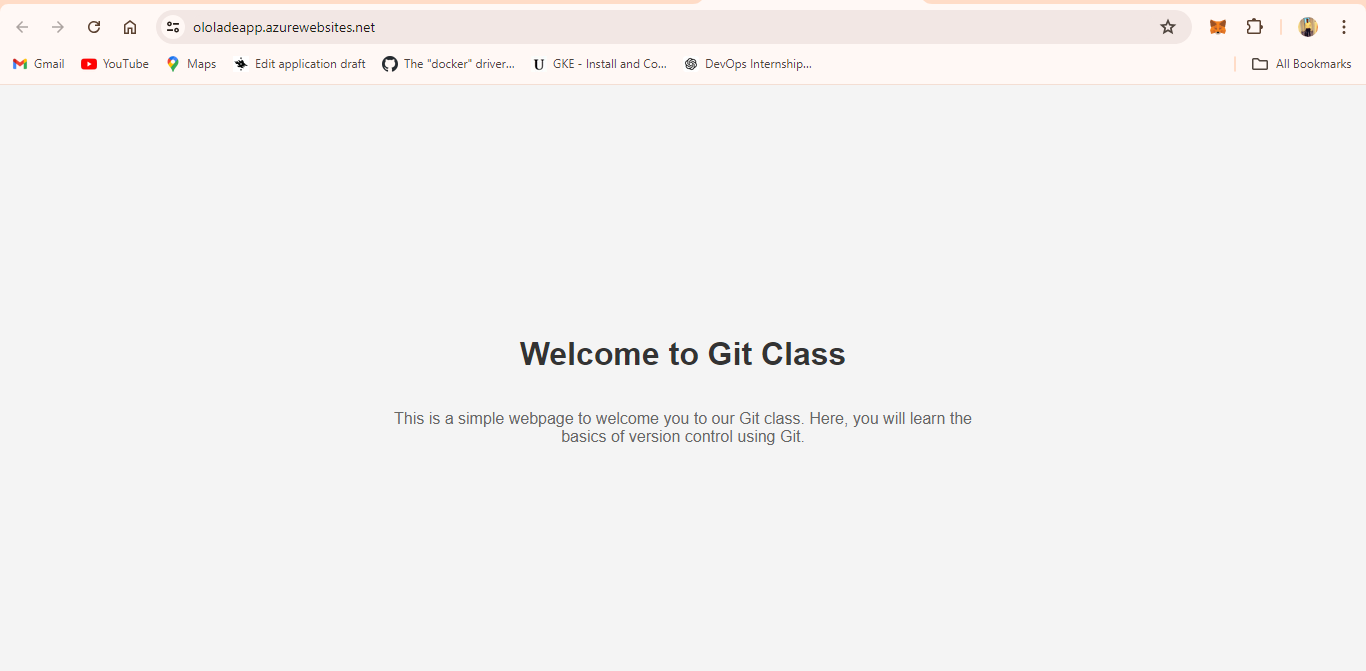
f. To know more about your deployment, click on the "Deployment Center"
g. From the image below, we can see our source as Git, we can also see the link to our repository and the branch our file is.
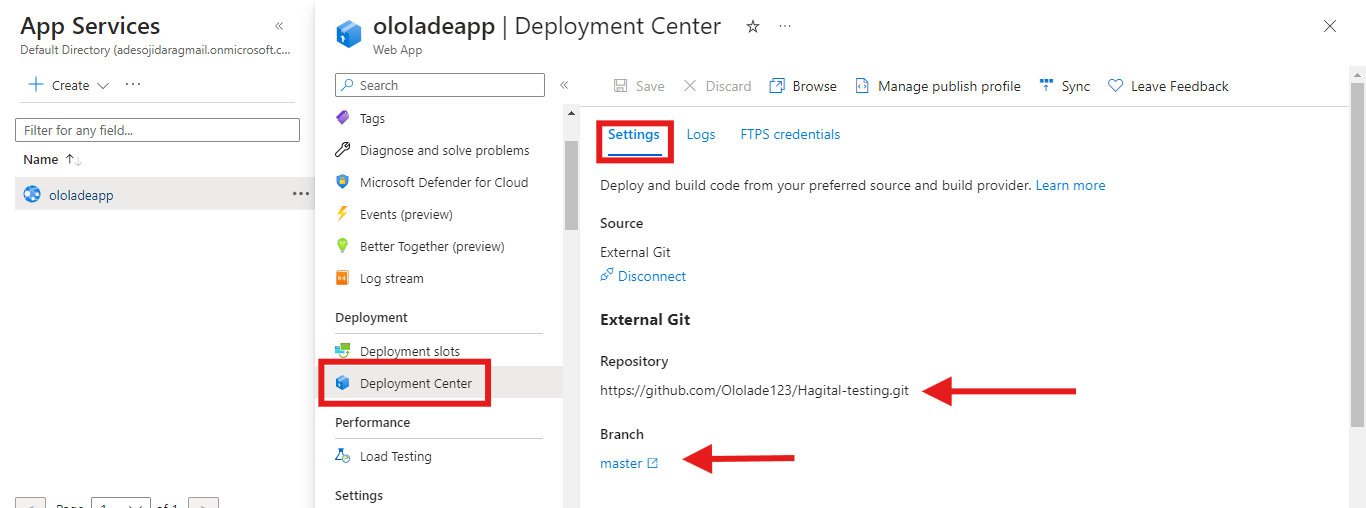
h. You can also view your commit message on the Logs

In conclusion, the Azure CLI provides a flexible and efficient way to create and manage web applications on the Azure platform. The availability of cross-platform support and integration with various development tools makes the Azure CLI a valuable asset for developers seeking to build and deploy web applications in the cloud.
Subscribe to my newsletter
Read articles from lolade ogundijo directly inside your inbox. Subscribe to the newsletter, and don't miss out.
Written by
