Create Your Site with GitHub Pages
 Aseru Kevin Ziyada
Today, we're diving into an exciting topic: learning how to create our own websites and host them for free using GitHub Pages. GitHub Pages is a robust platform offered by GitHub, enabling you to showcase your projects, host documentation, and even create personal websites directly from your GitHub repositories.
Key Features
Free hosting: With GitHub Pages, you can host your static website directly from your repository, enjoying free hosting right from GitHub.
Easy Setup: Setting up a website using GitHub Pages is incredibly straightforward. You have the flexibility to use HTML, CSS, and JavaScript, or even Markdown, making the process intuitive and adaptable to your needs.
Custom Domains: GitHub Pages supports custom domains, enabling you to create a professional-looking website with your own domain name.
Publish Your Content: Once configured, simply push your HTML, CSS, and other static files to your repository. GitHub Pages will automatically build and publish your site.
Version Control: GitHub Pages leverages Git for version control, making it as straightforward to manage and update your website as it is to manage your codebase
Getting Started
With the assistance of Jekyll, a static site generator seamlessly integrated with GitHub, users can create websites directly from their GitHub repositories. Now that we understand this capability, let's dive right in and get started..
Create a Repository: Name your repository relevant to your project, use your name for personal websites or your organization's name for organizational sites. We covered this topic in our first article; click here to check it out.
Create the index file: Utilize Markdown, as covered last week (Click here if you missed it). Start by adding a file named index.md to begin structuring our homepage content. Then add the title of the webpage to the file using the following format, and then commit the changes:
---
title: My GitHub Journey
---
Create the _config.yml File: The _config.yml file serves as the configuration file for our site, storing essential settings such as the chosen theme, reusable content like the site title, and your GitHub handle.
theme: minima
title: My GitHub Journey
author: Aseru Kevin Ziyada
Following the code above, I have integrated the Minima theme and included details for the title and author. Please proceed to commit the file.
Configure Settings: Go to your repository settings on GitHub, navigate to code and Automation section and click on Pages. Ensure that deploy from a branch is selected from the Source drop-down menu. Select main from the Branch drop-down menu. Then the click Save button.
Give in a minimum of 1 minute and then refresh the page. The page should now look like shown below.
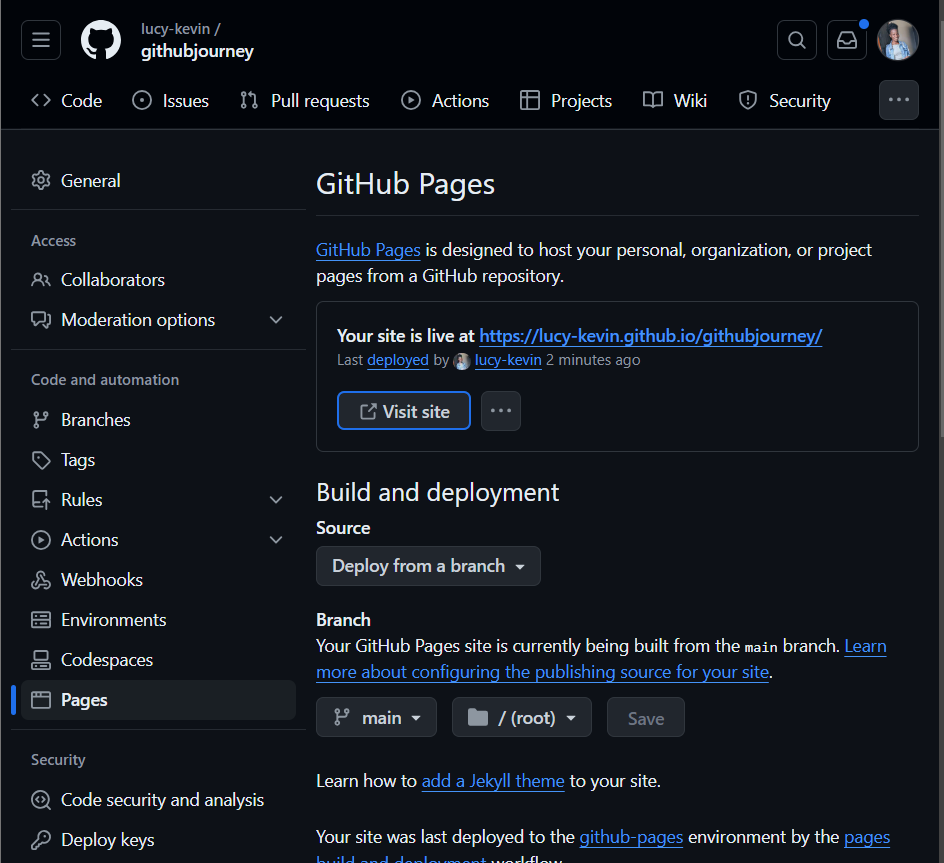
Tap on the Visit site button which will take you to the website you have created.
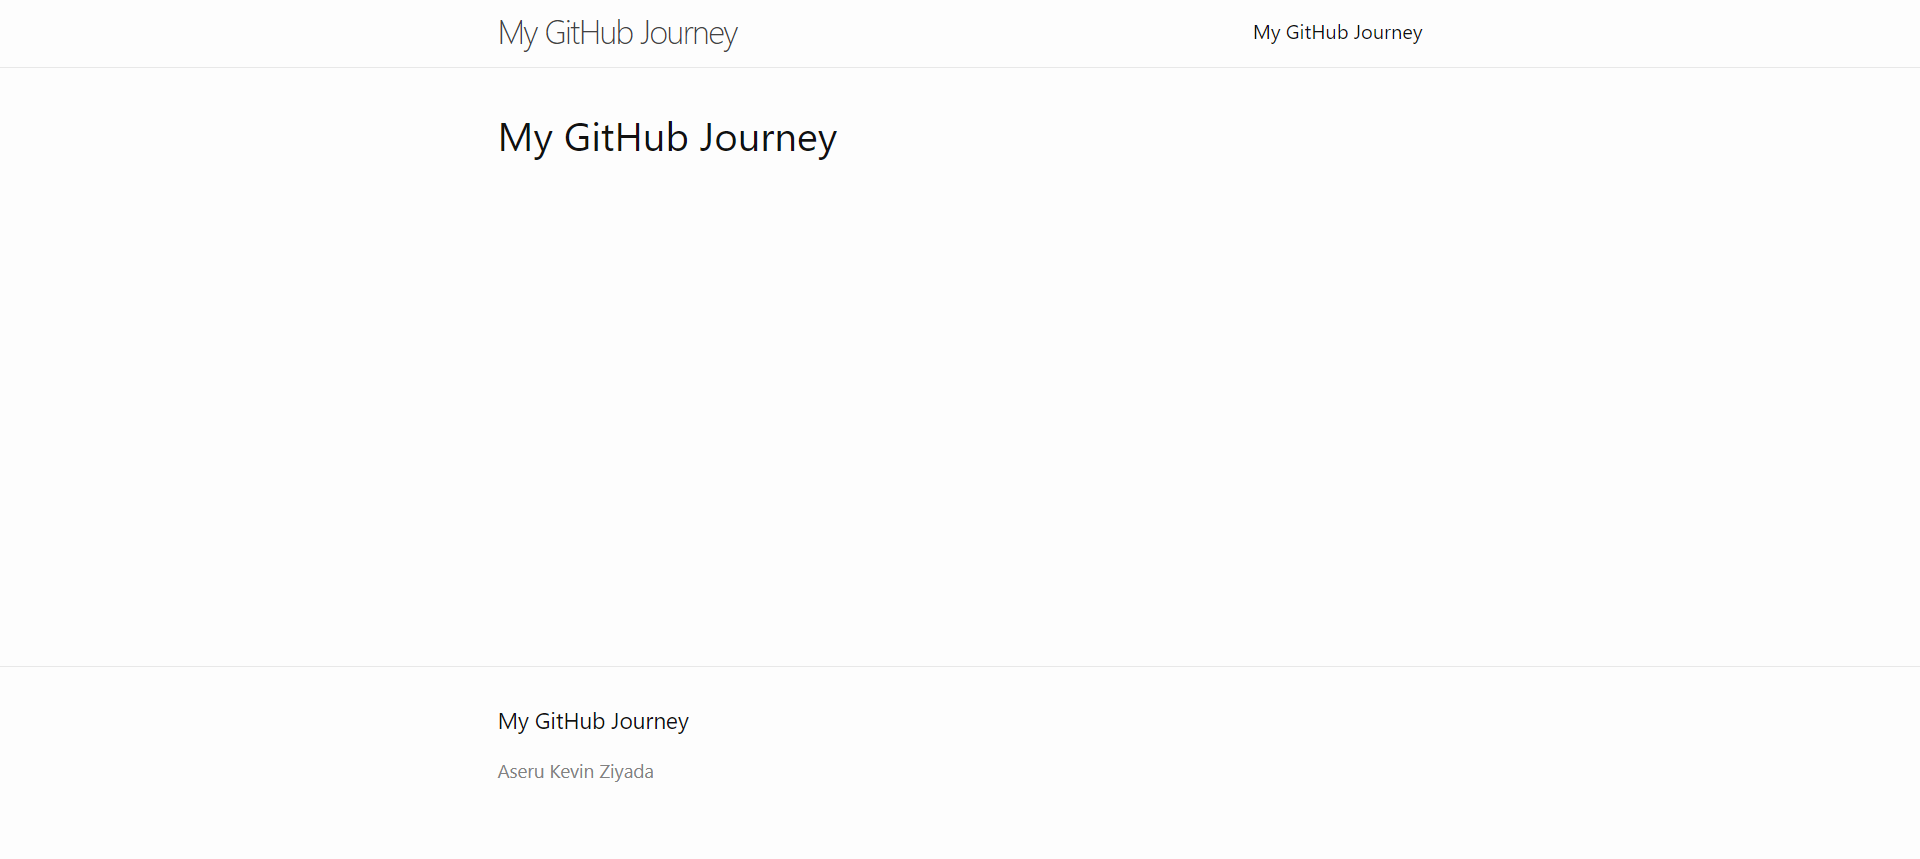
This is how my webpage looks. Yours may appear slightly different depending on the modifications you've made.
Proceed to add more content to the website. I'll begin by expanding the homepage to include a section about my GitHub journey. Additionally, I'll create more pages to showcase the articles I've written during my GitHub journey.
Since we're using the index.md file to display content on the homepage, return to the file and add the desired content. We can utilize the features we learned in the previous article to structure and present the information effectively.
After adding the content, which can include text, tables, images, etc., commit the changes. Wait for about a minute, then refresh your webpage to see the updates. This is how it looks after refreshing. You can check it out from here

Create a blog Post: To create a blog post, use specially named files and frontmatter. These files must be named _posts/YYYY-MM-DD-titlt, where _posts is the folder, YYYY-MM-DD is the date, and title is the title of your post. The frontmatter should appear at the top of your file and look like this:
---
title: "Welcome to my blog"
date: 2024-06-22
---
Lets browse to our repository and create a new file, I will call mine _posts/2024-06-8-Getting-Started-with-GitHub:-New-User-Insights.md and then add the content you want.
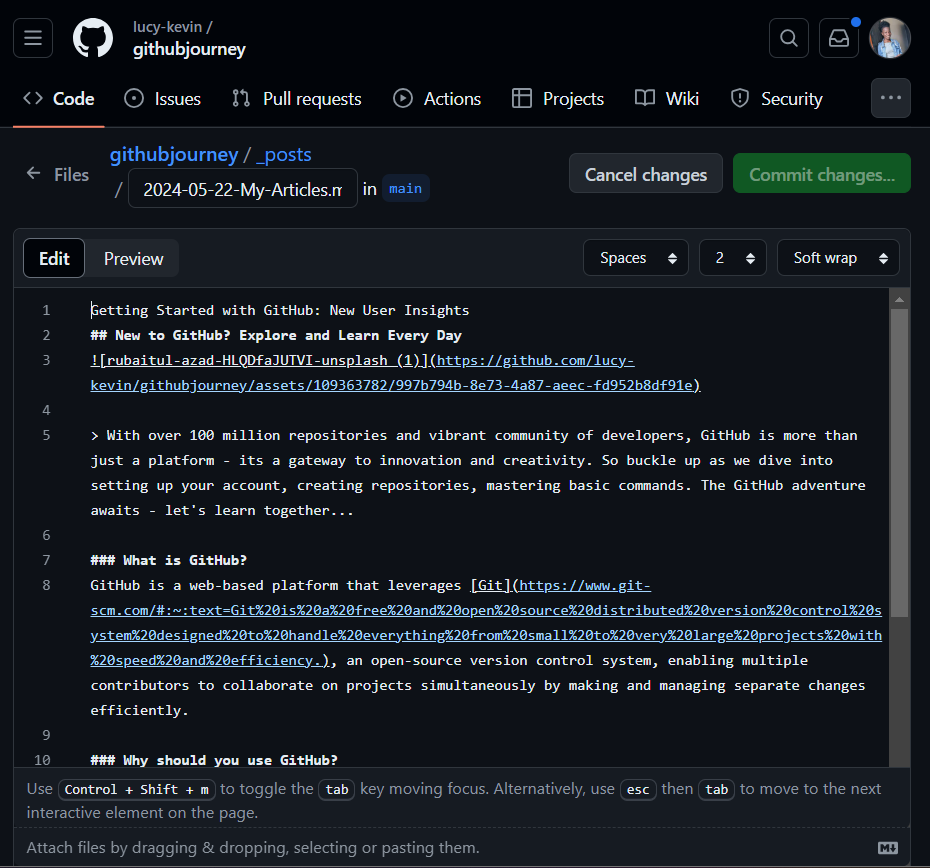
Once you've added your content, including images and links, commit your changes. After approximately a minute, refresh the webpage. Navigate to the homepage and locate the title of the newly created article. It should be looking slightly like shown below. Click here to see the page
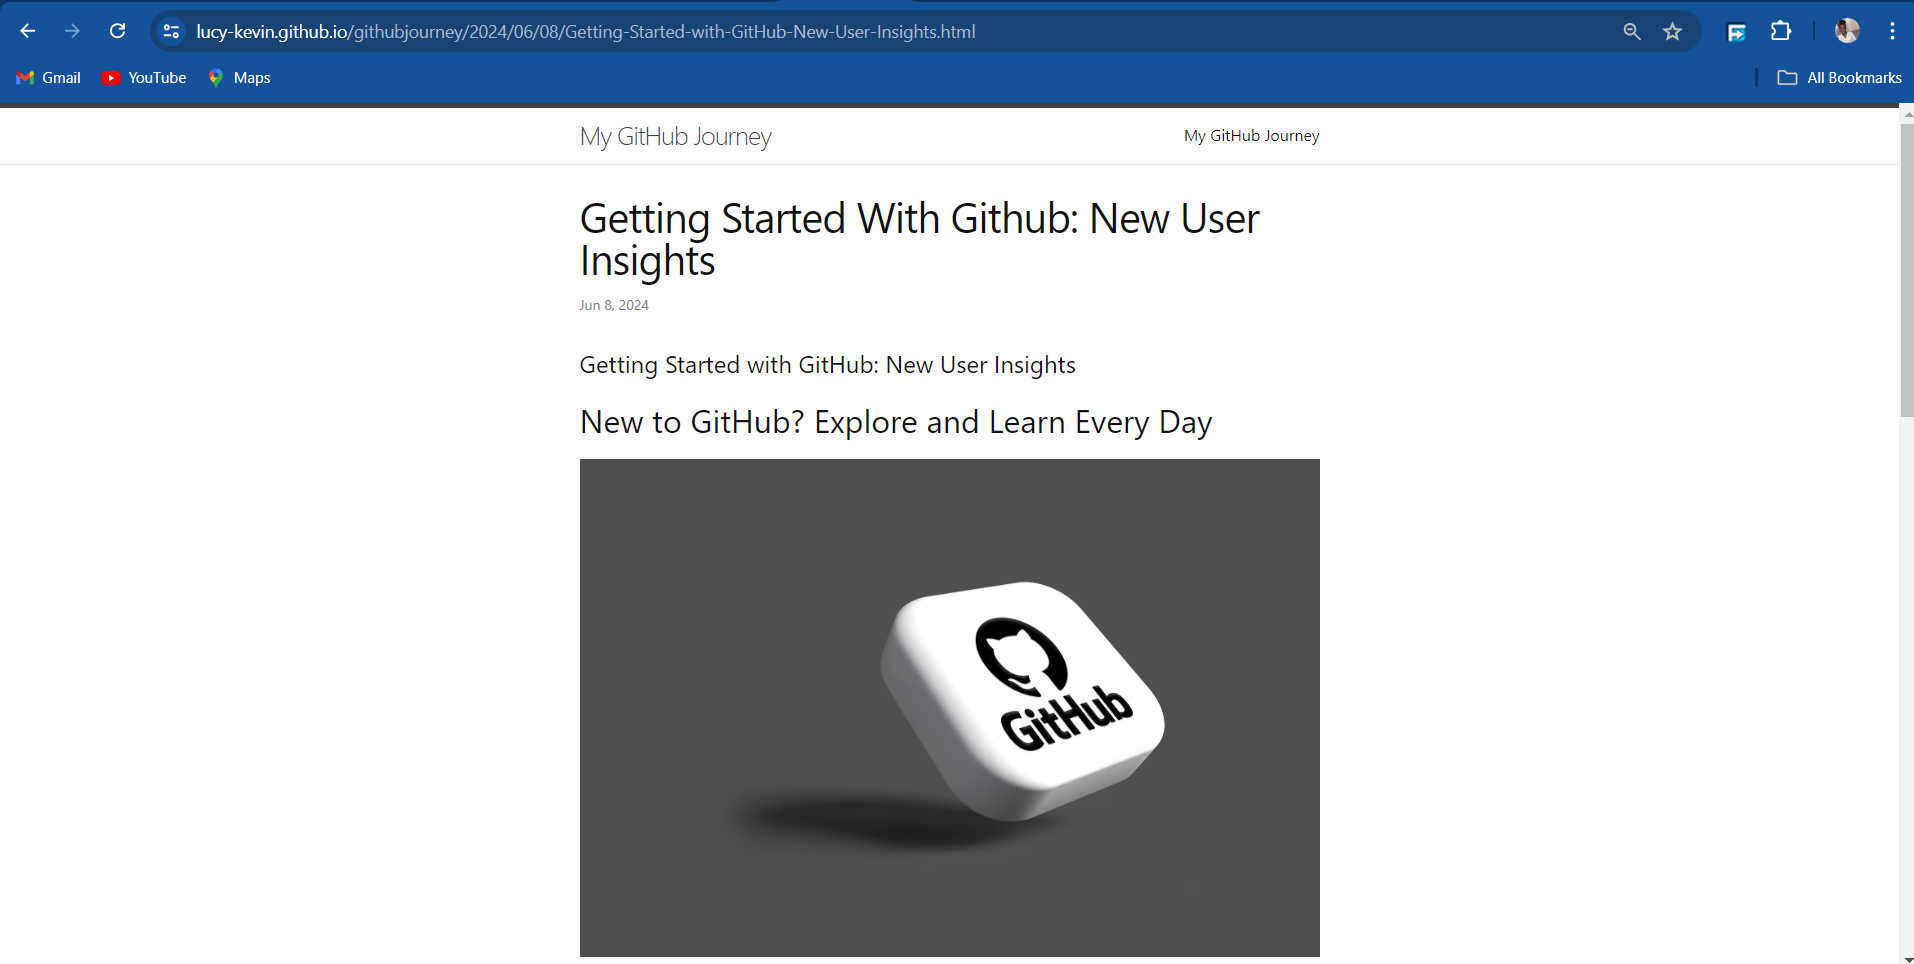
Congratulations on setting up your first website using GitHub Pages! Now you can share your URL with friends so they can check out your website. Well done!
In summary, GitHub Pages is a versatile tool for hosting websites directly from your repositories. It offers easy setup options with HTML, CSS, or Markdown, supports custom domains, and automates the publishing process. Git's version control simplifies site management, ensuring updates are efficient and organized. Programs like All in Africa have deepened my appreciation for its potential, motivating me to share more of my insights with you. Thank you for your interest and support!
Subscribe to my newsletter
Read articles from Aseru Kevin Ziyada directly inside your inbox. Subscribe to the newsletter, and don't miss out.
Written by

Aseru Kevin Ziyada
Aseru Kevin Ziyada
Recent grad exploring the realms of software engineering, with a passion for crafting seamless user experiences. 🚀 Currently delving into the world of open source and diving headfirst into Flutter development from scratch. Let's connect, learn, and build together! 💻✨ #SoftwareEngineering #UIUX #OpenSource #Flutter