Enhancing Frontend Performance with Code Splitting
 Agbafo Onyeukwu
In today's fast-paced computerized world, a consistent and quick user experience is pivotal for holding clients and driving engagement. One of the basic angles of conveying such an experience is guaranteeing that your web application loads rapidly and productively. Code splitting may be a capable method that can assist you accomplish this objective by breaking down your JavaScript bundles into littler, more sensible pieces. In this post, we'll plunge into the subtle elements of code splitting, its benefits, and how to actualize it in modern frontend application
Understanding Code Splitting
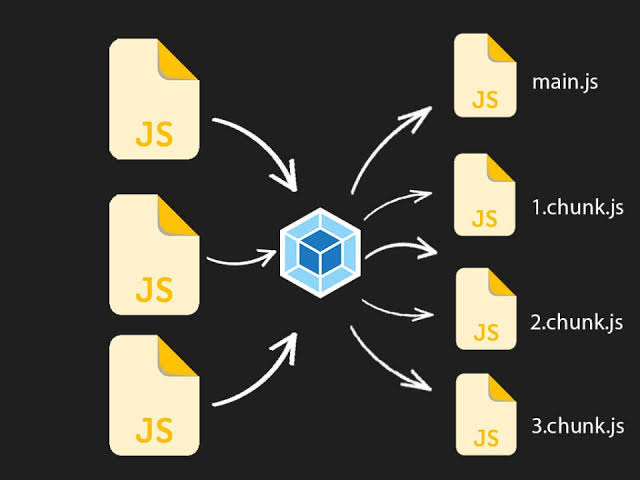
Code splitting is an resource supported by progressed JavaScript bundlers, such as Webpack and Rollup. It grants you to part your code into distinctive bundles that can be loaded on request or in parallel. By doing so, you'll be able significantly decrease the starting load time of your application, because only the fundamental code required for the initial rendering is loaded forthright.
There are two primary forms of code splitting:
Entry Point Splitting: Dividing code based on different entry points, which is useful for multi-page applications.
Dynamic Import Splitting: Splitting code at specific points in the application where modules are dynamically imported.
Benefits of Code Splitting
Improved Performance: Smaller bundles mean faster load times. Users can start interacting with your application sooner, improving the perceived performance.
Superior Caching: With code splitting, as it were the changed parts of your application got to be re-downloaded by the client, making way better utilize of browser caching.
Decreased Memory Utilization: Due to the loading of just the fundamental code, you decrease the memory impression of your application.
Implementing Code Splitting with Webpack
Let's walk through a basic implementation of code splitting using Webpack.
- Initial Setup: Ensure you have Webpack installed and configured in your project. If not, you can install it via npm
npm install webpack webpack-cli --save-dev
- Create Webpack Configuration: Set up your webpack.config.js file to enable code splitting.
const path = require('path');

module.exports = {
   entry: {
      main: './src/index.js',
      vendor: './src/vendor.js',
   },
   output: {
      filename: '[name].[contenthash].js',
      path: path.resolve(__dirname, 'dist'),
   },
   optimization: {
      splitChunks: {
        chunks: 'all',
      },
   },
};
- Dynamic Imports: Use dynamic imports in your application code to split bundles at specific points.
// src/index.js
import(/* webpackChunkName: "lodash" */ 'lodash').then(({ default: _ }) => {
   const element = document.createElement('div');
   element.innerHTML = _.join(['Hello', 'Webpack'], ' ');
   document.body.appendChild(element);
});
- Build Your Project: Run Webpack to build your project
npx webpack --config webpack.config.js
After running the build, Webpack will generate multiple bundles, including "main.[contenthash].js" and "vendor.[contenthash].js". The dynamic import will create a separate chunk for the lodash library, which will be loaded only when needed.
Conclusion
Code splitting is an fundamental procedure for improving frontend performance. By breaking down your application into littler bundles and loading code on request, you'll be able enhance load times, improve client experience, and make way better utilize of browser caching. Executing code splitting with tools like Webpack is direct and can lead to improved performance for your web applications.
Subscribe to my newsletter
Read articles from Agbafo Onyeukwu directly inside your inbox. Subscribe to the newsletter, and don't miss out.
Written by
