Introduce Stripe for .NET MAUI
 Tuyến Vũ
Overview
Stripe is a very well known payment service to let your end users pay easily and beautifully for your product/service(s) within your mobile apps and websites.
This article will guide you steps to integrate Stripe SDK into a newly created .NET MAUI app step by step.
Prerequisites
.NET 8
Java SDK 17
Visual Studio on Windows or Visual Studio for Mac, alternatively
JetBrains Rider alternatively
Visual Studio Code with .NET MAUI extension
.NET workloads for .NET MAUI
Download the get-started source code
Steps
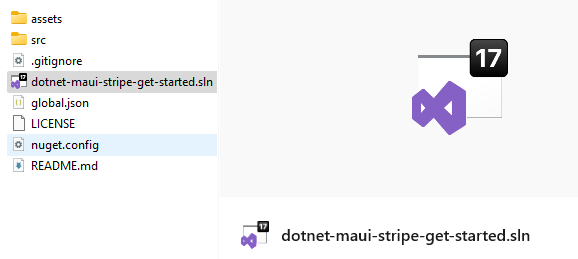
0/ Open the downloaded solution dotnet-maui-stripe-get-started.sln

0.a/ Create Shared.dev.cs file by making a copy of Shared.dev.cs.sample
|--src
    |-- QuickStart.Dotnet.StripeHost
        |-- Shared.cs
        |-- Shared.dev.cs        <------      YOUR_FILE_HERE
0.b/ Replace placeholders with your secrets
partial class ClientHelper
{
    public const string API_KEY = "YOUR_API_KEY";
    public const string DEFAULT_PUBLISHABLE_KEY = "YOUR_DEFAULT_PUBLISHABLE_KEY";
}
HINTS: You can copy these secrets quickly from the official quick start by Stripe.
0.c/ Run the API host
cd your-path-to-source-code/src/QuickStart.Dotnet.StripeHost
dotnet run -c debug
0.d/ Expose your API endpoint with ngrok
ngrok http http://localhost:4242
NOTE: ngrok is a tool that allows us to expose a development endpoint publicly via the network with ease.
0.e/ Amend Shared.dev.cs with the generated URL
partial class ClientHelper
{
    public const string BACKEND_URL= "https://generated-subdomain.ngrok-free.app";
}
1/ Create a new .NET MAUI app from Visual Studio

NOTE: Follow step by step with all default options
2/ Install Stripe SDK for .NET MAUI
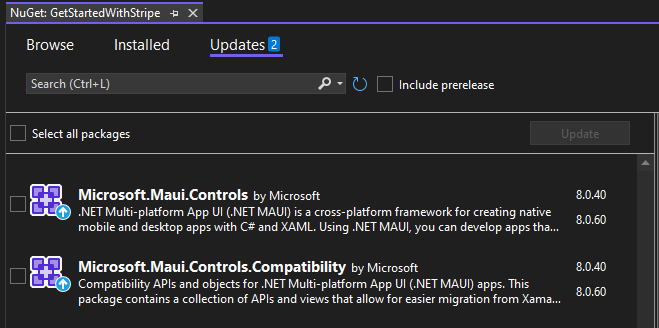
2.a/ Upgrade all .NET MAUI packages before installing Stripe.MAUI package

2.b/ Search for Stripe.Maui package and install

NOTE:
Before going next
Close the solution
Remove bin/obj folders of the .NET MAUI project
Reopen the solution
IMPORTANT!!! If you faced any issues of project loading failed, please repeat these steps :D
3/ Enable Stripe in MauiProgram.cs
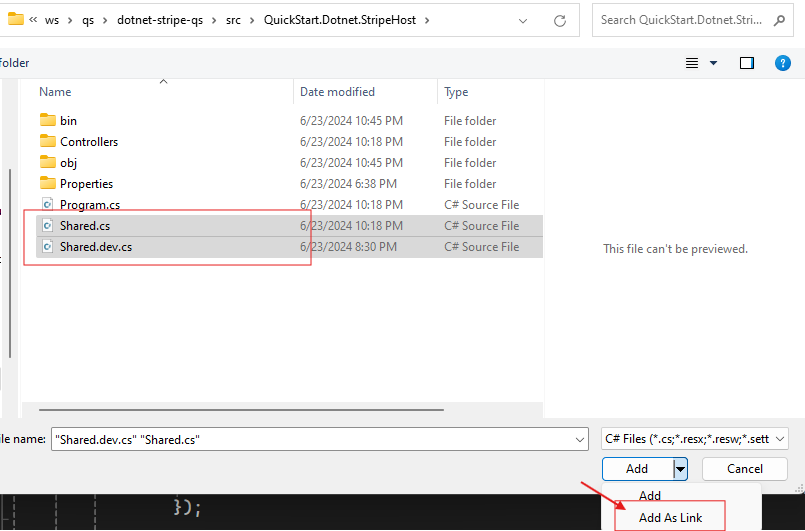
3.a/ Add shared files to the .NET MAUI project

NOTE: We will add these files as links to share code across projects.
3.b/ Add Stripe to MauiAppBuilder
builder
    .UseStripe(
        QuickStart.Dotnet.Stripe.ClientHelper.DEFAULT_PUBLISHABLE_KEY
    );
4/ Inject IPaymentSheet into MainPage.xaml.cs
public partial class MainPage : ContentPage
{
    private readonly IPaymentSheet paymentSheet;

    public MainPage(IPaymentSheet paymentSheet)
    {
        InitializeComponent();
        this.paymentSheet = paymentSheet;
    }
}
NOTE: To get the DI to work, we need to register MainPage as a scoped dependency through MauiAppBuilder.
// In MauiProgram.cs
builder.Services.AddScoped<MainPage>();
5/ Try paying with payment intent
5.a/ Override MainPage.xaml file with the below content
<?xml version="1.0" encoding="utf-8" ?>
<ContentPage xmlns="http://schemas.microsoft.com/dotnet/2021/maui"
             xmlns:x="http://schemas.microsoft.com/winfx/2009/xaml"
             x:Class="GetStartedWithStripe.MainPage">
    <StackLayout
        Padding="30,24"
        Spacing="25">
        <Button
            x:Name="PayNowButton"
            Text="Pay now"
            SemanticProperties.Hint="Pay with Stripe"
            Clicked="OnPayNow"
            IsEnabled="False"
            VerticalOptions="EndAndExpand"
            HorizontalOptions="Fill" />
    </StackLayout>
</ContentPage>
5.b/ Fetch payment intent client secret from the above API endpoint
private string paymentIntentClientSecret;
protected override async void OnAppearing()
{
    base.OnAppearing();

    // The helper method comes from the downloaded source code
    await QuickStart.Dotnet.Stripe.ClientHelper.FetchPaymentIntent()
        .ContinueWith(t =>
        {
            var (ok, msg) = t.Result;
            if (!ok)
            {
                MainThread.BeginInvokeOnMainThread(() => DisplayAlert("API Error", msg, "OK"));
                return;
            }

            paymentIntentClientSecret = msg;

            MainThread.BeginInvokeOnMainThread(() => PayNowButton.IsEnabled = true);
        })
        .ConfigureAwait(false);
}
NOTE:
By default,
Pay nowbutton is disabledIt will only be enabled if we can fetch the client secret successfully from the API
5.c/ Add OnPayNow handler
    private async void OnPayNow(object sender, EventArgs e)
    {
        var configuration = new Configuration("TuyenTV.dev Co.Ltd.");

        var (result, msg) = await paymentSheet.PresentWithPaymentIntentAsync(paymentIntentClientSecret, configuration)
            .ContinueWith(t =>
            {
                if (t.IsCompletedSuccessfully) return (t.Result, null);

                return (PaymentSheetResult.Canceled, "Cannot pay for a reason...");
            });

        switch(result)
        {
            case PaymentSheetResult.Completed:
                await DisplayAlert("Payment Result", "Payment completed successfully!", "OK");
                break;
            case PaymentSheetResult.Canceled:
                if (!string.IsNullOrWhiteSpace(msg))
                {
                    await DisplayAlert("Payment Result", "Payment completed failed!", "Try again");
                }
                break;
        }

        Debug.WriteLine("Payment complete.");
    }
6/ Run up and check out
Till now, you're ready to check out the result on both Android and iOS.
Android: You can try either on a emulator or on a real device by plugging it in directly to your PC
iOS:
If you have an Apple paid developer account, you can plug your iPhone directly to your PC and try out
Otherwise, you will need a MacOS device to run the simulator

Wrap-ups
I just guided you on how to integrate Stripe SDK into a newly created .NET MAUI project. You can follow these steps to add it to your project(s) easily.
Documents from Stripe are also very helpful, please always take a look to understand a feature you desire to add to your app.
If you want to check out the source code of the binding libraries, you can check it here. If you want to check out the source code of the .NET MAUI library (along with a sample app), you can check it here.
Happy Coding!!!
Subscribe to my newsletter
Read articles from Tuyến Vũ directly inside your inbox. Subscribe to the newsletter, and don't miss out.
Written by

Tuyến Vũ
Tuyến Vũ
Tuyen is a very skilled C#.NET developer with many years of building large systems for banking, real estate and ecommerce. He is also very strong in mobile application development across different stacks like Flutter, ReactNative, Xamarin.Forms/.NET MAUI.