How to Integrate INTMAX Wallet into Your dApp Using RainbowKit
 Glory Praise Emmanuel
RainbowKit is a React library designed to simplify the integration of wallet connections into decentralized applications (dApps). It offers an intuitive, responsive, and highly customizable interface, making it easier for developers to enhance their dApps with wallet functionalities.
To facilitate the integration of the INTMAX wallet and protocol with RainbowKit, the INTMAX team has developed a dedicated plugin in the INTMAX Wallet SDK.
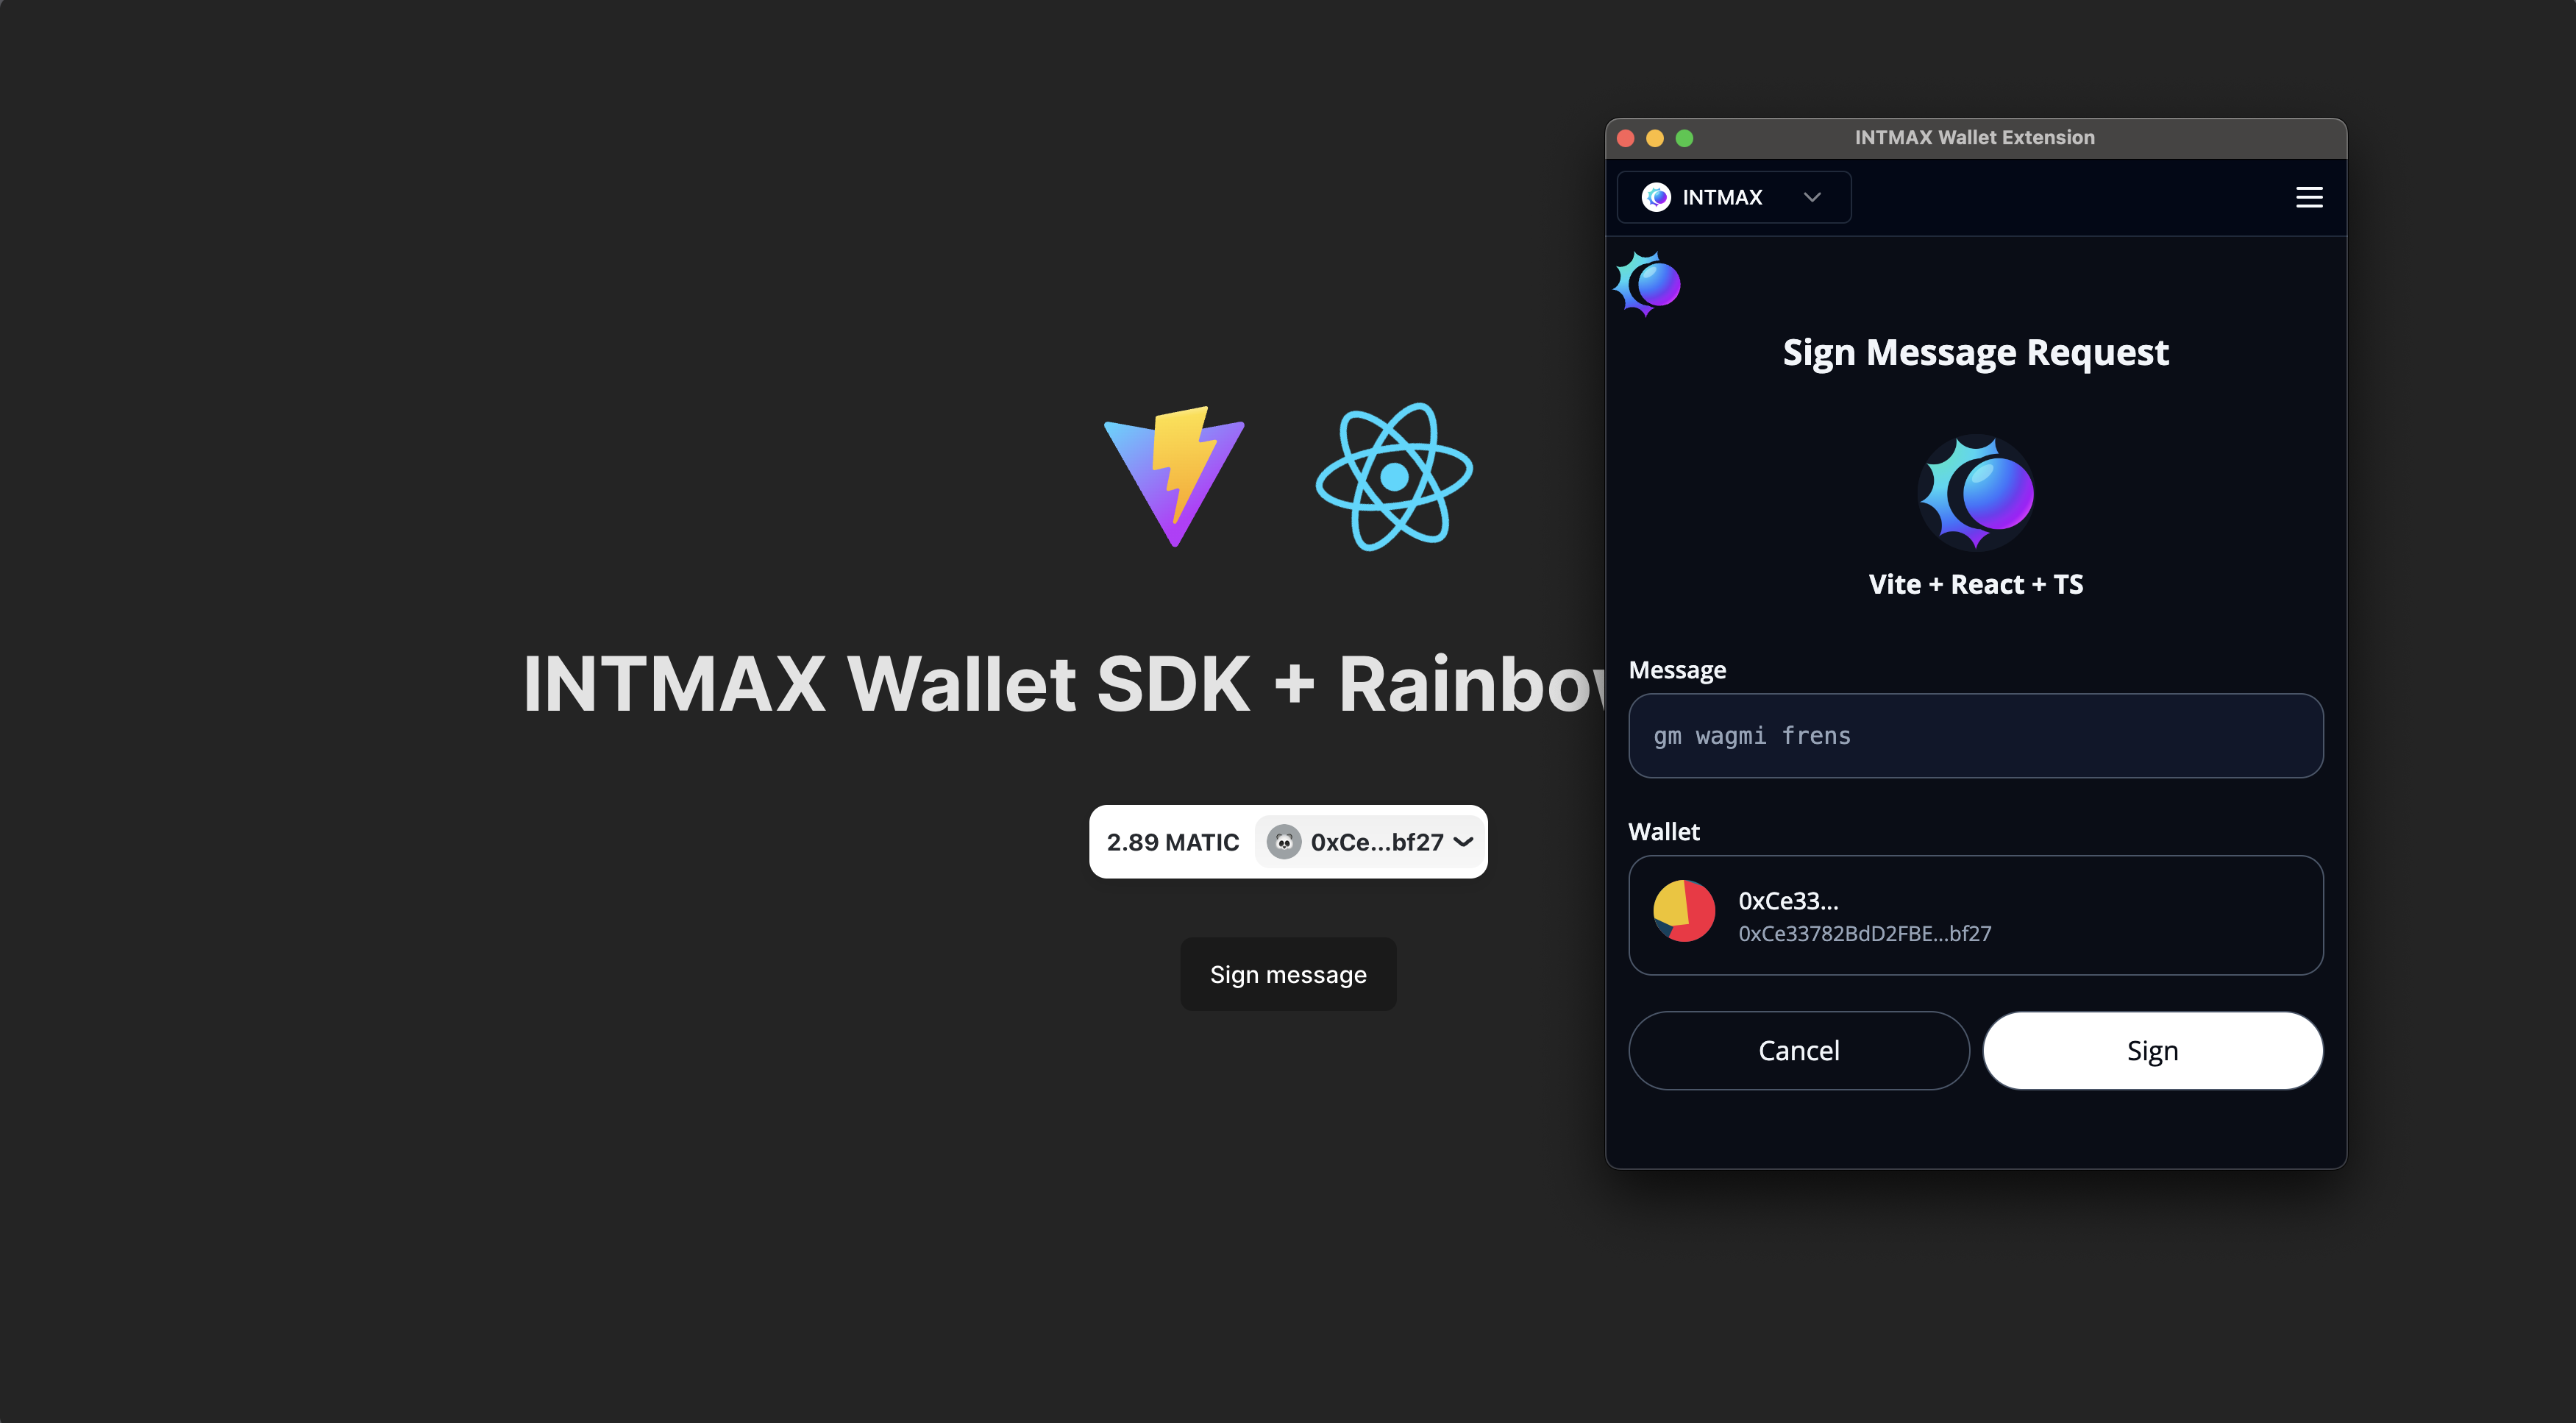
In this tutorial, you'll learn how to integrate the INTMAX Wallet into your dApp using the RainbowKit library and the INTMAX Wallet SDK. If you already have a dApp and want to integrate INTMAX Wallet, follow this guide as a reference. By the end of this guide, your RainbowKit adapter will look like this:
Prerequisites
Node version >=16.12.0
Some Knowledge of React
Creating The App
We recommend using Vite to create new React applications. To create a new React application using Vite, run the following command in your terminal:
npm create vite@latest my-test-dapp -- --template react-ts
cd my-voting-dapp
npm install
npm run dev
This command creates a new React Vite project named my-test-dapp
Installing RainbowKit
To install the necessary package, run:
npm install @rainbow-me/rainbowkit wagmi viem@2.x @tanstack/react-query
With the RainbowKit package installed, you can now integrate INTMAX as a wallet option in your dApp.
Initializing RainbowKit
First, import the required packages at the top of the main.tsx file:
import '@rainbow-me/rainbowkit/styles.css';
import { WagmiProvider, createConfig, http } from 'wagmi';
import {
  polygon,
} from 'wagmi/chains';
import {
  QueryClientProvider,
  QueryClient,
} from "@tanstack/react-query";
import { connectorsForWallets, RainbowKitProvider } from '@rainbow-me/rainbowkit';
Next, configure RainbowKit and Wagmi by wrapping your <App />component with the imported modules:
const client = new QueryClient();

ReactDOM.createRoot(document.getElementById('root')!).render(
  <WagmiProvider config={config}>
  <QueryClientProvider client={client}>
    <RainbowKitProvider>
    <App />
    </RainbowKitProvider>
  </QueryClientProvider>
</WagmiProvider>
)
Install INTMAX Wallet SDK
To install the INTMAX Wallet SDK, run:
npm install intmax-walletsdk
Then, import the SDK in the main.tsx file:
import { intmaxwalletsdk } from "intmax-walletsdk/rainbowkit";
Initialize the INTMAX Wallet SDK by specifying the custom wallets you want your dApp to support. For this example, we will add the INTMAX Wallet to the RainbowKit wallet options and set up our connectors.
Note: You can find the wallet logo in the public folder of this demo repository.
const wallets = [
  intmaxwalletsdk({
    wallet: {
      url: "https://wallet.intmax.io/",
      name: "INTMAX Wallet",
      iconUrl: "/logo.png",
    },
    metadata: {
      name: "Rainbow-Kit Demo",
      description: "Rainbow-Kit Demo",
      icons: ["logo.png"],
    },
  }),
];

const connectors =  connectorsForWallets(
  [
    {
      groupName: "Best Wallet",
      wallets,
    },
  ],
  { projectId: "N/A", appName: "Rainbow-Kit Example" },
)
Pass your connectors to Wagmi's createConfig and set up a provider:
const config = createConfig({
  chains: [ polygon ],
  transports: {
        [polygon.id]: http('<https://polygon-mainnet.g.alchemy.com/v2/RPC-KEY>'),
    },
  connectors,
});
You can get the RPC URL from services like Alchemy or QuickNode. Your final main.tsx file should look like this:
import ReactDOM from 'react-dom/client'
import App from './App.tsx'
import './index.css'
import '@rainbow-me/rainbowkit/styles.css';
import { WagmiProvider, createConfig, http } from 'wagmi';
import {
  polygon,
} from 'wagmi/chains';
import {
  QueryClientProvider,
  QueryClient,
} from "@tanstack/react-query";
import { connectorsForWallets, RainbowKitProvider } from '@rainbow-me/rainbowkit';
import { intmaxwalletsdk } from "intmax-walletsdk/rainbowkit";

const wallets = [
  intmaxwalletsdk({
    wallet: {
      url: "https://wallet.intmax.io/",
      name: "INTMAX Wallet",
      iconUrl: "/logo.png",
    },
    metadata: {
      name: "Rainbow-Kit Demo",
      description: "Rainbow-Kit Demo",
      icons: ["logo.png"],
    },
  }),
];

const connectors =  connectorsForWallets(
  [
    {
      groupName: "Best Wallet",
      wallets,
    },
  ],
  { projectId: "N/A", appName: "Rainbow-Kit Example" },
)

const config = createConfig({
  chains: [ polygon ],
  transports: {
        [polygon.id]: http('<https://polygon-mainnet.g.alchemy.com/v2/0rqV4Xm0DYA_jAyhpEtAftVBUvi0TG-q>'),
    },
  connectors,
});

const client = new QueryClient();

ReactDOM.createRoot(document.getElementById('root')!).render(
  <WagmiProvider config={config}>
  <QueryClientProvider client={client}>
    <RainbowKitProvider>
    <App />
    </RainbowKitProvider>
  </QueryClientProvider>
</WagmiProvider>
)
Now we have everything we need to add a connect wallet button to the app.
Adding A Connect Button
At the top of your App.tsx file, import the ConnectButton
import { ConnectButton } from '@rainbow-me/rainbowkit';
Replace the default counter button with the imported ConnectButton
//REPLACE THIS
<button onClick={() => setCount((count) => count + 1)}>
    count is {count}
</button>
// WITH THIS
<ConnectButton />
Remove the useState hook, and it's import since we no longer need the counter.
// DELETE THIS
const [count, setCount] = useState(0)
// AND THIS
import { useState } from 'react'
Your App.tsx file should look like this:
import reactLogo from './assets/react.svg'
import viteLogo from '/vite.svg'
import './App.css'
import { ConnectButton } from '@rainbow-me/rainbowkit';

function App() {

  return (
    <>
      <div>
        <a href="<https://vitejs.dev>" target="_blank">
          <img src={viteLogo} className="logo" alt="Vite logo" />
        </a>
        <a href="<https://react.dev>" target="_blank">
          <img src={reactLogo} className="logo react" alt="React logo" />
        </a>
      </div>
      <h1>INTMAX Wallet SDK + Rainbow Kit Library</h1>
      <div className="card">
        <ConnectButton />
      </div>
    </>
  )
}

export default App
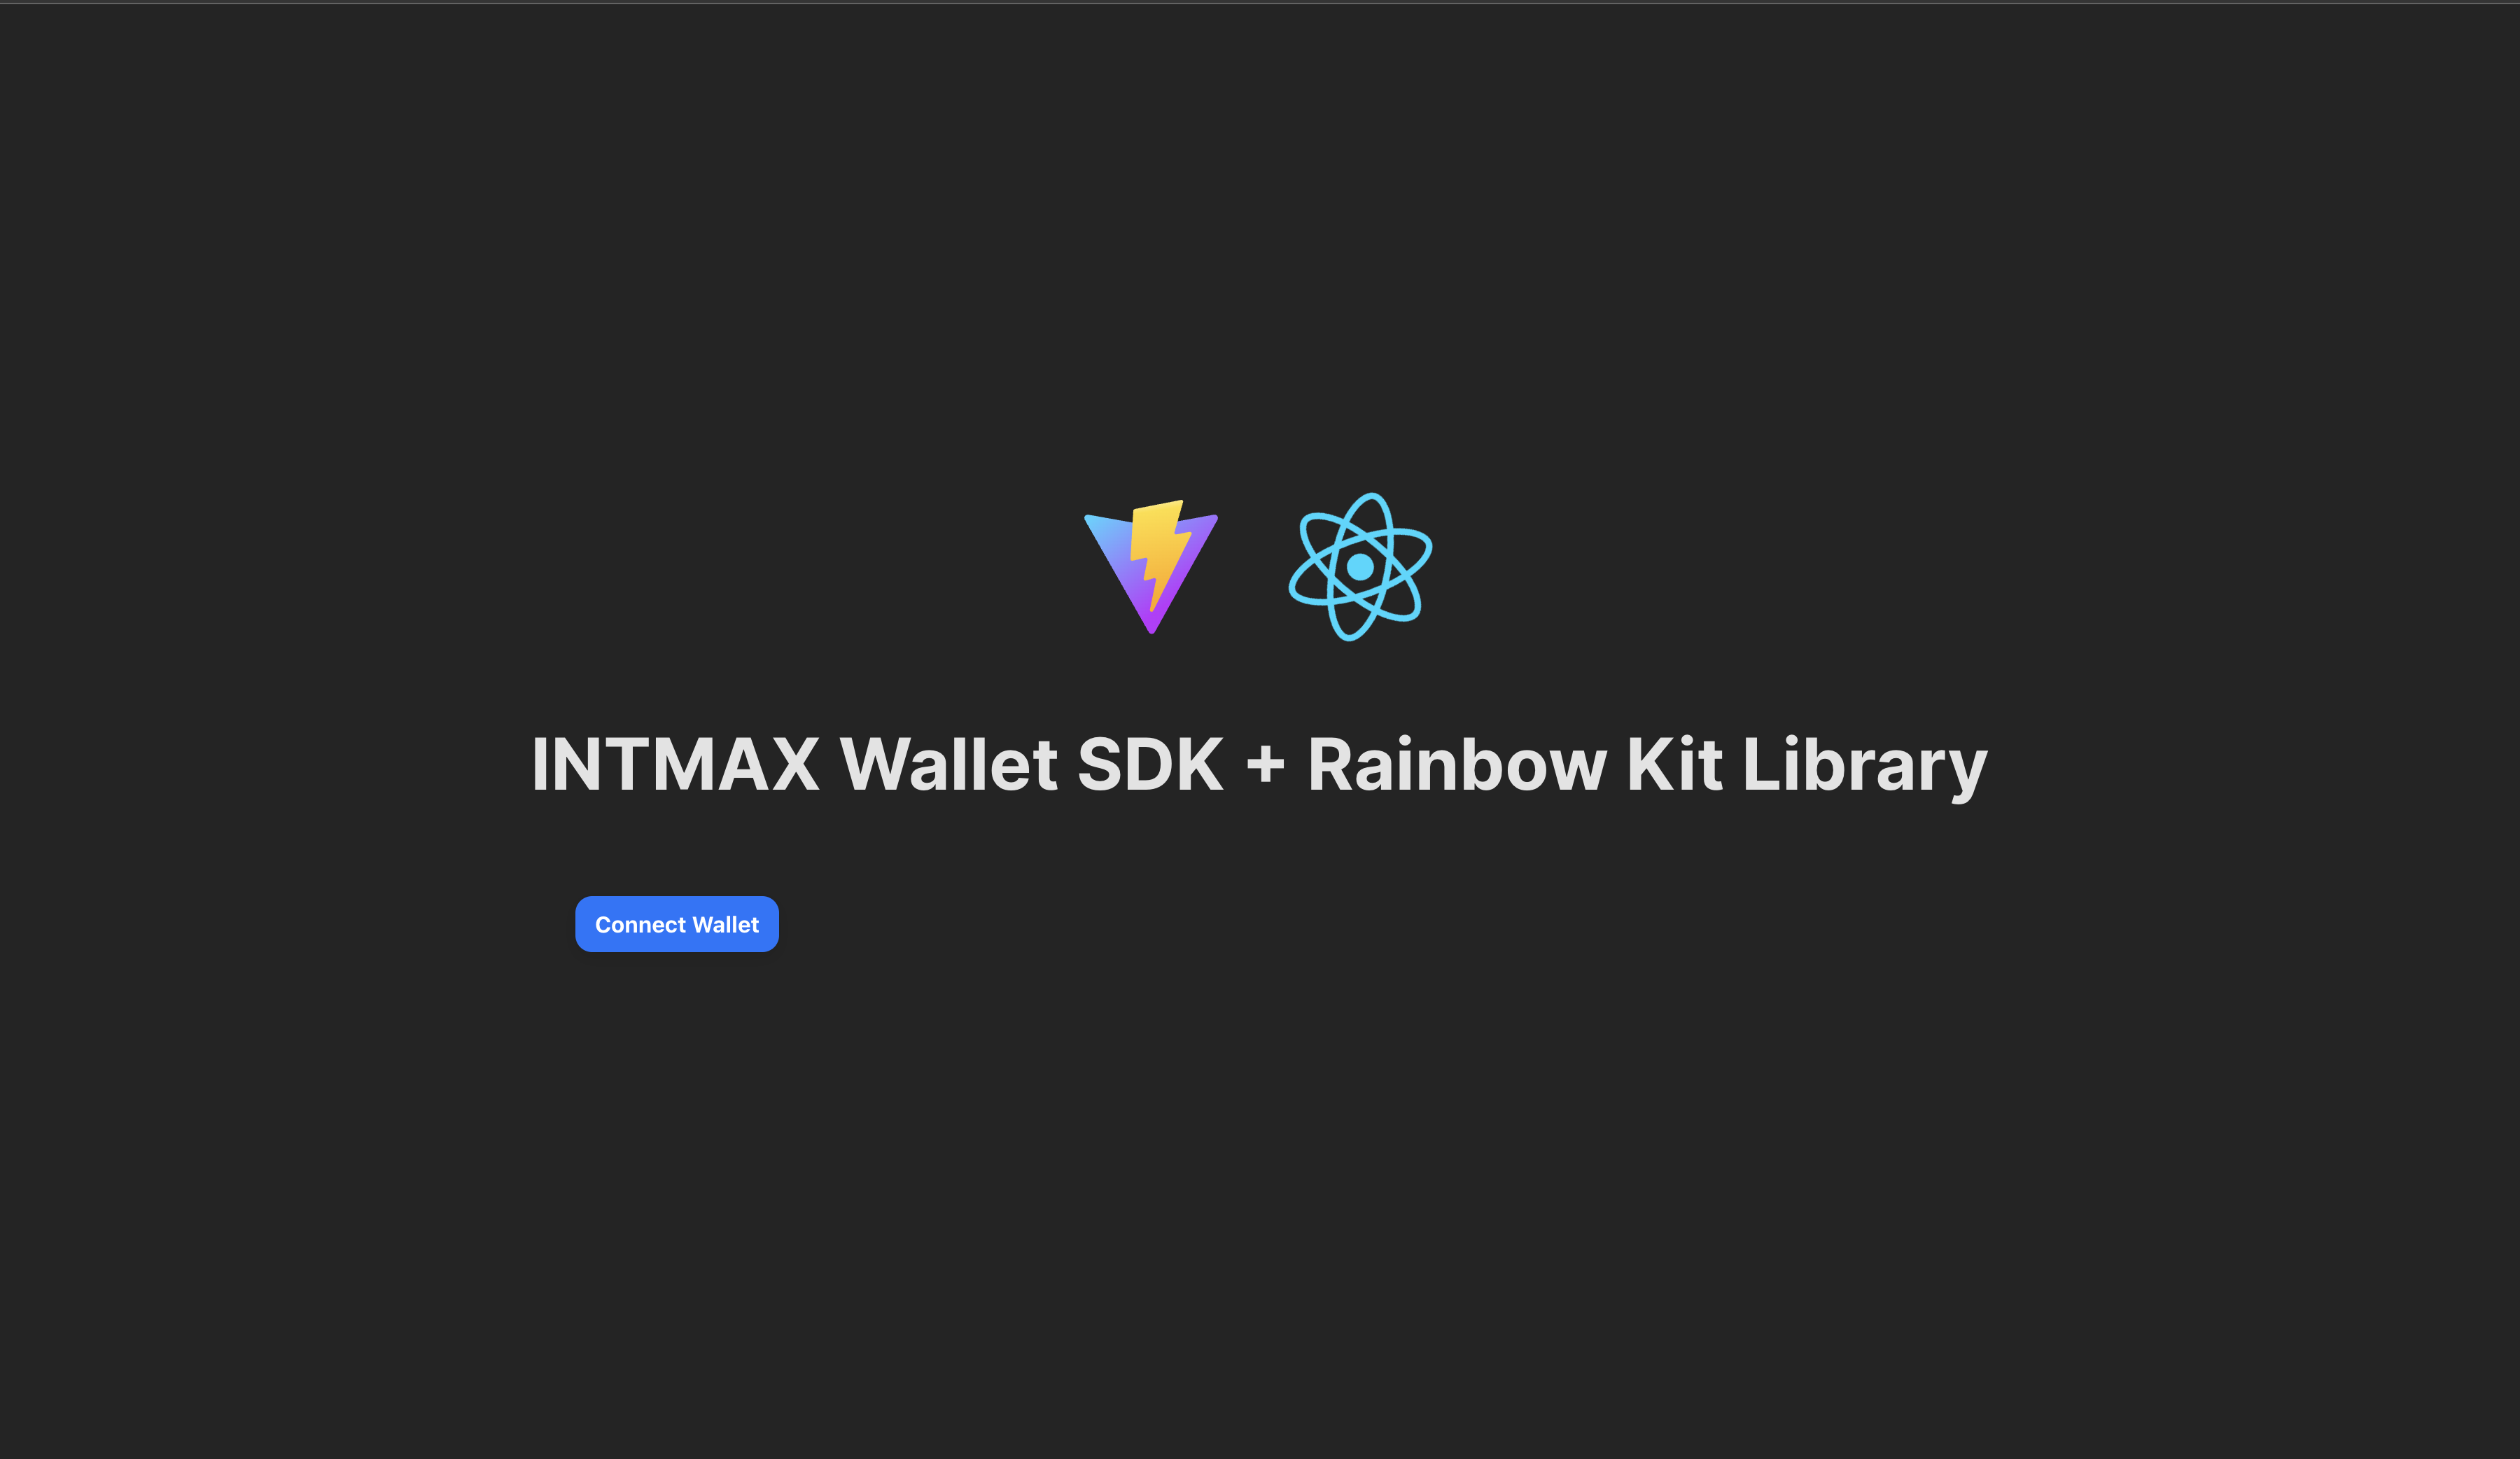
When you run your app locally, you should see the new connect button.
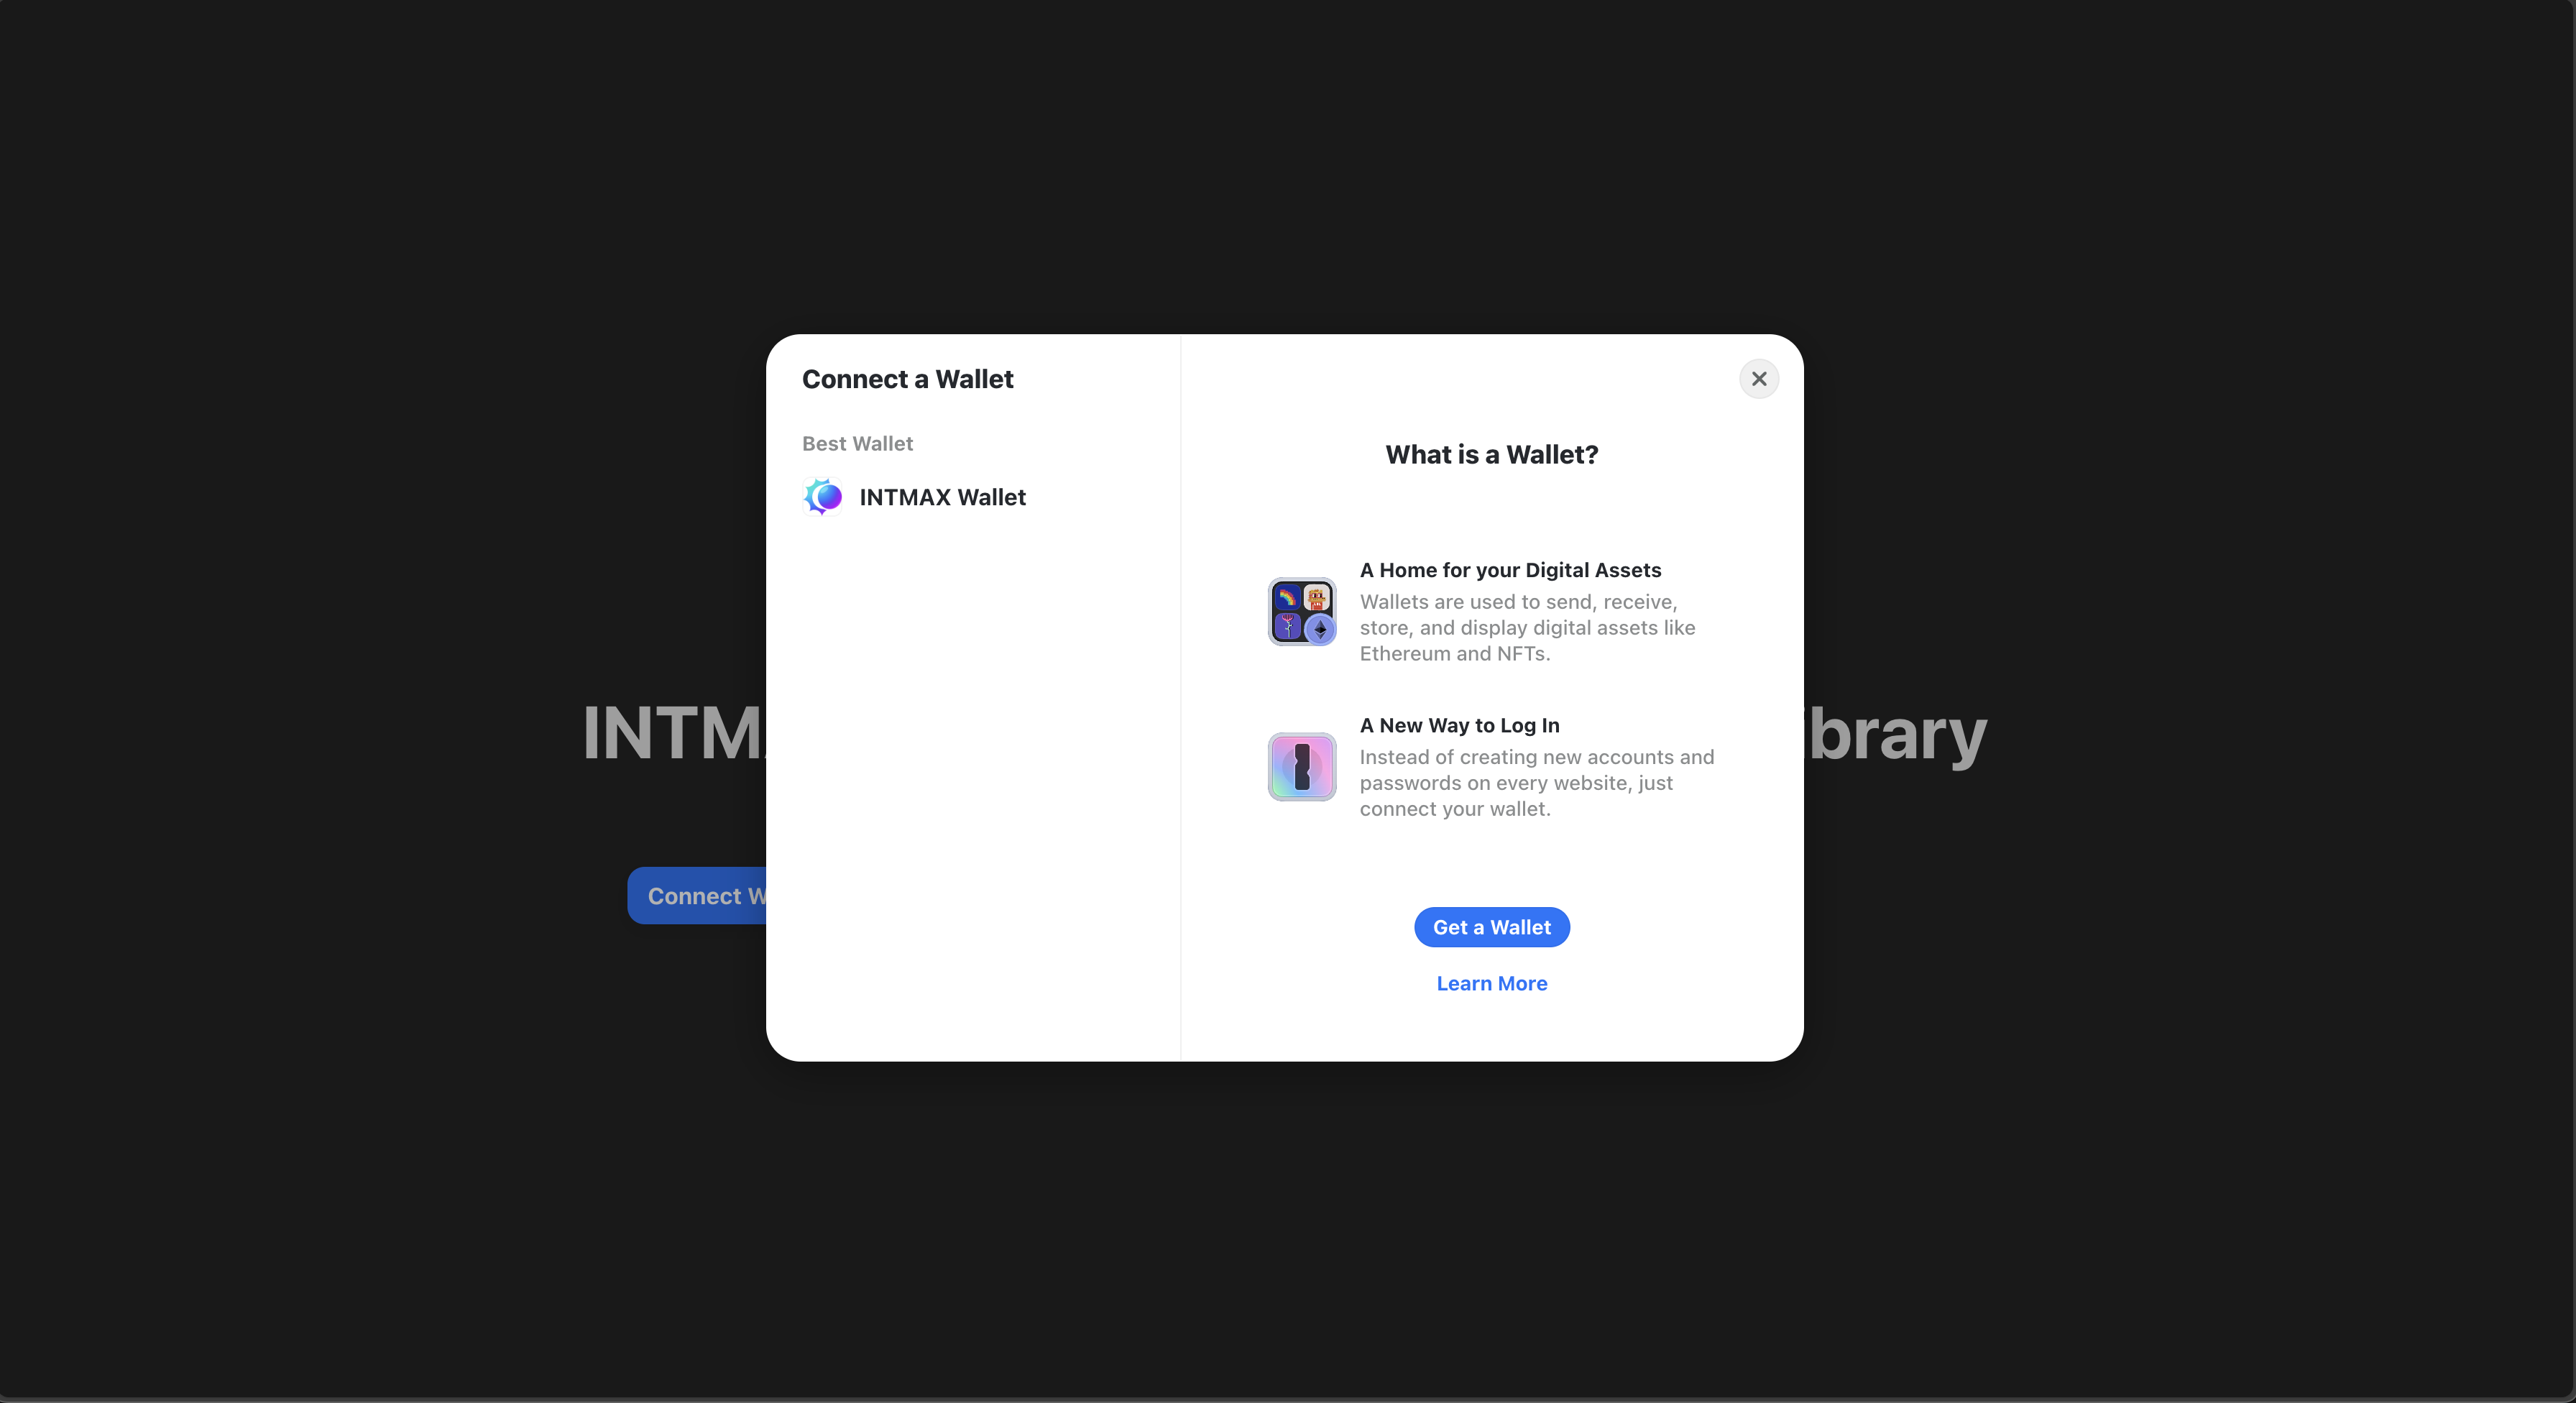
Clicking it will open a modal for connecting to the INTMAX Wallet.
Signing A Transaction
Inside your App component, initialize the useSignMessage hook from wagmi. This hook provides functions and state variables to interact with the Ethereum network for signing messages:
const { data, isError, isLoading, isSuccess, signMessage } = useSignMessage();
Define the structure of the "Sign Message" button. Use conditional rendering to display the signature or error message based on the state returned by useSignMessage:
<div className="card">
        <div className="button-container">
          <button disabled={isLoading} onClick={() => signMessage({
            message: 'gm wagmi frens',
          })}>
            Sign message
          </button>
          {isSuccess && <div>Signature: {data}</div>}
          {isError && <div>Error signing message, please connect wallet first!</div>}
        </div>
</div>
Your App.tsx file should now look like this:
import React from 'react';
import reactLogo from './assets/react.svg';
import viteLogo from '/vite.svg';
import './App.css';
import { ConnectButton } from '@rainbow-me/rainbowkit';
import { useSignMessage } from 'wagmi';

function App() {
  const { data, isError, isLoading, isSuccess, signMessage } = useSignMessage()

  return (
    <>
      <div>
        <a href="https://vitejs.dev" target="_blank">
          <img src={viteLogo} className="logo" alt="Vite logo" />
        </a>
        <a href="https://react.dev" target="_blank">
          <img src={reactLogo} className="logo react" alt="React logo" />
        </a>
      </div>
      <h1>INTMAX Wallet SDK + Rainbow Kit Library</h1>

      <div className="card">
        <ConnectButton />
      </div>

      <div className="card">
        <div className="button-container">
          <button disabled={isLoading} onClick={() => signMessage({
            message: 'gm wagmi frens',
          })}>
            Sign message
          </button>
          {isSuccess && <div>Signature: {data}</div>}
          {isError && <div>Error signing message, please connect wallet first!</div>}
        </div>
      </div>
    </>
  );
}

export default App;
Add CSS styles to your App.css file to ensure the "Sign Message" button and other elements are styled according to your design requirements. For example, to center the buttons and ensure they have the same width:
.card {
  display: flex;
  padding: 20px;
  justify-content: center;
  text-align: center;
  gap: 20px;
}

.button-container {
  display: flex;
  flex-direction: column;
  align-items: center;
}

button {
  height: 50px;
  margin-bottom: 10px;
}
Run your application again and test the integration.
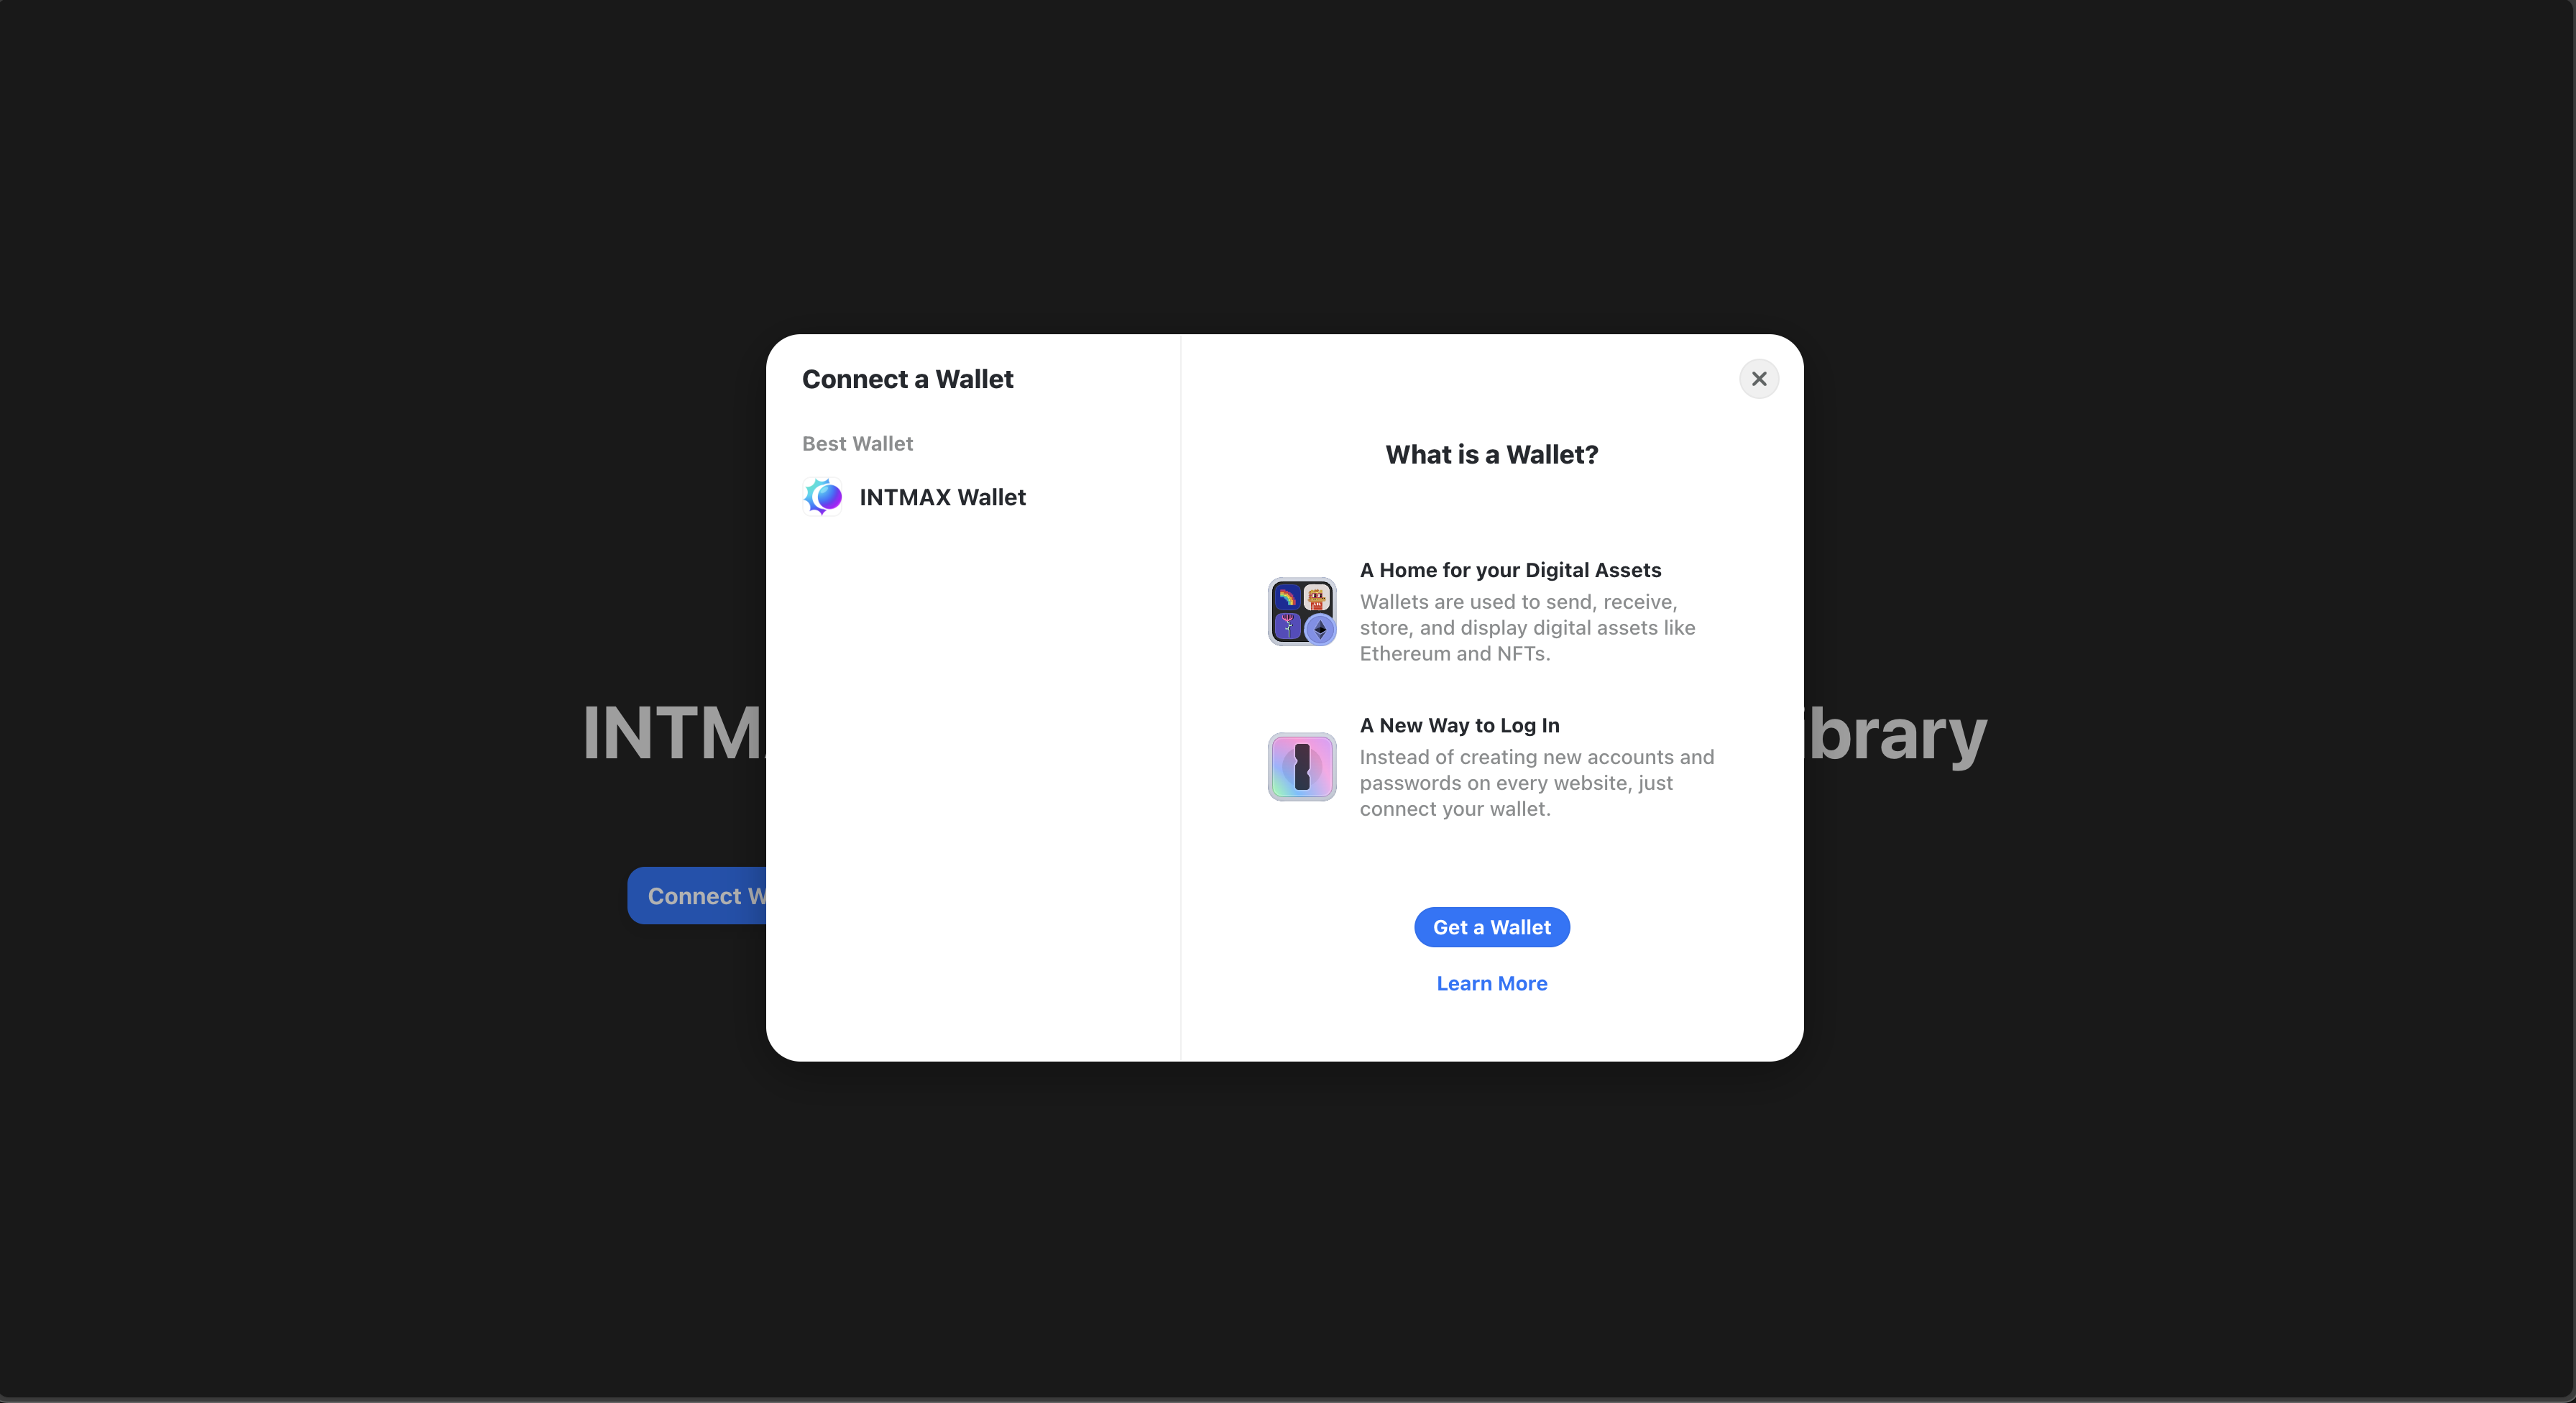
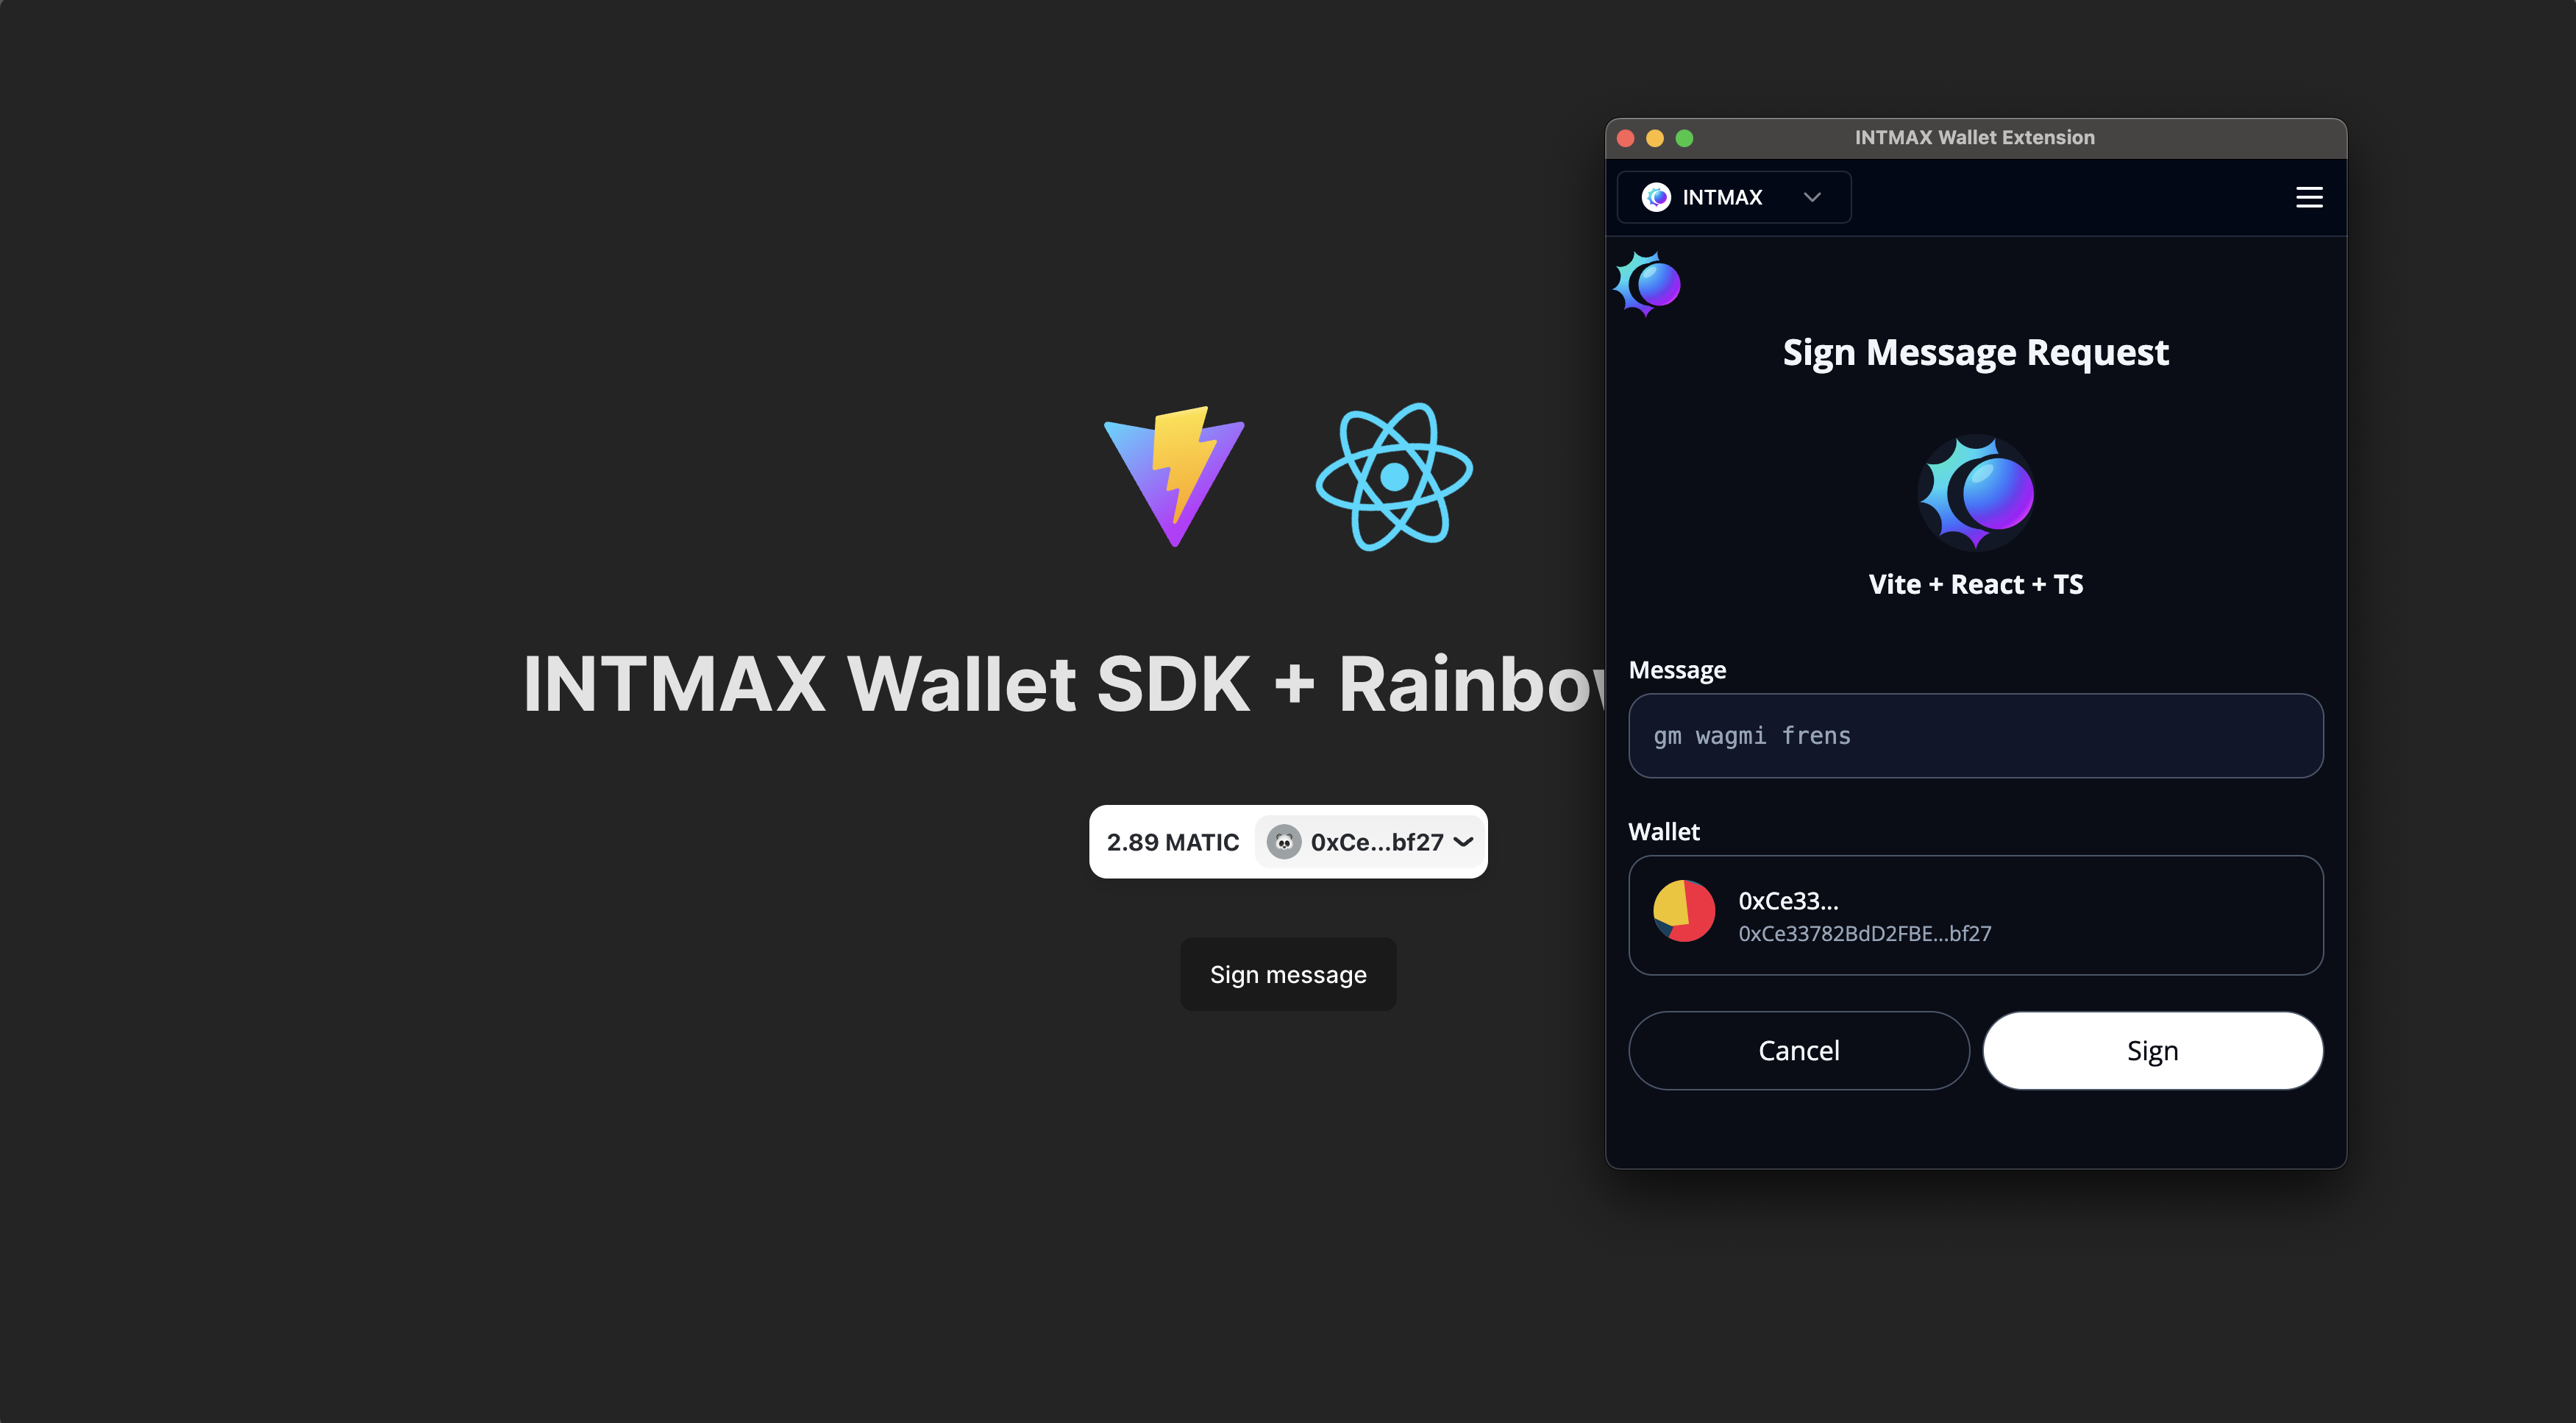
Clicking the "Sign Message" button will open a modal for signing the message with the INTMAX Wallet, which should trigger the signing process, and, upon success, display the signature. If there's an error, it should show an error message prompting the user to connect their wallet first.
Conclusion
RainbowKit provides a robust and user-friendly way to integrate wallet connections into your dApp with minimal effort. By leveraging the Intmax Wallet SDK, you can easily manage various wallets inside RainbowKit and utilize additional features like signing messages and sending transactions.
Quick Links
Learn more about Intmax Wallet SDK: https://intmax-wallet.gitbook.io/intmax-walletsdk
Live demo: https://intmax-sdk-rainbowkit-demo-3lht.vercel.app/
Full code in Github Rep: https://github.com/emmaglorypraise/INTMAX-SDK-RAINBOWKIT-DEMO
Reach out to me on Twitter if you have any questions.
Subscribe to my newsletter
Read articles from Glory Praise Emmanuel directly inside your inbox. Subscribe to the newsletter, and don't miss out.
Written by

Glory Praise Emmanuel
Glory Praise Emmanuel
Glory Praise Emmanuel is a Frontend Engineer, Technical writer and Blockchain Developer based in Nigeria. She is passionate about providing solutions with technology and making the world a better place. She is interested in Open Source and community building.