Day 2/40 - How To Dockerize a Project
 Praful Dhawale
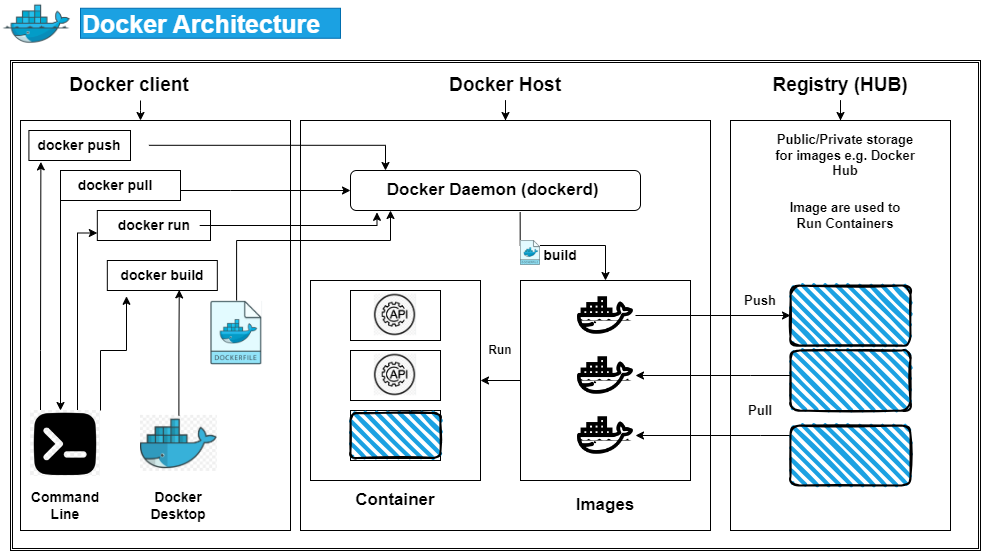
In the world of Docker, here are some key terms you'll encounter:
Docker Container:
- A lightweight, self-contained unit of software that packages your application code and all its dependencies (libraries, runtime) needed to run. Imagine a container as a standardized shipping container for your application, ensuring it runs consistently across different environments.
Docker Image:
- A blueprint or template that defines how a Docker container is built. It contains instructions on the base operating system, dependencies to install, and how to configure the environment for your application. You can think of an image as a recipe for creating a container.
Docker Hub:
- A public registry service for storing and sharing Docker images. It acts like a central repository where you can find and download pre-built images for various applications, operating systems, and tools. You can also push your own images to Docker Hub to share them publicly or privately with your team.
Dockerfile:
- A text file that contains instructions for building a Docker image. It specifies the base image, dependencies to install, how to copy your application code, and any other configurations needed for your containerized application.
Here's an analogy to help understand these concepts:
Imagine a restaurant (your application) that needs specific ingredients (dependencies) and a kitchen setup (environment) to prepare dishes.
A Docker container is like a portable kitchen containing all the ingredients and equipment needed to prepare a specific dish.
A Docker image is the recipe (instructions) for setting up that kitchen, including the ingredients and equipment required.
Docker Hub is a library full of pre-made kitchens (images) for various dishes (applications) that you can use or even contribute your own recipes (images) to.
The Dockerfile is the written recipe that details the specific steps for setting up your kitchen (container) for a particular dish (application).
I hope this explanation clarifies the relationships between these Docker concepts!
Get started
Download Docker desktop client
https://www.docker.com/products/docker-desktop/
To clone the sample Git repository, use the following command in your terminal:
git clone https://github.com/docker/getting-started-app.git
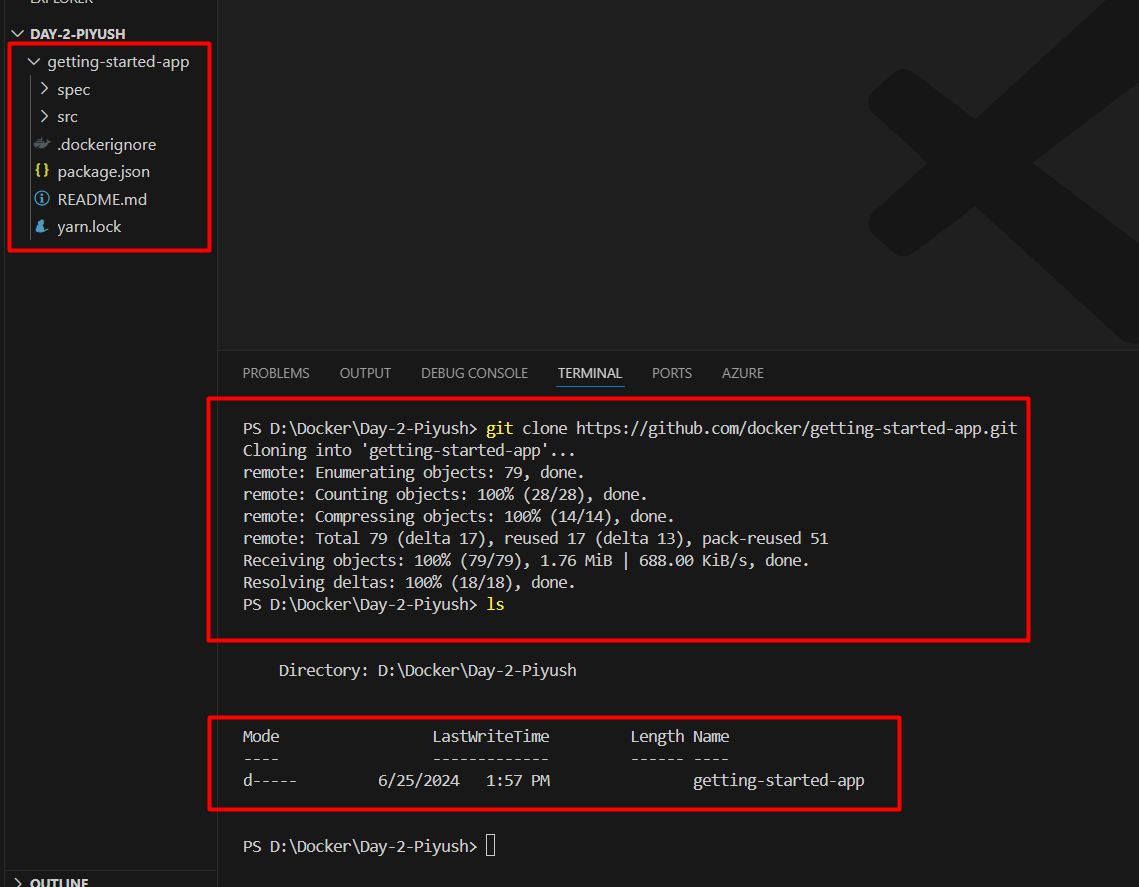
Change into the directory:
cd getting-started-app/
Create an empty file with the name Dockerfile:
touch Dockerfile
Using the text editor of your choice, paste the below content:
FROM node:18-alpine
WORKDIR /app
COPY . .
RUN yarn install --production
CMD ["node", "src/index.js"]
EXPOSE 3000
This Dockerfile defines the instructions for building a Docker image that likely runs a Node.js application. Let's break down each line:
FROM node:18-alpine:
This line specifies the base image for your container. It uses the official Node.js image (
node) with version 18 and thealpinevariant.The
alpinevariant is a popular choice as it's a lightweight version of the base image, reducing the final image size of your container.
WORKDIR /app:
- This instruction sets the working directory within the container to
/app. This is where your application code will be placed when the container runs.
- This instruction sets the working directory within the container to
COPY . .:
- This line copies all files and directories from your current local directory (
.) into the working directory (/app) within the container. This essentially copies your entire project codebase into the container.
- This line copies all files and directories from your current local directory (
RUN yarn install --production:
This instruction assumes you're using
yarnas a package manager for your Node.js project. It executes the commandyarn install --productionwithin the container.This command installs all the dependencies listed in your
package.jsonfile (excluding development dependencies due to the--productionflag).
CMD ["node", "src/index.js"]:
This line defines the default command to be executed when the container starts. It specifies two arguments:
"node": This tells the container to run the Node.js runtime engine."src/index.js": This specifies the main entry point for your application, likely located in thesrc/index.jsfile within your project.
EXPOSE 3000 (Optional):
- This line exposes port 3000 within the container. This doesn't map the port to the host machine by itself. It just tells Docker that the container listens on this port. You'll need to use port mapping during
docker runto publish this port to the host machine if your application requires external access.
- This line exposes port 3000 within the container. This doesn't map the port to the host machine by itself. It just tells Docker that the container listens on this port. You'll need to use port mapping during
Build the Docker image using the application code and Dockerfile:
docker build -t day-02-k8s-todo .
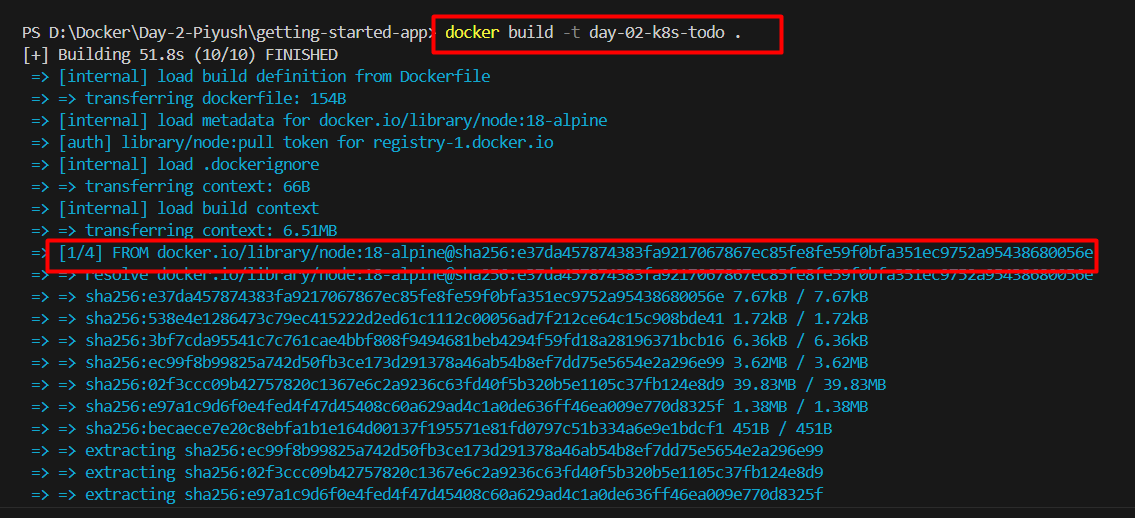
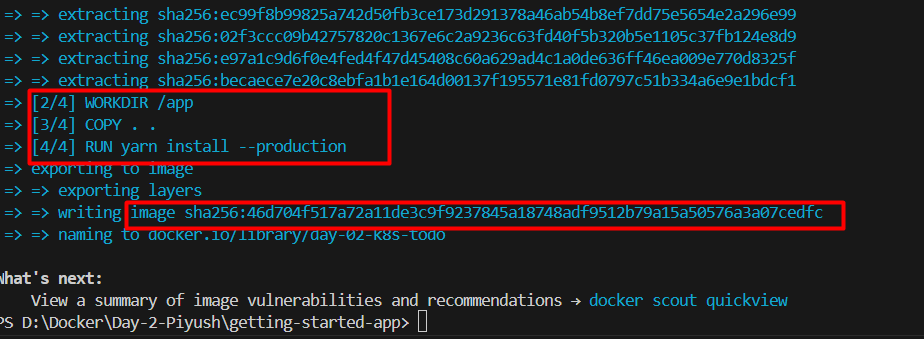
Verify the image has been created and stored locally using the below command:
docker images


Create a public repository on hub.docker.com and push the image to the remote repository:
Log in to Docker Hub:
docker loginTag the image:
docker tag day-02-k8s-todo:latest username/todo-repo:tagnameVerify the image:
docker imagesPush the image to the remote repository:
docker push dhawalepraful1310/todo-repo:latest


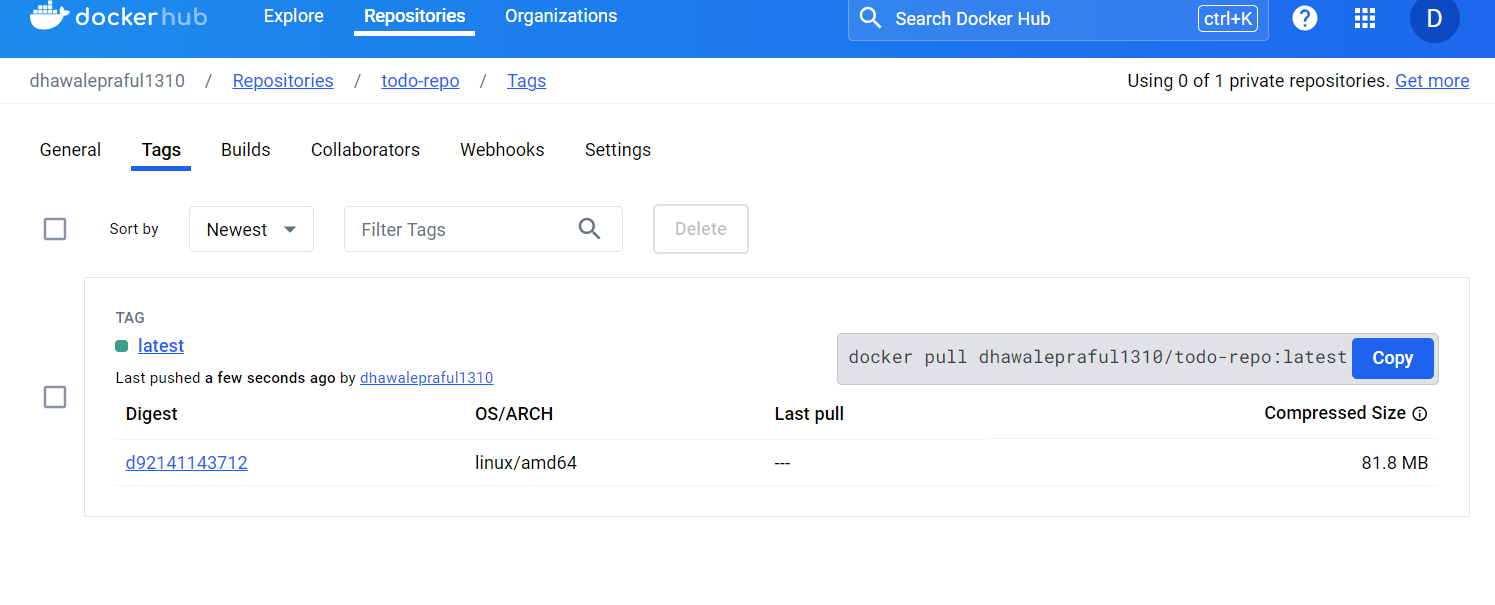
To pull the image to another environment, you can use the below command:
docker pull dhawalepraful1310/todo-repo:latest
To start the Docker container, use the below command:
docker run -dp 3000:3000 dhawalepraful1310/todo-repo:latest


Verify your app. If you have followed the above steps correctly, your app should be listening on localhost:3000.
To enter (exec) into the container, use the below command:
docker exec -it containername sh
or
docker exec -it containerid sh
Thank you for reading this article. If you liked it, please follow.
Subscribe to my newsletter
Read articles from Praful Dhawale directly inside your inbox. Subscribe to the newsletter, and don't miss out.
Written by

Praful Dhawale
Praful Dhawale
DevOps Engineer has to investigate and resolve technical issues, provide level 2 technical support, perform root cause analysis for production errors, build tools to improve customer experience, and develop software to integrate with internal back-end systems