Day 7 - AWS Project Used In Production
 Arnold Bernard
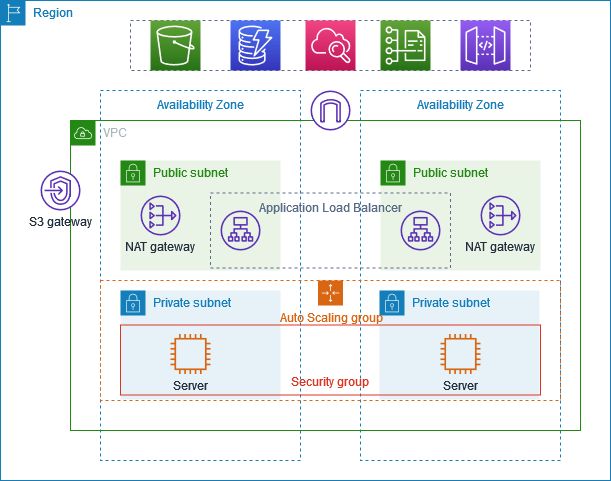
This project shows how to we can create a VPC that can be used for servers in production environment.
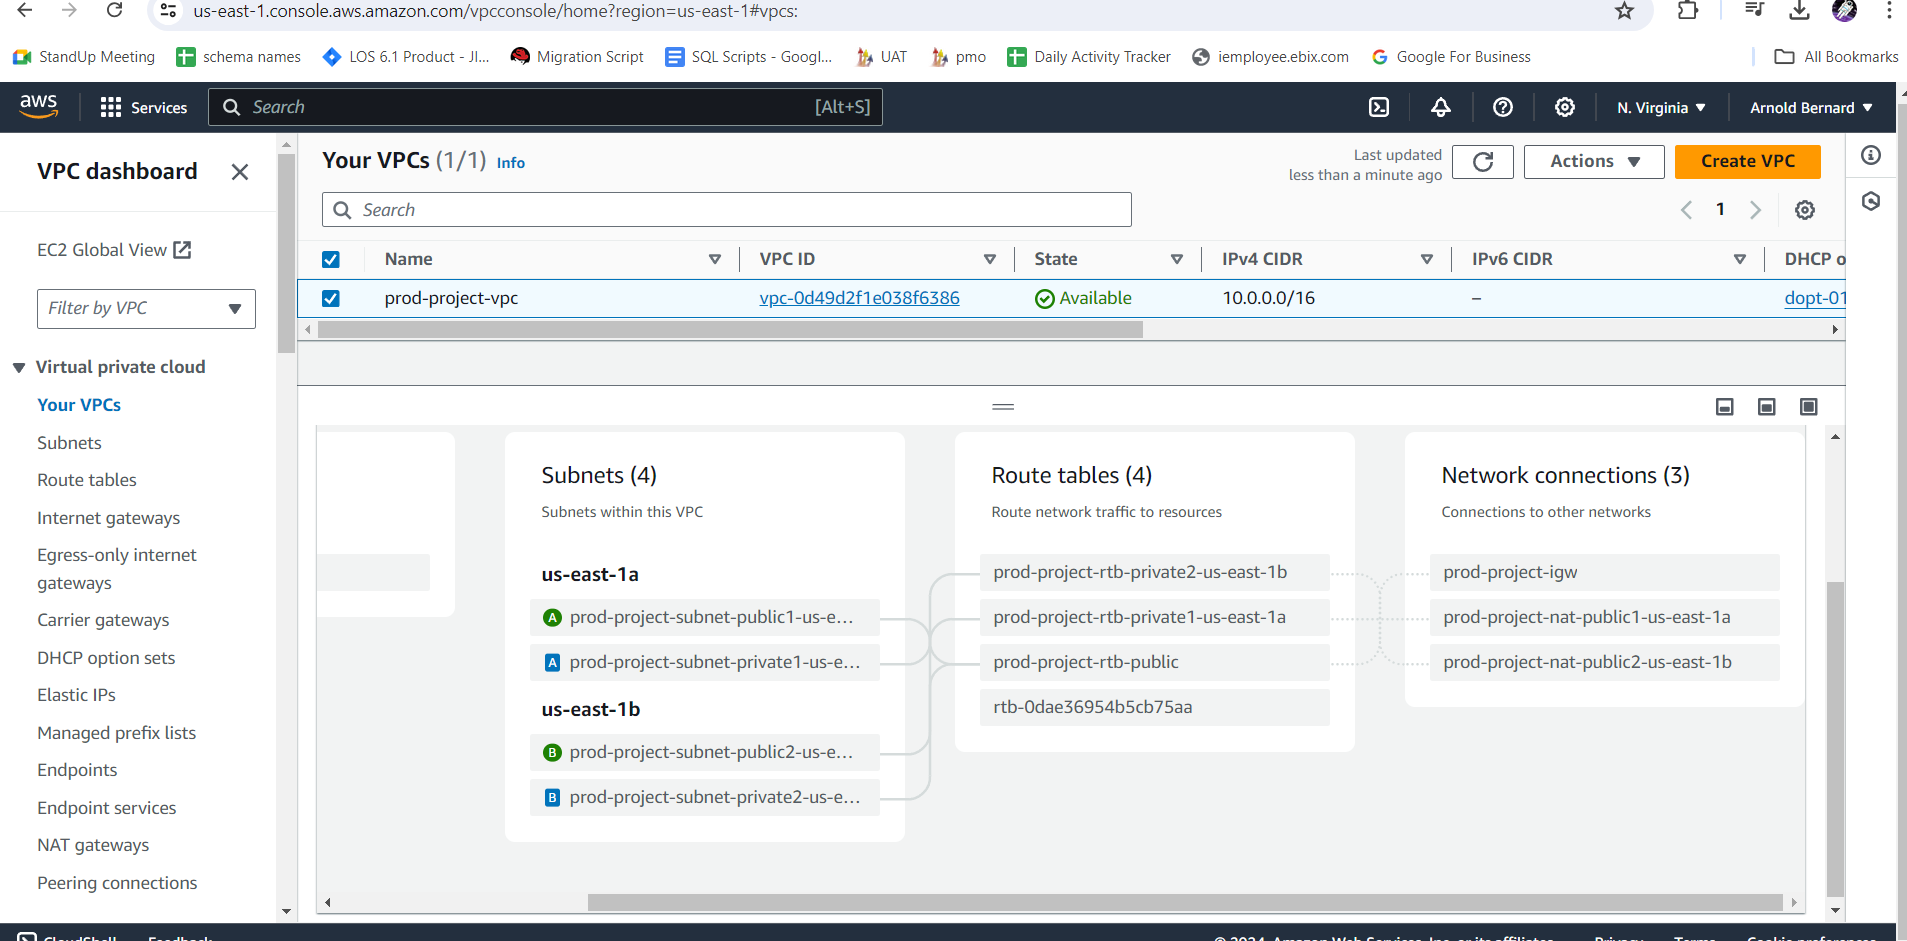
To improve resiliency we have deployed the servers in different AZ , by using a Auto scaling group and an Application Load Balancer. For more security , we have to deploy the servers in Private Subnets . The servers receive requests through the load balancer. The servers can connect to the internet by using NAT gateway. To improve resiliency , we deploy the NAT gateway in both Availability Zones
Setup 1 - Creating a VPC
Sign in to AWS Console:
Go to the AWS Console and sign in using your credentials.
Navigate to VPC Dashboard:
Once logged in, navigate to the Amazon VPC dashboard. You can find it under Services > VPC in the AWS Management Console.
Create VPC:
In the VPC dashboard, click on Create VPC to start the creation process.
Configure VPC Settings:
VPC Name: Enter
prod-project-vpcas the name for your VPC.IPv4 CIDR Block: Specify the IP address range in CIDR notation (e.g.,
10.0.0.0/16). This defines the range of private IP addresses that can be assigned to instances launched in your VPC.IPv6 CIDR Block: Optionally, you can specify an IPv6 CIDR block if needed.
Create VPC:
Review the configuration settings to ensure they are correct.
Click Create VPC to create your VPC named
prod-project-vpc.
Verify Creation:
AWS will now create your VPC. Once completed, you will see your VPC listed in the VPC dashboard under Your VPCs with the name
prod-project-vpc.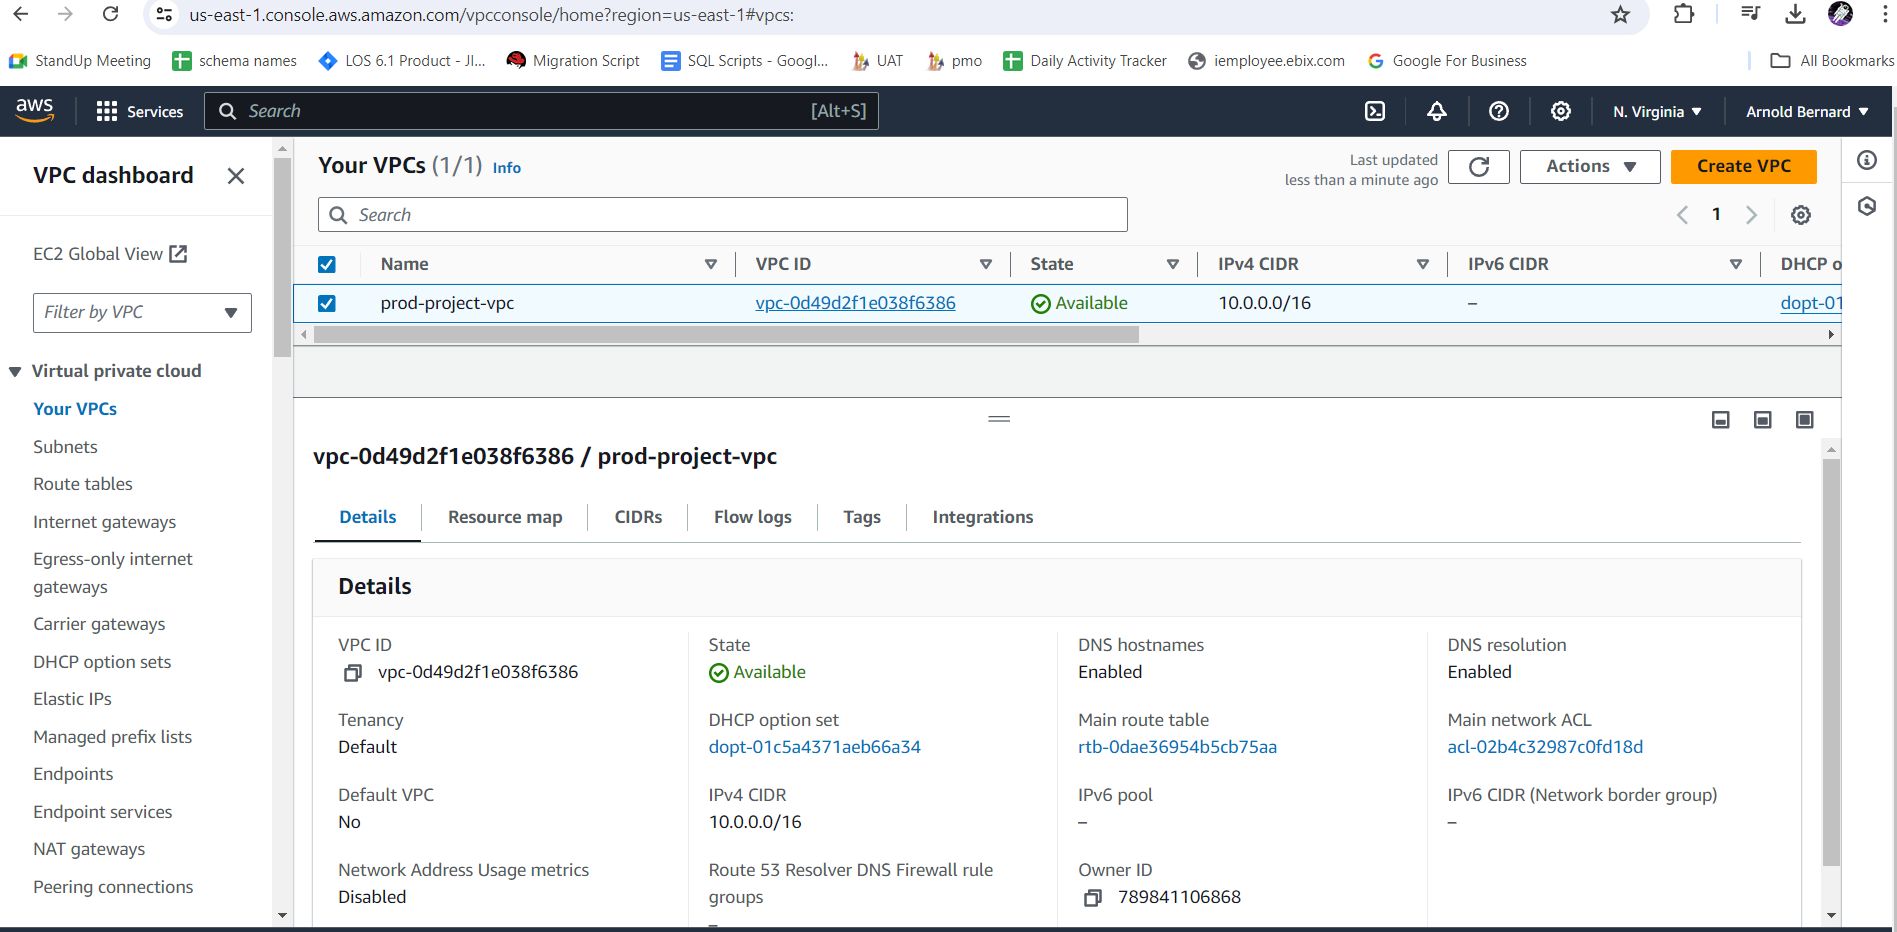
Step 2 - Create Auto Scaling Groups
Navigate to EC2 Dashboard:
Once logged in, navigate to the Amazon EC2 dashboard. You can find it under Services > EC2 in the AWS Management Console.
Create a Launch Template (or Configuration):
Launch Templates provide a configuration template for the instances launched by the Auto Scaling group. If you haven't created a launch template yet, follow these steps:
In the EC2 dashboard, under Auto Scaling in the left menu, click on Launch Templates.
Click on Create launch template.
Configure your launch template settings, including instance type, AMI, security groups, key pair, user data (optional scripts for instance configuration), and any other configuration specific to your application requirements.
After configuring, click on Create launch template.
Alternatively, you can use Launch Configurations instead of Launch Templates:
In the EC2 dashboard, under Auto Scaling in the left menu, click on Launch Configurations.
Click on Create launch configuration.
Configure your launch configuration settings similar to launch templates, providing instance details and configurations.
After configuring, click on Create launch configuration.
Create an Auto Scaling Group:
After creating a launch template or configuration, you can proceed to create the Auto Scaling Group:
In the EC2 dashboard, under Auto Scaling in the left menu, click on Auto Scaling Groups.
Click on Create Auto Scaling group.
Configure Auto Scaling Group Settings:
Choose launch template or configuration:
Select the launch template or configuration you created in step 2.
Click Next.
Configure Auto Scaling group details
Group name: Enter
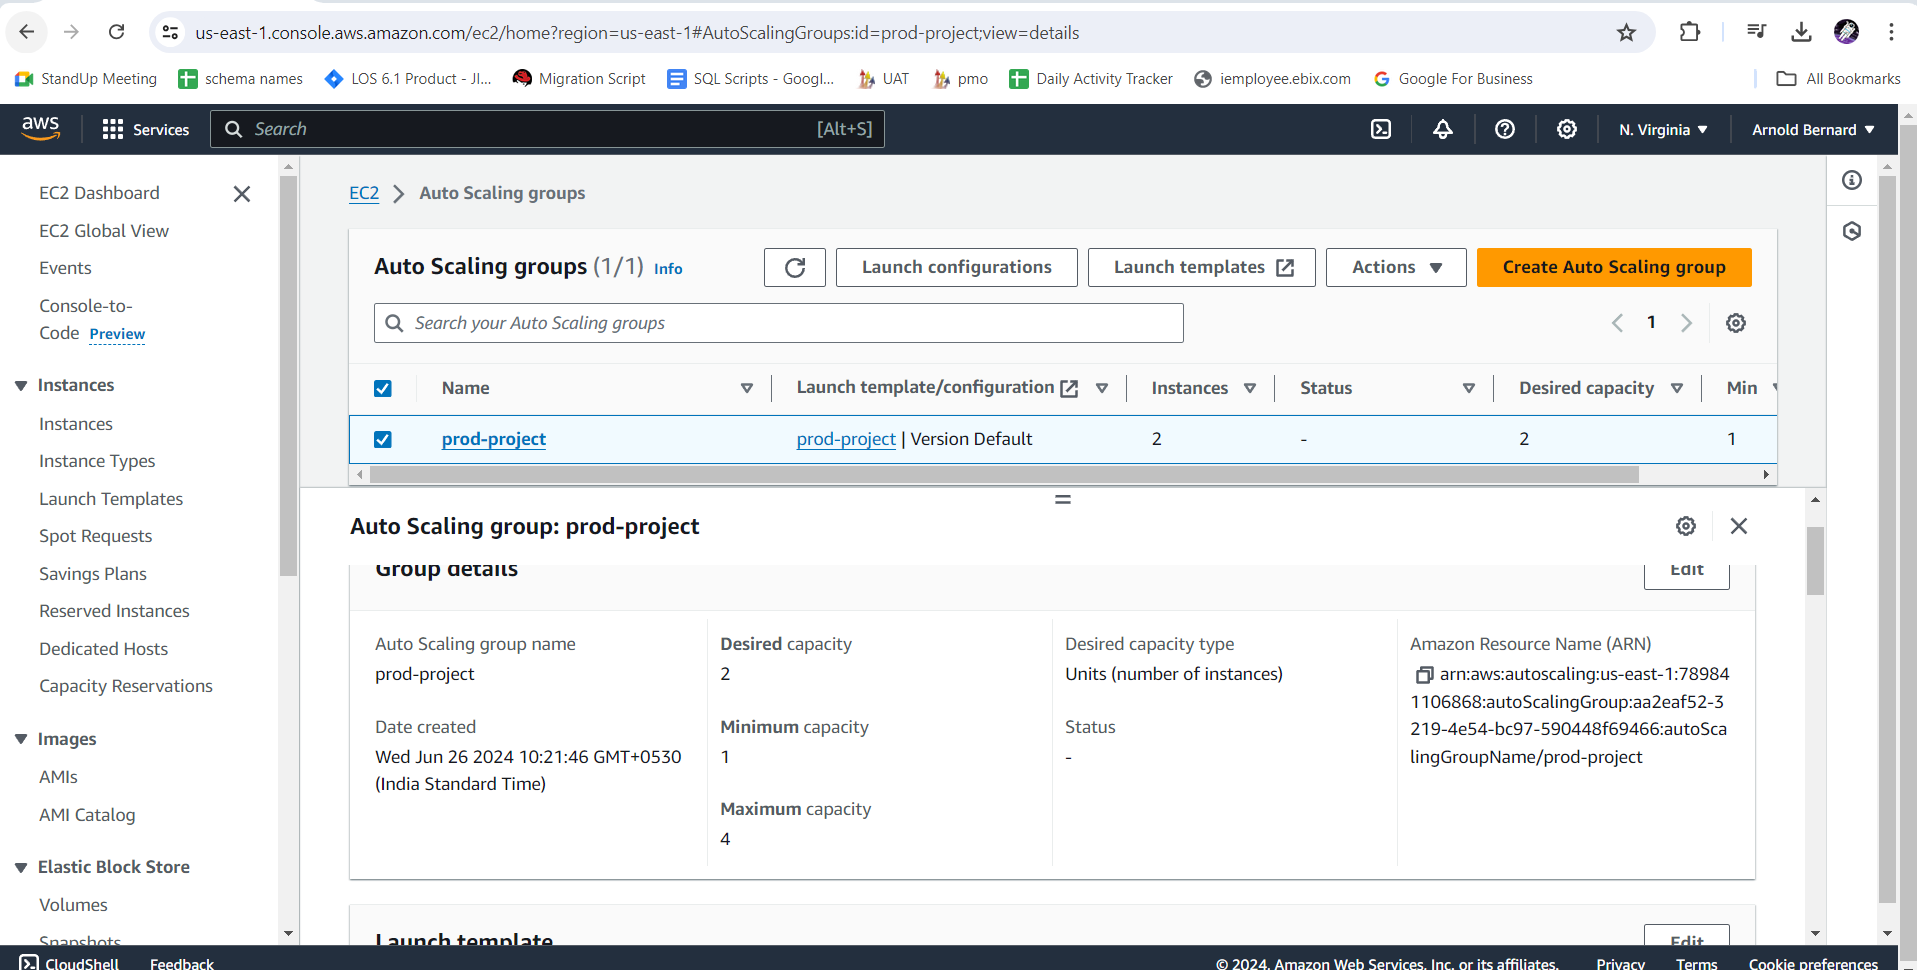
prod-projectas the name for your Auto Scaling group.Group size: Specify the initial number of instances (
Desired : 2,Minimum :1, andMaximum : 4instances) for your Auto Scaling group.Network: Choose the VPC and subnets where your instances will be launched. (Note : The VPC must be the Same which we have created in the very Beginning)
Click Next.
Configure scaling policies (optional):
Define scaling policies to automatically adjust the number of instances based on metrics like CPU utilization, network traffic, etc.
Configure scaling policies for both scaling out (adding instances) and scaling in (removing instances).
Click Next.
Add notifications (optional):
Configure notifications (using Amazon SNS) for Auto Scaling events.
Click Next.
Review and Create:
Review all the settings you have configured for your Auto Scaling group.
Click Create Auto Scaling group.
Verify Auto Scaling Group Creation:
AWS will create your Auto Scaling group named
prod-projectwith the specified configurations.Once created, you can view and manage your Auto Scaling group from the Auto Scaling Groups section in the EC2 dashboard.
Step 3 - Create Bastion Host
Visit my previous blog on more Info on Bastion host and how to Create it.
Note : In Network Settings select Auto-assign public IP as Enable , we will be needing the Public IP
Step 4 : Creating a Load Balancer
Create Load Balancer:
In the EC2 dashboard, under Load Balancing, click on Load Balancers in the left sidebar.
Click on Create Load Balancer.
Choose Application Load Balancer:
Select Application Load Balancer as the type of load balancer you want to create.
Click on Create to proceed.
Configure Load Balancer:
Step 1: Define Load Balancer
Name: Enter a name for your ALB (
prod-project).Scheme: The ALB should internet-facing (accessible from the internet).
IP Address Type: Choose IPv4 .
Step 2: Assign Security Settings
Security Groups: Select an existing security group. This controls the traffic allowed to reach your ALB.
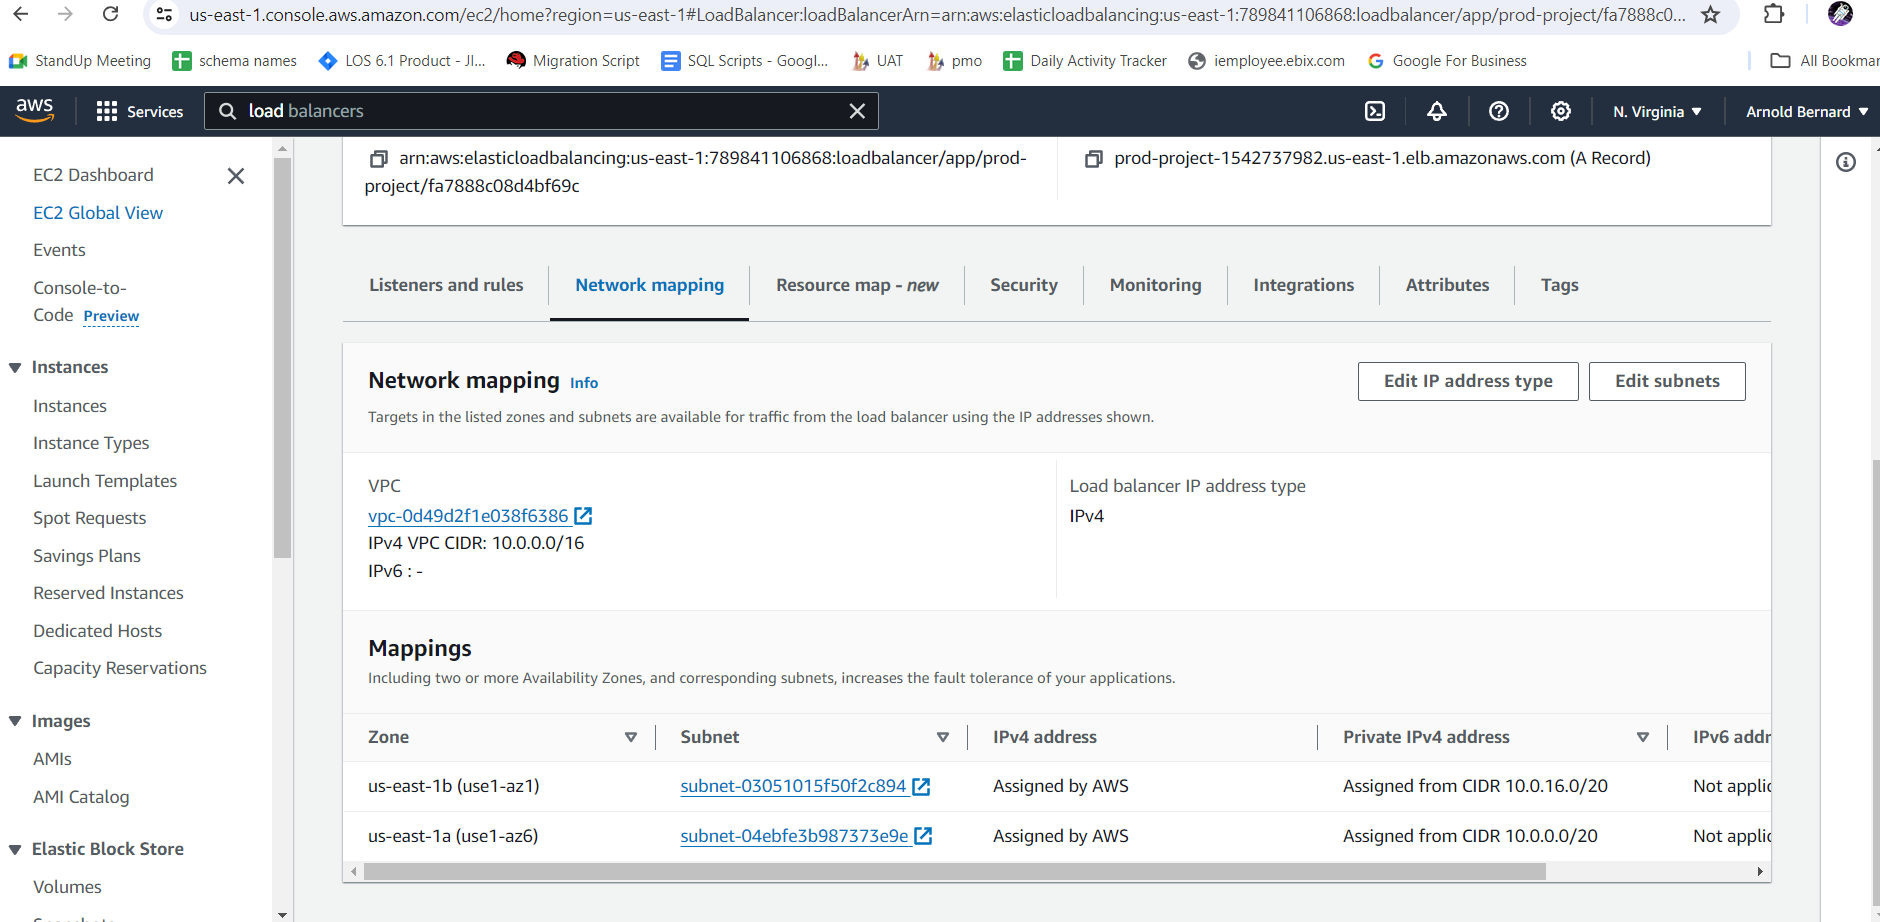
Step 3: VPC
In VPC select the existing VPC and inside mapping select only the Public Subnets.
Step 4 : Configure Routing
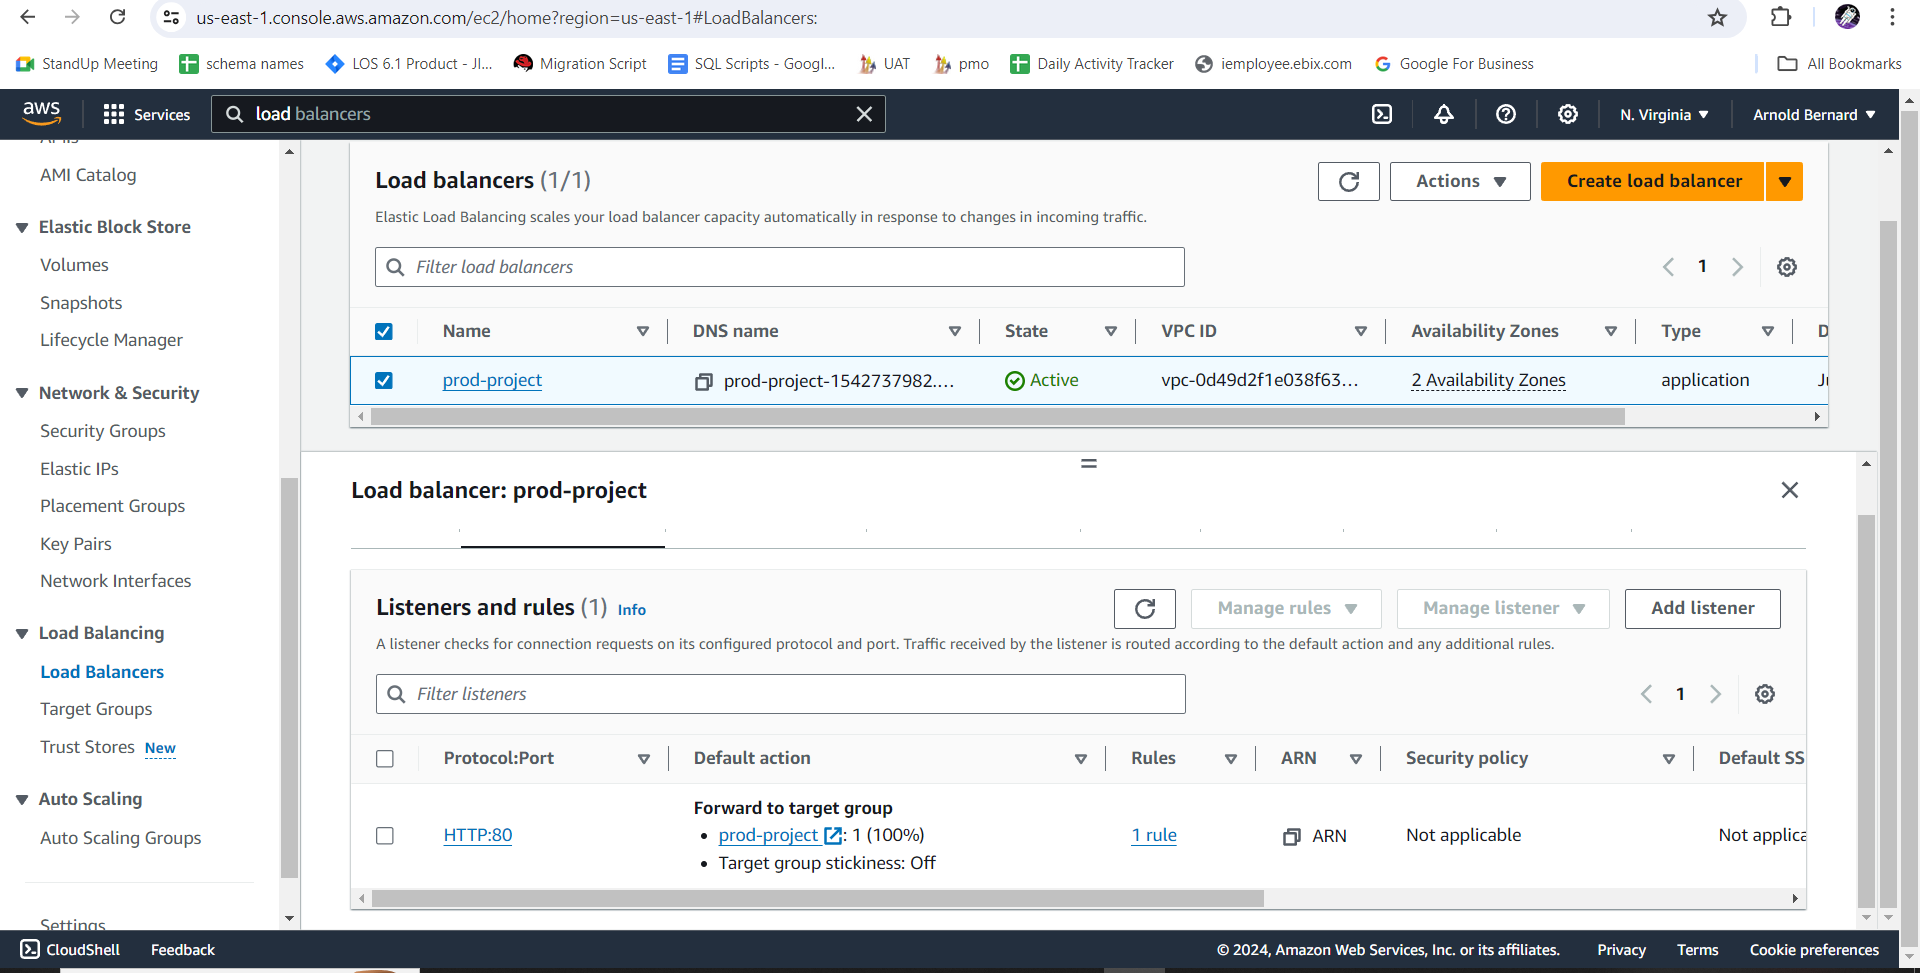
Listeners: Define the protocol and port on which the ALB listens for incoming traffic (Custom TCP port 8000, SSH on port 22).
Availability Zones: Select the VPC and Availability Zones where your ALB will distribute traffic.
Target Group: Create a new target group or select an existing one. The target group determines how the ALB routes traffic to registered targets (e.g., EC2 instances).
Connect to the Bastion Host using the Command
ssh -i /path/to/your-key.pem ec2-user@public-ip-addressNow you will be connected to the Bastion Server , Now we will be accessing our Scaled Instances from Bastion server , So we need the Pem file on the Bastion server, for that we will be using the SCP command
scp [file_name] remoteuser@remotehost:/remote/directoryAfter coping the PEM file on Bastion host try logging in on the Scaled server , put the private IP of the instance to be used.
Create an index.html on server that was just recently logged onto. I have a sample html instead
<!DOCTYPE html>
<html lang="en">
<head>
<meta charset="UTF-8">
<meta name="viewport" content="width=device-width, initial-scale=1.0">
<title>Interactive Page</title>
<style>
    body {
        font-family: Arial, sans-serif;
        text-align: center;
        background-color: #f0f0f0; /* Light grey background */
    }
    #content {
        margin-top: 50px;
    }
    button {
        padding: 10px 20px;
        font-size: 16px;
        cursor: pointer;
        background-color: #4CAF50; /* Green */
        color: white;
        border: none;
        border-radius: 4px;
        font-weight: bold;
    }
    button:hover {
                 background-color: #45a049; /* Darker green on hover */
    }
</style>
</head>
<body>
    <div id="content">
        <h2>Click the button to change the text!</h2>
        <p id="text">Original text</p>
        <button id="changeButton">Click me</button>
    </div>

    <script>
        // JavaScript to change text on button click
        document.getElementById('changeButton').addEventListener('click', function() {
            var textElement = document.getElementById('text');
            textElement.textContent = 'New text!';
        });
    </script>
</body>
</html>
Now we have to run Python HTTP server on port 8000 using Python 3
python3 -m http.server 8000
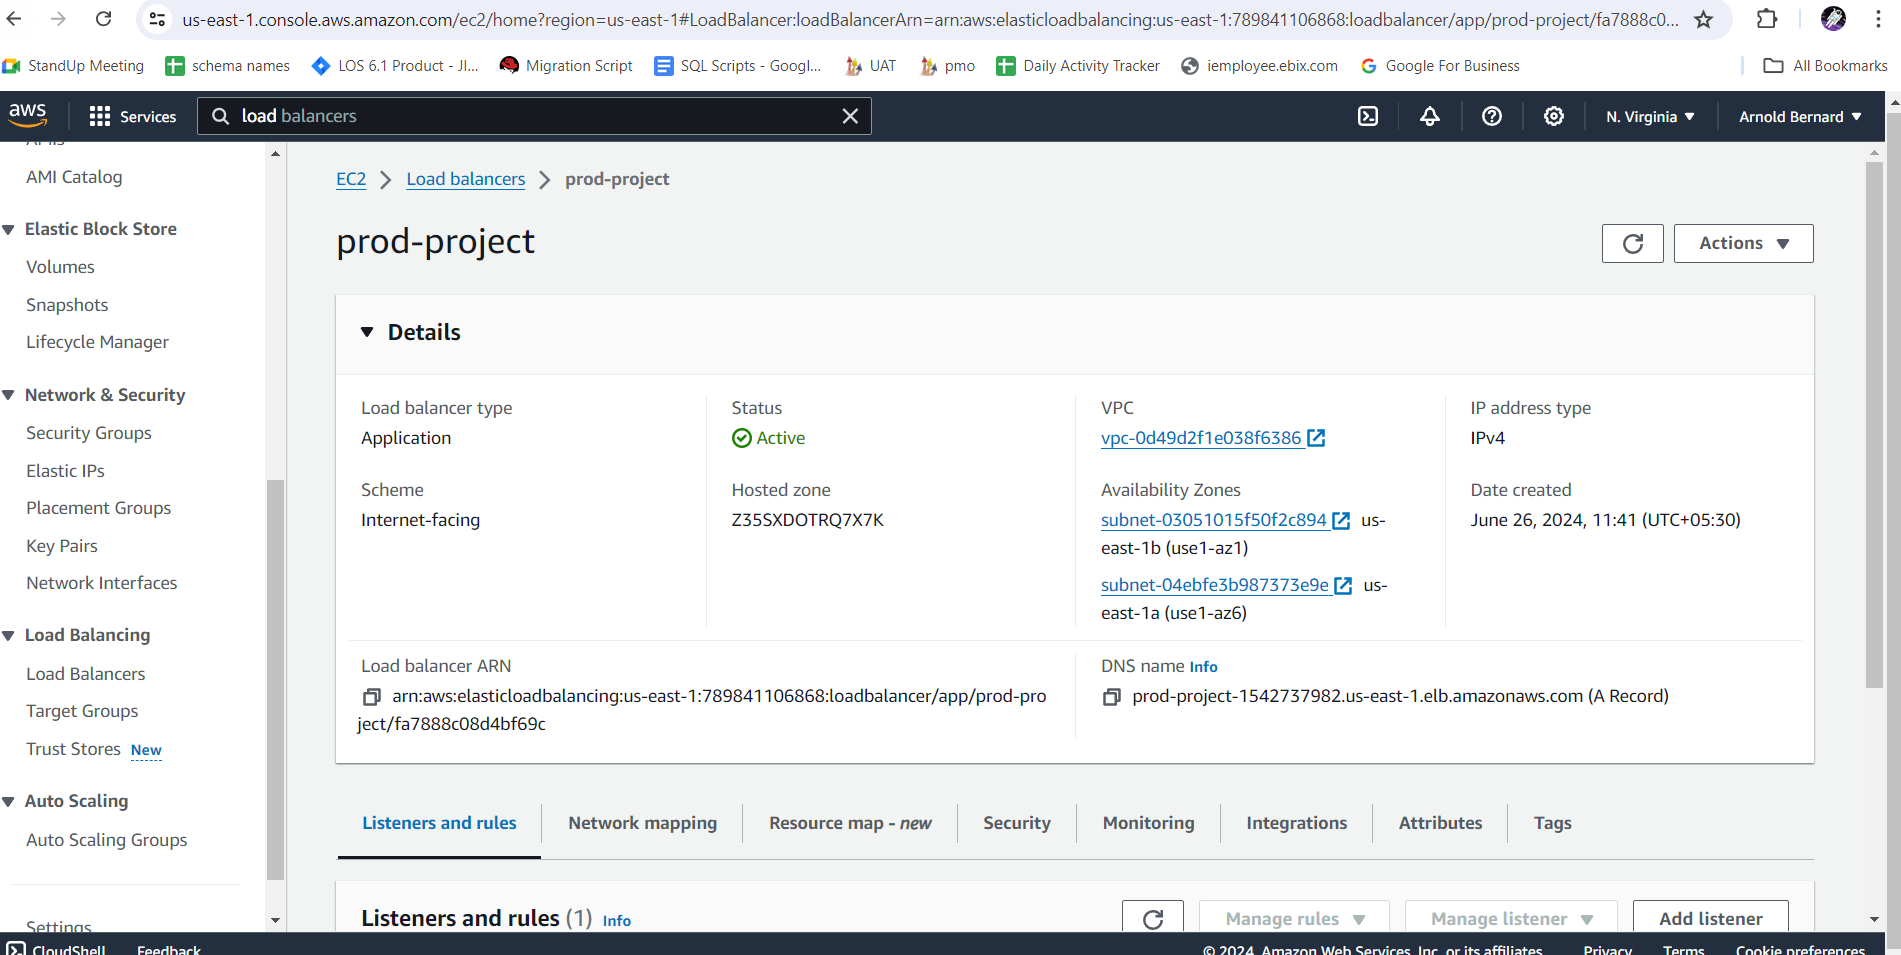
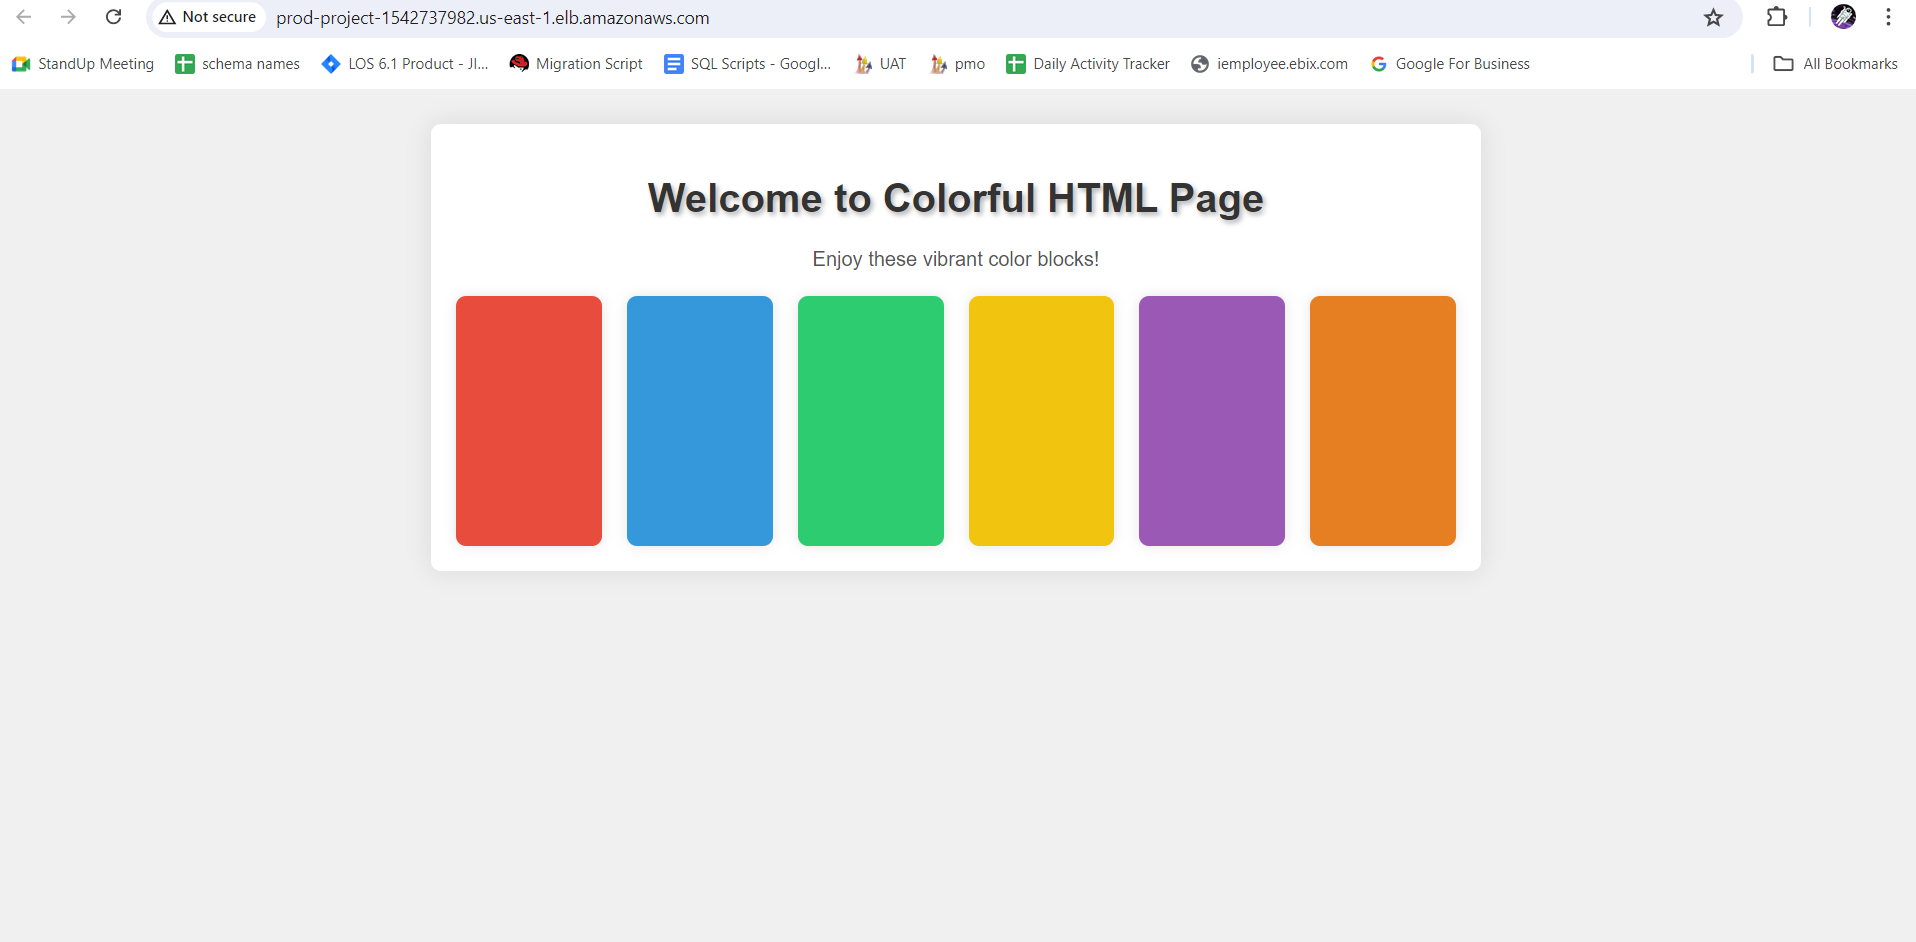
Now go to load balancers and click on the DNS name
You will have your PAGE ready.
Subscribe to my newsletter
Read articles from Arnold Bernard directly inside your inbox. Subscribe to the newsletter, and don't miss out.
Written by
