Building a Dynamic Category Menu in React: A Beginner's Guide
 Rauche Acho

Introduction
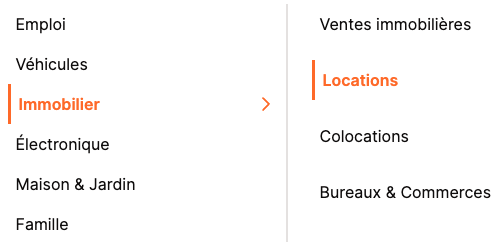
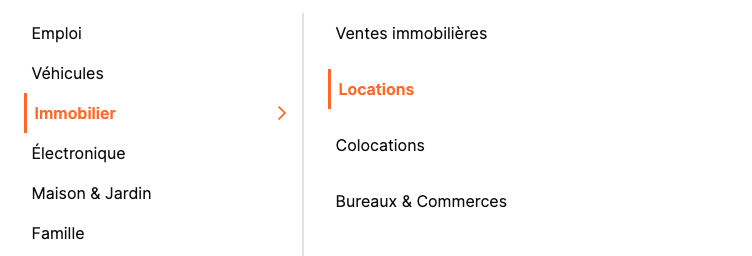
While working on my latest project, I hit a roadblock: I needed to create a category menu to help organize and navigate content. It was a bit challenging at first, but after figuring it out, I wanted to share my experience. This guide will walk you through creating a dynamic category menu component in React, making the process as enjoyable and straightforward as possible. Let's dive in and build this together!
Hint
To use the ChevronRight icon component from lucide-react with Tailwind CSS, ensure that you have lucide-react installed as a dependency in your project and that Tailwind CSS is set up. You can add lucide-react using npm or yarn
Here is what our data looks like:
[
    {
        id: "1",
        name: "Job",
        image: image,
        parent_id: null,
        created_at: "2023-01-01T00:00:00Z",
        updated_at: "2023-01-01T00:00:00Z",
    },
    {
    id: "2",
    name: "Vehicules",
    image: image,
    parent_id: null,
    created_at: "2023-01-01T00:00:00Z",
    updated_at: "2023-01-01T00:00:00Z",
    },
    {
        id: "3",
        name: "Cars",
        image: image,
        parent_id: "2",
        created_at: "2023-01-01T00:00:00Z",
        updated_at: "2023-01-01T00:00:00Z",
    },
    {
        id: "4",
        name: "Motos",
        image: image,
        parent_id: "2",
        created_at: "2023-01-01T00:00:00Z",
        updated_at: "2023-01-01T00:00:00Z",
    },
    {
        id: "5",
        name: "Real Estate",
        image: image,
        parent_id: null,
        created_at: "2023-01-01T00:00:00Z",
        updated_at: "2023-01-01T00:00:00Z",
    }
]
Dive into the Code
First, import useState from React. This helps track the selected categories. Declare three states: selectedParent, selectedChild, and selectedCategory.
import React, { useState } from "react";

const CategorieMenu = () => {
  const [selectedParent, setSelectedParent] = useState(null);
  const [selectedChild, setSelectedChild] = useState(null);
  const [selectedCategory, setSelectedCategory] = useState(null);
  // rest of your react component
};
Handling Clicks Changes Everything!
Next, add functions to manage clicks. When a user clicks on a parent or child category, update our states with setSelectedParent, setSelectedChild, and setSelectedCategory.
const handleParentClick = (categoryId) => {
  setSelectedParent(categoryId);
  setSelectedChild(null); // Reset child
  setSelectedCategory(categoryId);
};

const handleChildClick = (categoryId) => {
  setSelectedChild(categoryId);
  setSelectedCategory(categoryId);
};
Displaying Child Categories!
Now, create a function to display child categories when a parent category is selected. Use a filter to find the children and render them dynamically.
const renderChildren = (parentId) => {
  return categories
    .filter((category) => category.parent_id === parentId)
    .map((child) => (
      <li
        onClick={() => handleChildClick(child.id)}
        key={child.id}
        className={`ml-4 hover:text-primary group flex justify-between items-center cursor-pointer hover:font-semibold p-2 ${
          selectedChild === child.id
            ? "text-primary font-semibold border-l-[3px] border-primary "
            : ""
        }`}
      >
        {child.name}
      </li>
    ));
};
Putting It All Together!
Finally, combine everything in our component. Render parent and child categories, and apply styles to make it interactive and user-friendly.
return (
  <div className="bg-background flex w-full">
    <ul className="lg:flex-[0.8] w-full">
      {categories
        .filter((category) => !category.parent_id)
        .map((parent) => (
          <li key={parent.id}>
            <div
              className={`w-full hover:text-primary hover:font-semibold border-b lg:border-0 group flex justify-between items-center p-2 cursor-pointer ${
                selectedParent === parent.id
                  ? "text-primary lg:border-l-[3px] lg:border-primary font-semibold"
                  : ""
              }`}
              onClick={() => handleParentClick(parent.id)}
            >
              {parent.name}
              {categories.some(
                (category) => category.parent_id === parent.id
              ) && (
                <span
                  className={` ${
                    selectedParent === parent.id ? "lg:block" : "lg:hidden"
                  } lg:group-hover:block`}
                >
                  <ChevronRight className="text-primary" />
                </span>
              )}
            </div>
          </li>
        ))}
    </ul>
    <div className="hidden lg:block border-l-2 lg:flex-[1.2] pl-2">
      {selectedParent && (
        <ul className="space-y-4">{renderChildren(selectedParent)}</ul>
      )}
    </div>
  </div>
);
Voila, You Have a Category Menu!
And there you have it, an interactive category menu in React! Now you can navigate through your categories with style. Ready to take your React project to the next level? Have fun coding! 🚀
Subscribe to my newsletter
Read articles from Rauche Acho directly inside your inbox. Subscribe to the newsletter, and don't miss out.
Written by
