Setting Up a Kubernetes Cluster on Docker Desktop and Deploying a Node.Js Application 🚀
 Sprasad Pujari
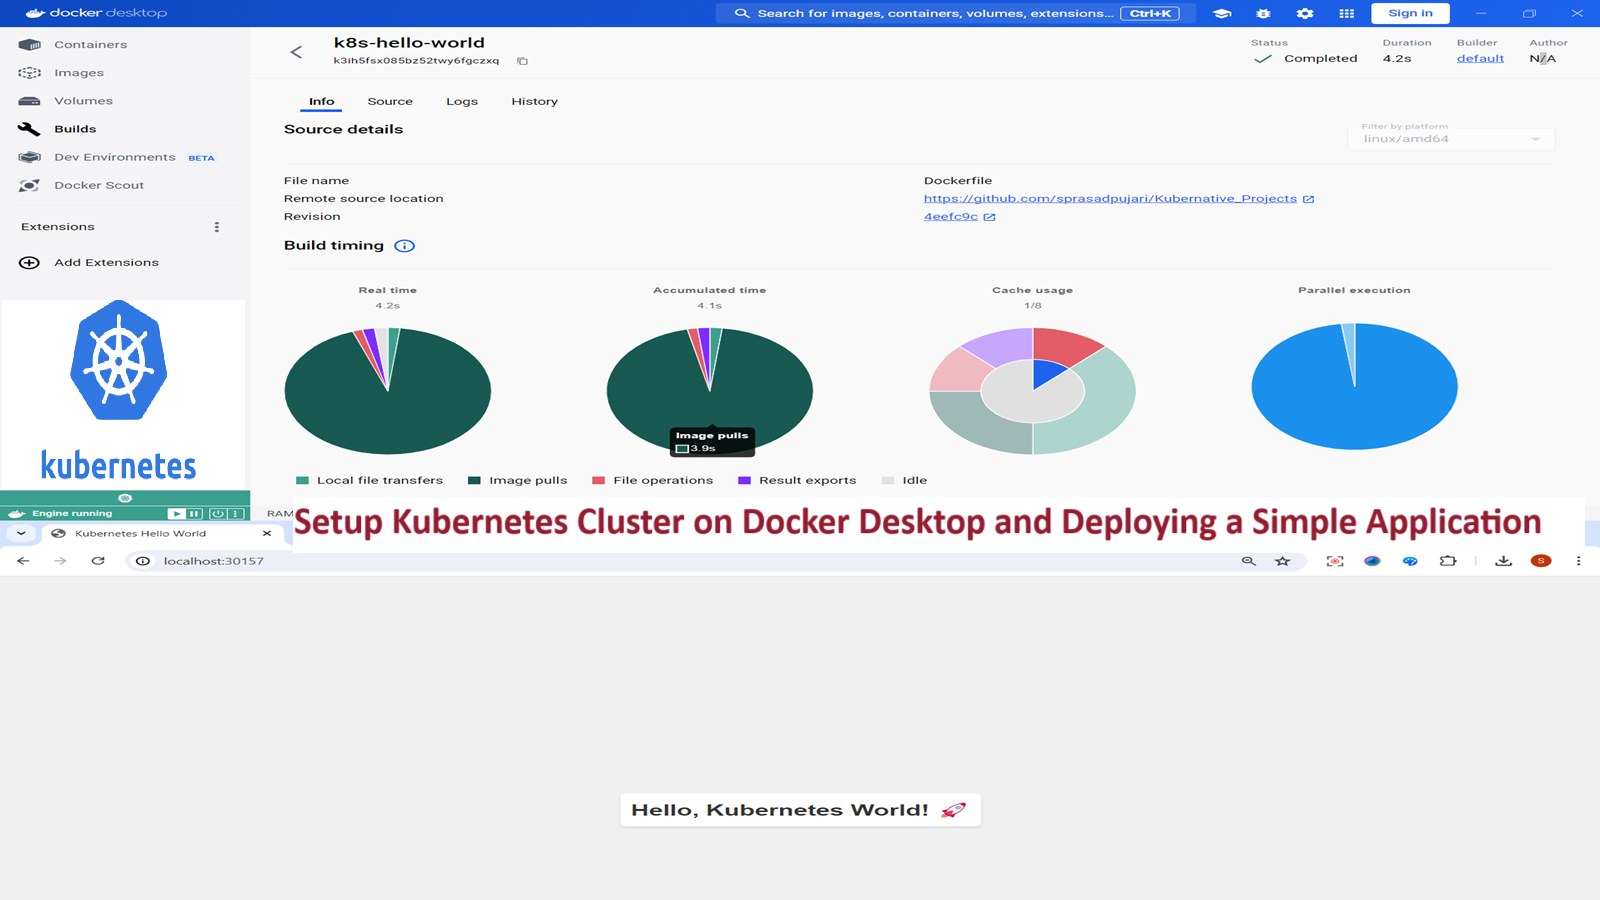
In this comprehensive guide, we'll walk through the process of setting up a Kubernetes cluster on Docker Desktop and deploying a simple application. This tutorial is perfect for beginners who want to get hands-on experience with Kubernetes in a local environment. Let's dive in! 🏊♂️
Prerequisites 📋
Before we begin, make sure you have the following installed on your machine:
Docker Desktop (latest version)
kubectl (Kubernetes command-line tool)
Step 1: Enable Kubernetes on Docker Desktop 🔧
Open Docker Desktop
Click on the gear icon (⚙️) in the top-right corner to open Settings
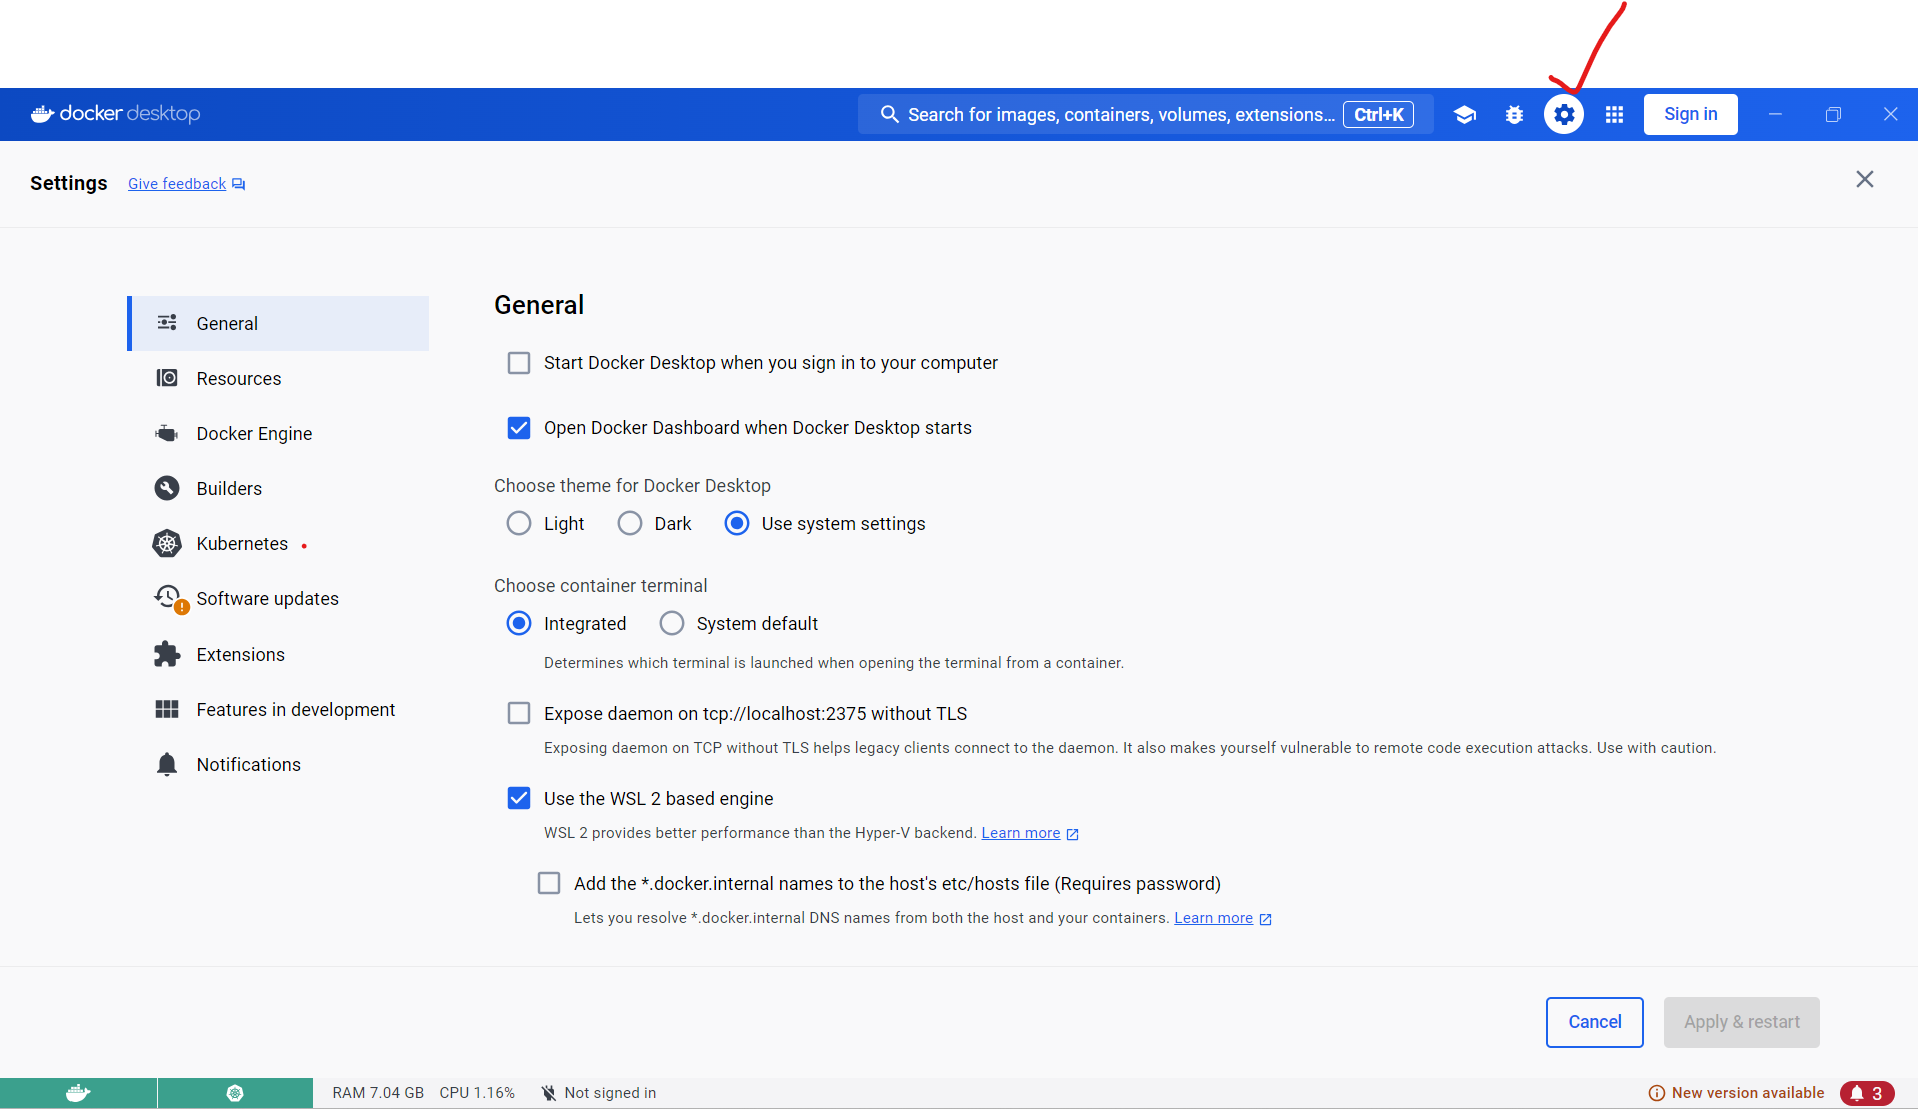
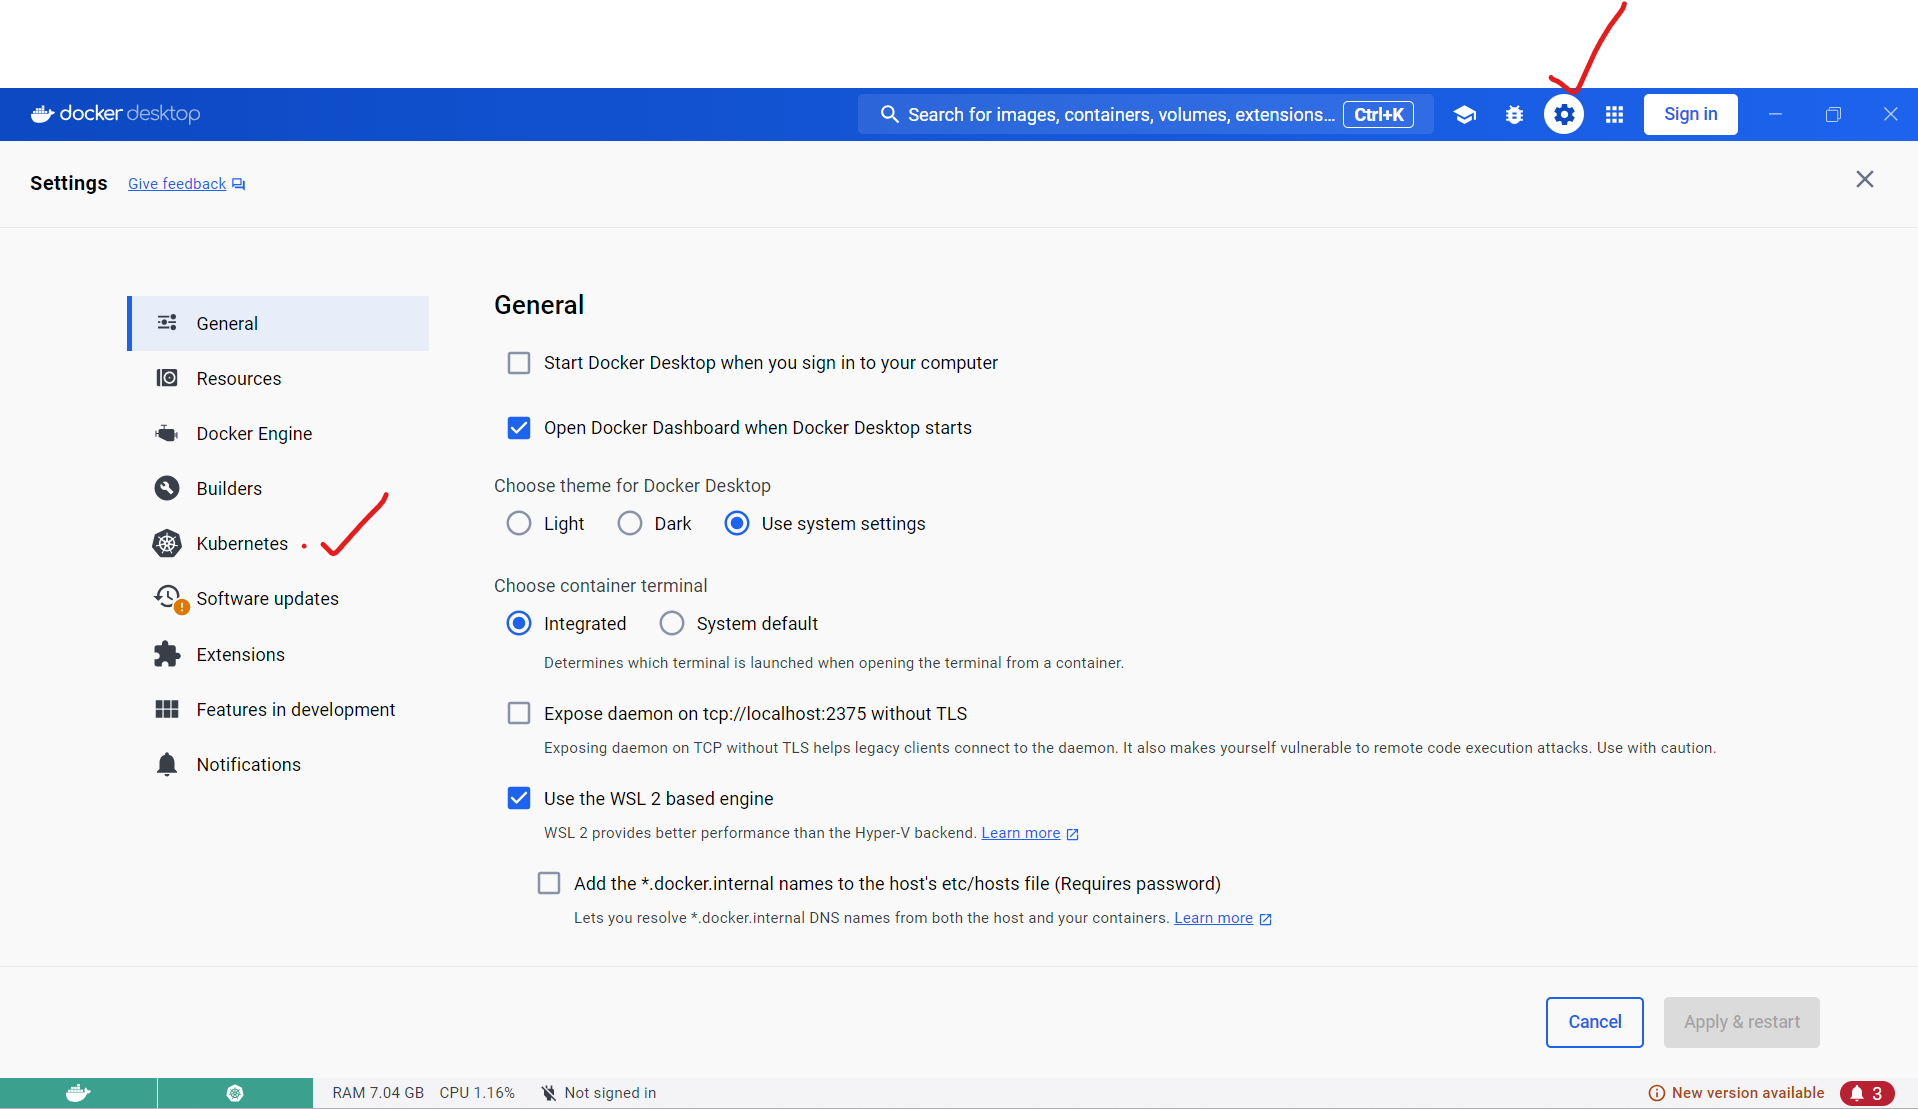
In the left sidebar, click on "Kubernetes"
Check the box that says "Enable Kubernetes"
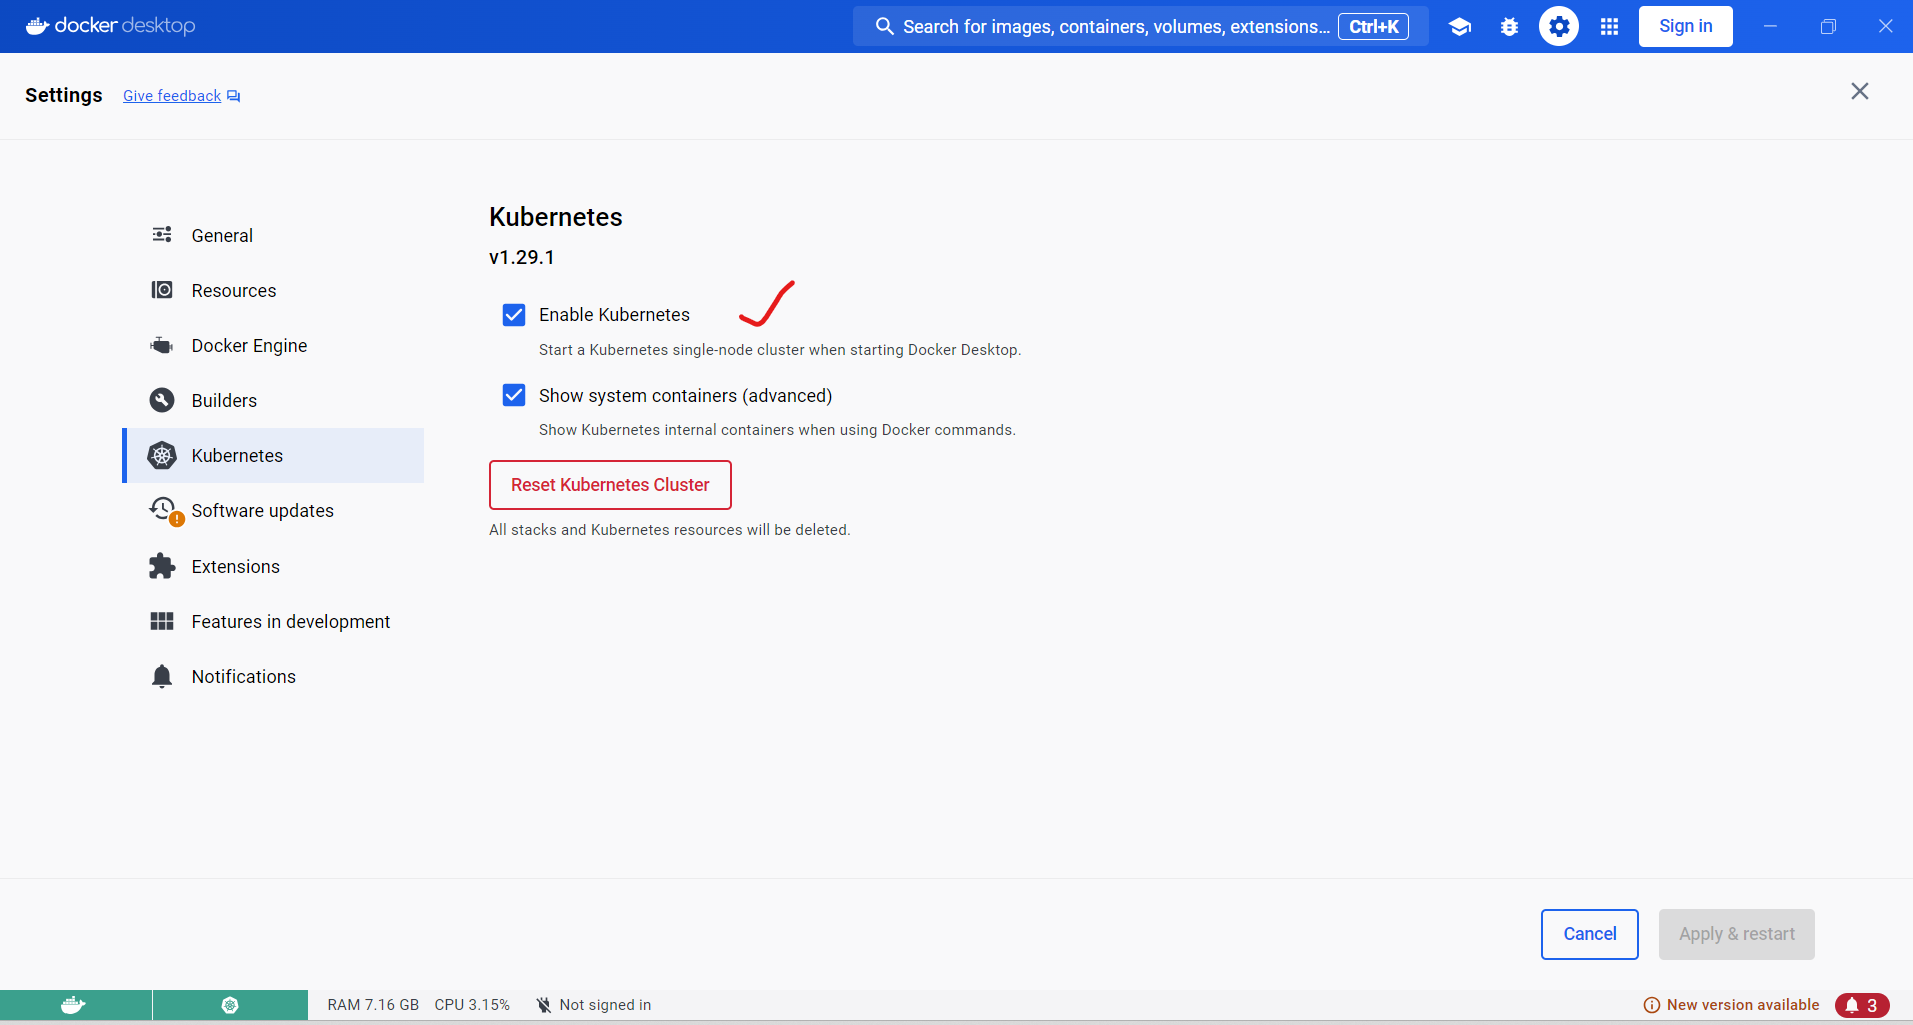
Click "Apply & Restart"
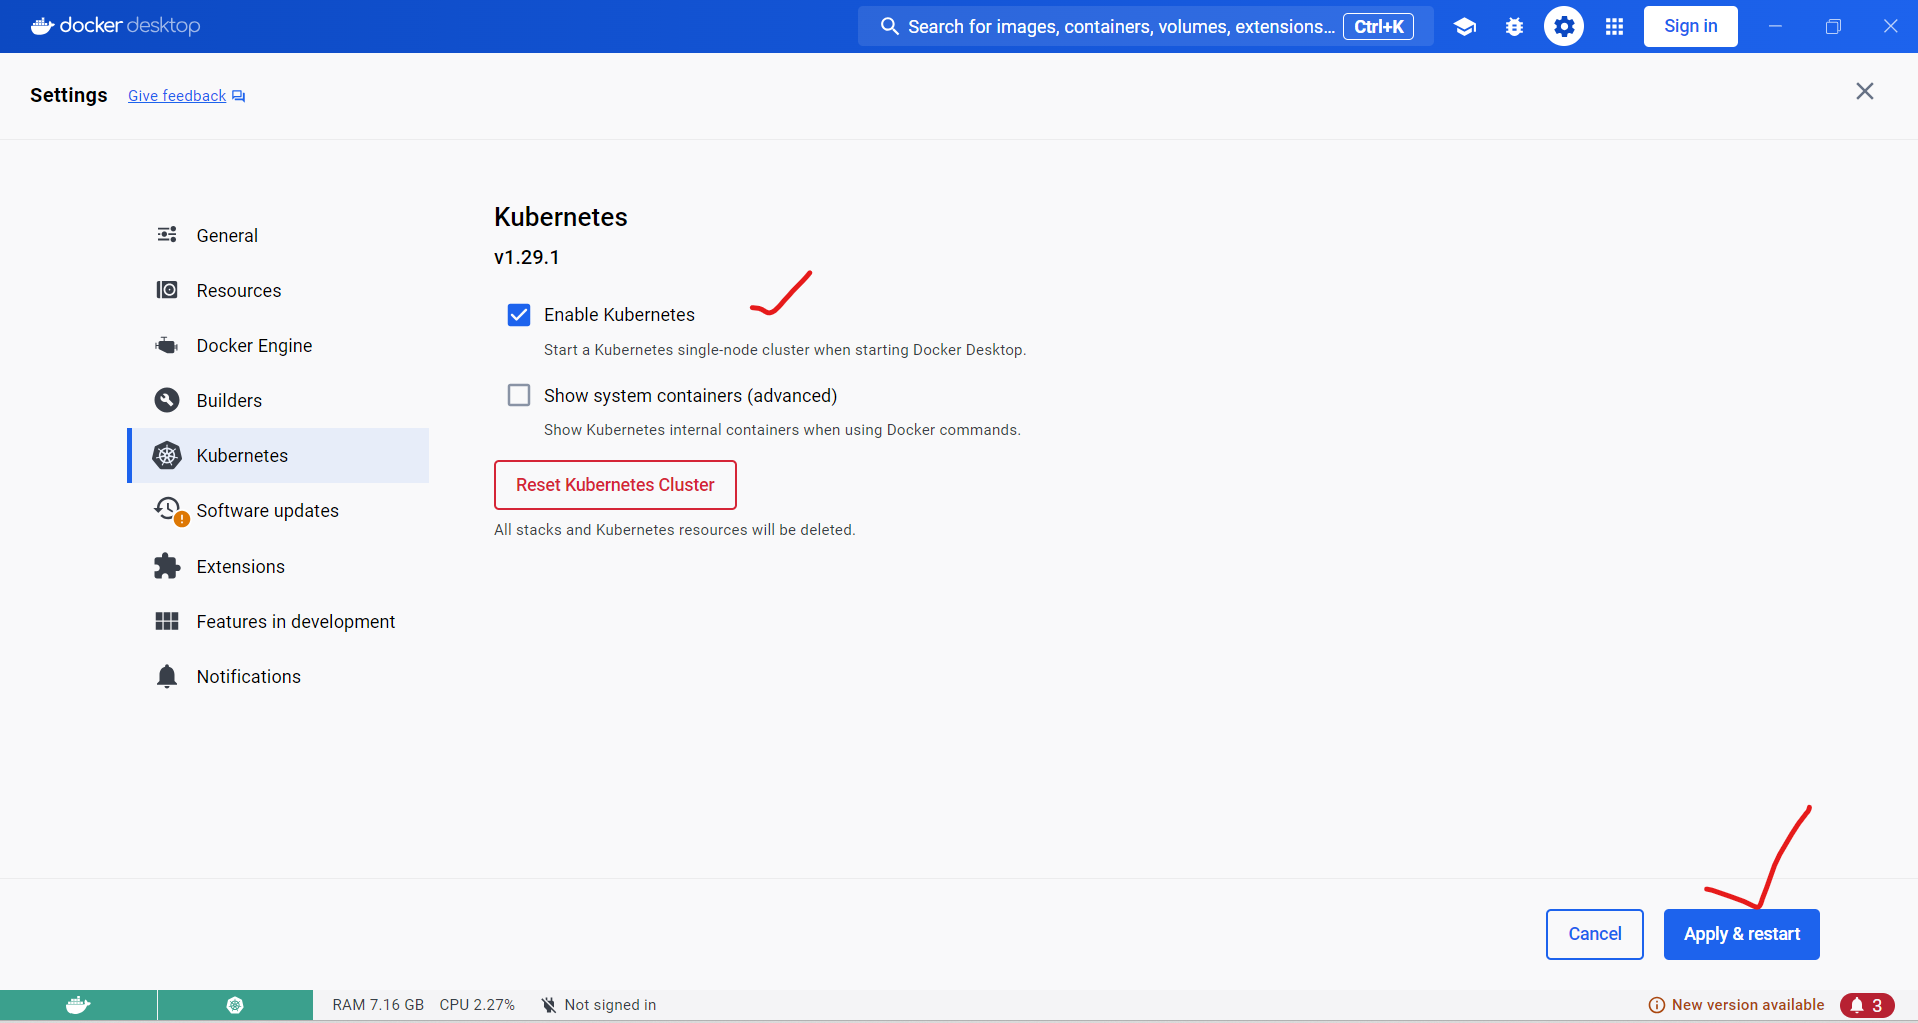
Docker Desktop will now download and install the necessary components for Kubernetes. This process may take a few minutes.
Step 2: Verify Kubernetes Installation 🔍
Once the installation is complete, let's verify that Kubernetes is running correctly:
Open a terminal or command prompt
Run the following command:
kubectl get nodes
You should see output similar to this:


This confirms that your Kubernetes cluster is up and running on Docker Desktop.
Step 3: Create a Simple Application 💻
For this tutorial, we'll create a simple "Hello World" web application using Node.js.
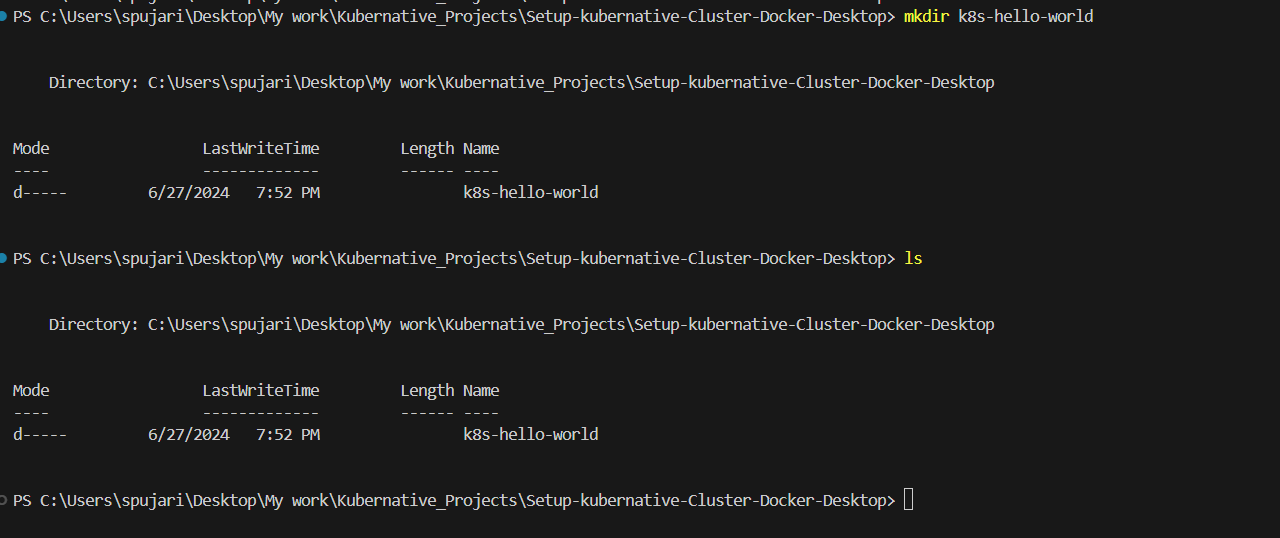
- Create a new directory for your project:
mkdir k8s-hello-world
cd k8s-hello-world

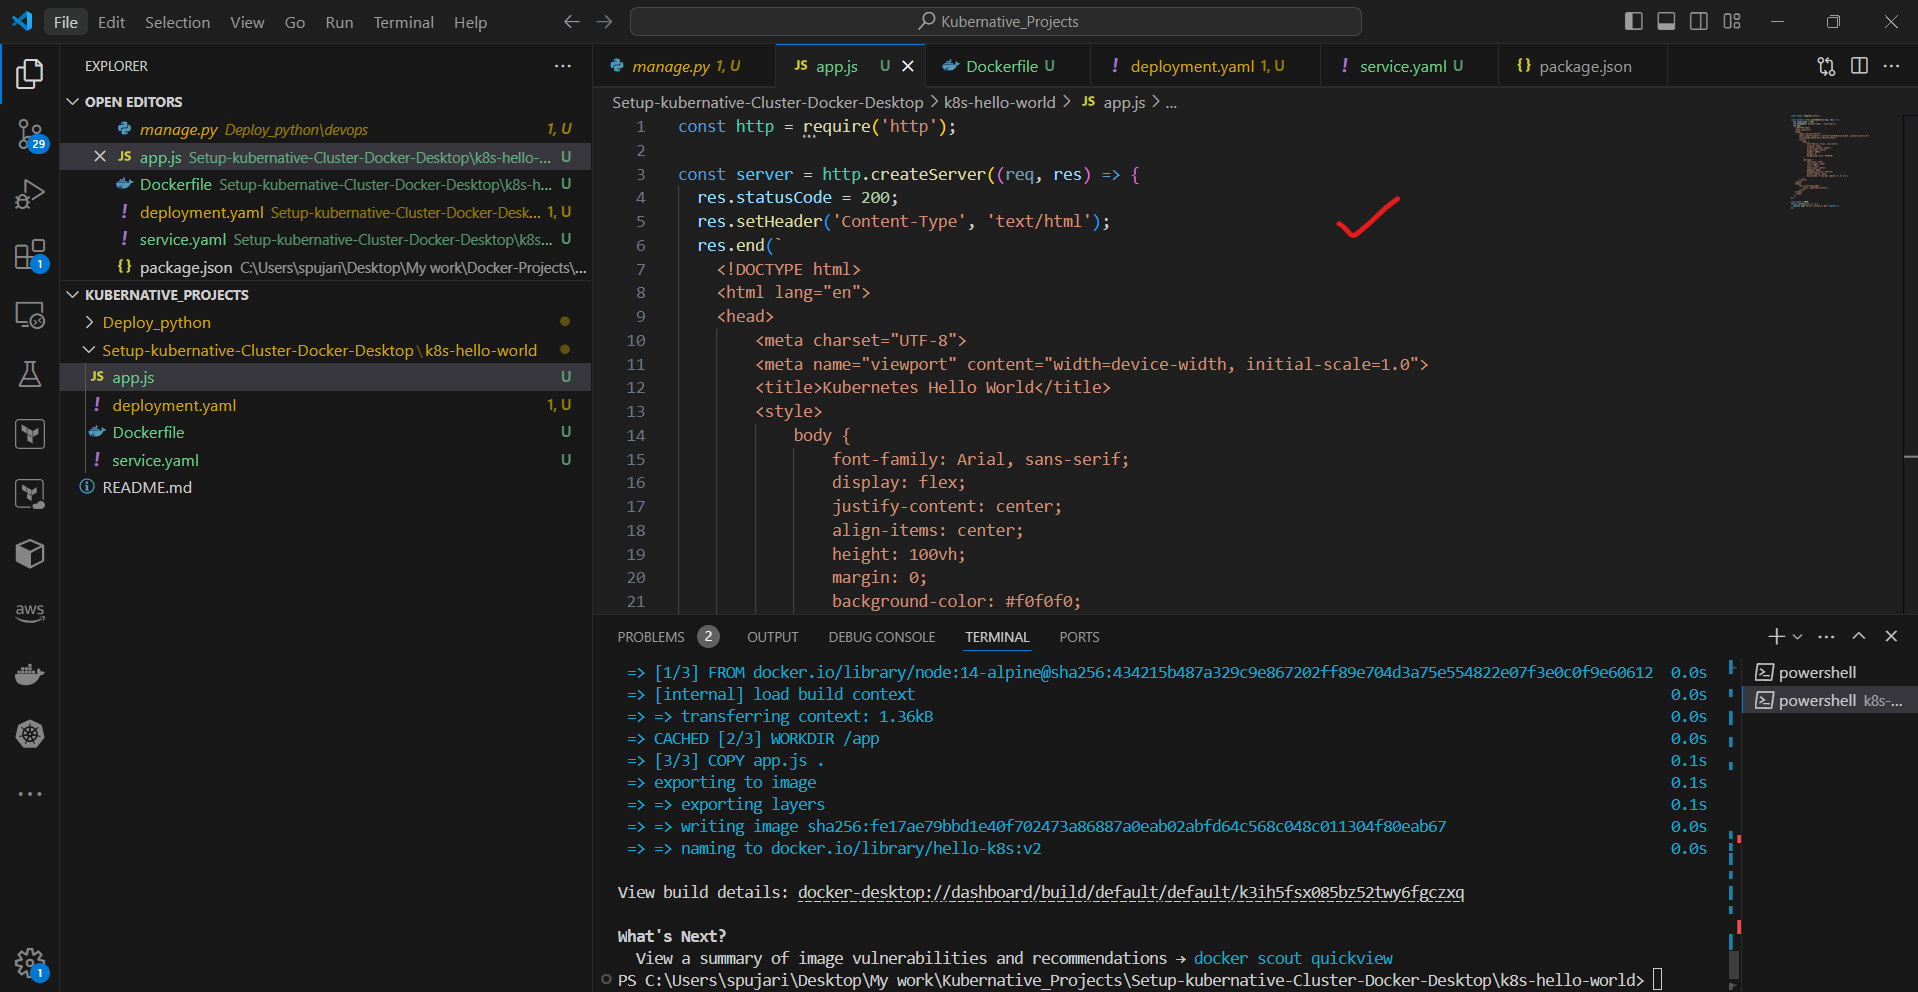
- Create a file named
app.jswith the following content:
const http = require('http');

const server = http.createServer((req, res) => {
  res.statusCode = 200;
  res.setHeader('Content-Type', 'text/html');
  res.end(`
    <!DOCTYPE html>
    <html lang="en">
    <head>
        <meta charset="UTF-8">
        <meta name="viewport" content="width=device-width, initial-scale=1.0">
        <title>Kubernetes Hello World</title>
        <style>
            body {
                font-family: Arial, sans-serif;
                display: flex;
                justify-content: center;
                align-items: center;
                height: 100vh;
                margin: 0;
                background-color: #f0f0f0;
            }
            .message {
                font-size: 3rem;
                font-weight: bold;
                color: #333;
                text-align: center;
                padding: 20px;
                background-color: #ffffff;
                border-radius: 10px;
                box-shadow: 0 4px 6px rgba(0, 0, 0, 0.1);
            }
        </style>
    </head>
    <body>
        <div class="message">
            Hello, Kubernetes World! 🚀
        </div>
    </body>
    </html>
  `);
});

const port = 3000;
server.listen(port, () => {
  console.log(`Server running on port ${port}`);
});
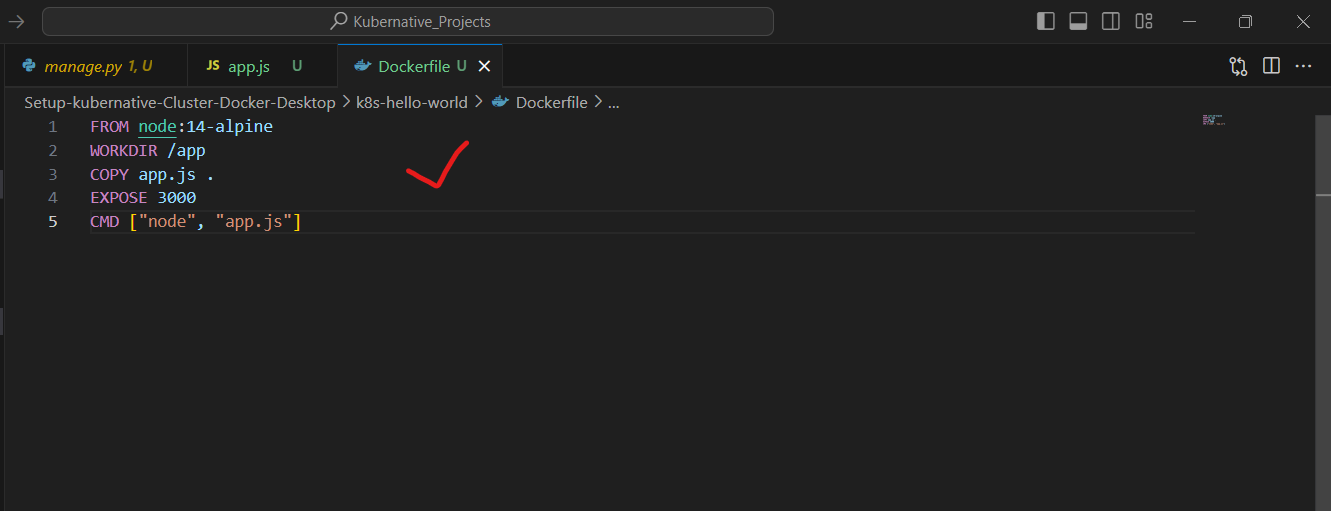
- Create a
Dockerfilein the same directory:
FROM node:14-alpine
WORKDIR /app
COPY app.js .
EXPOSE 3000
CMD ["node", "app.js"]
Step 4: Build and Push the Docker Image 🏗️
- Build the Docker image:
docker build -t hello-k8s:v1 .
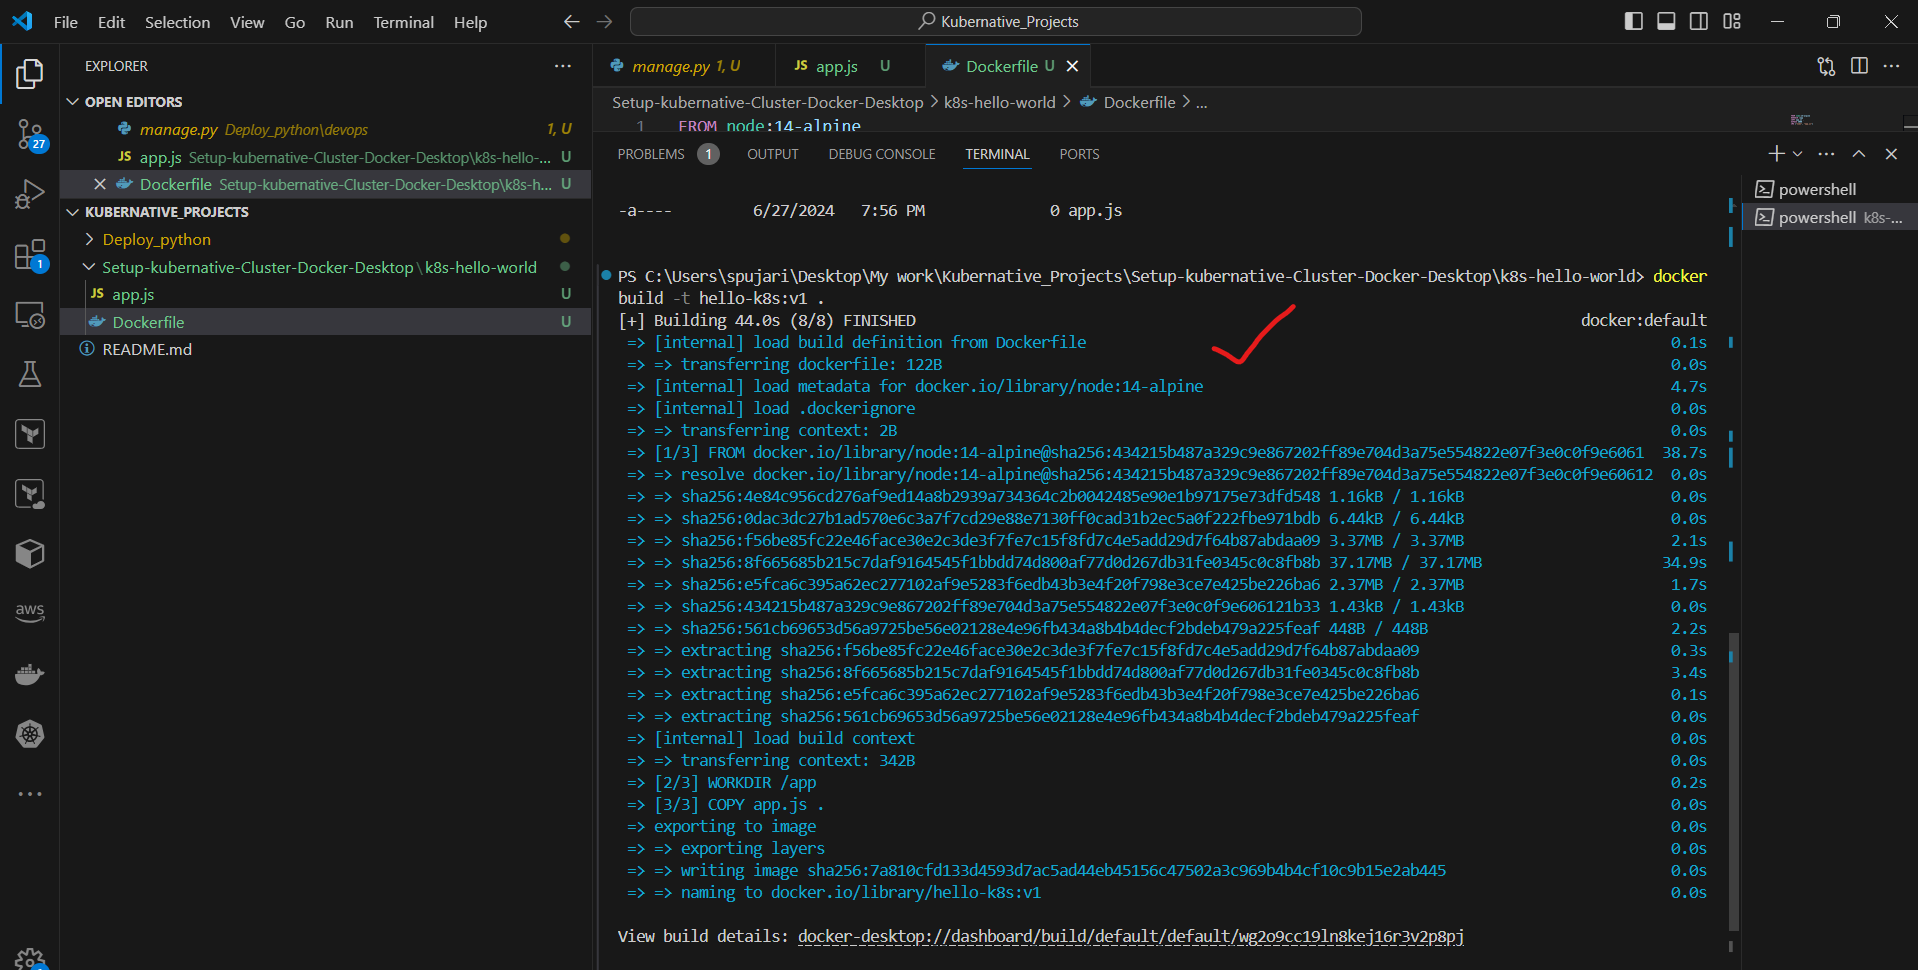
- Since we're using a local Kubernetes cluster, we don't need to push the image to a remote registry.
Step 5: Create Kubernetes Deployment 🚀
- Create a file named
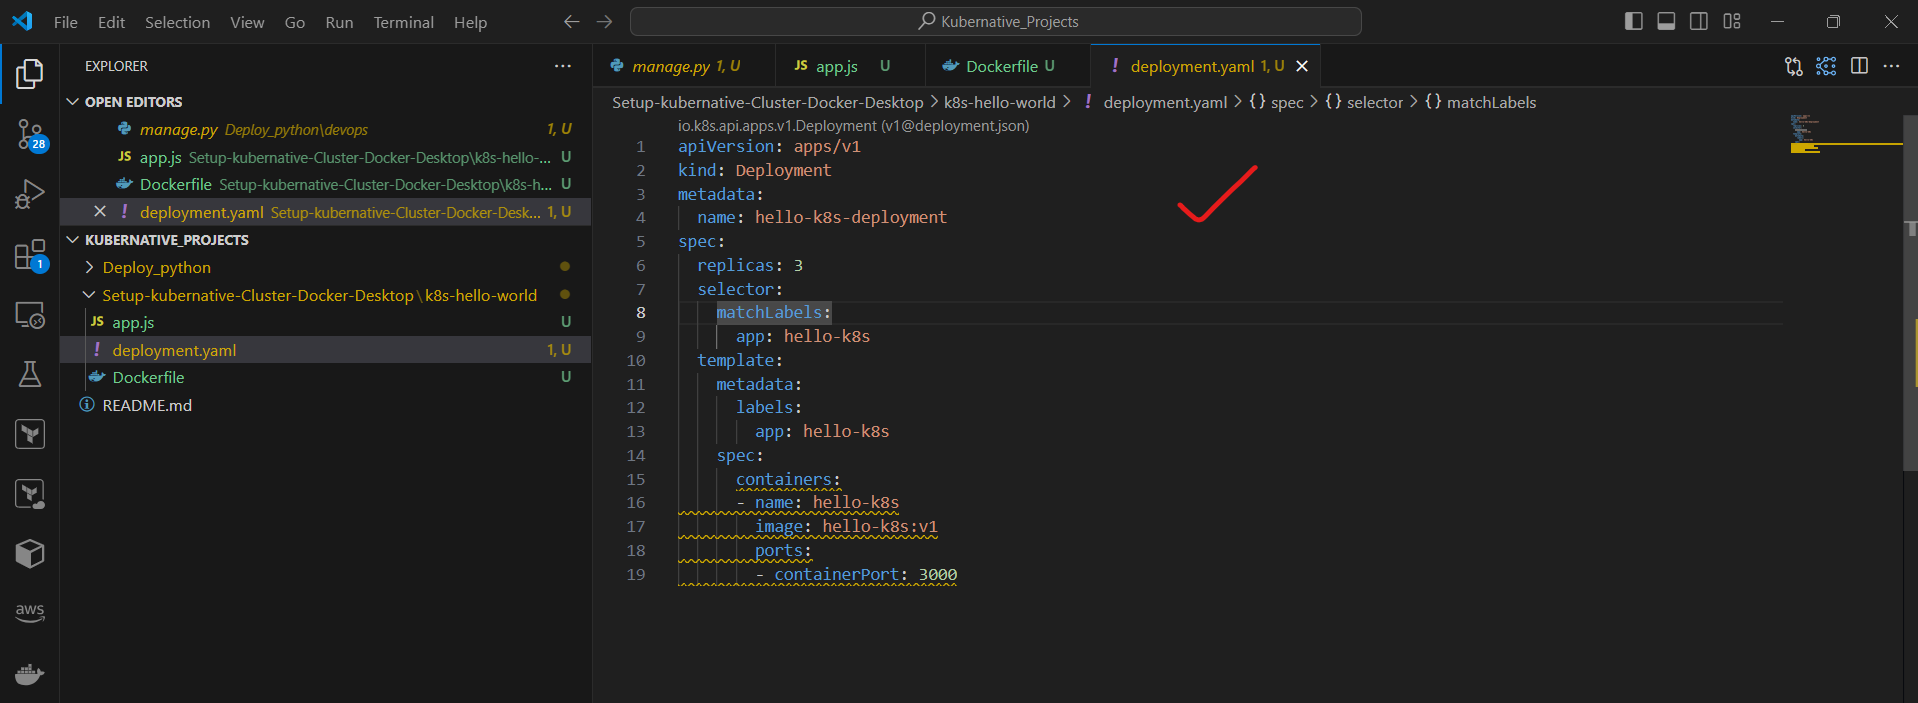
deployment.yamlwith the following content:
apiVersion: apps/v1
kind: Deployment
metadata:
  name: hello-k8s-deployment
spec:
  replicas: 3
  selector:
    matchLabels:
      app: hello-k8s
  template:
    metadata:
      labels:
        app: hello-k8s
    spec:
      containers:
      - name: hello-k8s
        image: hello-k8s:v1
        ports:
        - containerPort: 3000
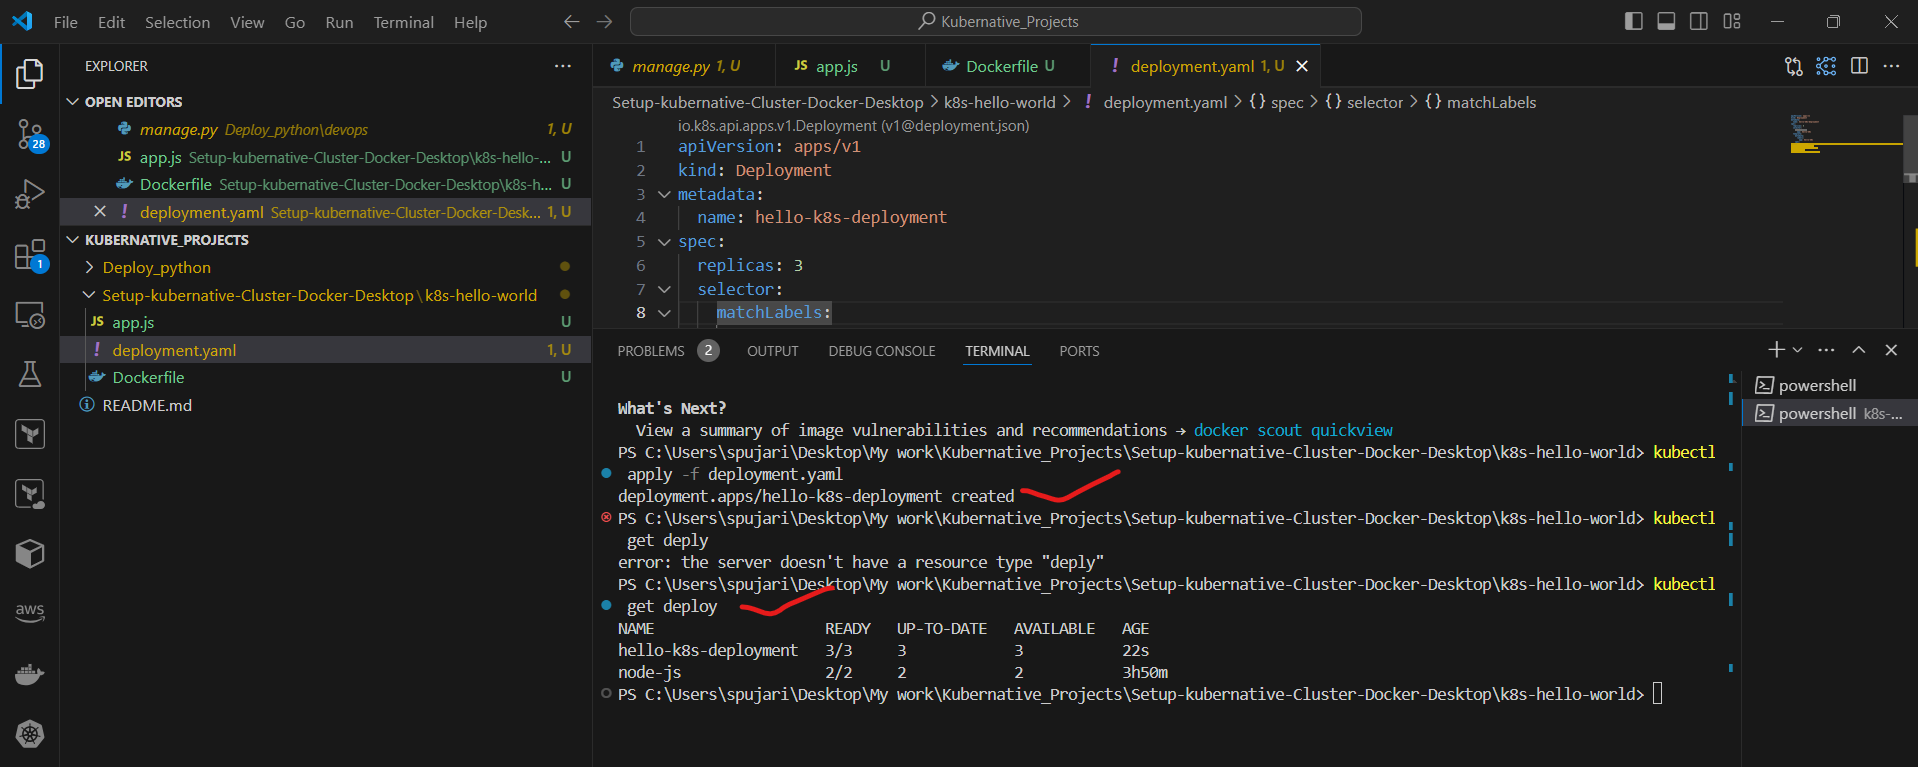
- Apply the Deployment:
kubectl apply -f deployment.yaml
Step 6: Create a Kubernetes Service 🌐
- Create a file named
service.yamlwith the following content:
apiVersion: v1
kind: Service
metadata:
  name: hello-k8s-service
spec:
  type: NodePort
  ports:
  - port: 80
    targetPort: 3000
  selector:
    app: hello-k8s

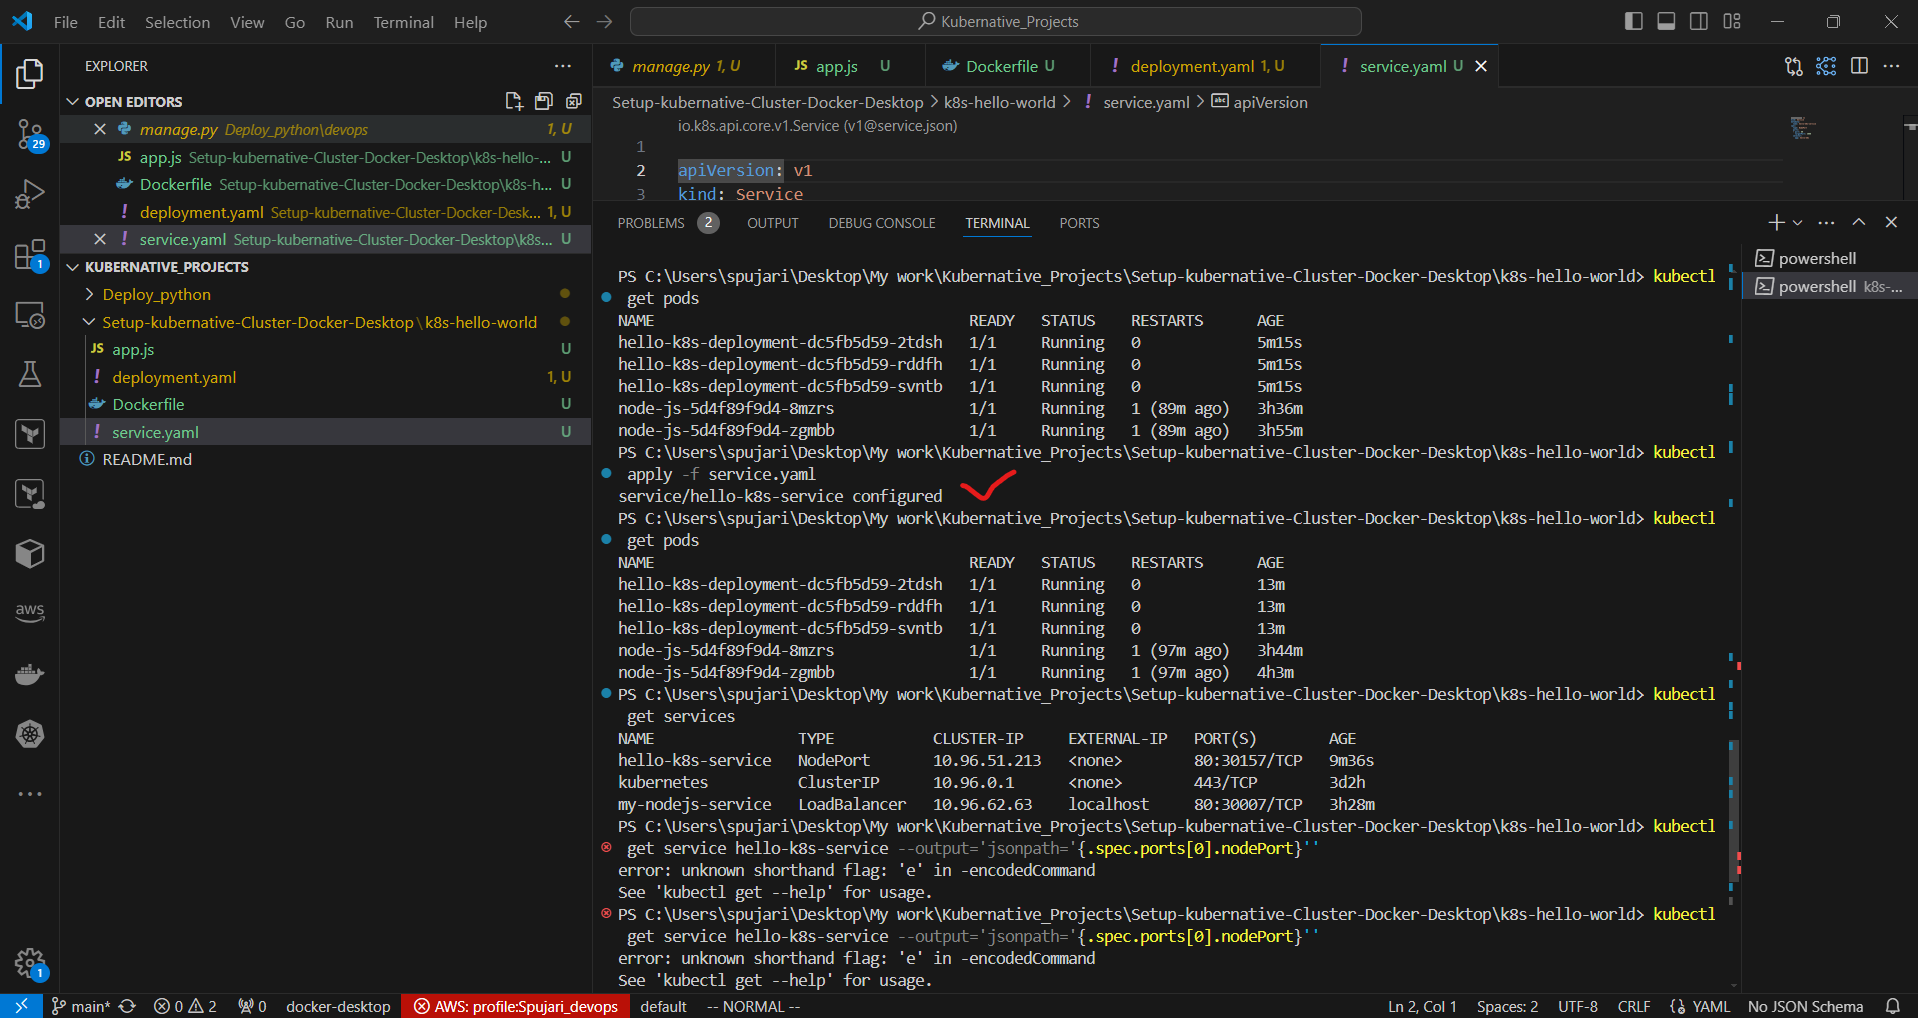
- Apply the Service:
kubectl apply -f service.yaml
Step 7: Verify the Deployment 🔍
- Check the status of the Pods:
kubectl get pods
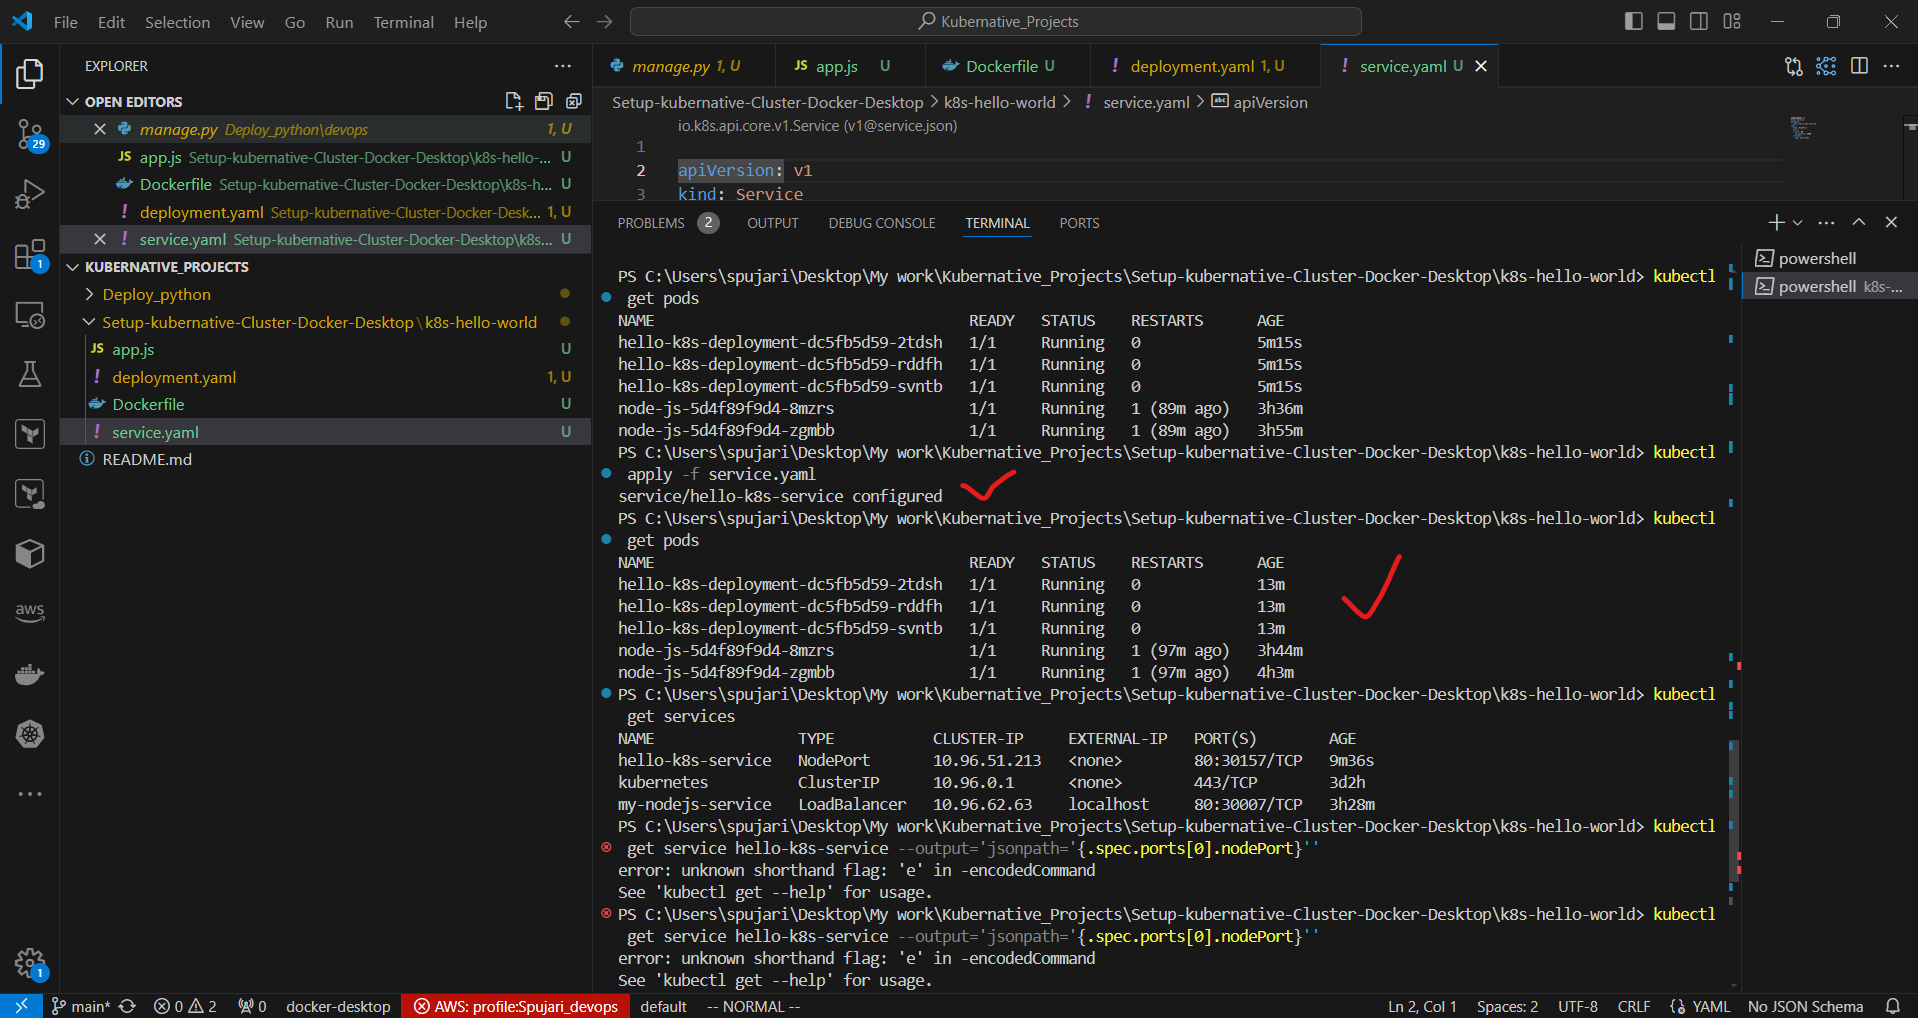
You should see three Pods running.
- Check the status of the Service:
kubectl get services
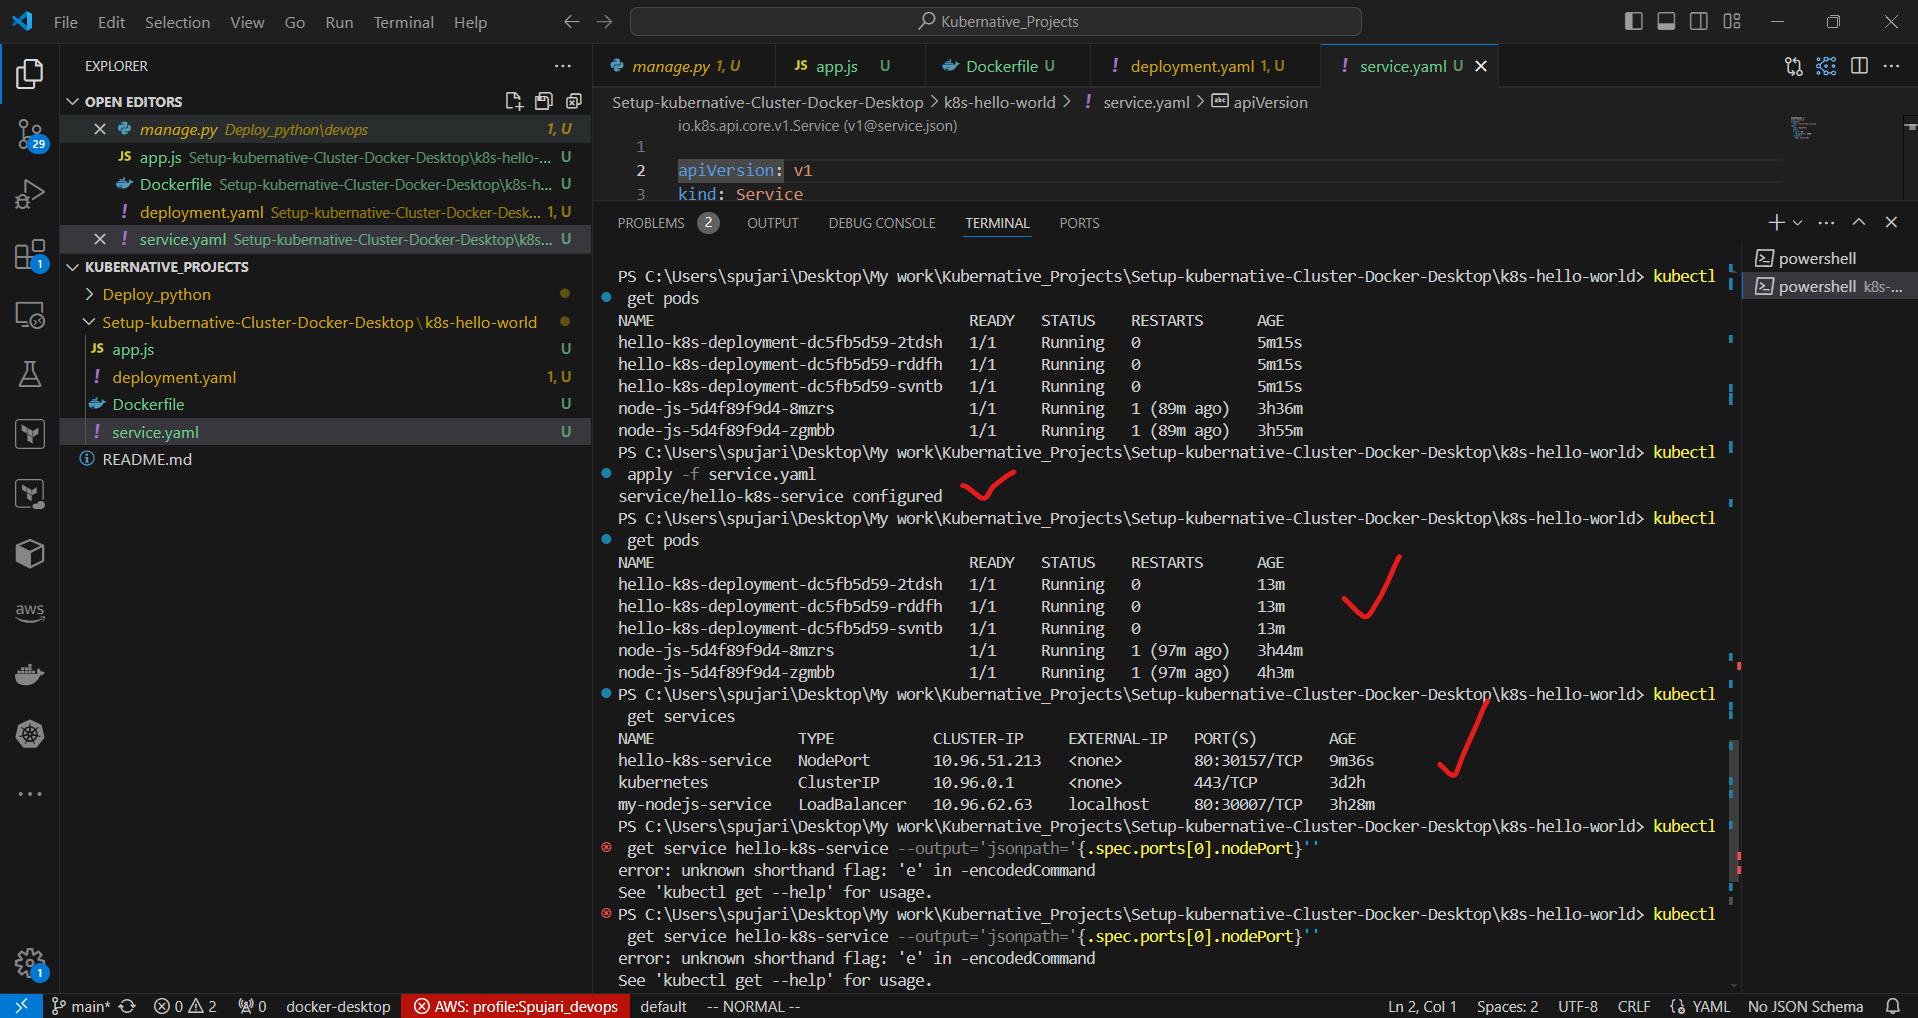
You should see the hello-k8s-service with an external IP (it might be localhost or a specific IP address).
Step 8: Access the Application 🌍
To access the application, you need to use the NodePort that Kubernetes assigned to the service. Here's how to find and use it:
- Get the NodePort:
kubectl get service hello-k8s-service -o=jsonpath='{.spec.ports[0].nodePort}'
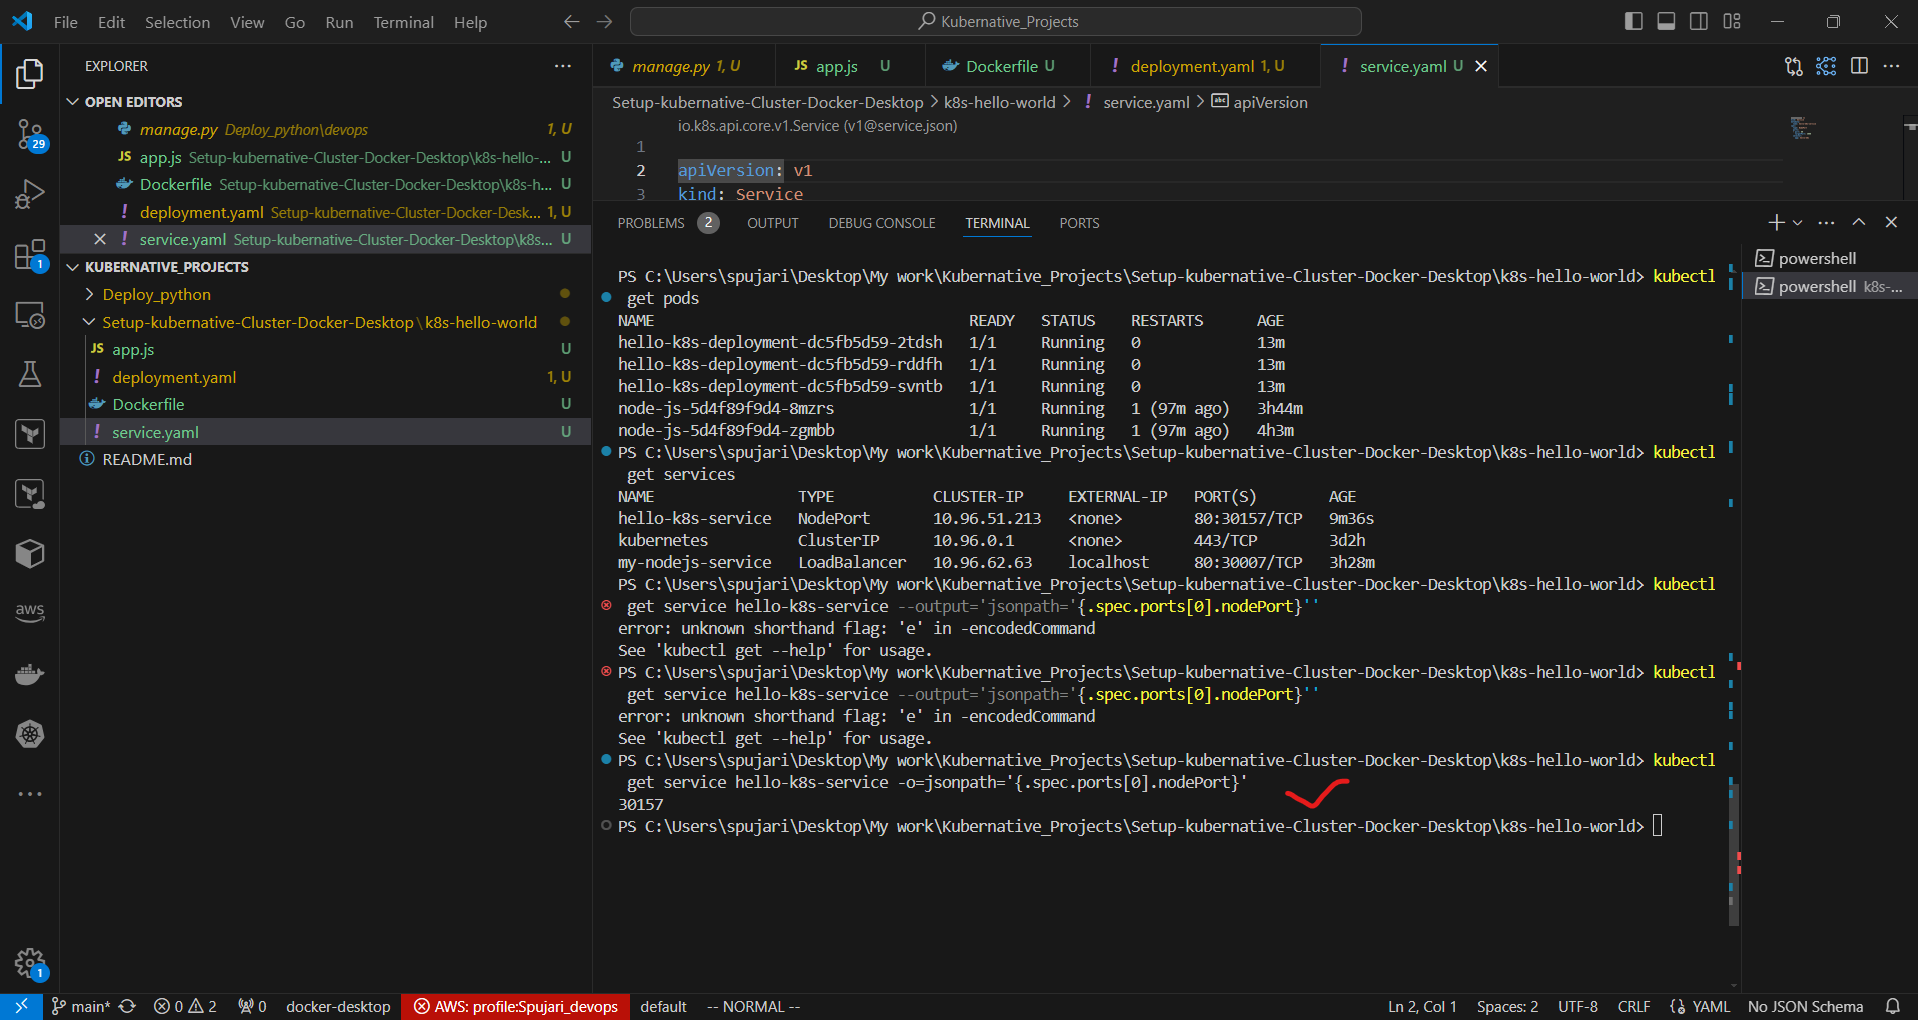
This command will output a port number, for example, 30157.
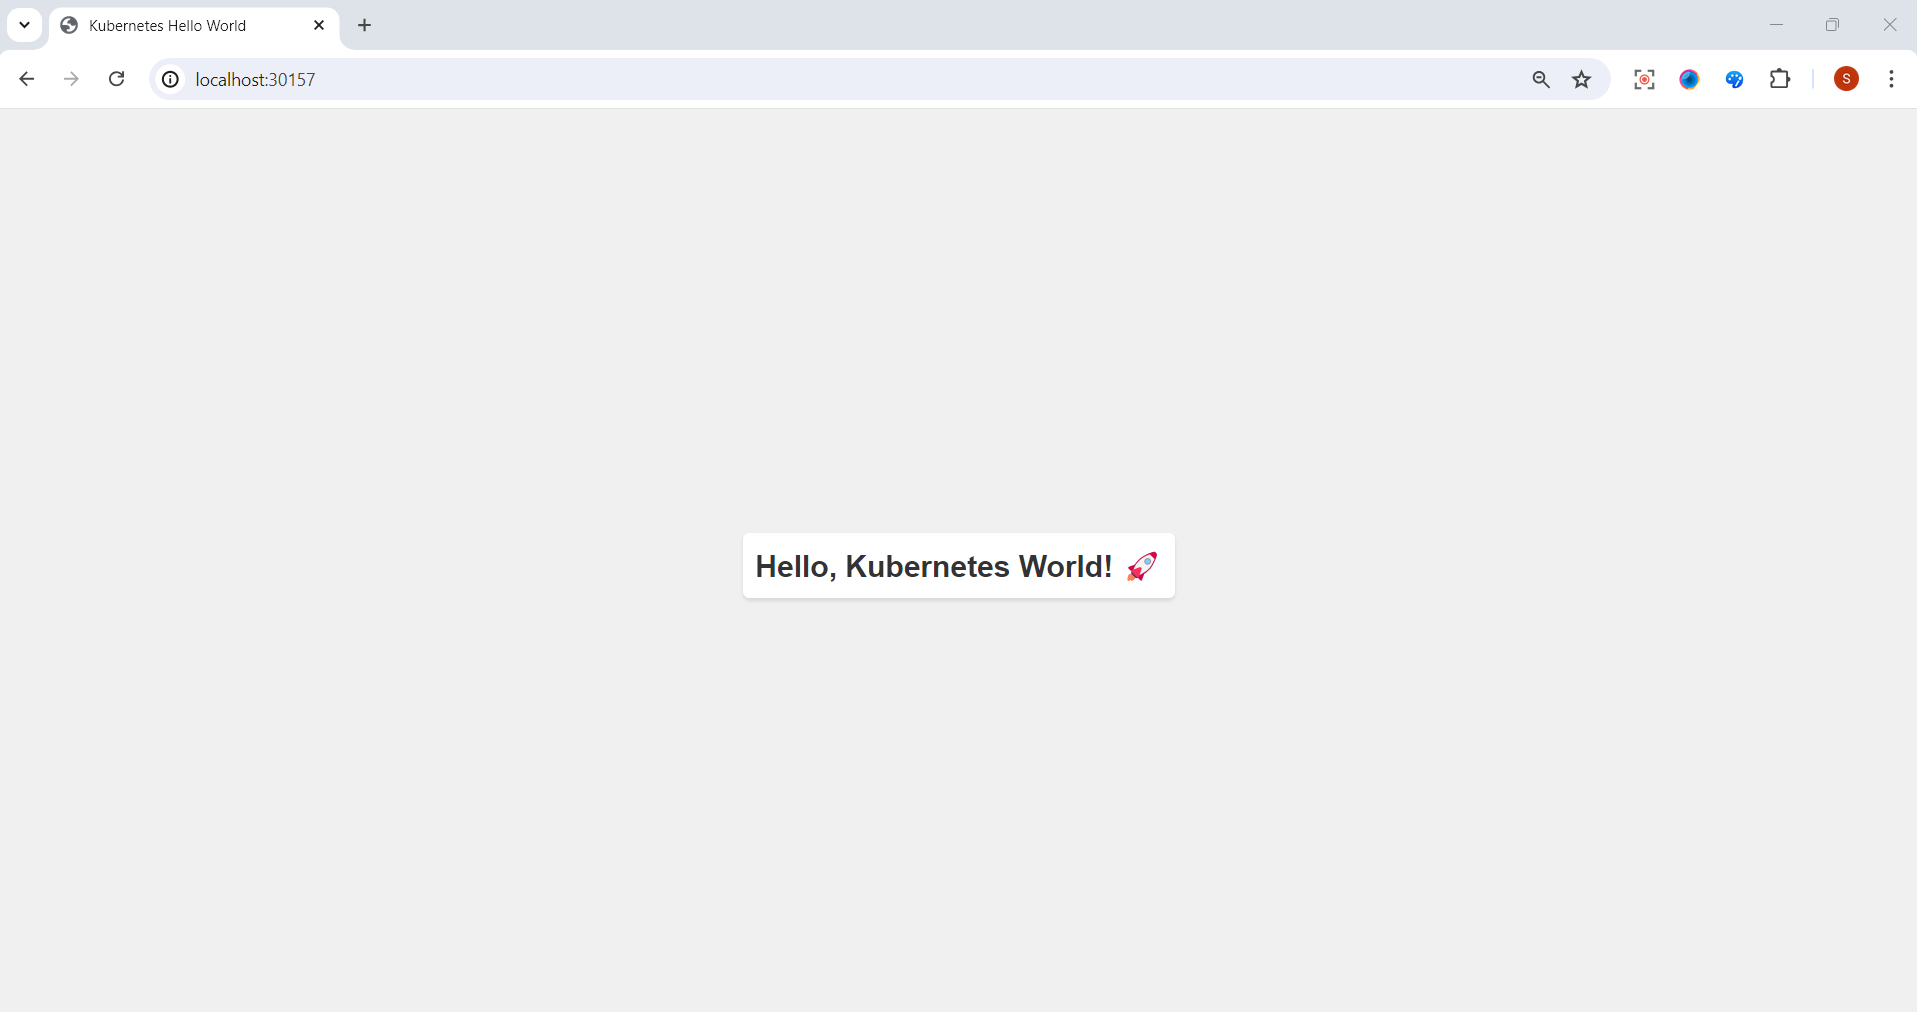
- Access the application:
Open a web browser and navigate to http://localhost:NODEPORT, replacing NODEPORT with the number you got from the previous command. For example, http://localhost:30157.
You should now see the message "Hello, Kubernetes World!".
Additional Note on LoadBalancer Services in Local Development
When developing locally with Docker Desktop or similar local Kubernetes setups, LoadBalancer services don't behave the same way they do in cloud environments. In cloud-based Kubernetes services (like GKE, EKS, or AKS), a LoadBalancer service would typically provision an external load balancer and provide an external IP.
For local development, you have a few options:
Use NodePort services, as demonstrated above.
Use Ingress controllers for more advanced routing (requires additional setup).
Use tools like Minikube which provide addons to simulate LoadBalancer behavior locally.
Thank you for bringing this to attention. It's an important distinction that helps in understanding the differences between local and cloud-based Kubernetes environments. Happy Kuberneting! 🚀👨💻👩💻
Step 9: Scale the Application ⚖️
Let's scale our application to 5 replicas:
kubectl scale deployment hello-k8s-deployment --replicas=5
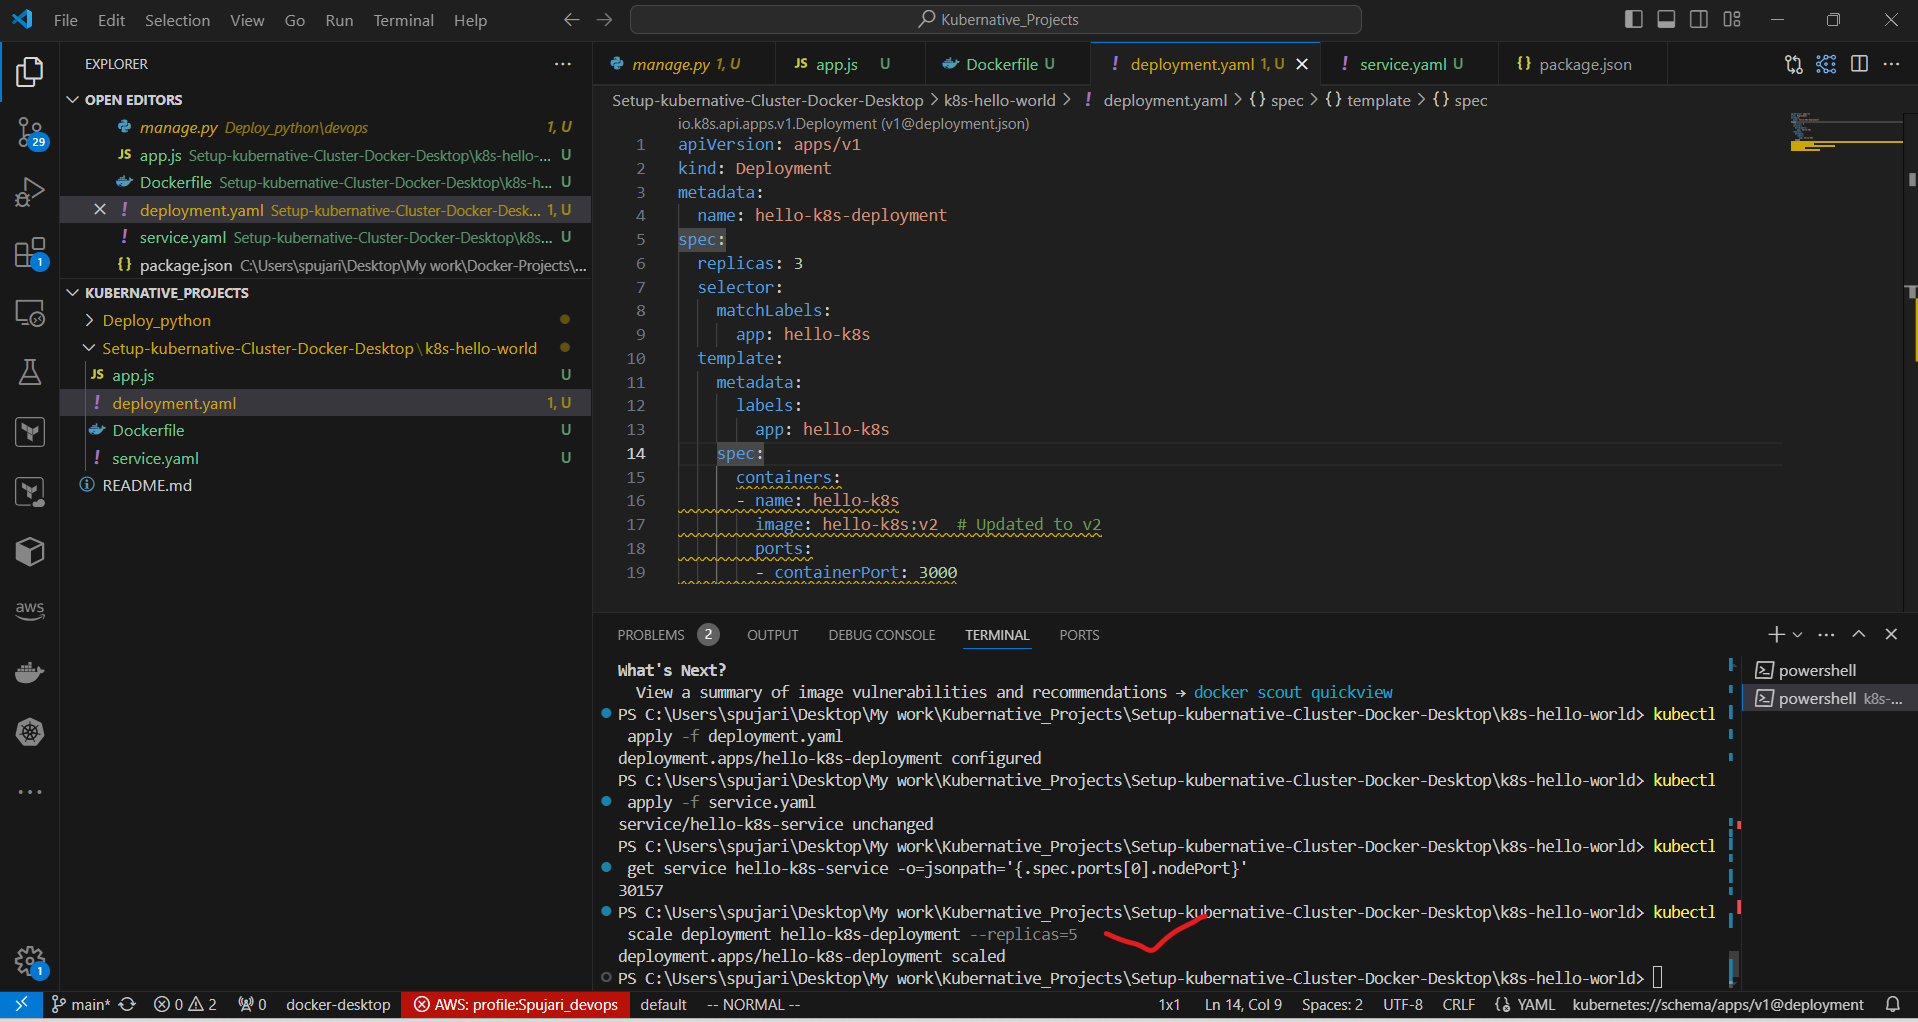
Verify the scaling:
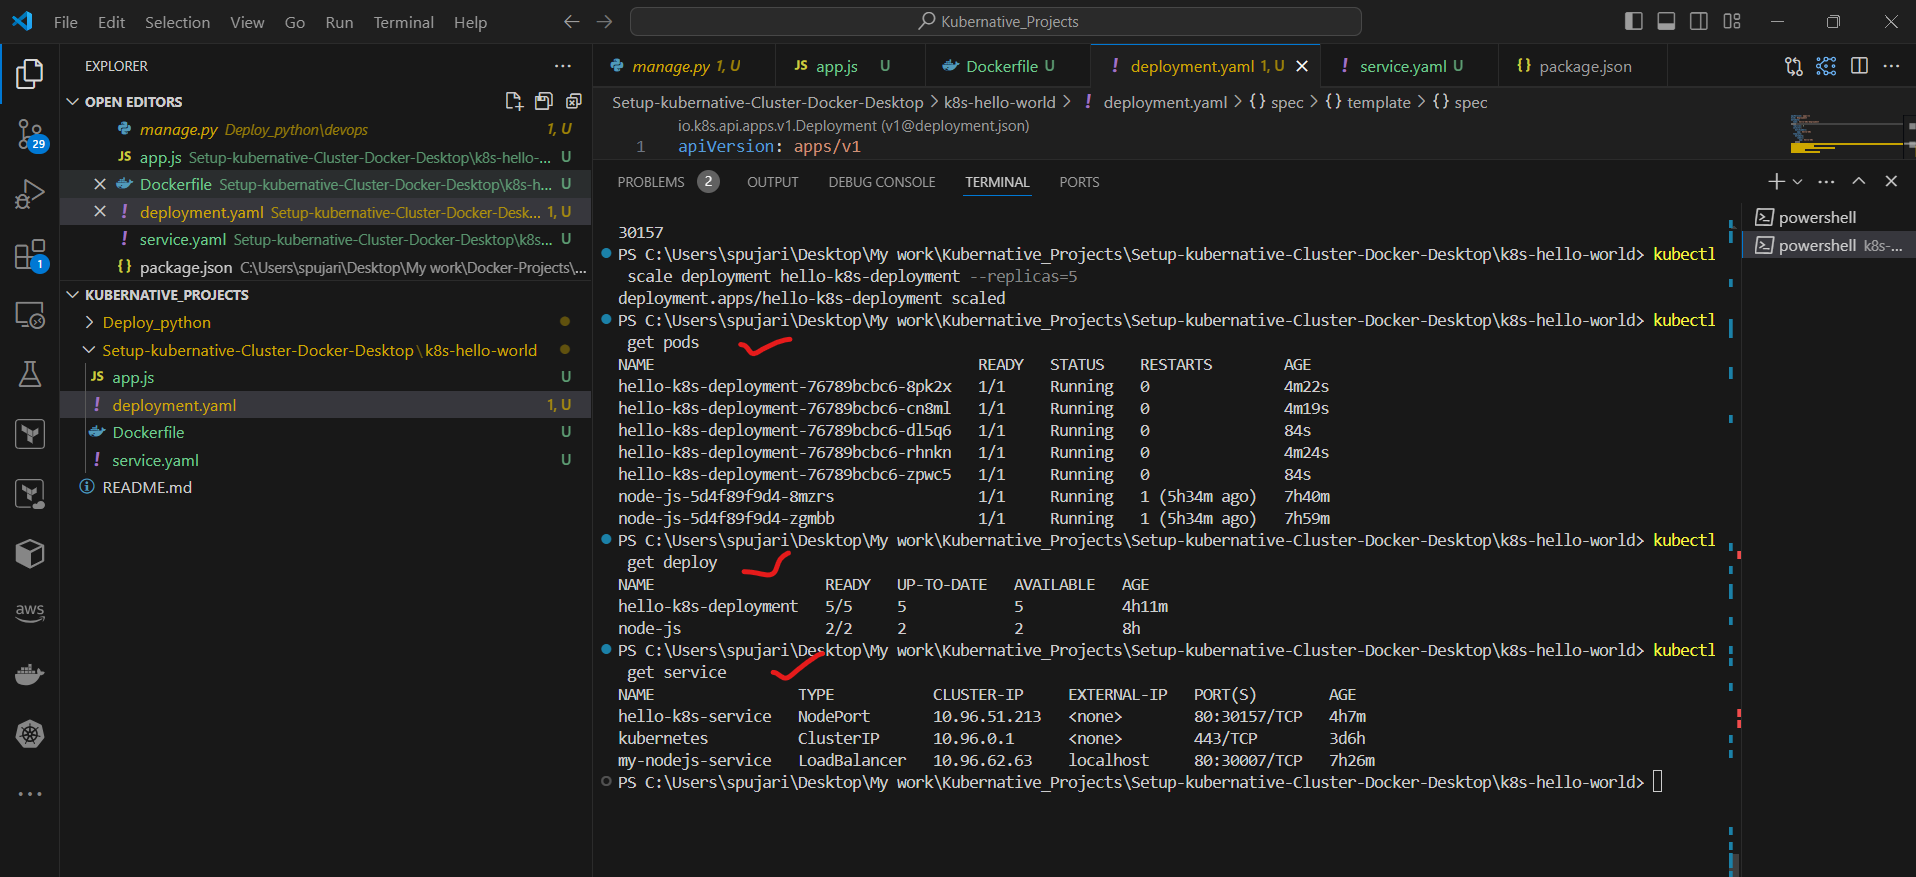
kubectl get pods
You should now see 5 Pods running.
Step 10: Clean Up 🧹
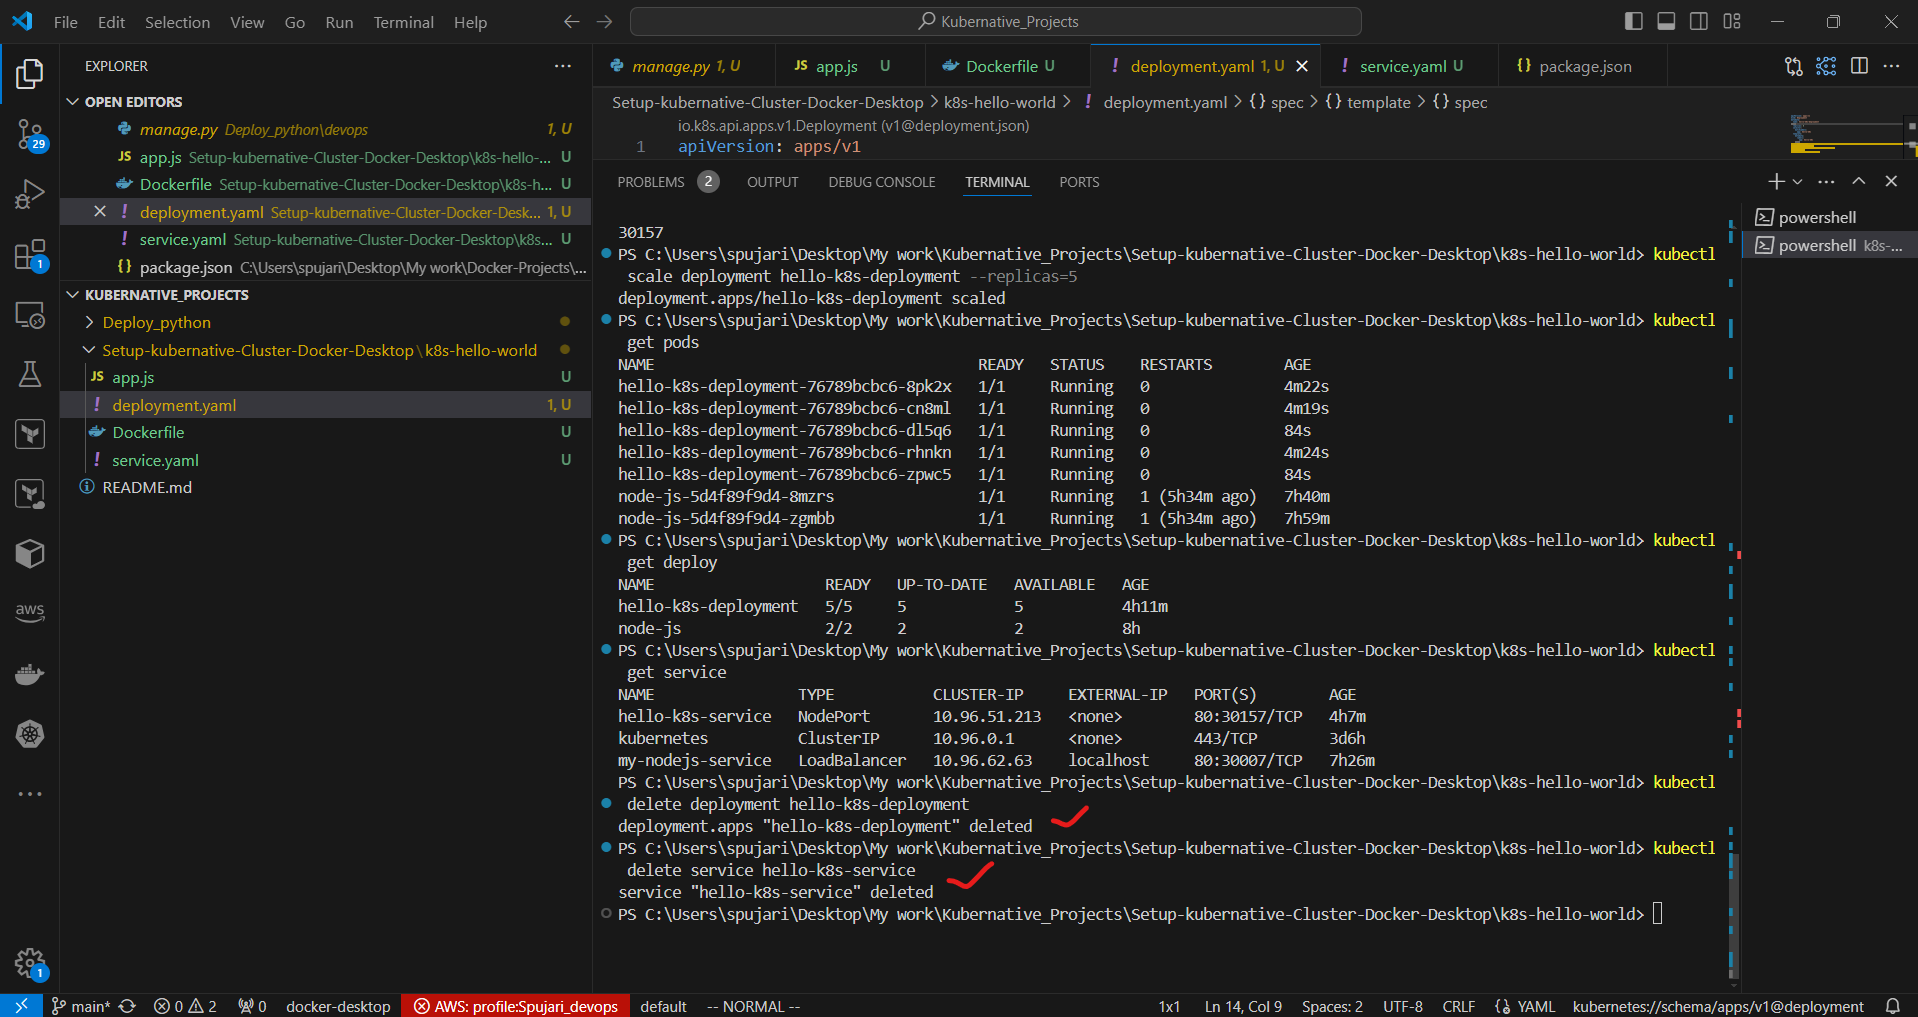
When you're done experimenting, you can delete the resources:
kubectl delete deployment hello-k8s-deployment
kubectl delete service hello-k8s-service
Conclusion 🎉
Congratulations! You've successfully set up a Kubernetes cluster on Docker Desktop, deployed a simple application, exposed it via a Service, and even scaled it. This hands-on experience provides a solid foundation for working with Kubernetes in more complex scenarios.
Remember, Kubernetes is a powerful tool with many more features and concepts to explore. Keep learning and experimenting to unlock its full potential in your development and deployment workflows. Happy Kuberneting! 🚀👨💻👩💻
Thank you for joining me on this journey through the world of cloud computing! Your interest and support mean a lot to me, and I'm excited to continue exploring this fascinating field together. Let's stay connected and keep learning and growing as we navigate the ever-evolving landscape of technology.
LinkedIn Profile: https://www.linkedin.com/in/prasad-g-743239154/
Project Details: Github URL-https://github.com/sprasadpujari/Kubernative_Projects/tree/main/Setup-kubernative-Cluster-Docker-Desktop/k8s-hello-world
Feel free to reach out to me directly at spujari.devops@gmail.com. I'm always open to hearing your thoughts and suggestions, as they help me improve and better cater to your needs. Let's keep moving forward and upward!
If you found this blog post helpful, please consider showing your support by giving it a round of applause👏👏👏. Your engagement not only boosts the visibility of the content, but it also lets other DevOps and Cloud Engineers know that it might be useful to them too. Thank you for your support! 😀
Thank you for reading and happy deploying! 🚀
Best Regards,
Sprasad
Subscribe to my newsletter
Read articles from Sprasad Pujari directly inside your inbox. Subscribe to the newsletter, and don't miss out.
Written by

Sprasad Pujari
Sprasad Pujari
Greetings! I'm Sprasad P, a DevOps Engineer with a passion for optimizing development pipelines, automating processes, and enabling teams to deliver software faster and more reliably.