Display Blog Articles in Blazor Site using GraphQL
 Ishrar G
In today's world of decoupled architectures, headless CMS systems provide a flexible and scalable approach to content management.
This article demonstrates how to leverage Blazor, a .NET framework for building interactive web UIs with C#, to seamlessly integrate content from a headless CMS like Hashnode's GraphQL API into your Blazor application.
I have my site in Blazor Server and I decided to show most recent articles from my blog on my site. I did it successfully and it was really a fun. I wanted to share fun with you.
Let's begin...
Let's assume you already have Blazor site and Hashnode blog available with you.
Prerequisites:
Basic understanding of Blazor development
A Hashnode blog with a few articles
A Blazor project set up (use Visual Studio or the .NET CLI)
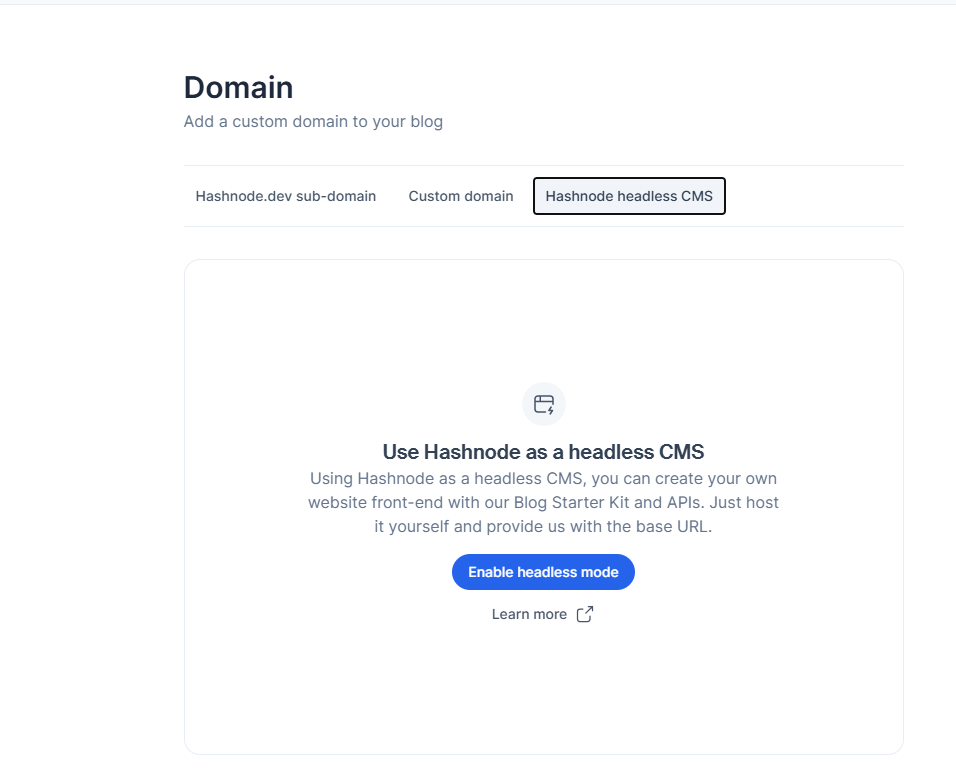
Activate Hashnode Headless feature
Goto Blog Dashboard
Open Settings
Goto Domain
Select Hashnode Headless CMS
Enable headless mode

Lets Jump to our Blazor app.
Install Nuget Packages :
Begin by installing the System.Text.Json, Newtonsoft.Json library in your Blazor project. You can also use Apollo GraphQL Client NuGet package. In this example I have not used it and I achieved with httpclient
Bash
dotnet add package System.Text.Json
dotnet add package Newtonsoft.Json
Interface idea: We are going to display 9 most recent articles in 3 rows with 3 articles in each row.
Lets create a Article Model in Article.cs
 public class Article
 {
     public string Id { get; set; }
     public string Slug { get; set; }
     public string Title { get; set; }
     public string Url { get; set; }
     public string OgImage { get; set; }
 }
Create Service to Bring Articles from Hashnode Blog from GraphQL API
Create one Service Class into ArticleService.cs
public class ArticleService
{
    private readonly HttpClient _httpClient;

    public ArticleService(HttpClient httpClient)
    {
        _httpClient = httpClient;
    }

    public async Task<List<Article>> GetArticlesAsync()
    {
        string blogAccountName = "yourblogaccountname";
        string AuthenticationToken = "c85e054t-43c4-488b-9254-74c00b07c01e";

        var query = new
        {
            query = @"
            query GetUserFeed {
                user(username: """ + blogAccountName + @""") {
                    posts(pageSize: 9, page: 1) {
                        edges {
                            node {
                                id,
                                slug,
                                title,
                                url,
                                ogMetaData {
                                    image
                                }
                            }
                        }
                    }
                }
            }
        "
        };

        var content = new StringContent(JsonSerializer.Serialize(query), Encoding.UTF8, "application/json");
        _httpClient.DefaultRequestHeaders.Authorization = new AuthenticationHeaderValue("Bearer", AuthenticationToken);
        var response = await _httpClient.PostAsync("https://gql.hashnode.com/", content);

        response.EnsureSuccessStatusCode();
        var responseContent = await response.Content.ReadAsStringAsync();

        var articles = new List<Article>();

        var json = JObject.Parse(responseContent);
        var edges = json["data"]["user"]["posts"]["edges"];

        foreach (var edge in edges)
        {
            var node = edge["node"];
            var article = new Article
            {
                Id = node["id"].ToString(),
                Slug = node["slug"].ToString(),
                Title = node["title"].ToString(),
                Url = node["url"].ToString(),
            };

            if (node["ogMetaData"] != null)
            {
                var og = node["ogMetaData"];
                article.OgImage = og["image"]?.ToString();
            }

            articles.Add(article);
        }

        return articles;
    }
}
Above code prepares GraphQL query and sends request to Hashnode API service to return article's Id, Slug, Title, URL and article's OgImage. It returns the list of Articles.
Get Authentication Token
If you do not have the Authentication token. It is easy to get one in Hashnode. You can jump to Developer section in Settings and click on Generate New Token

Add Service to Dependency Injection
Now, Add service to the dependency injection container (in Program.cs). Specifically, it is registering an HTTP client for the ArticleService class.
builder.Services.AddHttpClient<ArticleService>();
Create Component to Display Blog Articles
Create Component Articles.razor to articles loaded by service
@inject ArticleService ArticleService

<p><em>Loading...</em></p>

@if (articles != null)
{
  <div class="row">
    @foreach (var article in articles)
    {
      <div class="col-md-4 mb-4">
        <div class="card">
          @if (!string.IsNullOrEmpty(article.OgImage))
          {
            <img src="@article.OgImage" class="card-img-top" alt="@article.Title" />
          }
          else
          {
            <img src="images/Default.png" class="card-img-top" alt="@article.Title" />
          }
          <div class="card-body">
            <a href="@article.Url" target="_blank">
              <h5 class="card-title">@article.Title</h5>
            </a>
          </div>
        </div>
      </div>
    }
  </div>
}

@code {
  private List<Article> articles;

  protected override async Task OnInitializedAsync()
  {
    articles = await ArticleService.GetArticlesAsync();
  }
}
Above component brings articles using ArticleService and display them in 3X3 using bootstrap css.
Make sure you have included latest bootstrap included in App.razor or Parent Layout of the page
<link href="https://stackpath.bootstrapcdn.com/bootstrap/4.5.2/css/bootstrap.min.css" rel="stylesheet" />
Finally place the Article.razor component wherever you want to display the articles from blog.
<div class="mt-12 text-center gap-5">
  <h2 class="text-3xl font-bold">Blog posts</h2>
  <div id="articles" class="grid grid-cols-1 md:grid-cols-2 lg:grid-cols-3 gap-4">
    <Articles></Articles>
  </div>
</div>
For more details you can refer these
Subscribe to my newsletter
Read articles from Ishrar G directly inside your inbox. Subscribe to the newsletter, and don't miss out.
Written by

Ishrar G
Ishrar G
I specialize in developing, deploying, and integrating IT solutions with 16 years of experience in Microsoft technologies (.NET, Azure, SQL Server). I've led teams at SharpStack Technologies and Fraxinus IT Solutions to deliver successful projects for over 2,000 businesses. My passion is helping businesses leverage technology to solve problems and achieve growth.