How to Quickly Create a macOS VM on Your Windows PC
 Vivek Rathee
Windows is the most user-friendly operating system for PCs and laptops, at least in my personal opinion, but iPhones are better than Android when it comes to smooth user interaction.
To create smooth and vibrant iOS apps, and use software that is OS-bound like Xcode, a Windows user will need to create a VM running macOS.
First, let's start with a few prerequisites before we begin creating our VM:
Disable Memory Integrity: Go to Windows Security > In Device Security, click Go to Settings > Turn off*Memory Integrity*.
(You can turn it on again later)
Disable Hyper-V: Open Command Prompt with "Run as administrator" and run this command: 'bcdedit /set hypervisorlaunchtype off'.
Download and Install VirtualBox:
Go to this link: "https://www.virtualbox.org/wiki/Downloads".
From the VirtualBox platform packages, download Windows hosts.
Also, download the VirtualBox Extension Pack.
First, install Windows hosts followed by the Extension Pack.
Download .iso for macOS
Go to this link "https://archive.org/details/macos_iso".
Download the BigSur_11.7.1.iso file out of the 6 available options.
(It's a 13 GB file, might take a while depending on your internet connection speed. Have a snack)
With this, we are ready to build our VM that will run macOS.
Open VirtualBox.
Click on "New" to create a new VM.
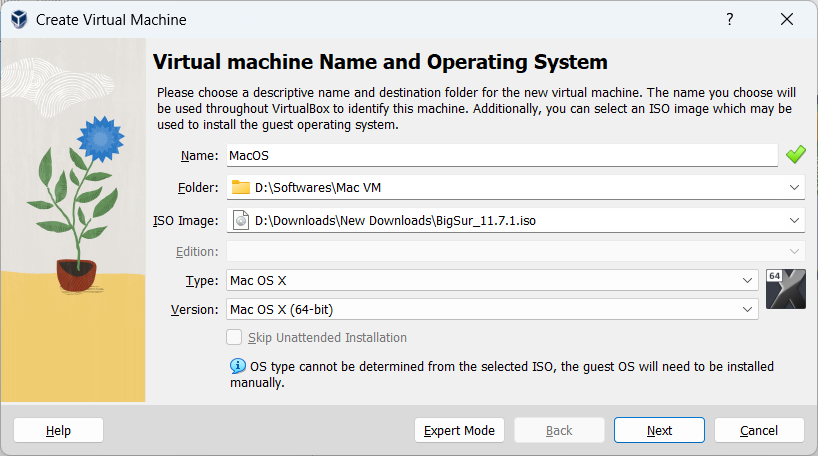
Configure the following:
Name - Name your VM whatever you want; I am going to use "MacOS".
Folder - Choose where you want to store your VM (Make sure the disk you are using to store your VM has 100GB of space available).
ISO Image - Use the ISO downloaded in the prerequisites.
Type - Select "Mac OS X".
Version - Select "Mac OS X (64-bit)".
Click Next.
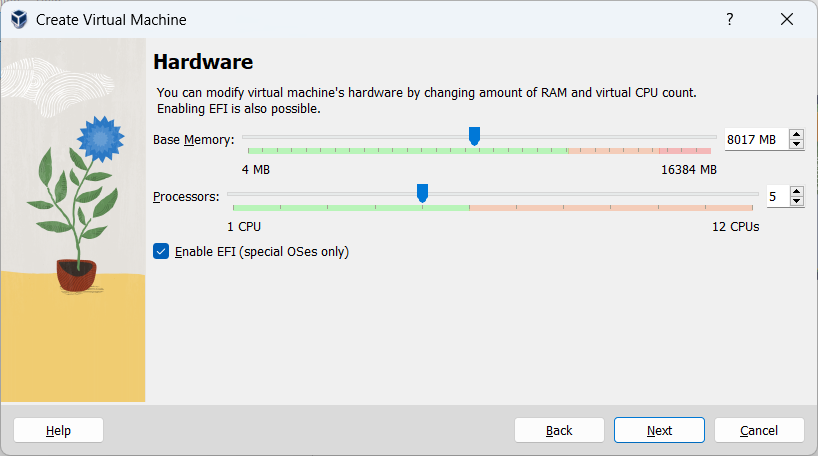
Configure the Hardware:
Base Memory - Minimum 6GB is recommended.
Processors - Minimum 4 are recommended.
Click Next.
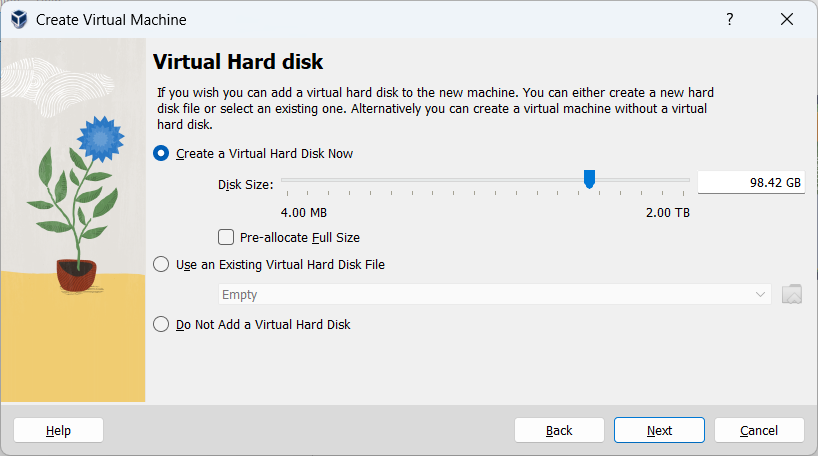
Select "Create a Virtual Hard Disc Now" - 100GB is recommended.
Click Next.
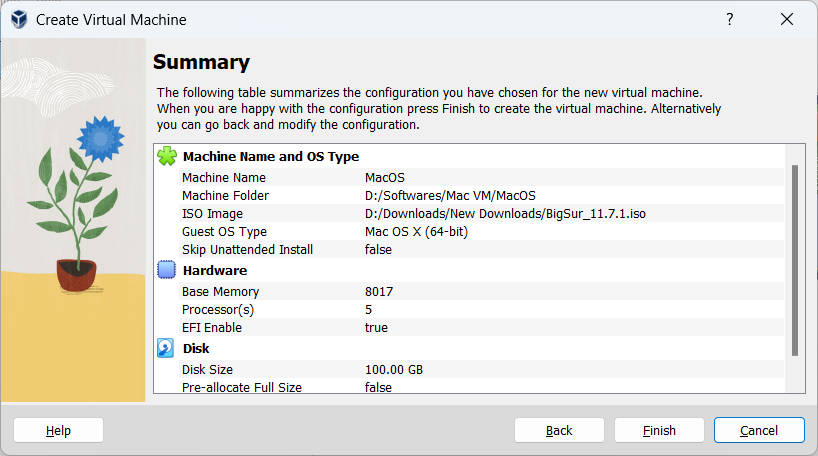
Review and click Finish.
Close VirtualBox completely (Make sure with Task Manager that it is not running in the background).
Open Command Prompt with "Run as administrator" and run the commands to patch your VM.
You can find the Patch Virtual Machine commands here (Make sure you change the name of "VM Name" to whatever you named it in Step 3)(Use commands suitable for your processor be it Intel or AMD).
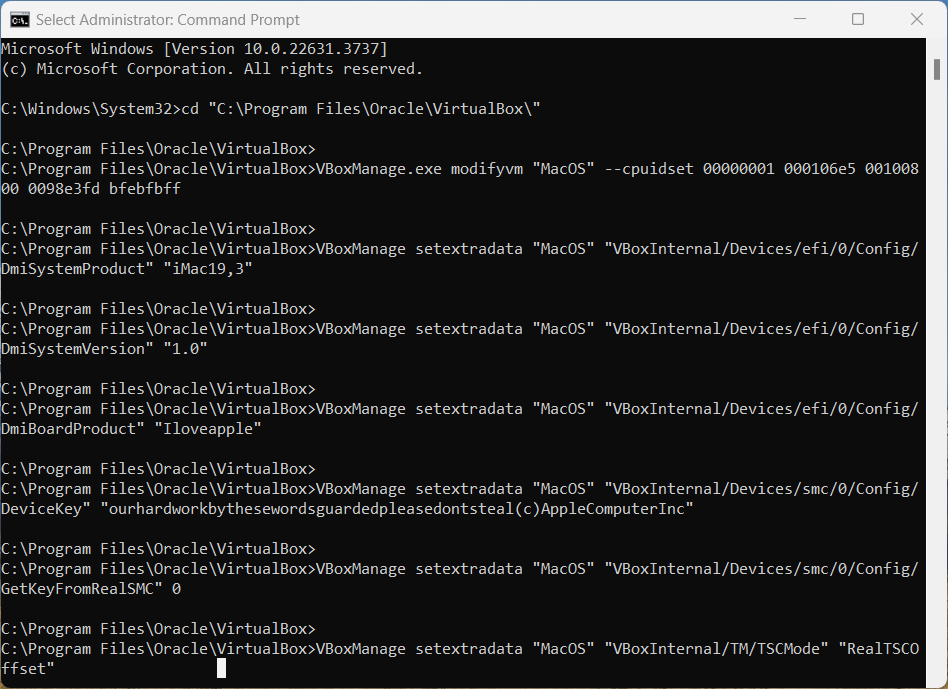
Restart your Windows host.
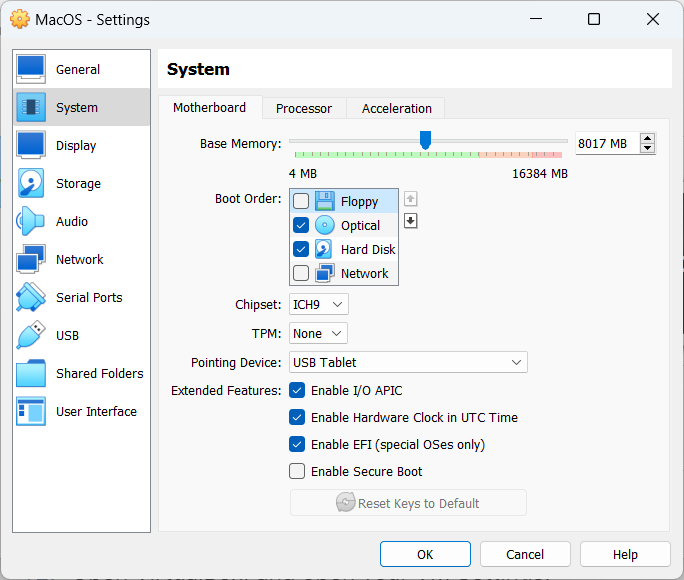
Open VirtualBox, and open your VM Settings.
In the System Tab under Boot Order uncheck "Floppy".
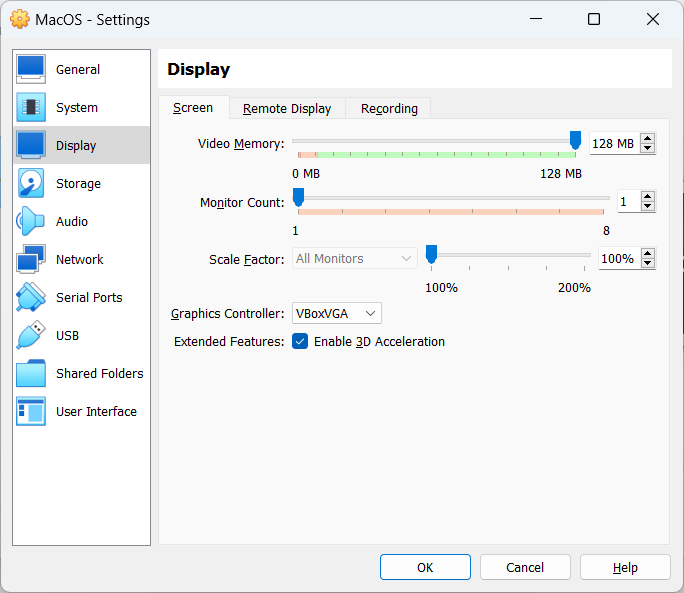
In Display Tab change Video Memory to 128MB and check "Enable 3D Acceleration" button.
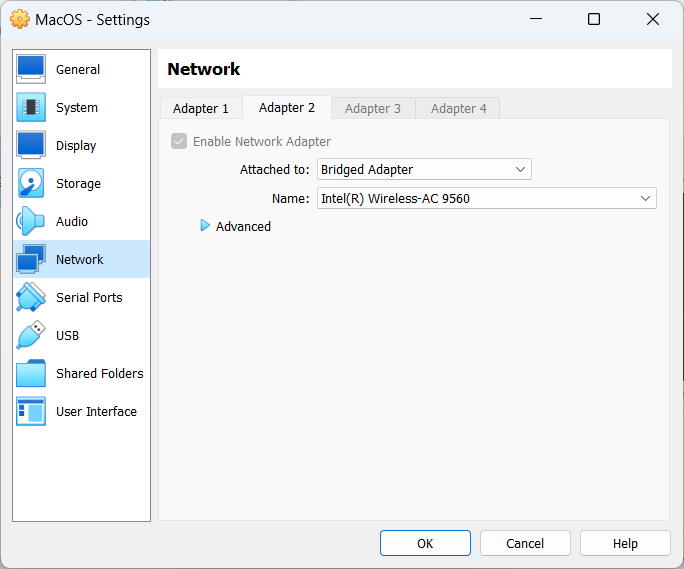
In the Network Tab under Adapter 2: Enable Network Adapter, Attached to: Bridged Adapter, Name: Your wireless adapter.
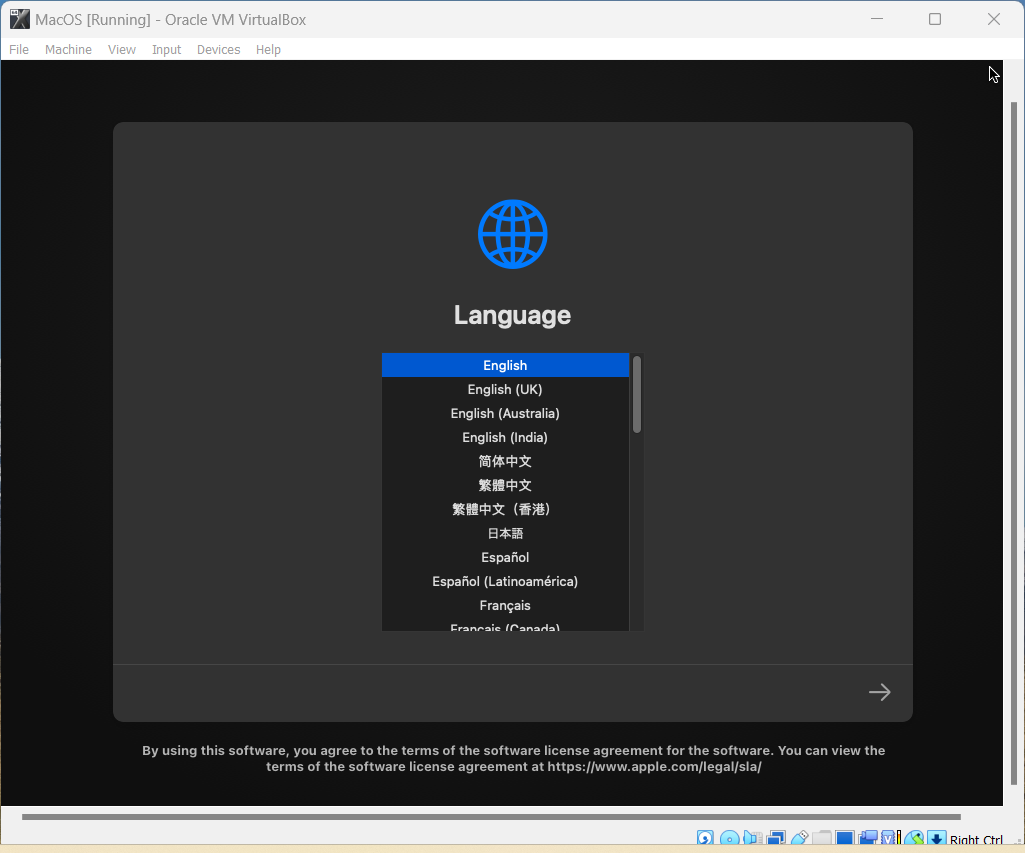
Start your VM.
After initial boot up process, Select your desired language.
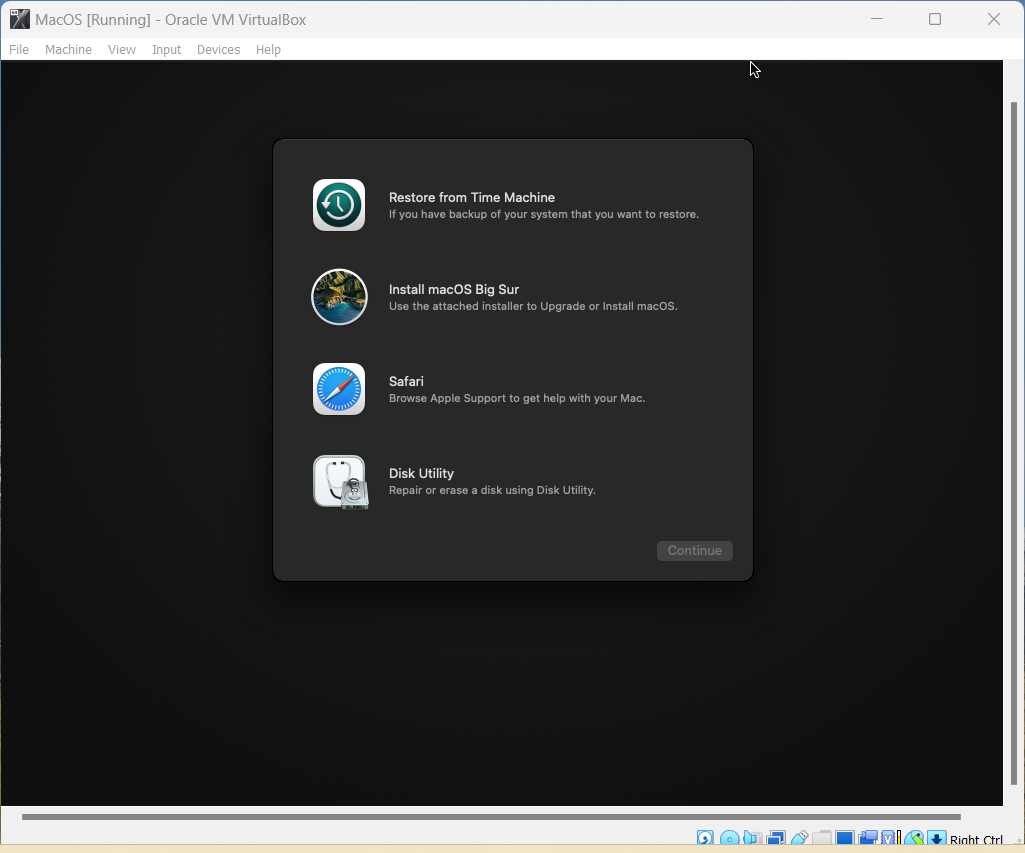
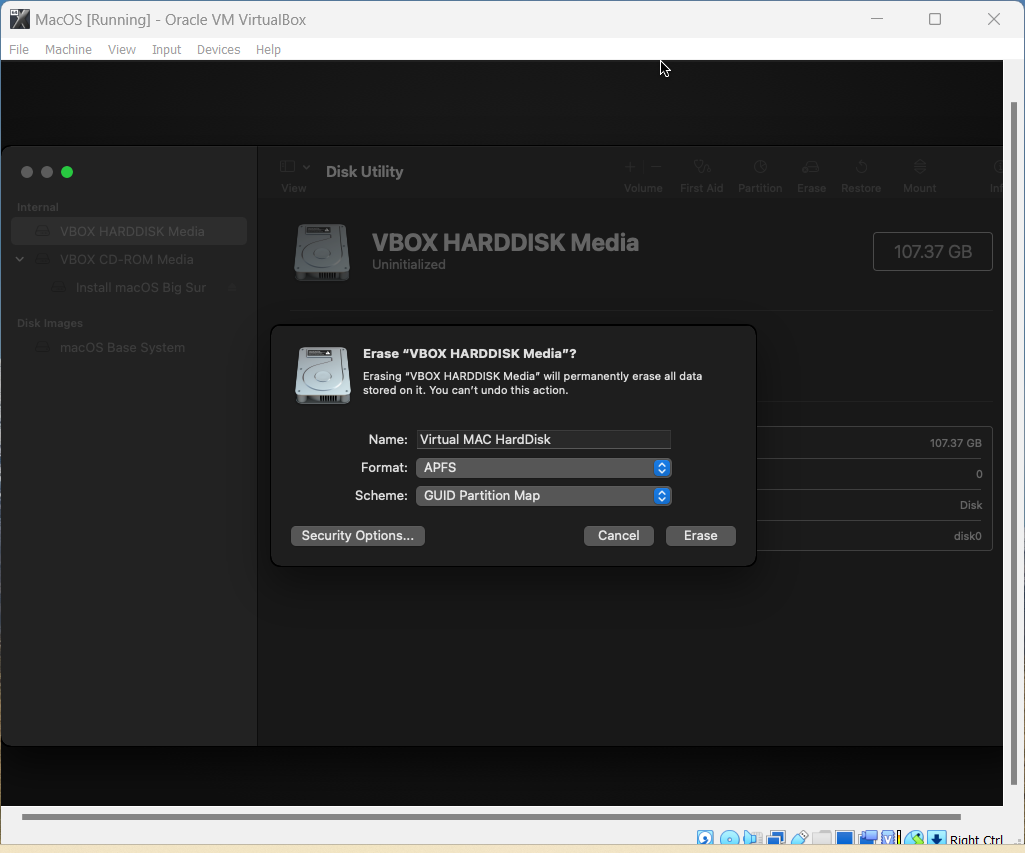
Select Disc Utility. Select VBOX HARDDISC Media.
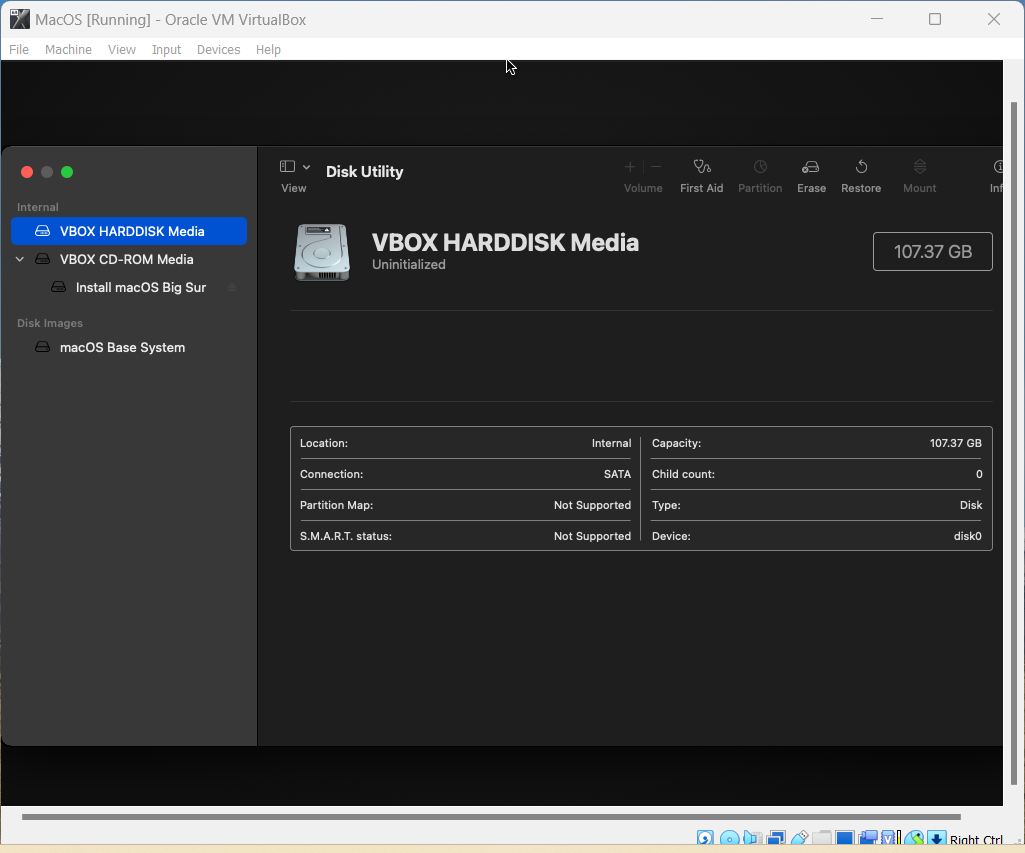
Click Erase, Give your disc a name like "Virtual Mac HardDisc" and Erase disc.
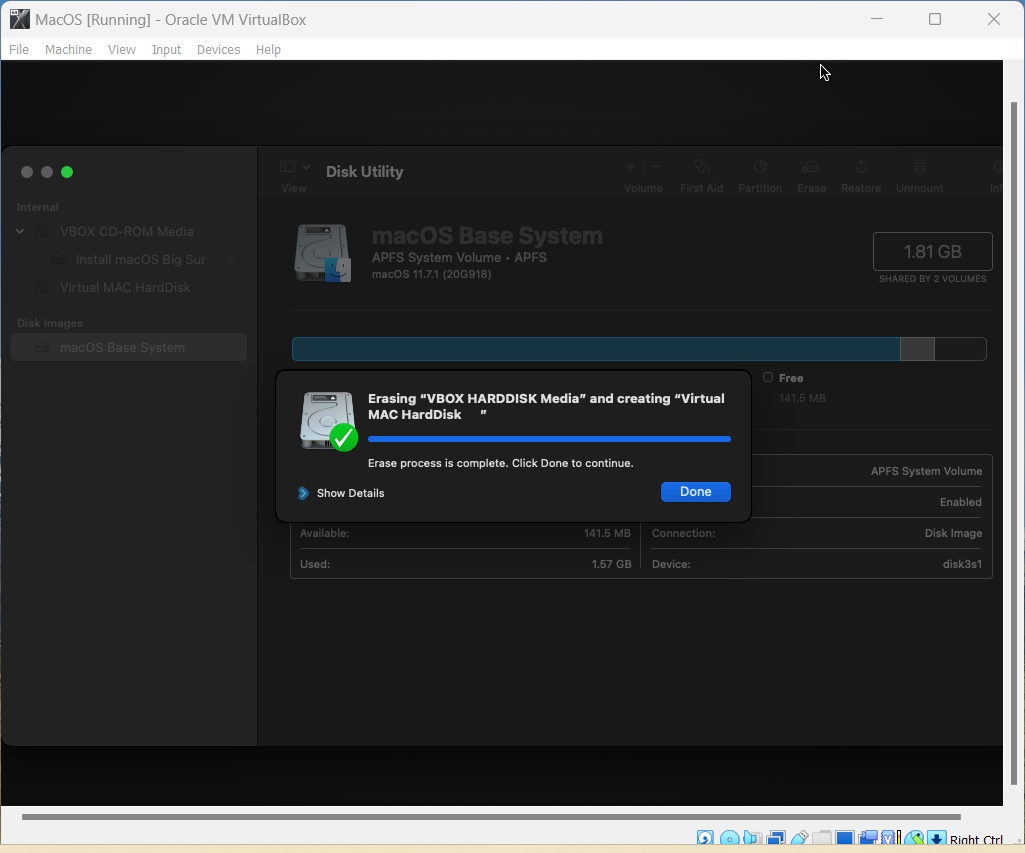
Close Disc Utility.
Select "Install MacOS Big Sur" and click continue.
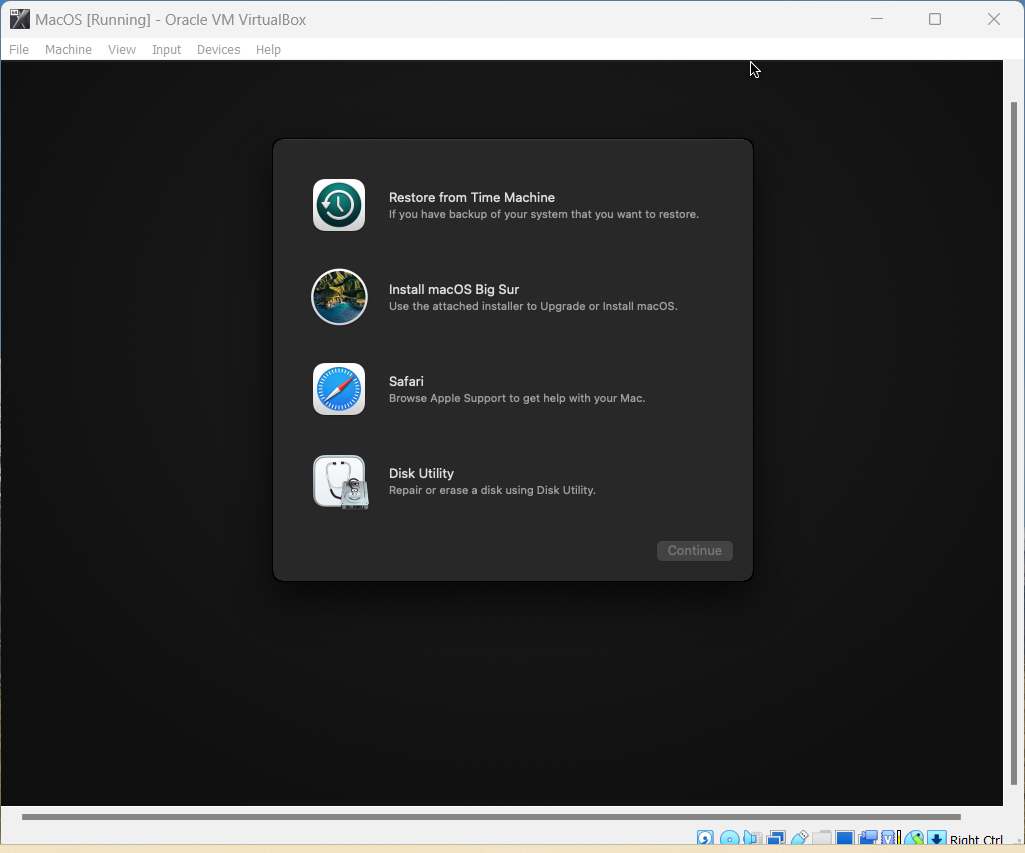
Proceed with the usual Mac installation.
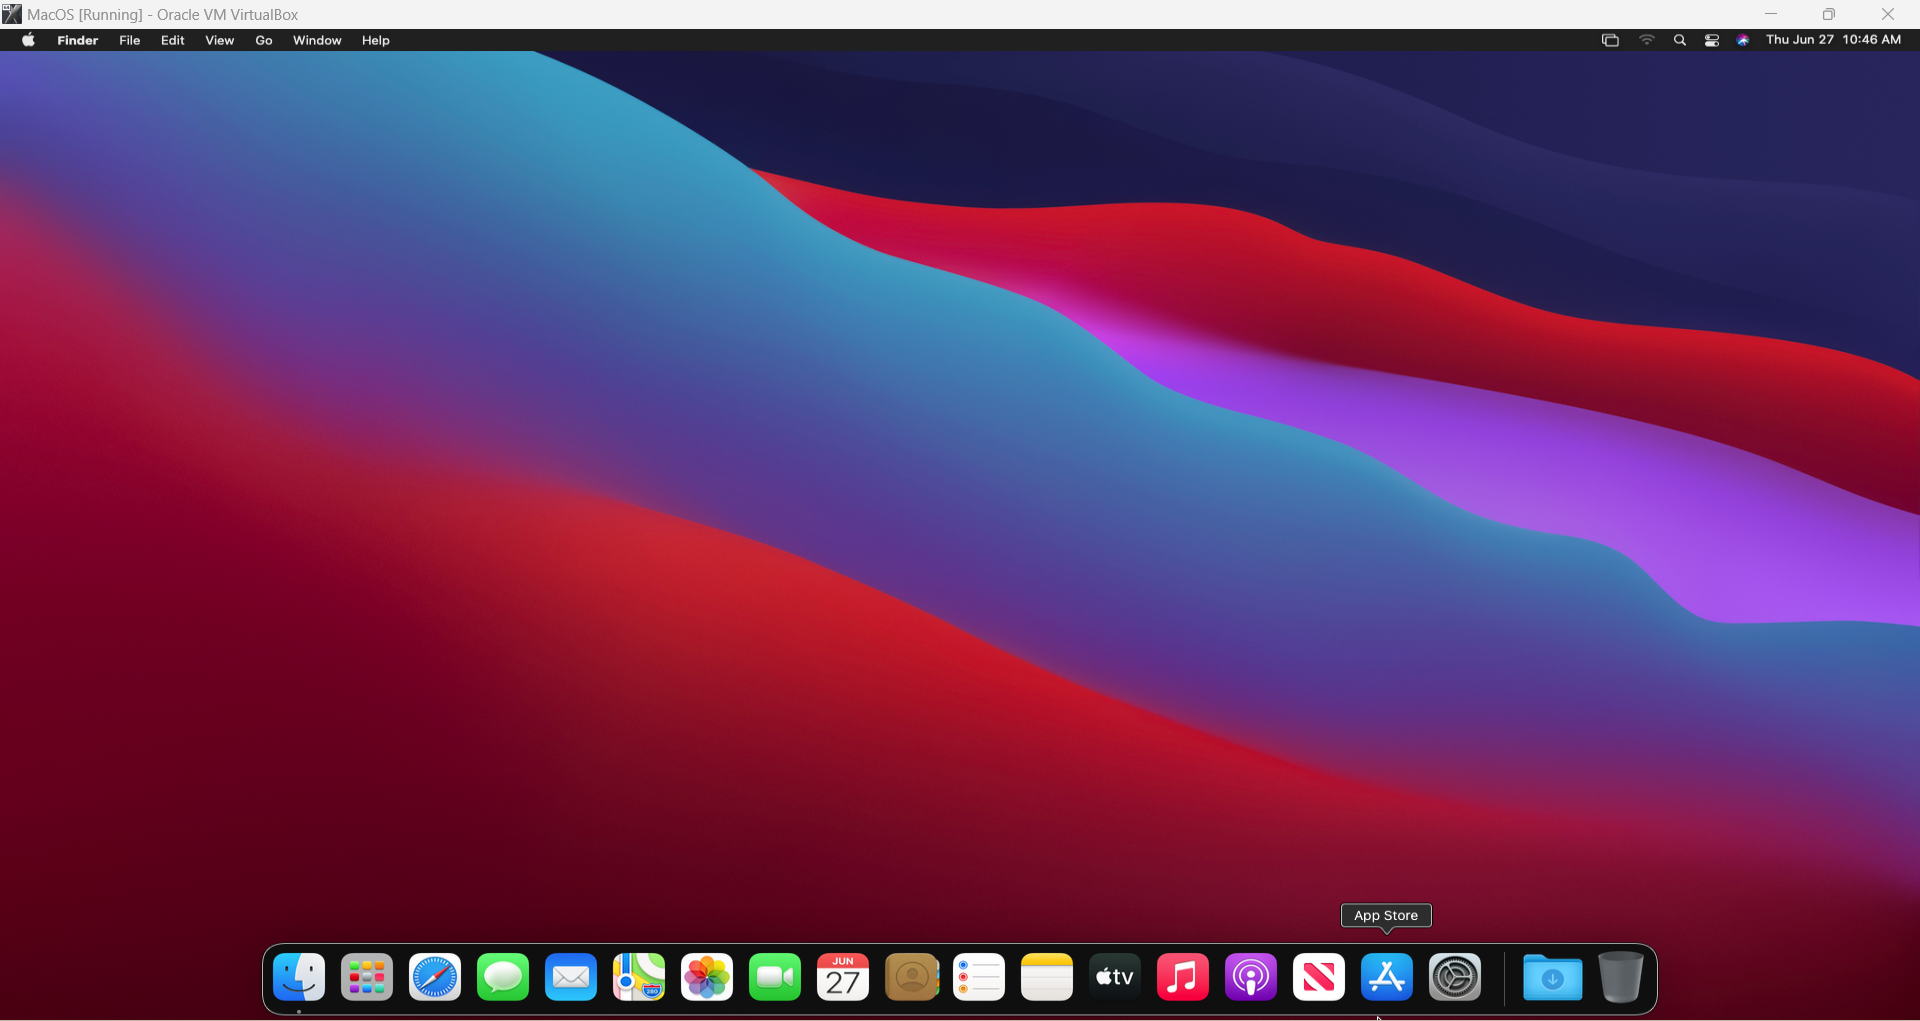
Voilà! You have your macOS on your Windows host.
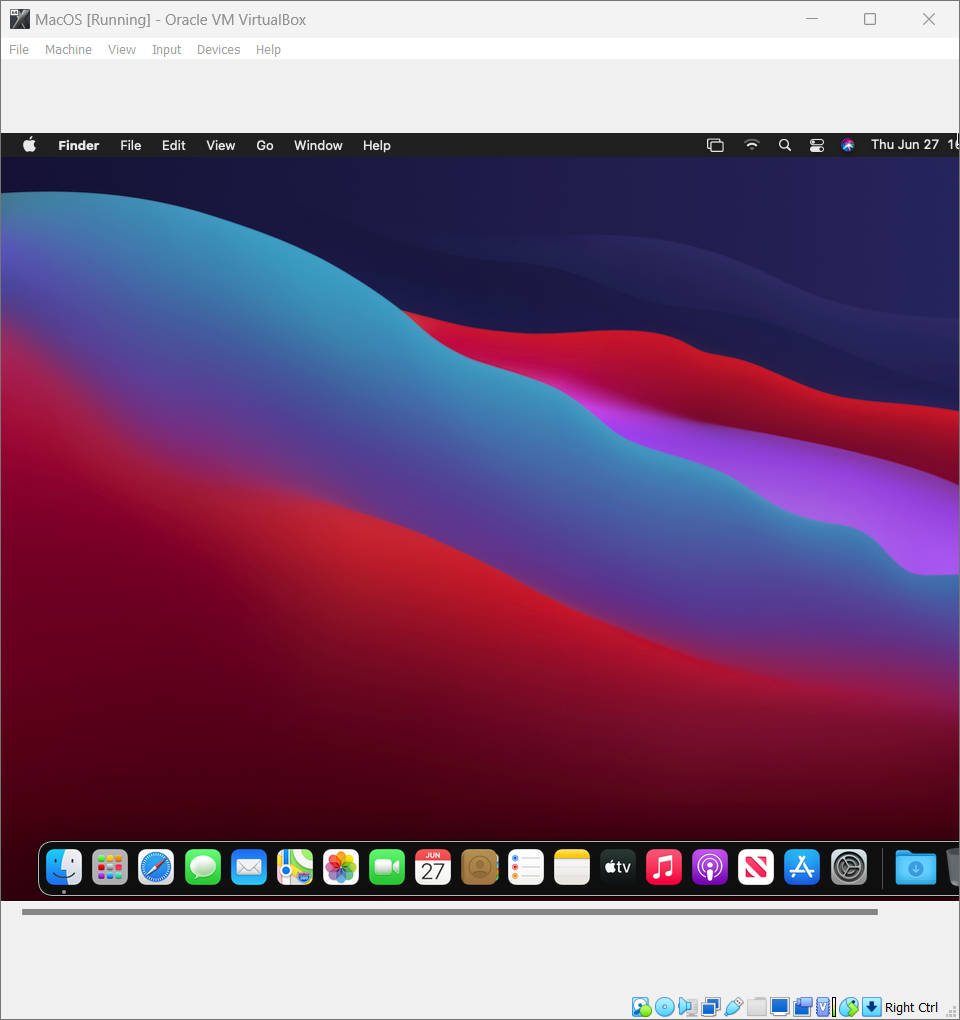
However, it will still have an odd-looking Display Resolution. To change it, close your VM, open Command Prompt with "Run as administrator," and run the following commands:
'cd "C:\Program Files\Oracle\VirtualBox\"'
'VBoxManage setextradata “VM Name” VBoxInternal2/EfiGraphicsResolution 1920x1080" (Make sure to change "VM Name" to your own VM name).
Subscribe to my newsletter
Read articles from Vivek Rathee directly inside your inbox. Subscribe to the newsletter, and don't miss out.
Written by

