Running PostgreSQL and pgAdmin 4 in Docker: A Complete Guide
 Aditya Shrivastav
Deploying databases in a containerized environment can simplify development and management processes. Docker is a powerful tool that allows you to package applications and their dependencies into isolated containers. In this blog post, we'll walk through the steps to set up a PostgreSQL database along with PgAdmin 4 using Docker.
Prerequisites
Before we begin, make sure you have the following installed on your system:
Docker Desktop
Docker Compose (Optional*)
Setup
Step 1: Run the PostgreSQL Docker Container
docker run --env POSTGRES_PASSWORD=password123 --env POSTGRES_DB=postgres --env POSTGRES_USER=postgres -v postgres-volume:/var/lib/postgresql/data -p 5432:5432 --name postgres -d postgres
The command above will create a new PostgreSQL container named postgres using image postgres with the following configurations:
POSTGRES_PASSWORD: The password for thepostgresuser.POSTGRES_DB: The name of the default database to be created.POSTGRES_USER: The name of the default user to be created.Create a volume named
postgres-volumeto persist the database data and mount it to the/var/lib/postgresql/datadirectory inside the container.Bind port
5432of the host machine to port5432of the container.-dflag to run the container in detached mode. If you want to run the container in the foreground, you can omit this flag.

Docker Compose
The same command can be converted into a docker-compose.yml file as shown below:
version: '3'
services:
  postgres:
    image: postgres
    container_name: postgres
    environment:
      - POSTGRES_DB=postgres
      - POSTGRES_USER=postgres
      - POSTGRES_PASSWORD=password123
    ports:
      - "5432:5432"
    volumes:
      - postgres-volume:/var/lib/postgresql/data
volumes:
  postgres-volume:
    driver: local
You can start the PostgreSQL container by running the following command:
docker compose up -d
#or
docker-compose up -d
Docker compose will save you from typing long commands and make it easier to manage multiple containers. You can also define multiple services in the same docker-compose.yml file. It is recommended to use this approach for managing containers in a production environment.
Step 2: Installing PgAdmin 4 Docker Extension
You don't need to install PgAdmin 4 separately. You can use the official Docker image provided by the PgAdmin team. Or better you can use the PgAdmin4 Docker extension. Using the extension is more convenient as it allows you to manage your PostgreSQL database directly from the Docker Desktop UI. Internally it also uses the official PgAdmin 4 Docker image.

Install the extension. It will automatically download the official PgAdmin 4 Docker image and run it in a container named `pgadmin4` when you click on the PgAdmin 4 icon in the Docker Desktop UI.
Click on the PgAdmin 4 icon in the Docker Desktop UI to open the PgAdmin 4 web interface.
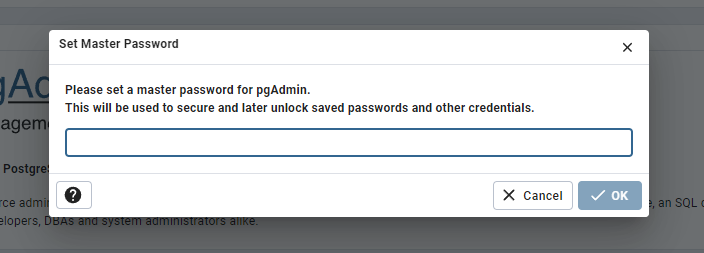
After opening the PgAdmin 4 will ask you to set a master password for the PgAdmin 4 web interface. This is because you can store your database credentials in the PgAdmin 4 web interface. So make sure to set a strong password.
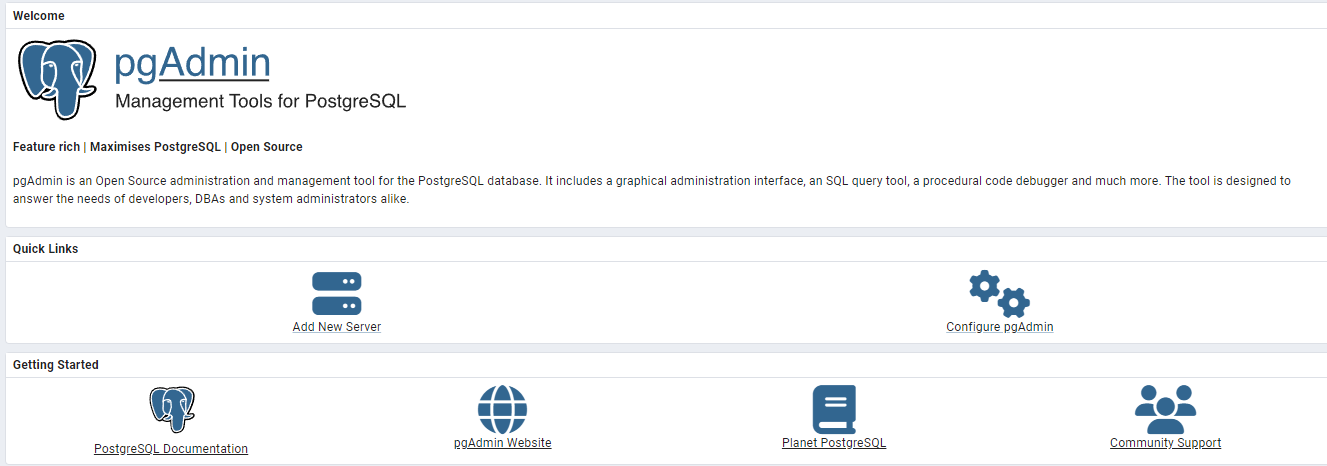
Click on the Add New Server button to add a new server connection.
This will open a new window where you can configure the connection details for your PostgreSQL server.
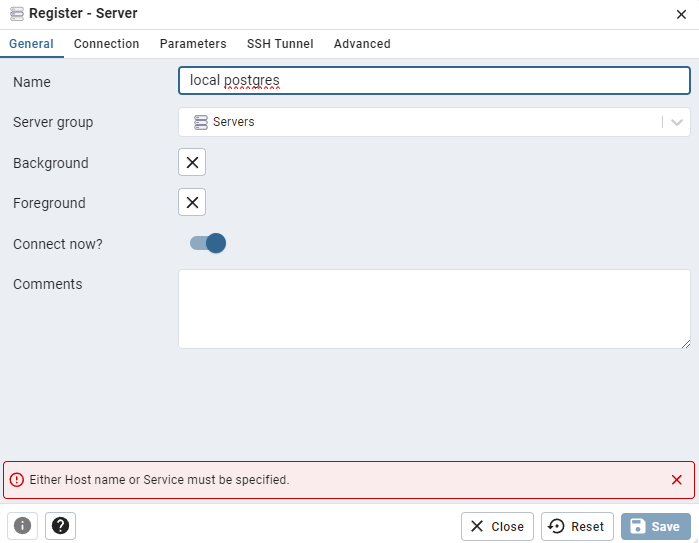
Enter any name for the connection and switch to the Connection tab.
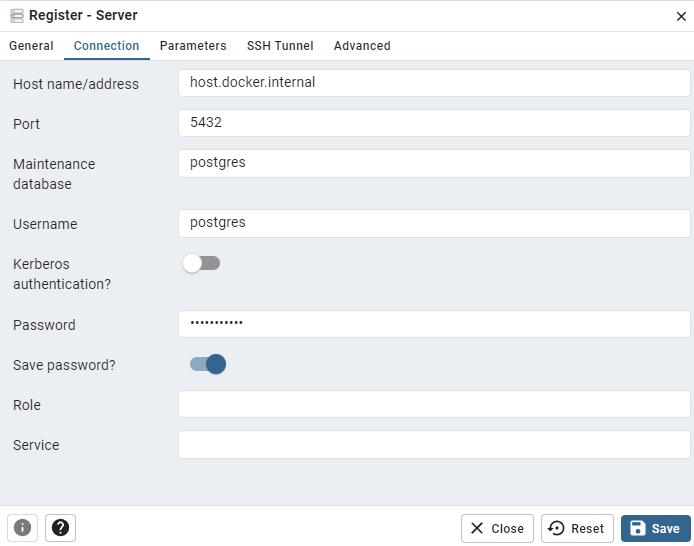
Enter the following details:
Host name/address:
host.docker.internal. This is the hostname that Docker Desktop uses to connect to the host machine. There are some blogs that suggest usinglocalhostor the IP address of the postgres container. But usinghost.docker.internalis the most reliable way to connect to the host machine from a Docker container.Port:
5432Maintenance database:
postgres. It is the name of the default database that we created in the PostgreSQL container from environment variablePOSTGRES_DB.Username:
postgres. It is the name of the default user that we created in the PostgreSQL container from environment variablePOSTGRES_USER.Password:
password123. The password we set for thepostgresuser in the PostgreSQL container.Optionally, you can save the password in the PgAdmin 4 web interface by checking the
Save password?checkbox.
Hit the Save button to save the connection details.
Now you can see the connection in the left sidebar under the Servers section.
Conclusion
In this blog post, we learned how to set up a PostgreSQL database along with PgAdmin 4 using Docker. Docker makes it easy to create isolated environments for your applications and manage dependencies effectively. By following the steps outlined in this post, you can quickly get started with PostgreSQL and PgAdmin 4 in a containerized environment.
If you have any questions or feedback, feel free to leave a comment below. Happy coding!
Subscribe to my newsletter
Read articles from Aditya Shrivastav directly inside your inbox. Subscribe to the newsletter, and don't miss out.
Written by

Aditya Shrivastav
Aditya Shrivastav
I am a web developer from india. I love to learn and implement my learnings in form of projects.