AWS Day 7: Building a Serverless Node.js API with AWS and Serverless Framework...🎞
 Aesha Shah
Introduction 🧧:
Serverless architecture is changing the way we build and deploy applications. Instead of worrying about servers and infrastructure, developers can now focus on writing code, while the cloud provider handles the rest. This means better scalability, lower costs, and less hassle. One of the best tools to help you dive into serverless development is the Serverless Framework, especially when working with AWS.
In this blog post, I'll show you how to create a serverless API using Node.js, AWS, and the Serverless Framework. We'll cover the basics of serverless technology, set up our development environment, and walk through the process of building and deploying a working API step by step.
What is serverless Framwork 💁♂️?
The Serverless Framework consists of a Command Line Interface and an optional Dashboard, helping you deploy code and infrastructure together on Amazon Web Services while increasingly supporting other cloud providers. This YAML-based tool uses simplified syntax to deploy complex infrastructure patterns easily, without needing to be a cloud expert. It allows developers to define infrastructure and code in a unified configuration file, automating the deployment process and managing functions, events, and resources seamlessly. We use the Serverless Framework because it streamlines the workflow, reduces the complexity of managing server infrastructure, and enables rapid, scalable, and cost-effective application development.
Let's Start the Hands-on Practice 👨💻:
Prerequisites📝:
AWS IAM user credentials for deployment.
Create an account on serverless.com
Nodejs and npm installed.
Serverless framwork installed.
Project Setup 🐱💻:
First, we need to install Node.js and npm on the system with the following commands:
sudo apt-get update
After updating the system, we need to install Node.js 16 or above versions and npm. For your reference, you can download it from here.
curl -o- https://raw.githubusercontent.com/nvm-sh/nvm/v0.39.3/install.sh
curl -o- https://raw.githubusercontent.com/nvm-sh/nvm/v0.39.3/install.sh | bash
source ~/.bashrc
nvm --version
nvm install 18.0.0
Verify the version of Nodejs and npm :
node -v
npm -v
Now, install the serverless using npm
sudo npm install -g serverless
The above command installs Serverless globally on your instance. Verify if it's properly installed with the following command:
serverless --version
Okay, we have successfully installed Serverless. Now, let's work on it. Run the following command first:
serverless login
When you hit this command, you will see a prompt to log in using your serverless account. Follow the link provided, log in, and click on "Continue to Dashboard"
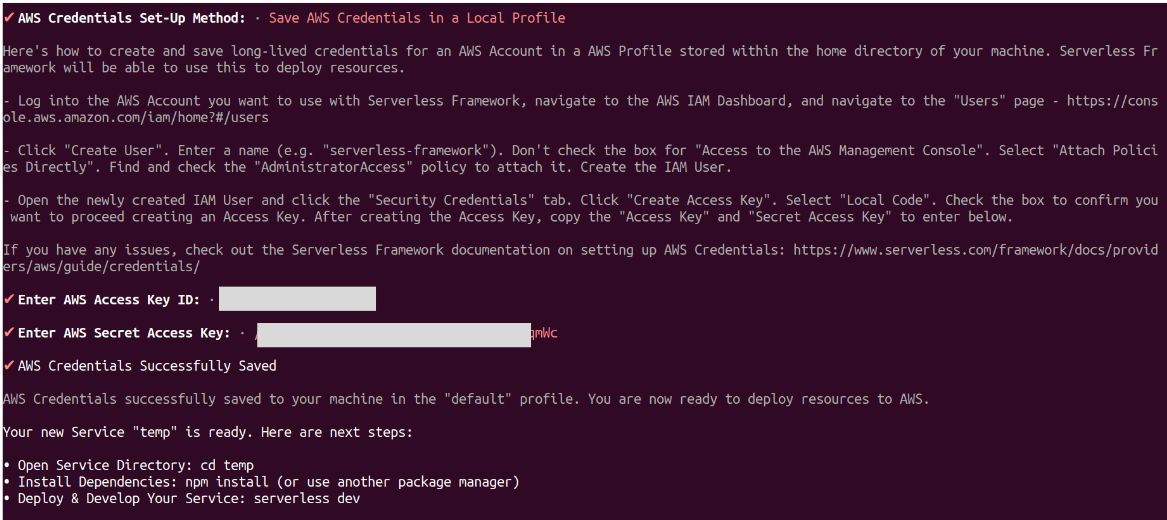
After logging in, click on "Skip adding an app" because we will create the app after setting up Serverless. Now you have the option for AWS Credentials set-up, so here I already have an IAM user and the access ID and secret key of this user. So click on "Save AWS Credentials in Local Profile."

You have successfully set up the Serverless project.
Note: If you are unable to add AWS credentials or forgot to add them, don't worry. Just install the AWS CLI on your machine and use the aws configure command to add your AWS access ID and secret key.
Now, it's time to clone the project:
git clone https://github.com/Aesha001/todoapp-serverless-project.git
cd todoapp-serverless-project
npm init -y
npm install express body-parser serverless-http
You need to make some changes to the serverless.yml file:
First, change the organization name with your organization name and also change the region where you want to deploy the project.
org: aesha01
app: todo-app
service: todo-app

provider:
  name: aws
  runtime: nodejs20.x
  region: us-east-2

functions:
  app:
    handler: index.handler
    events:
      - http:
          path: todos
          method: get
      - http:
          path: todos
          method: post
      - http:
          path: todos/{id}
          method: delete
After making the changes, deploy the project:
sudo serverless deploy
After successful deployment, you will see 3 APIs (GET, POST, and DELETE) in the output. To check if your APIs are working, use the Postman tool and follow the images below.
Also, check your AWS account to see if your project is deployed. Go to your CloudFormation service where your stack is successfully deployed, and check your Lambda service where you will find your project function created with all your files.
The exciting part is that you can go to your Serverless Framework Dashboard and find your app deployed by you on your machine.
Conclusion
In this blog post, we’ve built a serverless Node.js API using AWS and the Serverless Framework. We set up our environment, configured our project, and deployed it seamlessly. Serverless architecture simplifies development by handling infrastructure, allowing us to focus on writing code. This approach leads to scalable, cost-effective applications. I hope this guide has motivated you to dive deeper into serverless development and empowered you to create more innovative and efficient applications. Keep pushing your boundaries and happy coding..✨✨!
Subscribe to my newsletter
Read articles from Aesha Shah directly inside your inbox. Subscribe to the newsletter, and don't miss out.
Written by
