Guide to Create an ERC-20 Token Using Solidity on Avalanche 🔺
 Adityaa kr
What is an ERC-20 Token?
A standardized cryptocurrency token on the Ethereum blockchain, ensuring compatibility with various wallets and dApps.
Why ERC-20 Tokens are Important?
They simplify token creation and management by providing a standardized protocol, which promotes widespread use and interoperability within the blockchain ecosystem. This standardization ensures that tokens work seamlessly with wallets, exchanges, and decentralized applications.
Key Use Cases for ERC-20 Tokens
ICOs: Fundraising for new projects.
DeFi: Facilitating lending, borrowing, and trading.
Gaming/NFTs: Representing in-game assets and collectibles.
Let's create an ERC-20 Token Using Solidity on Avalanche 🔺
Creating an ERC-20 Token using Solidity on Avalanche involves developing a standard token contract on the Avalanche blockchain using Solidity, a programming language for writing smart contracts. This process includes defining the token's properties such as name, symbol, decimal units, and total supply.
The ERC-20 standard ensures interoperability with other tokens and applications on the Avalanche network. By deploying the contract on Avalanche, developers benefit from its high throughput, low fees, and compatibility with Ethereum tooling, making it an efficient platform for issuing and managing digital assets.
About Avalanche 🔺

Avalanche is a high-performance blockchain platform known for its scalability and low transaction fees. Launched by Ava Labs in 2020, it supports decentralized applications (dApps) and custom blockchain networks. Avalanche offers fast transaction processing, high throughput, and compatibility with Ethereum, making it a popular choice for developers and businesses.
Avalanche uses Solidity programming language
Prerequisites
Basic knowledge of blockchain
Understanding of consensus mechanisms
Proficiency in Solidity programming language
Core Wallet extension should installed in your browser
Setup Core Wallet and Remix
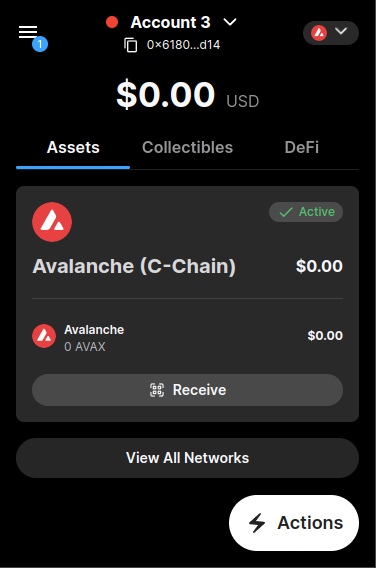
1) Setup Core Wallet
Open your core wallet to create your account.
(Here I'm using a new account to demonstrate how it looks.)
The interface will look like this
Copy the Address
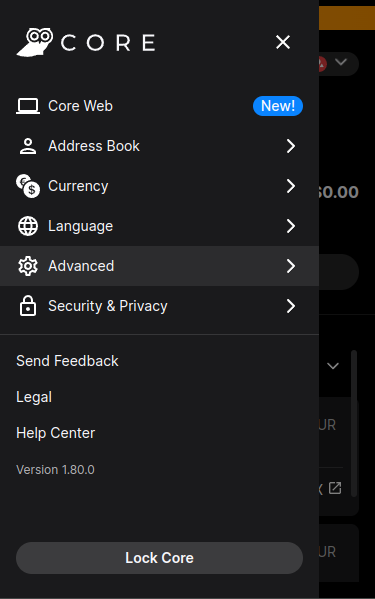
Switch to Testnet. Follow these steps:
- Click on the three dots on Main page, then select the "Advanced" section.
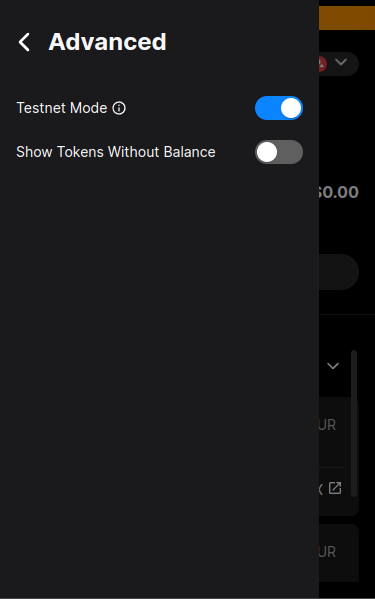
- Turn on TestnetMode.
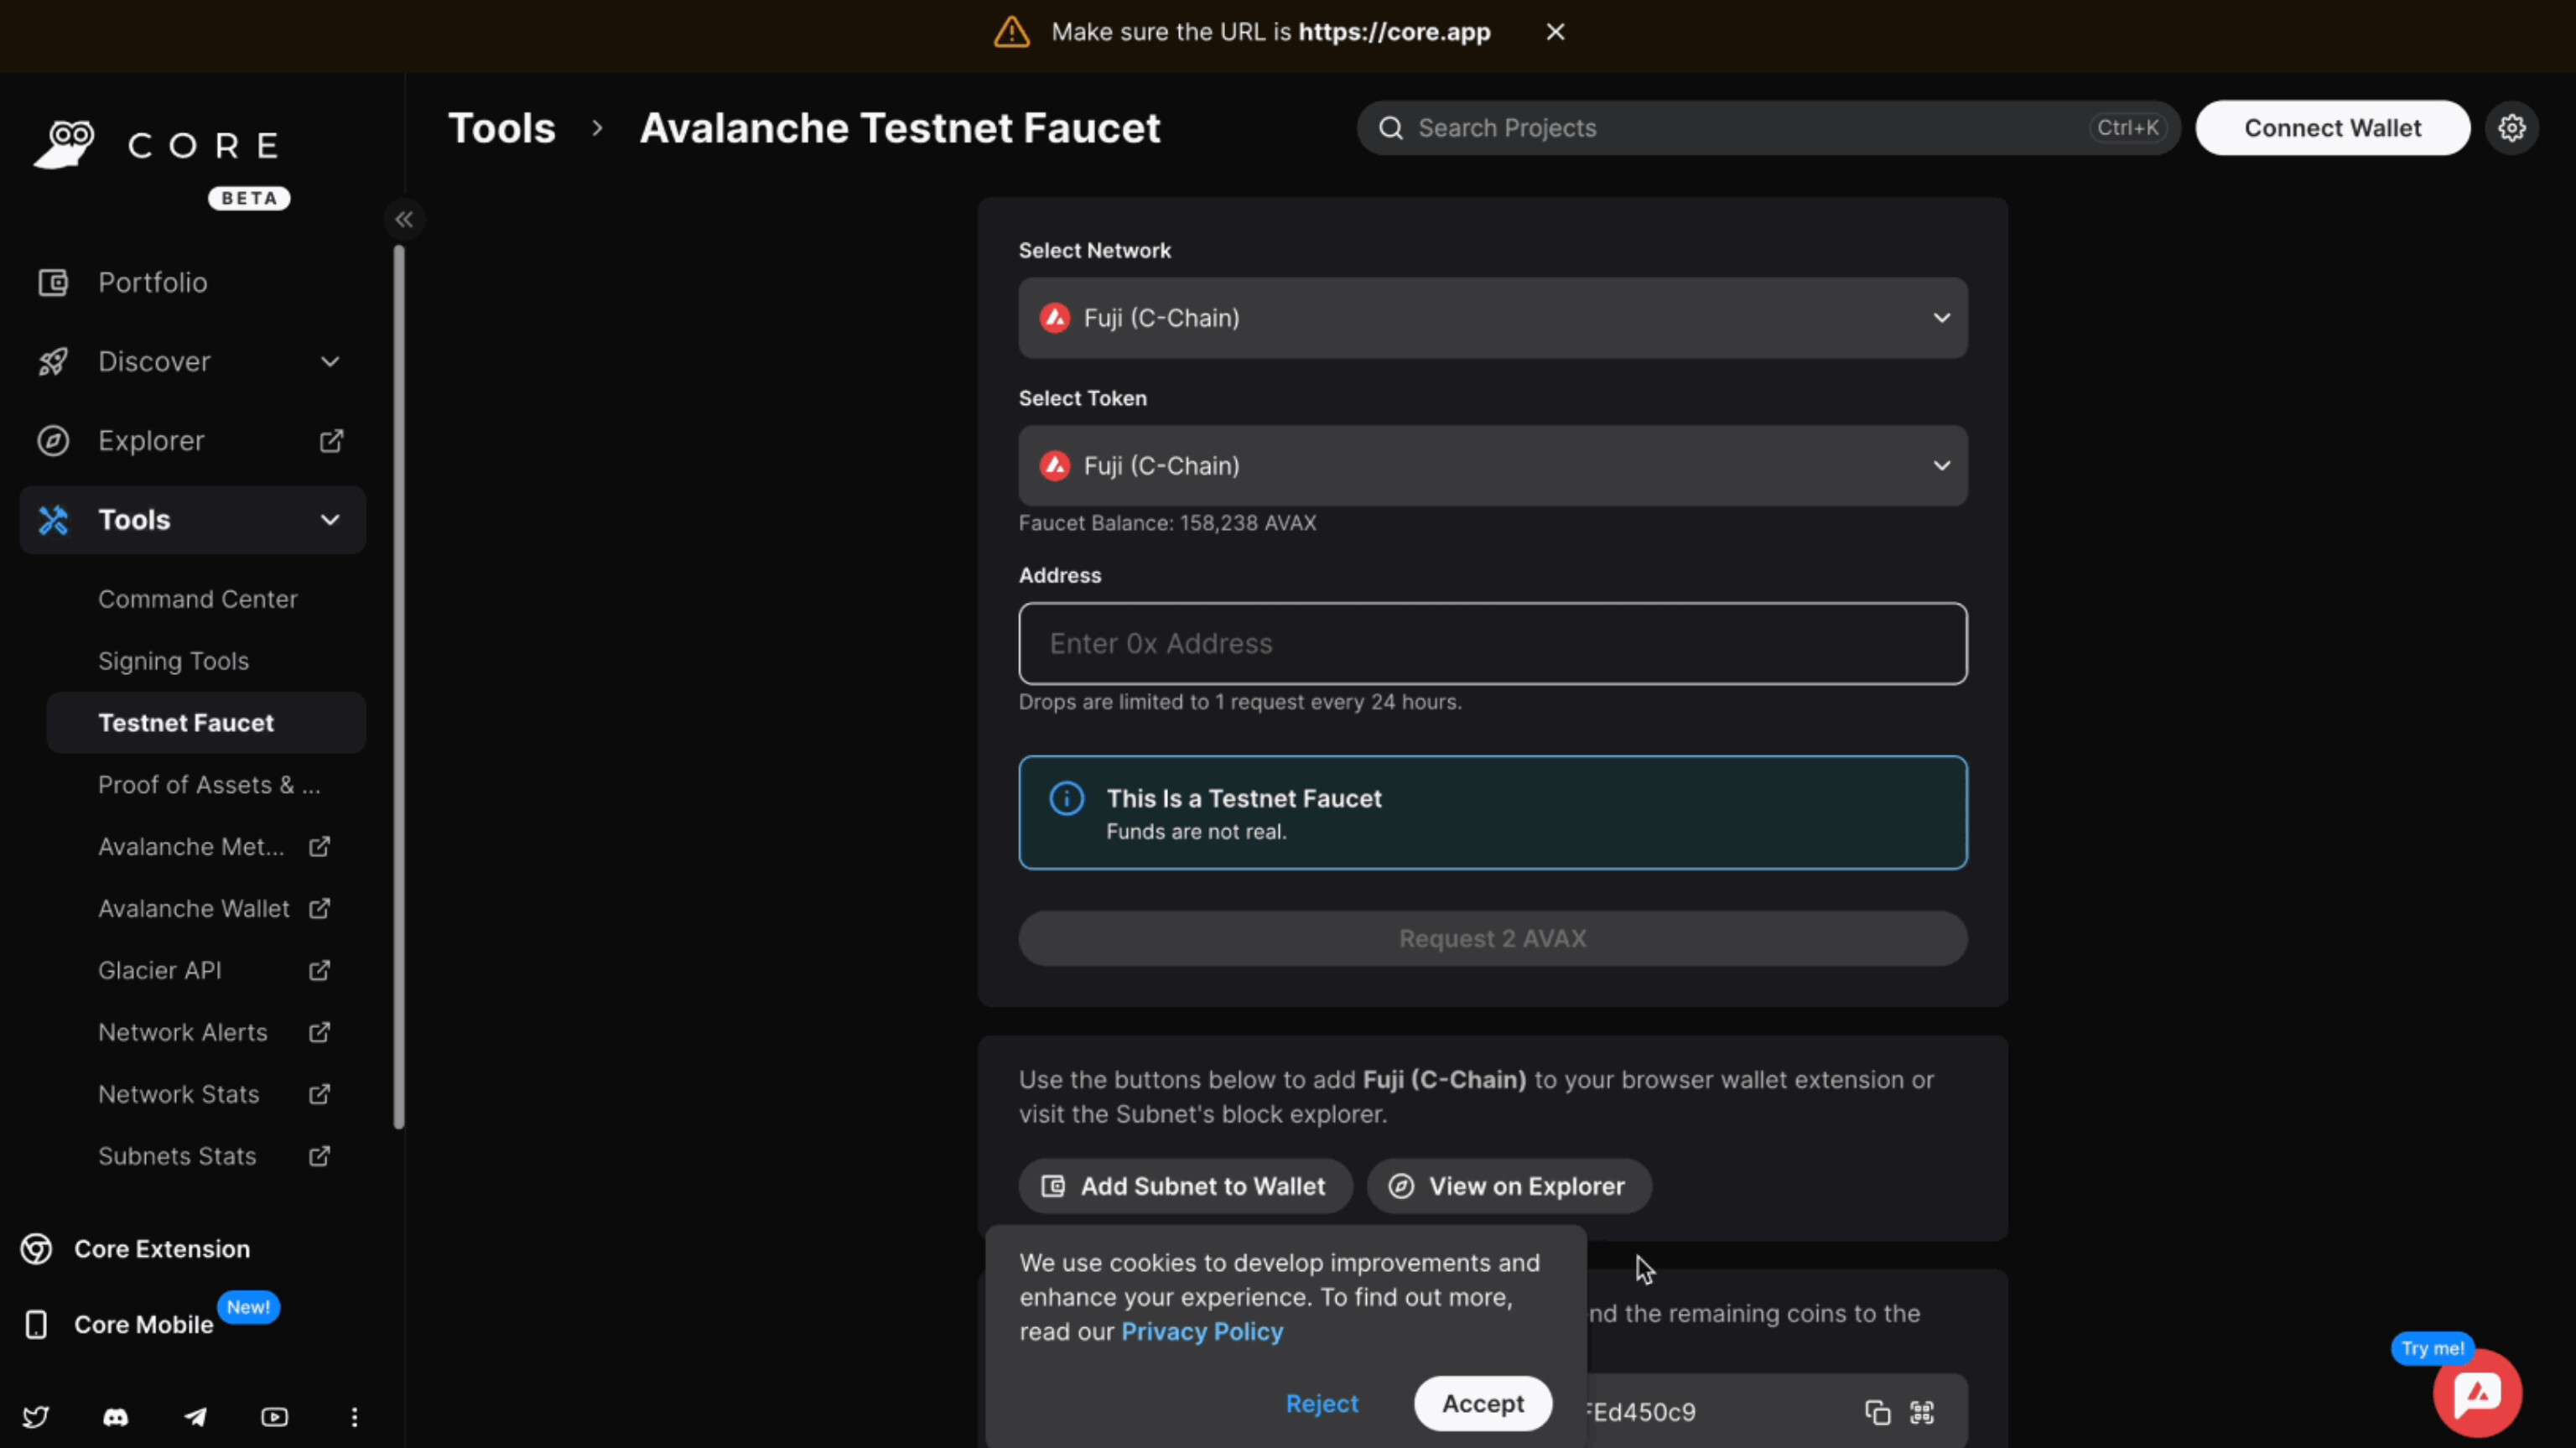
Time to get some Funds 💸💸
Head over to
(fuji-testnet-link).Paste your copied address into the Address field.
Click on the "Request 2 AVAX" button.
Tip: Make sure you have some funds in the Mainnet. If you encounter any problems, Feel free to reach out to me. I'll do my best to help you out[Here]
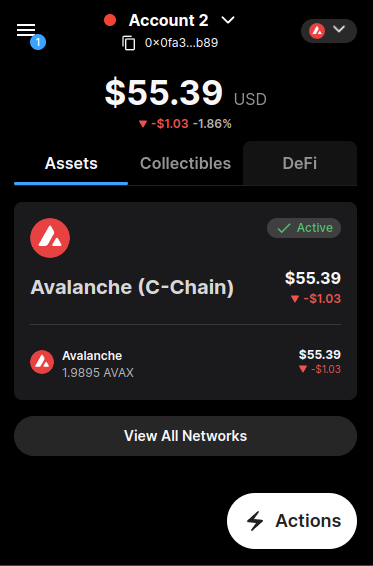
Yay! Funds received!
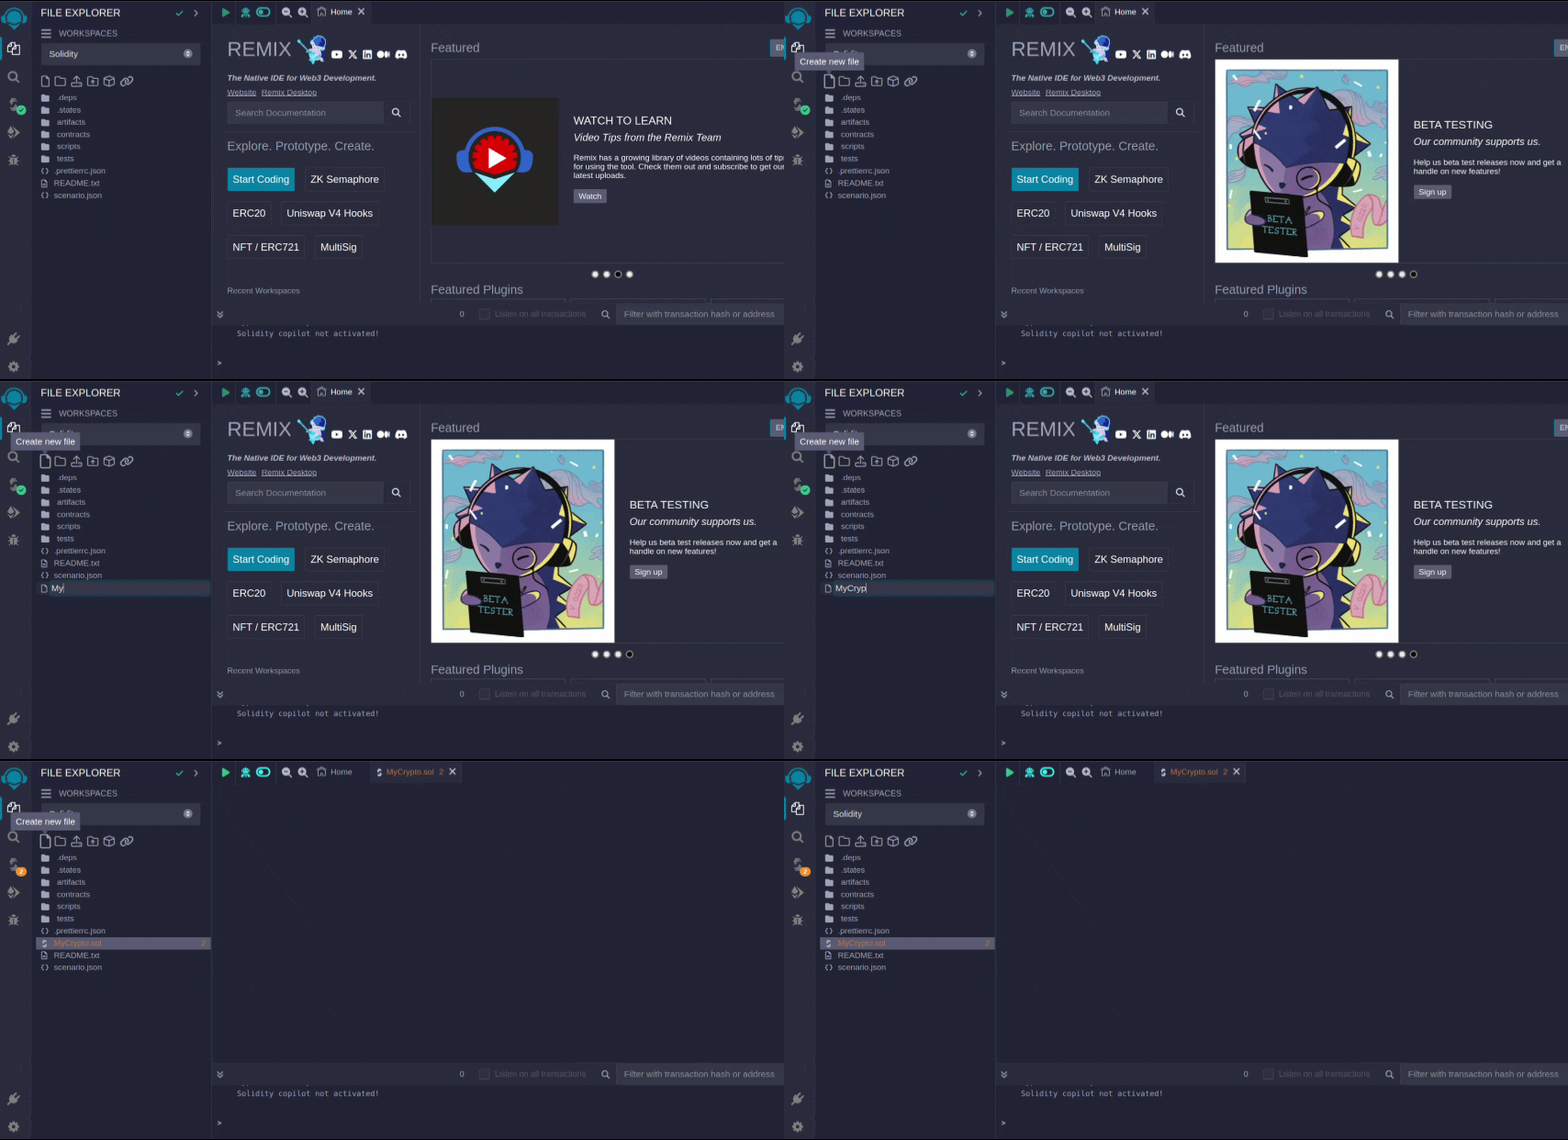
2) Setup Remix
Remix is an online IDE for Ethereum and related blockchains like Avalanche and Binance Smart Chain. It lets developers write, deploy, and debug Solidity smart contracts efficiently. [Click Here]
- Click on “Create New File” button. Set the name of your file as
MyCrypto.sol
Writing an ERC20 Token in Solidity
Great job so far, folks!
Let's create a simple ERC20 token using the Solidity programming language, including a minting feature for easy token creation.
We'll begin with the basic structure common to all smart contracts.
// SPDX-License-Identifier
pragma solidity ^0.8.20;
The initial statement grants universal permission to freely utilize the smart contract, outlining its licensing rights.
Following this, the Solidity compiler version is set to
0.8.20or higher.Subsequently, the ERC20 token is imported from the OpenZeppelin library to inherit its functionality.
import "@openzeppelin/contracts/token/ERC20/ERC20.sol";
This code grants access to all functionalities in OpenZeppelin's ERC20.sol file, which is crucial for building secure smart contracts.
OpenZeppelin is an open-source framework that provides a variety of pre-audited smart contracts, including tokens, to simplify development efforts.
By inheriting from ERC20, we leverage its constructor and mint function to create and manage our custom ERC20 token.
contract MyContract is ERC20 {
    constructor() ERC20("YourCoin", "YOUR"){
    _mint(msg.sender, 100000 * 10 ** ERC20.decimals());
    }
}
Let's break this down. 👇
contract MyContract is ERC20
This line initializes the smart contract MyContract, which inherits the ERC20 token using the is keyword.
constructor() ERC20("YourCoin", "YOUR")
Inherited contracts call their own constructors and those of the parent contracts, as seen here.
"YourCoin" is the token's name (modifiable), and "YOUR" is its symbol.
_mint(msg.sender, 100000 * 10 ** ERC20.decimals());
This is where the magic happens. The _mintfunction from the ERC20 token handles minting tokens and assigning them to the contract deployer (that's you,msg.sender).
The 100000 * 10 ** ERC20.decimals()); calculation determines the total number of tokens to mint. It's a way to ensure you have the correct amount of tokens available.
That's a wrap!
We've written a complete ERC20 token in Solidity. Here’s the final code:
// SPDX-License-Identifier: MIT
pragma solidity ^0.8.20;
import "@openzeppelin/contracts/token/ERC20/ERC20.sol";

contract MyContract is ERC20 {
    constructor() ERC20("YourCoin", "YOUR"){
    _mint(msg.sender, 100000 * 10 ** ERC20.decimals());
    }
}
Great job! You've mastered the basics of writing an ERC20 token in Solidity.
🔧 Now, it's time to compile this contract.
Click on the third icon and then click "Compile".
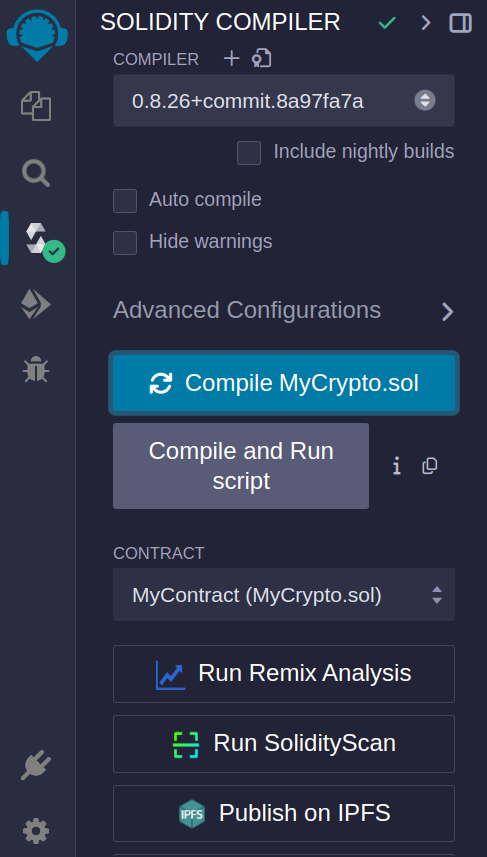
Update the Advance configuration as shown below.
Modify the EVM version to
paris.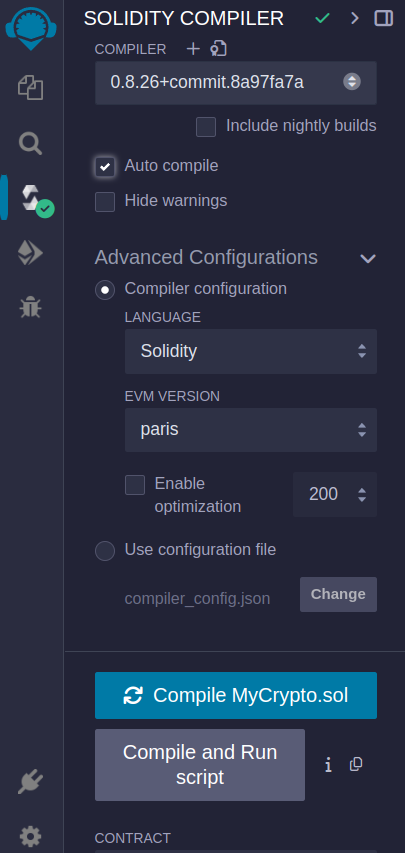
Now! You how to deploy your token, but before that you need to
connect Remix IDE to your Core wallet account.
Click on deploy icon that is right next to the compile icon in the side bar.
Click and scroll through the “Environment” bar and
select “Injected Provider - Core.”
Full video linked below
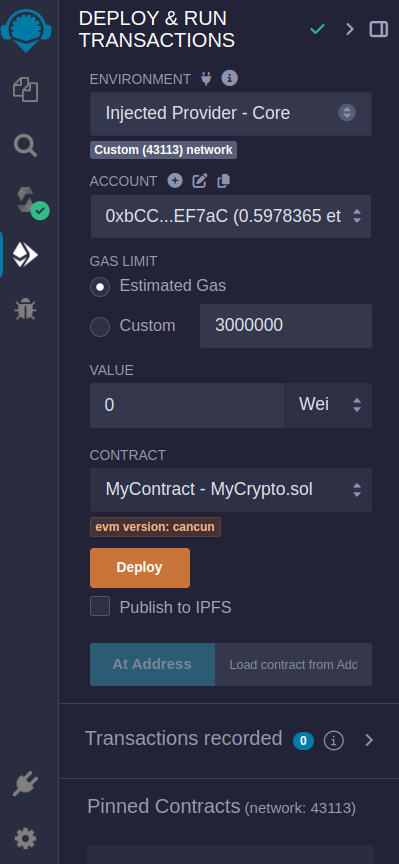
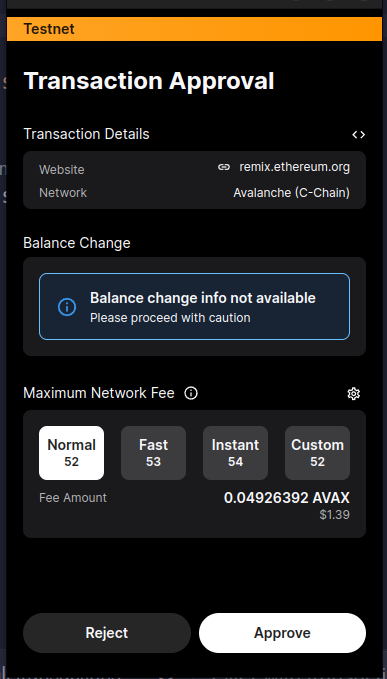
The Core wallet page will appear. Click on “Approve” to finally connect your Core wallet to Remix IDE.
Now, we will officially Deployed our token.
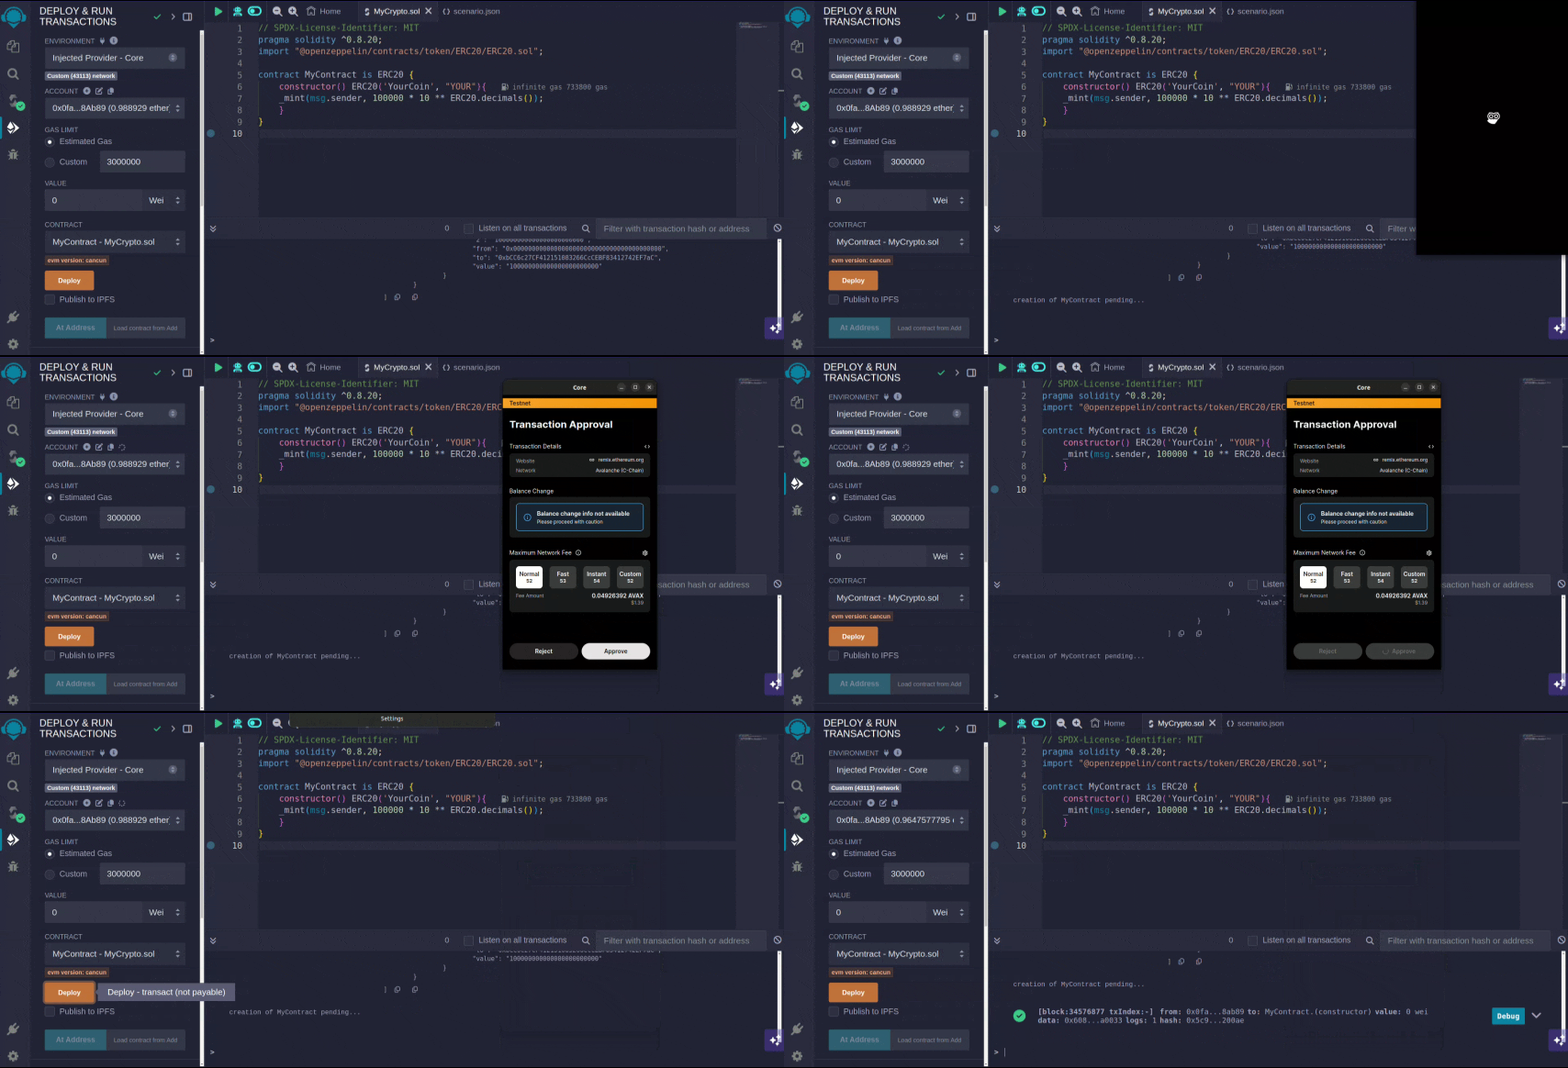
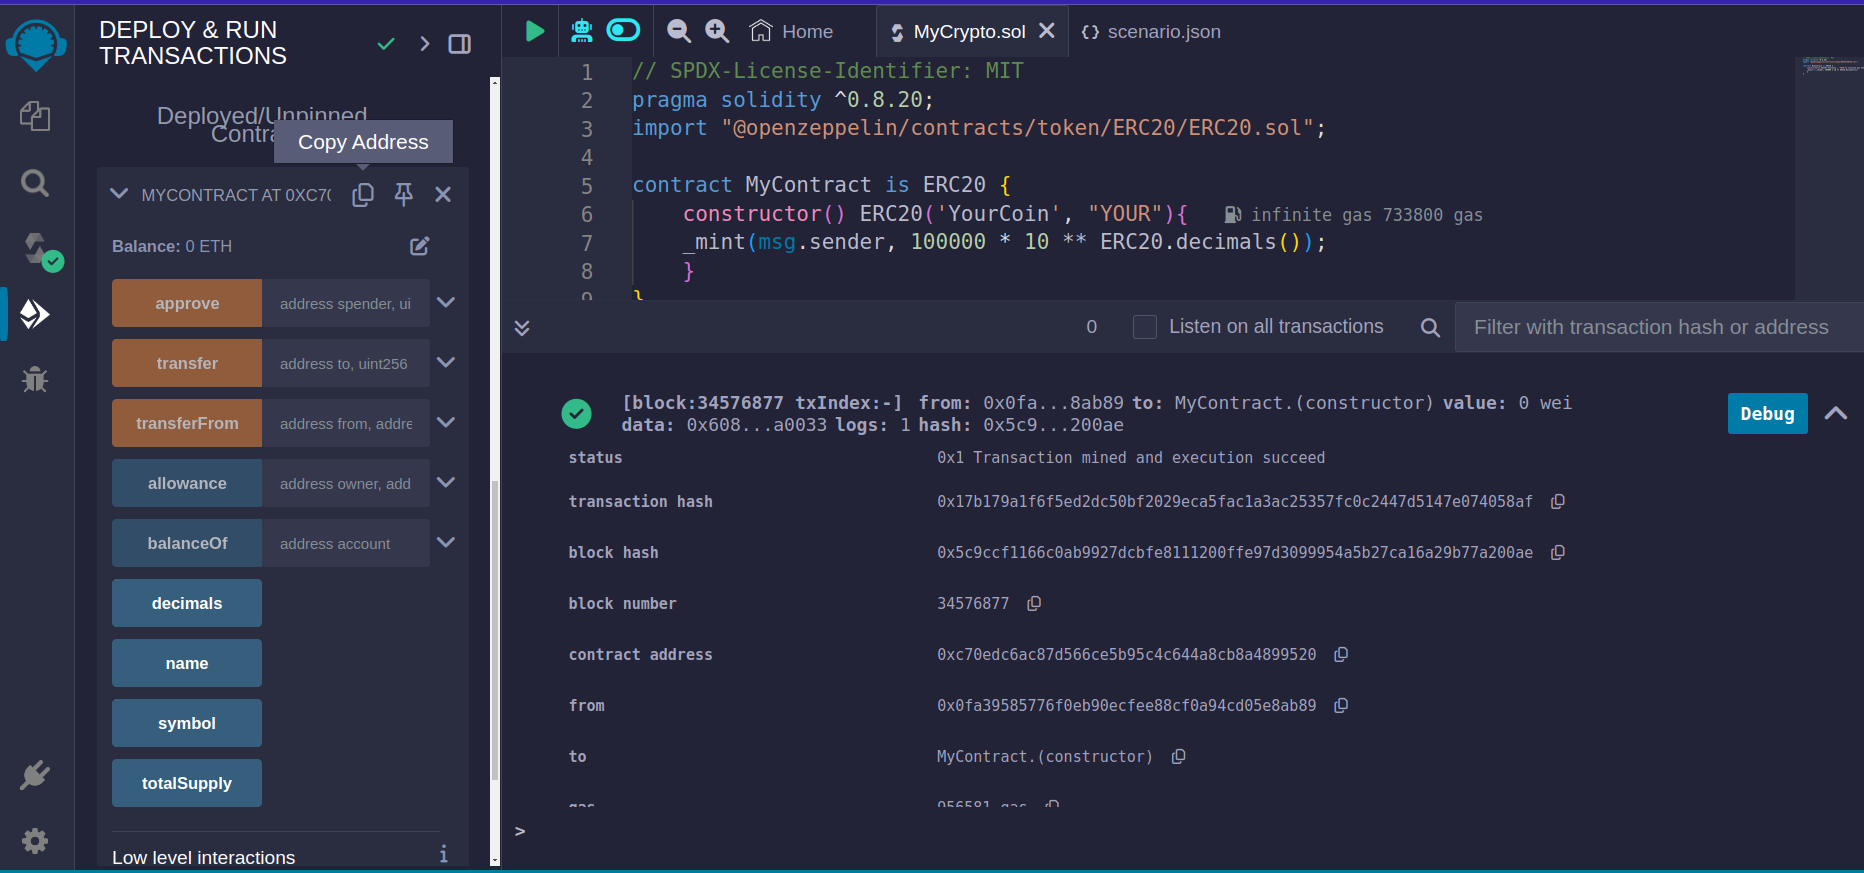
Congratulations! Your contract has been successfully deployed.
(You will see a message similar to this in your compiler).

Great work! Impressive till now.
Now we have to do a little bit more to actually see our token and its supply
so that we can use it too. Let’s see how?
First of all, you need to -
Copy the contract address from the "Deployed Contracts" section.
Let's proceed.
Last and Final Step:
Now, we need to copy this address and import it into our core wallet.
Here are the steps:
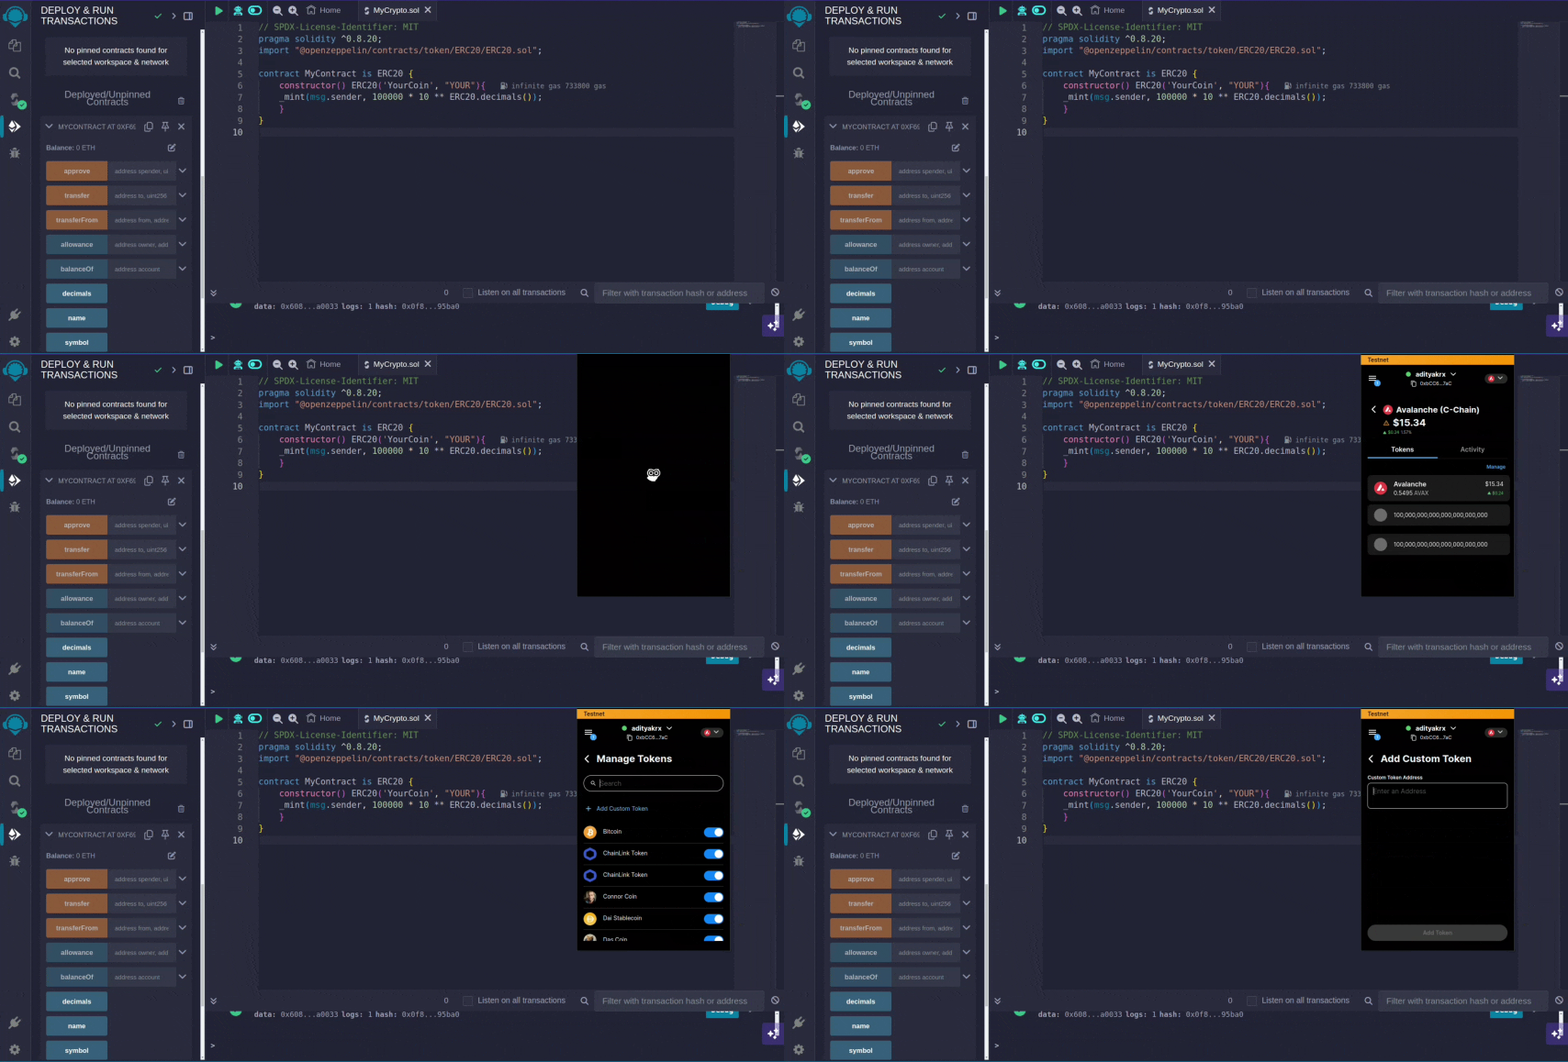
Click on "Avalanche C-chain Token" section.
Click on "Manage".
Click on "Add Custom Token".
Paste the contract address you copied from Remix.
Detailed Video with steps
Congratulations! We've successfully obtained
YourCoin, our own ERC20 token!
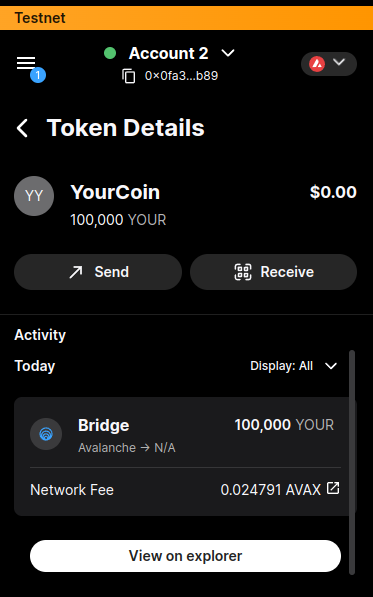
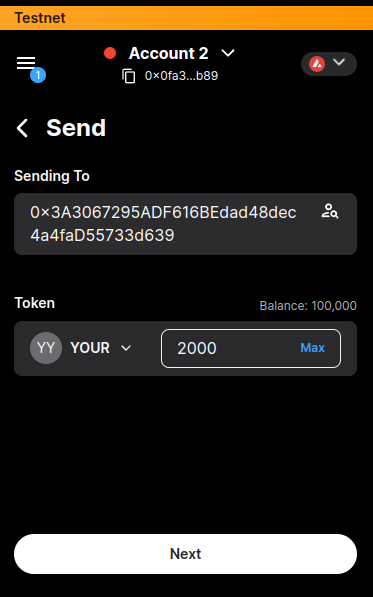
You can now send it to other addresses as well.
Enjoy your new ERC20 token!
Final Thoughts:
Subscribe to my newsletter
Read articles from Adityaa kr directly inside your inbox. Subscribe to the newsletter, and don't miss out.
Written by

Adityaa kr
Adityaa kr
Passionate about tech and driven by curiosity.