🚀 From Zero to Kubernetes: A Comprehensive Guide to Deploying NGINX on AWS EKS with Visual Studio Code
 Sprasad Pujari
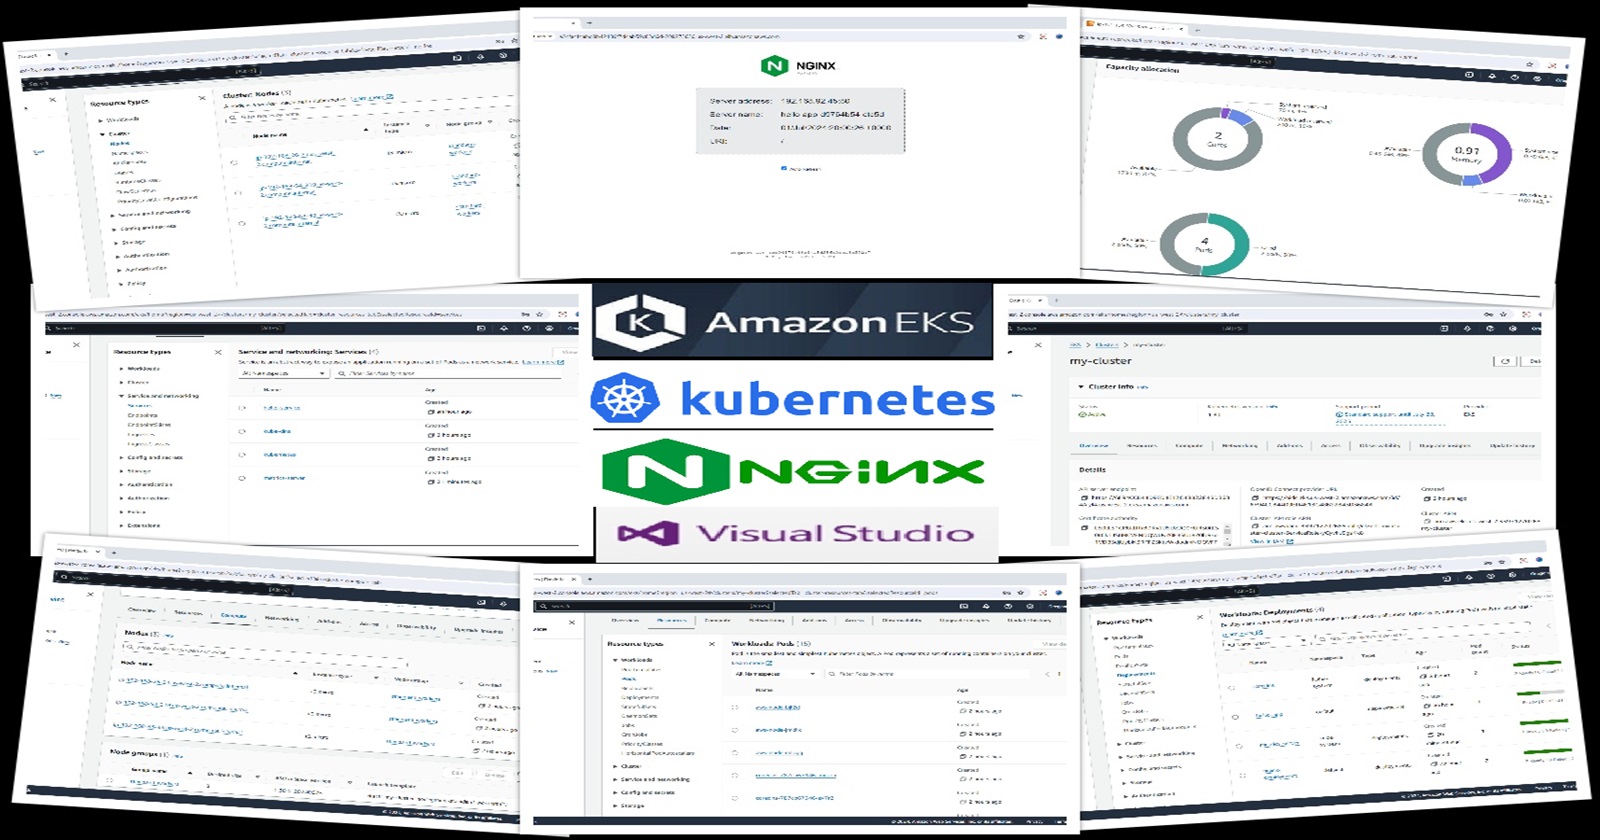
This comprehensive guide will take you on a journey from the basics of Kubernetes to deploying a real-world application on Amazon's Elastic Kubernetes Service (EKS). We'll be using Visual Studio Code as our development environment, making the process streamlined and accessible for developers of all levels.
📝 Step-by-Step Guide to Install EKS on Visual Studio Code:
🛠️ Install Prerequisites
• AWS account:
Sign up for an AWS account if you don't have one
Set up IAM user with necessary permissions (EC2, VPC, IAM, CloudFormation) • AWS CLI:
Download and install AWS CLI from the official website
Run
aws configureto set up your credentials • kubectl:Install kubectl using your system's package manager or download from Kubernetes website
Verify installation:
kubectl version --client• eksctl:Install eksctl using Homebrew (macOS) or Chocolatey (Windows)
For Linux, download the latest release from GitHub
Verify installation:
eksctl version
🧩 Install VS Code Extensions
• Open VS Code
• Go to Extensions (Ctrl+Shift+X)
• Search and install:
"AWS Toolkit"
"Kubernetes"
🔑 Configure AWS Credentials • Open Command Palette (Ctrl+Shift+P)
• Type "AWS: Create Credentials Profile"
• Follow prompts to enter your AWS Access Key ID and Secret Access Key
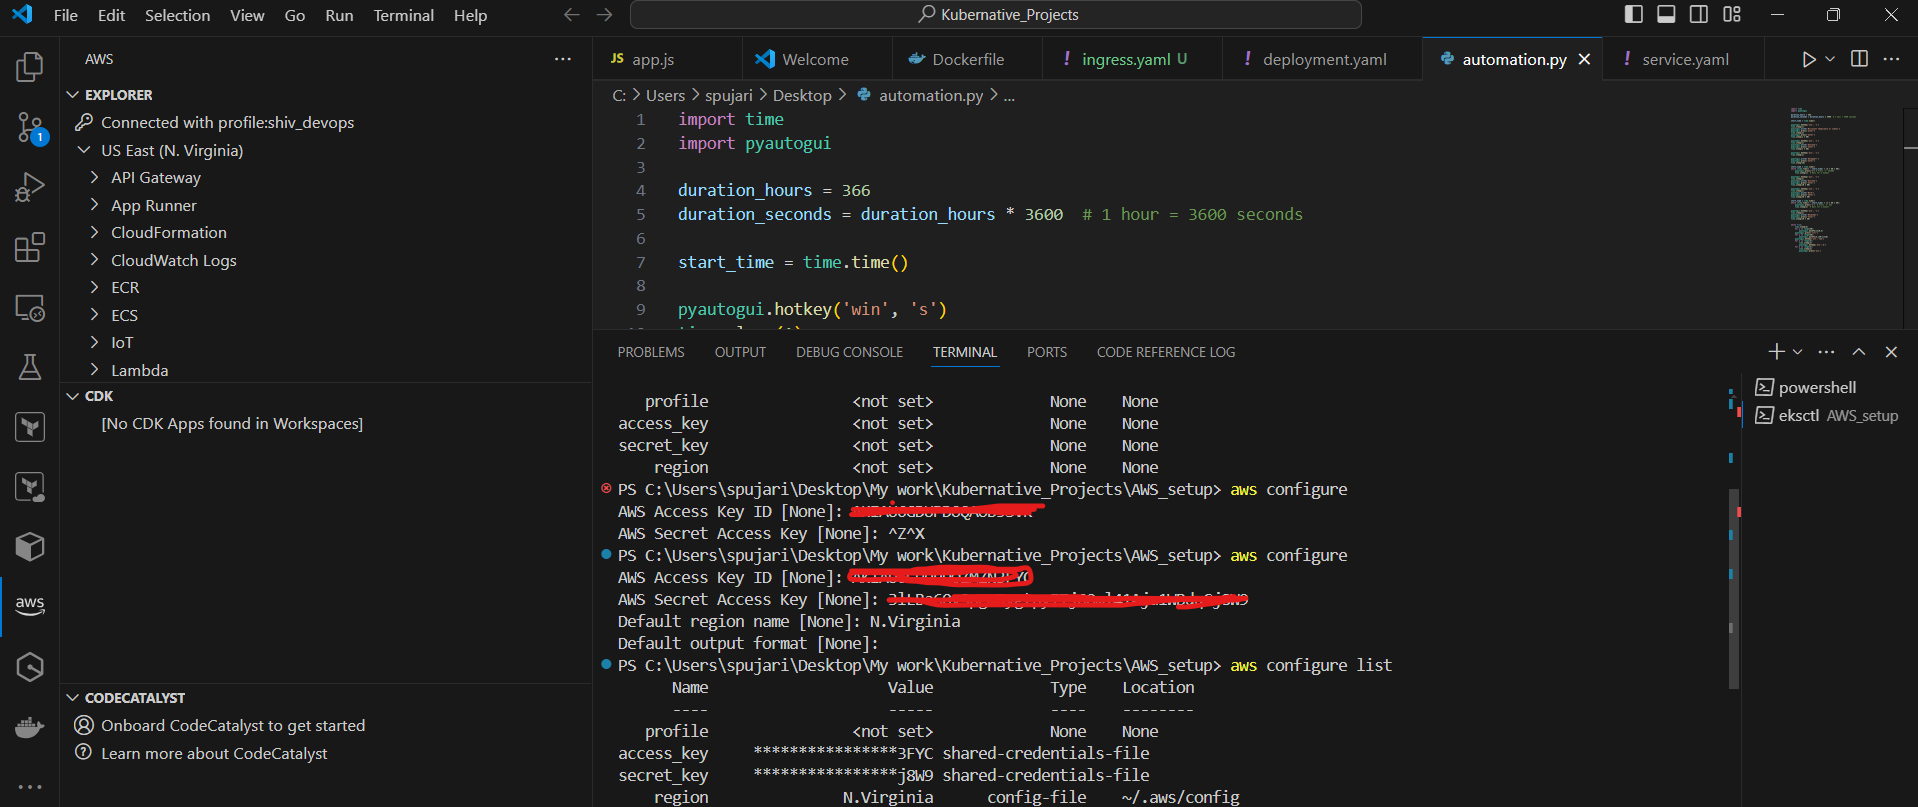
🌐 Create EKS Cluster (if not already created)
• Open a terminal in VS Code • Run:
eksctl create cluster --name my-cluster --region us-west-2 --nodegroup-name standard-workers --node-type t3.micro --nodes 3 --nodes-min 1 --nodes-max 4 --managed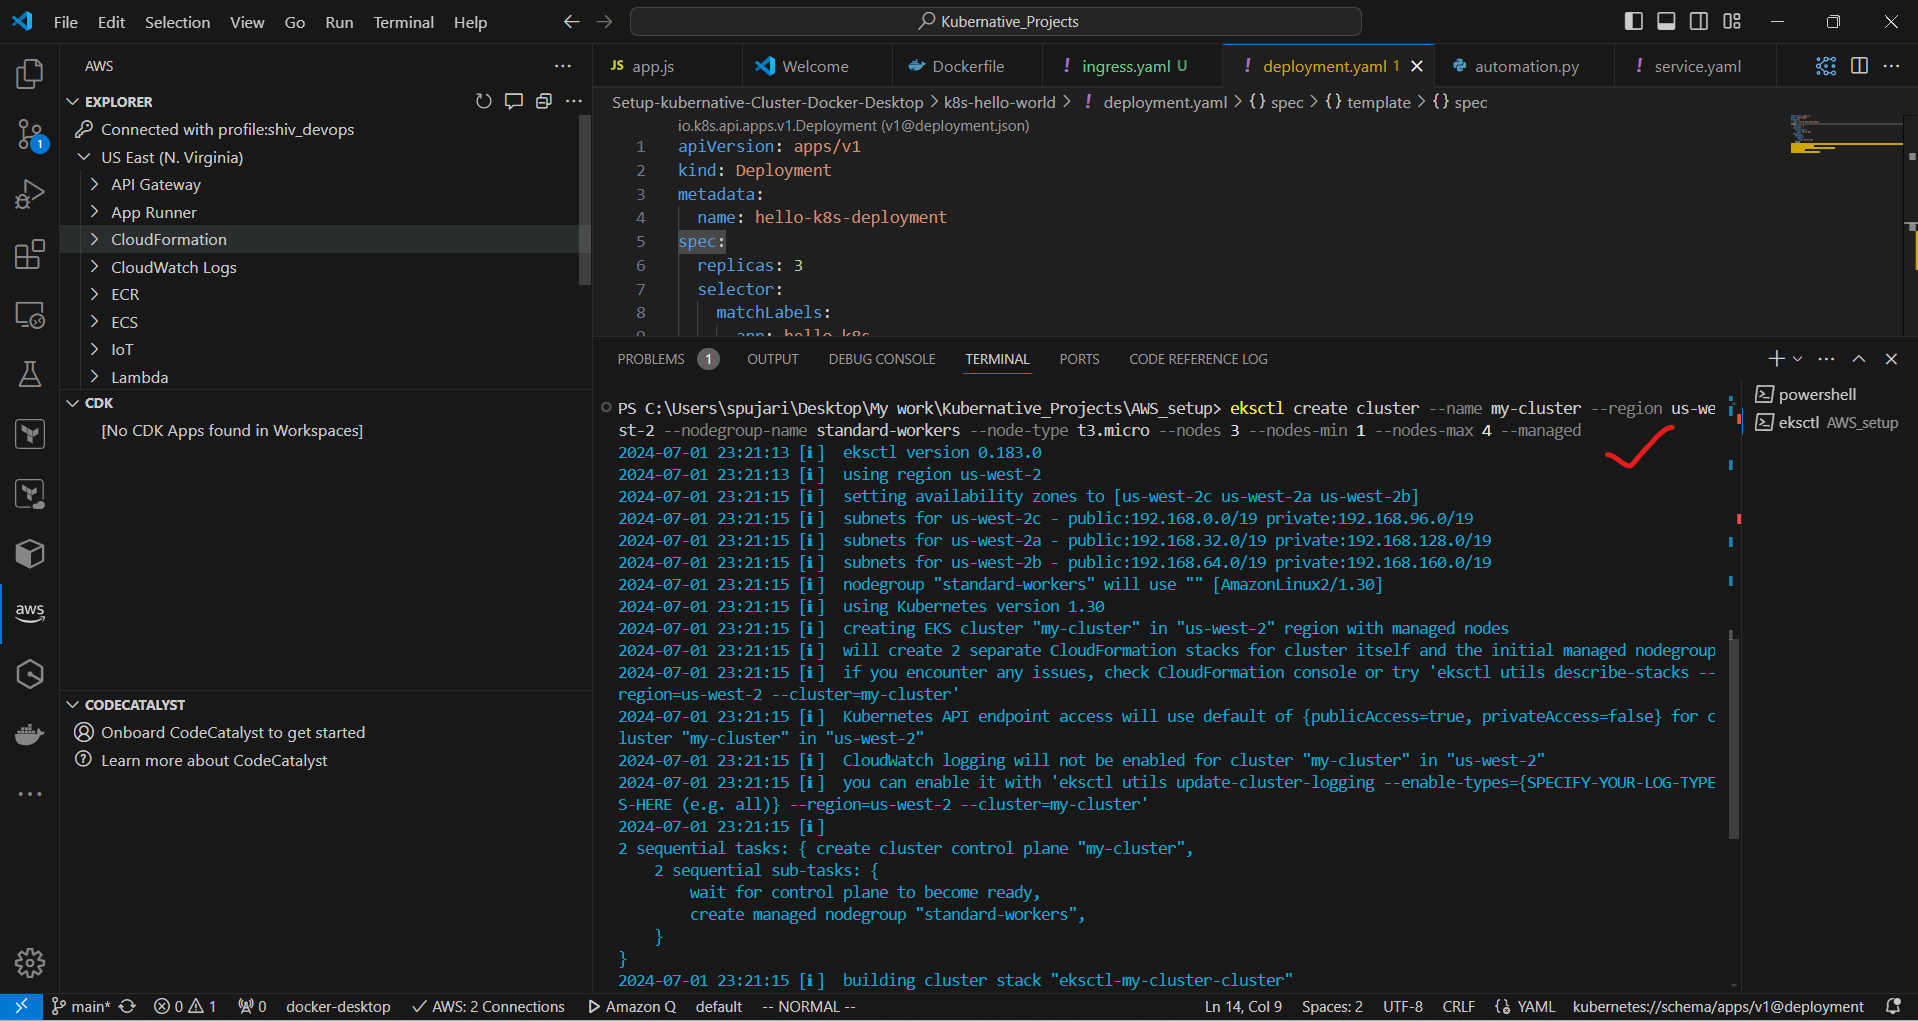
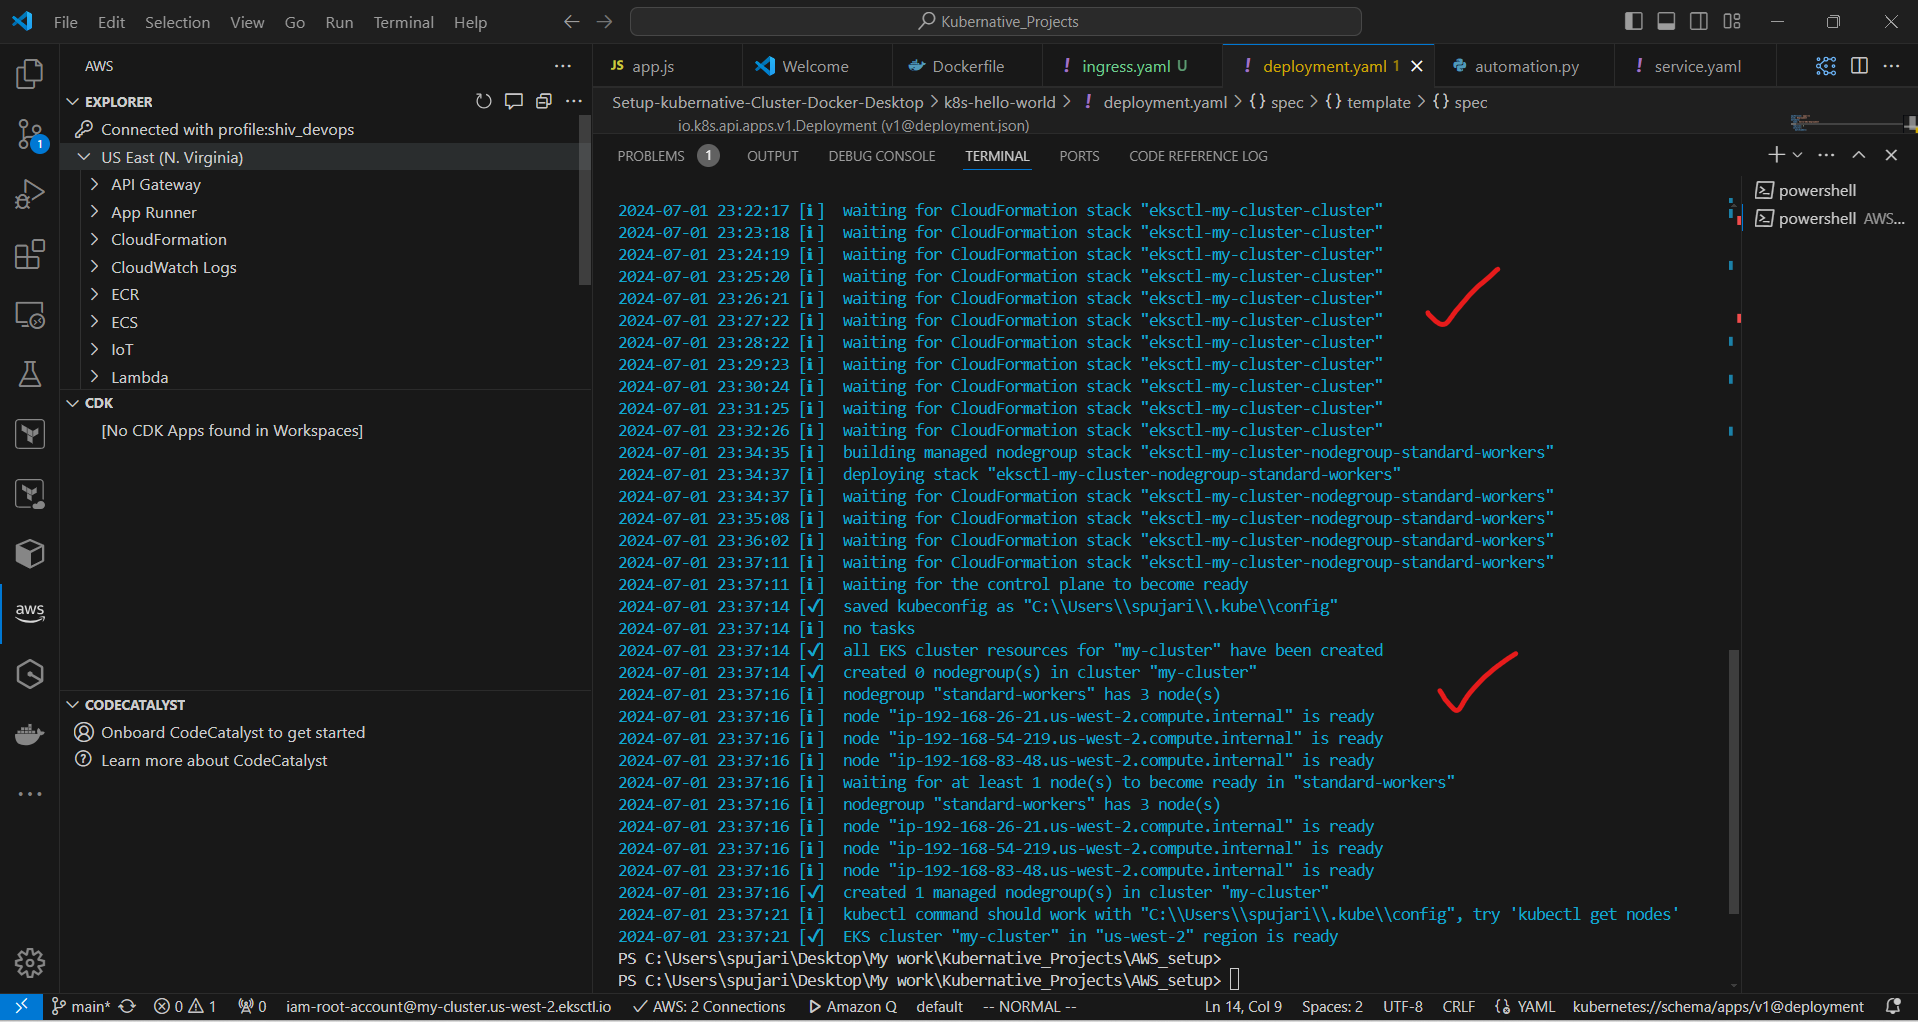
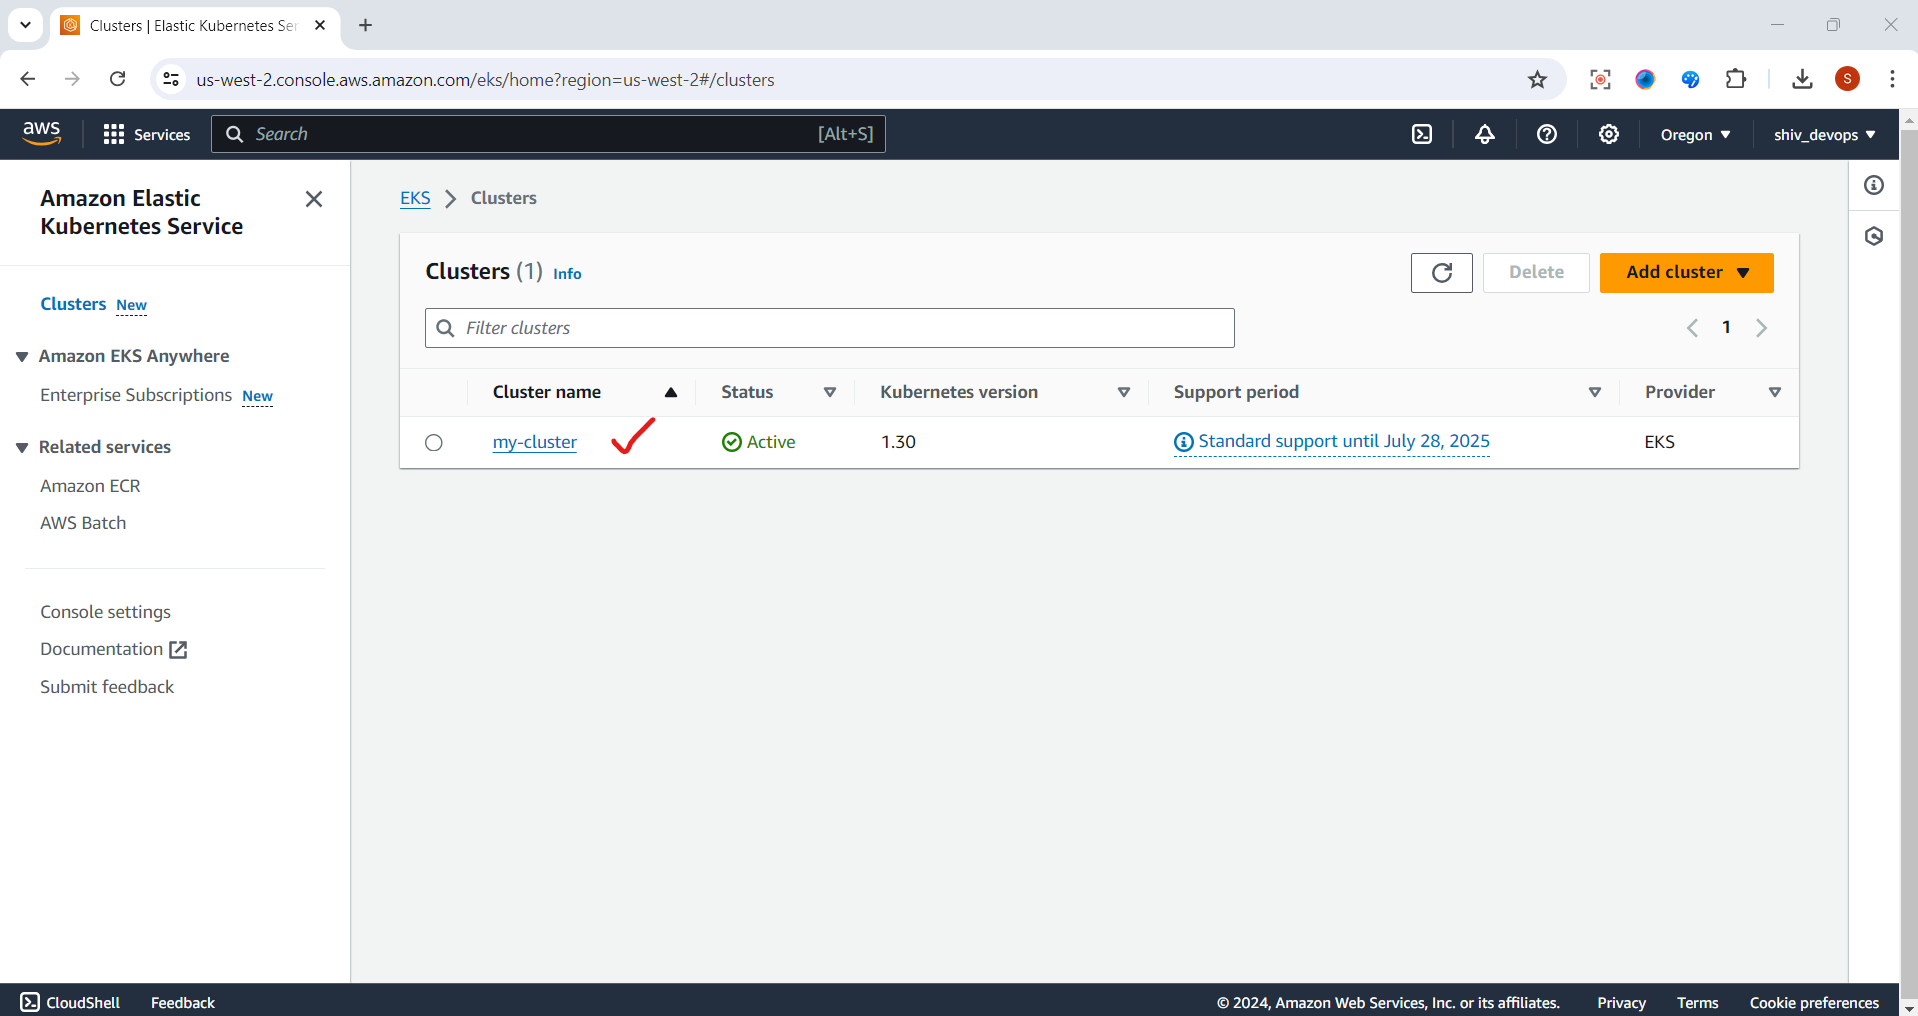
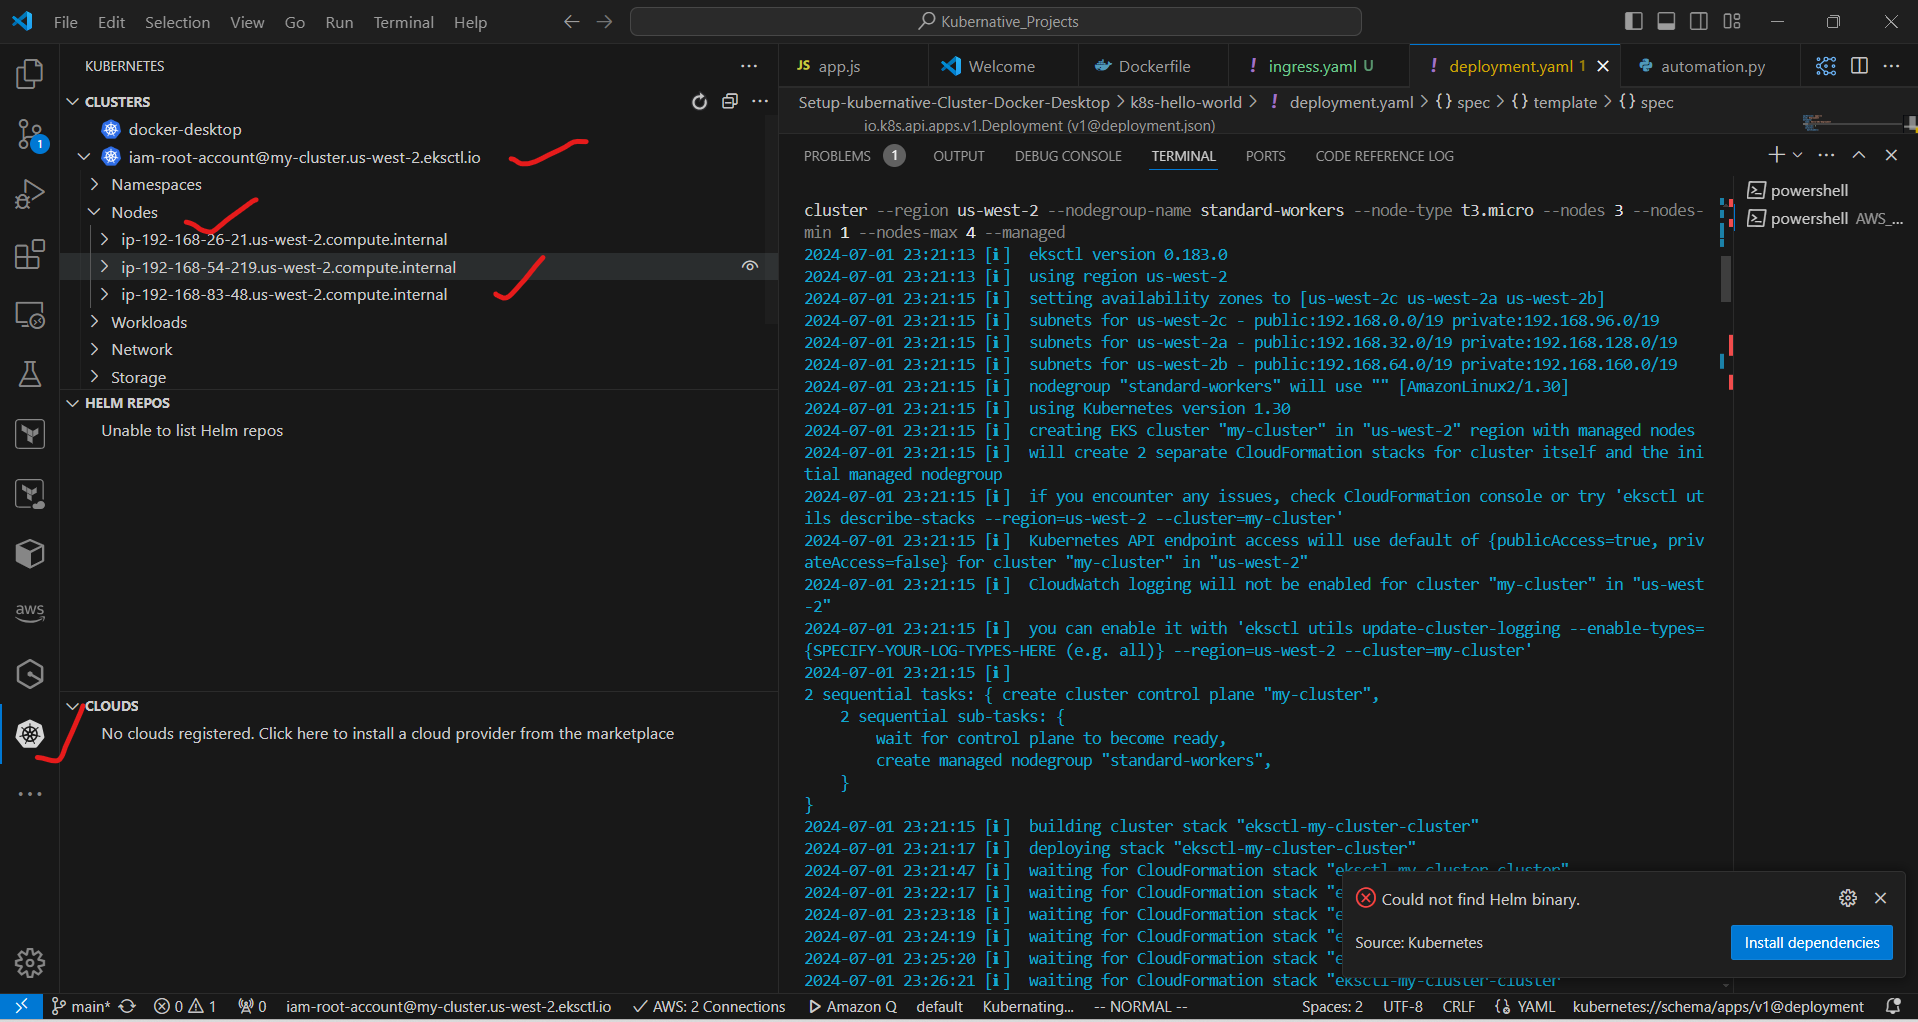
Now lets check our my-cluster is created in AWS
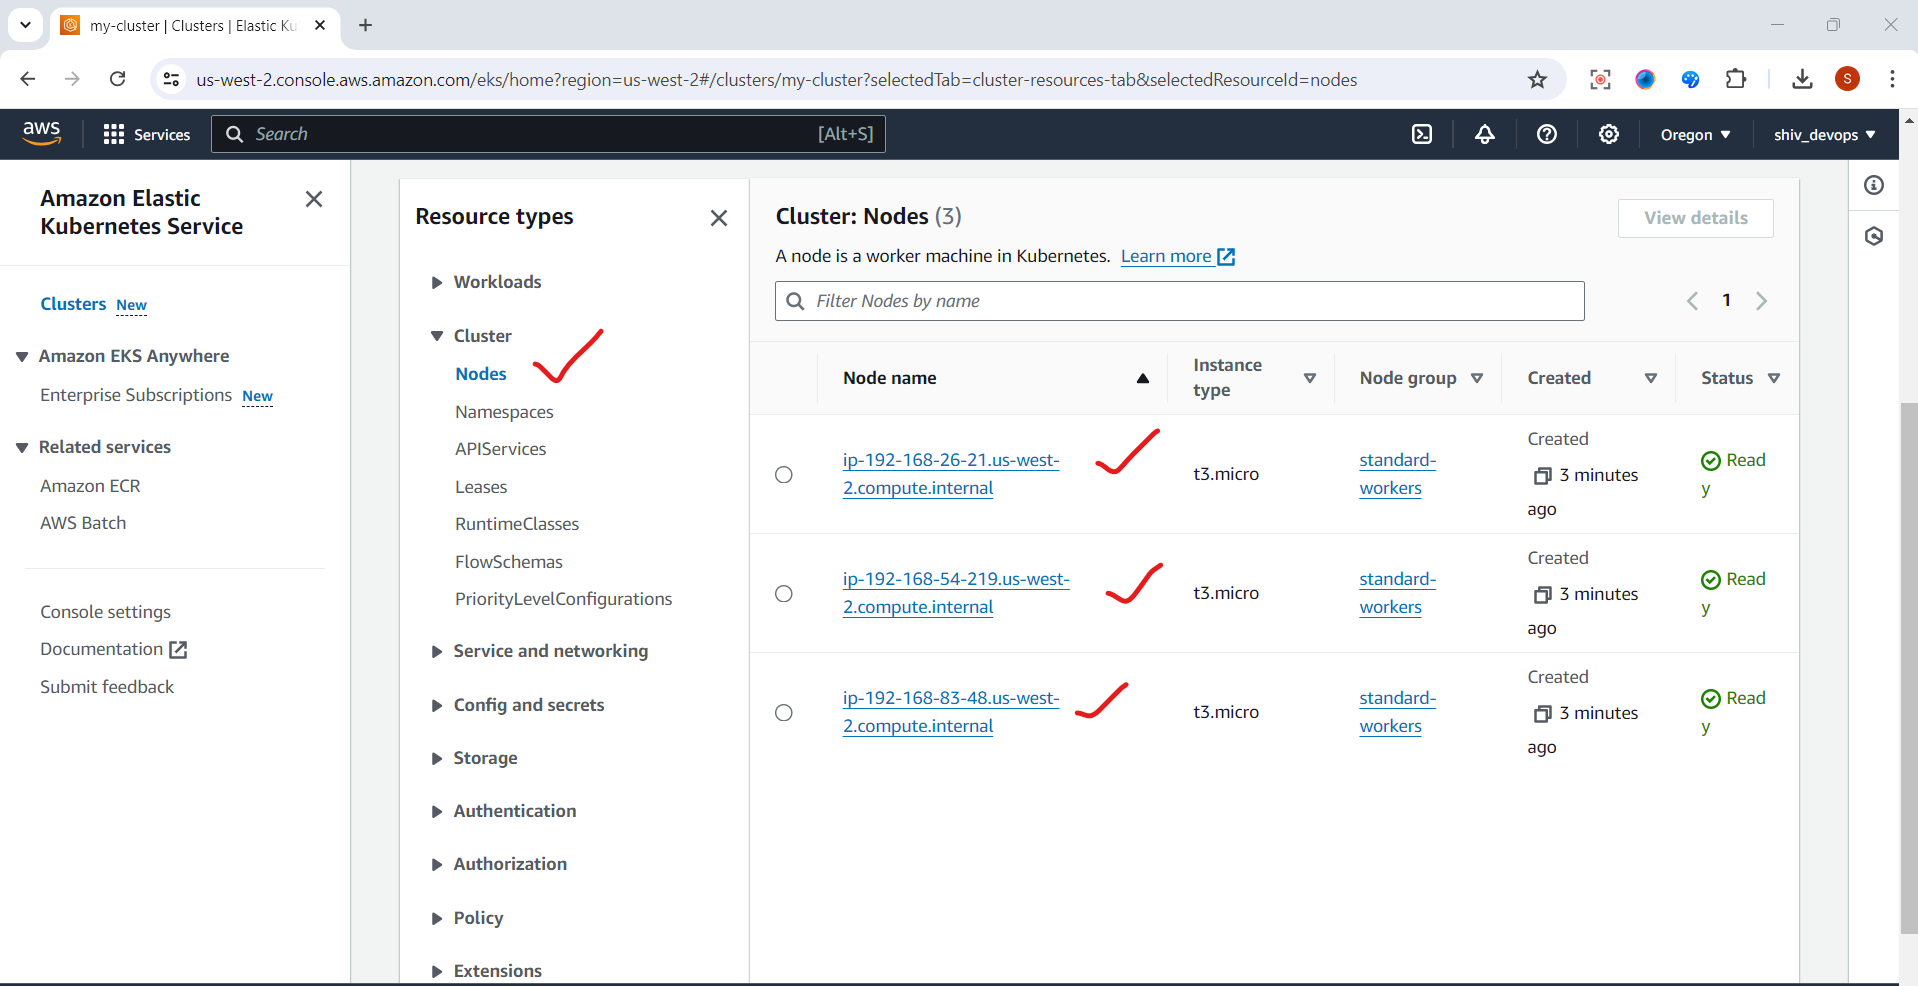
As we mention in our command require 3 worker node ,let see 3 worker node is created in our AWS environment or not.
This process may take 15-20 minutes
🔗 Configure kubectl • In the terminal, run:
aws eks --region us-west-2 update-kubeconfig --name my-cluster🔍 Verify Connection • In the terminal, run:
kubectl get nodes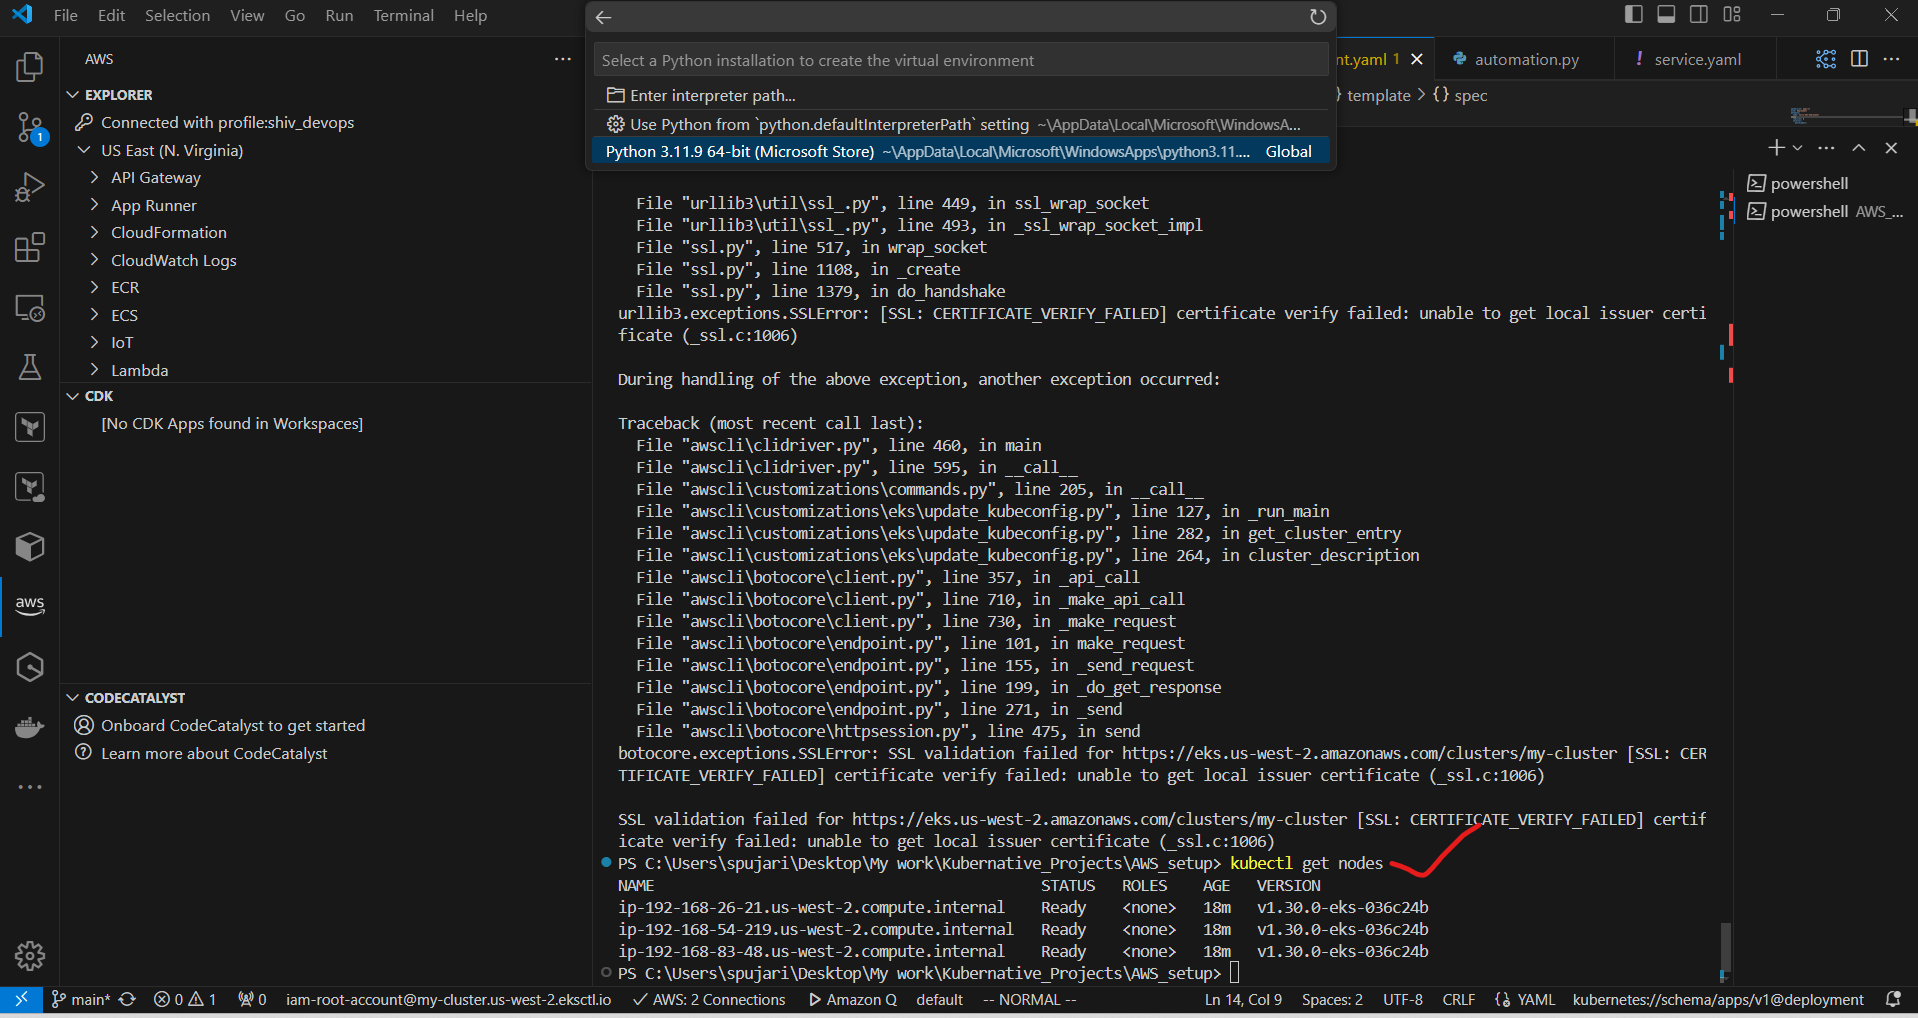
• You should see your cluster nodes listed
🧭 Explore EKS in VS Code
• Open the AWS Explorer (AWS icon in the sidebar)
• Navigate to EKS under your region
• You should see your cluster listed
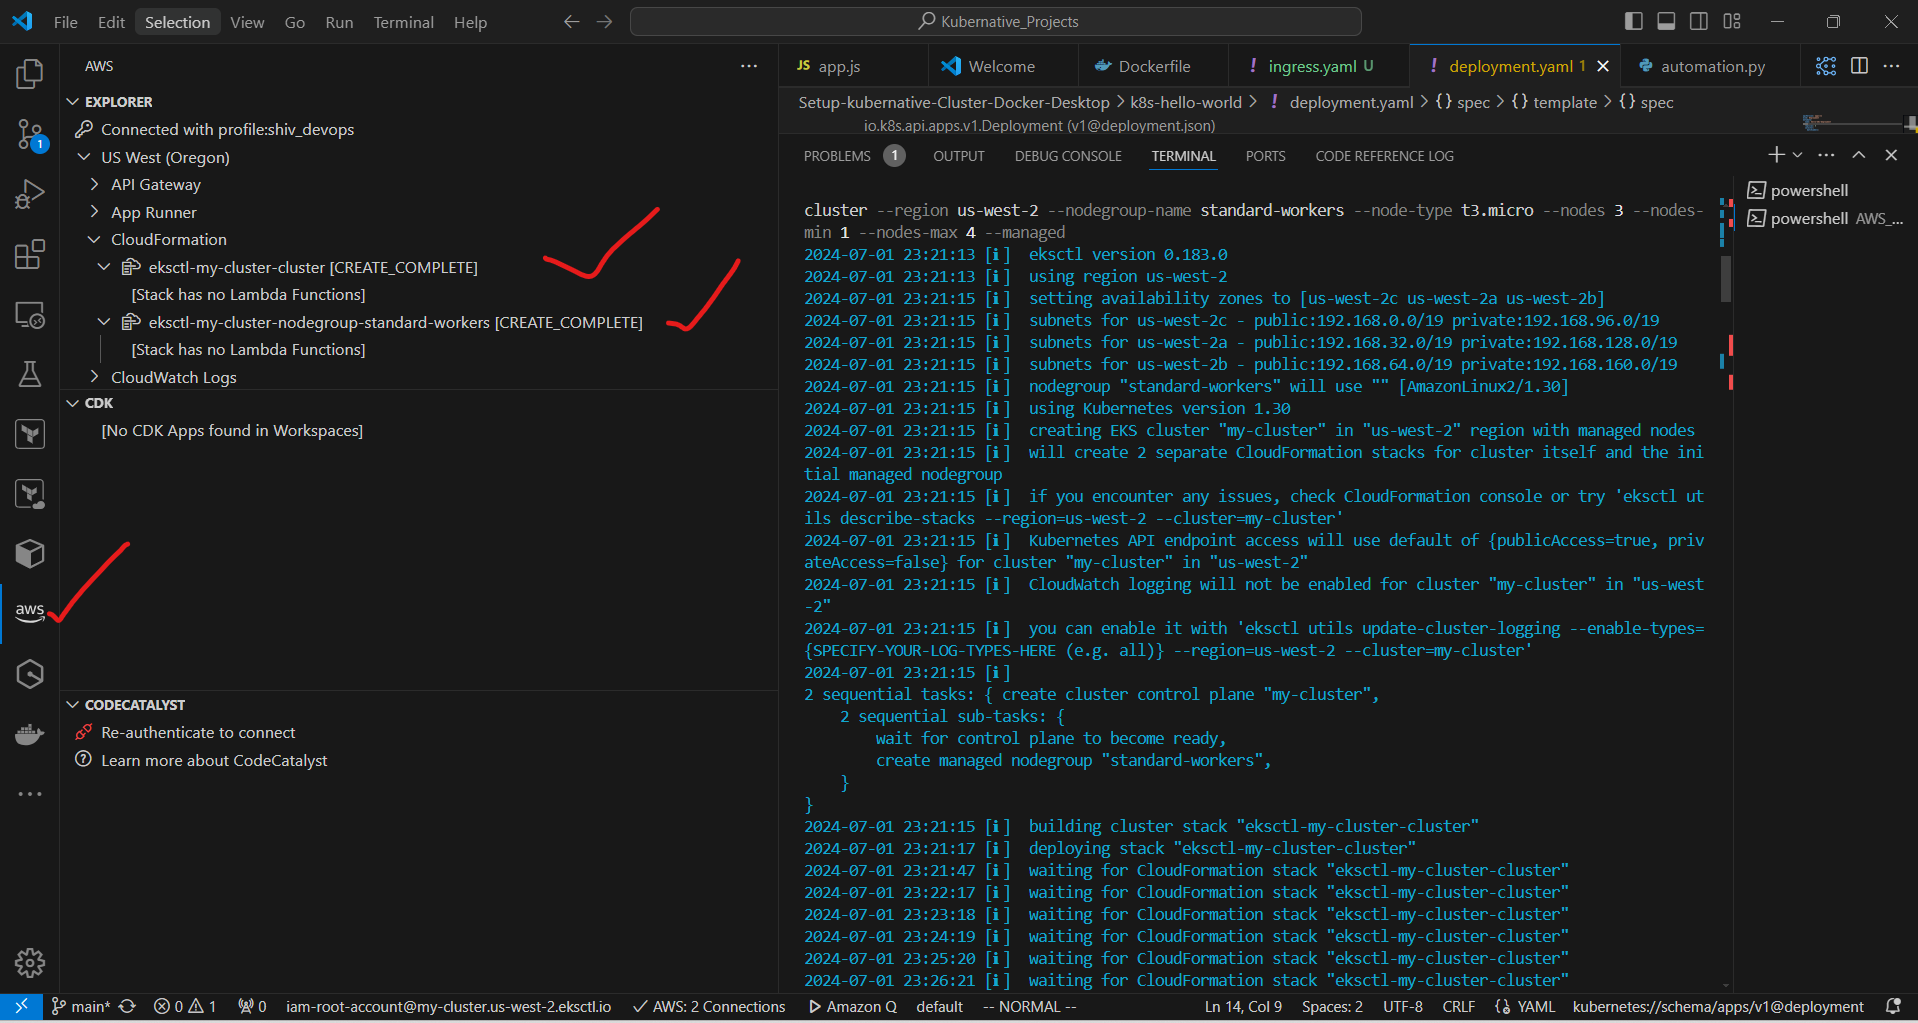
📊 Use Kubernetes Explorer
• Click on the Kubernetes icon in the sidebar
• Your EKS cluster should appear here
🚀 Deploy to EKS
• Create a file named
deployment.yaml• Add a sample deployment:
 apiVersion: apps/v1
 kind: Deployment
 metadata:
   name: hello-app
 spec:
   replicas: 3
   selector:
     matchLabels:
       app: hello
   template:
     metadata:
       labels:
         app: hello
     spec:
       containers:
       - name: hello
         image: nginxdemos/hello
         ports:
         - containerPort: 80
         resources:
           requests:
             cpu: 100m
             memory: 128Mi
           limits:
             cpu: 500m
             memory: 256Mi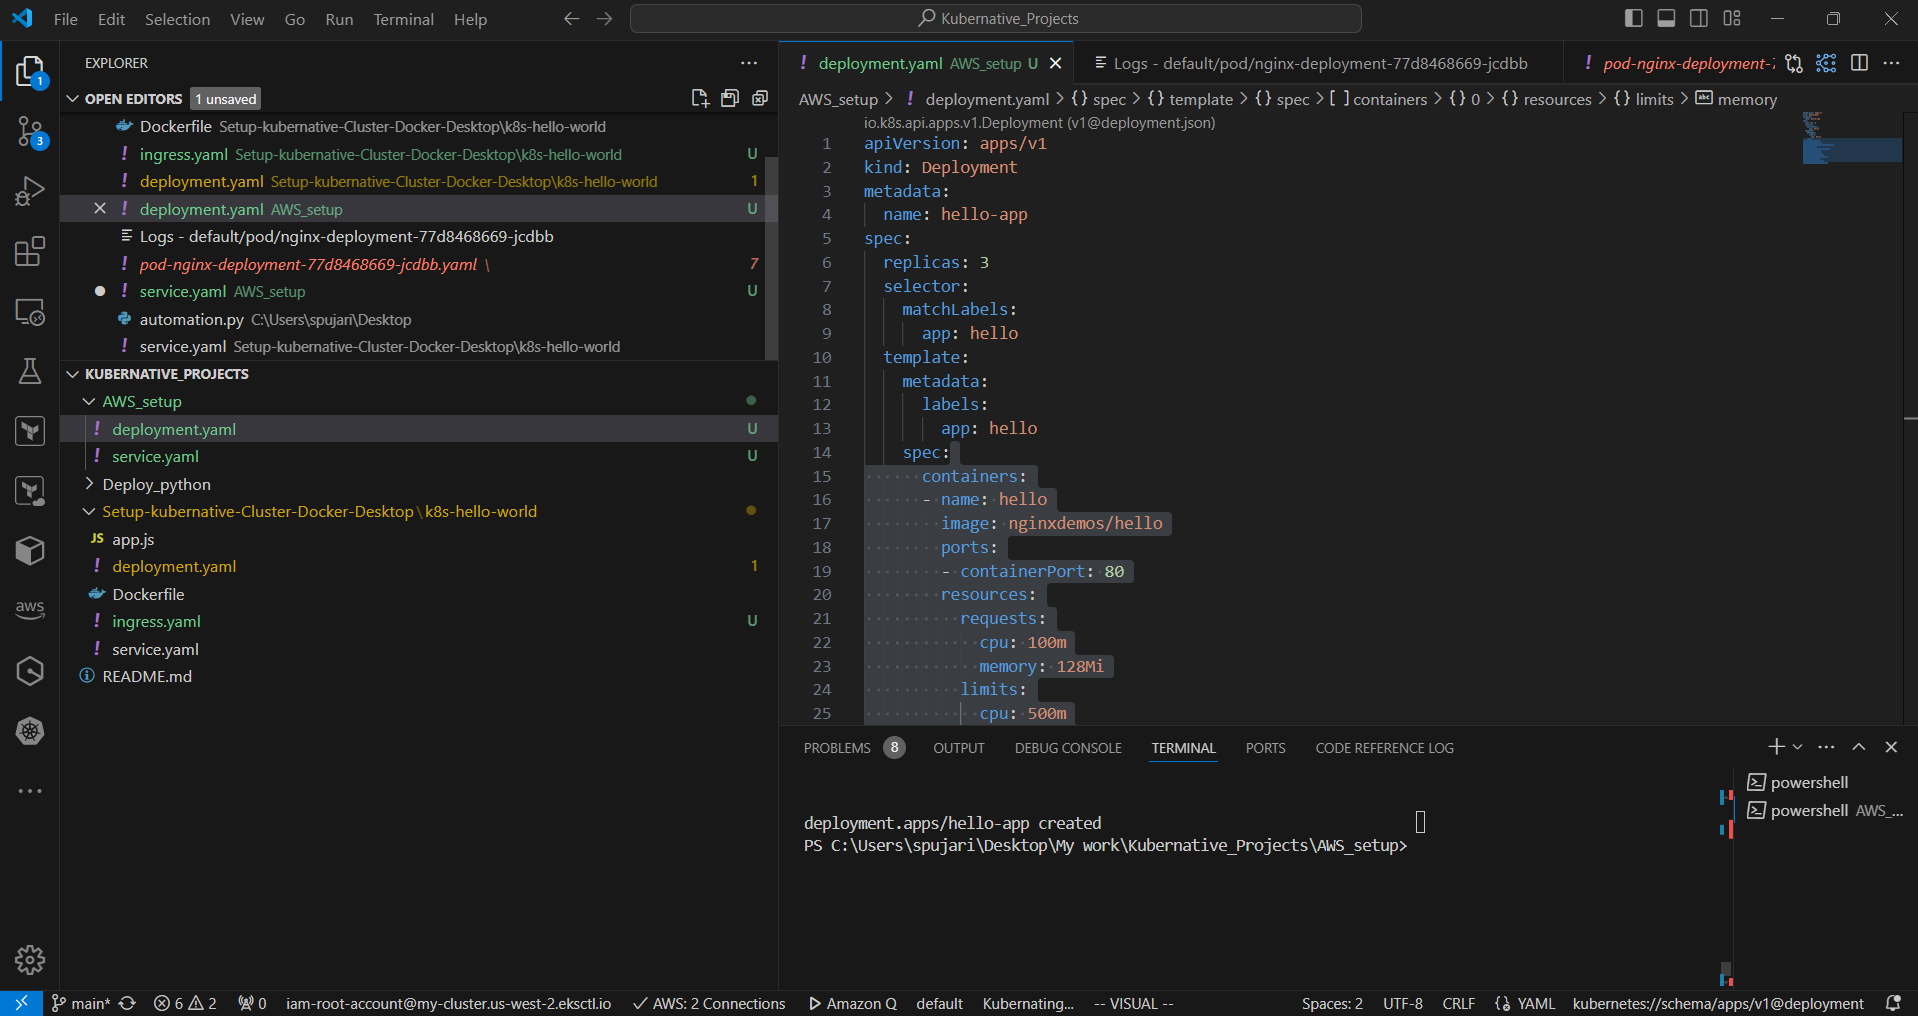
•Run below command to apply the deployment file
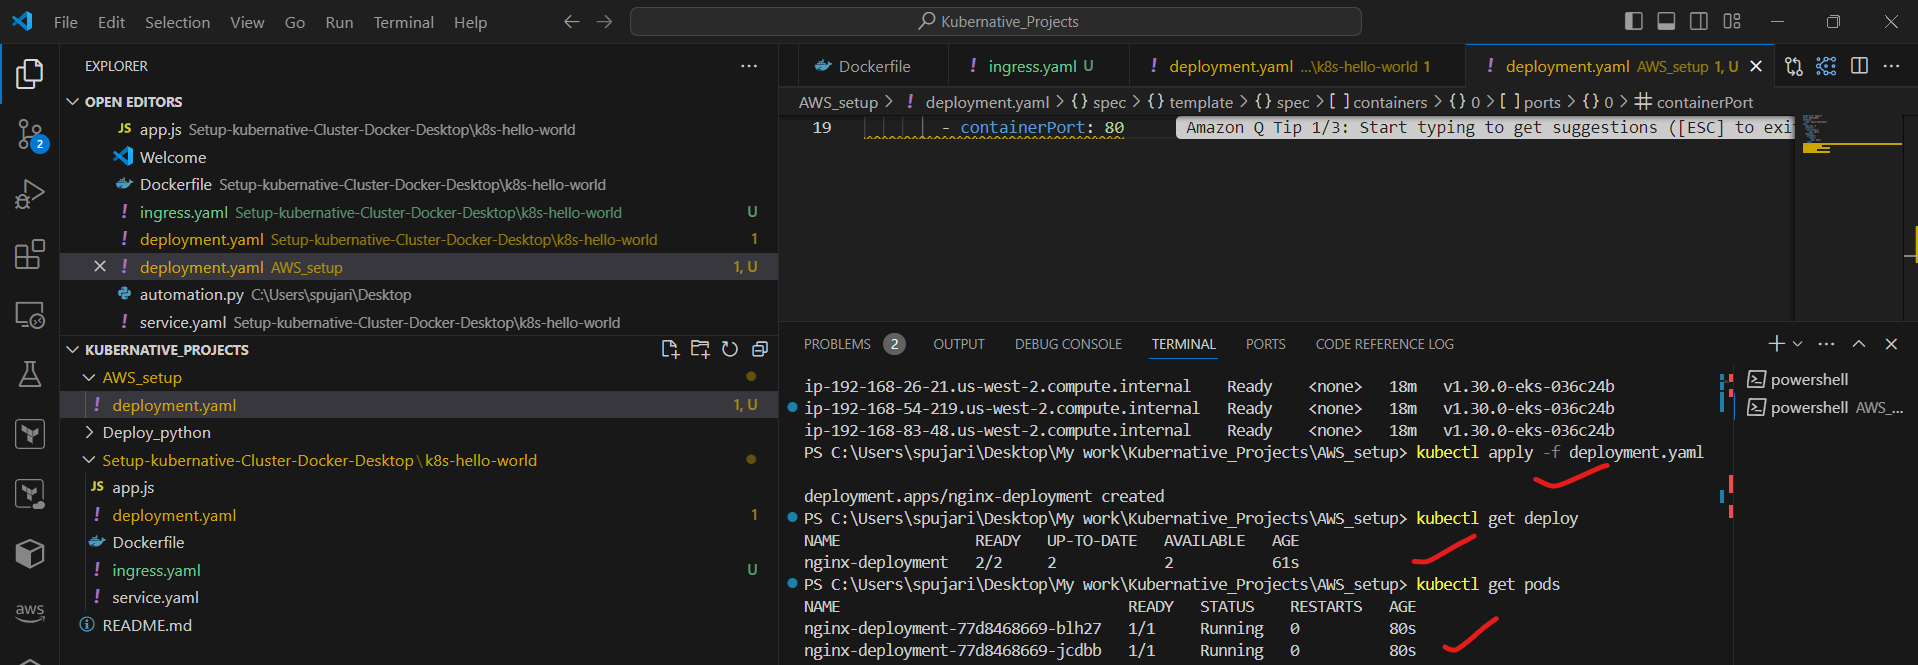
• Verify deployment:
 kubectl get deployments
 kubectl get pods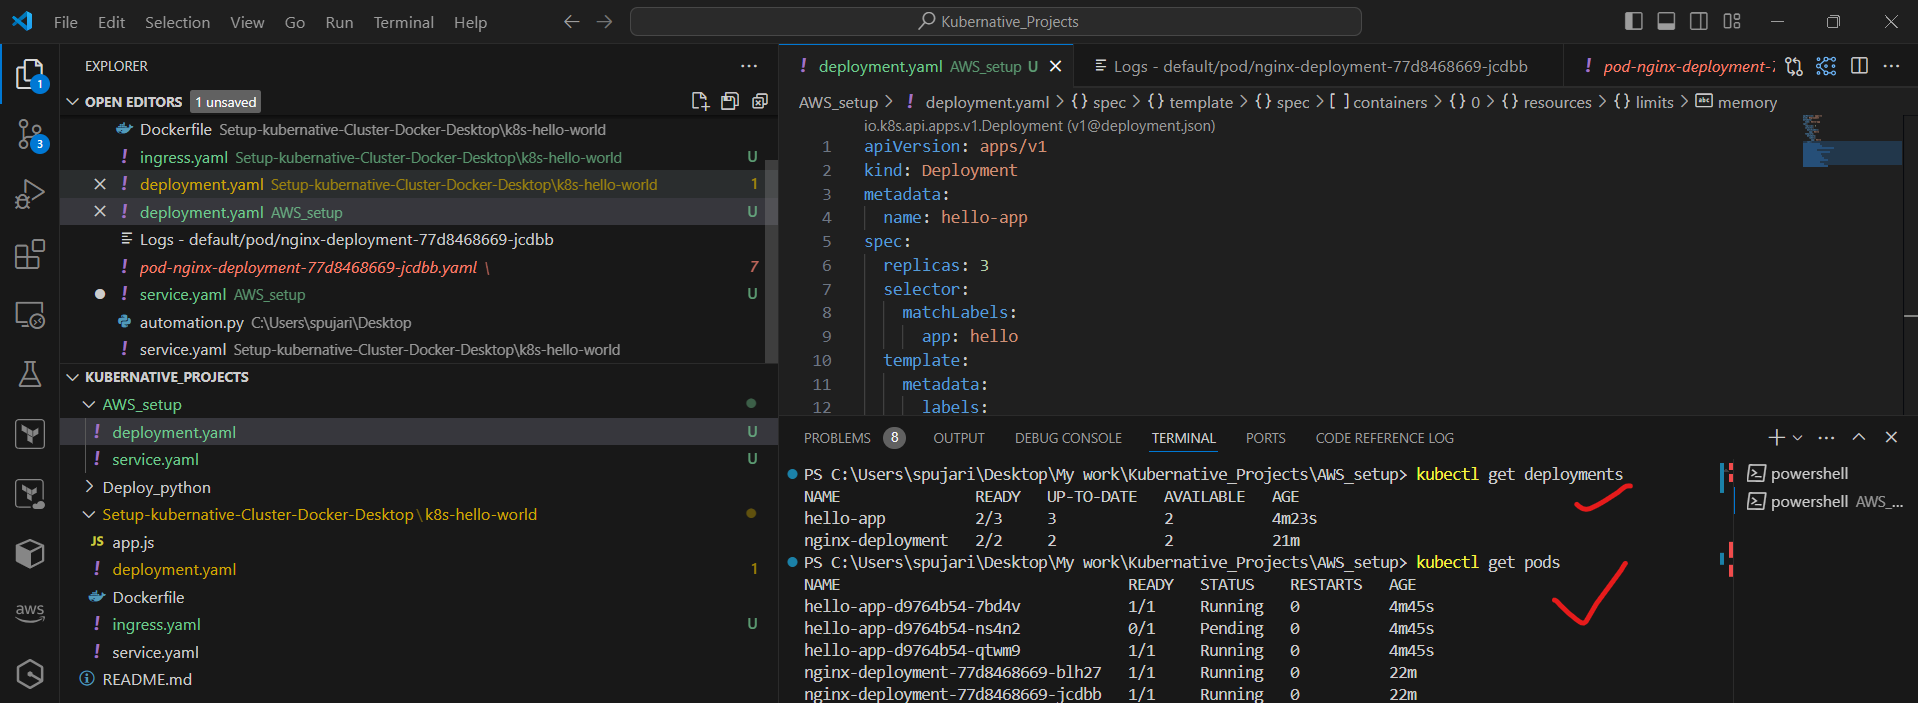
• Check pod details:
kubectl describe pod <pod-name>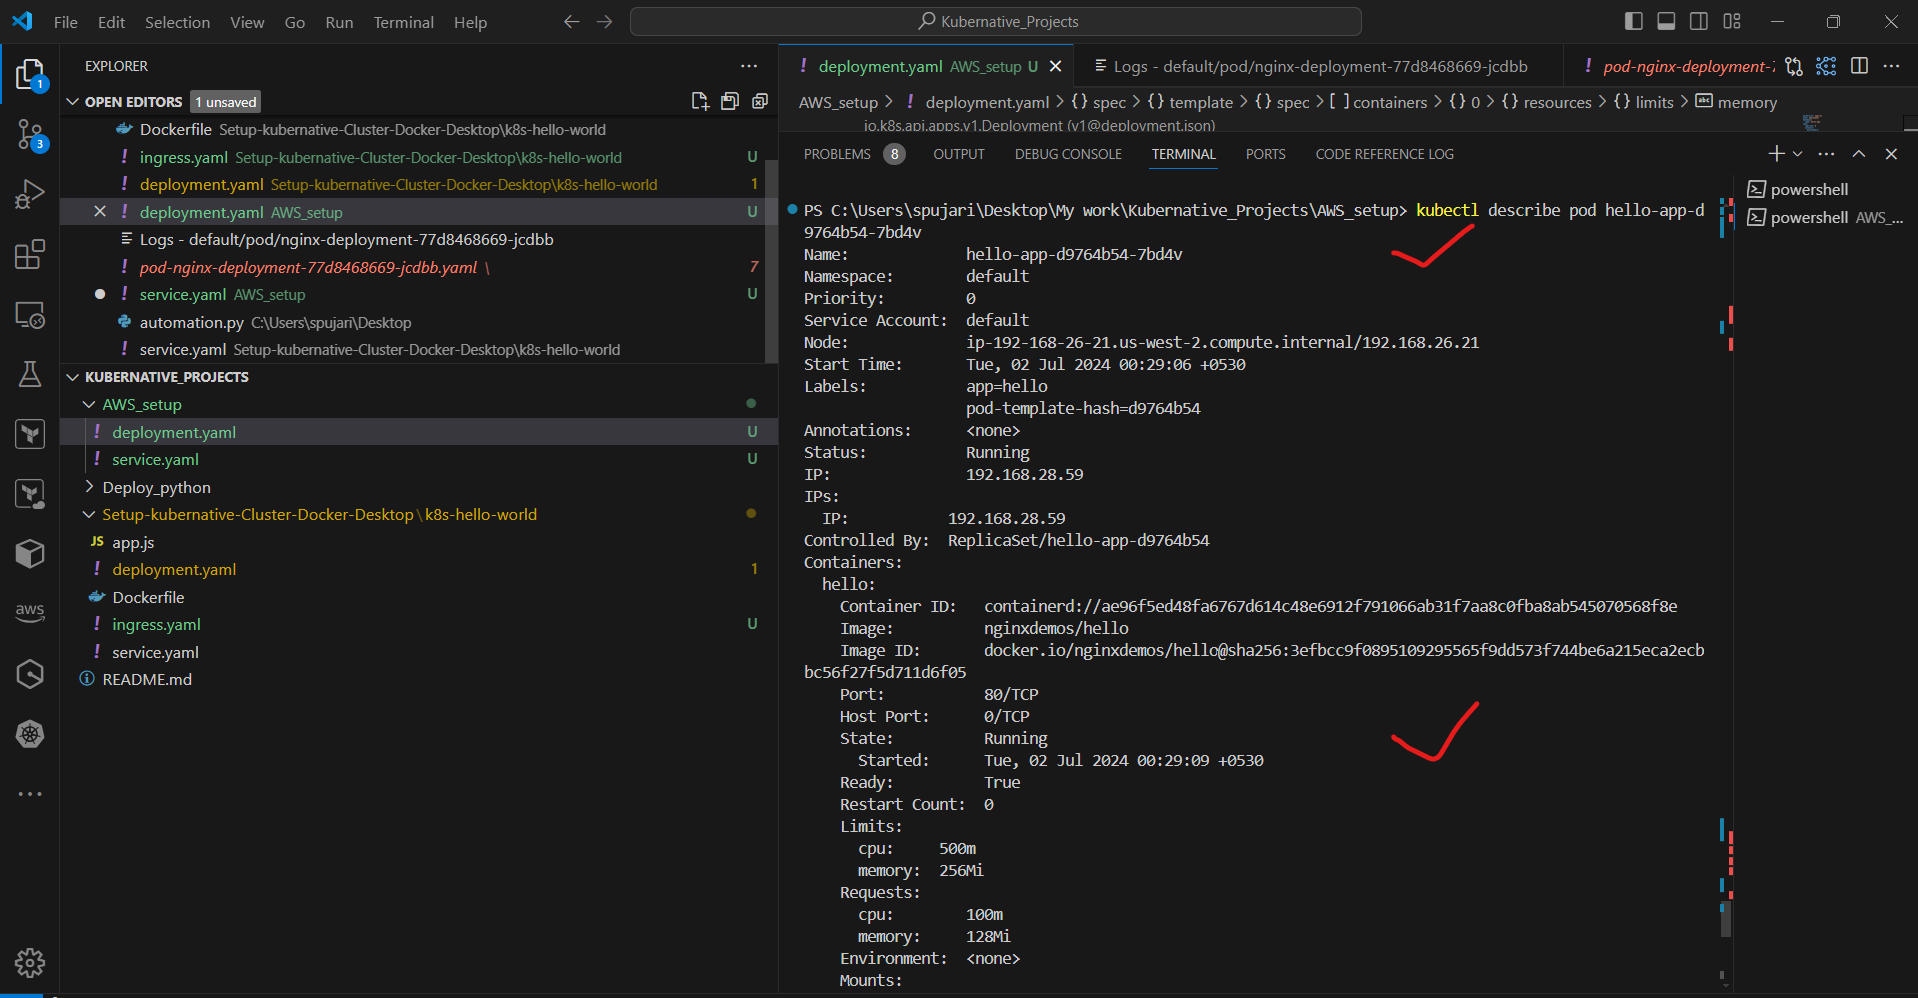
🔬 Monitor Deployment
• Use the Kubernetes Explorer to view pods, services, etc.
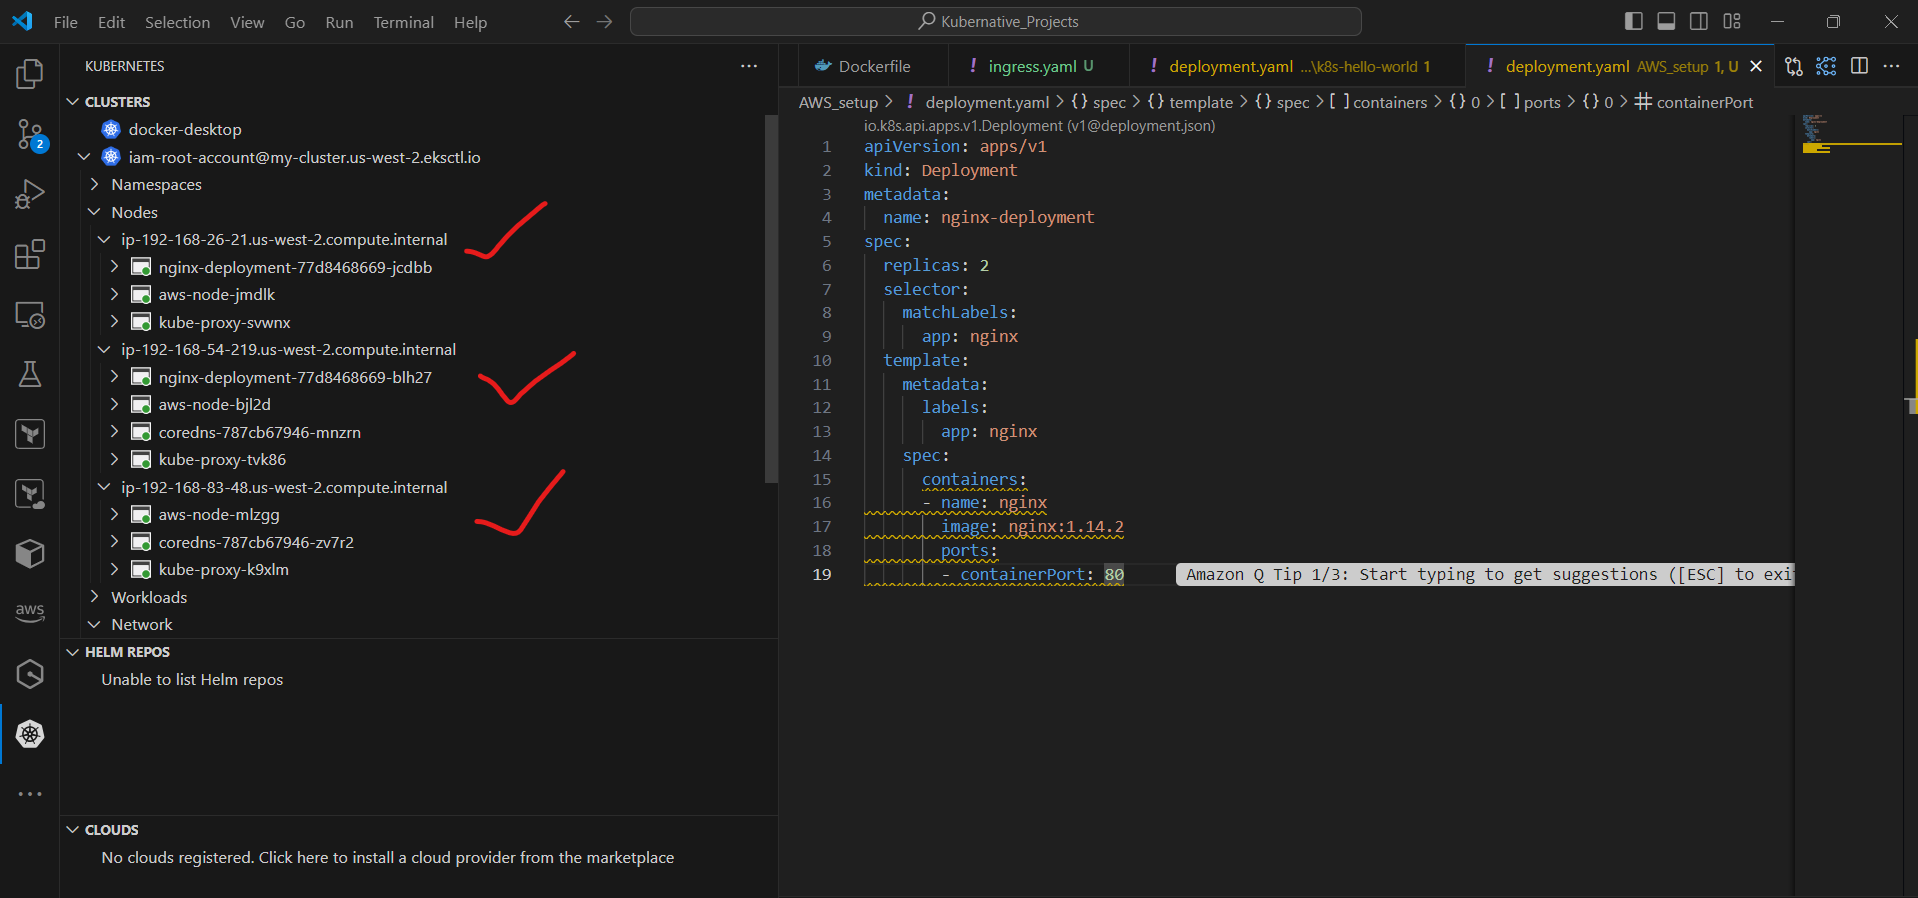
• Right-click on resources to get logs, describe resources, etc.
🌐 Create a Service
• Create a file named
service.yaml:apiVersion: v1 kind: Service metadata: name: hello-service spec: type: LoadBalancer ports: - port: 80 targetPort: 80 selector: app: hello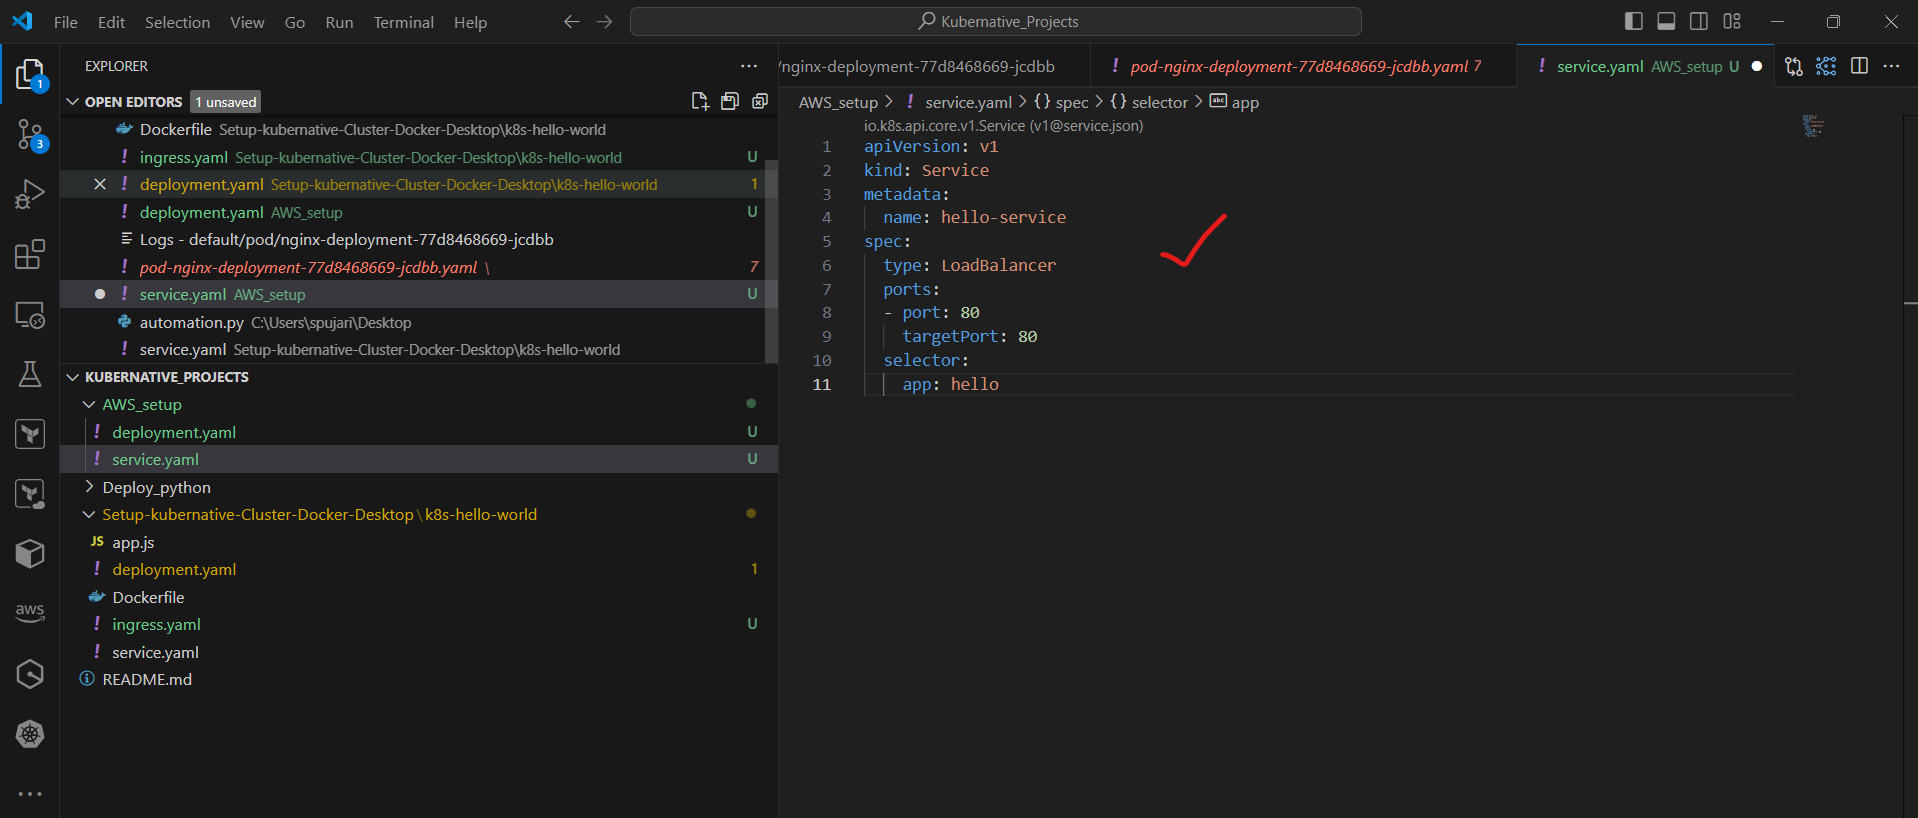
• This YAML file:
Creates a LoadBalancer service
Routes external traffic to port 80 of your pods
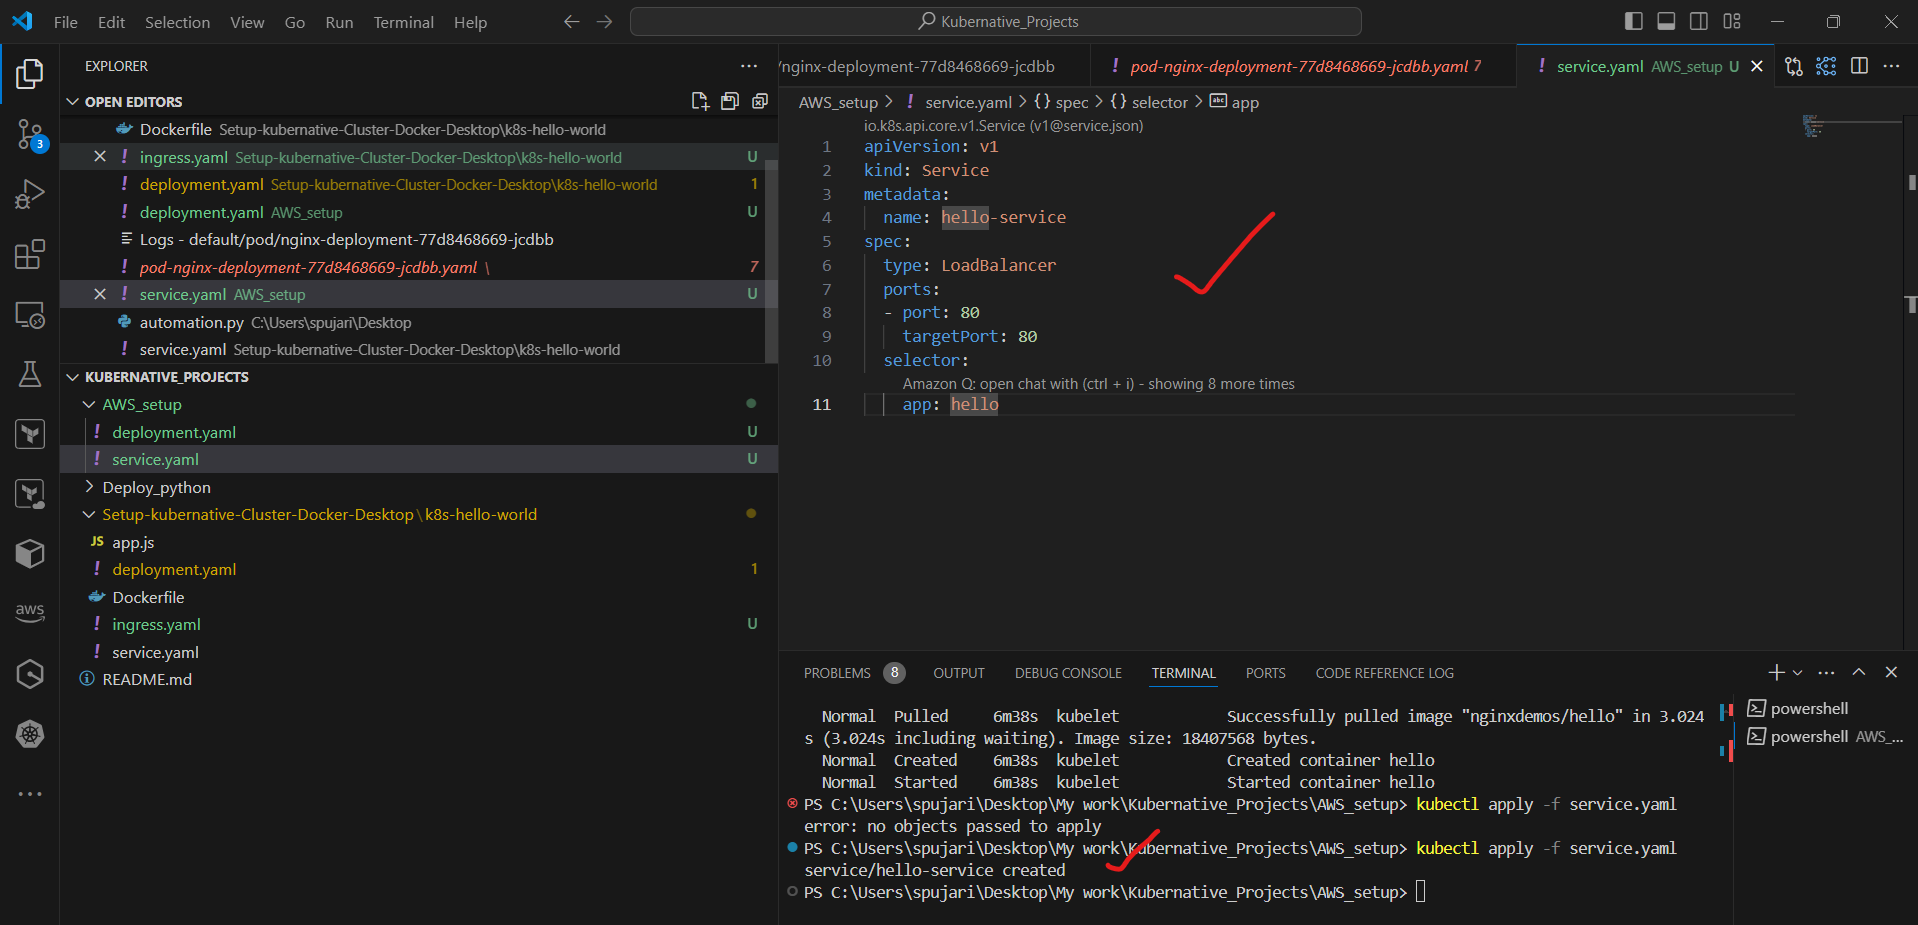
Apply the service:
kubectl apply -f service.yaml
🔍 Verify the Service
• Get service details:
kubectl get services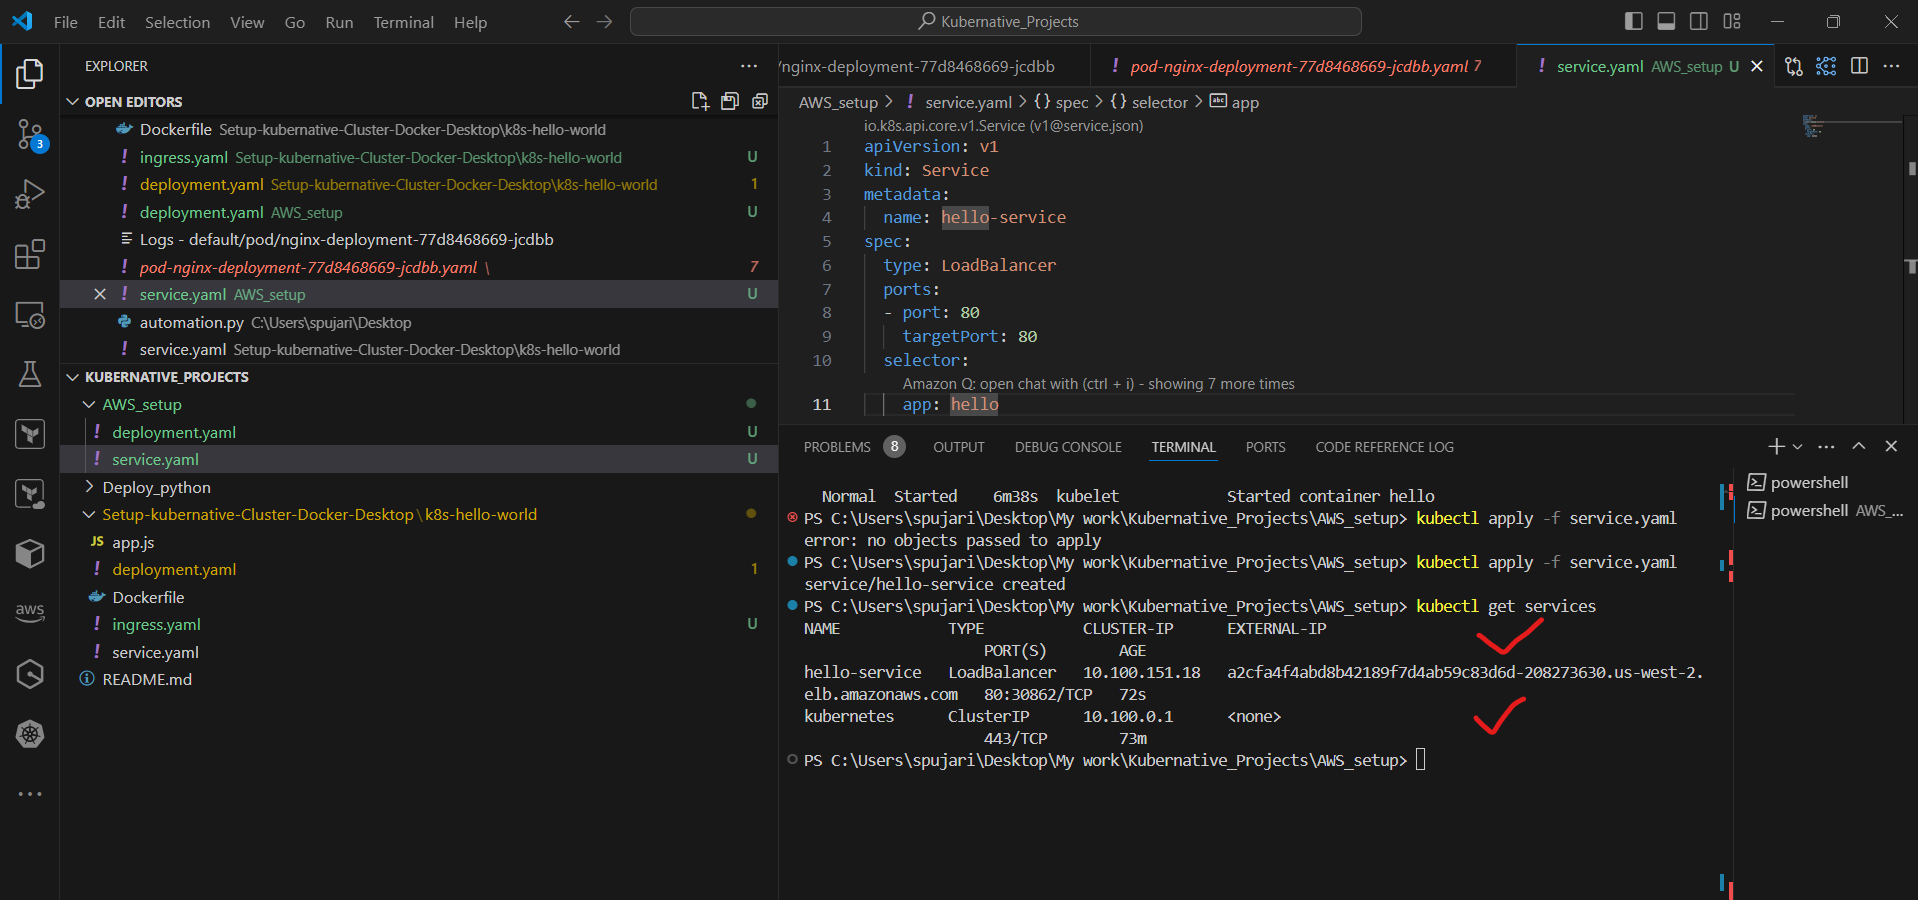
• Describe the service:
kubectl describe service hello-service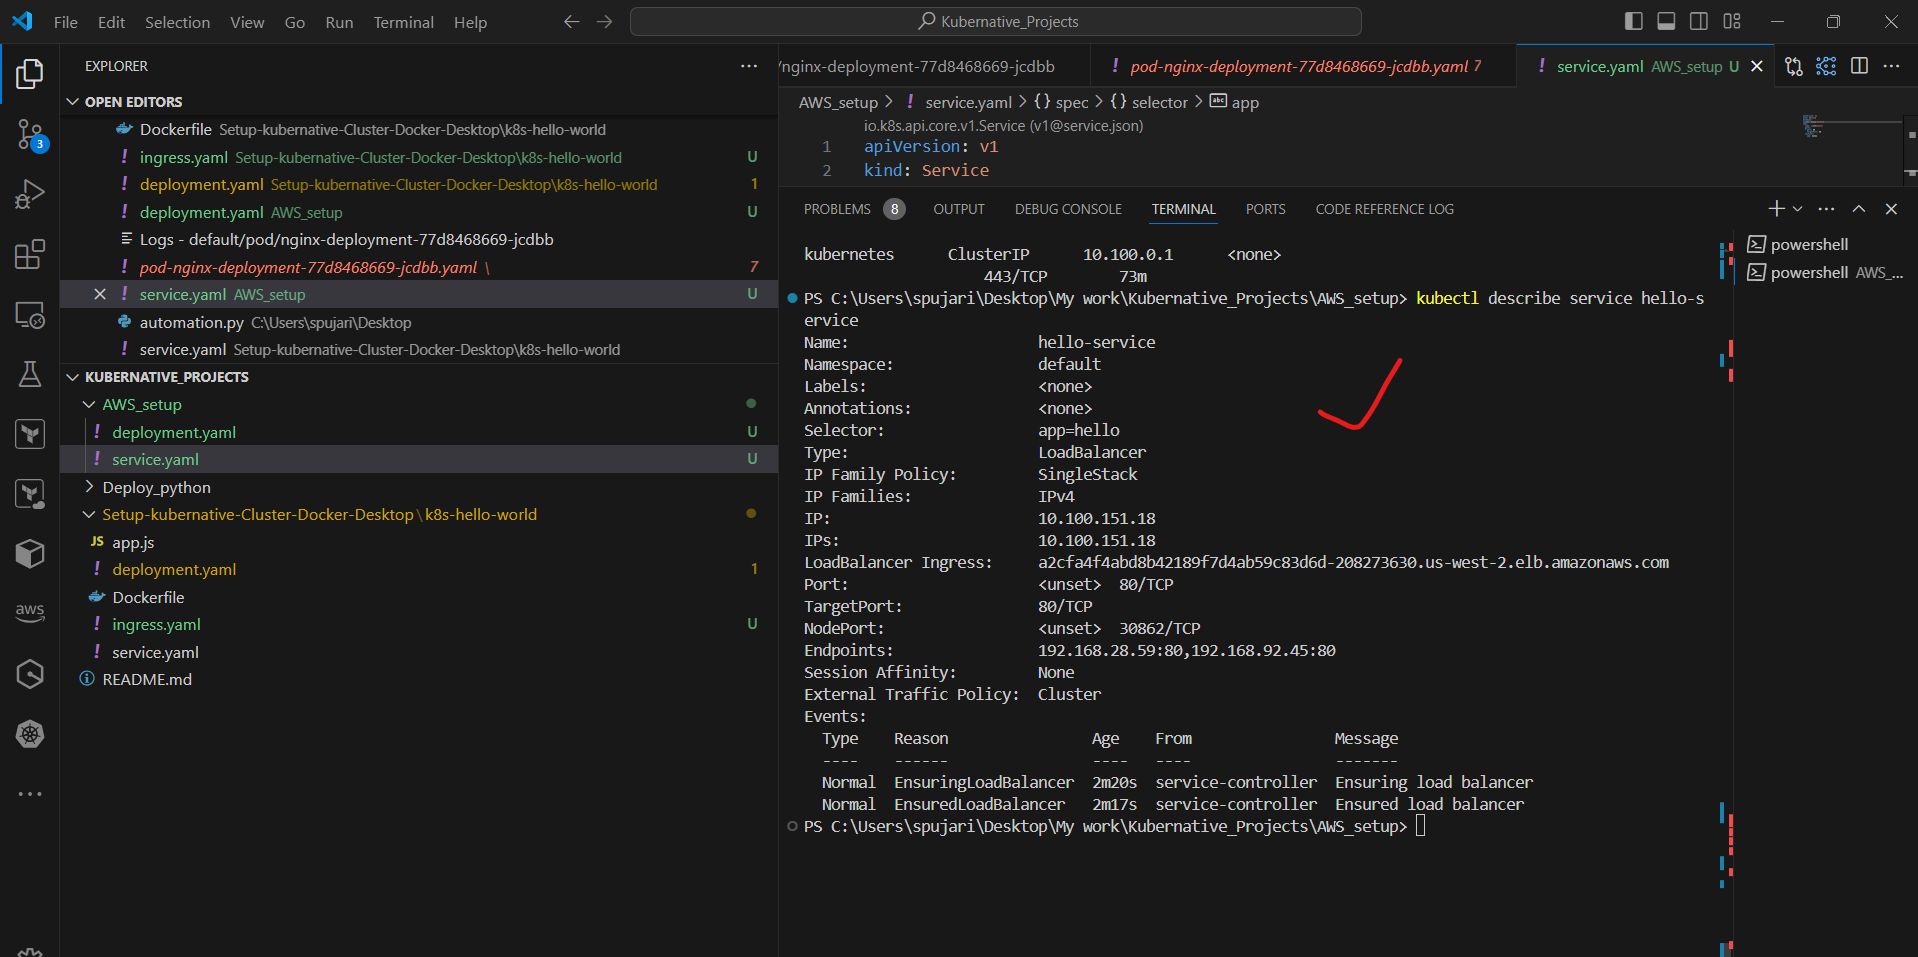
• Note the external IP (this may take a few minutes to provision)
• Check service endpoints:
kubectl get endpoints hello-service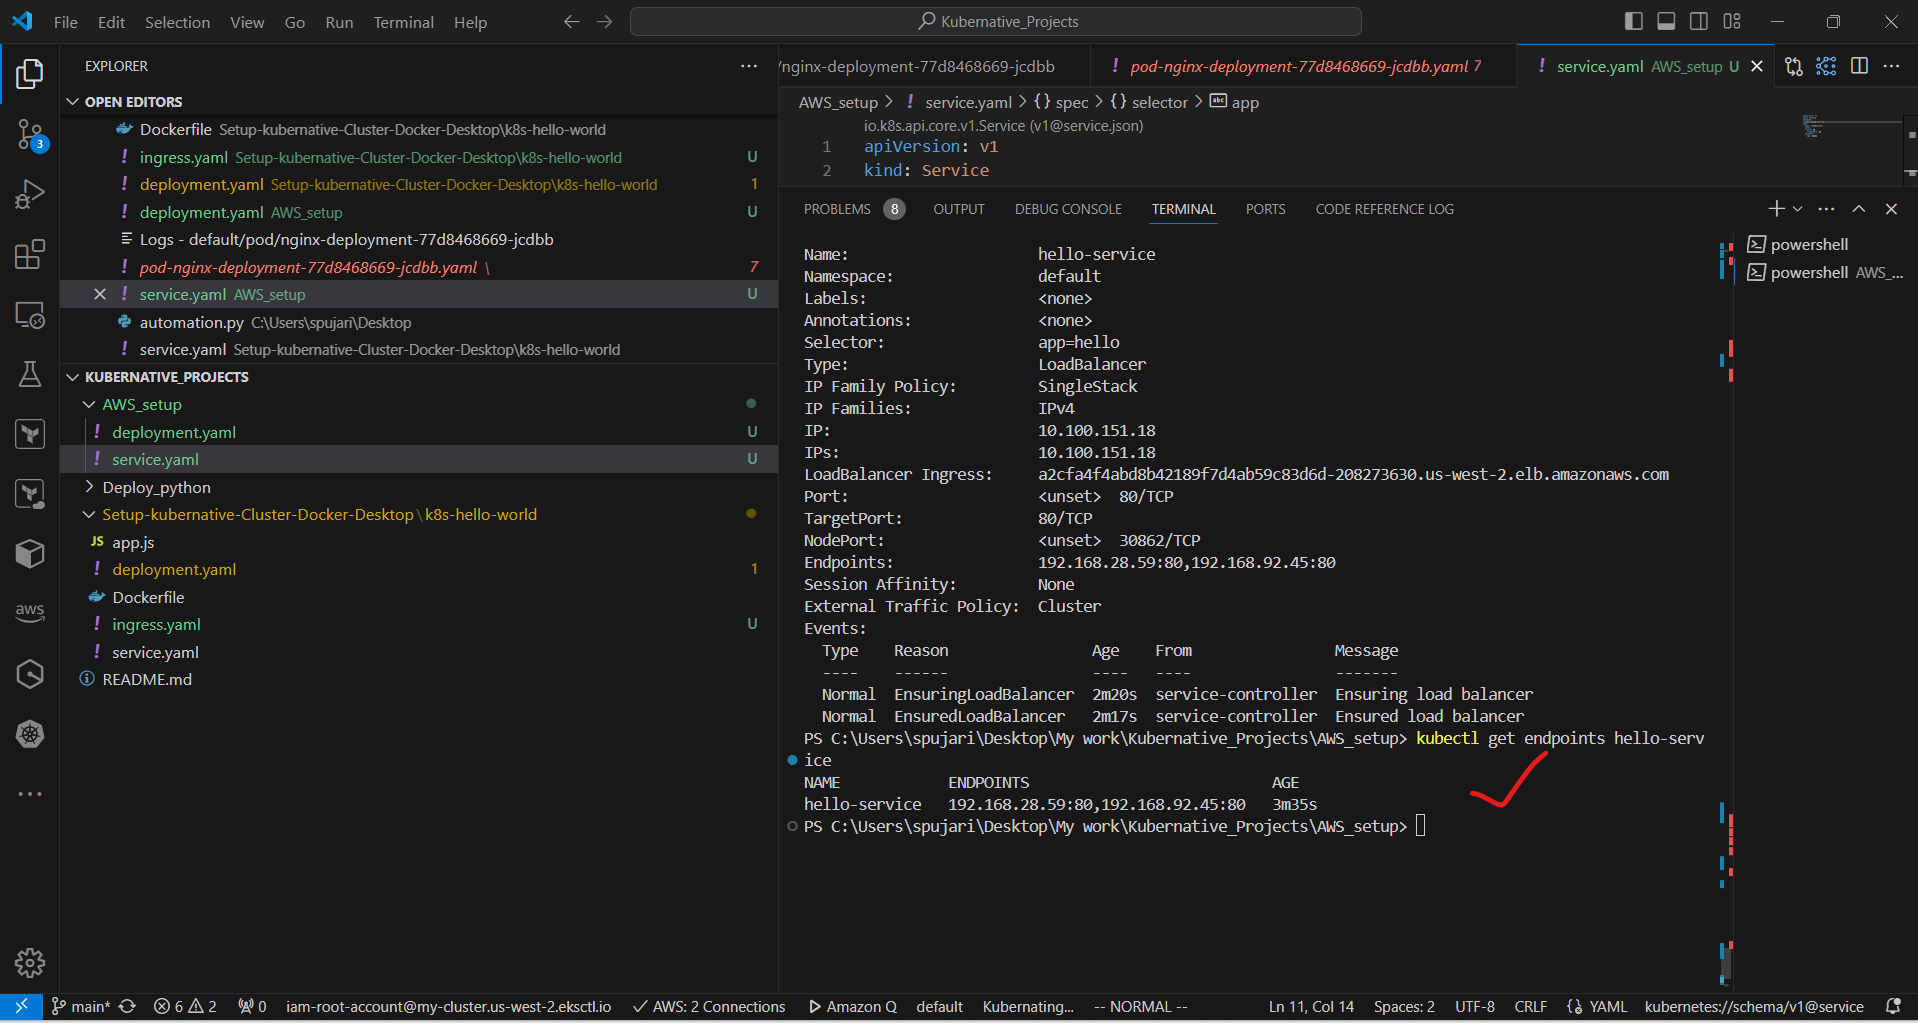
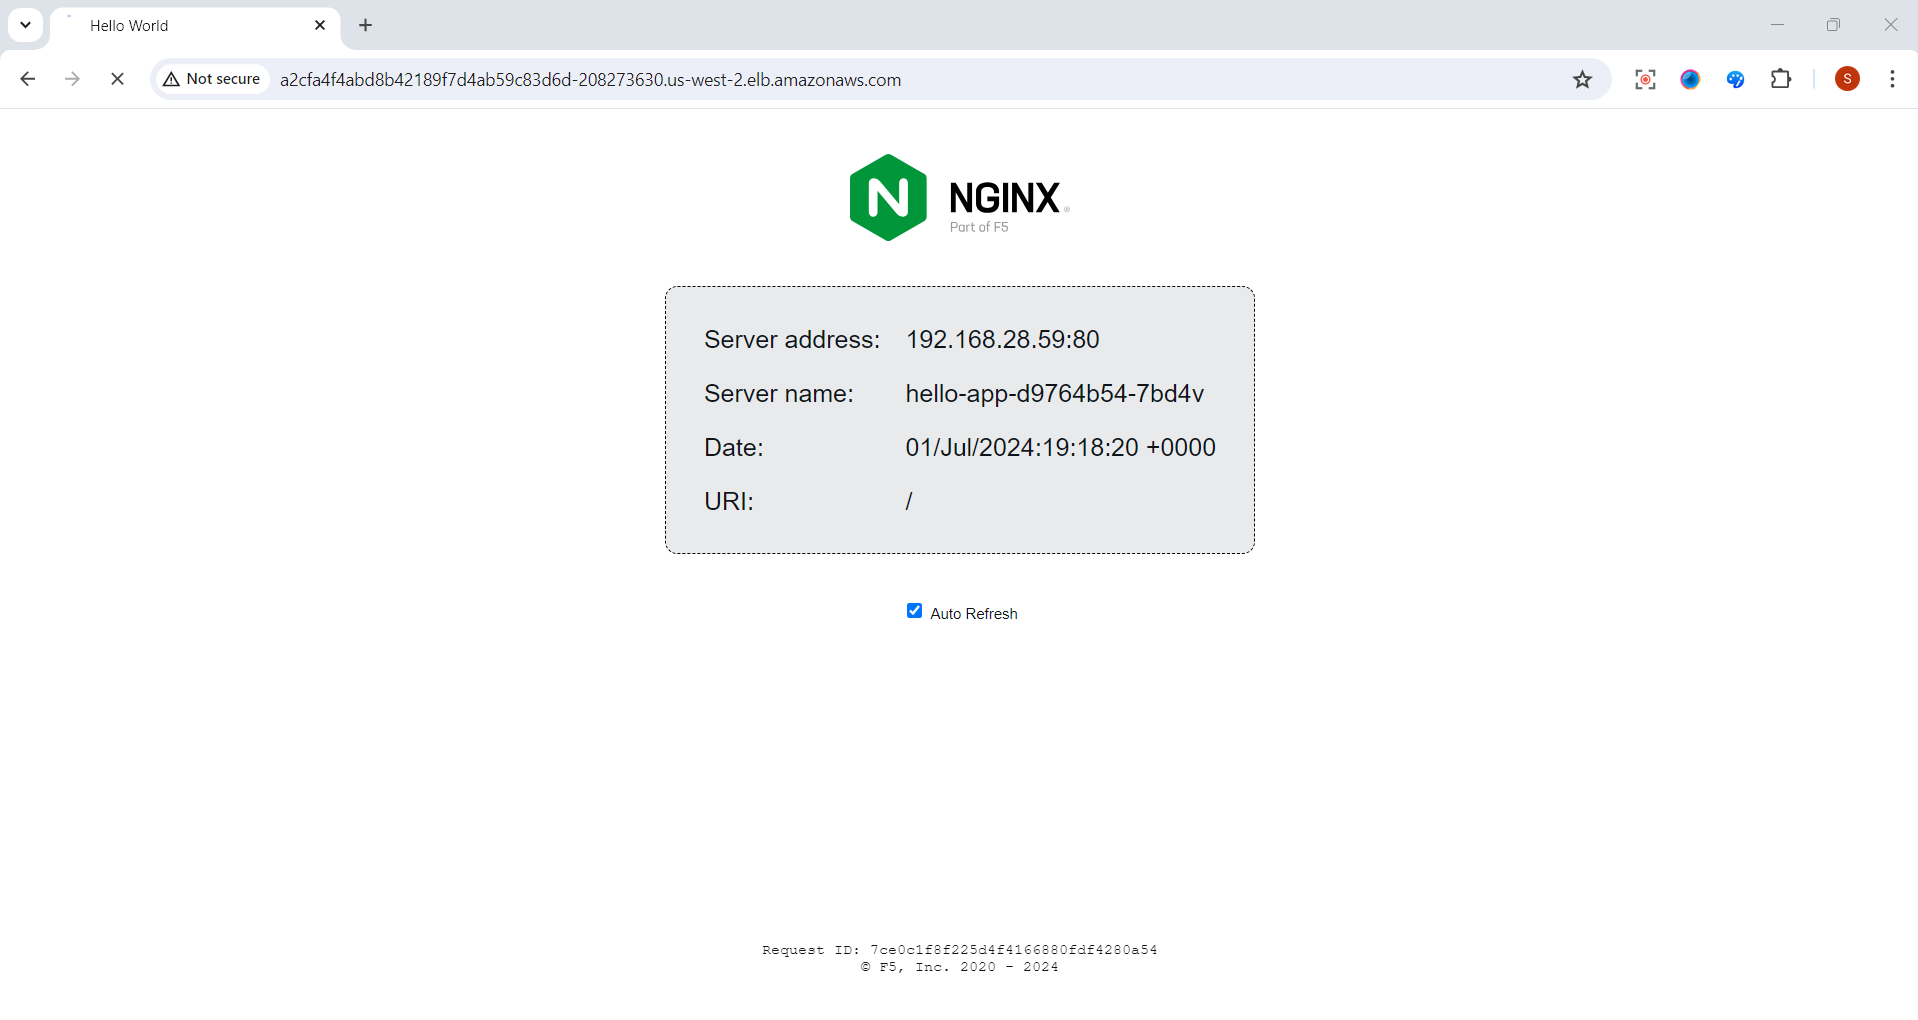
🌍 Access the Application
• Open a web browser
• Enter the external IP of the LoadBalancer service
• You should see the NGINX demo app
• Test load balancing by refreshing the page multiple times
🔢 Scale the Application • Scale to 5 replicas:
kubectl scale deployment hello-app --replicas=5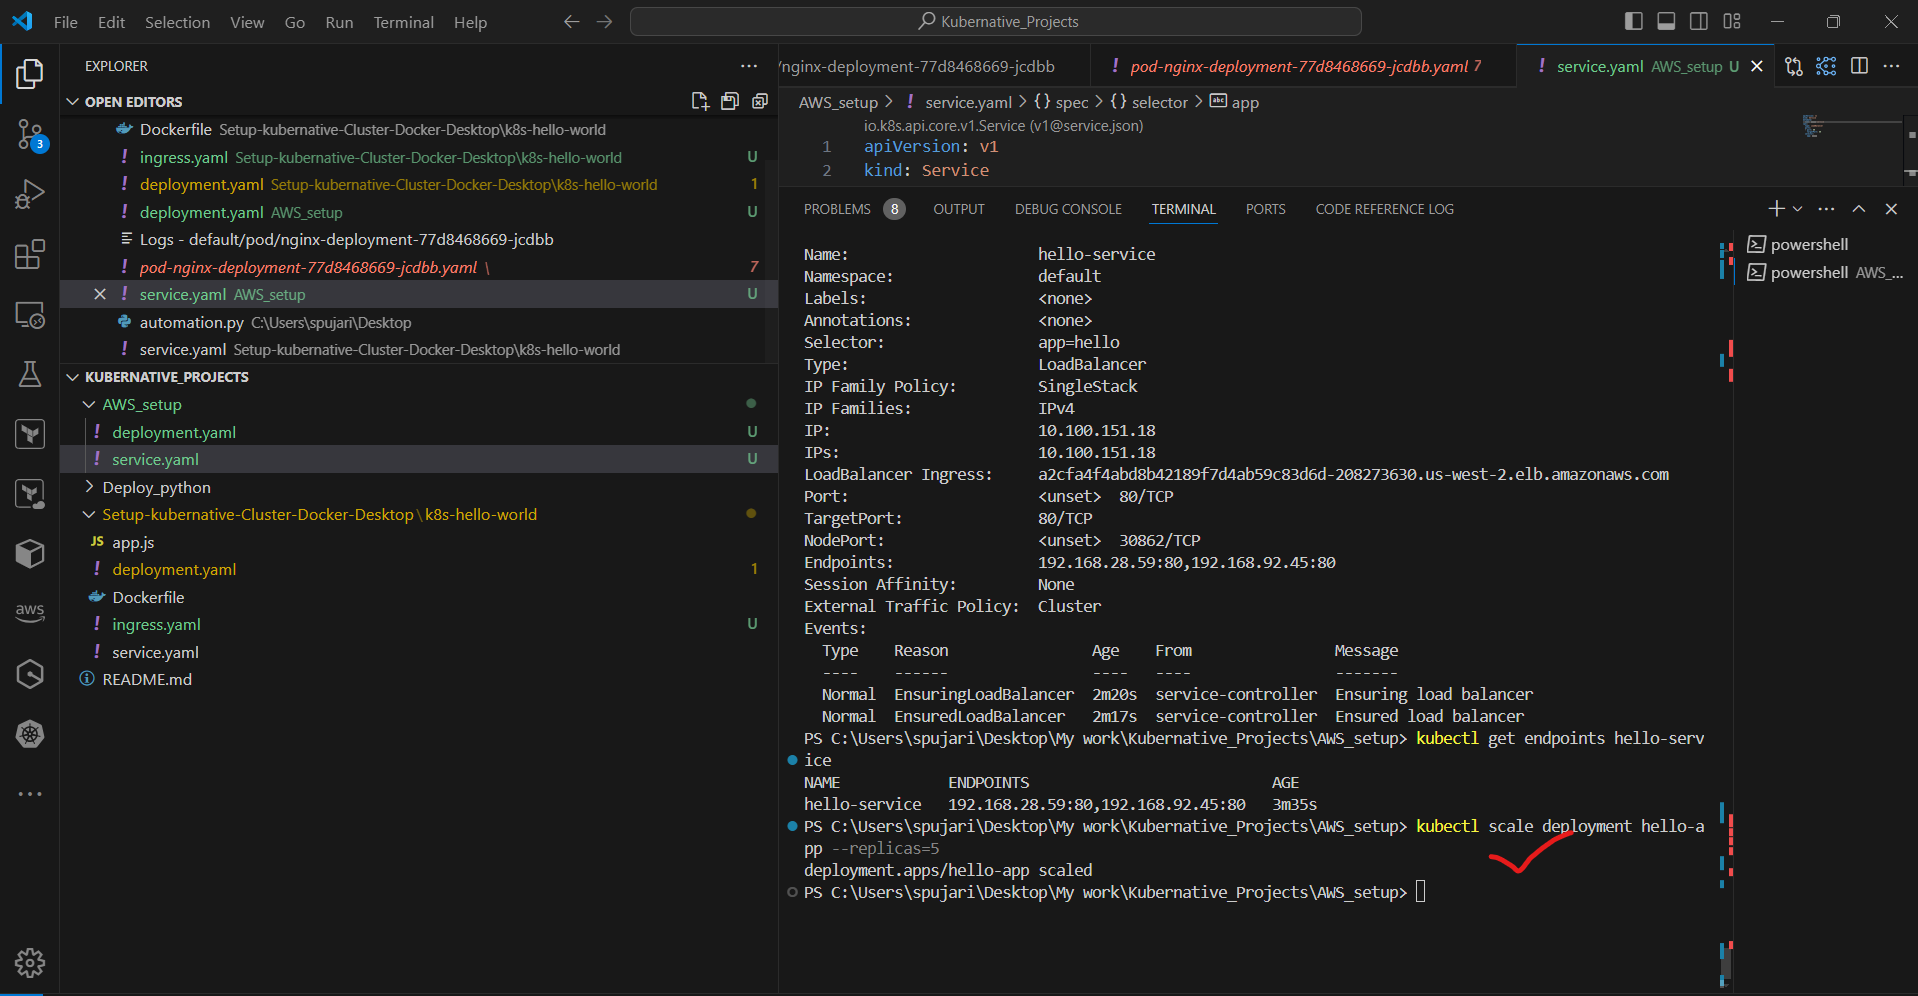
• Verify scaling:
kubectl get pods
kubectl get deployment hello-app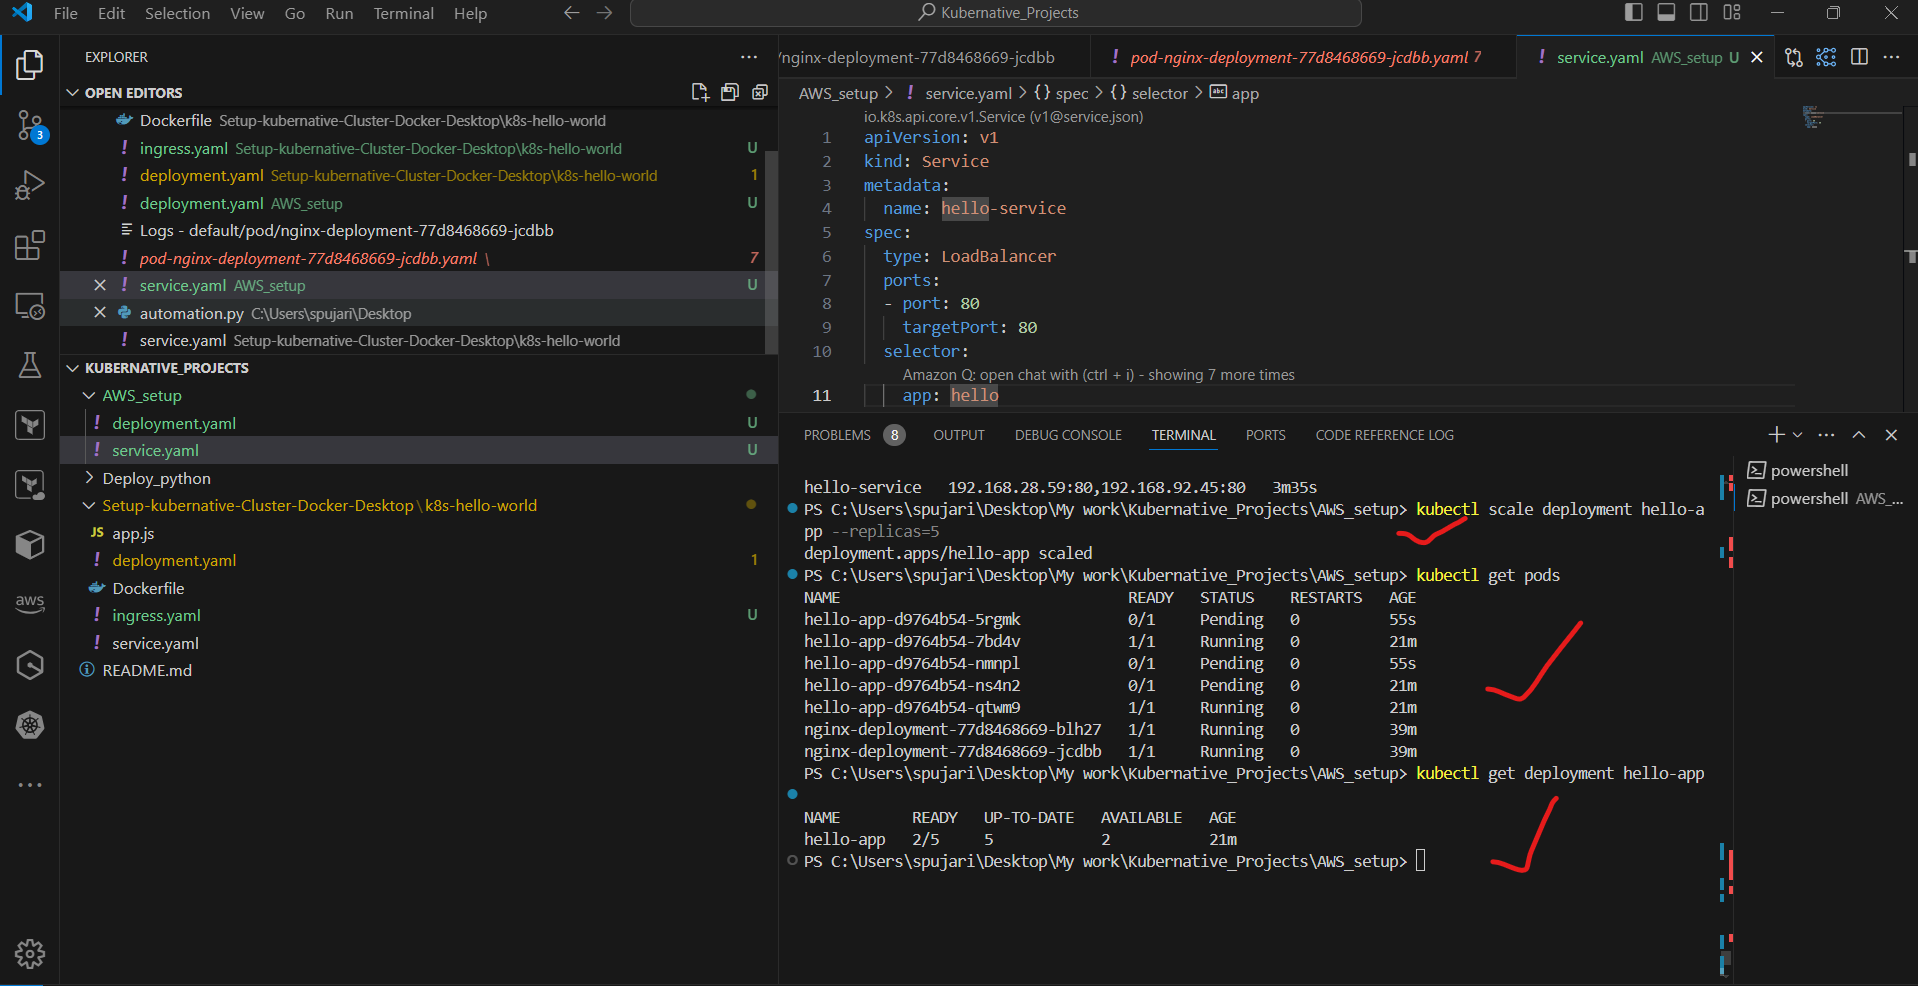
• Watch pods being created:
kubectl get pods -w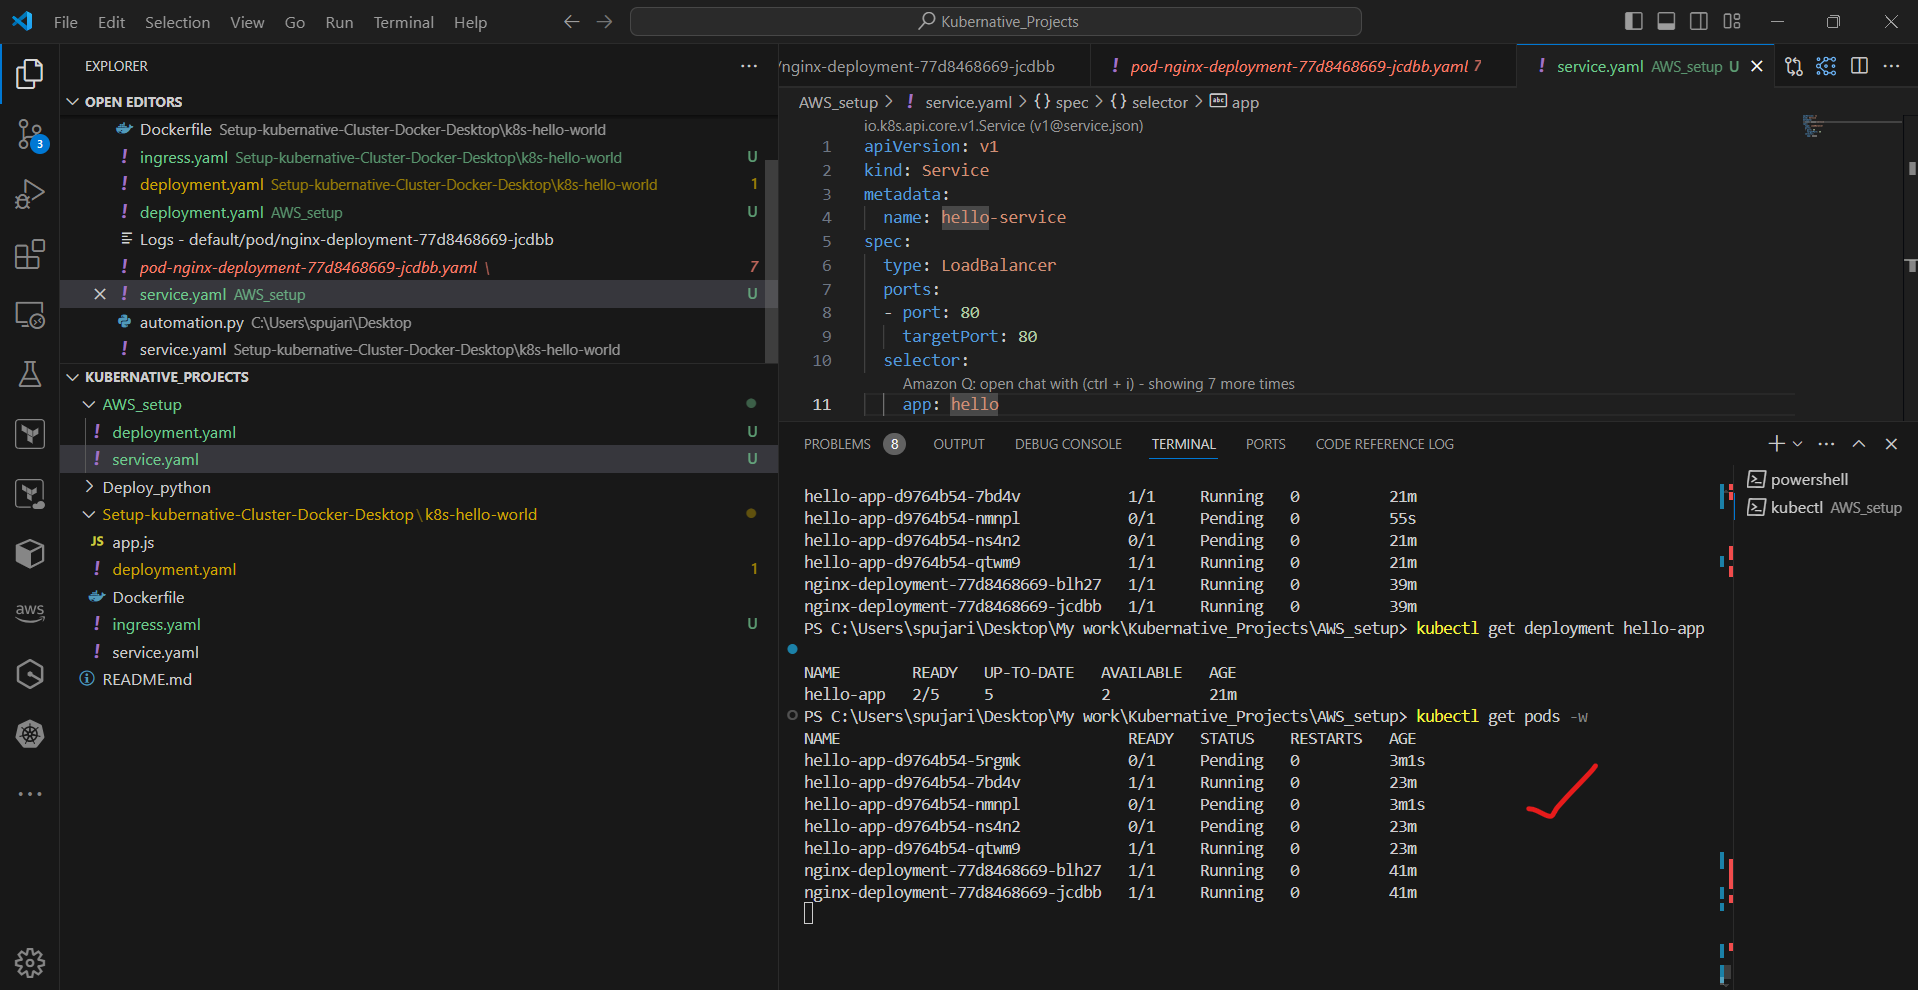
🔄 Update the Application
• Edit
deployment.yaml, change image tonginxdemos/hello:plain-text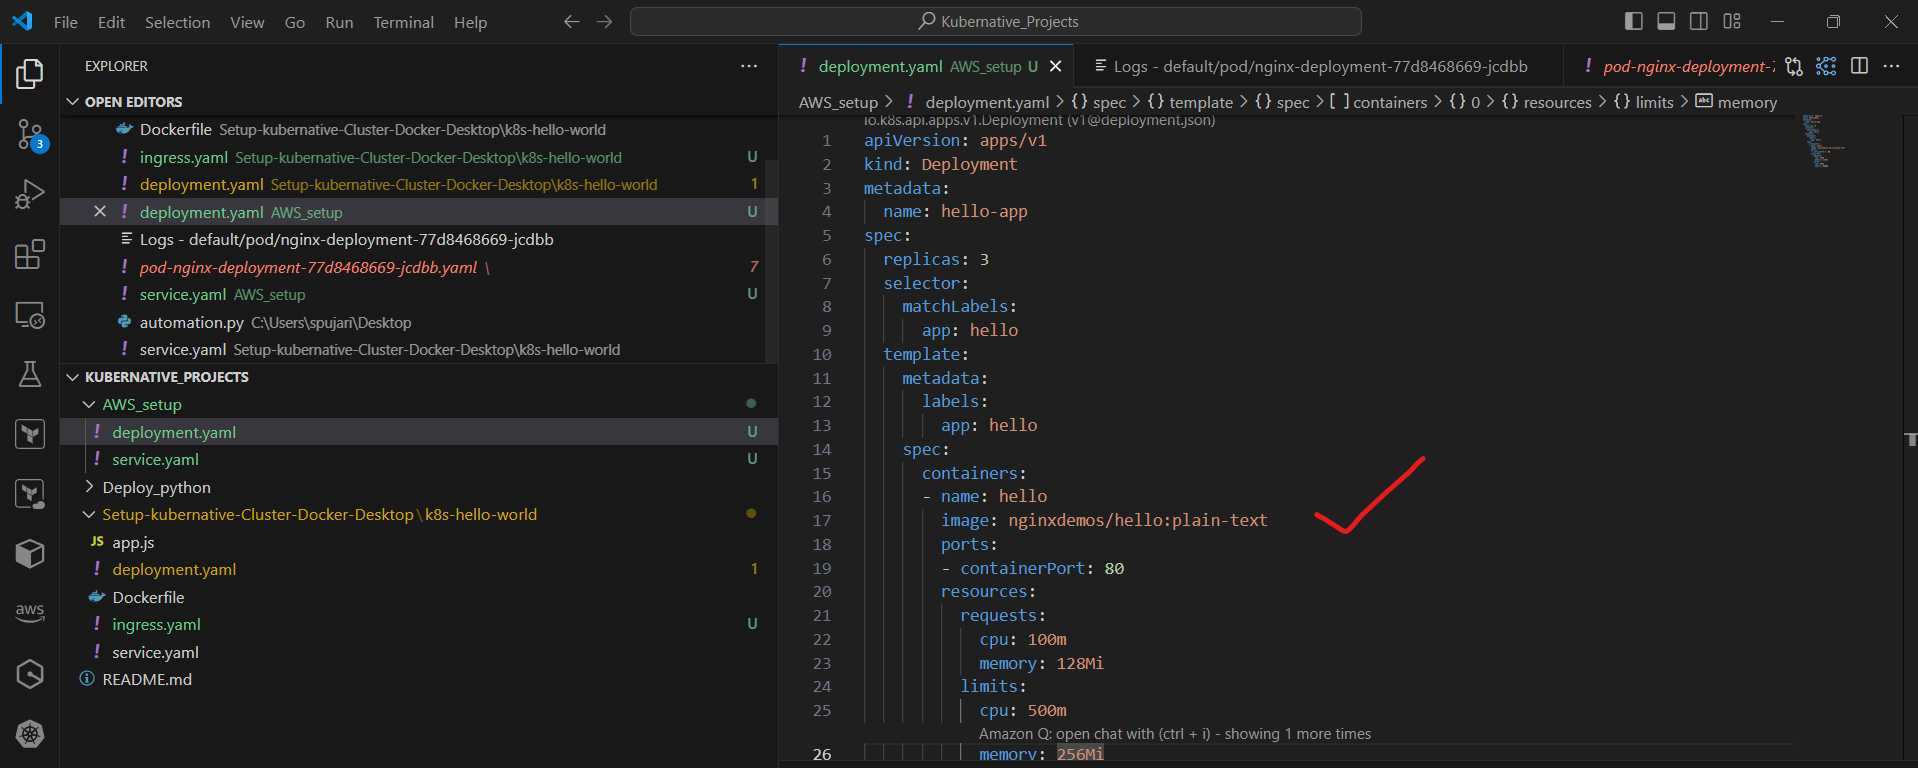
• Apply the changes:
kubectl apply -f deployment.yaml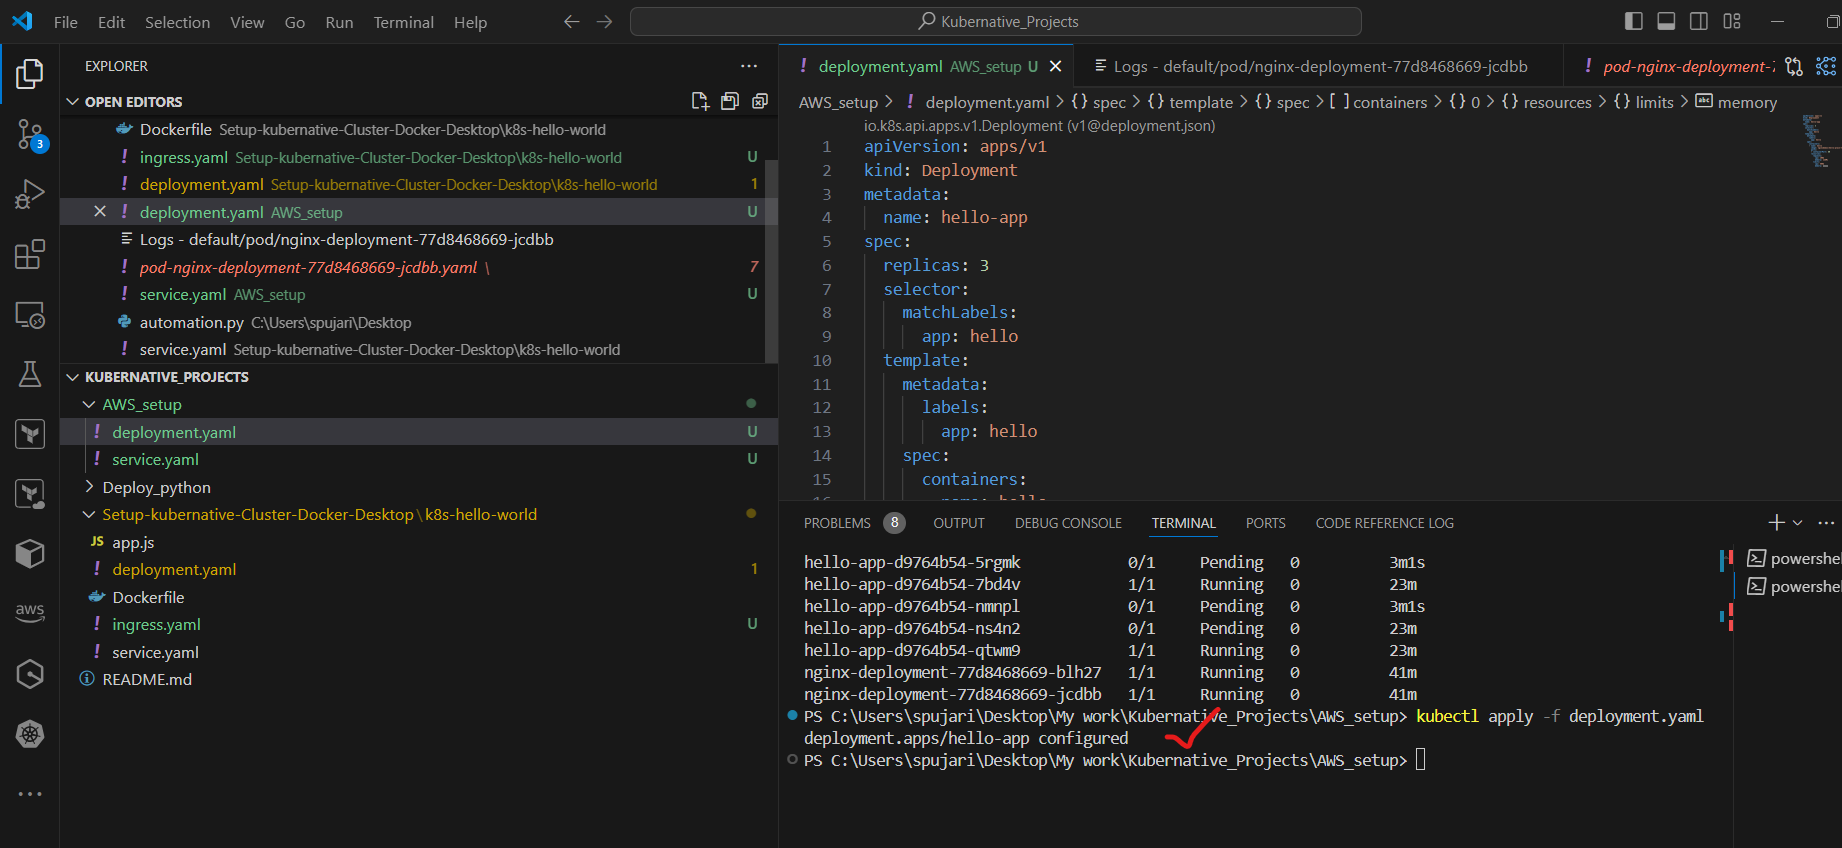
• Watch the rollout:
kubectl rollout status deployment/hello-app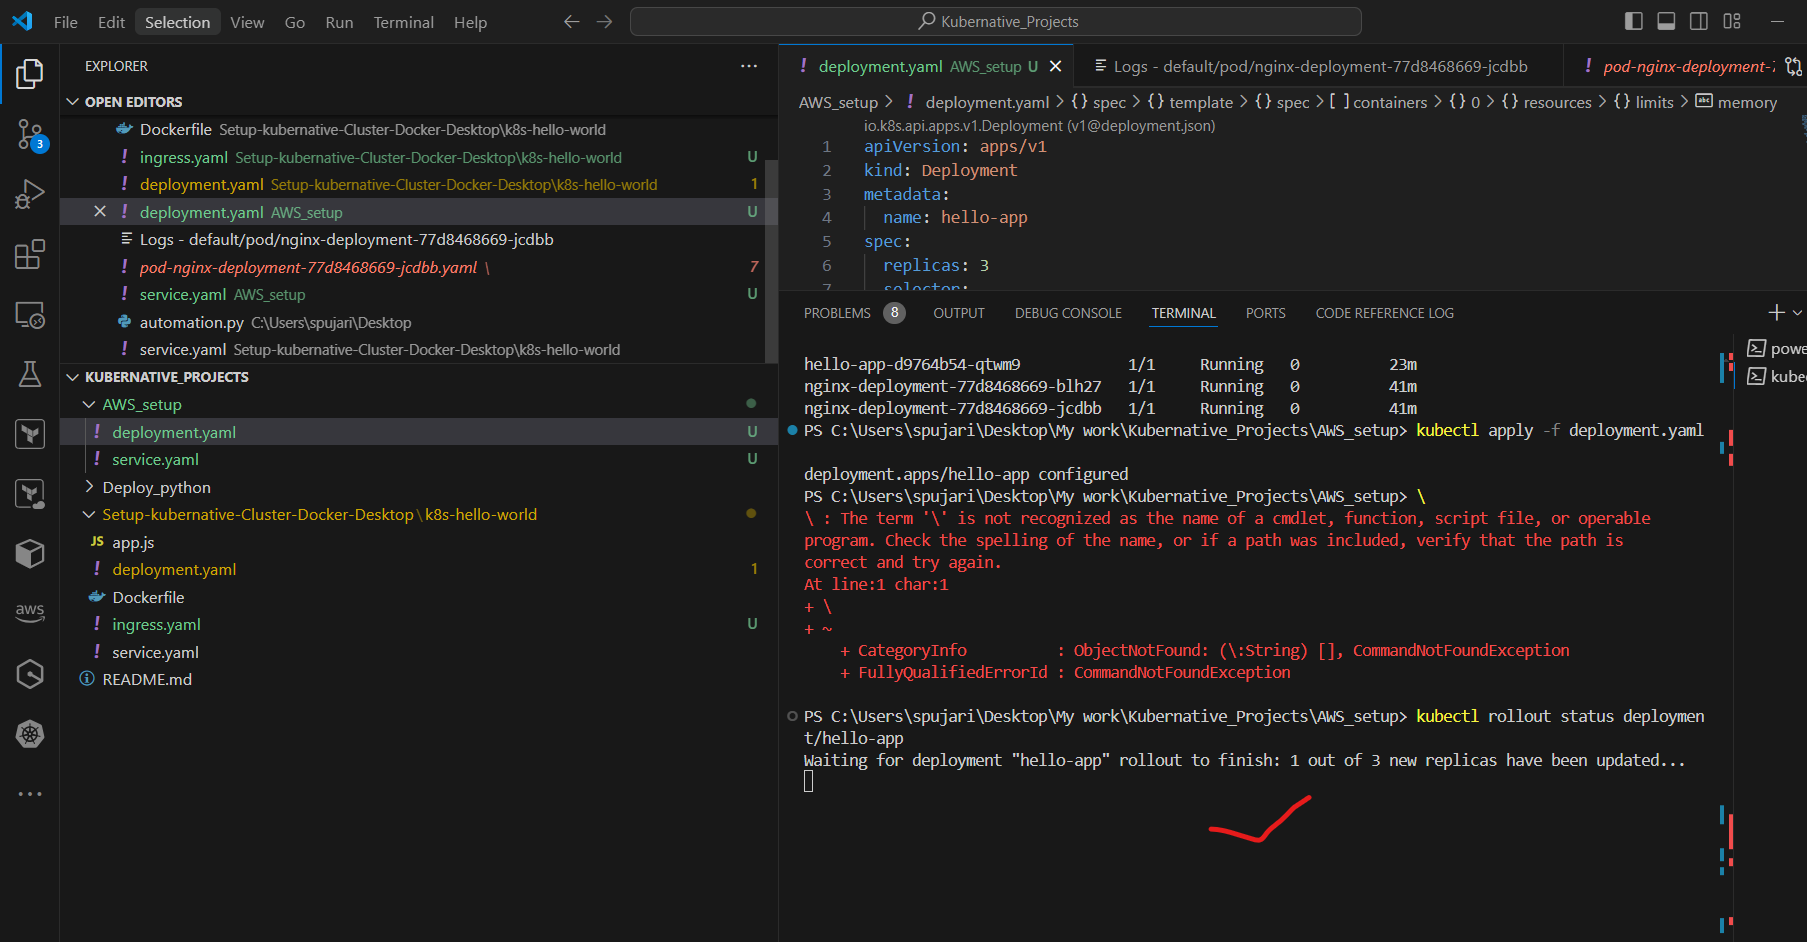
• Verify the update:
kubectl describe deployment hello-app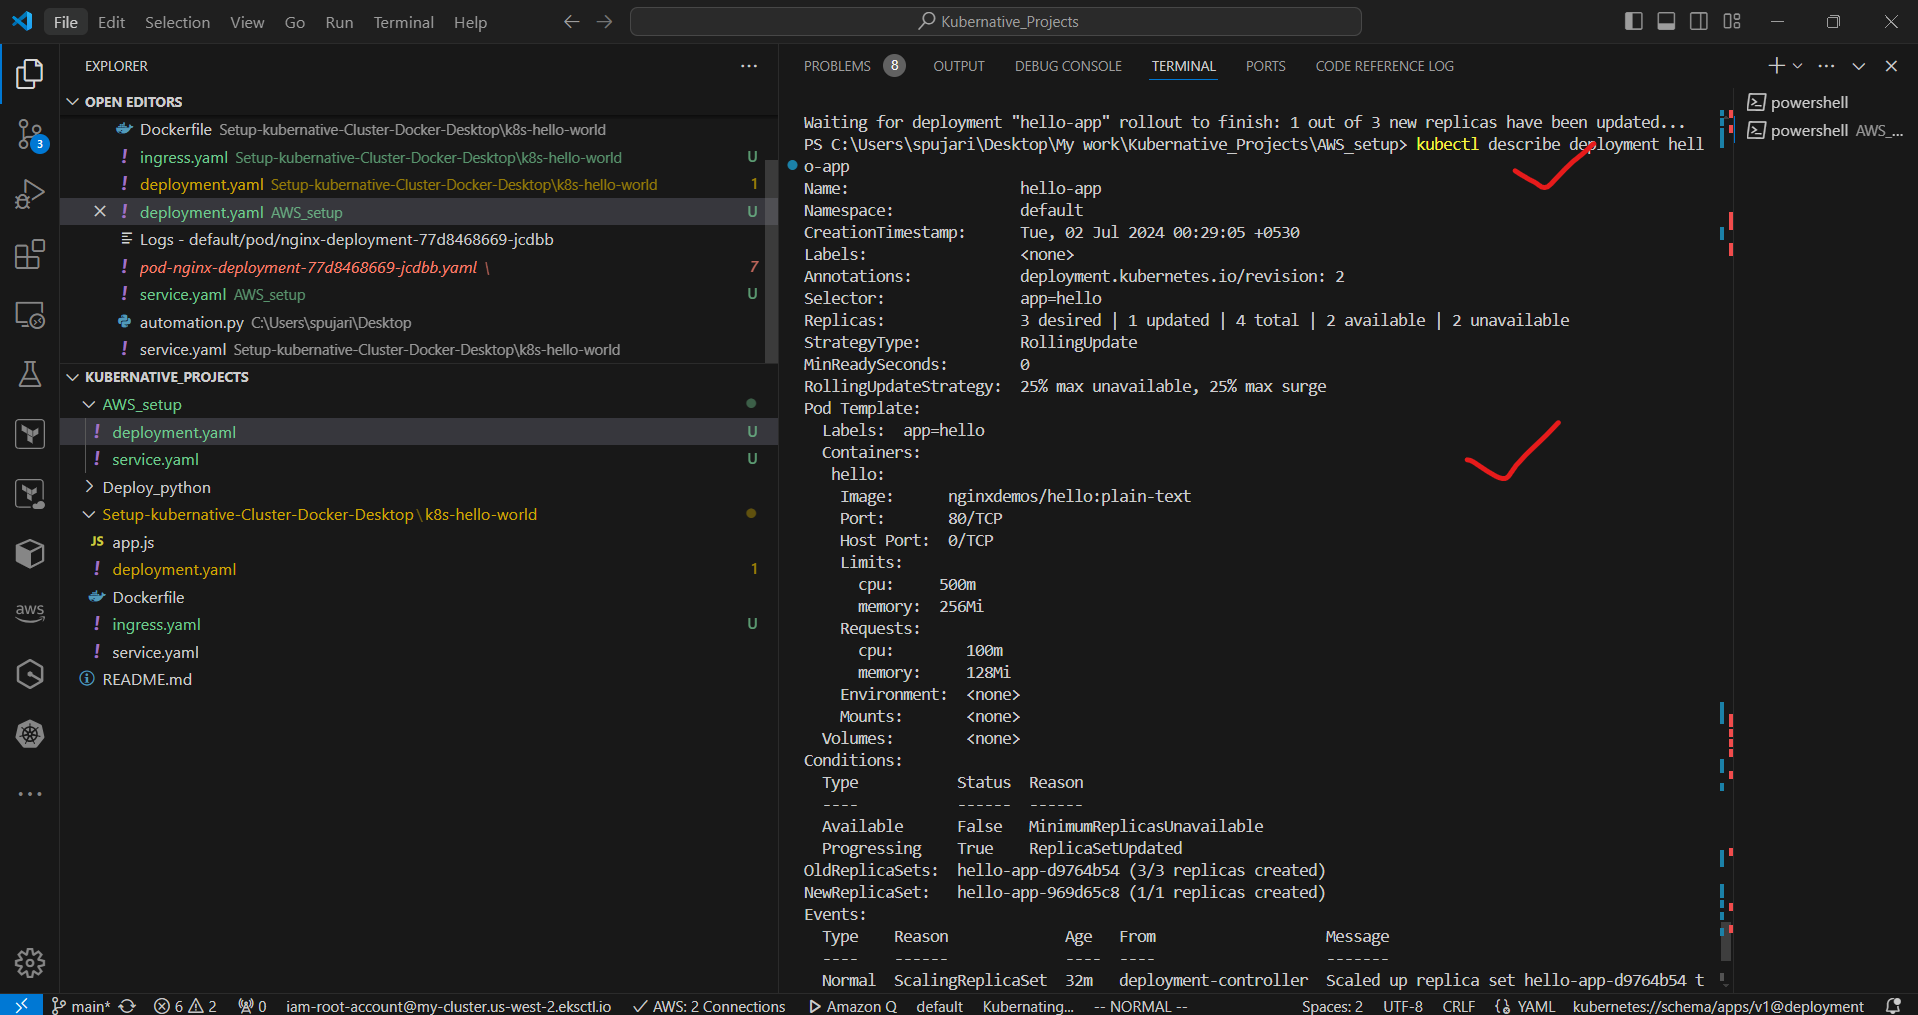
📊 Monitor the Cluster
• View cluster info:
kubectl cluster-info
kubectl top nodes
kubectl top pods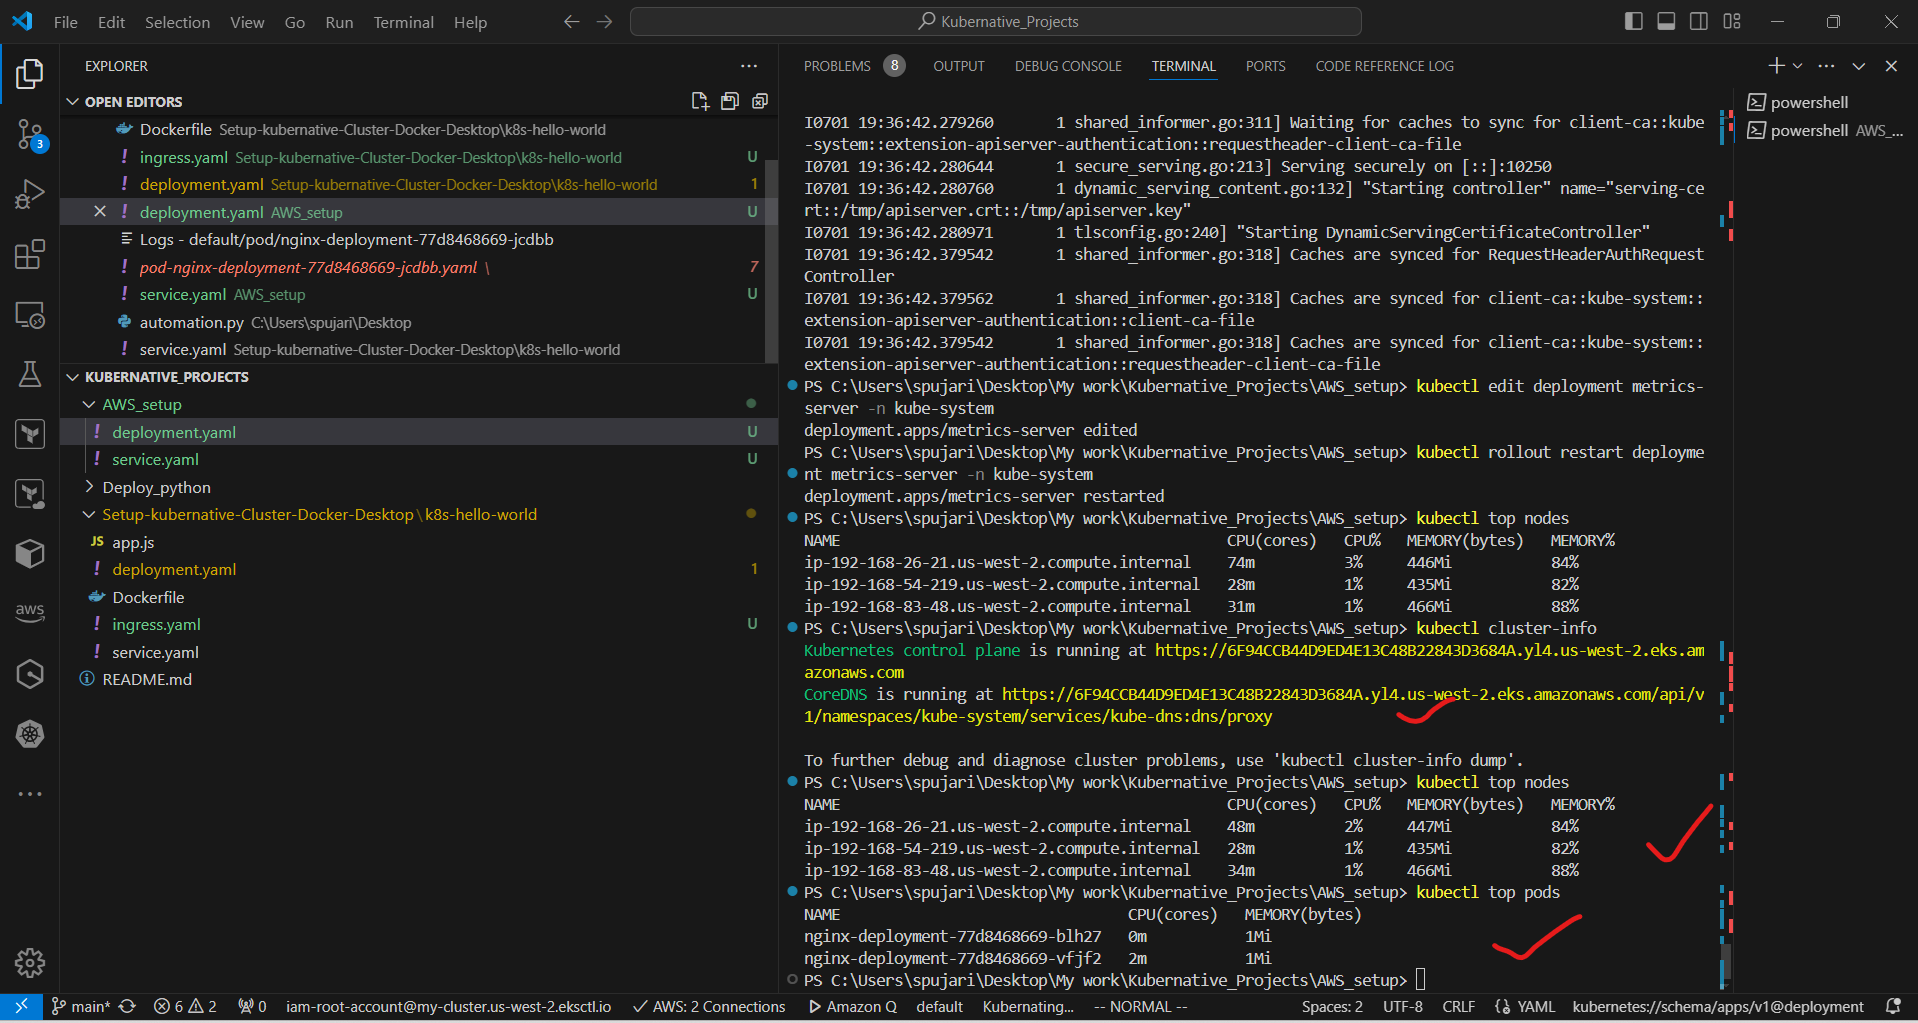
• Check pod logs:
kubectl logs deployment/hello-app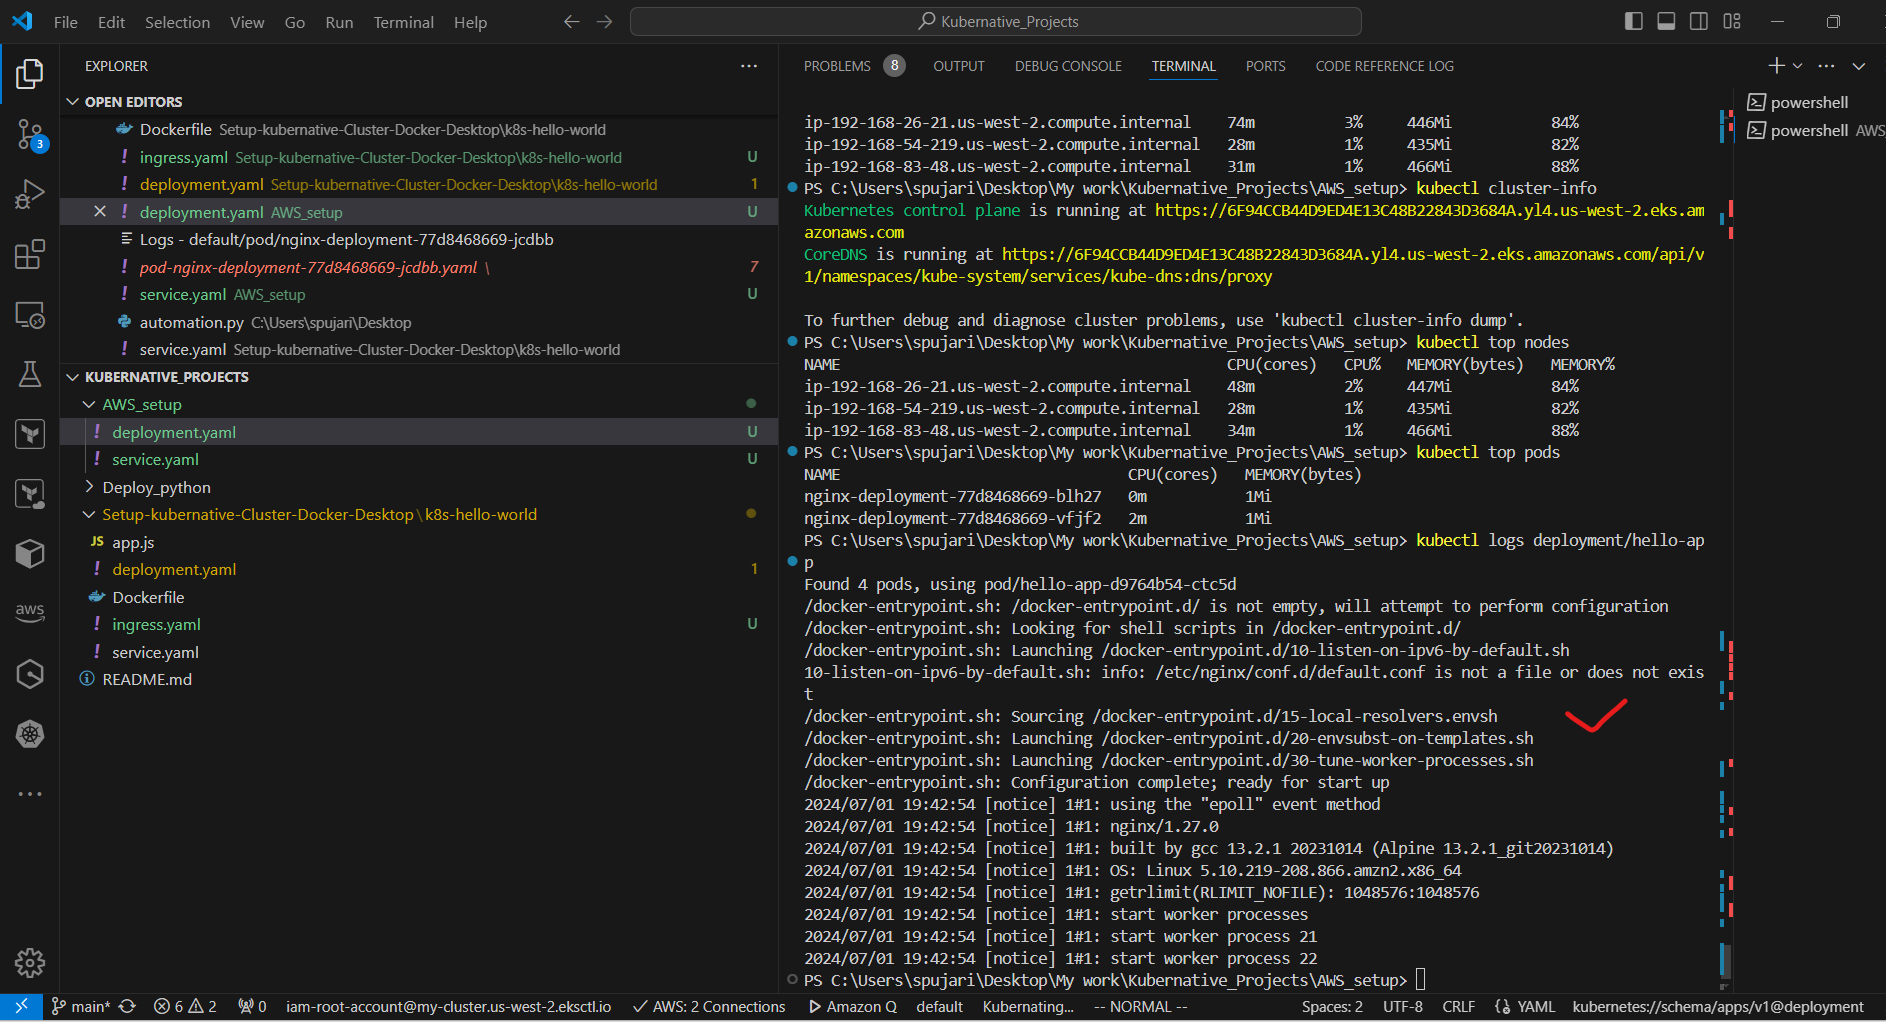
• Set up Prometheus and Grafana for advanced monitoring (optional)
🧹 Clean Up
• Delete the service:
kubectl delete -f service.yaml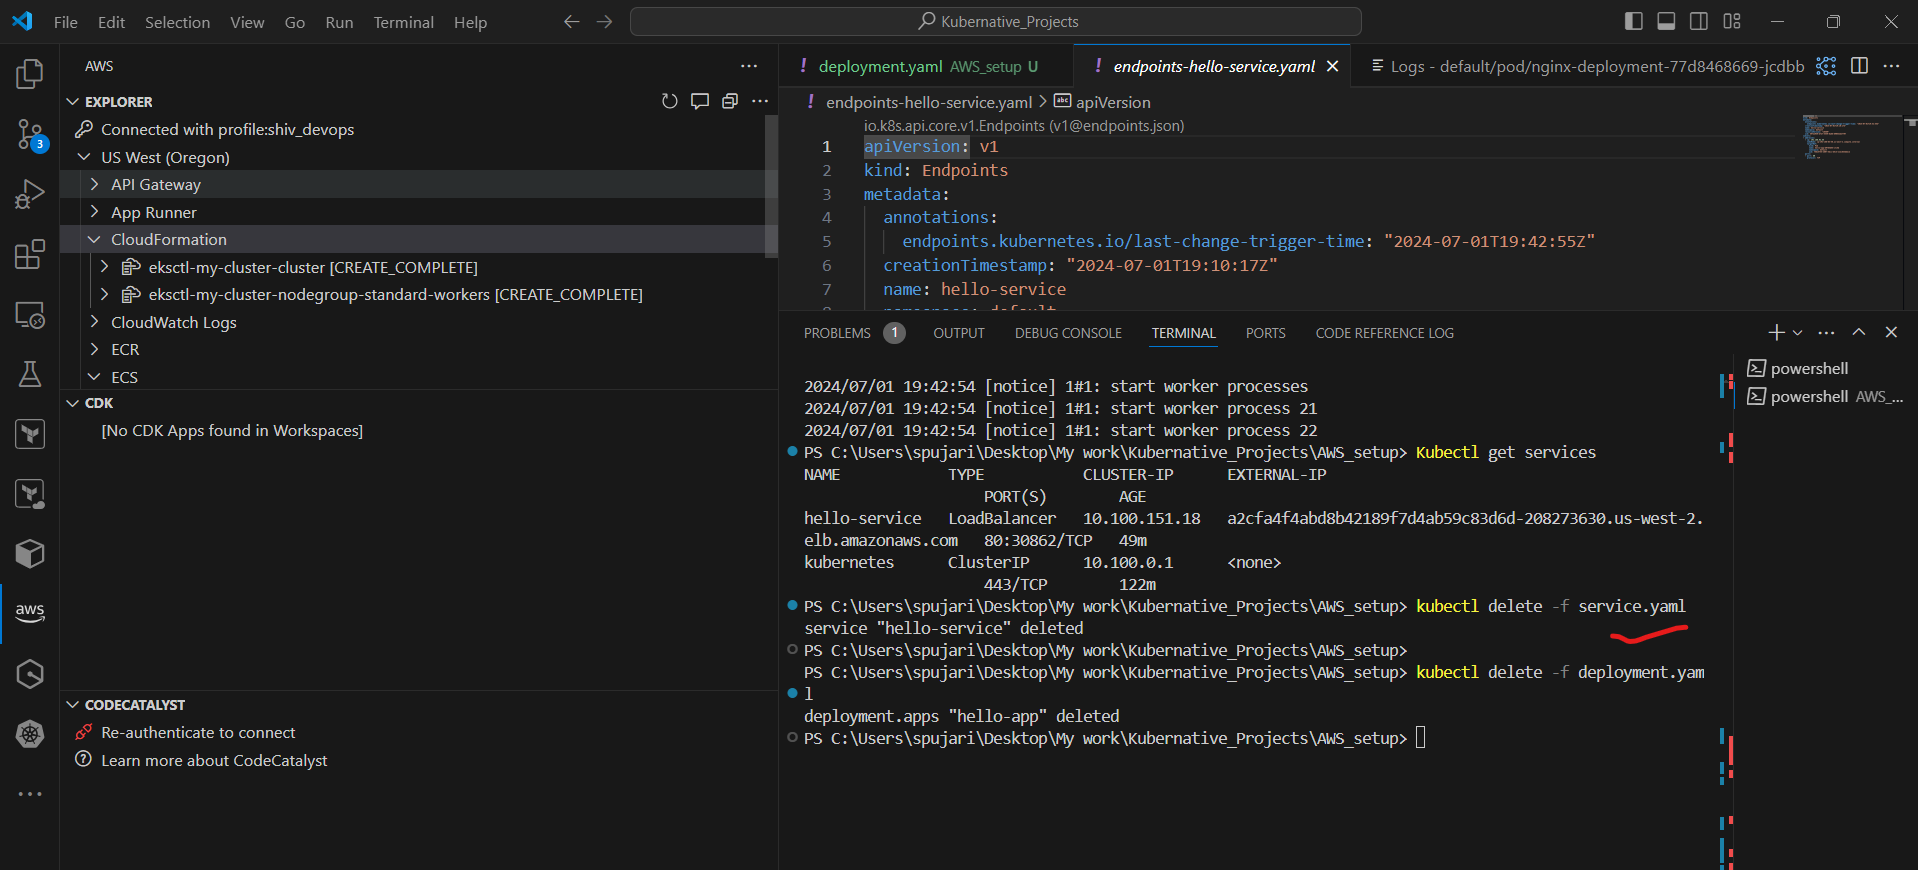
• Delete the deployment:
kubectl delete -f deployment.yaml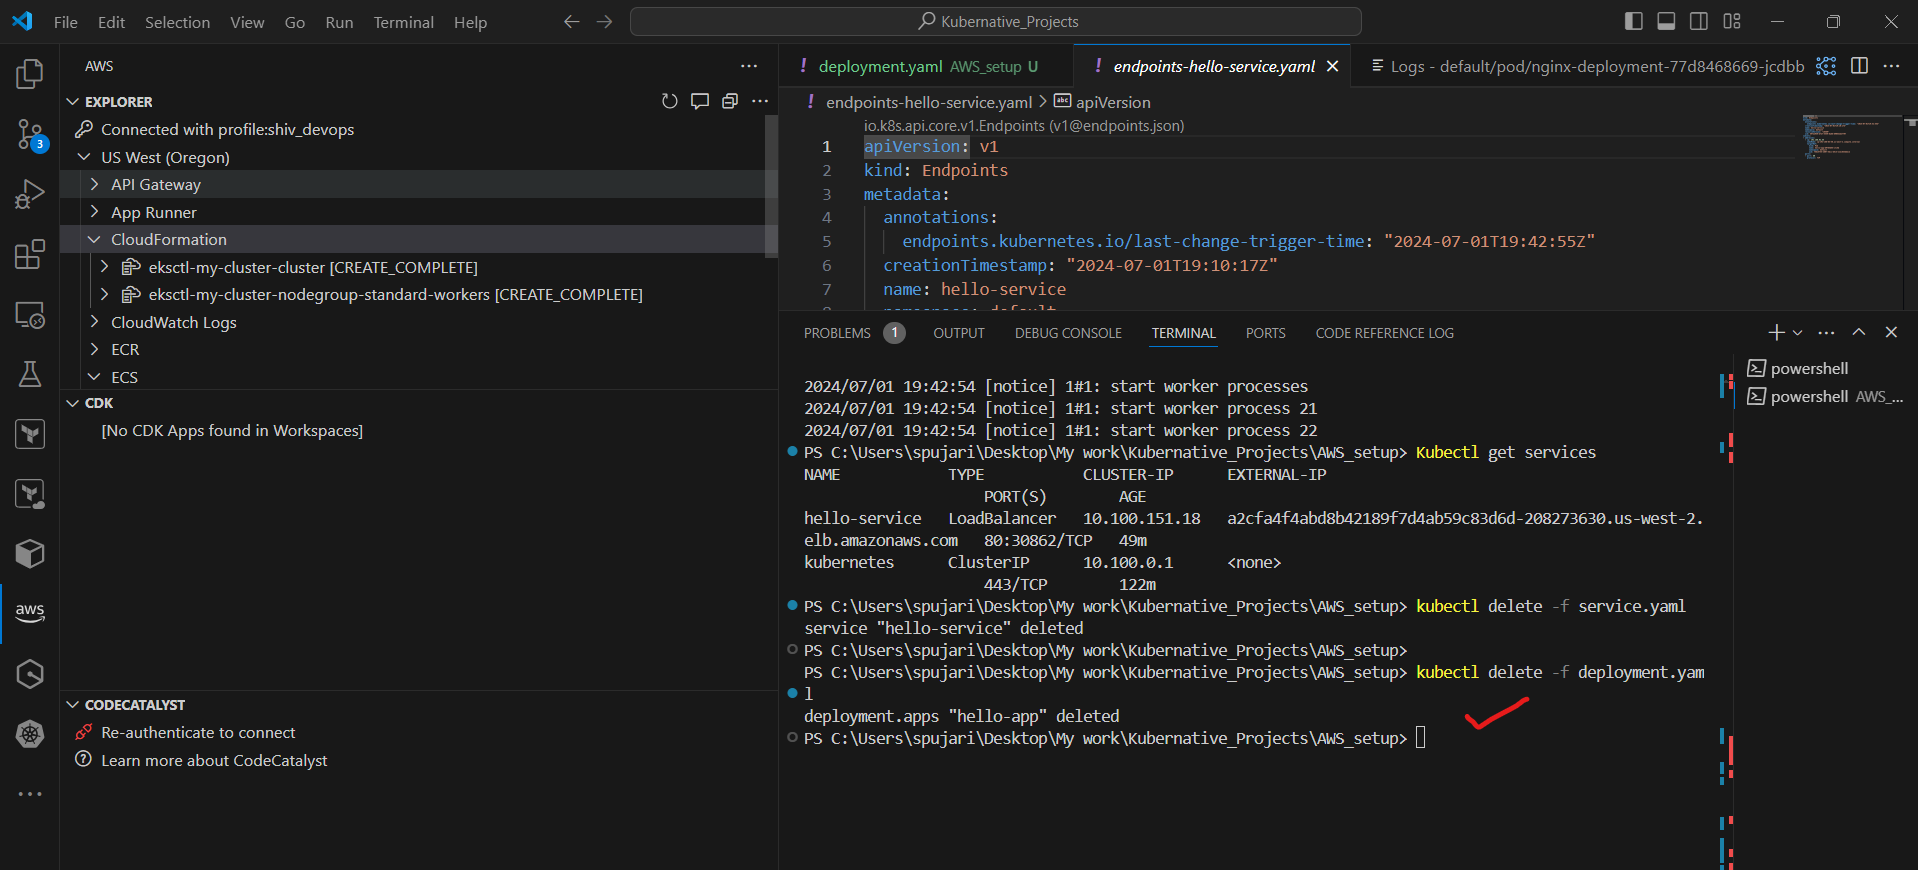
• Delete the EKS cluster:
eksctl delete cluster --name my-cluster --region us-west-2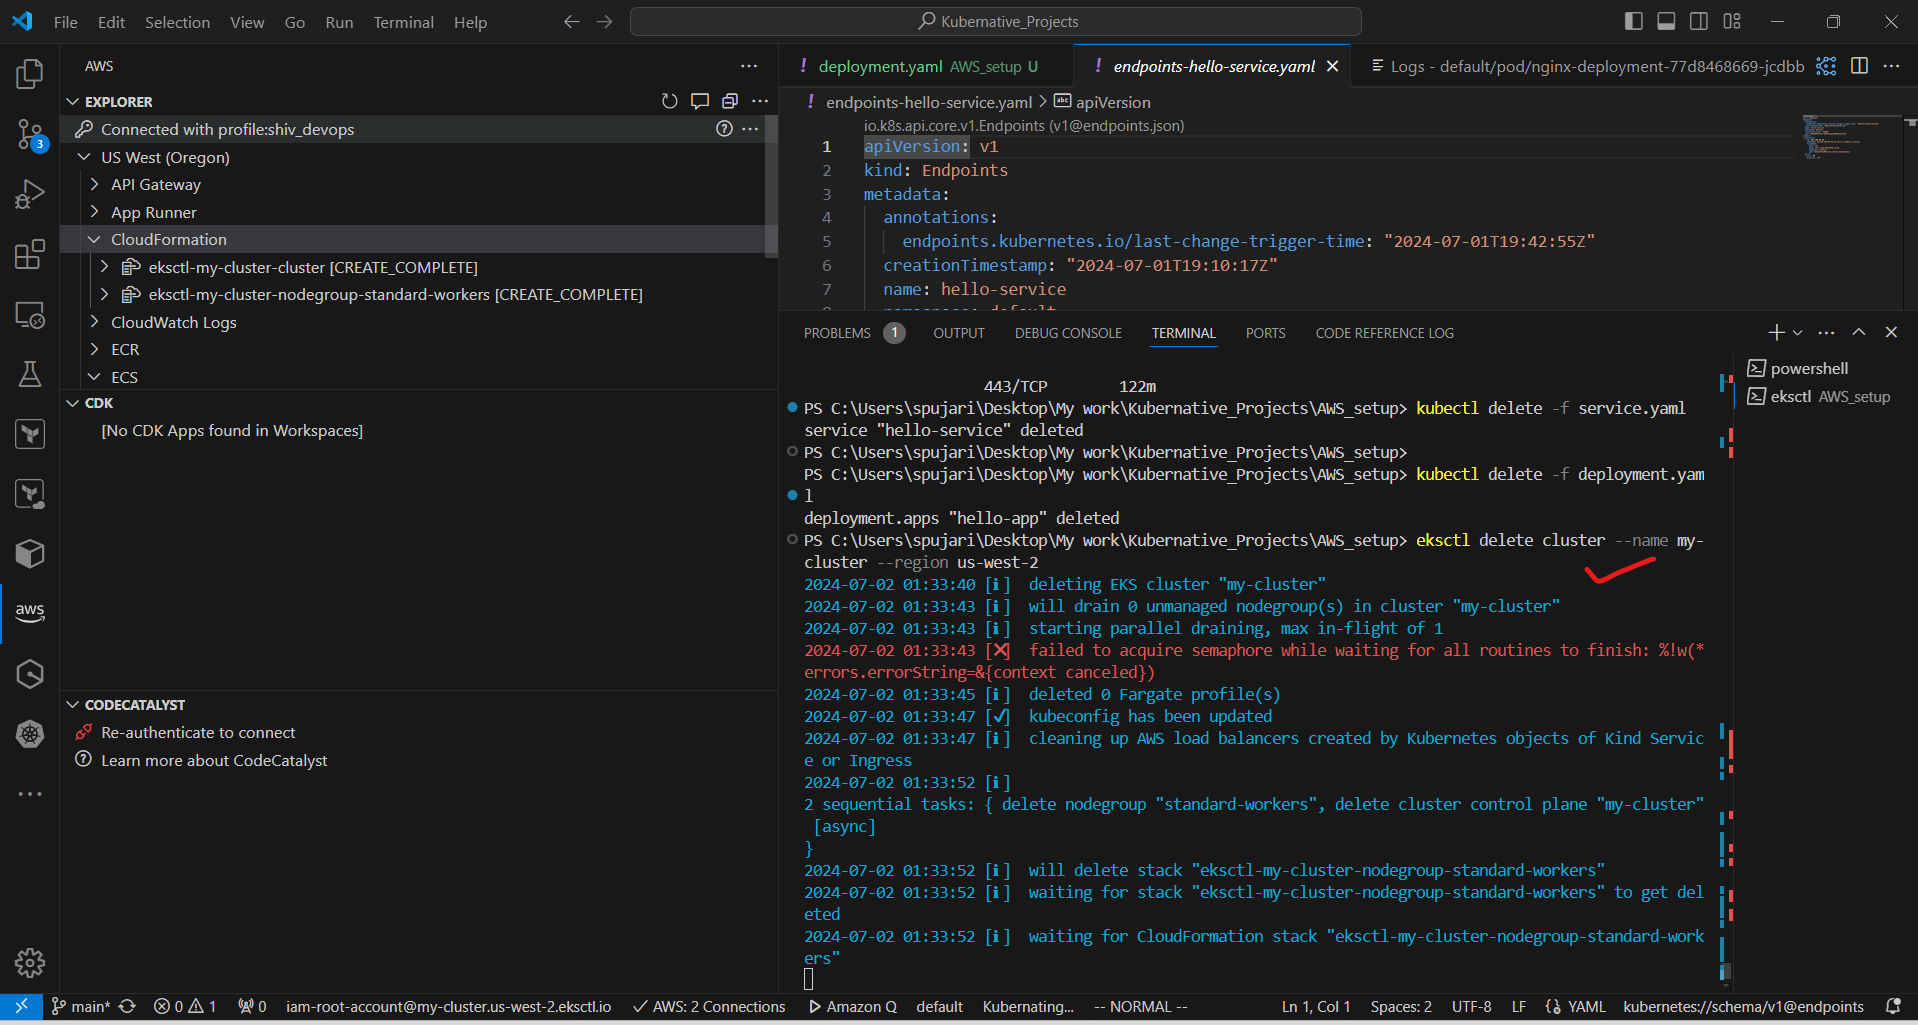
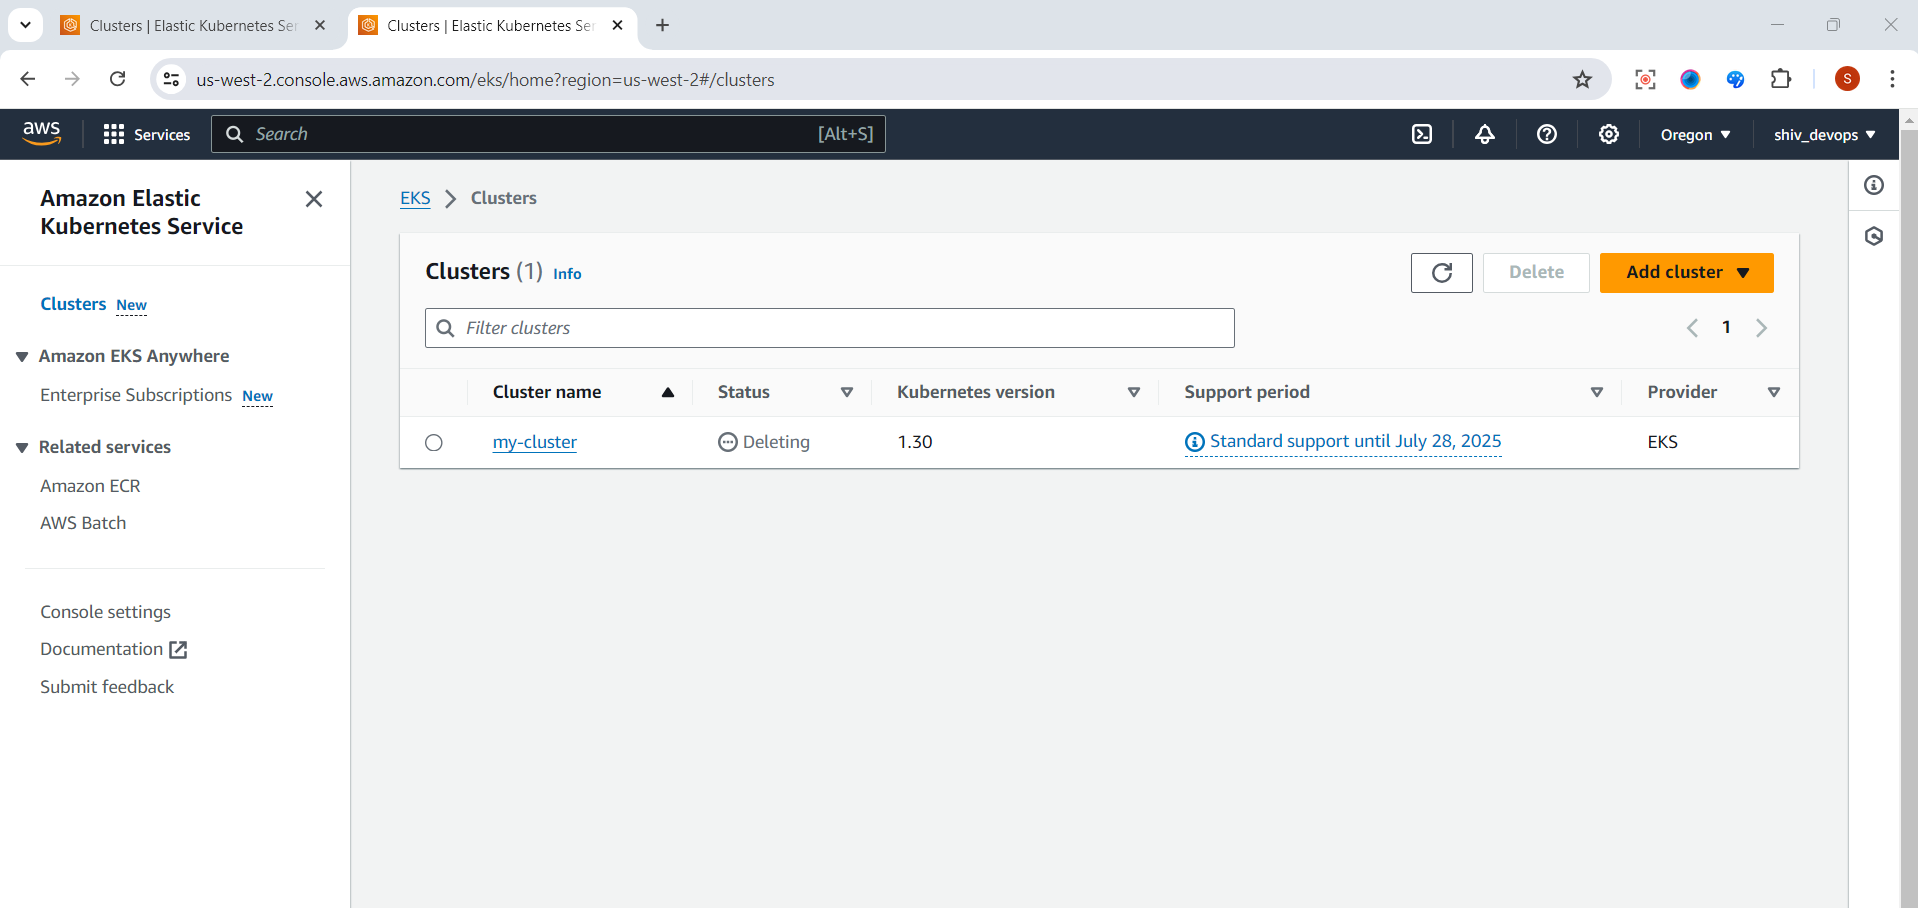
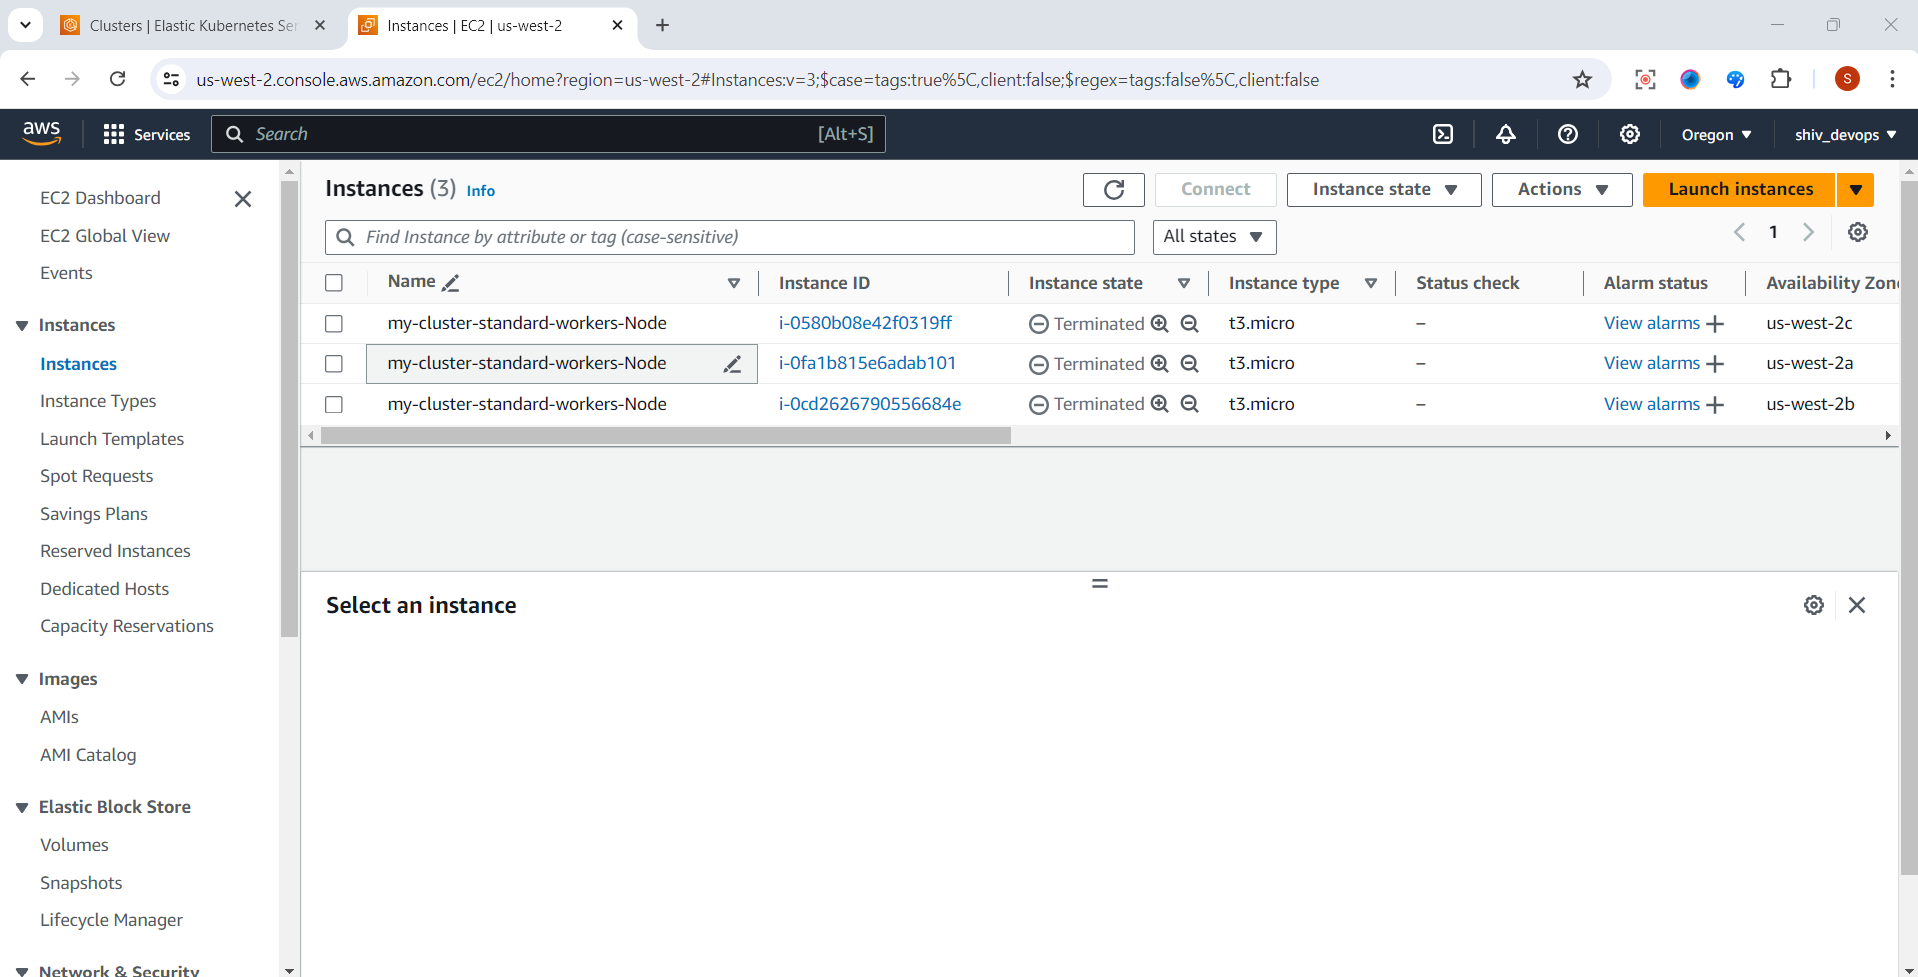
• Verify deletion in AWS Console:
Check EKS, EC2, VPC, and CloudFormation services
🔐 Additional Security Measures
• Set up RBAC for your cluster:
Create roles and role bindings
Use least privilege principle
Implement network policies:
Install a network policy provider (e.g., Calico)
Define ingress and egress rules
Use AWS IAM for pod authentication:
Create IAM roles for service accounts
Associate pods with IAM roles
🔧 Troubleshooting Tips
• Check pod status:
kubectl get pods• View pod logs:
kubectl logs <pod-name>• Describe resources:
kubectl describe <resource-type> <resource-name>• Check cluster events:
kubectl get events --sort-by=.metadata.creationTimestamp• Use
kubectl execto run commands inside containers• Verify network connectivity between pods
Would you like me to elaborate on any specific part of this expanded guide.
Thank you for joining me on this journey through the world of cloud computing! Your interest and support mean a lot to me, and I'm excited to continue exploring this fascinating field together. Let's stay connected and keep learning and growing as we navigate the ever-evolving landscape of technology.
LinkedIn Profile: https://www.linkedin.com/in/prasad-g-743239154/
Project Details: Github URL-https://github.com/sprasadpujari/Kubernative_Projects/tree/main/AWS_EKS_Setup_Nginx
Feel free to reach out to me directly at spujari.devops@gmail.com. I'm always open to hearing your thoughts and suggestions, as they help me improve and better cater to your needs. Let's keep moving forward and upward!
If you found this blog post helpful, please consider showing your support by giving it a round of applause👏👏👏. Your engagement not only boosts the visibility of the content, but it also lets other DevOps and Cloud Engineers know that it might be useful to them too. Thank you for your support! 😀
Thank you for reading and happy deploying! 🚀
Best Regards,
Sprasad
Subscribe to my newsletter
Read articles from Sprasad Pujari directly inside your inbox. Subscribe to the newsletter, and don't miss out.
Written by

Sprasad Pujari
Sprasad Pujari
Greetings! I'm Sprasad P, a DevOps Engineer with a passion for optimizing development pipelines, automating processes, and enabling teams to deliver software faster and more reliably.