Automate CI/CD with Jenkins and GitHub Webhooks: Full Guide
 Jasai Hansda
Continuous Integration and Continuous Deployment (CI/CD) are essential practices in modern software development. They ensure that code changes are automatically built, tested, and deployed, leading to faster and more reliable releases. In this guide, we'll walk through setting up a CI/CD pipeline with Jenkins, configuring GitHub to trigger builds on code changes, and deploying a Dockerized API.
What is CI/CD?
Continuous Integration (CI)
Continuous Integration is a development practice where developers integrate code into a shared repository several times a day. Each integration is automatically tested by an automated build system to detect errors as early as possible. The main goals of CI are:
Early Bug Detection: By integrating code frequently, errors can be detected and fixed early in the development process.
Improved Collaboration: Developers share their code frequently, leading to better collaboration and communication.
Automated Testing: Automated tests are run on each integration, ensuring that the codebase remains stable and bug-free.
Continuous Deployment (CD)
Continuous Deployment is a practice where every change that passes automated tests is automatically deployed to production. This ensures that the software is always in a releasable state. The benefits of CD include:
Faster Release Cycles: Automated deployments mean that new features and bug fixes can be released more frequently.
Reduced Manual Effort: Automation reduces the need for manual intervention, minimizing human errors and saving time.
Consistency: Automated deployment ensures that the deployment process is consistent and repeatable.
Introducing Jenkins
Jenkins is an open-source automation server that helps implement CI/CD pipelines. It supports building, testing, and deploying software, making it a versatile tool for any development team. Here are some key features of Jenkins:
Key Features of Jenkins
Extensibility: Jenkins has a rich ecosystem of plugins that extend its functionality. Whether you need support for a specific version control system, build tool, or deployment environment, there's likely a plugin for it.
Pipeline as Code: Jenkins supports defining build pipelines as code using its Pipeline DSL (Domain-Specific Language). This makes it easy to version and share your CI/CD pipeline definitions.
Distributed Builds: Jenkins can distribute build and test workloads across multiple machines, speeding up the CI process.
Integration with Popular Tools: Jenkins integrates with many popular development, testing, and deployment tools, such as Git, Docker, Maven, and Kubernetes.
Getting Started with CI/CD and Jenkins
We will be setting up a CI/CD pipeline with Jenkins, configuring GitHub to trigger builds on code changes, and deploying a Dockerized API in Amazon AWS**.**
Before Configuring the automation Pipeline need to take care of these things first:
Jenkins installed and running.
Docker installed on the Jenkins server.
Git repository for your application code.
Docker Hub account.
Hosting environment for your Docker containers (e.g., AWS EC2, DigitalOcean, etc.).
Setting up the Server
Follow these steps to :Create your AWS EC2 resources and launch your EC2 instance(Free Tier)
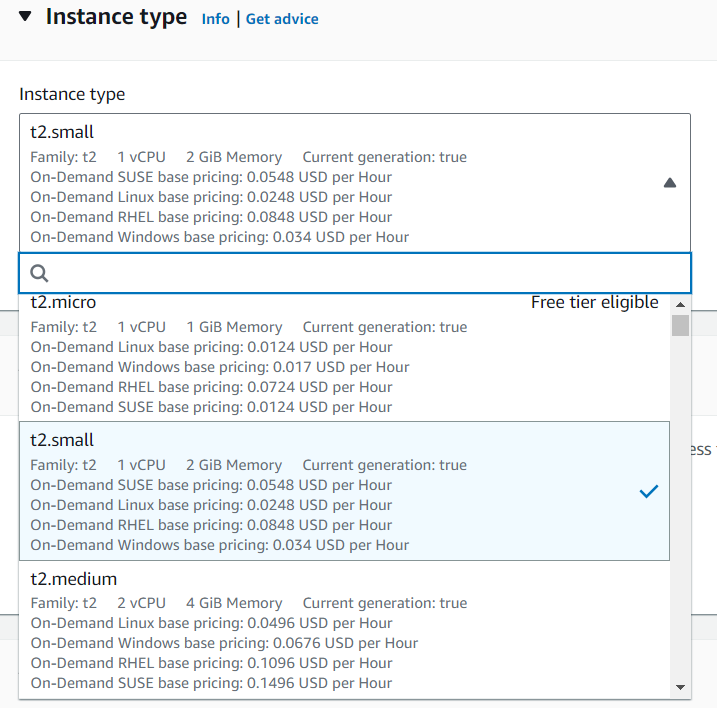
Note: To run Docker and Jenkins, you may need to choose an Instance Type that is above t2.micro, with a minimum of t2.small to run smoothly on your machine.
Installing Jenkins
We will install Jenkins using Docker.
Step 1: Install Docker
You can follow these steps to install Docker on your system.
Step 2: Pull the Jenkins Docker Image
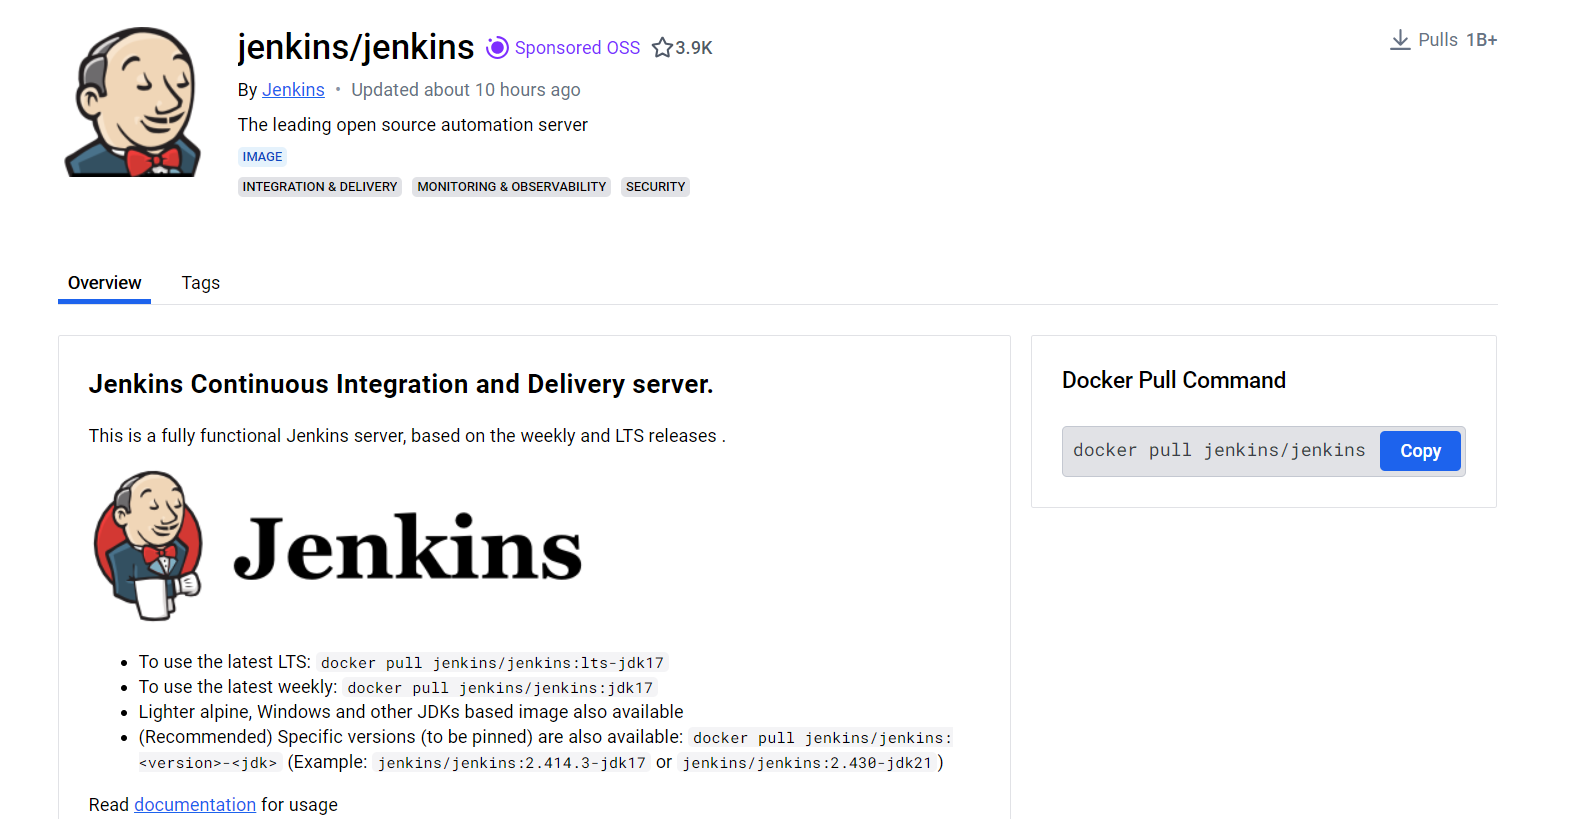
Open a terminal or command prompt and pull the latest official Jenkins Docker image from Docker Hub:
docker pull jenkins/jenkins:lts-jdk17
Check the Official Jenkins image and documentation
Step 3: Run Jenkins Container
Run the Jenkins container with the following command:
docker run -p 8080:8080 -p 50000:50000 --restart=on-failure -v jenkins_home:/var/jenkins_home jenkins/jenkins:lts-jdk17
Step 4: Run Jenkins Docker Container with Docker Access (Optional)
In some cases, you may want to install Docker inside the Jenkins container itself. This can be useful if you need Docker CLI tools to be available directly within the container.
Stop the existing Jenkins container:
 docker stop your_jenkins_container_name
 docker rm your_jenkins_container_name
Run a new Jenkins container with Docker socket mounted:
Run the Jenkins container with access to the Docker socket on the host machine. This setup allows the Jenkins container to use Docker commands to manage containers and images.
 docker run -d \
    --name jenkins \
    -p 8080:8080 -p 50000:50000 \
    -v /var/jenkins_home:/var/jenkins_home \
    -v /var/run/docker.sock:/var/run/docker.sock \
    jenkins/jenkins:lts
Add Jenkins User to Docker Group (Inside the Container)
Enter the running Jenkins container:
docker exec -it jenkins /bin/bashInstall Docker inside the Jenkins container (if not already installed):
 apt-get update
 apt-get install -y docker.io
Add the Jenkins user to the Docker group:
usermod -aG docker jenkinsExit the container:
exitRestart Jenkins Service
Restart the Jenkins service to apply the changes:
docker restart jenkins
Note: Common error
Some errors like permission denied while trying to connect to the Docker daemon socket indicate that the Jenkins user inside the Docker container does not have permission to access the Docker daemon socket. This usually happens because the jenkins user is not part of the docker group or the permissions on the Docker socket are not set correctly.
Here are the steps to solve this issue:
Ensure Jenkins User is in the Docker Group:
First, ensure that the
jenkinsuser is added to thedockergroup inside the Jenkins container:docker exec -it --user root jenkins /bin/bash usermod -aG docker jenkins exit docker restart jenkinsAdjust Permissions on Docker Socket:
Ensure that the Docker socket has the correct permissions. You can change the permissions on the Docker socket by running:
sudo chmod 666 /var/run/docker.sockThis command allows all users to read and write to the Docker socket.
Verify Changes:
After adding the
jenkinsuser to thedockergroup and adjusting the permissions, verify that the Jenkins container can access Docker:docker exec -it jenkins /bin/bash docker psIf the
docker pscommand works without any permission errors, the Jenkins container should now be able to run Docker commands
Note: Common error
Sometimes after running the Jenkins container, the STATUS will show Exited (some seconds ago). If you check the logs and get Permission denied for the /var/jenkins_home directory, need to execute one command:
To check for exited containers also:
docker ps -a
To check logs:
docker logs <containerID>If you get an error like this:

Run this command:
sudo chown -R 1000:1000 /var/jenkins_homeCheck the changes and restart jenkins
ls -ld /var/jenkins_home
Step 5: Access Jenkins
Open a web browser and navigate to
http://your-public-ip:8080ORhttp://ec2-user@your-ec2-public-dns:8080You will be prompted to unlock Jenkins. Retrieve the initial admin password by running the following command:
docker exec jenkins cat /var/jenkins_home/secrets/initialAdminPassword
- Copy the password from the terminal and paste it into the Jenkins web interface.
Step 6: Customize Jenkins
Follow the setup wizard to customize Jenkins.
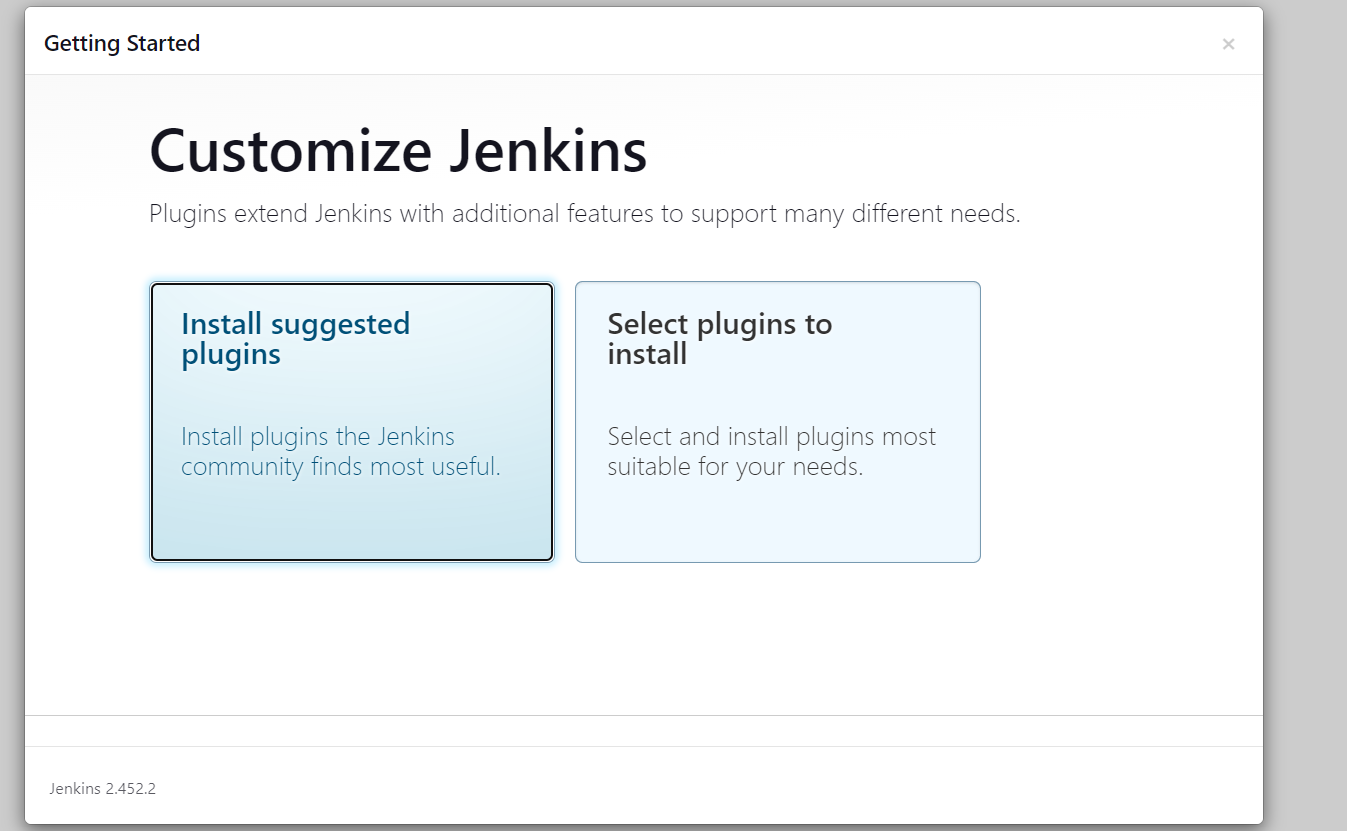
Install the recommended plugins when prompted.
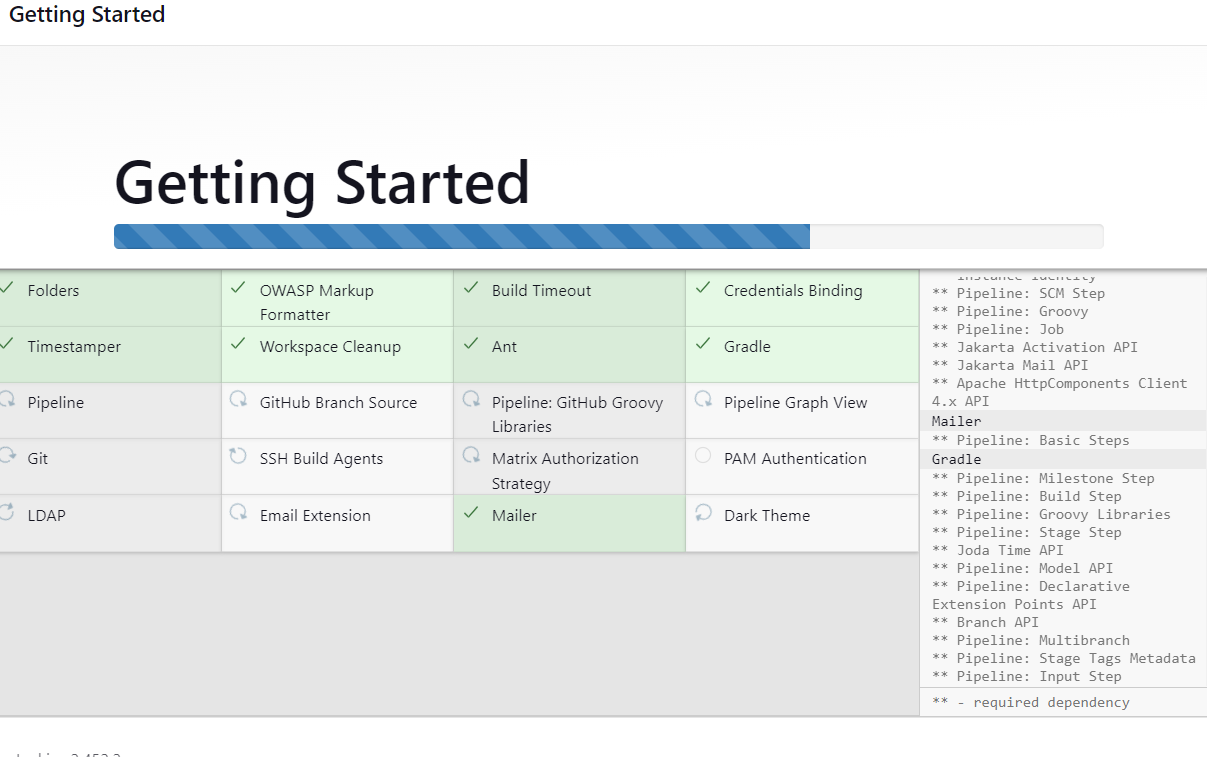
Create your first admin user account.
Jenkins System Configuration
Once the setup wizard is complete, you can start configuring Jenkins:
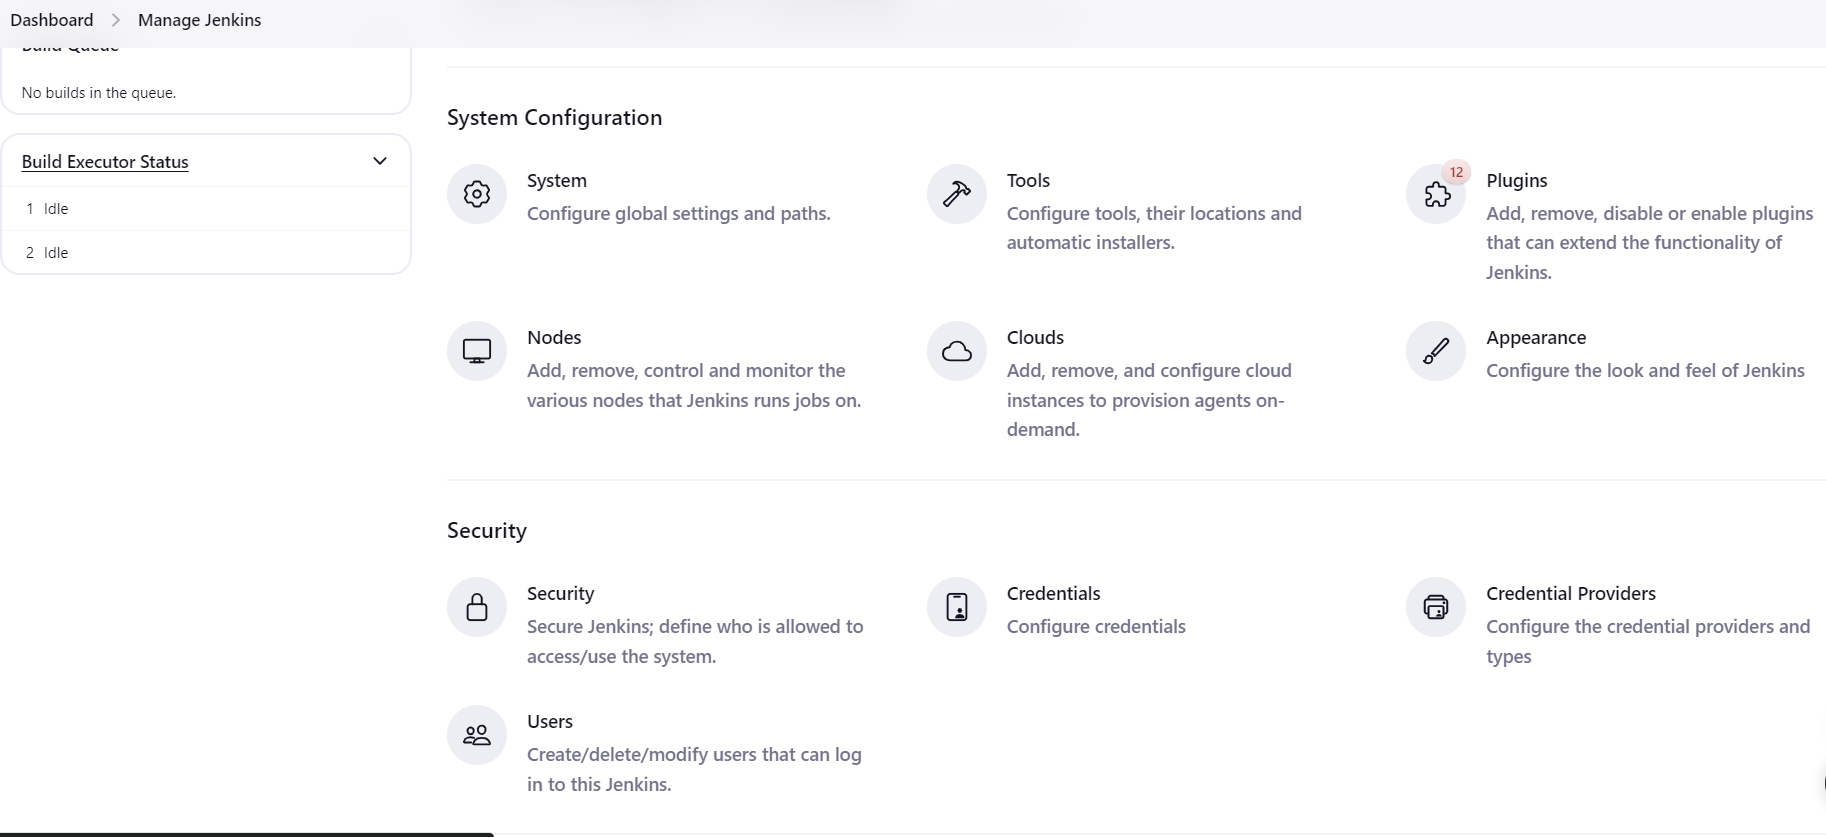
Step 1: Install Plugins
Navigate to Manage Jenkins > Plugins > Available to search and install additional plugins as needed.
Here we will be installing the:
Docker Plugin
Git Plugin
SSH Agent Plugin

Step 2: Configure Jenkins Credentials

2.1. Add Credentials
In the
Credentialspage, choose the appropriate domain (usually the global domain is used for general purposes).
Click on (global) to add credentials at the global level.
Click on Add Credentials on the left sidebar.
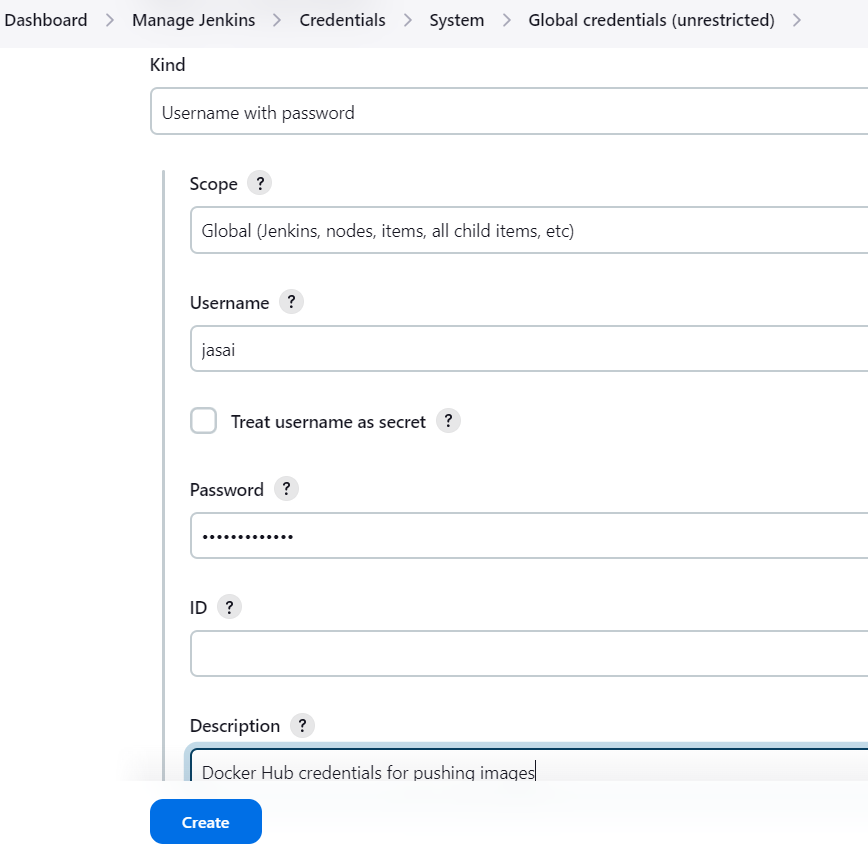
2.2. Enter Docker Hub Credentials
Kind: Select Username with password.
Scope: Select Global (this makes the credentials available to all jobs).
Username: Enter your Docker Hub username.
Password: Enter your Docker Hub password/passkey.
ID: (Optional) You can provide a unique ID to refer to these credentials. (e.g.,
docker-hub-credentials).If kept empty, Jenkins will assign a unique ID.Description: Add a meaningful description, such as "Docker Hub credentials for pushing images".
Click OK to save the credentials.
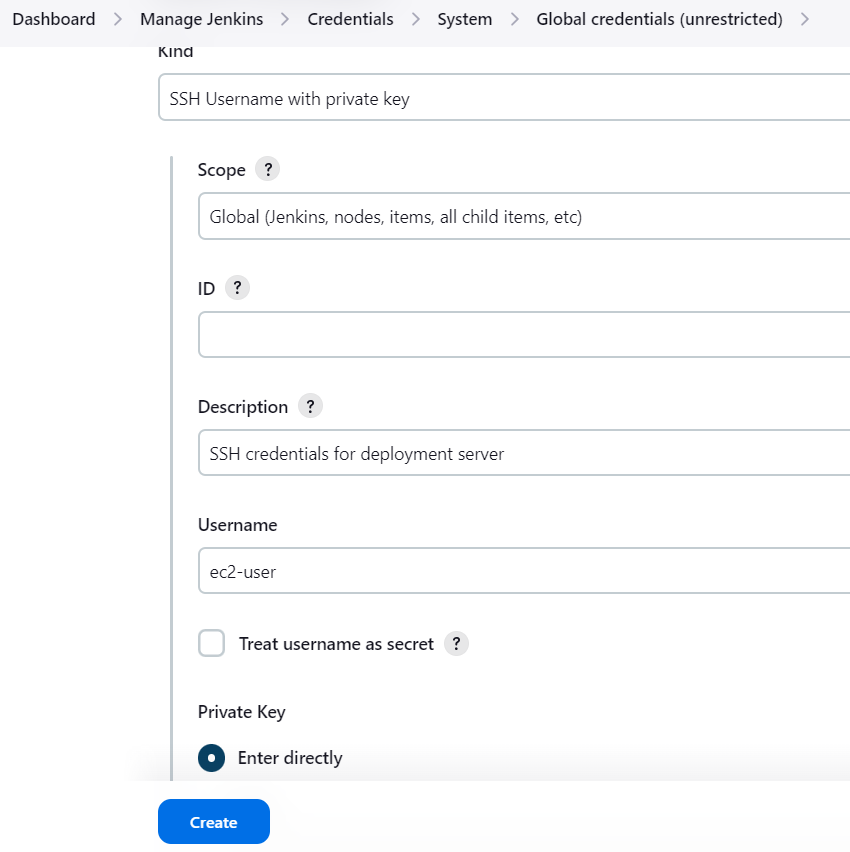
2.3. Add SSH Credentials for Deployment Server
Kind: Select SSH Username with private key.
Scope: Select Global.
Username: Enter the SSH username for your deployment server. In this case, AWS EC2 User: ec2-user (default user in AWS).
Private Key: Select Enter directly and paste the private key. The key is the SSH key which gets generated when launching EC2 instance and is stored in your system as
<keyName>.pem.ID: (Optional) Provide a unique ID (e.g.,
deployment-server-ssh).Description: Add a description, such as "SSH credentials for deployment server".
Click OK to save the credentials.
Configure Jenkins Pipeline Job
Step 1: Create a New Pipeline Job
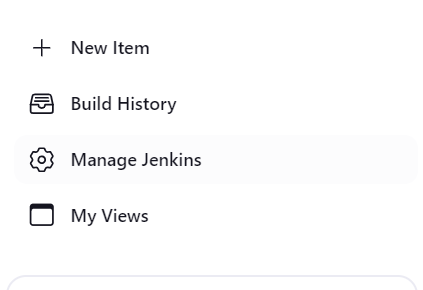
Open Jenkins and click on New Item.
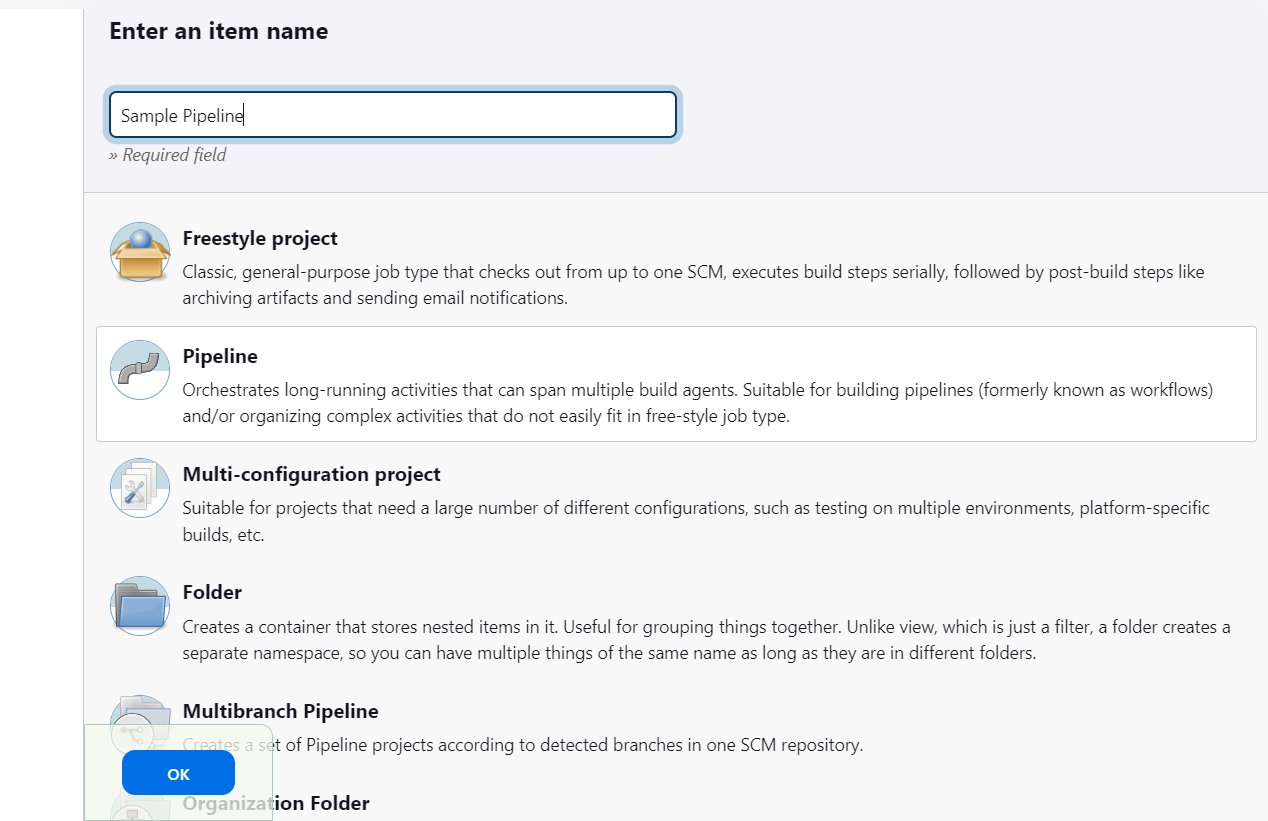
Select Pipeline and give your job a name.
Click OK.
Step 2: Configure the Pipeline
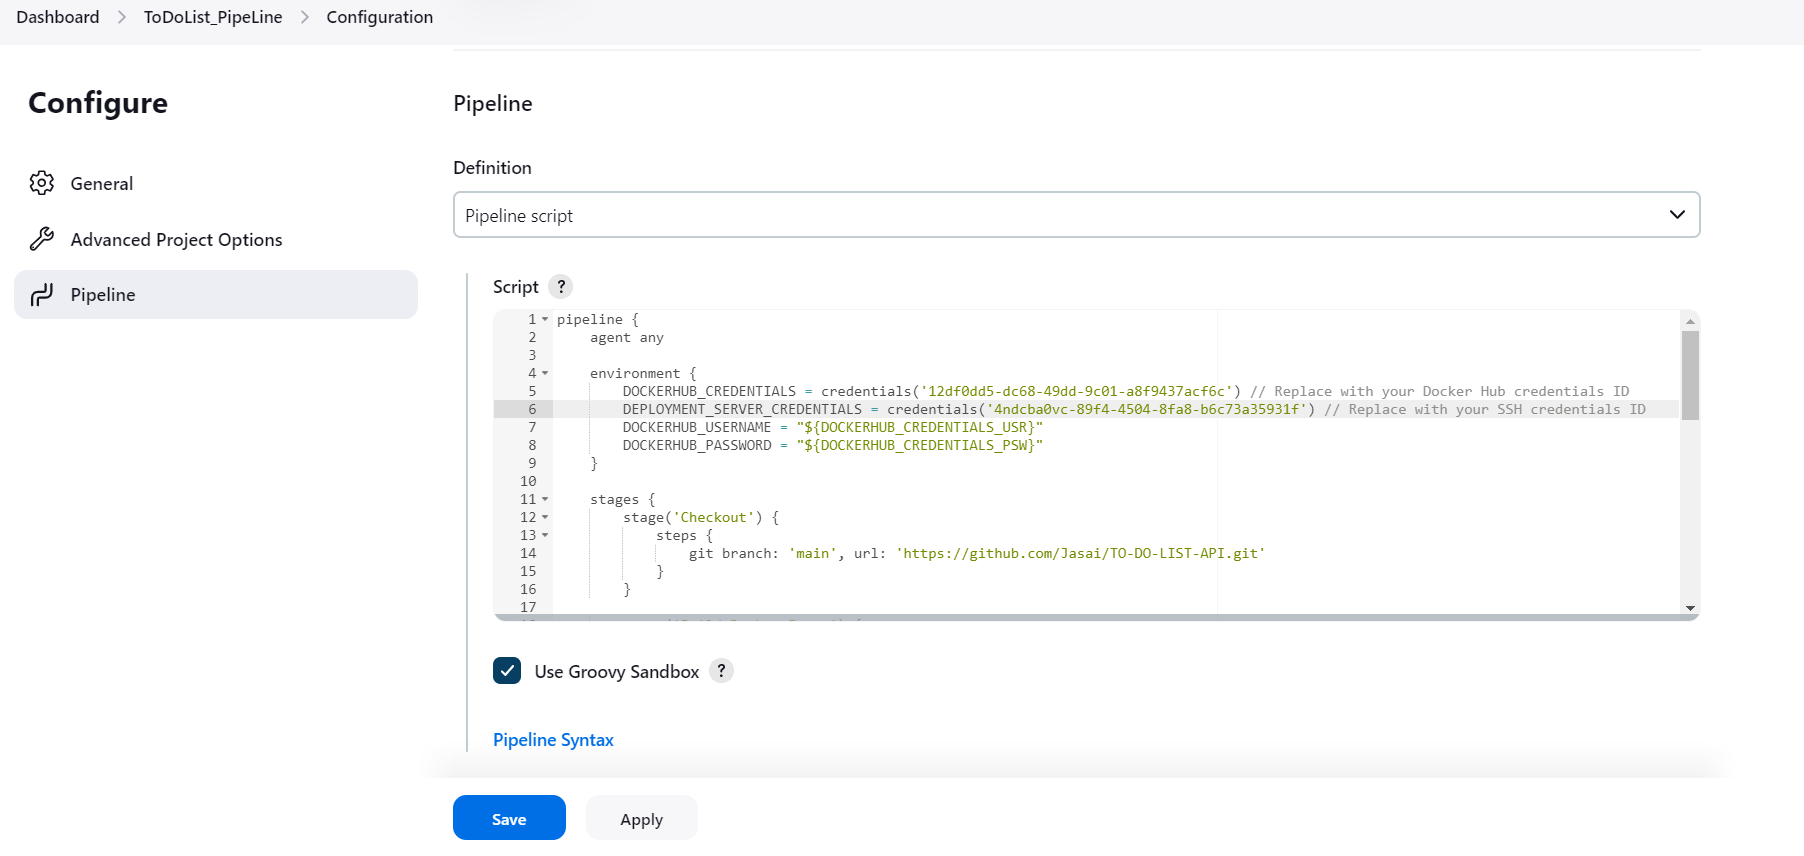
In the configuration page of your newly created pipeline job, go to the Pipeline section.
Choose Pipeline script from the Definition dropdown.
Step 3: Define Pipeline Stages
Define the pipeline stages in detail to ensure each step of your build and deployment process is clearly outlined. Here is how you can structure your pipeline stages:.
Defining Environmental Variables:
Add a stage to define credentials IDs, which are configured in Jenkins. These credentials will be used in further stages.
  environment {
         DOCKERHUB_CREDENTIALS = credentials('1d810dd5-dc68-49dd-9c01-a8f9437hjv12') // Replace with your Docker Hub credentials ID
         DEPLOYMENT_SERVER_CREDENTIALS = credentials('64f0cba0-89f4-4504-8fa8-b6c73a31234g') // Replace with your SSH credentials ID
         DOCKERHUB_USERNAME = "${DOCKERHUB_CREDENTIALS_USR}"
         DOCKERHUB_PASSWORD = "${DOCKERHUB_CREDENTIALS_PSW}"
     }
Checkout Stage:
Add a stage to check out the code from your Git repository.
Use the following script to checkout the code:
 stage('Checkout') {
     steps {
          git branch: 'main', url: 'https://github.com/your-repo/repo.git'
        }
    }
Build Docker Image Stage:
Add a stage to build the Docker image.
We use the
docker buildcommand to create a Docker image.stage('Build Docker Image') { steps { script { sh 'docker build -t dockerhub-username/dockerhub-repoName .' } } }
Push Docker Image Stage:
Add a stage to push the Docker image to Docker Hub.
We use the
docker pushcommand to push image to Docker Hub.stage('Push Docker Image') { steps { script { sh ''' echo $DOCKERHUB_PASSWORD | docker login -u $DOCKERHUB_USERNAME --password-stdin docker push dockerhub-username/dockerhub-repoName:latest ''' } } }
Deploy Docker Container Stage:
Add a stage to deploy the Docker container.
Use the following script to deploy the container. Replace
your-username@your-server-ipanddockerhub-username/dockerhub-repoNamewith your actual server IP and Docker image name respectively:stage('Deploy Docker Container') { steps { sshagent(['64f0cba0-89f4-4504-8fa8-b6c73a31234g']) { sh ''' ssh -o StrictHostKeyChecking=no your-username@your-server-ip " docker pull dockerhub-username/dockerhub-repoName:latest && docker stop container-name || true && docker rm container-name || true && docker run -d --name container-name -p 3000:3000 dockerhub-username/dockerhub-repoName:latest" ''' } } }
Final Pipeline Script:
pipeline {
agent any
environment {
DOCKERHUB_CREDENTIALS = credentials('1d810dd5-dc68-49dd-9c01-a8f9437acf6c') // Replace with your Docker Hub credentials ID
DEPLOYMENT_SERVER_CREDENTIALS = credentials('64f0cba0-89f4-4504-8fa8-b6c73a31234g') // Replace with your SSH credentials ID
DOCKERHUB_USERNAME = "${DOCKERHUB_CREDENTIALS_USR}"
DOCKERHUB_PASSWORD = "${DOCKERHUB_CREDENTIALS_PSW}"
}
stages {
stage('Checkout') {
steps {
git branch: 'main', url: 'https://github.com/your-repo/repo.git'
}
}
 stage('Build Docker Image') {
             steps {
                 script {
                     sh 'docker build -t dockerhub-username/dockerhub-repoName .'
                 }
             }
         }
 stage('Push Docker Image') {
  steps {
    script {
            sh '''
            echo $DOCKERHUB_PASSWORD | docker login -u $DOCKERHUB_USERNAME --password-stdin
            docker push dockerhub-username/dockerhub-repoName:latest
                 '''
           }
        }
    }
 stage('Deploy Docker Container') {
             steps {
                  sshagent(['64f0cba0-89f4-4504-8fa8-b6c73a31234g']) {
                     sh '''
                     ssh -o StrictHostKeyChecking=no your-username@your-server-ip "
                     docker pull dockerhub-username/dockerhub-repoName:latest &&
                     docker stop container-name || true &&
                     docker rm container-name || true &&
                     docker run -d --name container-name -p 3000:3000 dockerhub-username/dockerhub-repoName:latest"
                     '''
                 }
             }
         }
}
}
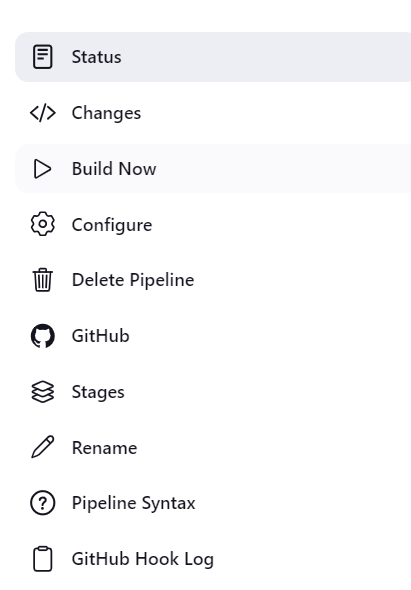
Save and build manually to test if your image is getting pushed to Docker Hub and deployed on the server.
Setting Up GitHub Webhooks
To trigger a build automatically when you push changes to your GitHub repository, you need to configure a webhook in GitHub and set up your Jenkins job to listen for changes.
Here's how to set it up:
Step 1: Configure GitHub Webhook
Go to Your GitHub Repository:
Navigate to
Settings>Webhooks.
Add a Webhook:
Payload URL:
http://your-jenkins-server/github-webhook/Content type:
application/jsonSecret: empty (or configure it if you want to use a secret token).
Which events would you like to trigger this webhook?: Select
Just the push event.Click
Add webhook.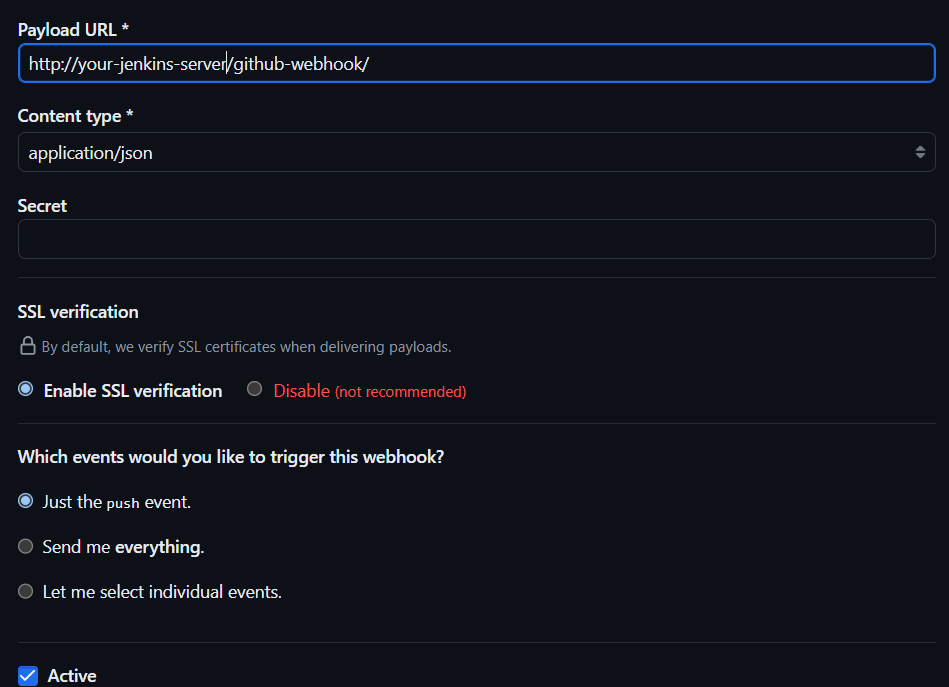
Step 2: Configure Jenkins Job
Open your Jenkins job configuration and add your GitHub Repository.
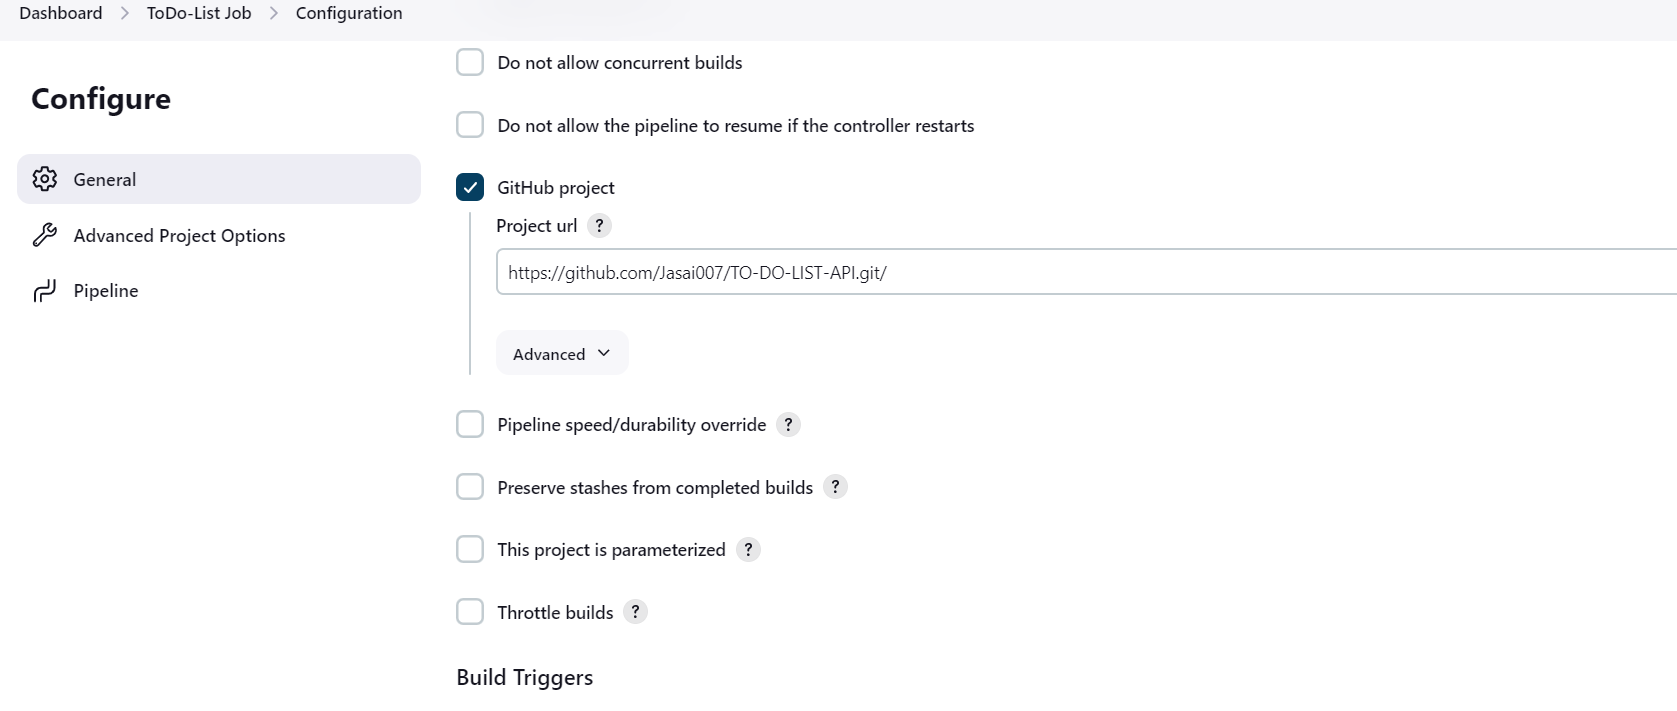
In the Build Triggers section, check the box for GitHub hook trigger for GITScm polling.
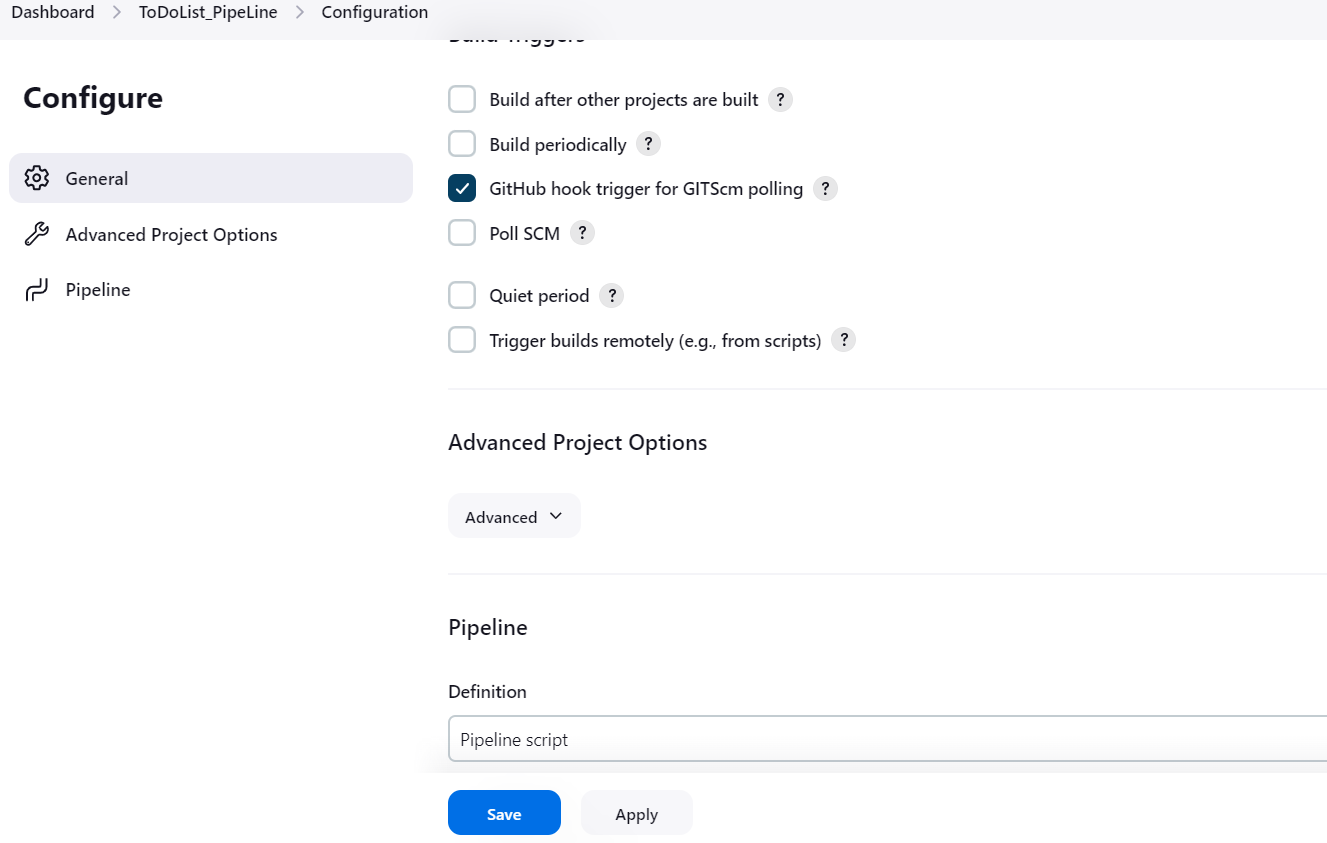
This setup ensures that whenever you push changes to the GitHub repository, the webhook will trigger a build in Jenkins automatically, and your updated Jenkinsfile will handle the build and deployment process.
Running the Application
After the Docker container is deployed, it should be running on your server. You can verify this by accessing the API endpoint.
Access Your Application:
Check on the server if the Dockerized application is up. (
docker ps -a)Open your browser and go to
http://your-server-ip:3000.You should see your application running.
View Build History:
On the job details page, you will see a list of recent builds. Each build will have a unique build number.
Click on the build number to view detailed information about that specific build.

Troubleshooting
If you encounter any issues, check the following:
Jenkins build logs for any errors.
Docker container logs using
docker logs containerIDon your deployment server.Network configurations and firewall rules to ensure your server is accessible.
Conclusion
Setting up a CI/CD pipeline with Jenkins can significantly streamline your development process, ensuring that code changes are automatically tested and deployed. By following this guide, you have configured Jenkins, set up GitHub webhooks, and deployed a Dockerized API. This robust setup will help you maintain a smooth and efficient development workflow.
Subscribe to my newsletter
Read articles from Jasai Hansda directly inside your inbox. Subscribe to the newsletter, and don't miss out.
Written by

Jasai Hansda
Jasai Hansda
Software Engineer (2 years) | In-transition to DevOps. Passionate about building and deploying software efficiently. Eager to leverage my development background in the DevOps and cloud computing world. Open to new opportunities!