Day 25: Amazon RDS: Step-by-Step Hands-On Guide with AWS Console ☑
 Shailesh
Table of contents

Introduction
Amazon Relational Database Service (RDS) is a managed database service that makes it easy to set up, operate, and scale a relational database in the cloud. This guide provides a step-by-step walkthrough of creating and managing an RDS instance using the AWS Management Console.
Step 1: Sign in to the AWS Management Console
Navigate to the AWS Management Console: Open your browser and go to the AWS Management Console at https://aws.amazon.com/console/.
Sign In: Enter your AWS credentials to sign in.
Step 2: Open the RDS Dashboard
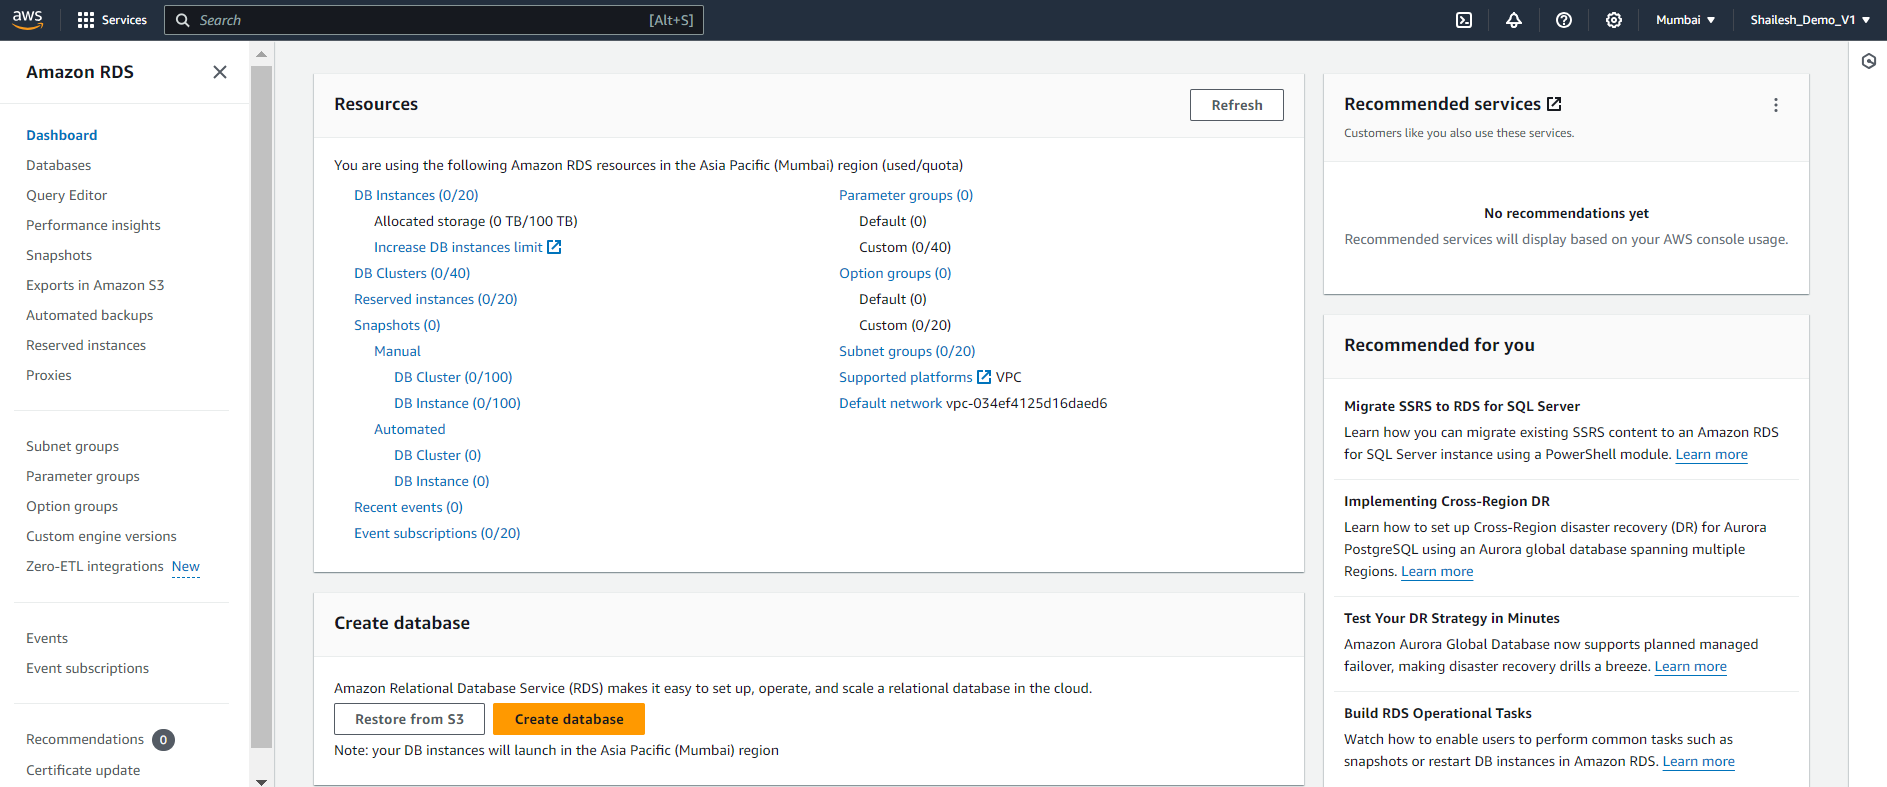
Search for RDS: In the AWS Management Console, type "RDS" in the search bar and select "RDS" from the dropdown menu.
RDS Dashboard: You will be taken to the Amazon RDS dashboard.
Step 3: Create a New RDS Instance
Click on "Create Database": On the RDS dashboard, click on the "Create database" button.

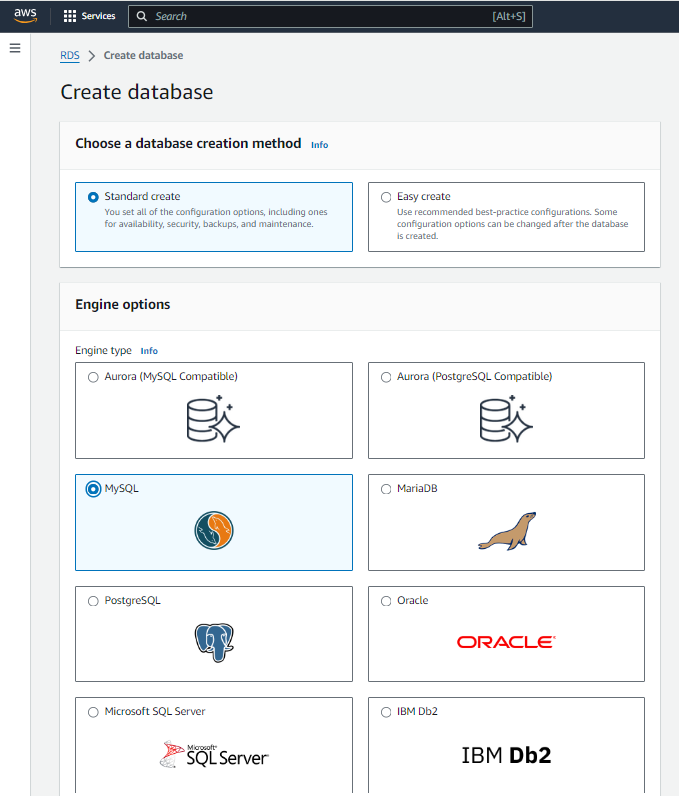
Choose a Database Creation Method:
Select "Standard Create" for more configuration options.
Choose the database engine (e.g., MySQL, PostgreSQL, MariaDB, Oracle, SQL Server).
For this guide, we will use MySQL.
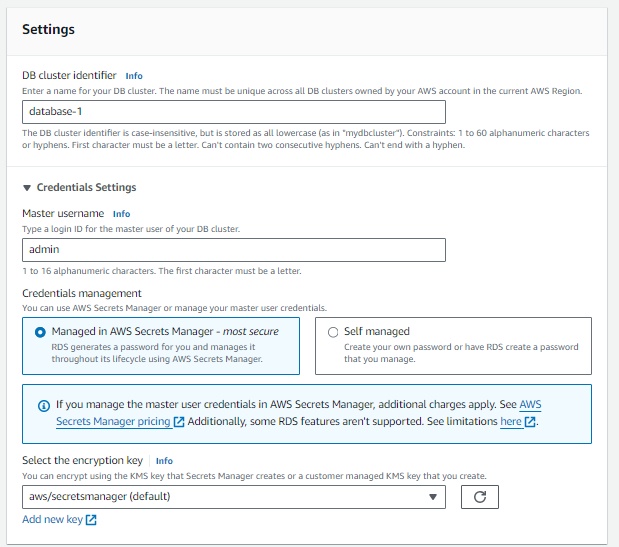
Specify DB Details:
DB instance identifier: Provide a unique name for your RDS instance.
Master username: Enter a username.
Master password: Enter a password and confirm it.
Step 4: Configure Instance Specifications
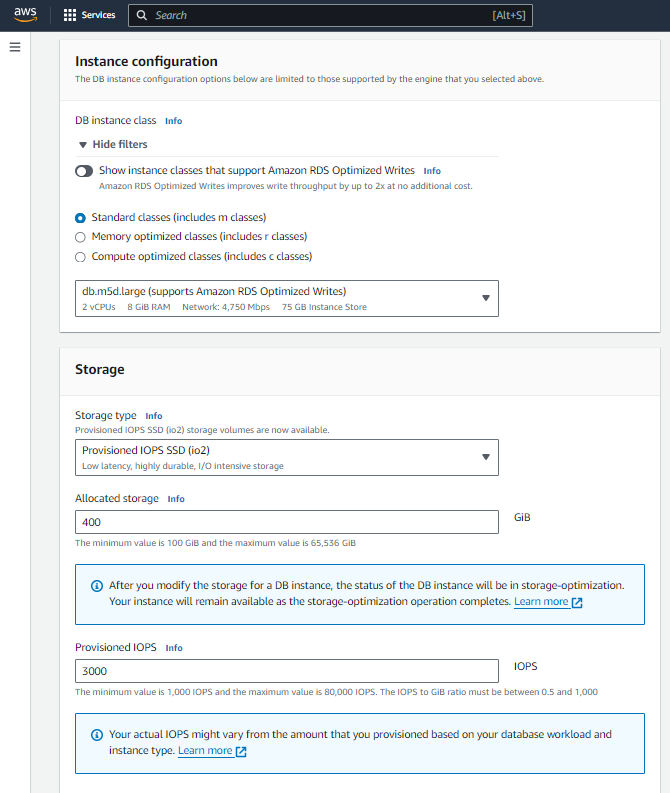
Instance Specifications:
DB instance class: Choose the instance class that fits your needs (e.g., db.t3.micro for free tier).
Storage type: Select the storage type (e.g., General Purpose SSD).
Allocated storage: Specify the amount of storage you need.
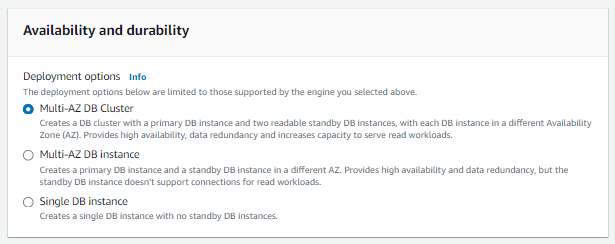
Availability & Durability:
Multi-AZ deployment: Choose "Yes" for high availability or "No" for single AZ.
VPC: Select the default VPC.
Step 5: Configure Connectivity
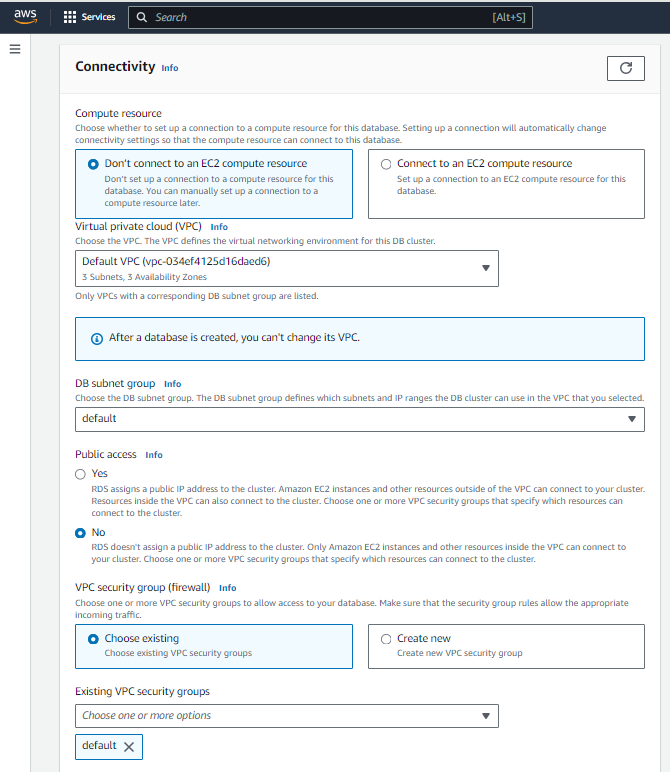
Connectivity:
Virtual Private Cloud (VPC): Choose your VPC.
Subnet group: Select the subnet group.
Publicly accessible: Choose "Yes" or "No" based on your needs.
VPC Security Group:
- Choose an existing security group or create a new one to allow traffic to your RDS instance.
Step 6: Additional Configuration
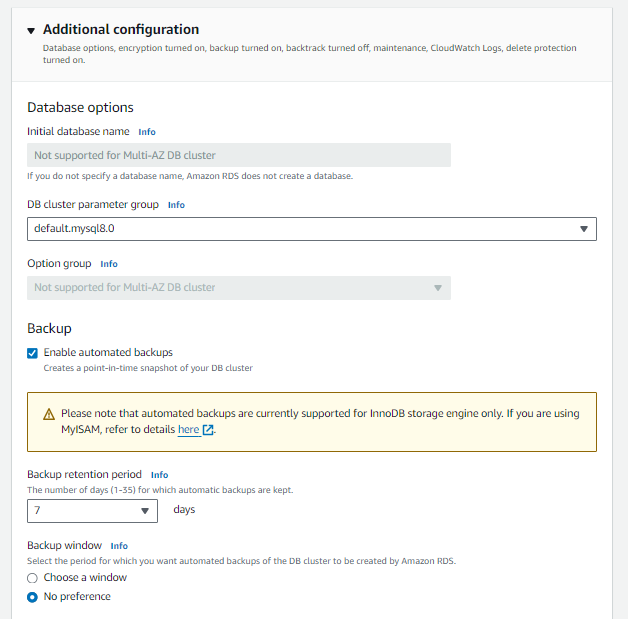
Database Options:
DB parameter group: Choose a parameter group.
Option group: Select an option group if needed.
Backup:
Backup retention period: Set the number of days to retain backups.
Backup window: Choose a backup window.
Maintenance:
Auto minor version upgrade: Enable or disable automatic minor version upgrades.
Maintenance window: Set the preferred maintenance window.
Step 7: Review and Create
Review: Review all your settings.
Create Database: Click on "Create database" to launch your RDS instance.
Step 8: Connecting to Your RDS Instance
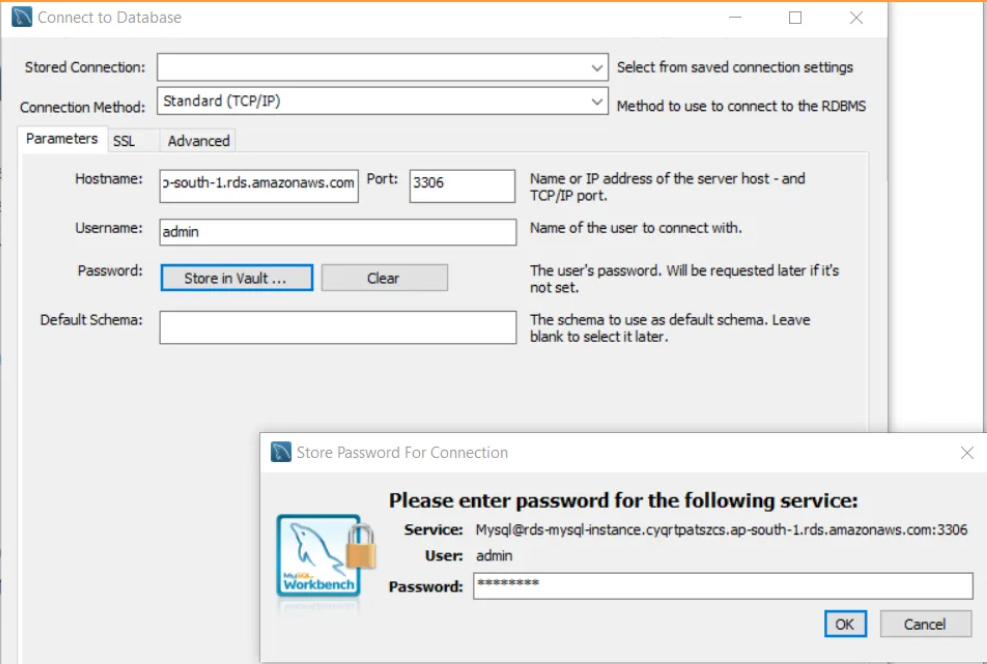
Find Endpoint: Once the instance is created, go to the "Databases" section on the RDS dashboard and click on your instance. Note the "Endpoint" under the "Connectivity & security" tab.
Connect: Use this endpoint to connect to your RDS instance from your application or database client.
Conclusion💡
Amazon RDS simplifies the process of setting up, operating, and scaling relational databases in the cloud. This step-by-step guide has shown you how to create an RDS instance using the AWS Management Console.
Stay tuned for more AWS insights!!⚜ If you found this blog helpful, share it with your network! 🌐😊
Happy cloud computing! ☁️🚀
Subscribe to my newsletter
Read articles from Shailesh directly inside your inbox. Subscribe to the newsletter, and don't miss out.
Written by

Shailesh
Shailesh
As a Solution Architect, I am responsible for designing and implementing scalable, secure, and efficient IT solutions. My key responsibilities include: 🔸Analysing business requirements and translating them into technical solutions. 🔸Developing comprehensive architectural plans to meet organizational goals. 🔸Ensuring seamless integration of new technologies with existing systems. 🔸Overseeing the implementation of projects to ensure alignment with design. 🔸Providing technical leadership and guidance to development teams. 🔸Conducting performance assessments and optimizing solutions for efficiency. 🔸Maintaining a keen focus on security, compliance, and best practices. Actively exploring new technologies and continuously refining strategies to drive innovation and excellence.