Building a Node.js App Image with GitHub Actions, Pushing to Azure Container Registry, and Running on Azure App Service
 Philip Nwachukwu
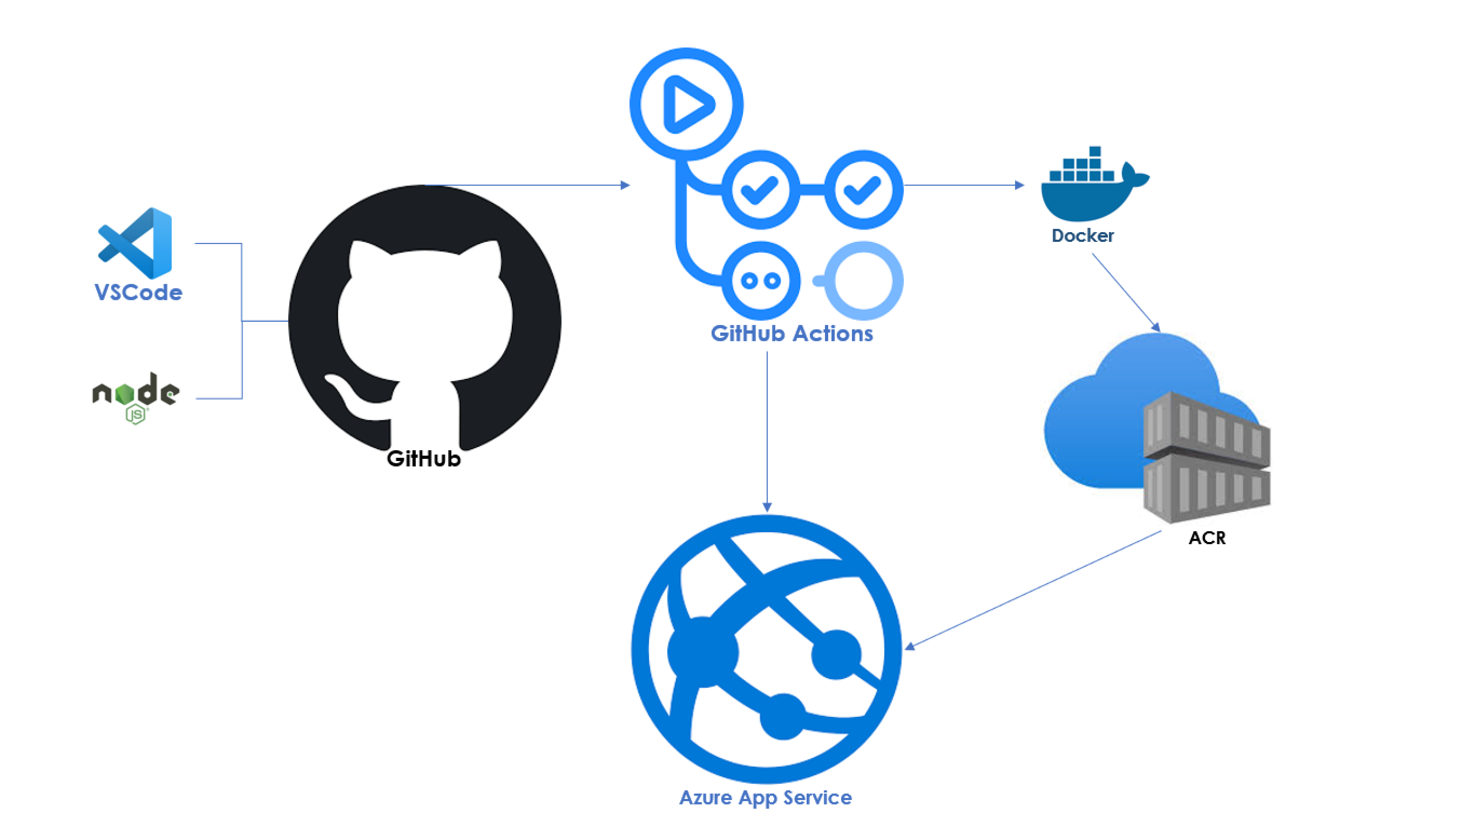
Welcome to my blog! Today, I will guide you through the process of building a Docker image for a Node.js application using GitHub Actions, pushing the image to Azure Container Registry (ACR), and running the image using Azure App Service. This tutorial is perfect for those looking to streamline their CI/CD pipeline with Azure and GitHub Actions.
Prerequisites
Basic knowledge of Node.js, Docker, and GitHub Actions.
Step 1: Creating a Simple Node.js App
First, let's create a simple Node.js application that displays "Welcome to my Blog".
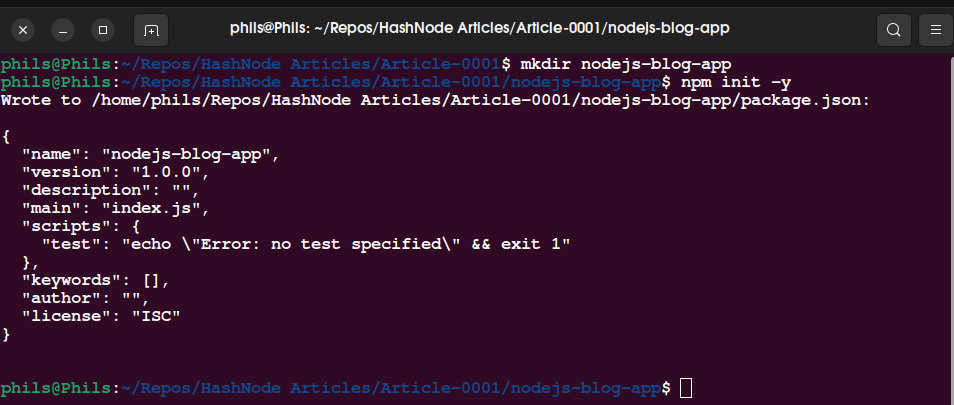
- Create a new directory for your project and navigate into it:

- Initialize a new Node.js project:
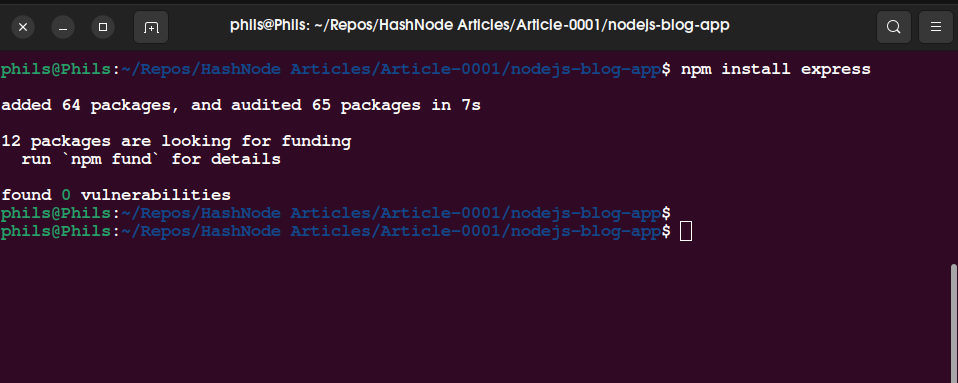
- Install Express:
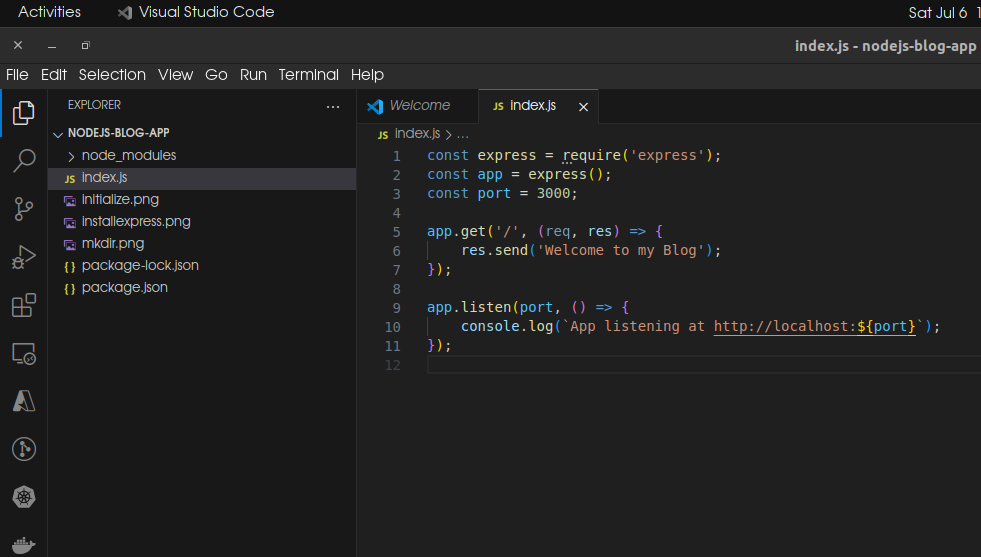
- Open the app on vscode and create an index.js file:
const express = require('express');
const app = express();
const port = 3000;

app.get('/', (req, res) => {
    res.send('Welcome to my Blog');
});

app.listen(port, () => {
    console.log(`App listening at http://localhost:${port}`);
});
Step 2: Creating a Dockerfile
Next, let's create a Dockerfile to containerize our Node.js application.
- In the root of your project directory, create a file named
Dockerfileand add the following content:
# Use the official Node.js image from the Docker Hub
FROM node:14

# Create and change to the app directory
WORKDIR /usr/src/app

# Copy application dependency manifests to the container image.
# A wildcard is used to ensure both package.json AND package-lock.json are copied.
COPY package*.json ./

# Install dependencies
RUN npm install

# Copy the rest of the application code to the container image.
COPY . .

# Run the web service on container startup.
CMD [ "node", "index.js" ]

# Inform Docker that the container listens on the specified network ports at runtime.
EXPOSE 3000
Step 3: Setting Up GitHub Actions
We will use GitHub Actions to automate the building and pushing of our Docker image to Azure Container Registry.
- In the root of your project, create a directory named
.github/workflows.
Inside the .github/workflows directory, create a file named docker-image.yml and add the following content:
name: Docker Image CI

on:
  push:
    branches: [ "main" ]
  pull_request:
    branches: [ "main" ]

jobs:
  build:
    name: 'Build and Push to ACR'
    runs-on: ubuntu-latest

    defaults:
      run:
        shell: bash

    steps:
      - name: Checkout
        uses: actions/checkout@v4

      - name: Docker Login
        uses: azure/docker-login@v1
        with:
          login-server: ${{ secrets.ACR_URL }}
          username: ${{ secrets.ACR_USERNAME }}
          password: ${{ secrets.ACR_PASSWORD }}

      - run: |
          docker build -t nodejs-app .
          docker tag nodejs-app ${{ secrets.ACR_URL }}/nodejs-app:${{ github.sha }}
          docker push ${{ secrets.ACR_URL }}/nodejs-app:${{ github.sha }}
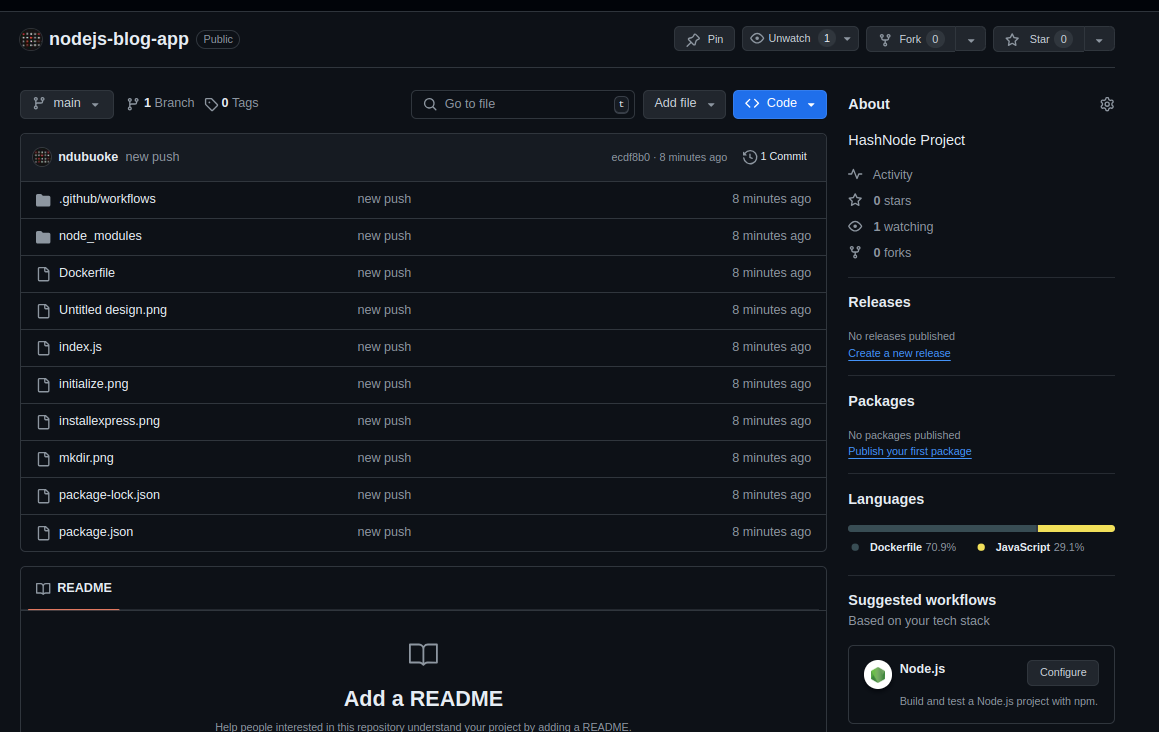
- Create a GitHub repository and push the folder to it. Go to Actions and notice the pipeline fails.
Step 4: Configuring Azure Container Registry on the Portal
Create an Azure Container Registry (ACR):
Go to the Azure Portal.
Click on Create a resource and search for Container Registry.
Click Create.
In the Create container registry page, fill in the required fields:
Resource group: Select your resource group or create a new one.
Registry name: Enter a unique name for your registry.
SKU: Select Basic.
Click Review + create, then Create
Retrieve ACR Credentials:
After the ACR is created, go to the resource.
In the Settings section, click on Access keys.
Note down the ACR URL, Username and Password (you will use these for GitHub secrets).
Turn on the
Admin userto activate the password.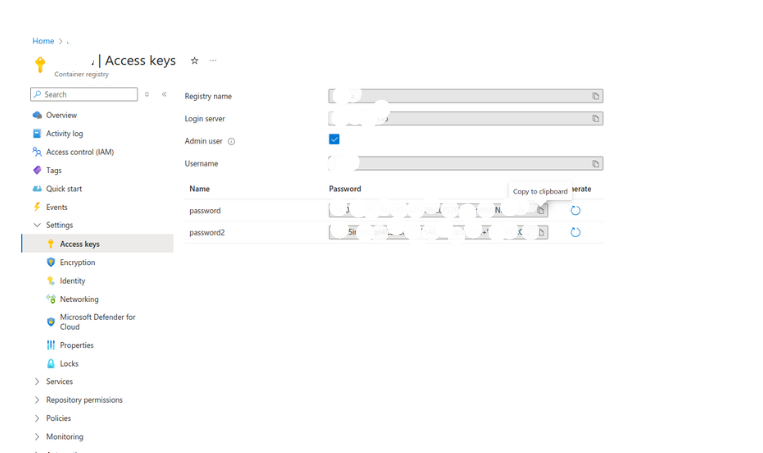
Create GitHub Secrets:
Go to your GitHub repository.
Click on Settings > Secrets and variables > Actions > New repository secret.
Create the following secrets:
ACR_USERNAME: Your ACR username.ACR_PASSWORD: Your ACR password.ACR_URL: Your ACR URL.
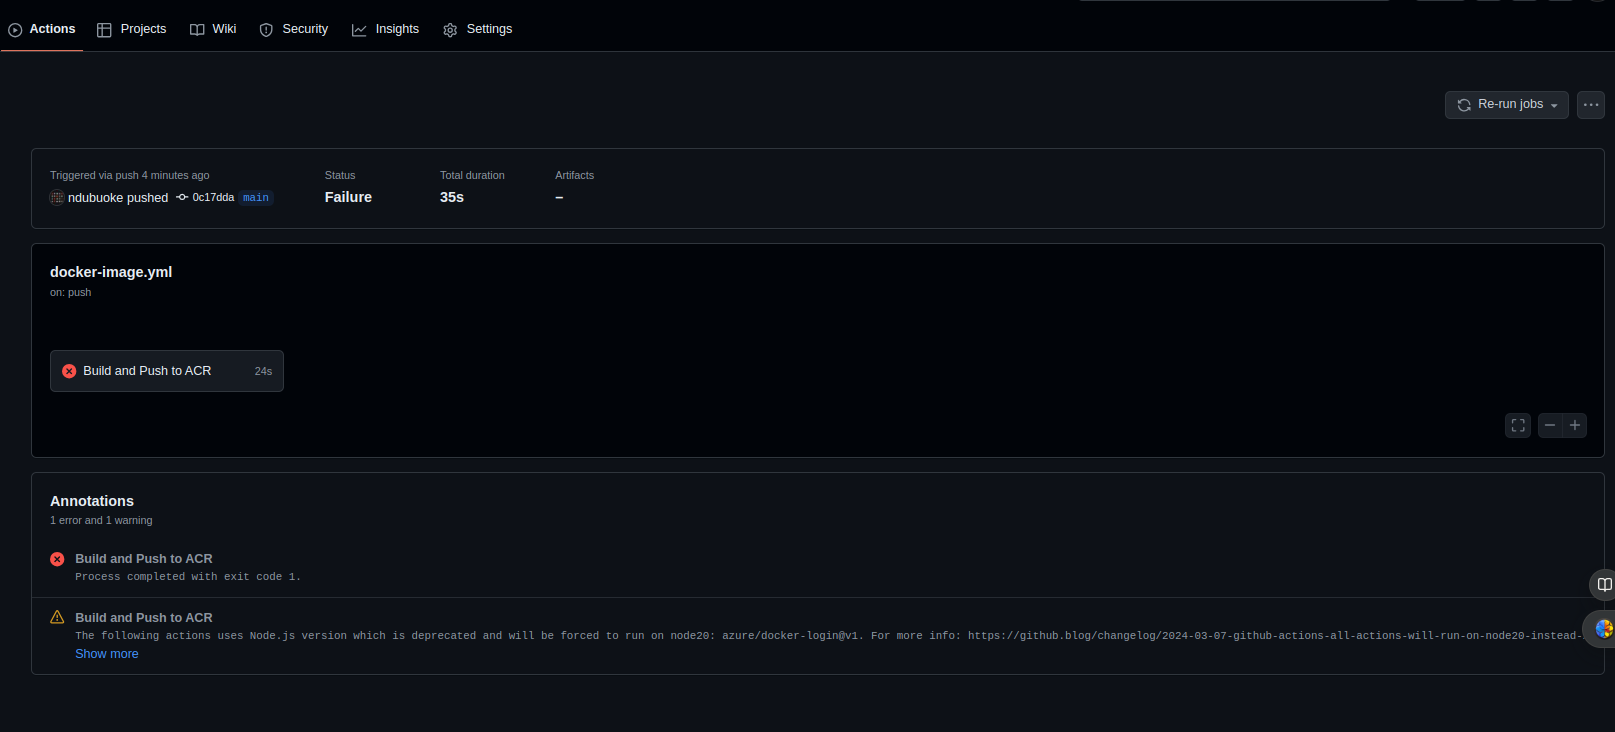
Rerun the failed job and watch magic happen. It passes and pushes the image to ACR
Step 5: Deploying to Azure App Service on the Portal
- Create an Azure App Service Plan:
In the Azure Portal, click on Create a resource and search for App Service Plan.
Click Create.
Fill in the required fields:
Resource group: Select your resource group.
Name: Enter a name for your App Service Plan.
Publish: Select Container.
Operating System: Select Linux.
Region: Choose a region.
SKU and size: Select B1 or any other tier that suits your needs.
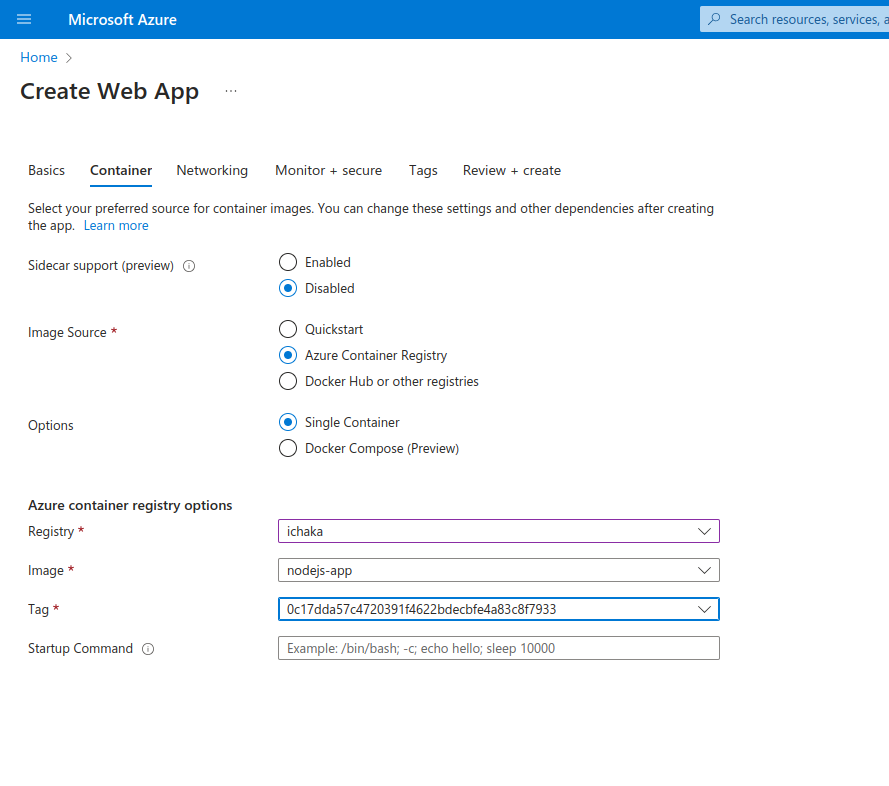
Click Next, select Azure Container Registry as Image Source.
Insert
node index.jsin startup command
Click Review + create, then Create.
2. Once the deployment is complete, visit the url


Conclusion
By following these steps, you have configured your Azure Container Registry and deployed your Dockerized Node.js application to Azure App Service using the Azure Portal. This setup provides a robust and scalable environment for your application, leveraging the power of Azure services.
I hope this guide has been helpful. Stay tuned for more DevOps content, and happy blogging!
For more inspiration listen to https://open.spotify.com/track/7j7pWcqJrHE7xtsKirb0sB?si=422a781bda2d44a2
Subscribe to my newsletter
Read articles from Philip Nwachukwu directly inside your inbox. Subscribe to the newsletter, and don't miss out.
Written by

Philip Nwachukwu
Philip Nwachukwu
👨💻 About Me: Hey there! I'm Philip, a passionate DevOps engineer from Nigeria with a knack for transforming complex challenges into seamless solutions. With years of hands-on experience in the tech industry, I've honed my skills in automating workflows, optimizing deployments, and ensuring robust infrastructure for high-performing teams. 🌍 Beyond Code: When I'm not immersed in code, you can find me exploring the vibrant tech community in Nigeria, mentoring aspiring engineers, or enjoying a good book on technology trends and innovations. I believe in the power of sharing knowledge and fostering a collaborative tech ecosystem. In my downtime, I'm an avid board game enthusiast, a football fanatic, and a lover of action-packed movies. Whether I'm strategizing my next move on the game board, cheering for my favorite team, or getting lost in the thrills of an action film, I always find ways to unwind and have fun.