Building a Ping-Pong Game with Turtlesim
 Jishnu Suresh
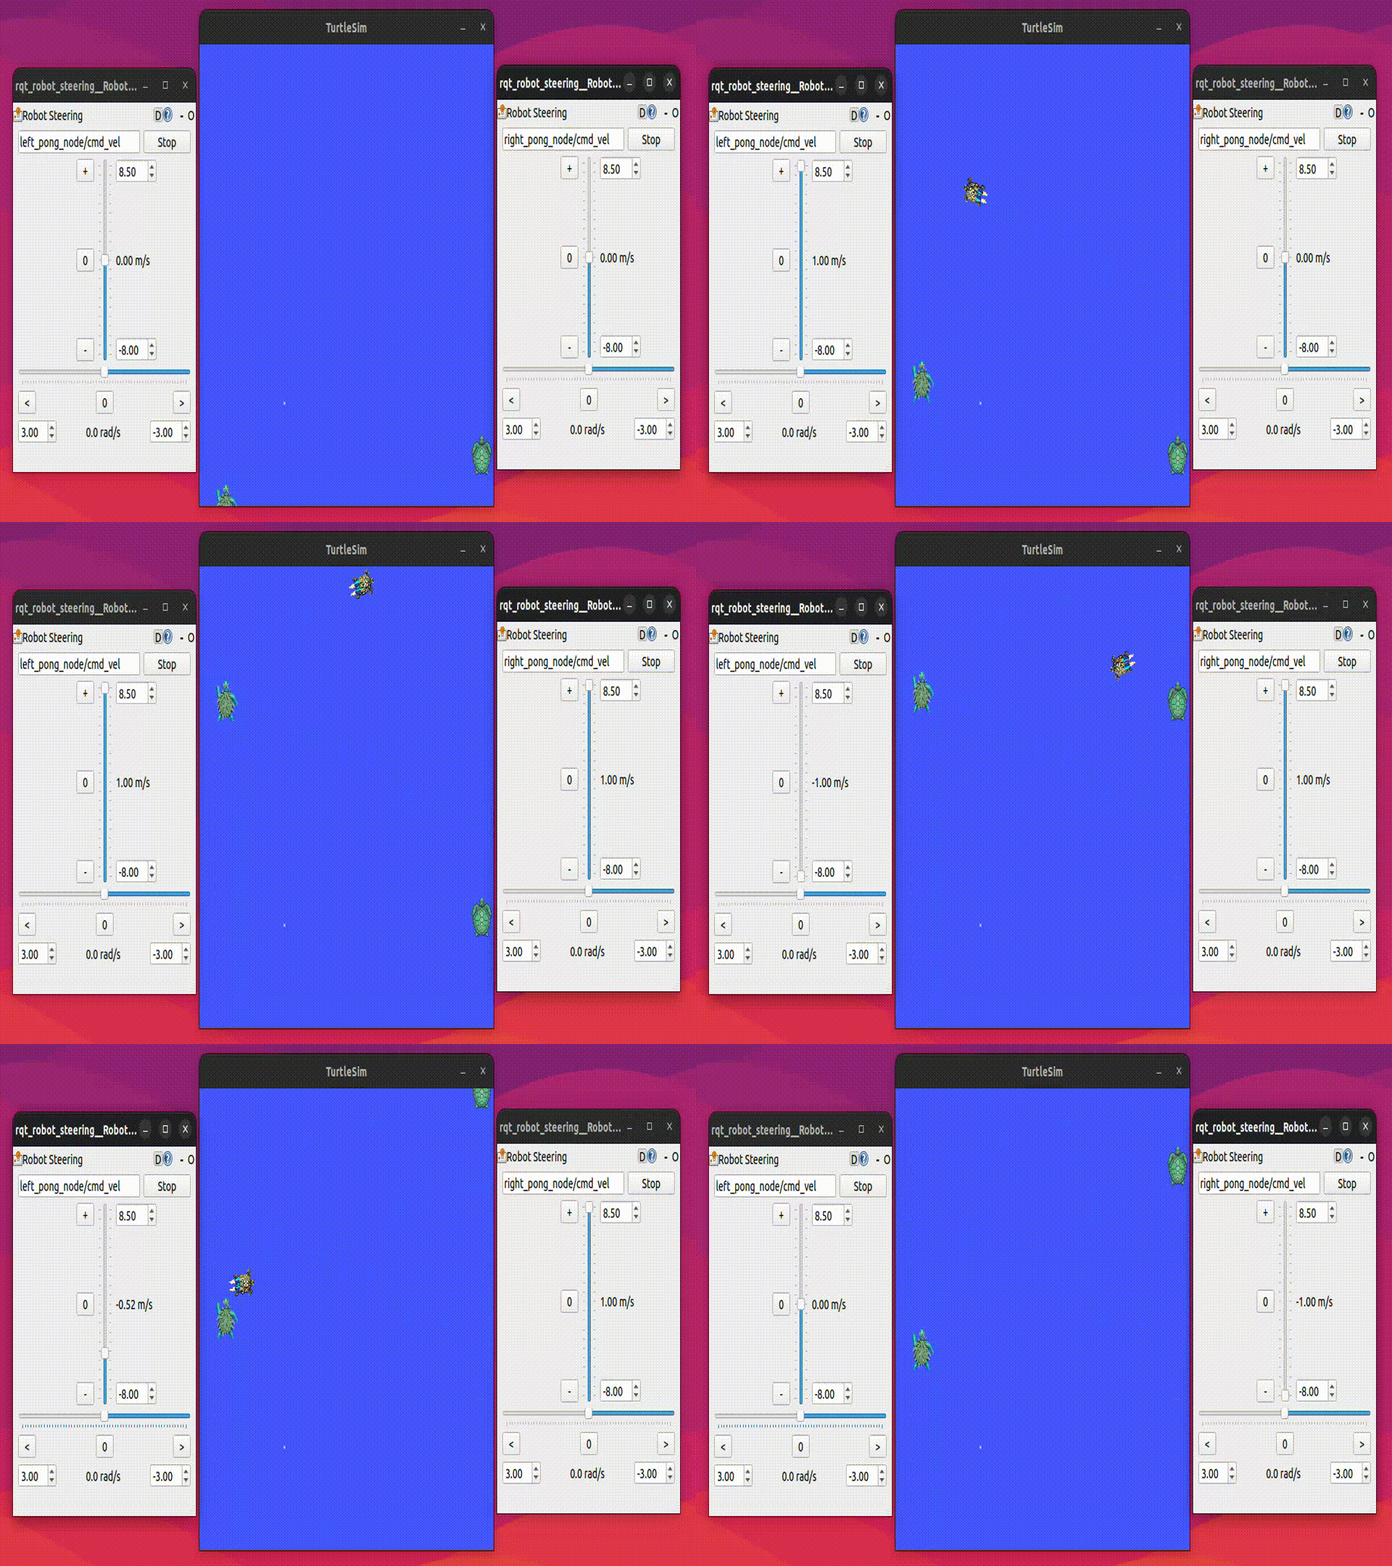
Applying what you have learned through hands-on projects is one of the best ways to solidify your understanding. I decided to build a ping-pong game using the Turtlesim simulator, and I’d like to share my experience. Let’s call this project “turtlesim-pingpong.” Turtlesim is a simulator designed for learning basic ROS concepts. You can learn more about Turtlesim here.

Ping-Pong
Ping-pong, also known as table tennis, typically involves two players who try to keep a ball on a table. In our simulation, the players and the ball are represented by turtles created in the simulator.
Prerequisites
- Basic understanding of ROS concepts such as messages, topics, publishers, and subscribers.
How It Works
We have three nodes: the ball and the two players (left and right).
Initialization: When the simulator starts, it spawns
turtle1by default. We need to kill this turtle (using the/killservice) and spawn three different turtles for the players and the ball.Interaction Diagram: The interaction between the nodes is illustrated below.
Ball Node: The logic for the ball is in
ball_node.py. This node checks for collisions with the wall, changes direction, and handles interactions with the bats (pong nodes).Pong Nodes: There are two pong nodes (left and right players/bats). They are controlled individually using the
/cmd_veltopic throughrqt(using therobot_steering_controllerplugin).Topic Communication:
The ball node publishes its position via the
ball/posetopic.The left and right bat nodes subscribe to this topic to control their interactions accordingly.
The up and down movements of the bats are controlled by publishing data to the
left_pong/cmd_velandright_pong/cmd_veltopics using therobot_steering_controller.
Let’s Code It Up!
Create a Workspace
The first step for all ROS-based projects is to create a workspace to manage our codebase. This is simply a base directory with a src folder inside it.
mkdir -p turtlesim-ping-pong/src
Create a ROS Package
ROS supports both Python and CMake for creating packages. For this project, we will use Python as it is more beginner-friendly. More information can be found here.
    cd turtlesim-ping-pong/src
    ros2 pkg create --build-type ament-python turtlesim_pingpong
Writing the Nodes
The main nodes for this project are the ball and the controller. Create separate files for each node within the newly created package directory (turtlesim-ping-pong/src/turtlesim_pingpong/turtlesim_pingpong/). Let's name these files ball_node.py and pong_node.py. The code for these nodes can be found on my GitHub repository.
Register the Entry Points for the Nodes
The entry points for the nodes are configured using the package.xml and setup.py files. Ensure these configurations are correctly set up.
Write the Launch File
Launch files help in starting the entire project with a single command. These files are placed in a separate launch folder within the package.
mkdir launch
Next, create a new launch file named turtlesim_pingpong.launch.py in the launch folder.
Build & Launch the Project
From the root folder run the following command to build the package. It creates an optimized build along with 3 additional directories build , install , log .
colcon build
Source the build using below command. It helps in including the newly build packages to the current ROS run time environment.
source install/setup.bash
In order to run the project, we use the ros2 launch command
ros2 launch turtlesim_pingpong turtlesim_pingpong.launch.py
To control the turtlesim-pingpong using rqt_robot_steering, install the rqt_robot_steering plugin if you haven't already with sudo apt-get install ros-humble-rqt-robot-steering, and launch rqt by running rqt in the terminal. In rqt, open the rqt_robot_steering plugin and set the topic name to /right_pong_node/cmd_vel (for left side player open a separate rqt window) for both the left and right player turtles to control them.
That’s it, to conclude. I hope to share more of my ROS projects in future.
Subscribe to my newsletter
Read articles from Jishnu Suresh directly inside your inbox. Subscribe to the newsletter, and don't miss out.
Written by

Jishnu Suresh
Jishnu Suresh
I am a passionate young engineer from India. I love working with tech, learn and write about my experiences.