Day 3 | EC2-Instance Creation | MobaXterm Connect to EC2 | Simple Linux Commands
 Gaurav Daksh
EC2-Instance Creation on AWS:
What is EC2:
Amazon EC2 (Elastic Compute Cloud) instance is a virtual server in Amazon's Elastic Compute Cloud (EC2) for running applications on the Amazon Web Services (AWS) infrastructure. EC2 allows users to rent virtual computers on which to run their own computer applications. Here are some key features of an EC2 instance:
Scalability: You can quickly scale up or down the number of instances based on demand.
Instance Types: EC2 offers various instance types optimized for different use cases, including compute-optimized, memory-optimized, and storage-optimized instances.
Regions and Availability Zones: Instances can be launched in different geographic regions and availability zones to enhance redundancy and reduce latency.
AMI (Amazon Machine Image): An AMI is a template that contains the software configuration (operating system, application server, and applications) required to launch your instance.
Elastic Block Store (EBS): Provides persistent block storage volumes for use with EC2 instances. Each EBS volume is automatically replicated within its availability zone to protect you from component failure.
Security Groups: Act as a virtual firewall to control inbound and outbound traffic to your instances.
Key Pairs: Securely login to your instances using SSH for Linux instances and RDP for Windows instances.
Elastic IP Addresses: Static IP addresses designed for dynamic cloud computing, allowing you to mask instance or availability zone failures by rapidly remapping your public IP addresses to any instance in your account.
EC2 is highly flexible and widely used for a variety of applications, from web hosting and batch processing to large-scale enterprise applications.
EC2-Instance Creation:
Go to your aws.amazon.com and log into your account.
Go to your dashboard -
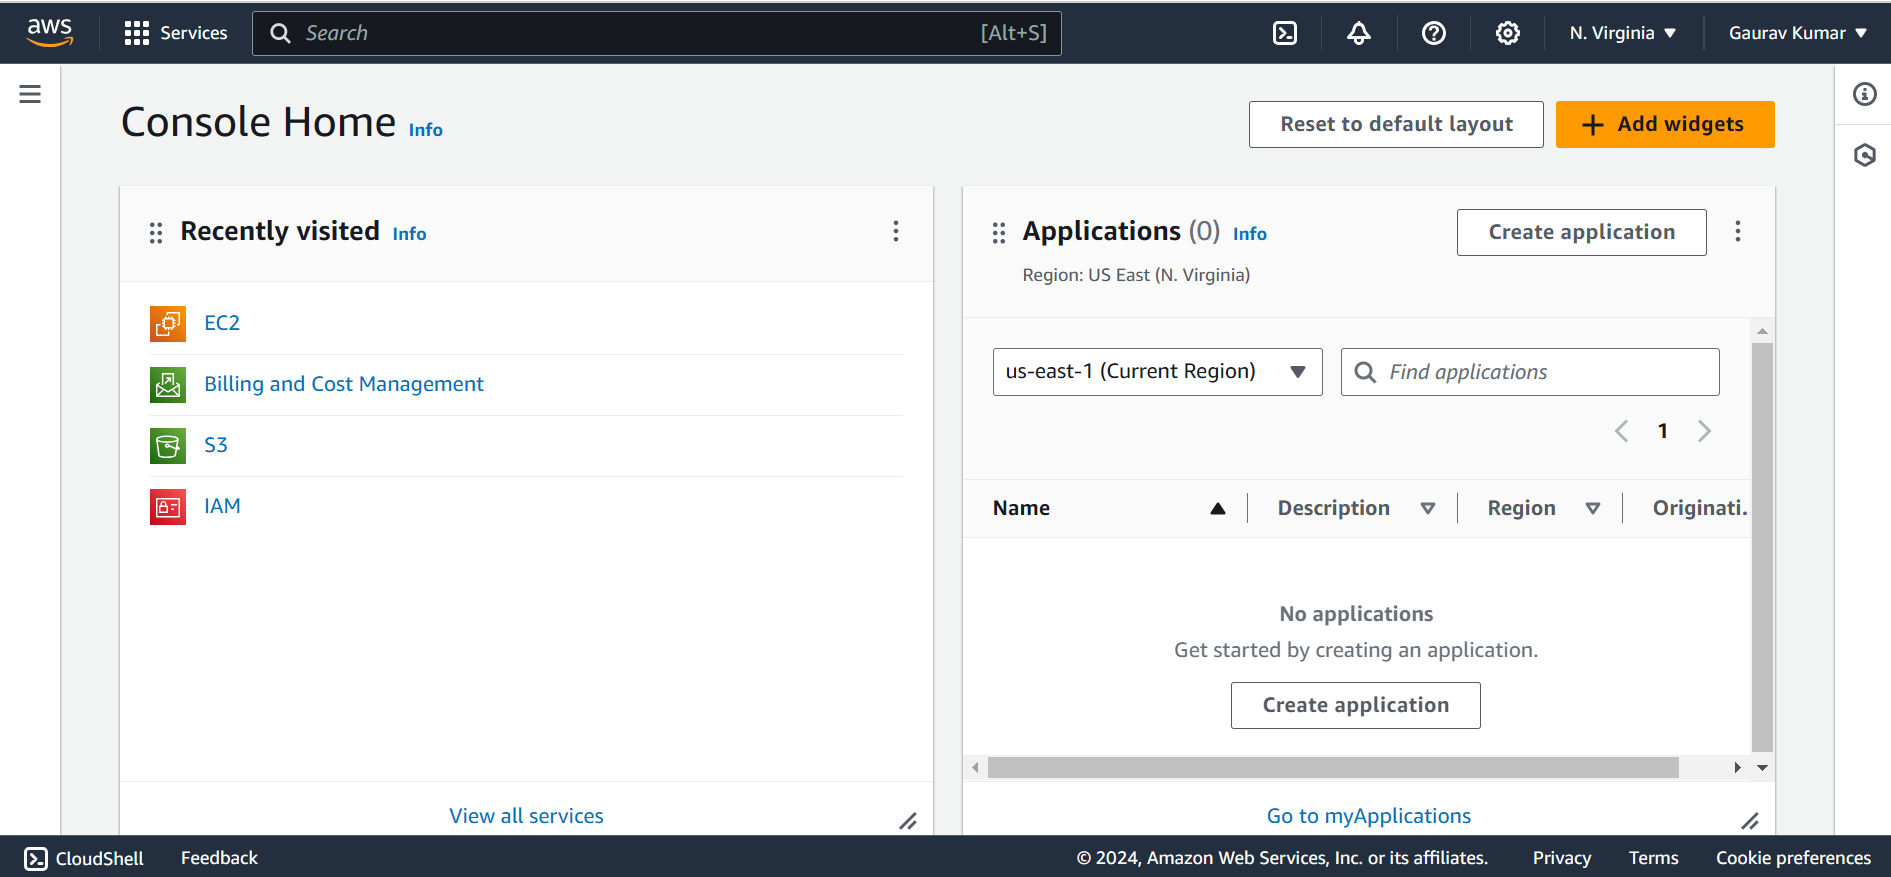
Click on EC2 or go to services > go to Compute \> Click on EC2.
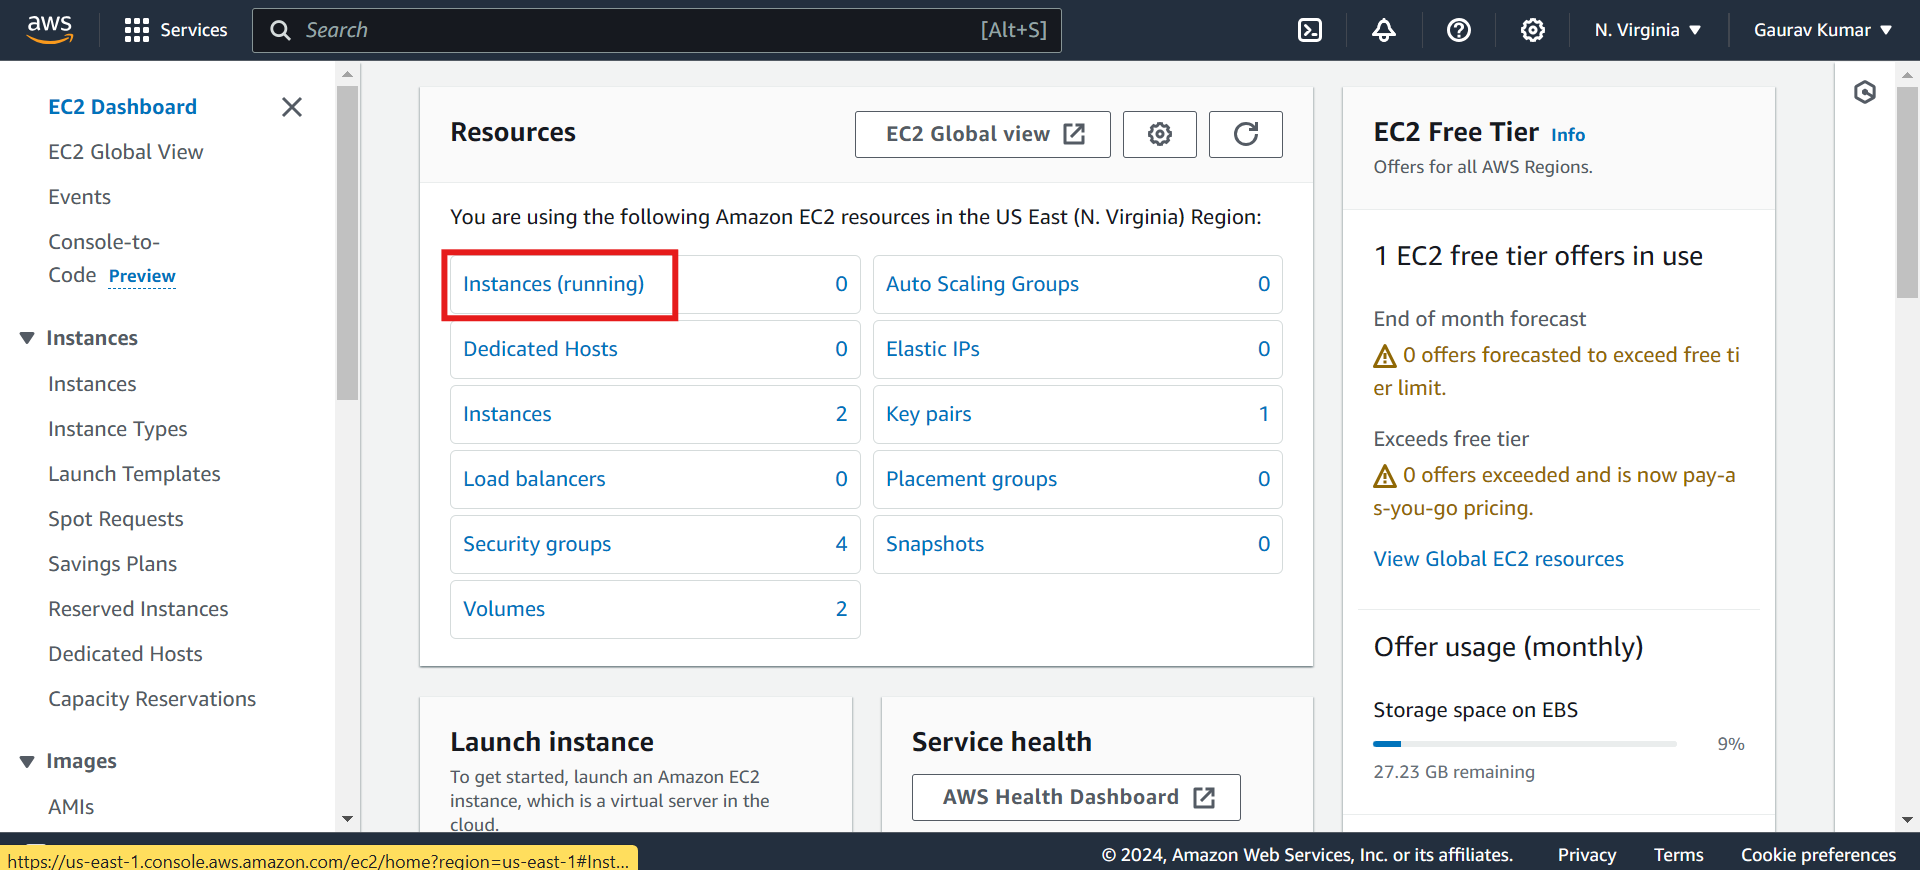
Click on Instance(running).
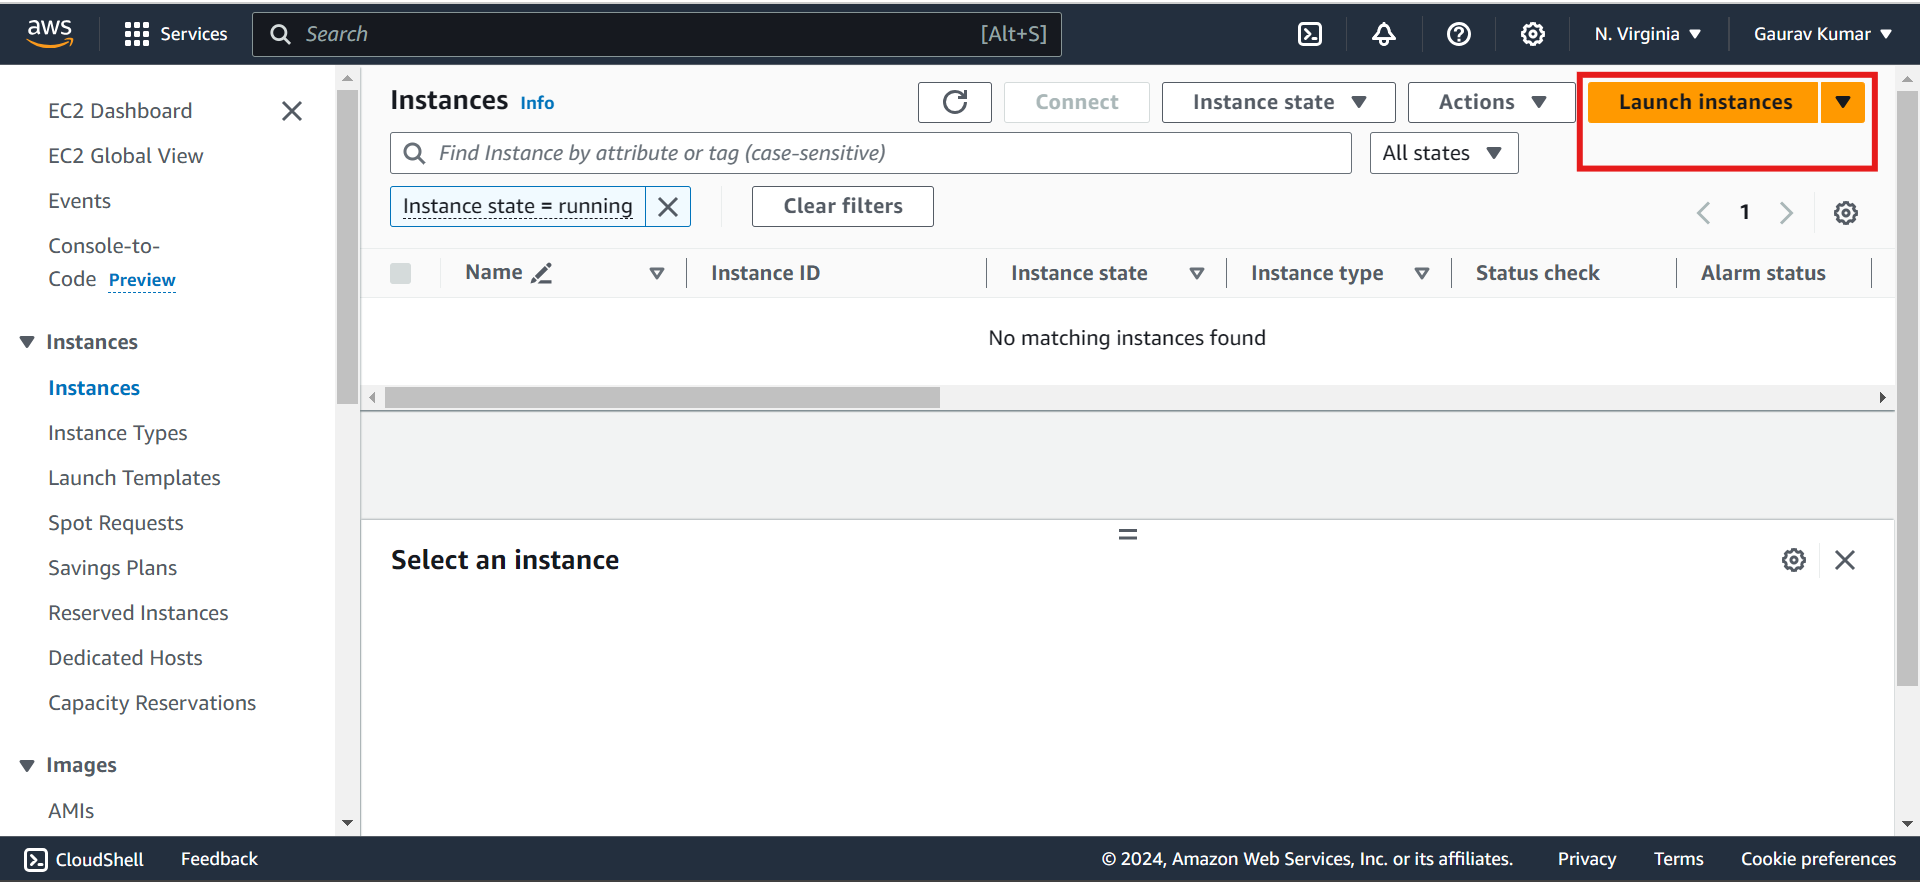
No Instance is running here So click on Launch Instances.
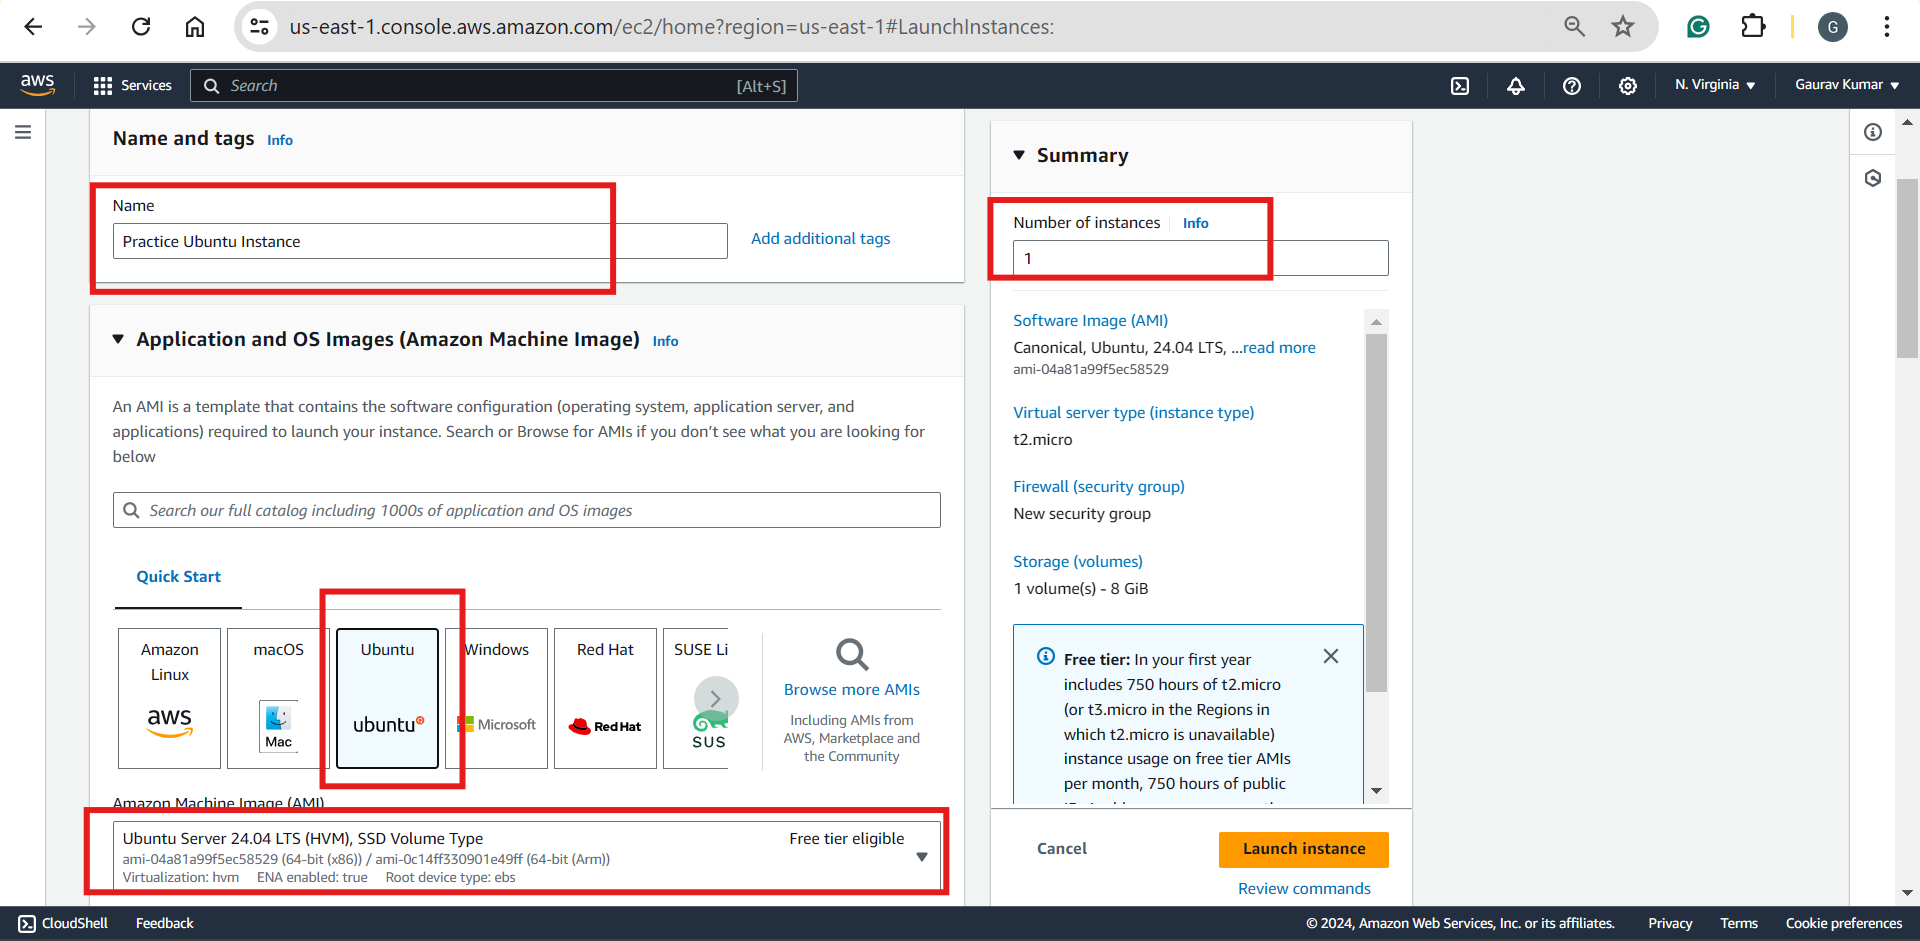
Here Give any name to your instance (Practice Ubuntu Instance).
Select any image Linux, Ubuntu, Windows, RedHat, etc. Keep Ubuntu Free tier eligible.
Create a new key pair and select the .pem key for the Ubuntu machine or use the .ppk key to connect with the Windows machine or Putty software.
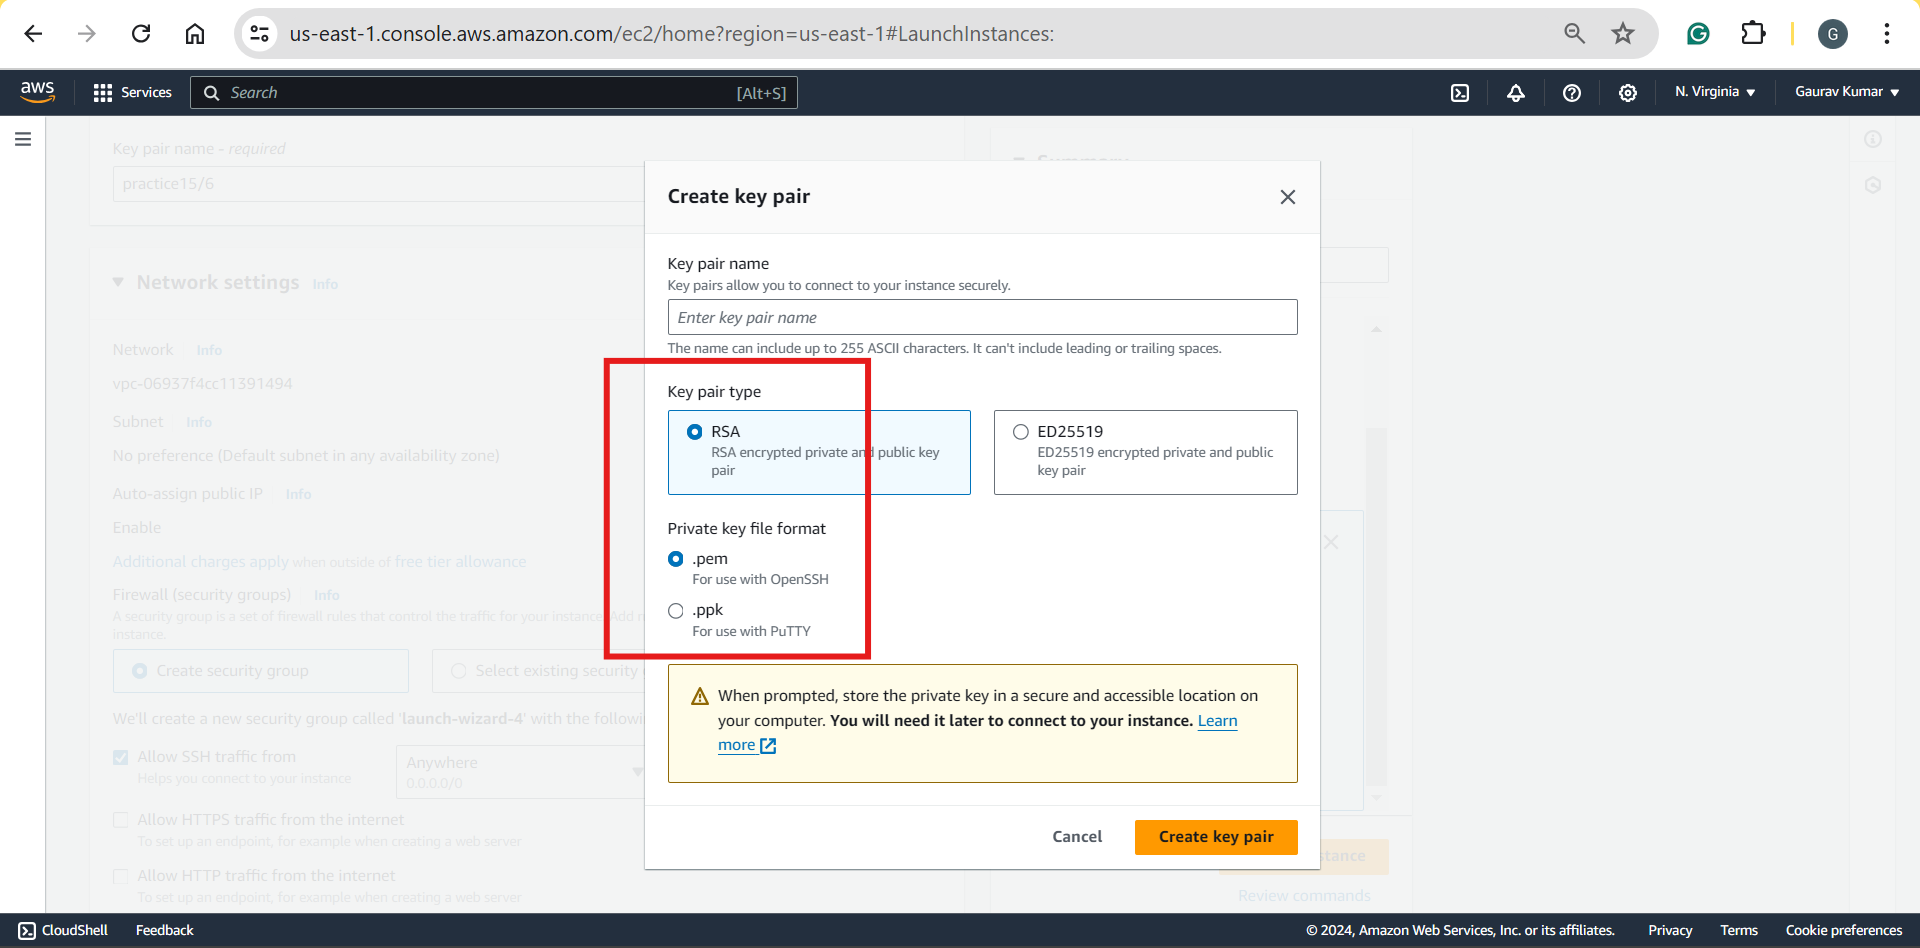
Don't make any other changes and directly click on Launch Instance.
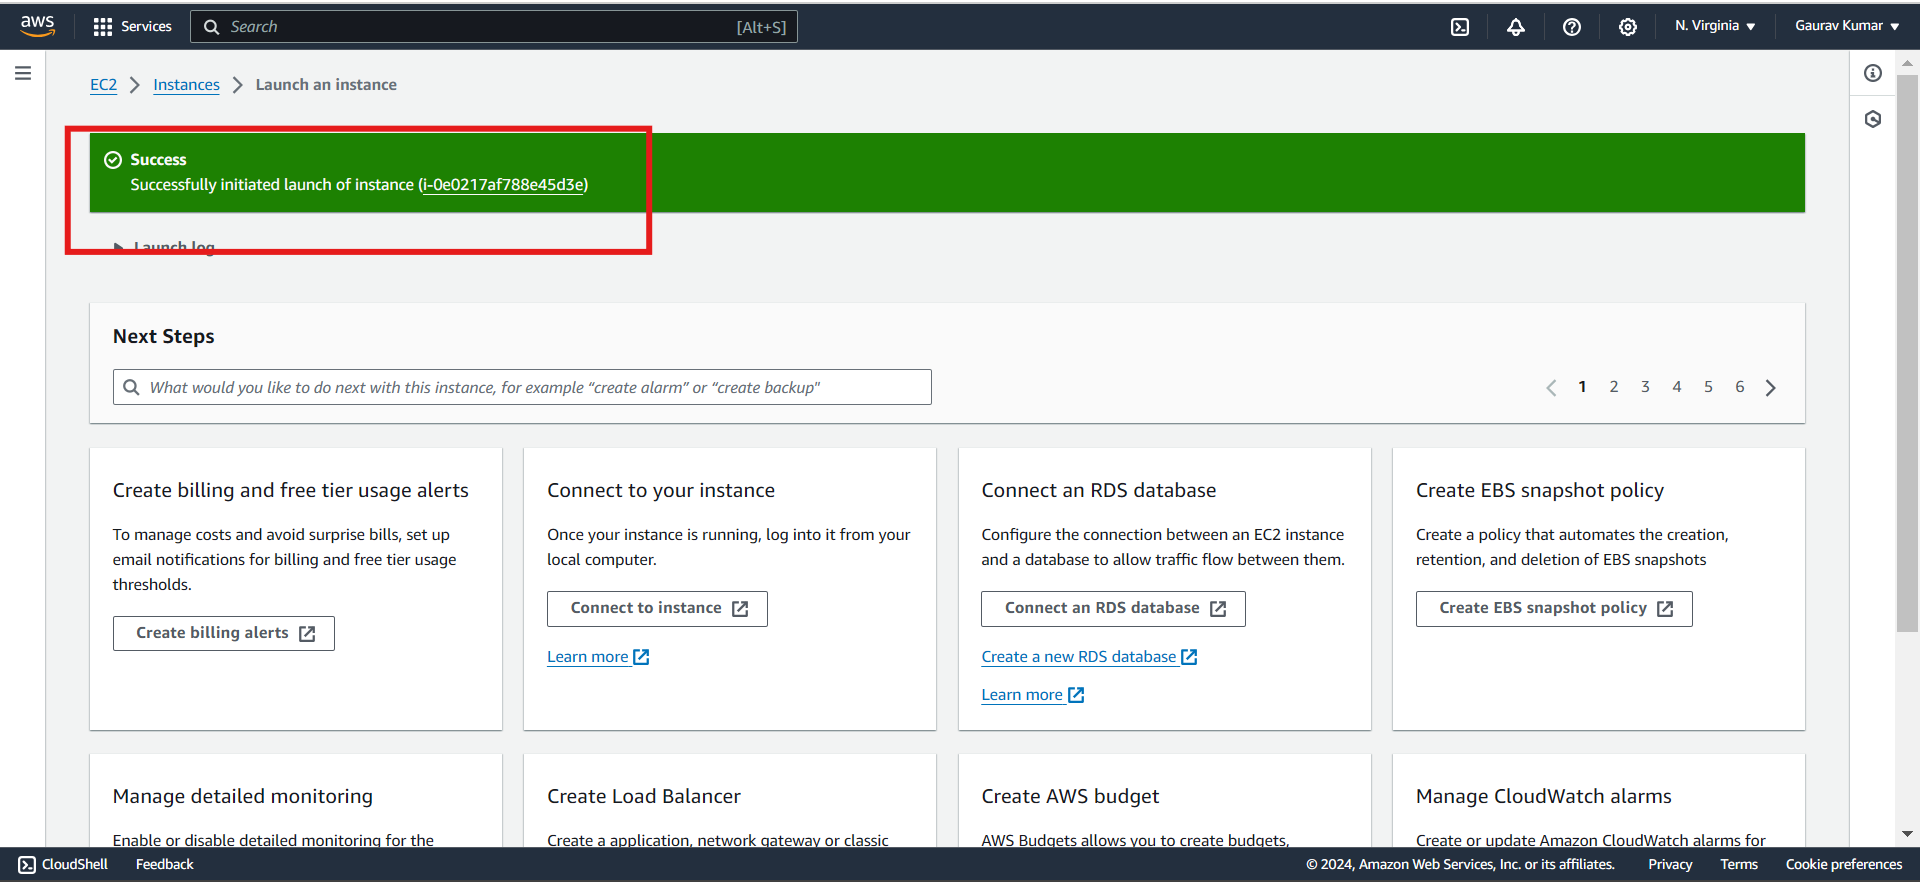
Now instance is created successfully. Click on the instance number and wait for the instance to be up and running, also status check should be 2/2 for an instance to run.
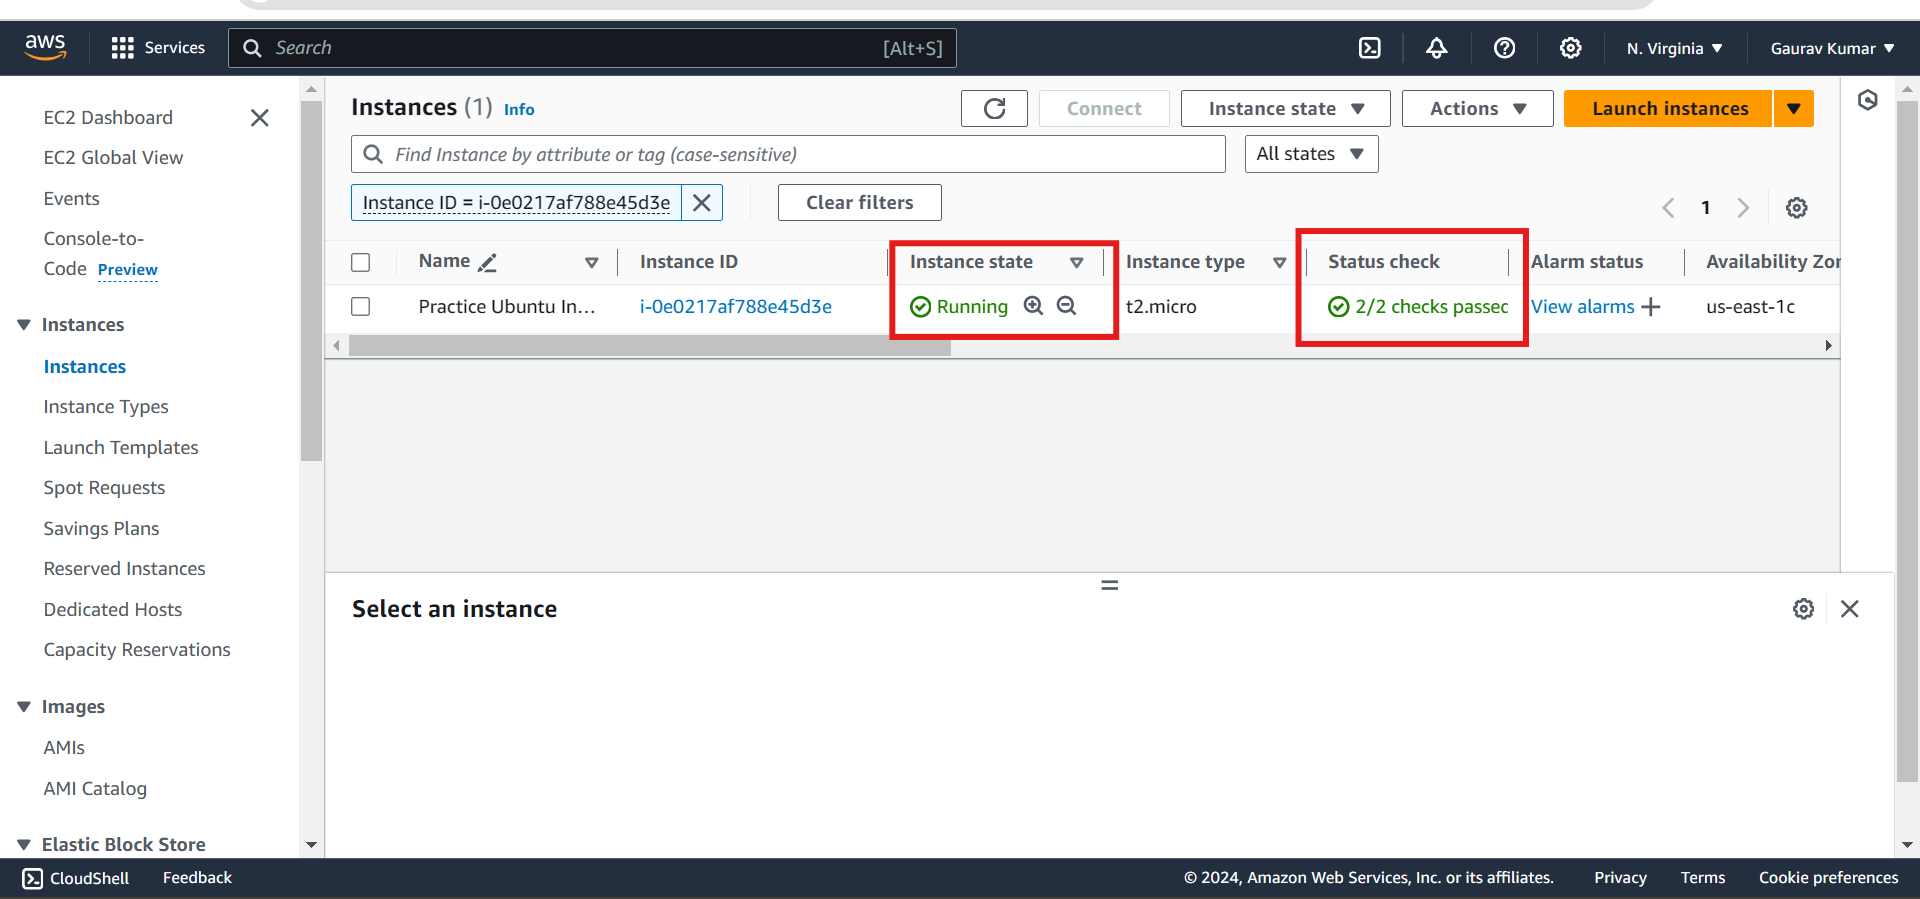
Click on instance and we will get a Public IPv4 address to connect with any machine.
Connect EC2-Instance with MobaXterm:
MobaXterm is a toolbox for remote computing.
Go to https://mobaxterm.mobatek.net/download-home-edition.html and download MobaXterm Home Edition(Installer Edition).
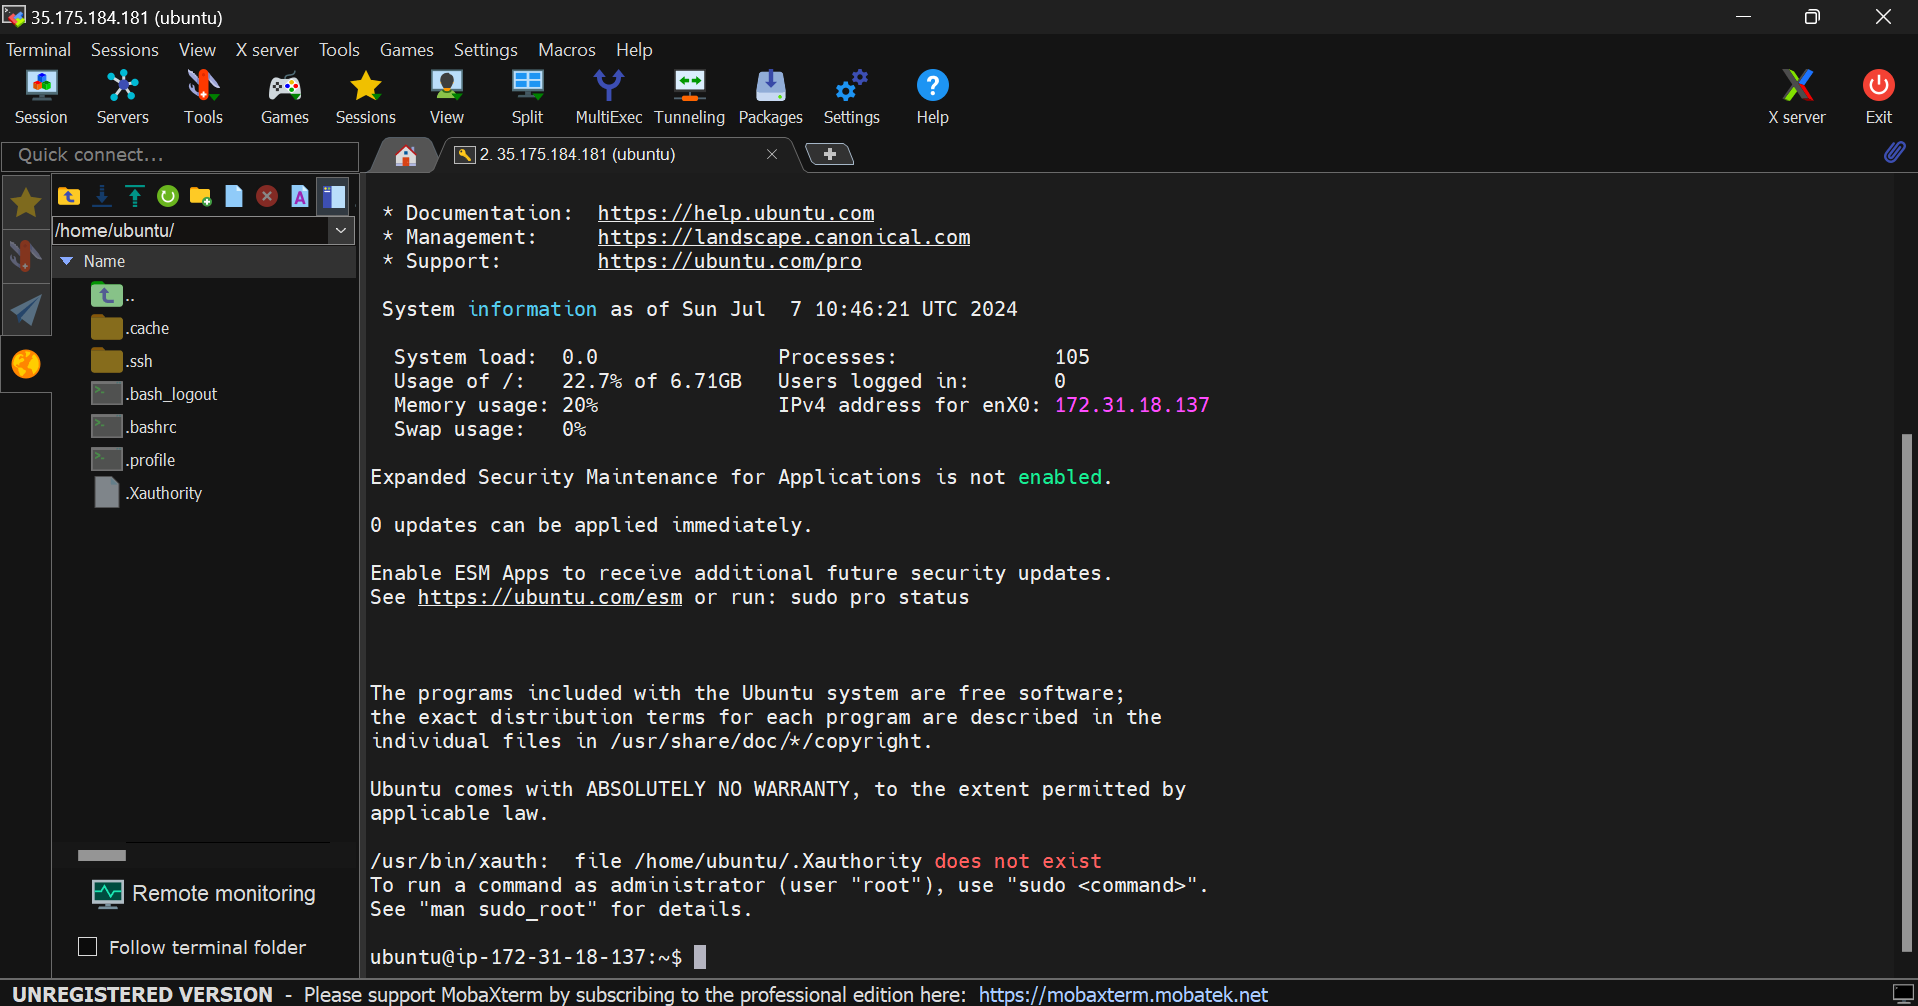
Install MobaXterm and Open it. Click on Session \> Click on SSH \> Put your public IP in the Remote host section > Specify username (Default username for Ubuntu is ubuntu) > Put Private Key and select OK.
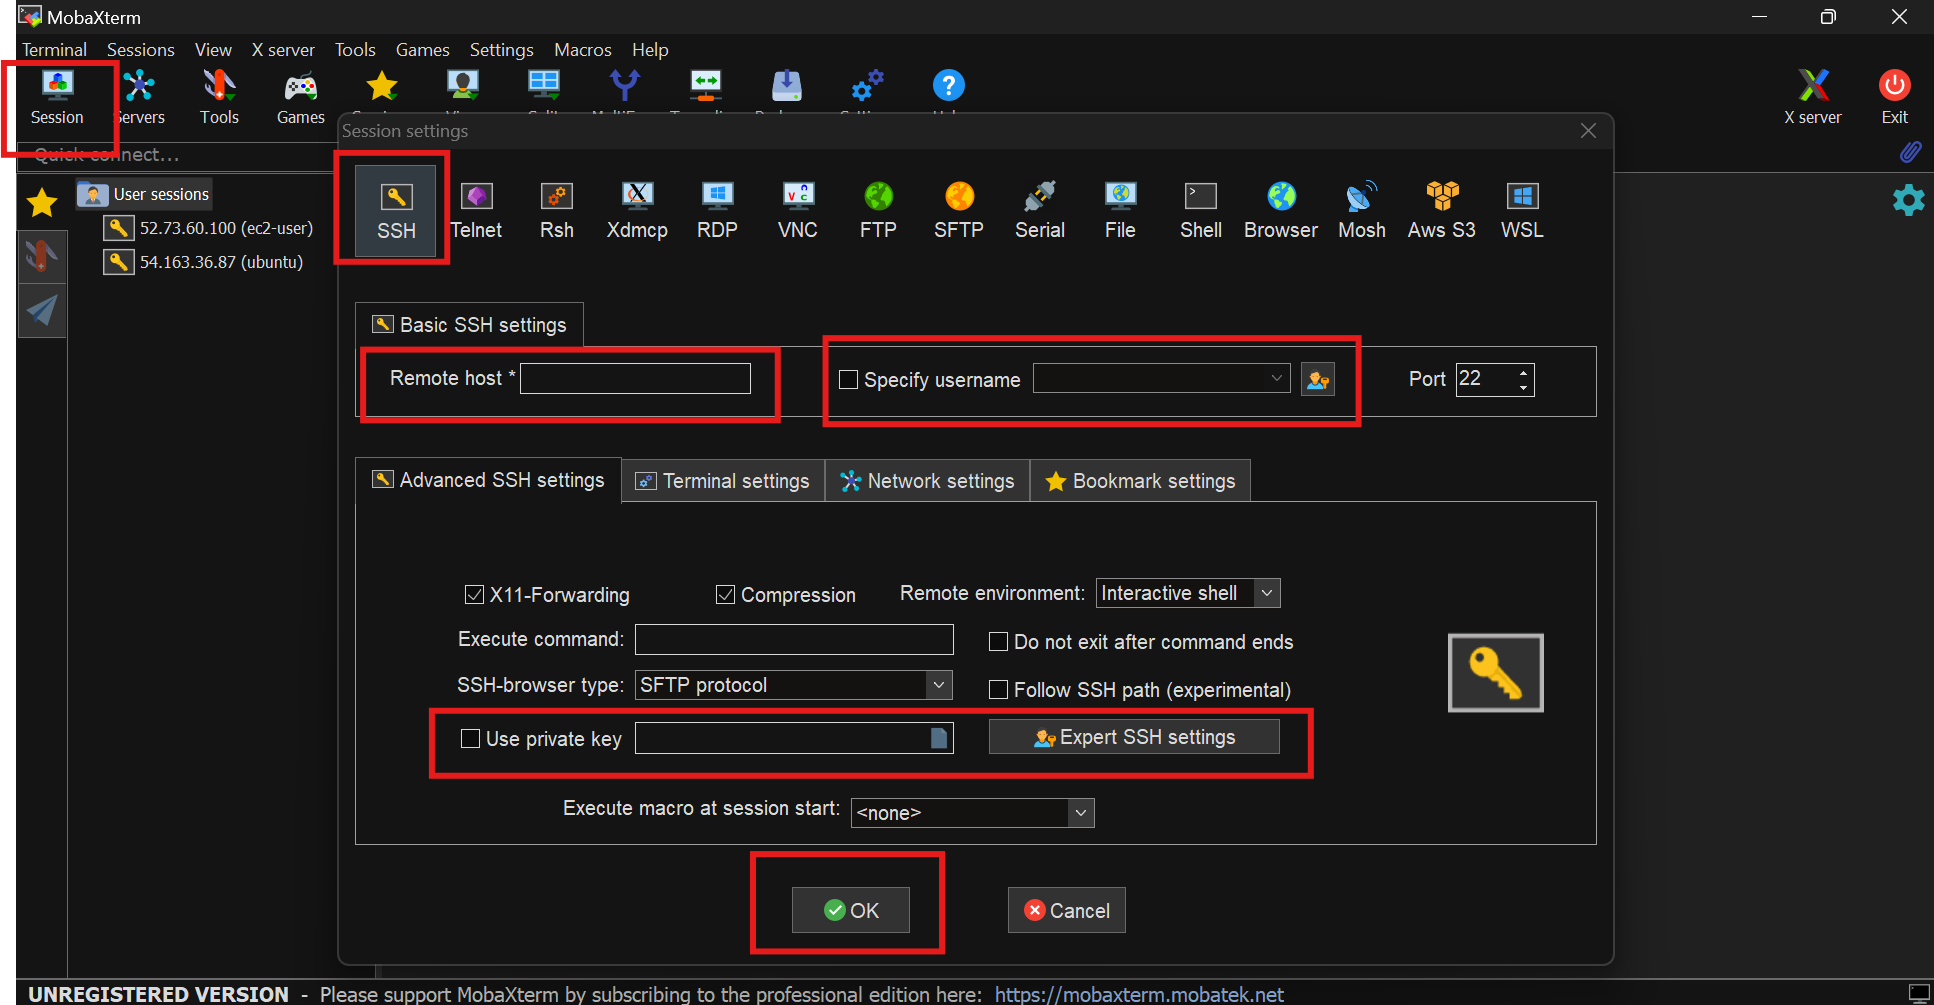
Now our Ubuntu machine is up and running. So Let's start with Linux Comments.
Linux Commands:
There are some simple Commands:
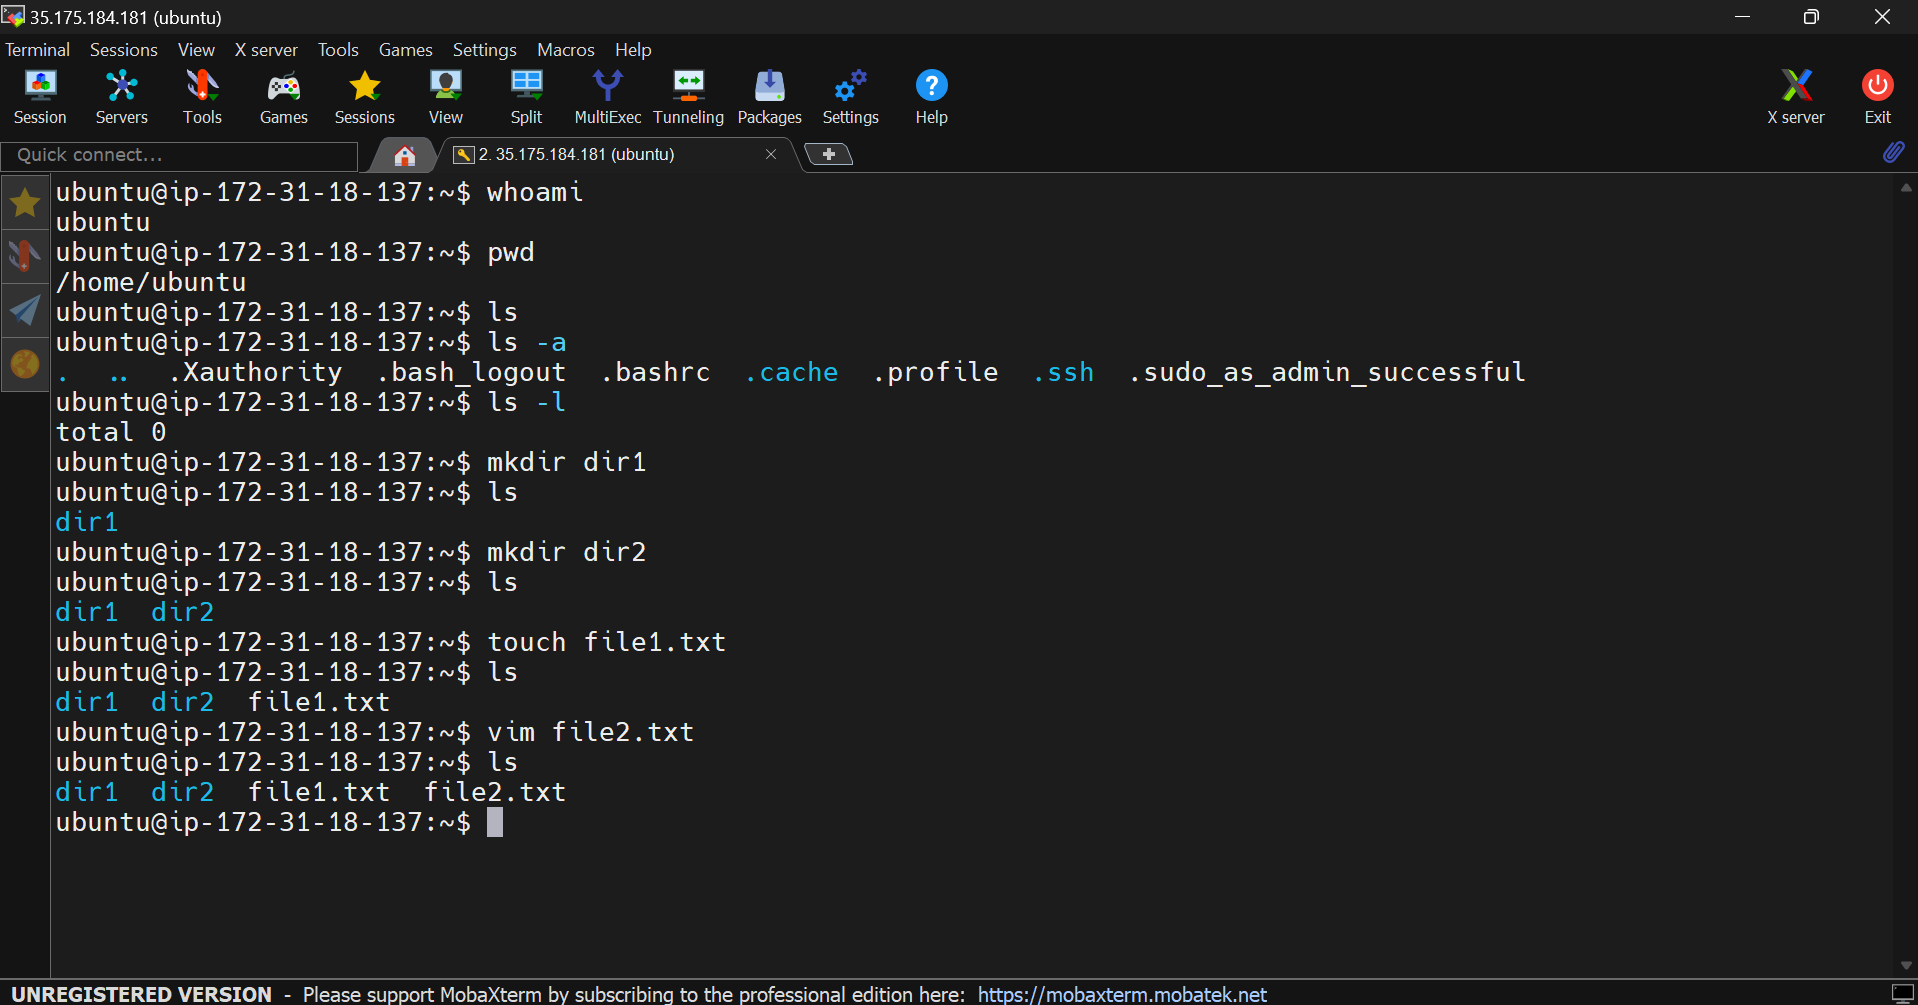
ls : This command is used to list the content of a directory
ls -l : it will show the owner, filesize, and permissions of the files and directories
ls -la : it will show the hidden files as well
sudo : this command is used for performing root privileges commands
pwd : this command will print your current directory location
cat : this command will be used to open the files
cat -n : this adds line numbers to filesvi or vim : this is a text editor used in Linux.
normal mode: it's the default mode
insert mode: in insert mode, you can type text into the file. To enter insert mode, you need to press the 'i' button
command mode: to enter command mode, you need to press the ESC button and then ':' In command mode, if you want to save, you have to give wq!
grep : this command searches for a particular string/word in a file
sort : this command is used to sort the results of the search either alphabetically or numerically. it also sorts files and dir's
tail : this command prints the last N number of data of the given input. By default, it prints 10 lines
head : This command prints the first N number of data of a given input. By default, it prints 10 lines
chmod : this command is used to change the permissions of the files and directories
chown : this command is used to change the ownership of the files and directories
ping : this command will ping a host or IP to check the connection
lsof : it will display all the open files on a Linux OS
ifconfig : it will print all the network information like IP, subnet, and MAC address
id : will be used to get the ID info of the user and group
sed : it stands for "stream editor". it will be used to edit text files in a Linux sed s/aws/azure/g
file.txt : wherever aws is there in that file, it will be replaced with Azure
diff : this command is used to find the difference between two files # diff file1 file2
history : it will print all previous commands executed by the user.
find : this command is used to find files and directories
find . -name "*.txt" : it will print all files which end with .txt in that path
free : this command is used to print memory details
ssh user@host : to connect the server through ssh
ssh-keygen : this is used to generate public/private keys for that user
nslookup or dig : this stands for "Name server lookup". it will be used to check DNS server info
yum : this command will be used to install packages with dependencies in Redhat, centos, and Amazon Linux
rpm : it is used to install particular packages without dependencies in Redhat, centos, and Amazon Linux
apt-get : it is used to install packages on Ubuntu Linux server sample commands: for installing:
yum install package-name apt-get install pkg-name rpm -ivh pkg-name
for deleting :
yum remove package-name apt-get remove pkg-name rpm -e pkg-name
for updating:
yum update package-name apt-get update pkg-name rpm -Uvh pkg-name
netstat : this command will used to print all opening ports
df : it prints the complete used and available disk space in the system
du : it is used to print disk utilization of files and directories
top: it is used to monitor the system's resources and processes that are running in real-time.
ps : we use the ps command to check the ID of the processes which are running on the server
ps -a: show process for all users ps -u
username : show process for a particular user
kill : this command is used to kill the processes
chage : command will be used to change the password fields.
rm -rf : to delete files
rmdir : to delete directories 38
cp: to copy files from one location to another location
mv : to rename files or directories
ln : to create a hard link to the file
ln -s : to create a soft link to the file
uname -a : to see all the information about the system
uname -r : to see only kernel info
cat /etc/os-release : os information
wc : it shows no of lines and words of file
wc -l filename : shows lines
wc -w filename : show words
w : it prints user logged info
uptime : server uptime information
Subscribe to my newsletter
Read articles from Gaurav Daksh directly inside your inbox. Subscribe to the newsletter, and don't miss out.
Written by
