Beginner's Guide to Terraform : Setting Up Projects, Remote Backends, and Reusable Modules
 Pratik Gote
Table of contents
- Introduction
- GitHub Repo
- Step 1: Install Terraform
- Step 2: Install AWS CLI
- Step 3: Configure AWS CLI
- Step 4: Create a New Terraform Project
- Step 5: Initialize Terraform
- Step 6: Create a Terraform Configuration File
- Step 8: Run Terraform Plan
- Step 9: Apply Terraform Configuration
- Step 10: Verify the EC2 Instance
- Step 11: SSH into the EC2 Instance
- Step 12: Configure Remote Backend
- Step 13: Initialize Remote Backend
- Step 8: Create a Reusable Module
- Step 9: Use the Module in Your Main Configuration
- Conclusion

Introduction
Terraform is an infrastructure as code (IaC) tool that allows you to manage and provision infrastructure resources on various cloud and on-premises environments. In this tutorial, we'll take our first steps in Terraform by creating a simple project, configuring a remote backend, and building reusable modules.
GitHub Repo
You can find the complete code for this project on GitHub at
Step 1: Install Terraform
ere are the official Terraform installation instructions from the Terraform website:
Windows:
%[https://developer.hashicorp.com/terraform/tutorials/aws-get-started/install-cli#install-terraform-on-windows]
macOS:
%[https://developer.hashicorp.com/terraform/tutorials/aws-get-started/install-cli#install-terraform-on-macos]
Linux:
%[https://developer.hashicorp.com/terraform/tutorials/aws-get-started/install-cli#install-terraform-on-linux]
These links provide detailed instructions for installing Terraform on various operating systems, including Windows, macOS, and Linux.
You can also find the official Terraform documentation on the HashiCorp website:
Step 2: Install AWS CLI
Install the AWS CLI on your machine. You can download the AWS CLI binary from the official AWS website. Once downloaded, follow the installation instructions for your operating system.
Step 3: Configure AWS CLI
Configure the AWS CLI by running the following command:
aws configure
This command will prompt you to enter your AWS access key, secret key, and default region. Enter the required information to configure the AWS CLI.
Step 4: Create a New Terraform Project
mkdir terraform-ec2-instance
cd terraform-ec2-instance
Step 5: Initialize Terraform
Initialize Terraform in your project directory:
terraform init

This command will create a terraform.tfstate file in your project directory, which stores the state of your infrastructure.
Step 6: Create a Terraform Configuration File
Create a new file named main.tf with the following contents:
terraform {
  required_providers {
    aws = {
      source  = "hashicorp/aws"
      version = "~> 4.16"
    }
  }

  required_version = ">= 1.2.0"
}

provider "aws" {
  region  = "us-west-2"
}

resource "aws_instance" "app_server" {
  ami           = "ami-830c94e3"
  instance_type = "t2.micro"

  tags = {
    Name = "Terraform_Demo"
  }
}
Save the main.tf file. This file now contains the Terraform configuration to create an AWS instance.
Note: Make sure to replace the ami value with a valid Amazon Machine Image (AMI) ID that is available in your AWS account.The Terraform configuration file contains three main sections:
Terraform Configuration: This section specifies the required version of Terraform and the required providers.
AWS Provider Configuration: This section specifies the AWS provider and the region where the resources will be created.
AWS Instance Resource: This section specifies the AWS instance resource to be created, including the AMI ID and instance type. The
tagsblock specifies the name of the instance.
Step 8: Run Terraform Plan
Run the following command to generate an execution plan:
terraform plan
This command will show you a preview of the changes that Terraform will make to your infrastructure. Review the plan to ensure it matches your expectations.

Step 9: Apply Terraform Configuration
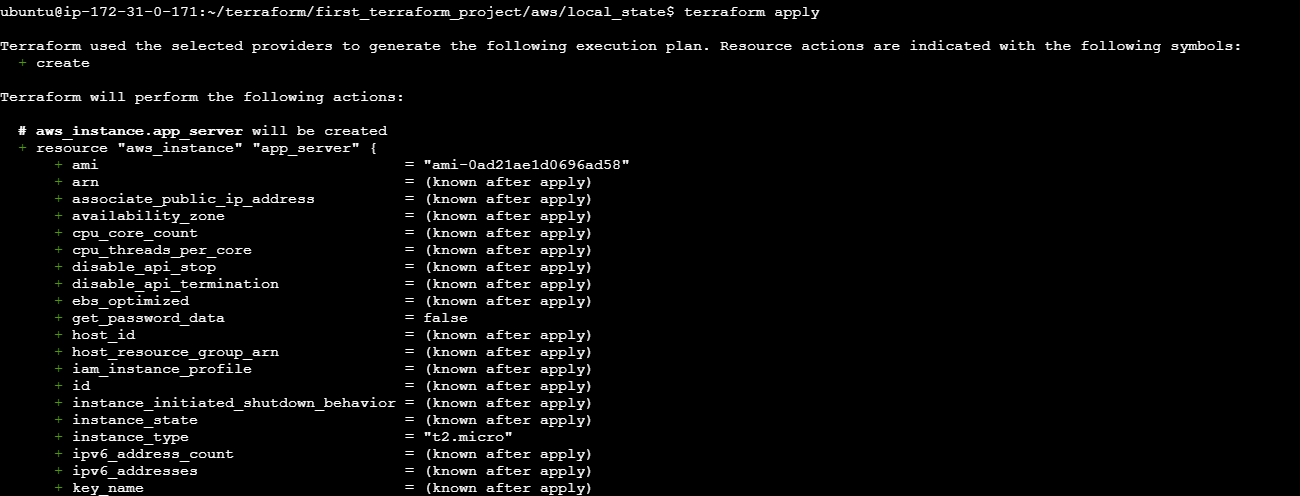
Apply your Terraform configuration:
terraform apply
This command will create the EC2 instance and security group defined in your Terraform configuration files.

Step 10: Verify the EC2 Instance
Verify that the EC2 instance has been created successfully:
terraform show
This command will display the details of the EC2 instance and security group.
Step 11: SSH into the EC2 Instance
SSH into the EC2 instance using the key pair you specified in the ec2_instance.tf file:
ssh -i "YOUR_EC2_KEY_PAIR.pem" ubuntu@YOUR_EC2_INSTANCE_PUBLIC_IP
Replace YOUR_EC2_KEY_PAIR.pem with the path to your EC2 key pair file, and YOUR_EC2_INSTANCE_PUBLIC_IP with the public IP address of your EC2 instance.
That's it! You have now created an EC2 instance using Terraform, without hardcoding your AWS credentials.

Step 12: Configure Remote Backend
Configure a remote backend to store your Terraform state:
terraform {
  backend "remote" {
    organization = "your-organization"

    workspaces {
      name = "your-workspace"
    }
  }
}
Replace your-organization and your-workspace with your actual Terraform Cloud organization and workspace names.
Step 13: Initialize Remote Backend
Initialize the remote backend:
terraform init -reconfigure
This command will configure the remote backend and store your Terraform state in the cloud.
Step 8: Create a Reusable Module
Create a new directory for your module and navigate into it:
mkdir modules
cd modules
Create a new file called module.tf and add the following code:
resource "aws_instance" "example" {
  ami           = "ami-0c94855ba95c71c99"
  instance_type = "t2.micro"
}
This code defines a reusable module that creates an EC2 instance.
Step 9: Use the Module in Your Main Configuration
Update your main.tf file to use the module:
module "example" {
  source = file("./modules/module.tf")
}
This code imports the module and uses it to create an EC2 instance.
Conclusion
In this project, we successfully created a Terraform configuration file to deploy an AWS instance using Terraform. We initialized Terraform and generated an execution plan using the terraform plan command. This plan outlines the infrastructure changes that Terraform will make to our AWS account. With this configuration, we can easily manage and deploy our AWS infrastructure using Terraform. configured a remote backend, and built a reusable module. With this foundation, you're now ready to explore more advanced Terraform concepts and start managing your infrastructure as code.
Subscribe to my newsletter
Read articles from Pratik Gote directly inside your inbox. Subscribe to the newsletter, and don't miss out.
Written by

Pratik Gote
Pratik Gote
About Me 👋 Greetings! I'm Pratik Gote, a dedicated software developer with a strong passion for staying at the forefront of technological advancements in the industry. Armed with a solid foundation in Computer Science, I excel in creating innovative solutions that push boundaries and deliver tangible results. What I Do I specialize in: Full-Stack Development: Crafting scalable applications using cutting-edge frameworks such as React, Vue.js, Node.js, and Django. 💻 Cloud Computing: Harnessing the capabilities of AWS, Azure, and Google Cloud to architect and deploy robust cloud-based solutions. ☁️ DevOps: Implementing CI/CD pipelines, Docker containerization, and Kubernetes orchestration to streamline development workflows. 🔧 AI and Machine Learning: Exploring the realms of artificial intelligence to develop intelligent applications that redefine user experiences. 🤖 My Passion Technology is dynamic, and my commitment to continuous learning drives me to share insights and demystify complex concepts through my blog. I strive to: Demystify Emerging Technologies: Simplify intricate ideas into accessible content. 📚 Share Practical Insights: Offer real-world examples and tutorials on state-of-the-art tools and methodologies. 🛠️ Engage with Fellow Enthusiasts: Foster a collaborative environment where innovation thrives. 🤝 Get in Touch I enjoy connecting with like-minded professionals and enthusiasts. Let's collaborate on shaping the future of technology together! Feel free to connect with me on LinkedIn : https://www.linkedin.com/in/pratik-gote-516b361b3/ or drop me an email at pratikgote69@gmail.com. Let's explore new horizons in technology! 🚀