How to Implement Role-Based Access Control in NestJS with MongoDB - Part 1
 Amanpreet Singh
Introduction
This post is the first in a series titled "Implement Role-Based Access Control in NestJS using MongoDB." In this series, we'll dive into creating an RBAC (Role-Based Access Control) app from scratch using NestJS and MongoDB. Whether you're a beginner or looking to implement role-based access control in your app, follow along and build the app with me!
Authentication & Authorization
Before we get into the details, let's first understand what is Authentication and Authorization.
Authentication is the process of identifying users and validating who they claim to be. One of the most standard and obvious factors in authenticating identity is a password. If the user matches the password credentials, it means the identity is valid, and the system grants access to that user. This entire phase is usually done before authorization.
Authorization on the other hand is the process of giving a user permission to access a specific resource or function.
Prerequisites
To get started, you'll need to have Node.js and npm (Node Package Manager) installed on your machine. If you haven't installed them yet, you can download and install them from the official Node.js website (https://nodejs.org/).
You also need to install NestJS CLI by executing the below command. We will also be using MongoDB via Docker
npm i -g @nestjs/cli
For this article, I am using
Node v20.2.0
NestJs CLI 10.1.12
Docker & Docker Desktop (for GUI)
MongoDB
Setting up the NestJS Application
Let's create a new NestJs application in your Projects directory or wherever you prefer like. Run the following command in your terminal window.
nest new
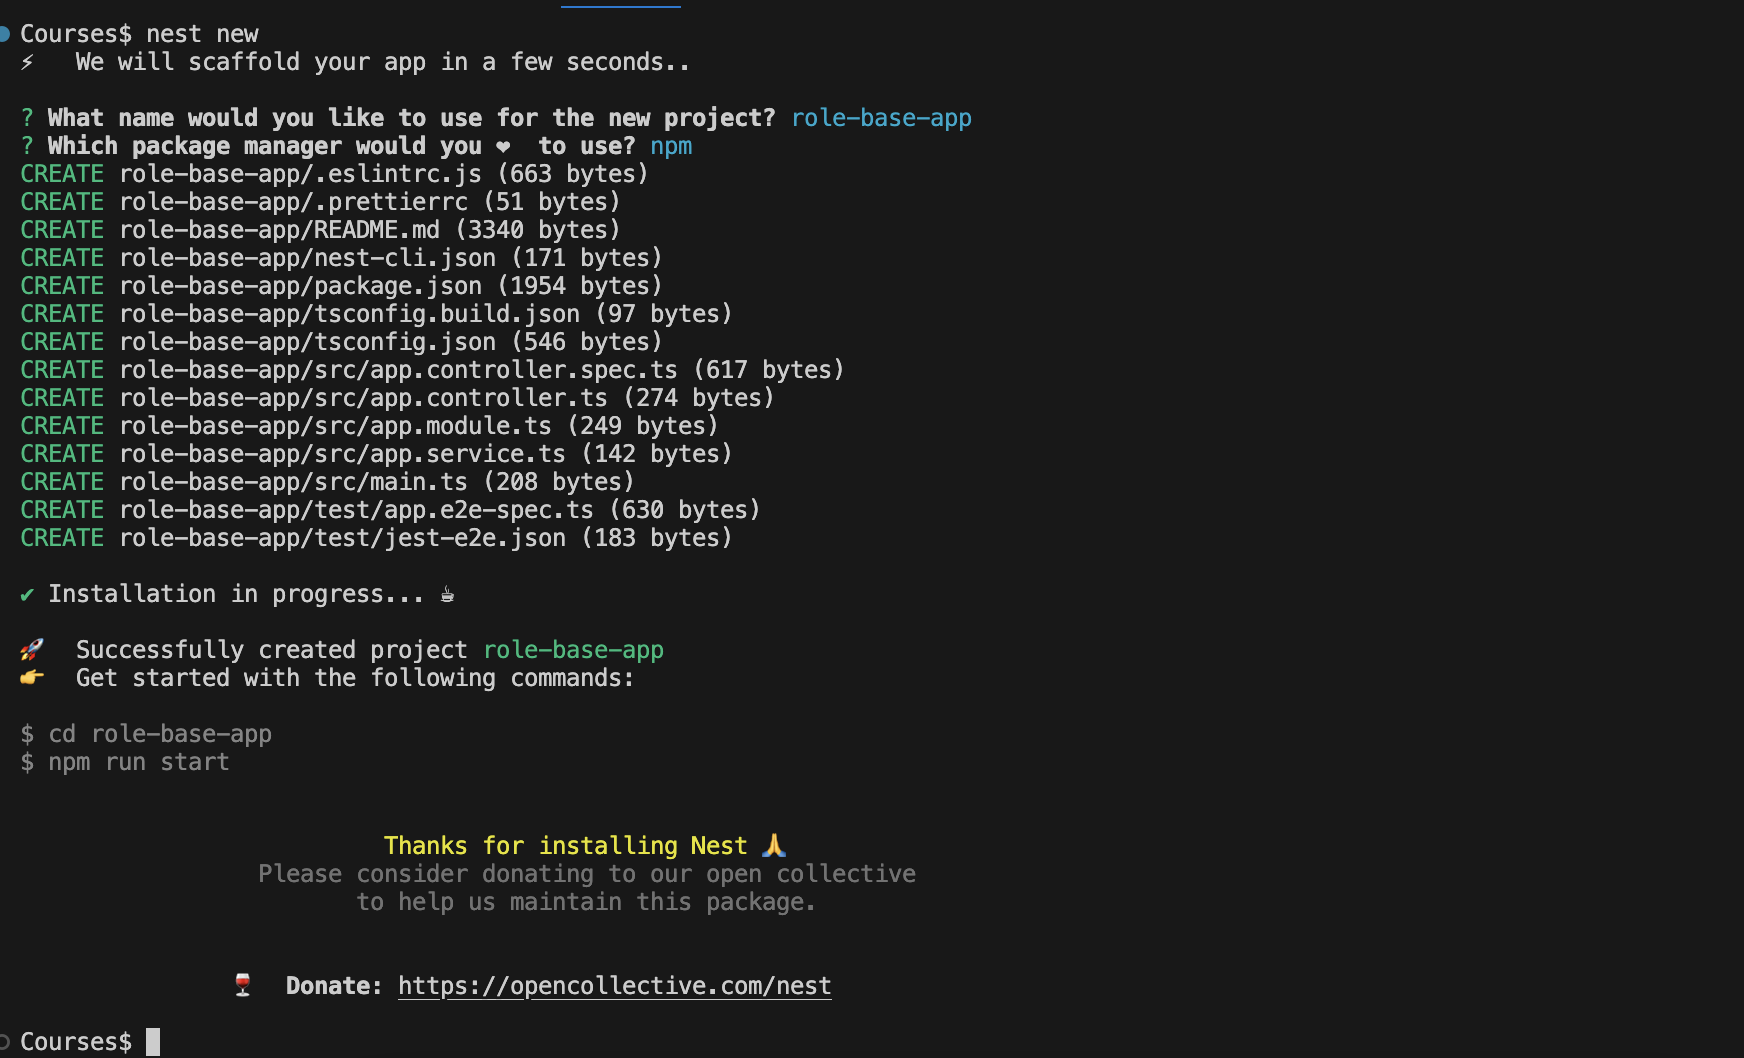
Once you run the above command, you will see something like that displayed in the below image.

Enter your preferred name of the project and select the package manager you would love to use. I am using npm as a package manager. Installation of all the dependencies and scaffolding of your app will be done in a few seconds.
To get started with your project run the following commands:
cd role-base-app # or the name of your project
npm run start
Once your application is started it will show something like this in your terminal.

Creating Resources
Throughout the lifespan of any project, we often need to add resources to our project. These resources typically require multiple, repetitive operations that we have to repeat each time we define a new resource.
To create a new resource, simply run the following command in the root directory of your project:
nest g resource users
nest g resource command not only generates all the NestJs building blocks like module, service, and controller classes but also generates entity class, DTO classes as well as the testing (.spec) files.
Also, it automatically creates placeholders for all the CRUD endpoints (routes for REST APIs). Indeed a very very useful command to speed up our development process. We will create a users resource for our application which will include all the roles.
Once you run the above command, use REST API as an option for the transport layer and enter Yes to generate CRUD entry points which automatically create placeholders for all the CRUD endpoints i.e. in our case the routes for REST APIs.

MongoDB and Mongoose Setup
We will be using docker to set up MongoDB for our application. Let's create the docker-compose file in our project's root directory by running the following command.
touch docker-compose.yml
Before we add anything to the compose file, let's create an environment file .env to store DB details and other secret credentials which we do not want to be publically available. The file should be created at the root of the project folder.
touch .env
Add the database contents to your .env file. Later we are going to use this file to add more secret variables such as JWT information, etc.
# DB
MONGODB_NAME= role-base
MONGODB_URI= mongodb://localhost:27017/role-base
Now, let's update the docker-compose file, make sure to add the following content in that file.
# version is now obsolete
version: "3"

services:
  db:
    image: mongo # container image to be used
    restart: always
    ports: # expose ports in “host:container” format
      - 27017:27017
    environment: #env variables to pass into the container
       MONGODB_DATABASE: ${MONGODB_NAME} # DB name as per the environment file
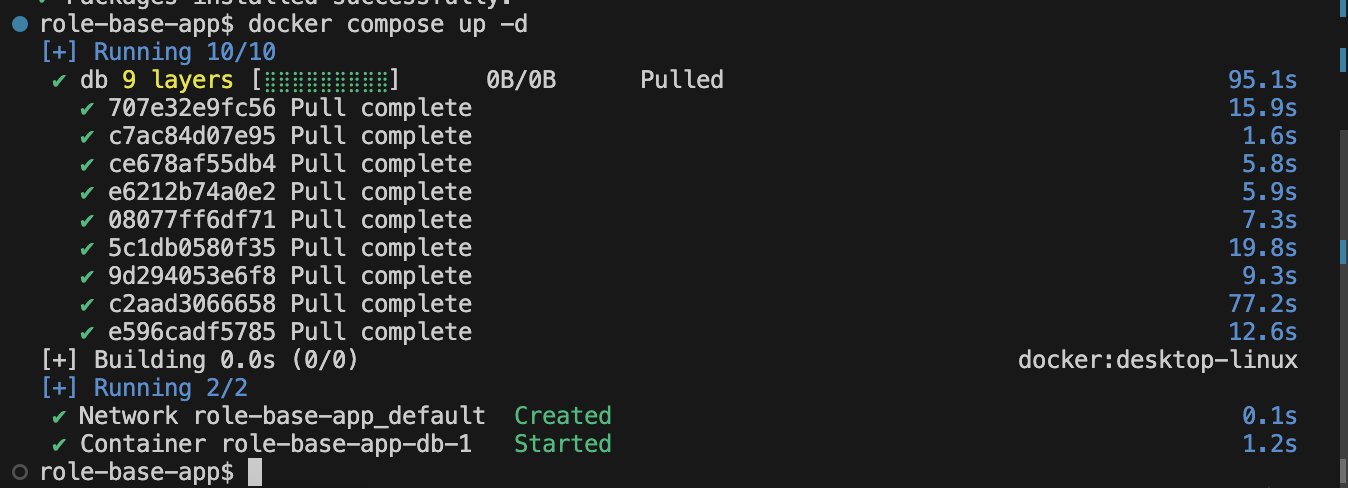
Now let's start our container in background or detached mode by running the following command
docker compose up -d
Initially, it will pull all the images if not present, in our case the image mongo will be pulled from the docker hub.

Introducing the Mongoose Module
Mongoose is the most popular MongoDB object modelling tool. We can install Mongoose dependencies in our application by running the following command
npm i mongoose @nestjs/mongoose
Once dependencies are installed let's add MongooseModule in our AppModule
@Module({
  imports: [
    MongooseModule.forRootAsync({
      imports: [ConfigModule],
      useFactory: async (configService: ConfigService) => ({
        uri: configService.get<string>('MONGODB_URI'),
      }),
      inject: [ConfigService],
    }),
    UsersModule
  ],
})
In the above code, the Mongoose module is configured asynchronously using MongooseModule.forRootAsync({}) method.
Inside the object, we can see the imports property, which is an array of modules that need to be imported before configuring the Mongoose module. In this case, it imports the ConfigModule, which suggests that the configuration for the Mongoose module might depend on the configuration provided by the ConfigModule.
The useFactory property is a callback function that is responsible for creating the Mongoose module configuration. It is an asynchronous function that takes an instance of the ConfigService as a parameter. The ConfigService is injected into the function using the inject property.
Make sure you have added the @nestjs/config package by executing the below command.
npm i @nestjs/config
Next, we start your app in the development mode by running the following command
npm run start:dev
If everything works fine, you will see the MongooseModule initialized which means we have successfully connected with our MongoDB database.
In case of any issues please make sure your container is up and running and also the DB name matches what you have in the docker-compose.yml file.

Creating a Mongoose Model
One of the most vital concepts in MongoDB is the idea of "Data Models". These Models are responsible for creating, reading, and deleting "documents" from the Mongo database.
Every schema we create maps to our MongoDB collection and defines the shape of the documents in that collection.
Let's head over to our user.entity.ts file and add the Schema definition for the User model. We use a @Schema() decorator to define a schema for the User class.
The class named User will consist of name, email, password and role as properties for now and to define a property in schema we use @Prop() decorator.
Lastly the SchemaFactory.createForClass() method is used to create a schema for the User class and exported via UserSchema constant.
import { Prop, Schema } from '@nestjs/mongoose';
import { Document } from 'mongoose';

@Schema()
export class User extends Document{
  @Prop()
  name: string;

  @Prop()
  email: string;

  @Prop()
  password: string;

  @Prop()
  role: string;
}

export const UserSchema = SchemaFactory.createForClass(User);
Now, let's make Mongoose aware of this module by updating our UserModule is as follows.
@Module({
  imports: [
    MongooseModule.forFeature([
      {
        name: User.name,
        schema: UserSchema,
      },
    ]),
  ],
...
...
})
The MongooseModule.forFeature() method is used to define a feature module for the User entity. The forFeature() method takes an array of objects that define the name of the entity and the schema that should be used for the entity.
In this case, the name property is set to User.name, which is the name of the User class defined in another file. The schema property is set to UserSchema, which is the schema for the User entity.
Conclusion
That's it for today. We have successfully set up a new NestJs app and created a Users resource with database configuration and integration of MongoDB and Mongoose as the ORM. We also added environment DB variables to secure our app.
Next Post
Stay tuned for the next post, where we will deep dive more into Authentication. The new blog post will be published by 10 July 2024.
References
Subscribe to my newsletter
Read articles from Amanpreet Singh directly inside your inbox. Subscribe to the newsletter, and don't miss out.
Written by

Amanpreet Singh
Amanpreet Singh
Passionate developer and software crafter with a passion for problem-solving. Always learning and growing in the field. Currently looking for a job or freelance gig. Need a software consultant? I am your guy! With experience in websites, applications, and cloud services, I can provide top-notch solutions for your business needs. Let's work together to take your tech game to the next level. Contact me today for part-time consulting opportunities