Creating a Monorepo Using Turborepo, Next.js, and Tailwind CSS: A Complete Guide
 Karangiya Vraj
As modern web applications grow in size and complexity, especially when encompassing multiple applications, developers are in search of more efficient ways to manage their codebases. A highly effective solution to this challenge is the use of monorepos, which enable the organization of multiple projects within a single repository.
However, setting up a monorepo manually can be quite challenging. This is where Turborepo proves invaluable. Turborepo simplifies the process of creating a monorepo by automating many of the necessary steps. In this article, I will guide you through using Turborepo to set up a monorepo, using a Next.js project as the foundation and Tailwind CSS for styling.
Table of contents
What is a Monorepo?
Create a New Monorepo
What is a workspace?
Examining the package.json
Understanding Imports and Exports
Sharing Configs
Understanding Turbo.json
Building with Turborepo
Running Dev Scripts
Adding Tailwind CSS
Conclusion
Introduction
Today, this guide will demonstrate how to install and use Turborepo to manage multiple apps within the same monorepo. You will learn how to set up and run two or more different applications using Turborepo.
1. What is a Monorepo?
Delving deeply into the concept of a monorepo isn't necessary here, as there are numerous resources available on the topic (recommended resource). However, to simplify it:
Monorepo is an architectural concept that allows you to keep multiple projects or apps in a single repository. Many companies, like Google, use this approach.
Let's get started!
2. Create a New Monorepo:
Let’s start by creating a Turborepo monorepo with the following command:
npx create-turbo@latest
When running the command, you’ll be prompted to choose the location where it should be created and select a package manager. For this article, I will be using npm, you can choose whichever package manager you prefer, such as yarn or pnpm.
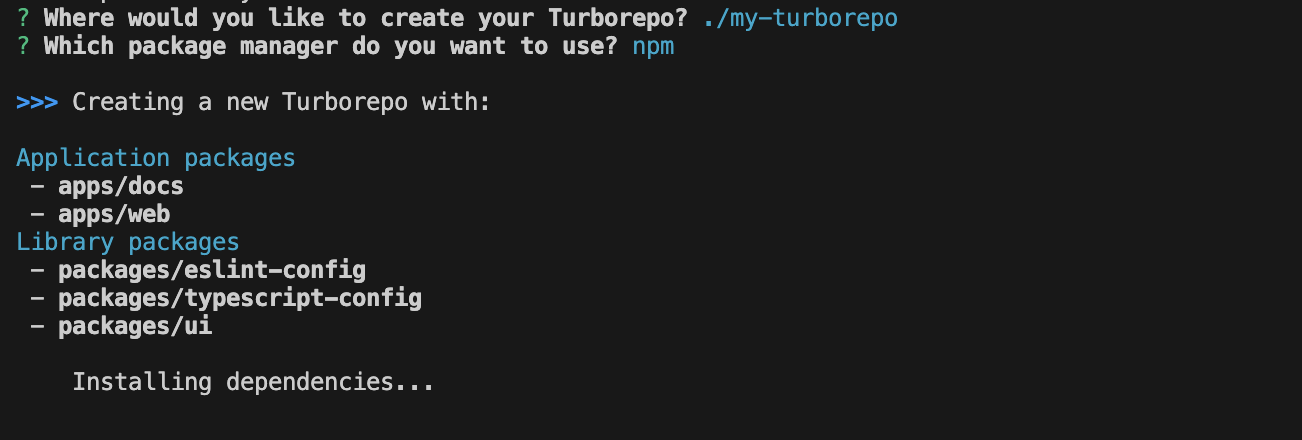
After the setup is complete, you will see a "Success!" message in your terminal, just like this:
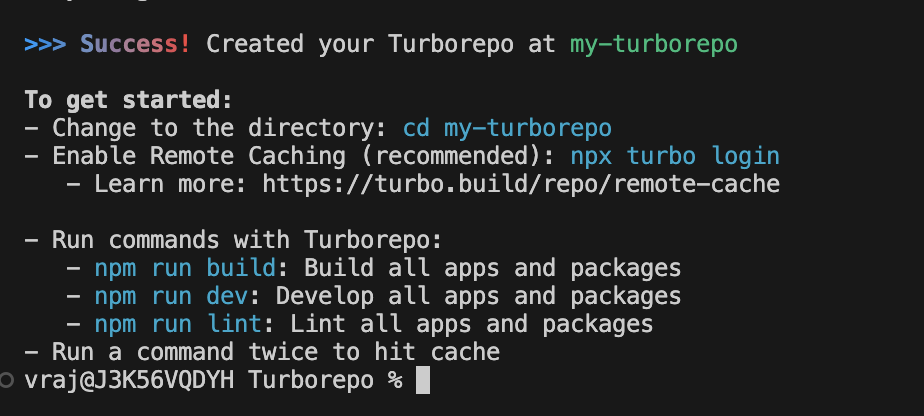
This will create a bunch of workspaces in the "app" and "packages" directory.
3. What is a workspace?
Workspace is basically a folder containing a package.json. Each workspace can declare its own dependencies, run its own scripts, and export code for other workspaces to use.
Now, navigate to the directory (cd yourProjectName)and open the project in your preferred IDE.
Now you can test running it with the following command
npm install && npm run dev
If your terminal looks like the screenshot below, then congratulations, the initial setup is complete!
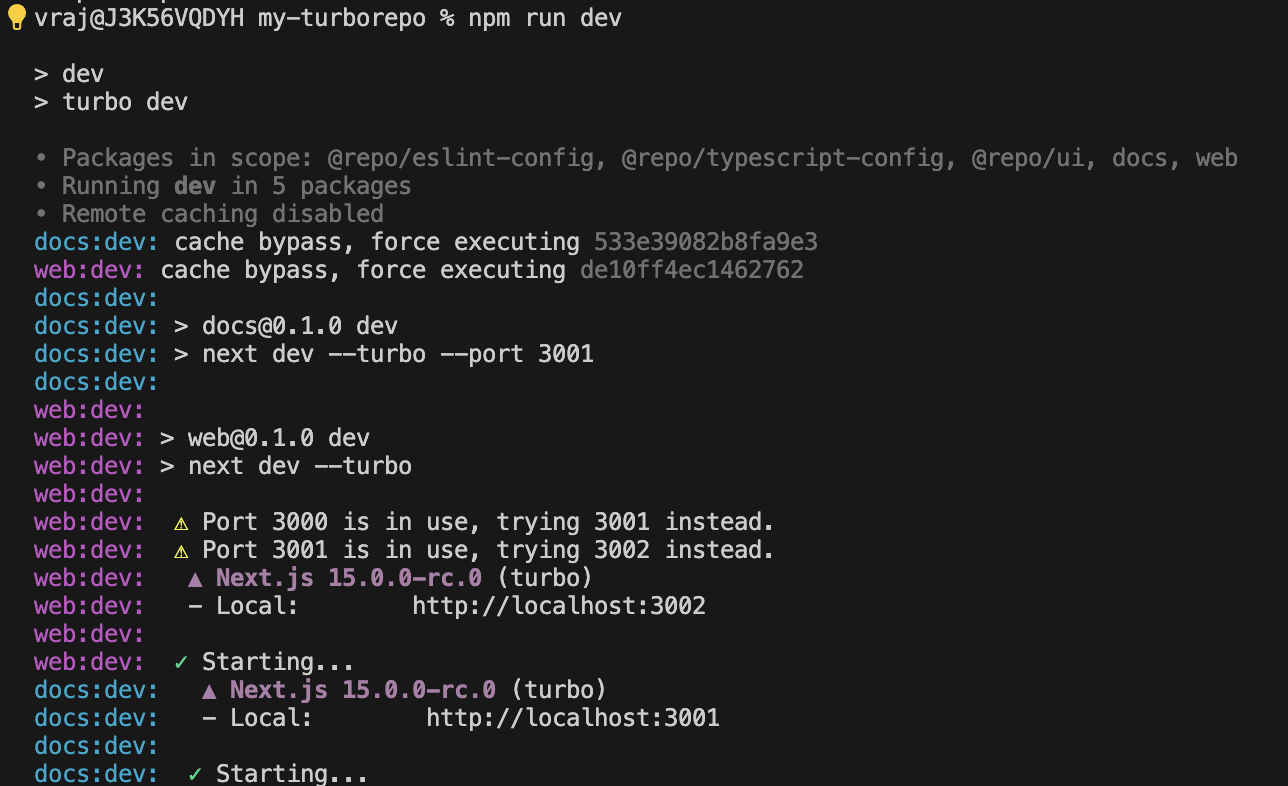
| By default, it creates 2 Next.js apps and 3 packages, as shown below.
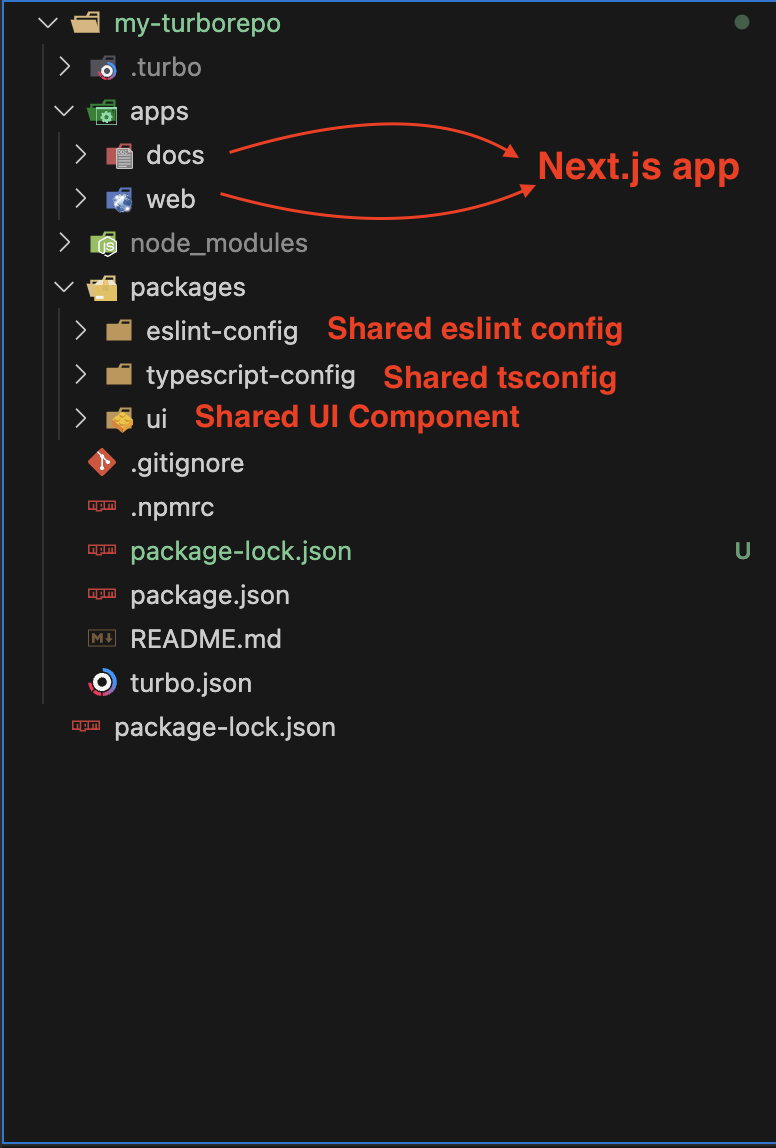
appsare all the applications we have in this monorepo. By default (fromnpx create-turbo@latest), it generatesdocsandwebapplications (Next.js).packagescontains shared configurations, includingeslint,tsconfig, and a unifiedUI, which manage elements across the entire monorepo.
4. Examining the package.json:
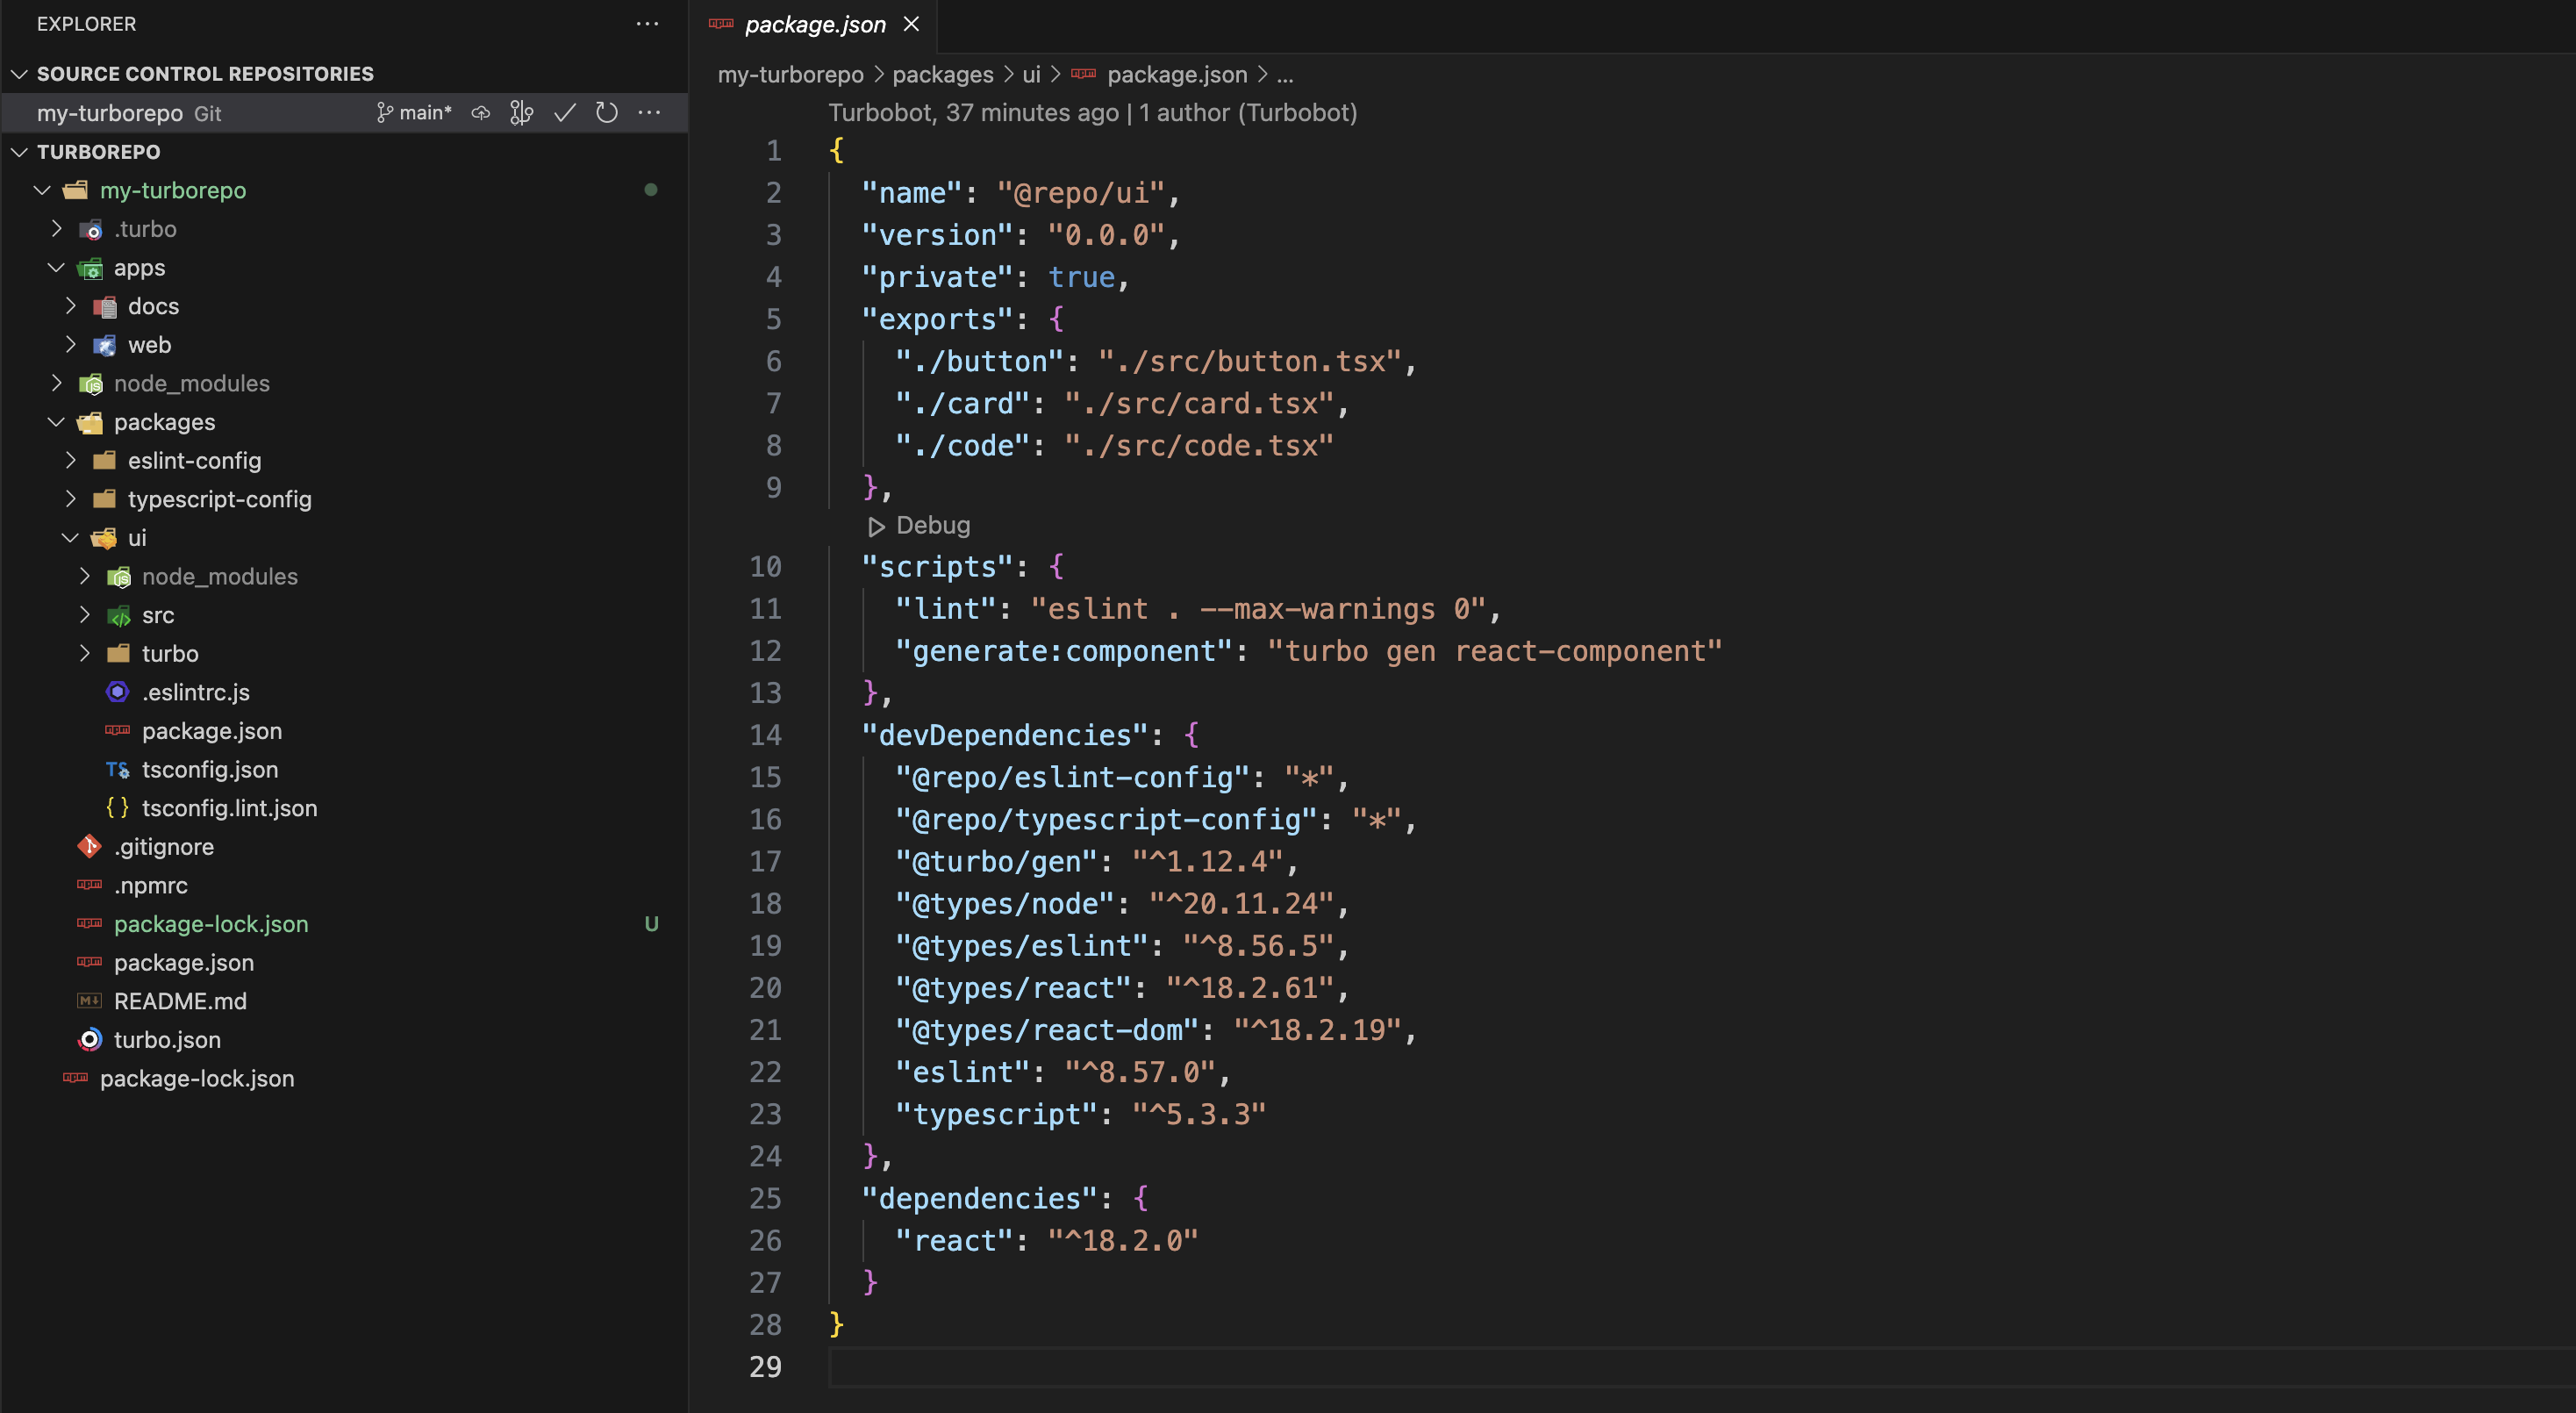
First, open the package.json inside "packages/ui" folder. You'll notice that the package's name is "name": "@repo/ui" - right at the top of the file.
Next, open the package.json inside "apps/web" folder. You'll notice that this package's name is "name": "web". You'll also see that "web" depends on a package called @repo/ui.
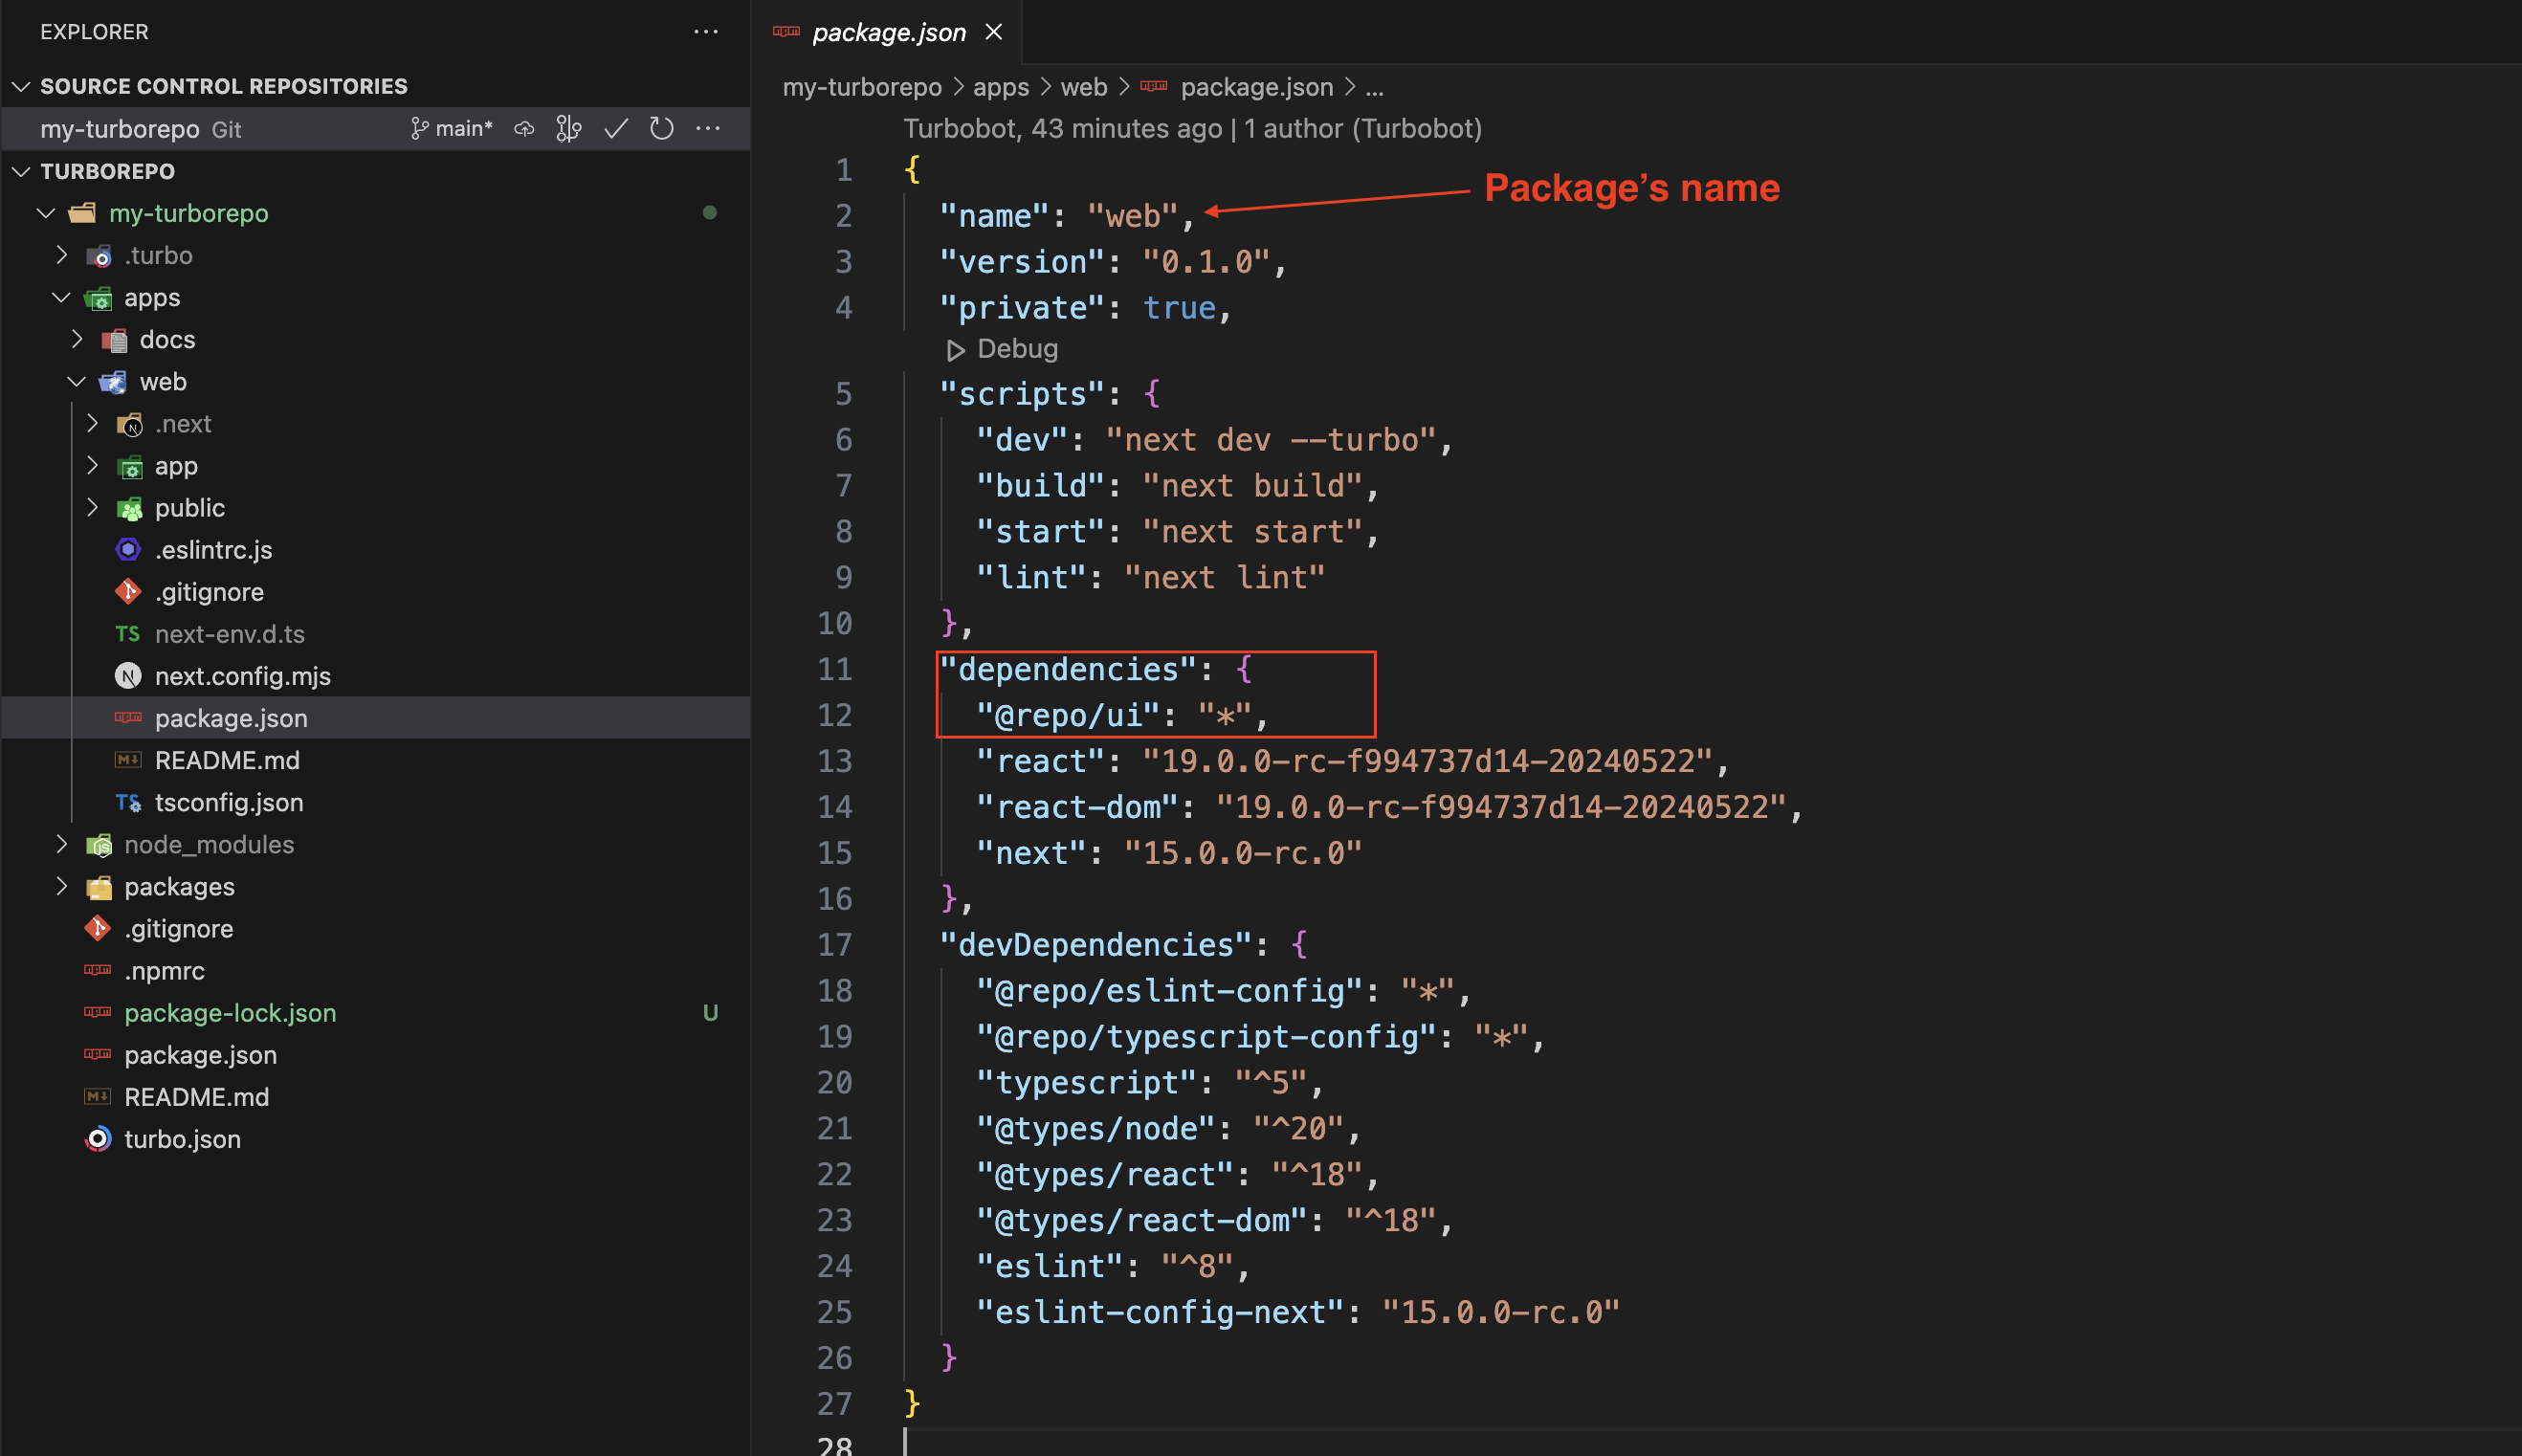
This means that our "web" app depends on our local @repo/ui package. Actually both "web" and "docs" depend on @repo/ui - a shared component library.
This pattern of sharing code across applications is extremely common in monorepos -and means that multiple apps can share a single design system.
5. Understanding Imports and Exports:
If you take a look at the "web" app's home page, you'll see it's importing the Button component directly from @repo/ui. To understand how this works, open the package.json inside @repo/ui. You'll notice the following screenshot:
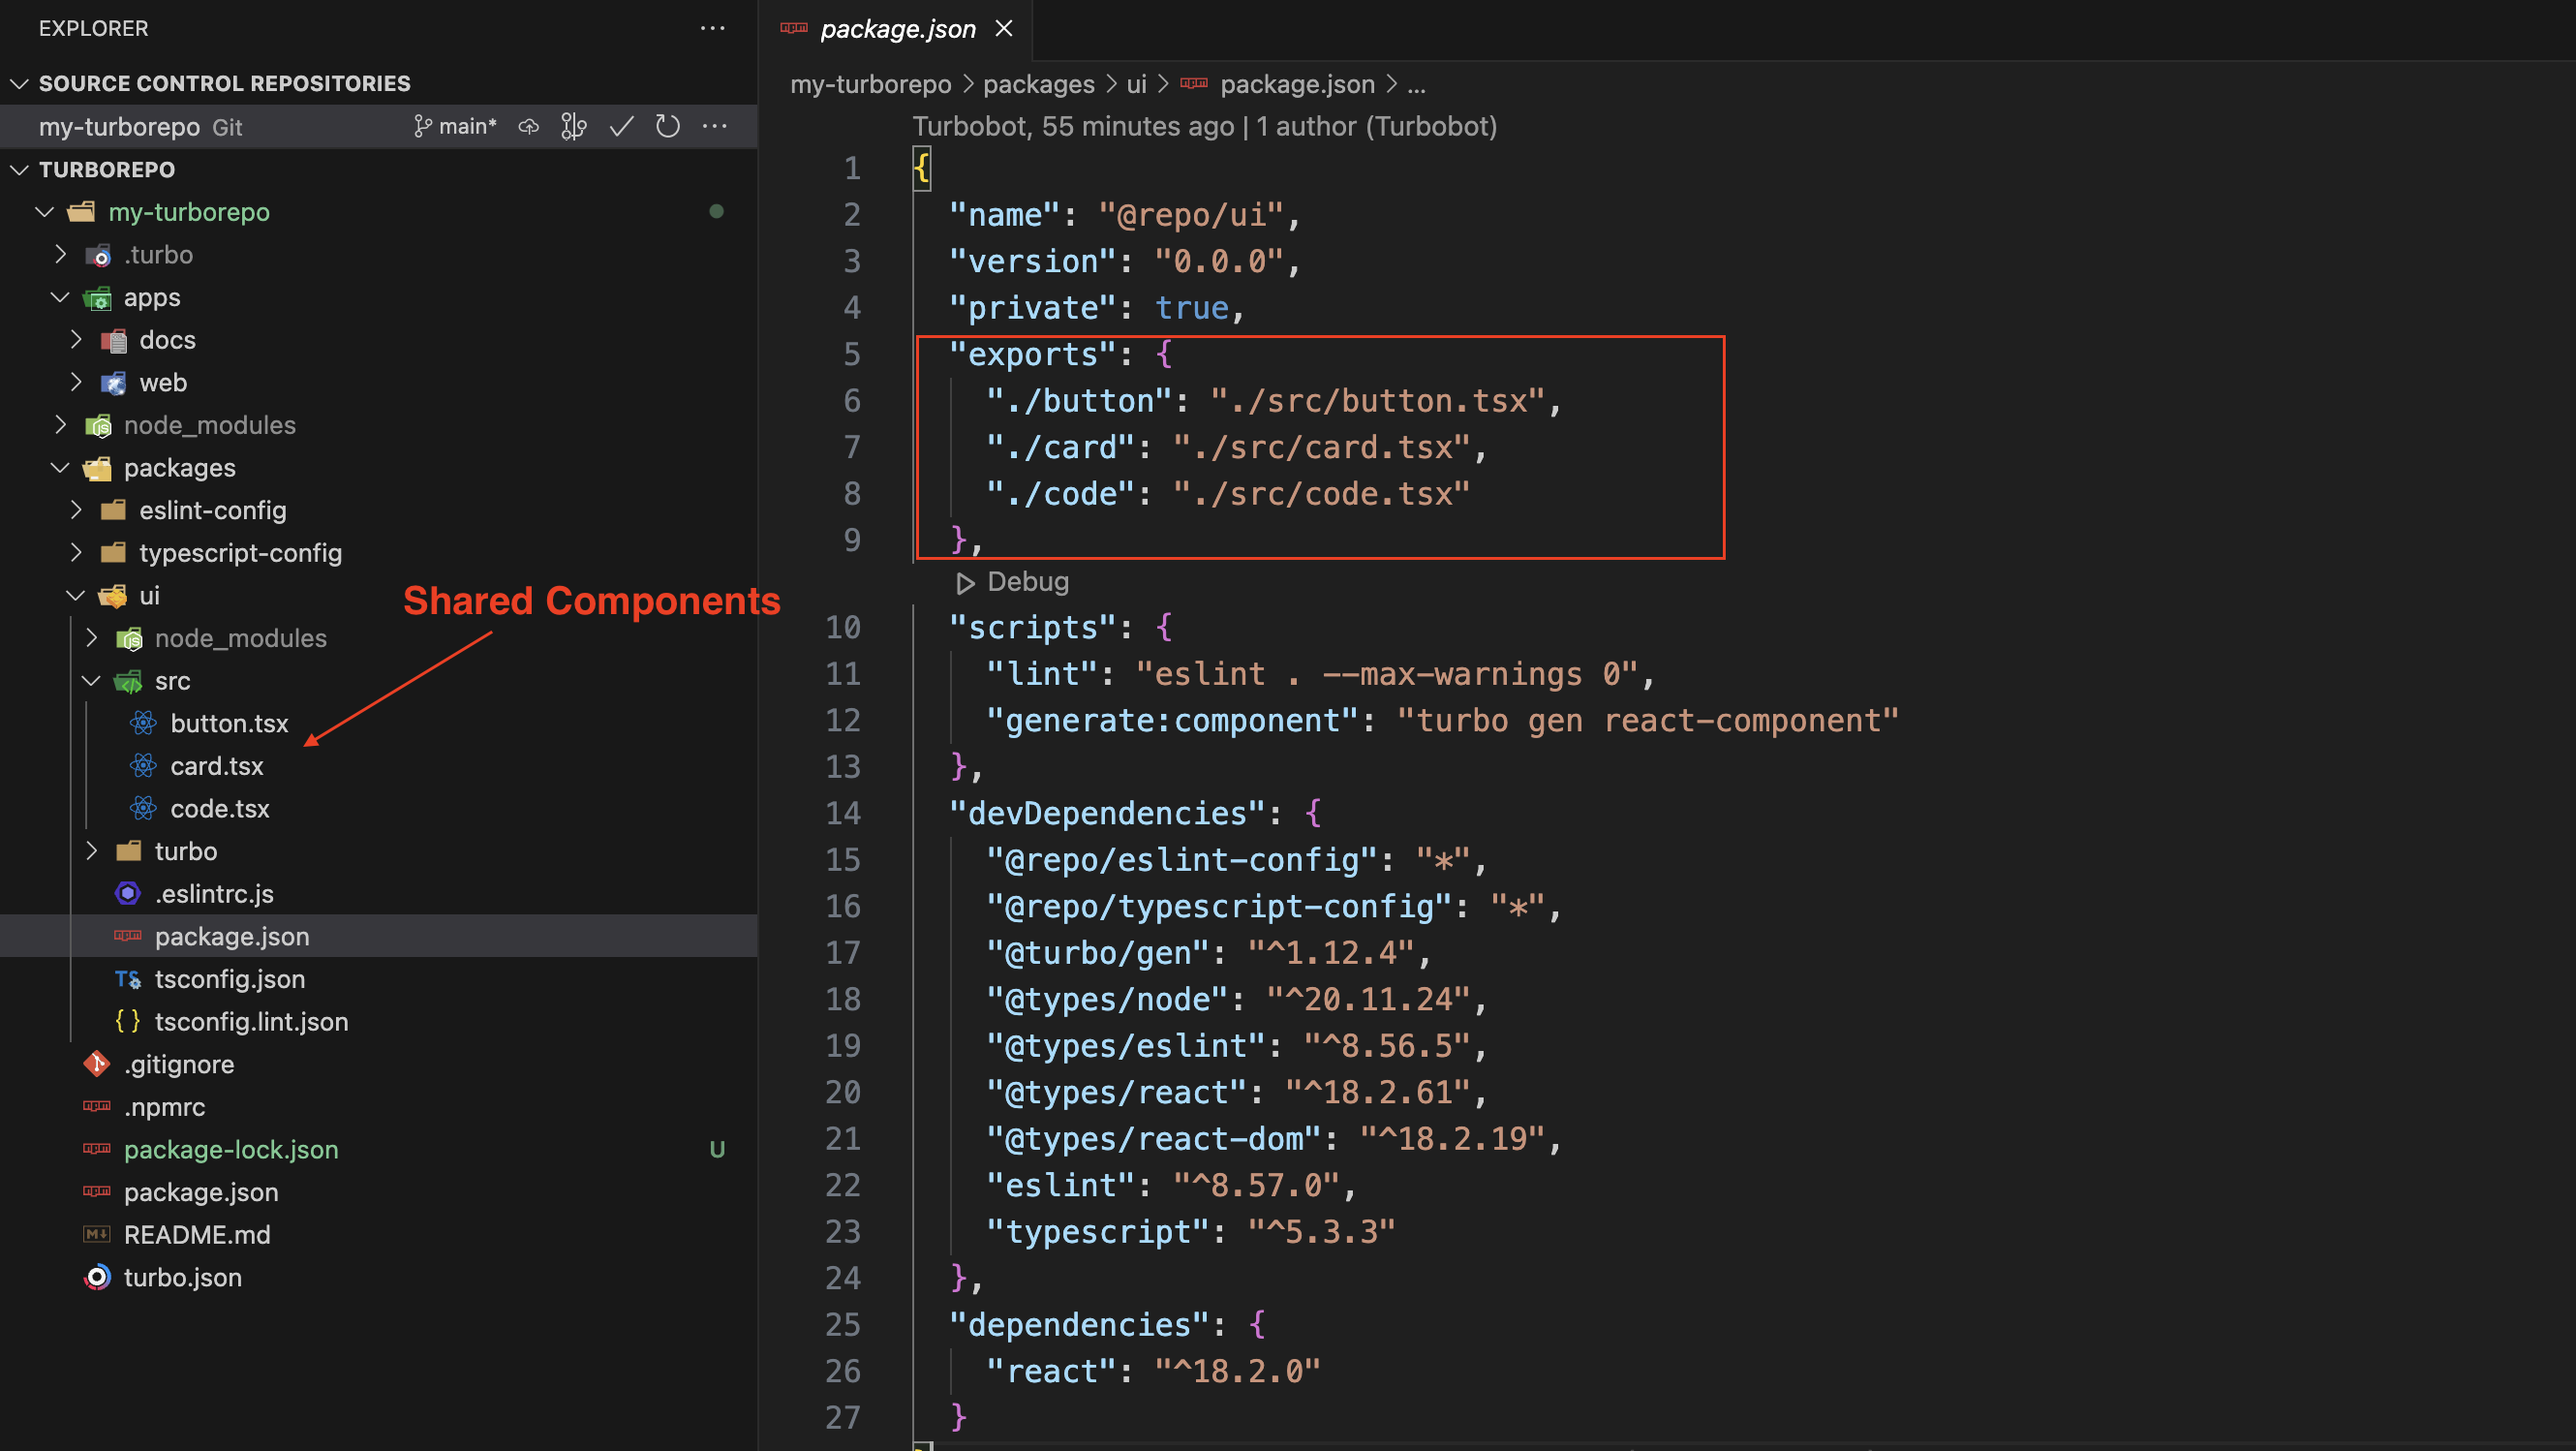
Above, you can see how we create a shared component in the ui/src folder, export it in the package.json file and then use it across the application (web or docs).
6. Sharing Configs:
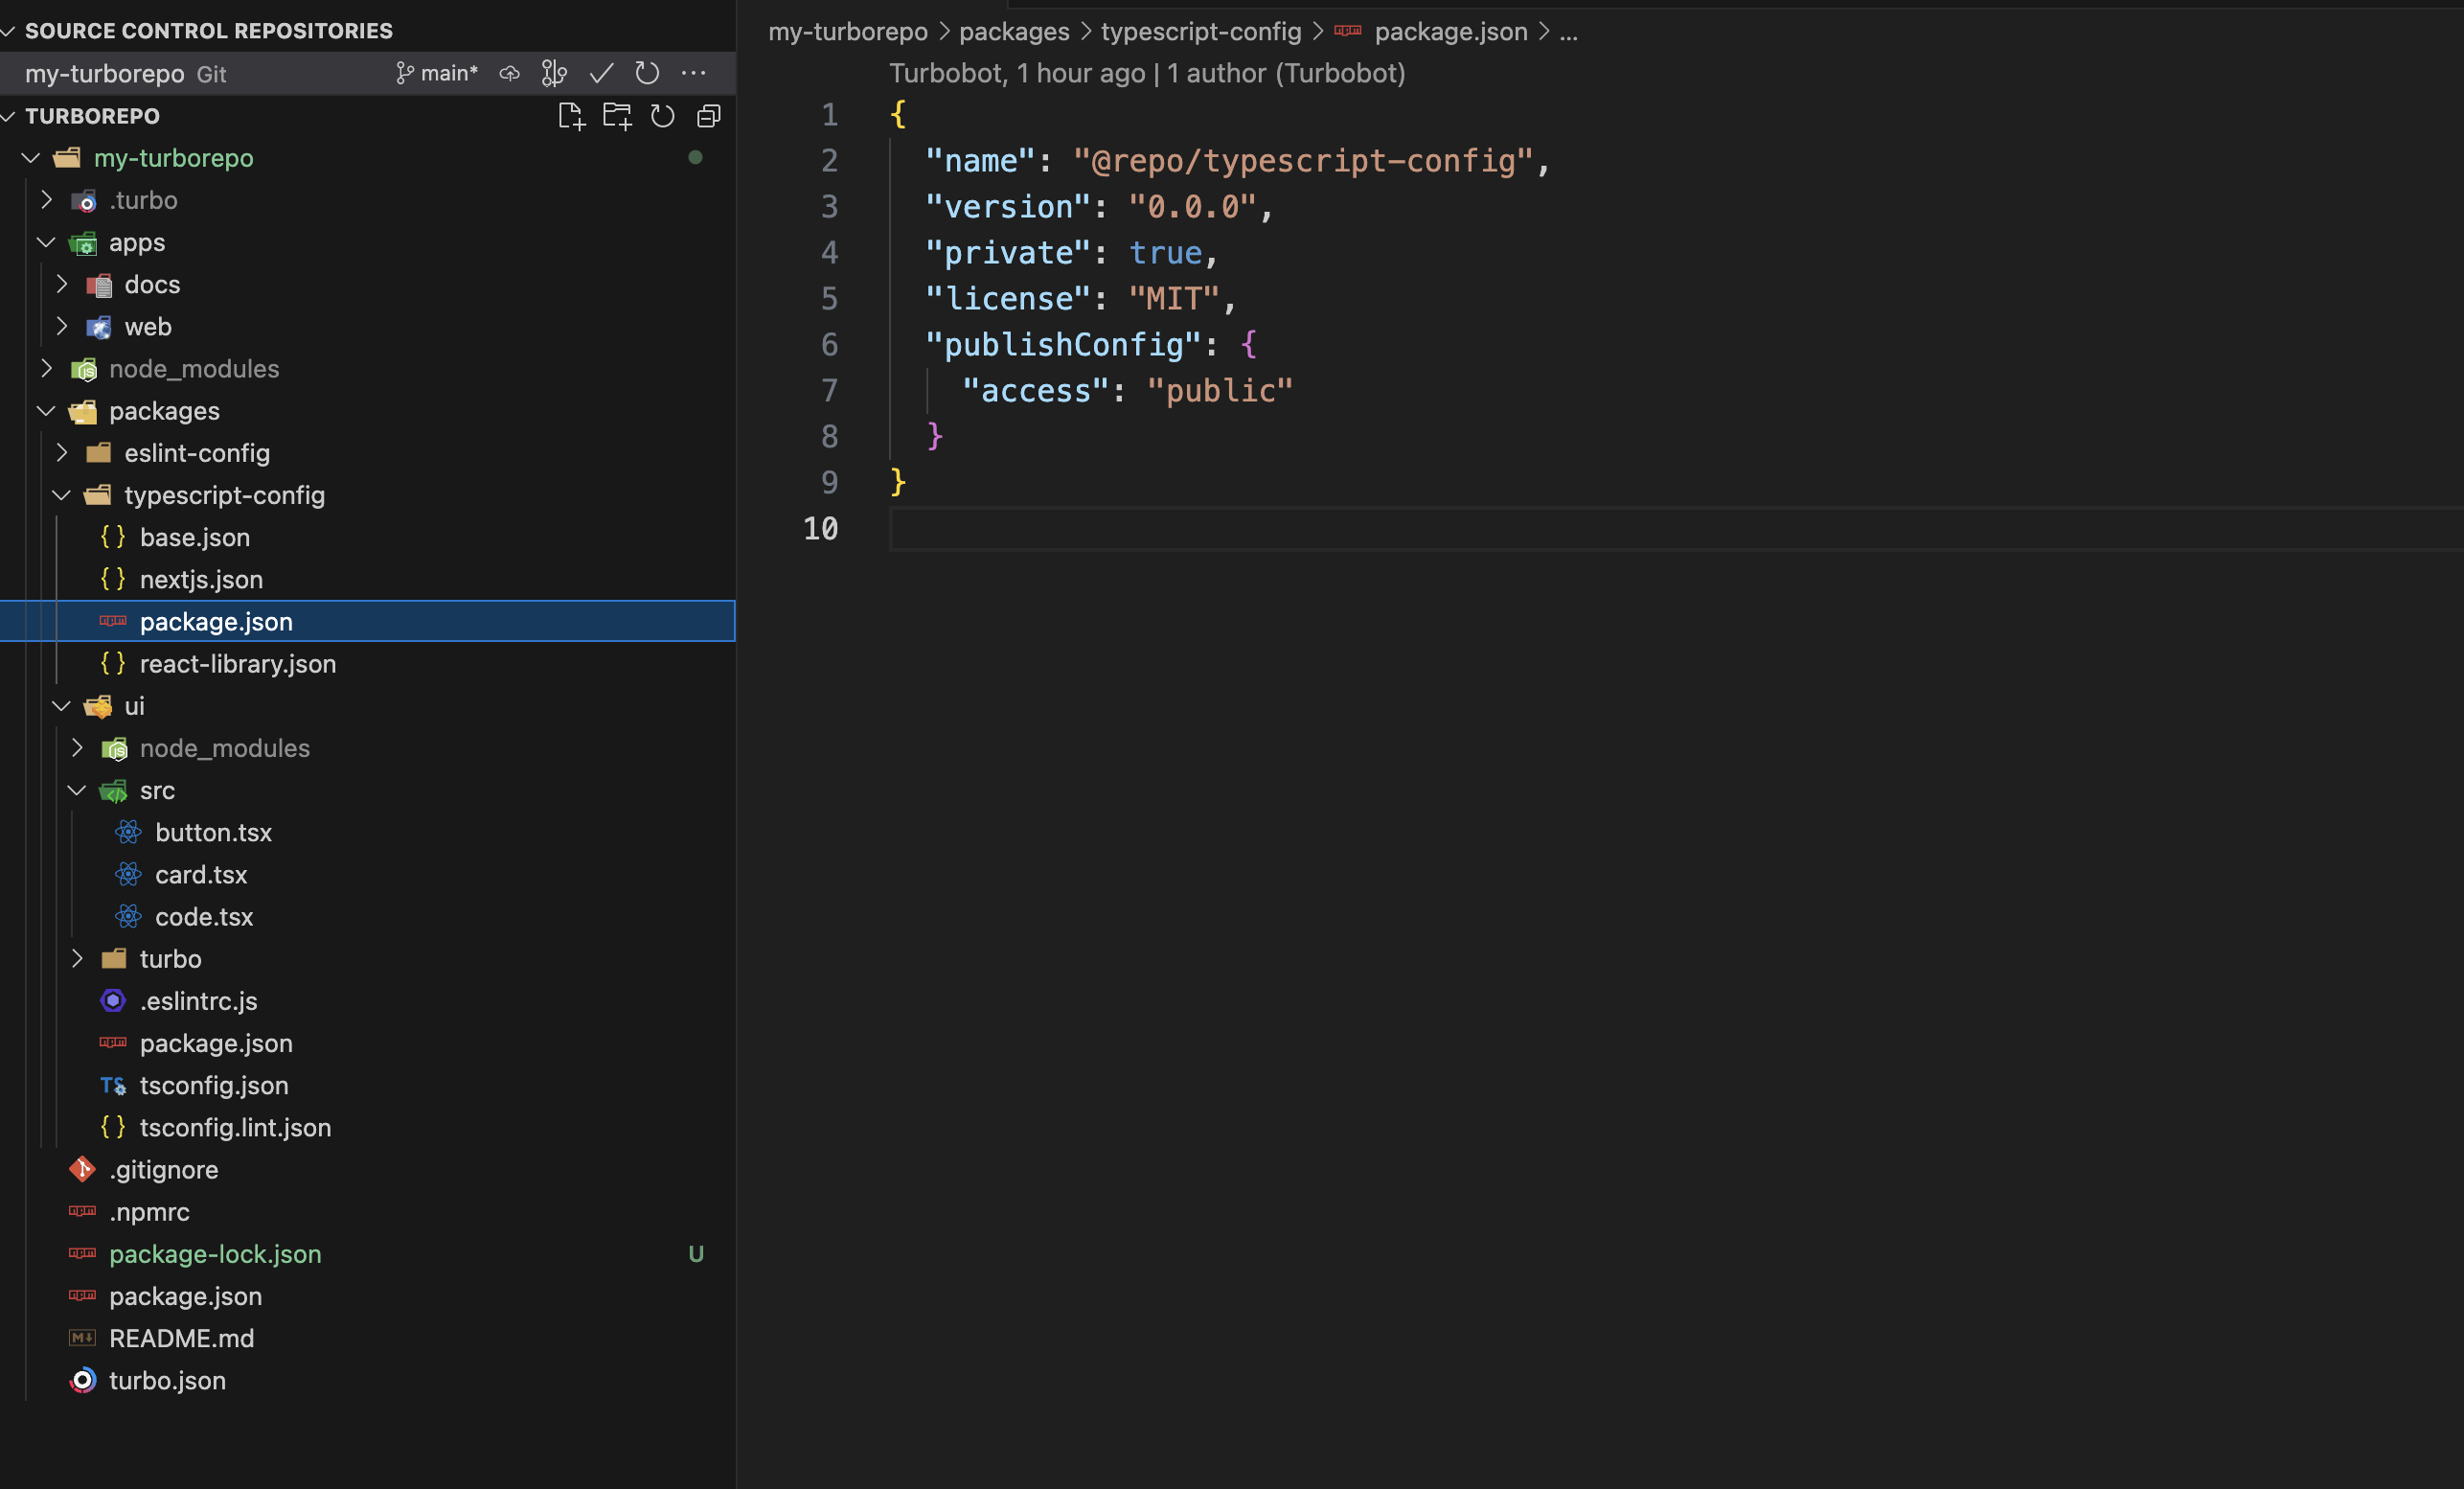
Let's check out the package.json in the "typescript-config" folder. This file helps us share our TypeScript configuration across the entire monorepo:
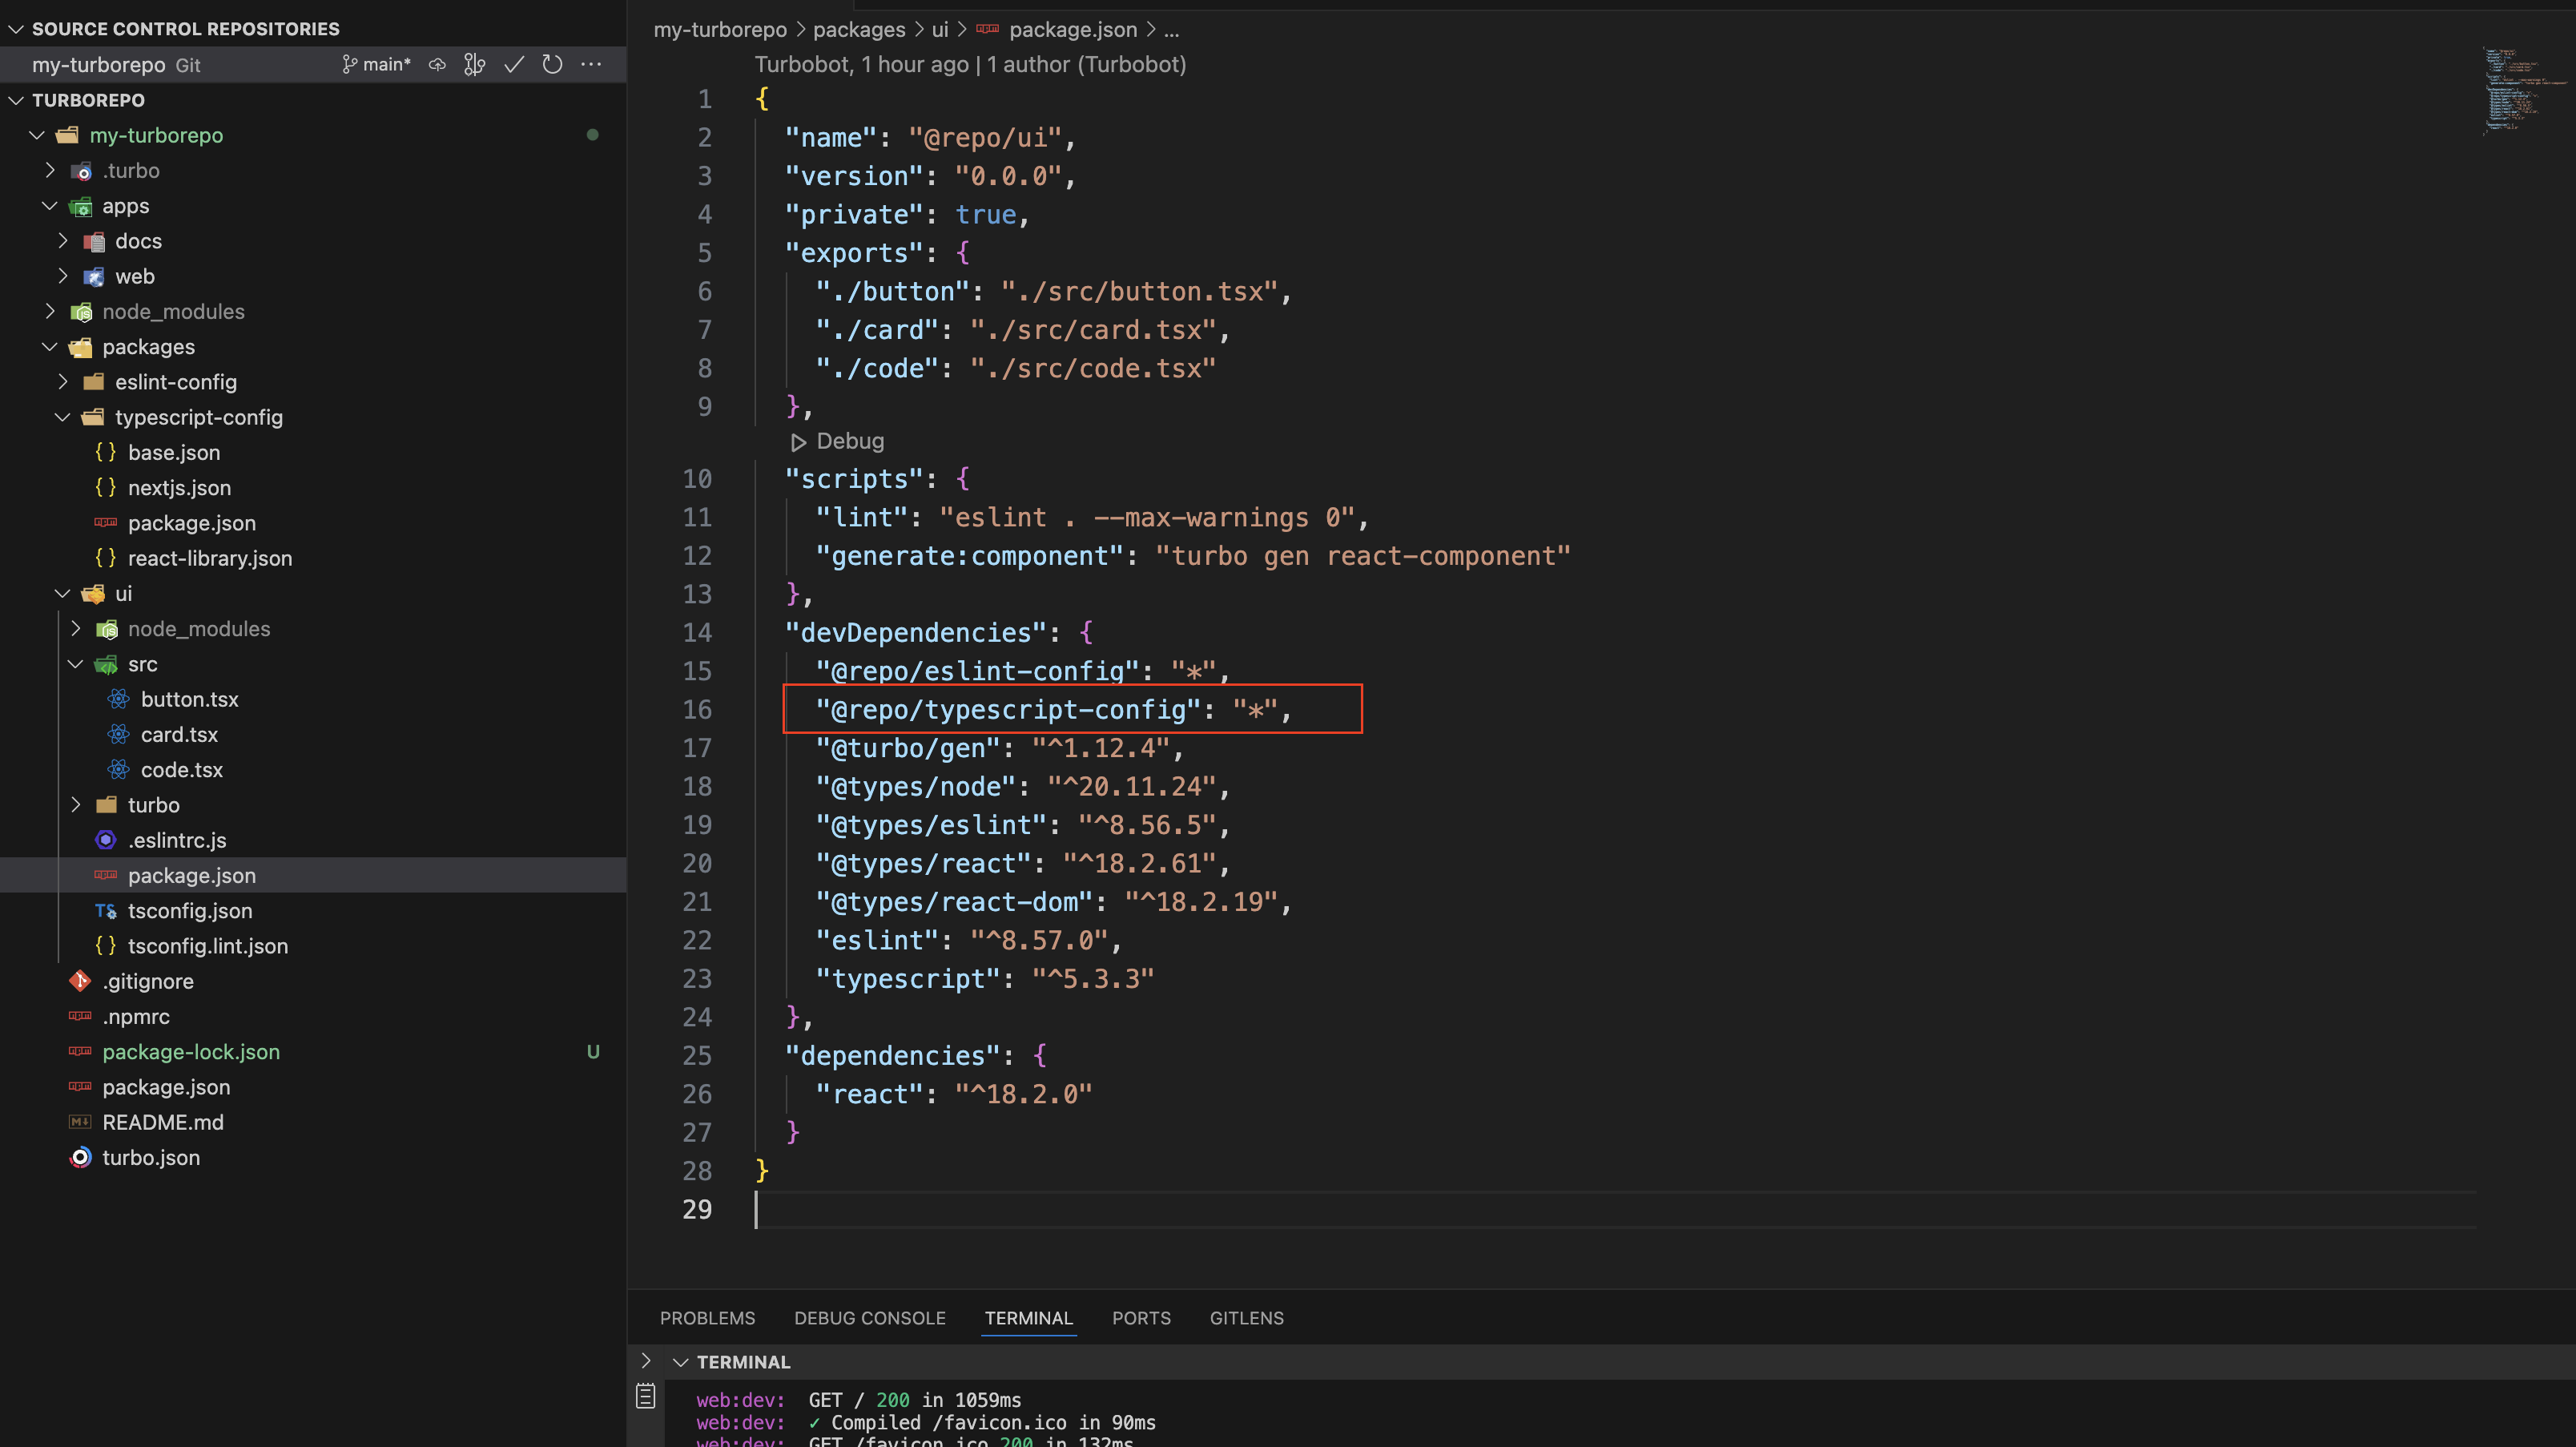
Packages which depend on "typescript-config"can extend these files directly. For instance, @repo/ui depends on "typescript-config":
And inside its tsconfig.json file, it imports the intended file using extends:
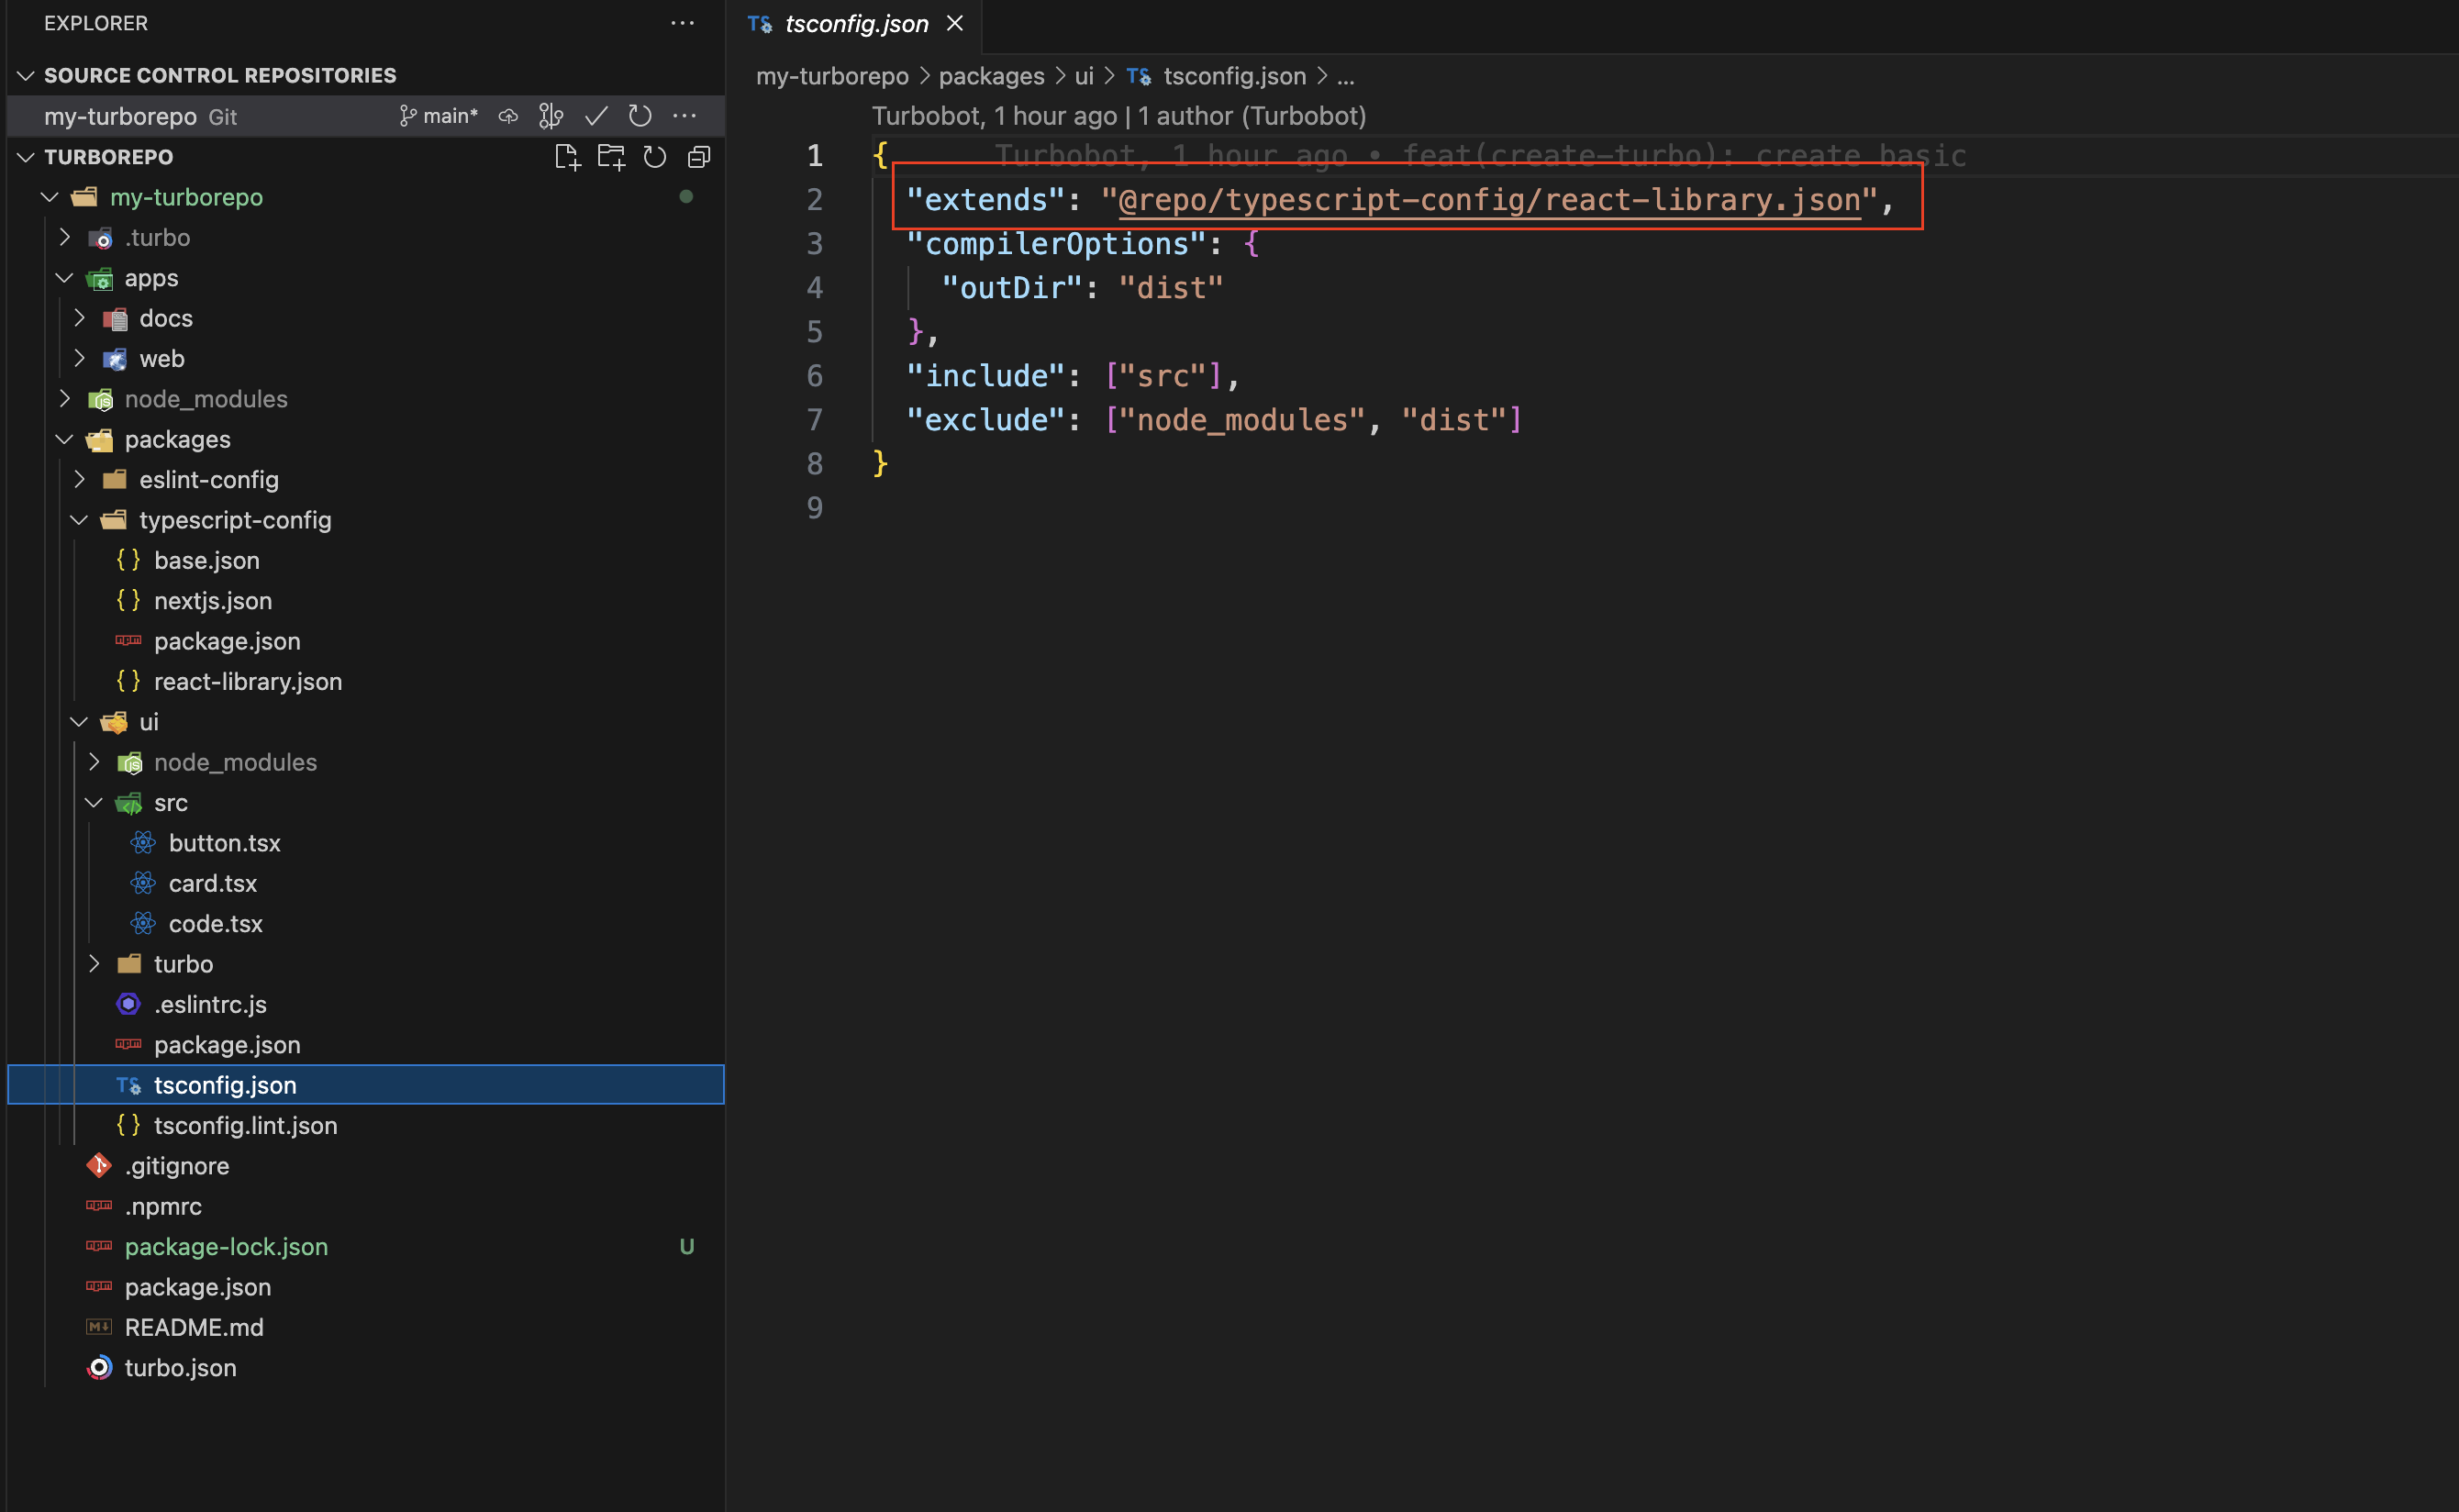
This pattern allows for a monorepo to share a single tsconfig.json across all its workspaces, reducing code duplication.
7. Understanding Turbo.json:
Now that we understand our repository and its dependencies, let's see how Turborepo can help. Turborepo makes running tasks simpler and much more efficient.
| Let's take a look inside our root package.json:
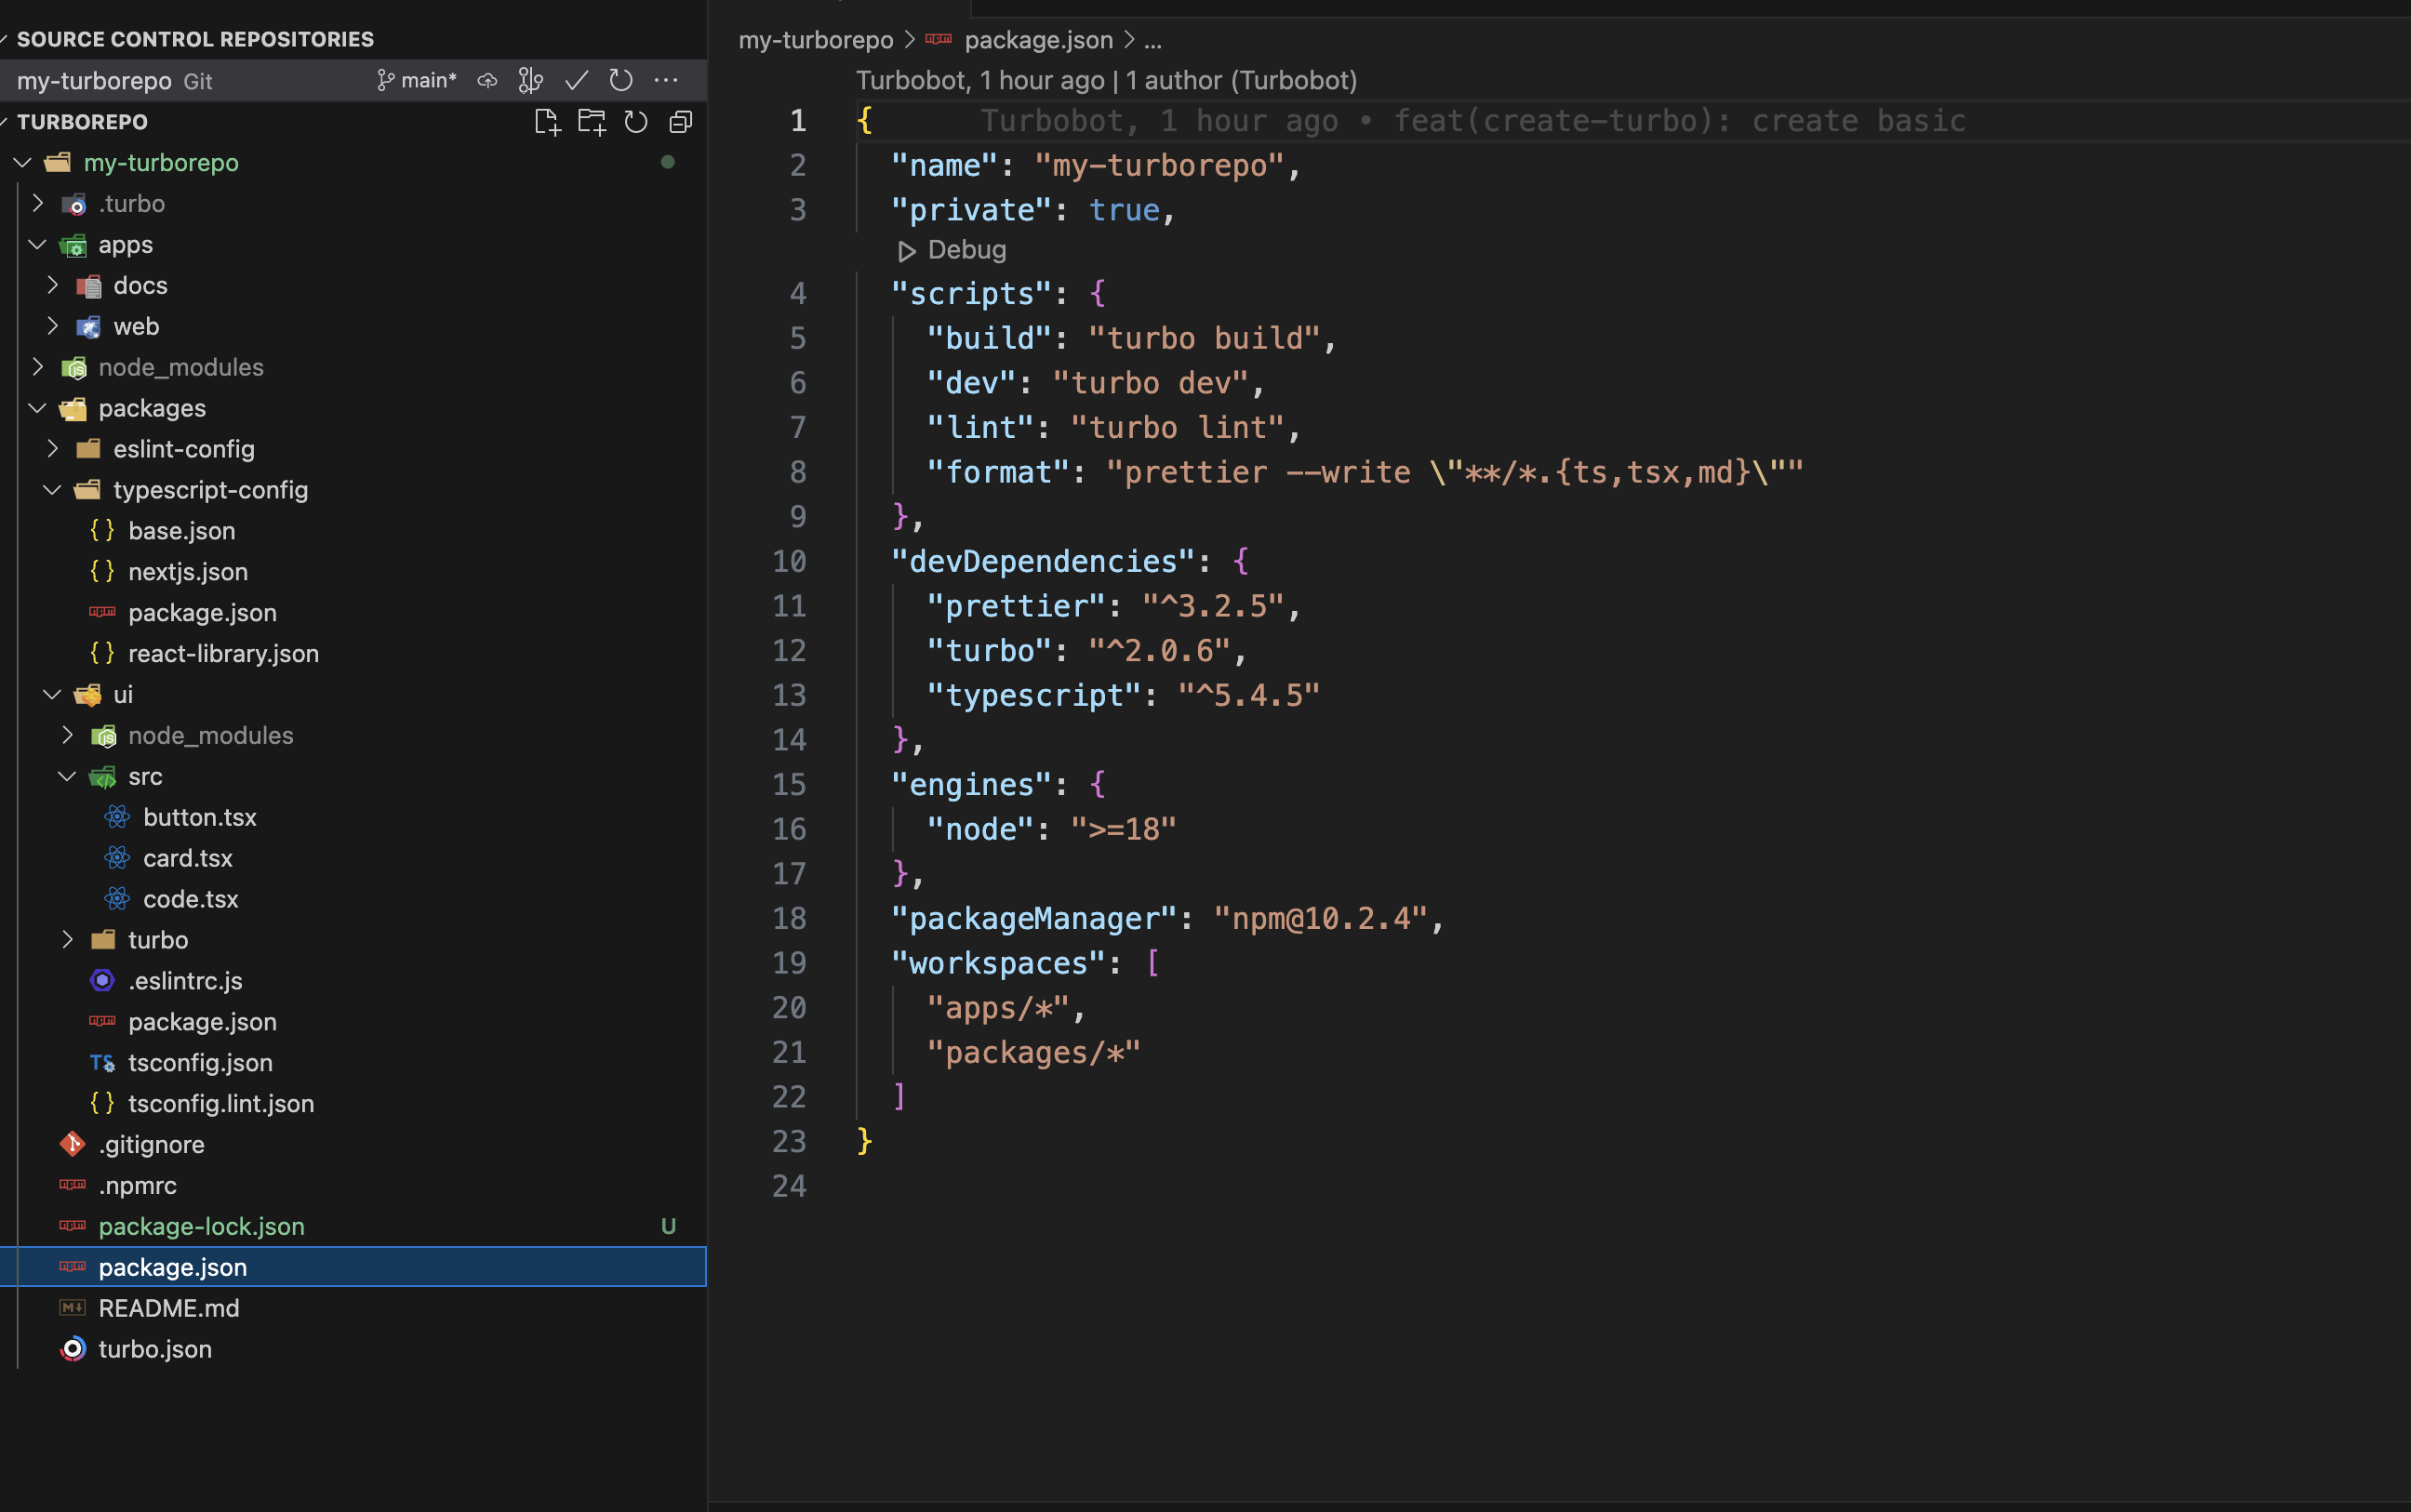
We have three tasks listed in the scripts that use turbo run. You'll see that each of these scripts is also mentioned in the turbo.json's pipeline attribute:
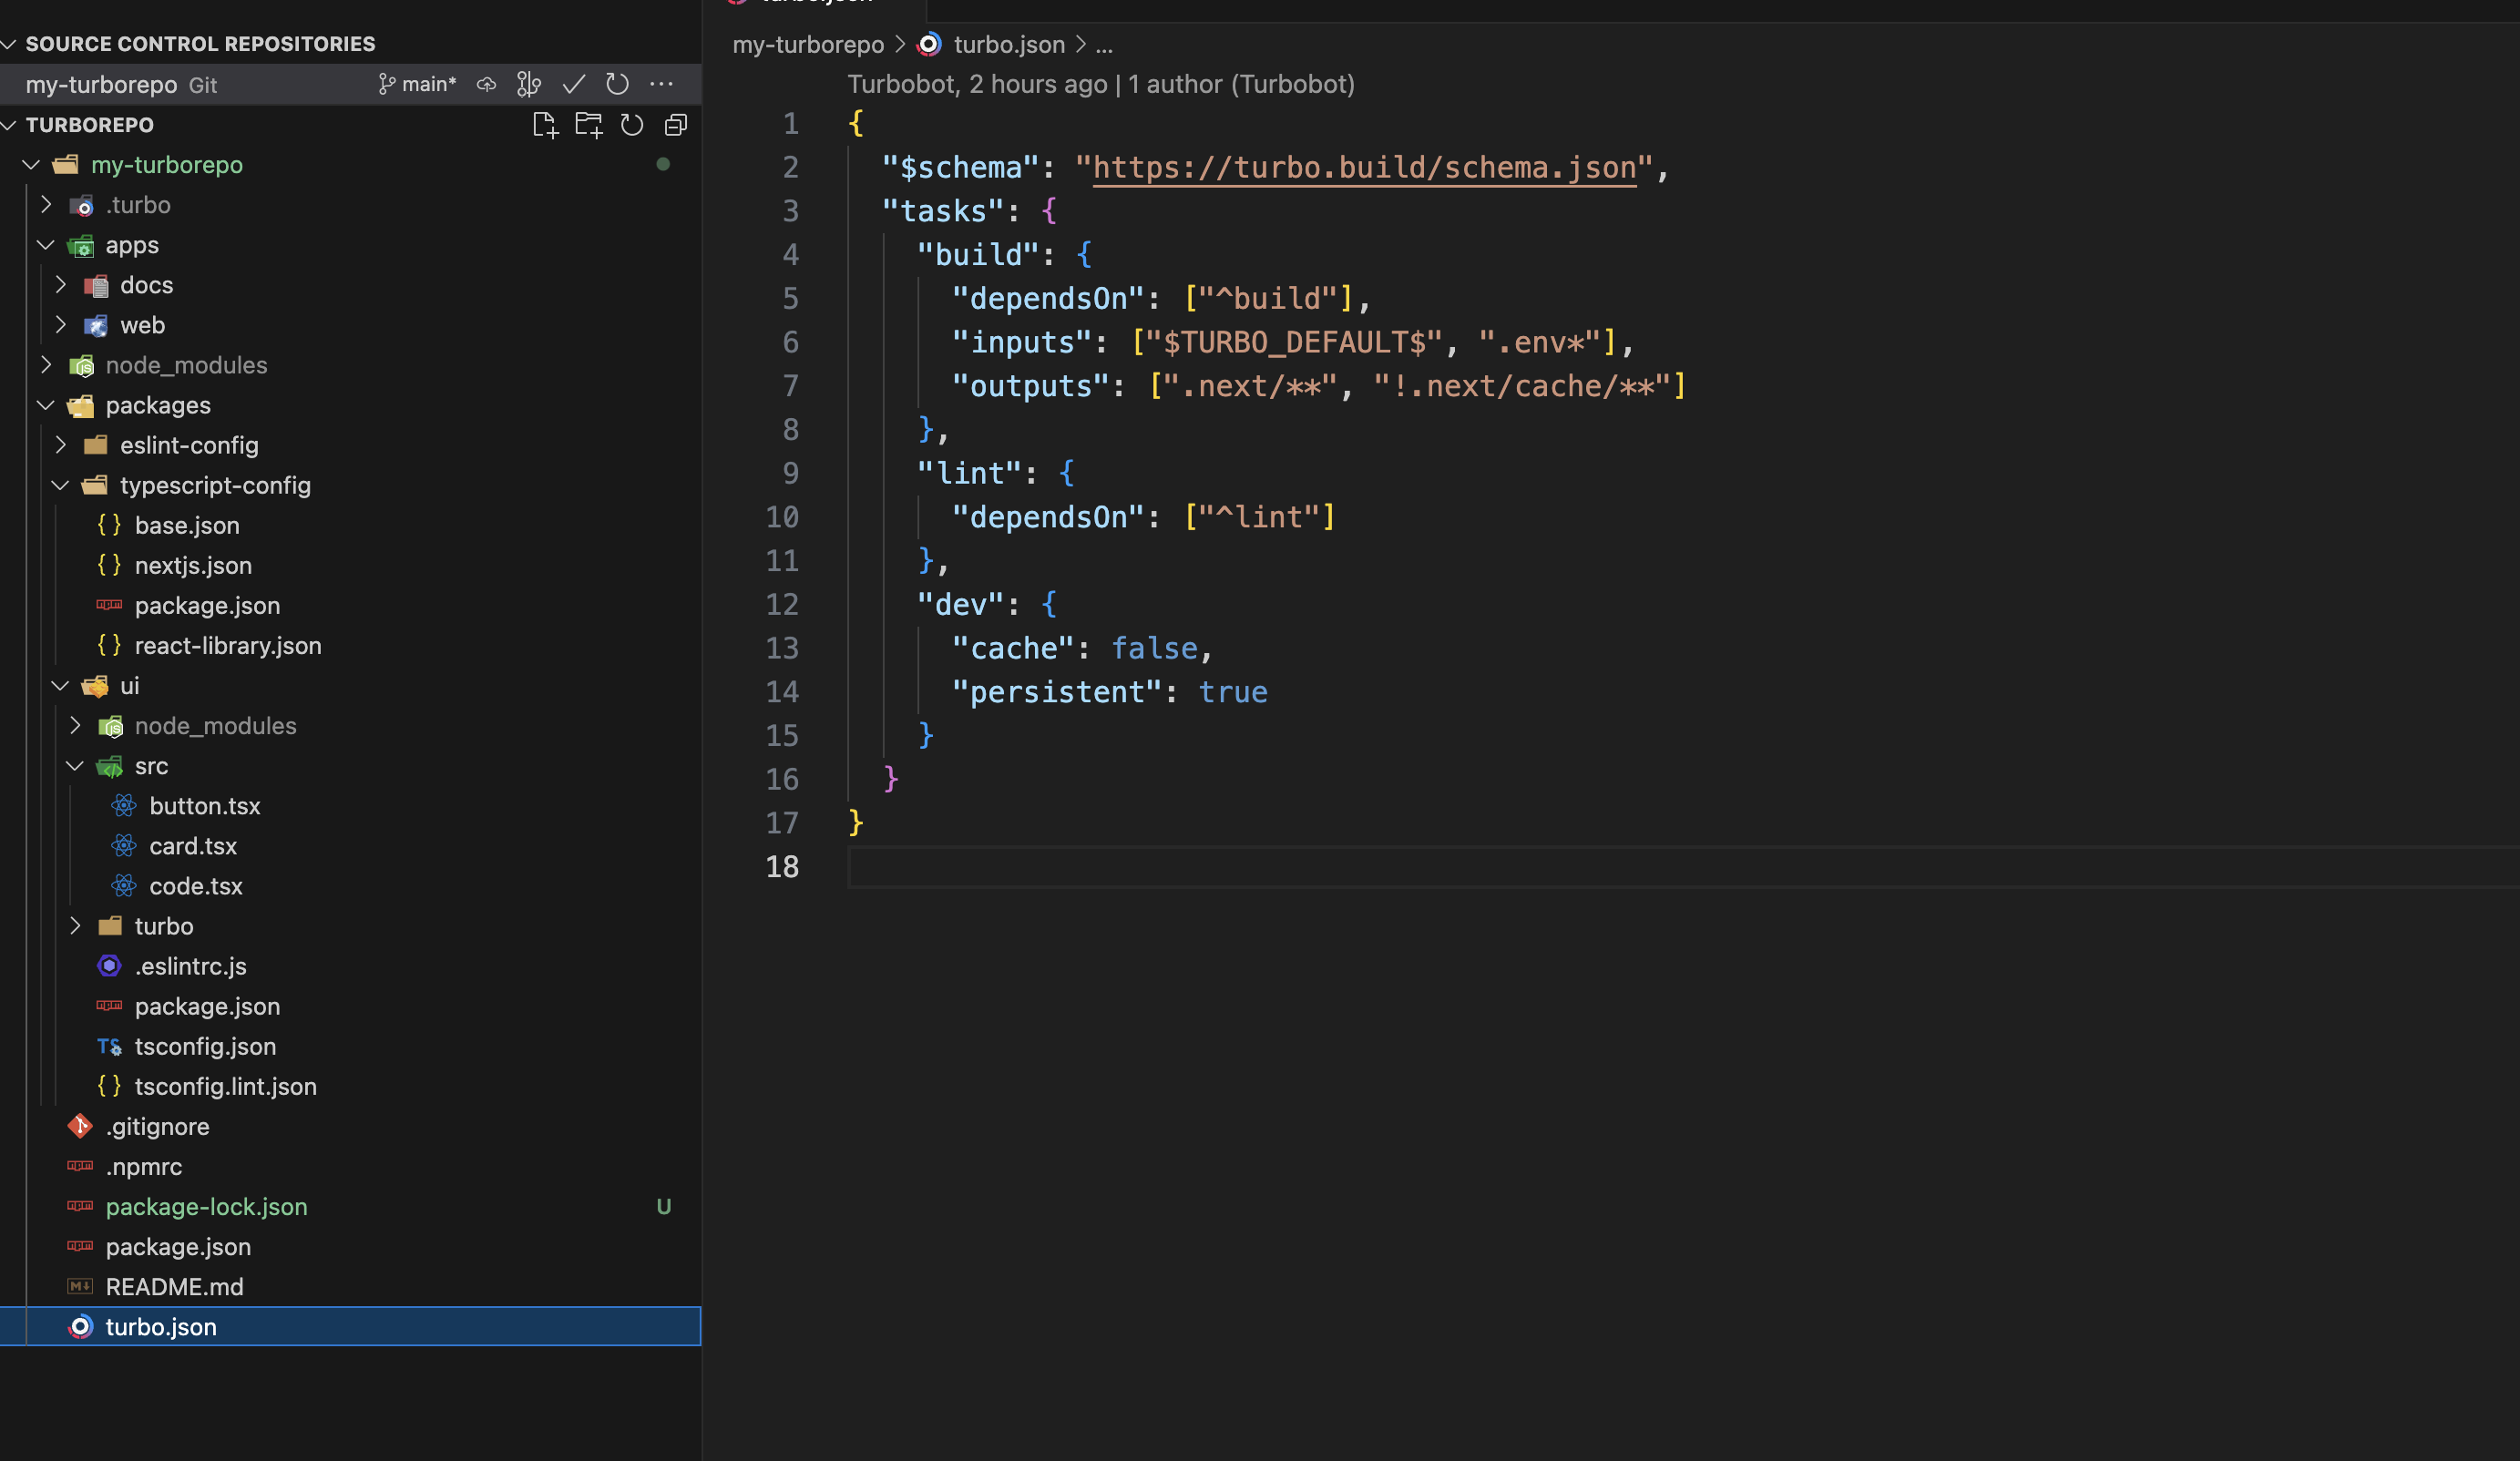
Every task that's registered inside turbo.json can be run with turbo run <task>.
8. Building with Turborepo:
Let's build our project by running npm run build. This command will execute the build script for all workspaces that have one. Right now, only the "docs" and "web" workspaces have a build script in their package.json, so only those will be built.
| Let's look inside the build pipeline in turbo.json:
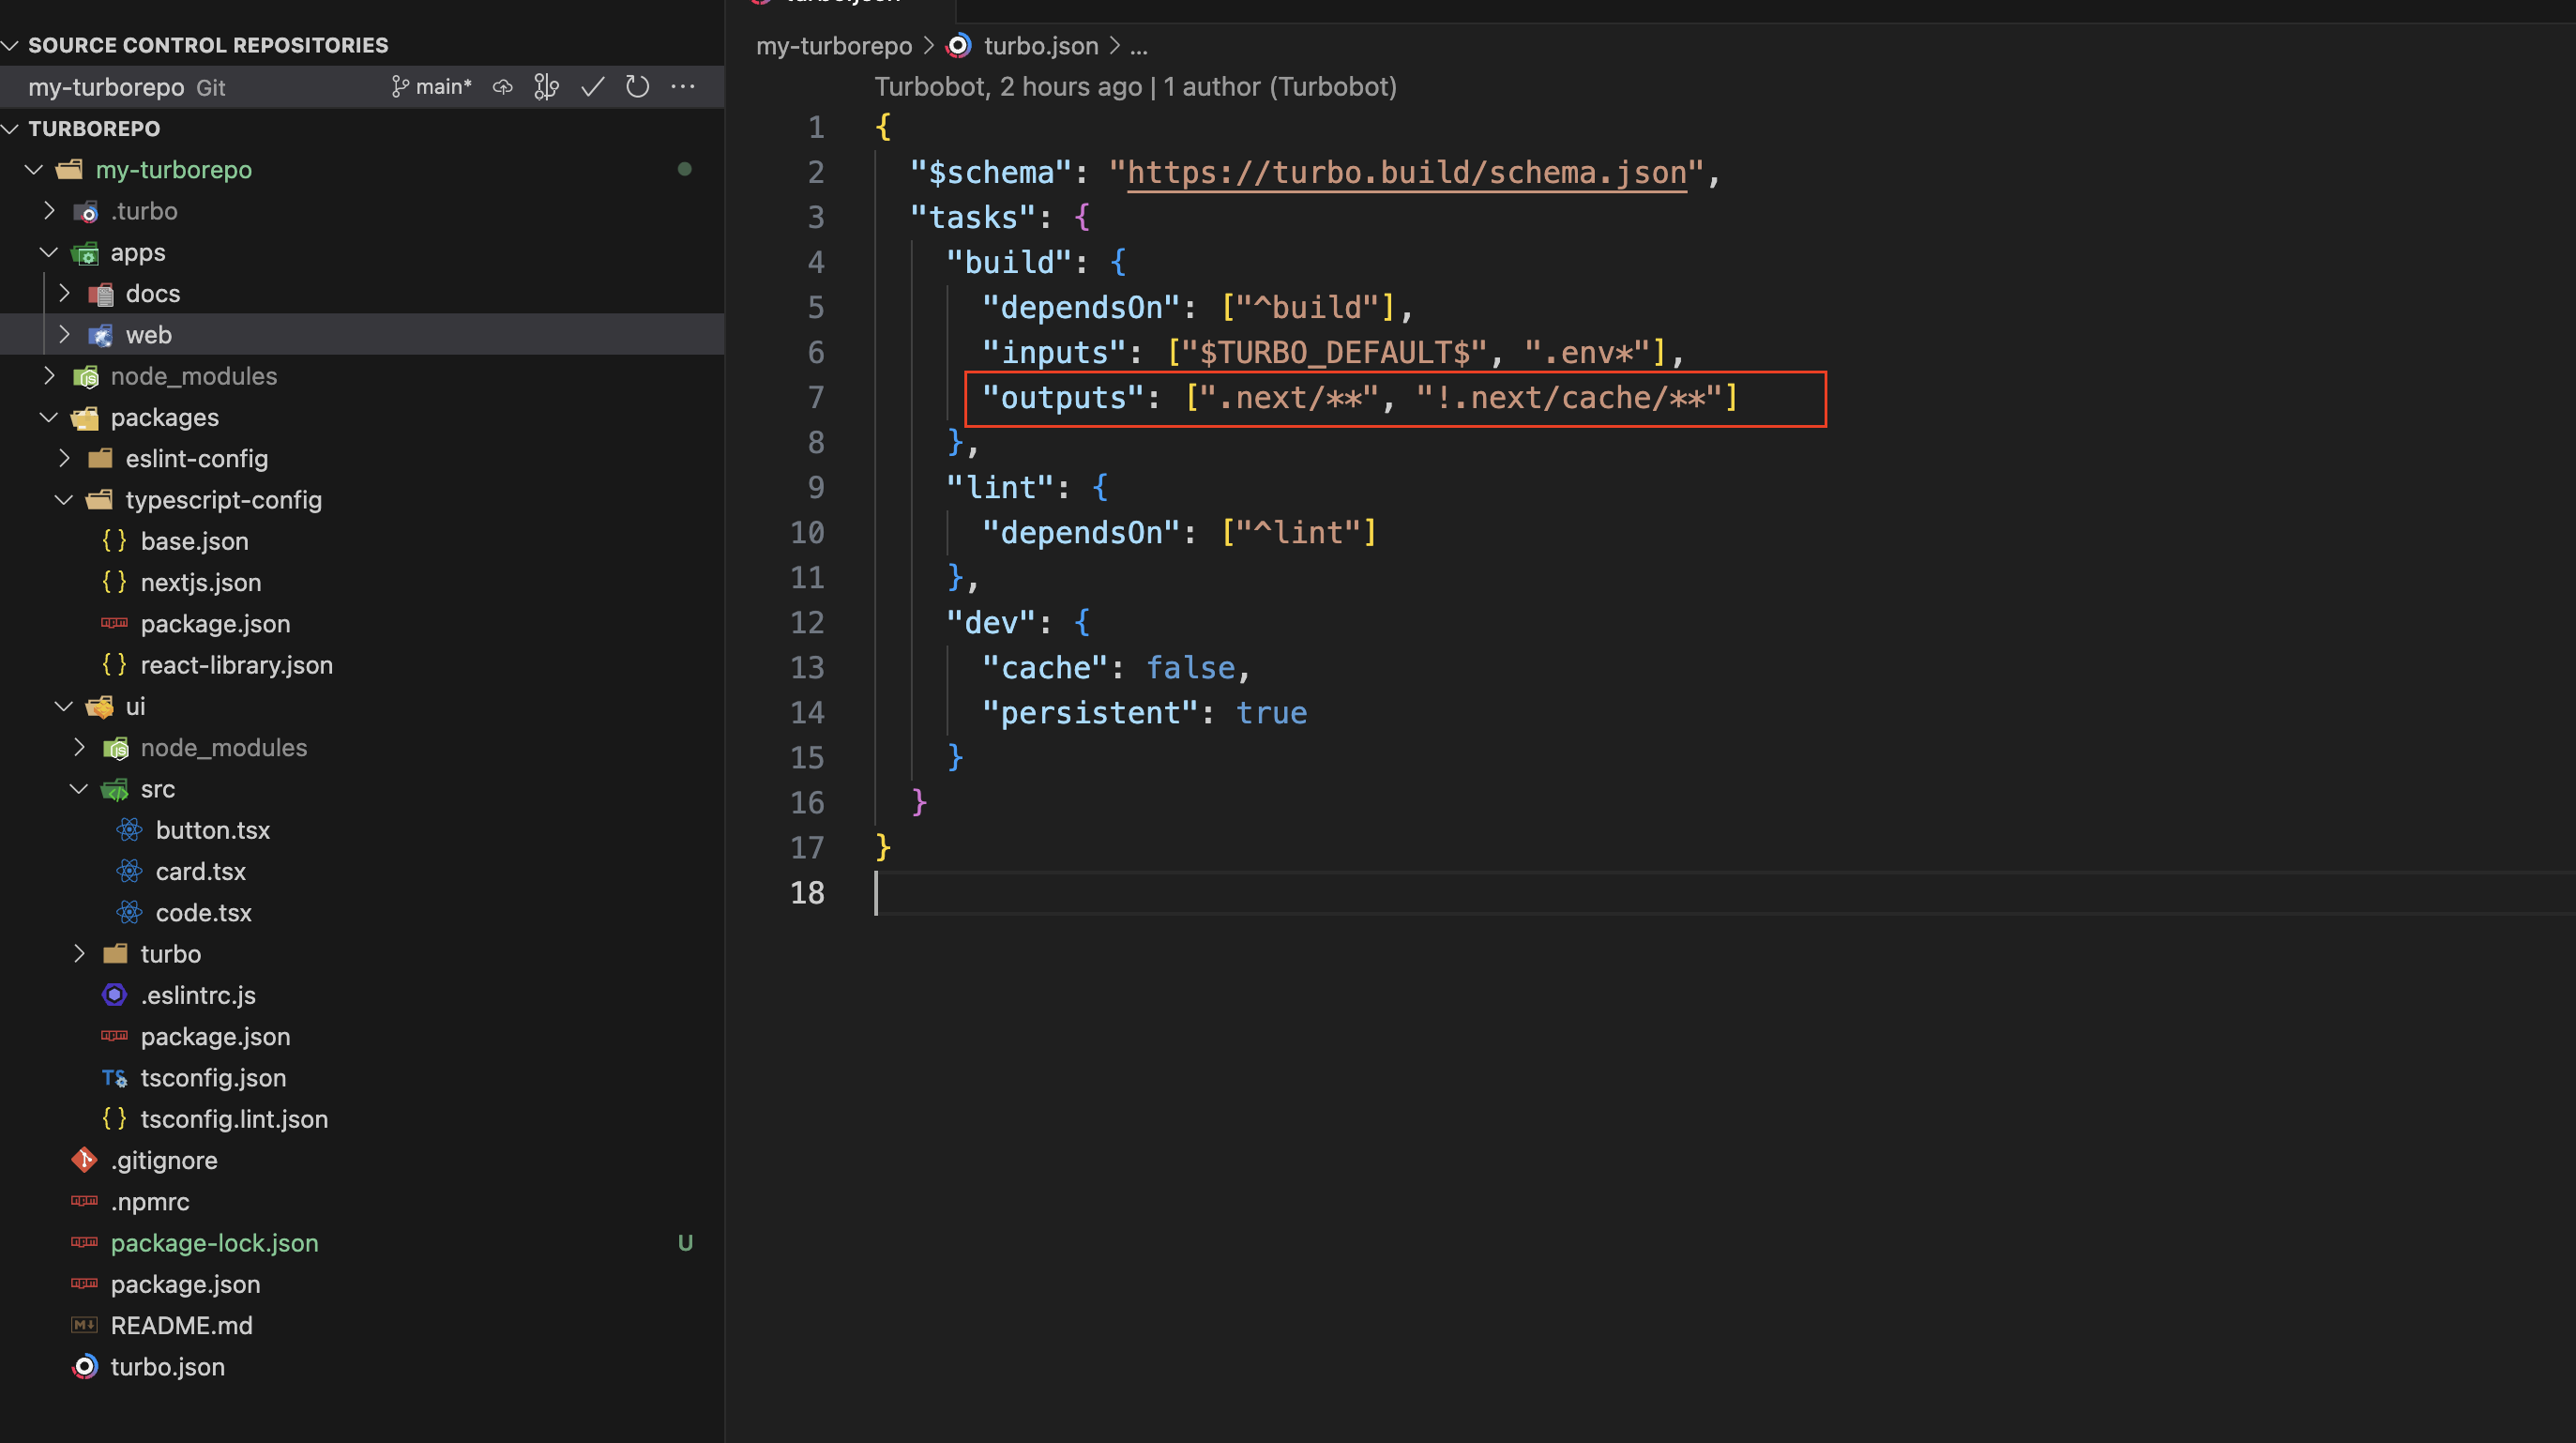
Specifying outputs for the build pipeline means that when Turbo finishes running that task, it'll save the output you specify in its cache.
To see this in action, delete the apps/docs/.next build folder and run the build script again. Since Turborepo has cached the result of our previous build, it will restore the entire .next folder from the cache instantly, without having to run the build process again, making it extremely fast and efficient.
9. Running Dev Scripts:
Only two scripts will execute docs:dev and web:dev, as these are the only two workspaces that specify dev. Both dev scripts will run simultaneously, starting your Next.js applications on ports 3000 and 3001.
| Let's look at the dev pipeline in turbo.json:
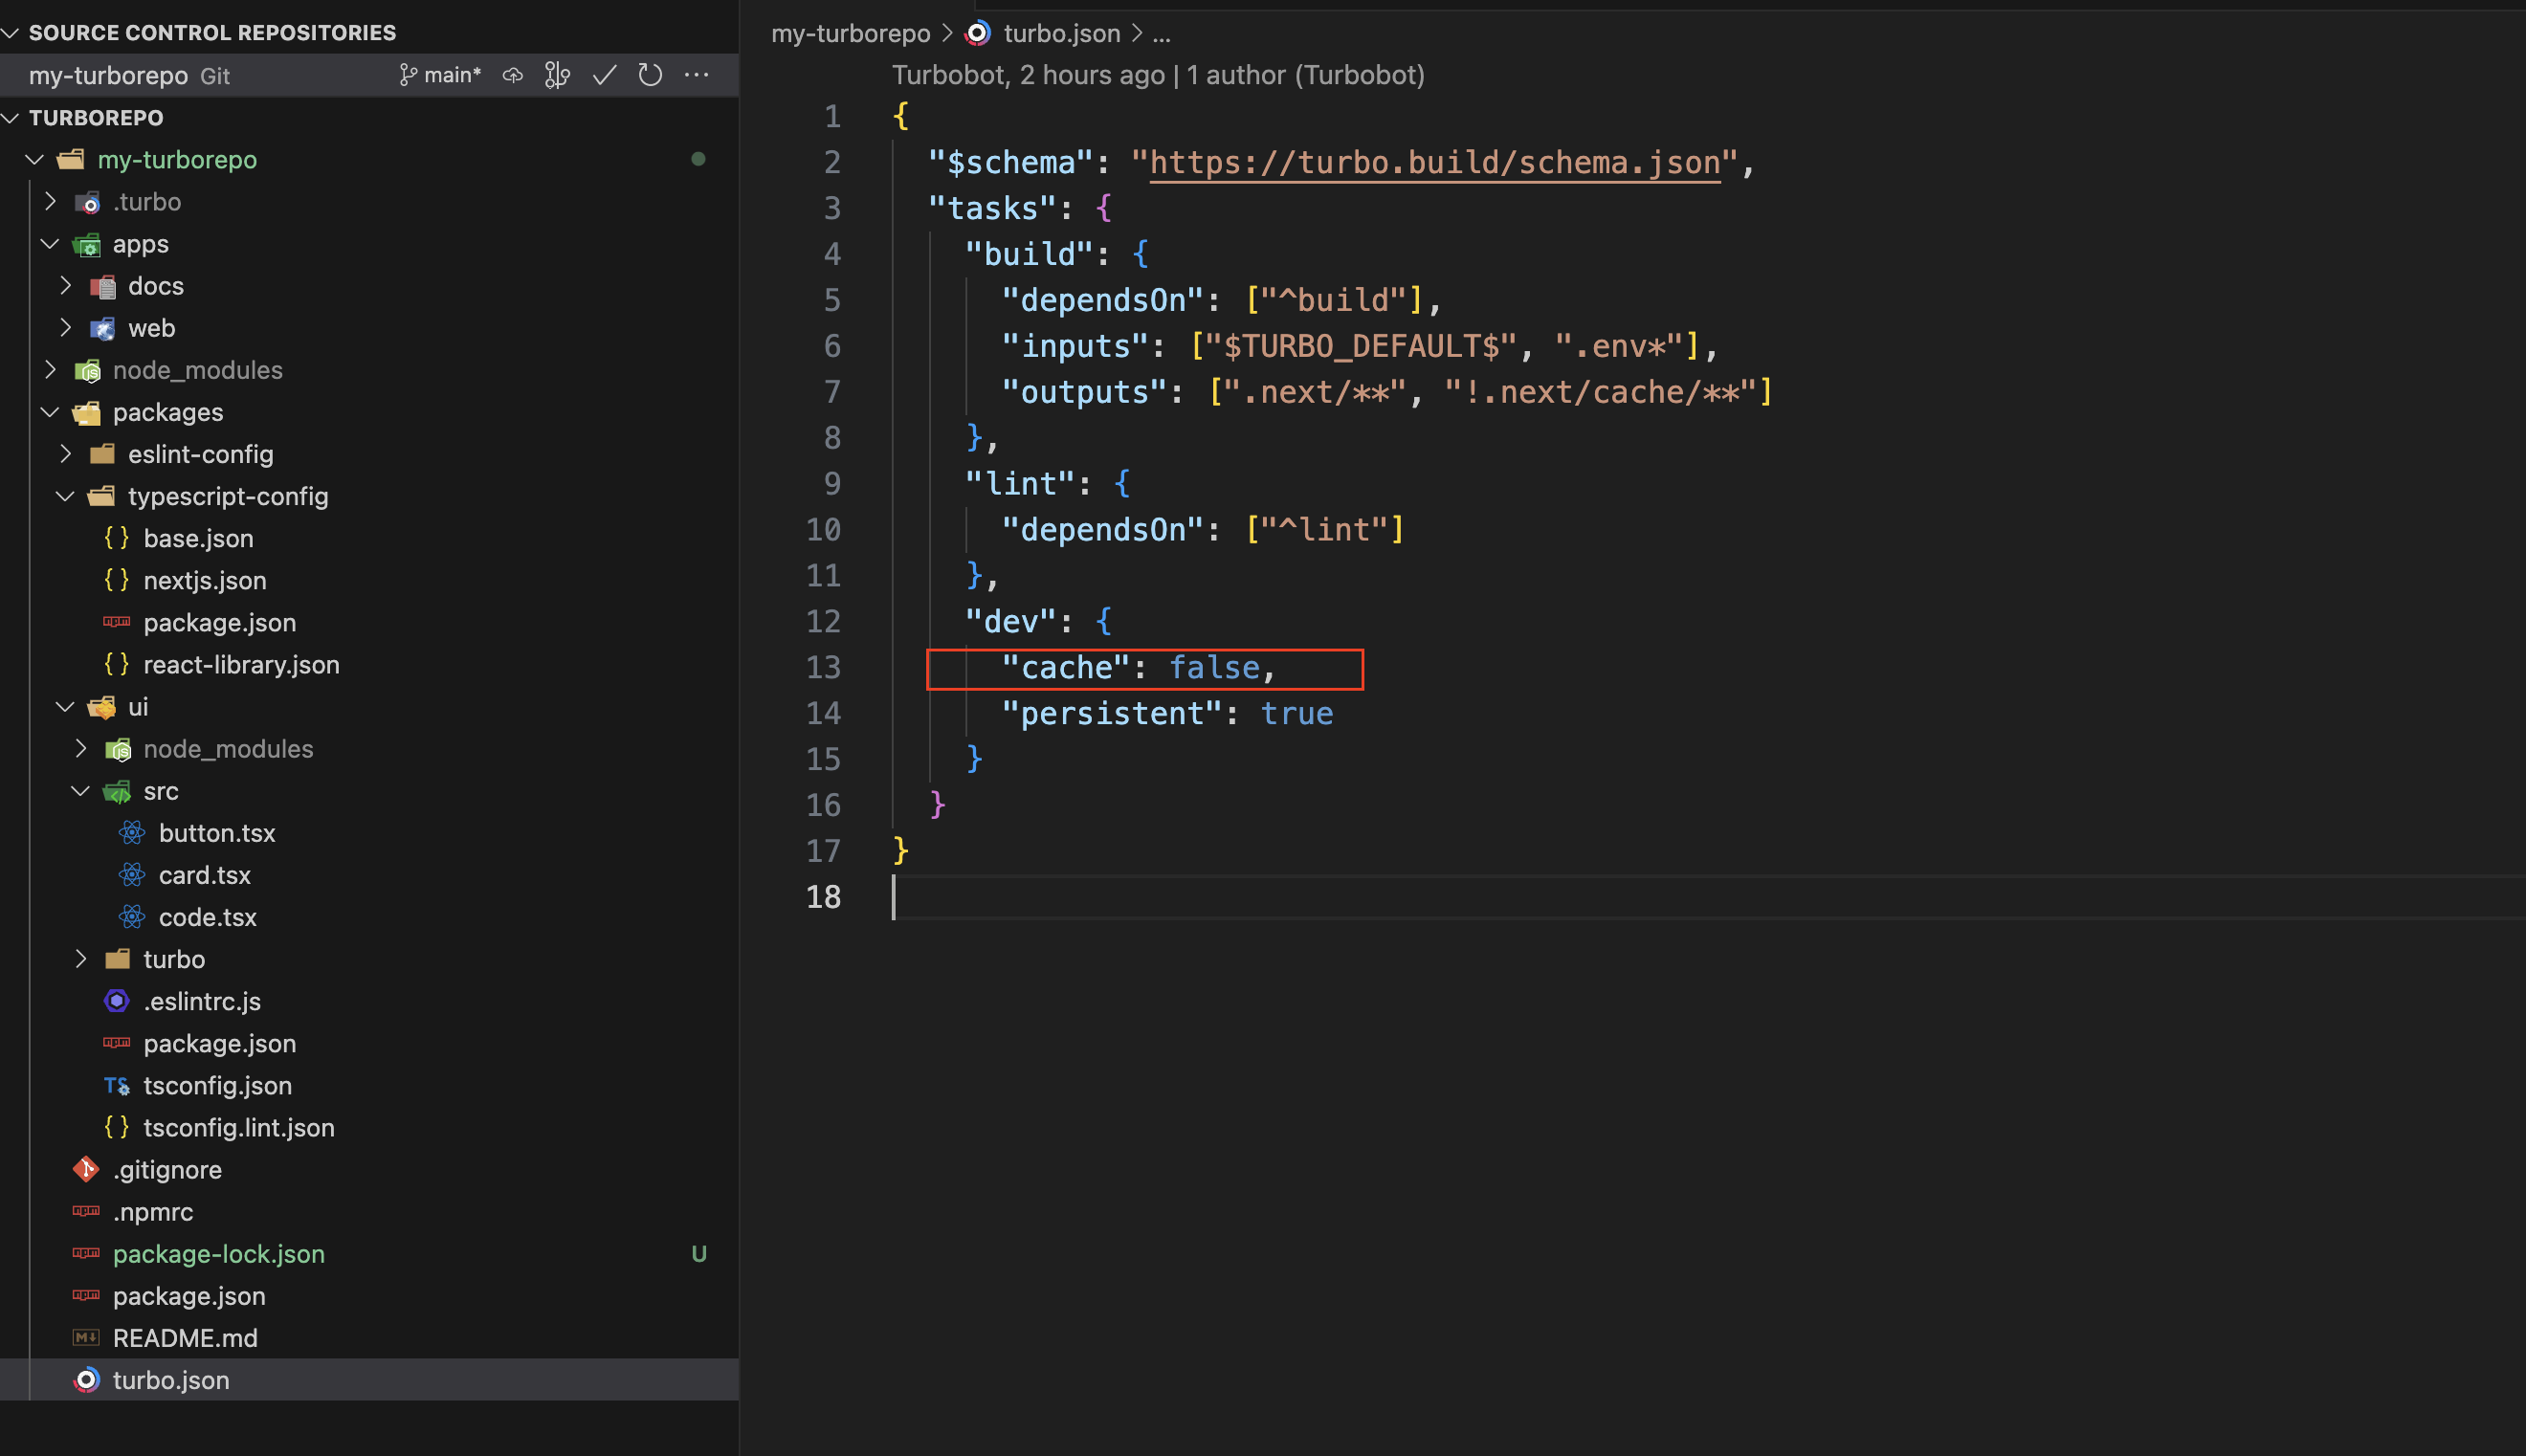
Inside the dev pipeline, we have specified "cache": false. This instructs Turborepo not to cache the results of the dev script.
10. ADDING TAILWINDCSS
We can set up our workspaces to share a single tailwind.config.js throughout our monorepo. First, we will create a new workspace in the packages folder, naming it "tailwind-config." This workspace will house our shared Tailwind CSS configuration:
First, create the package.json file:
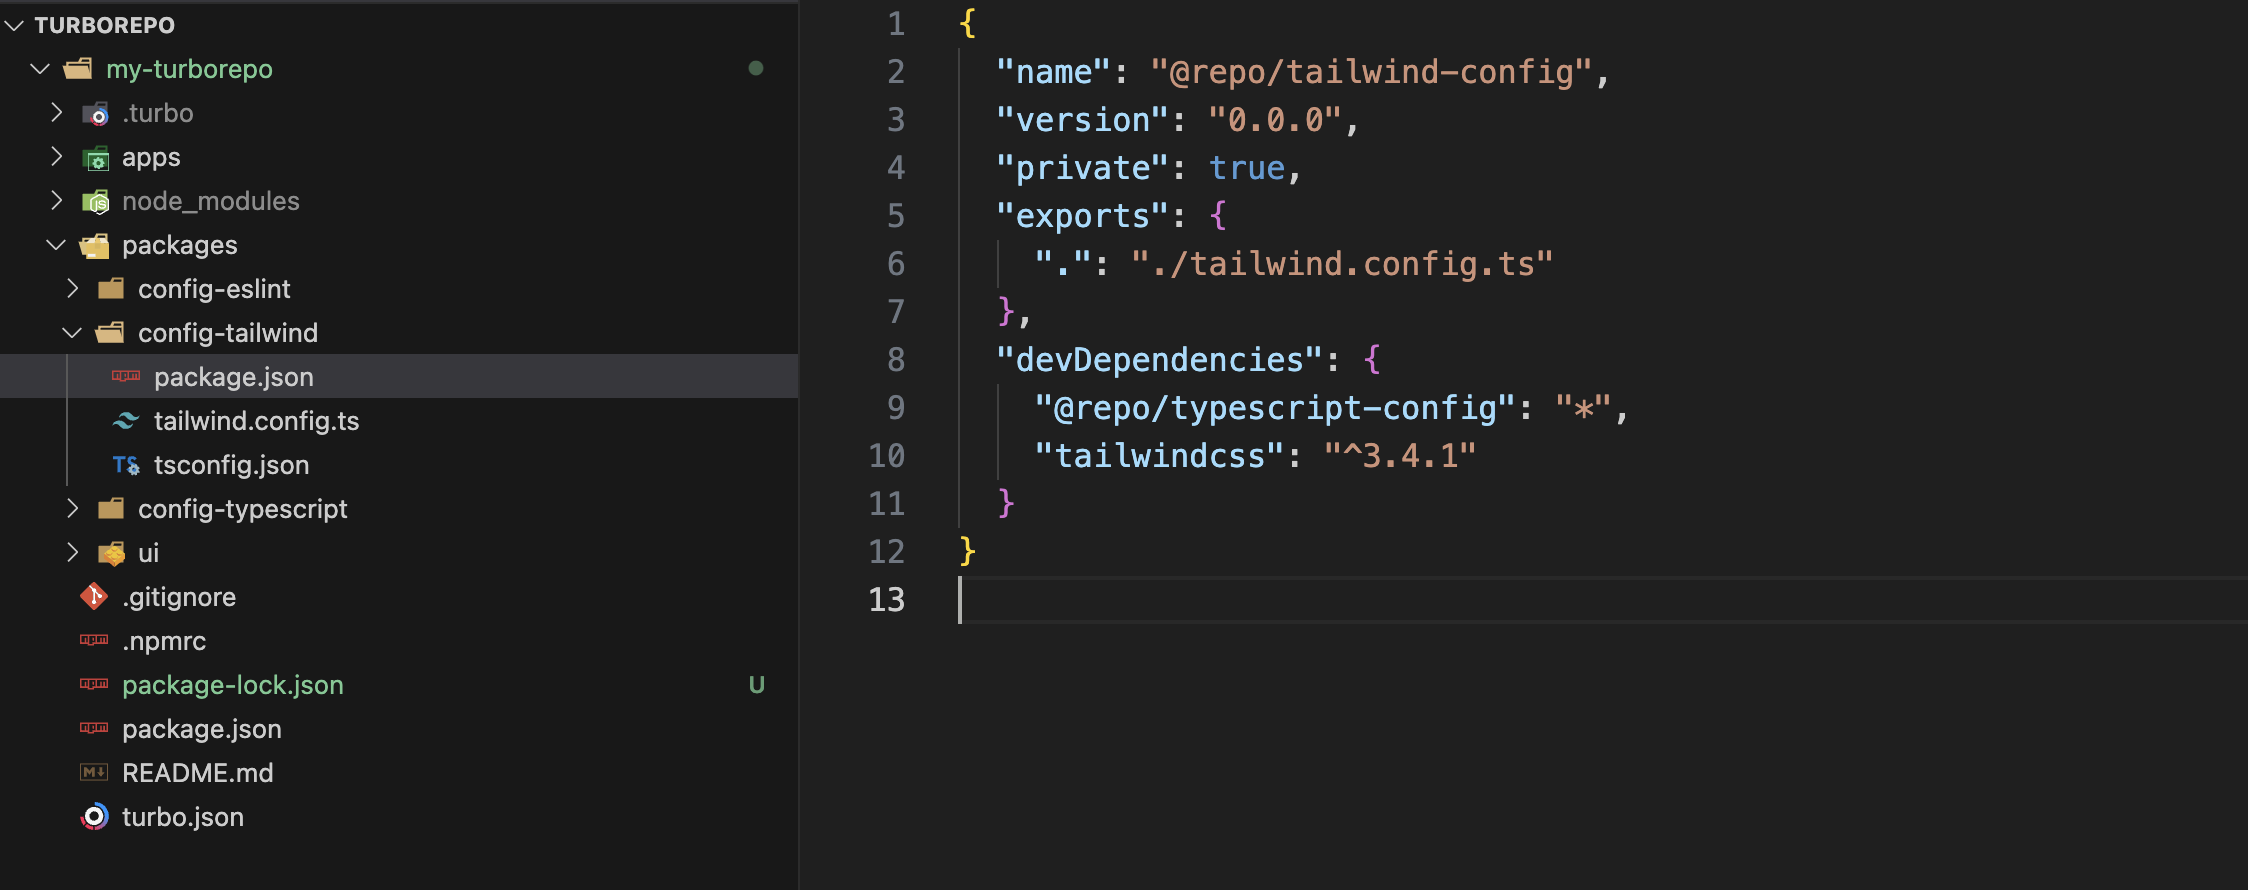
Next, create the tailwind.config.js file and include your common classes that are used across all applications. This way, we avoid rewriting the common classes in every application.
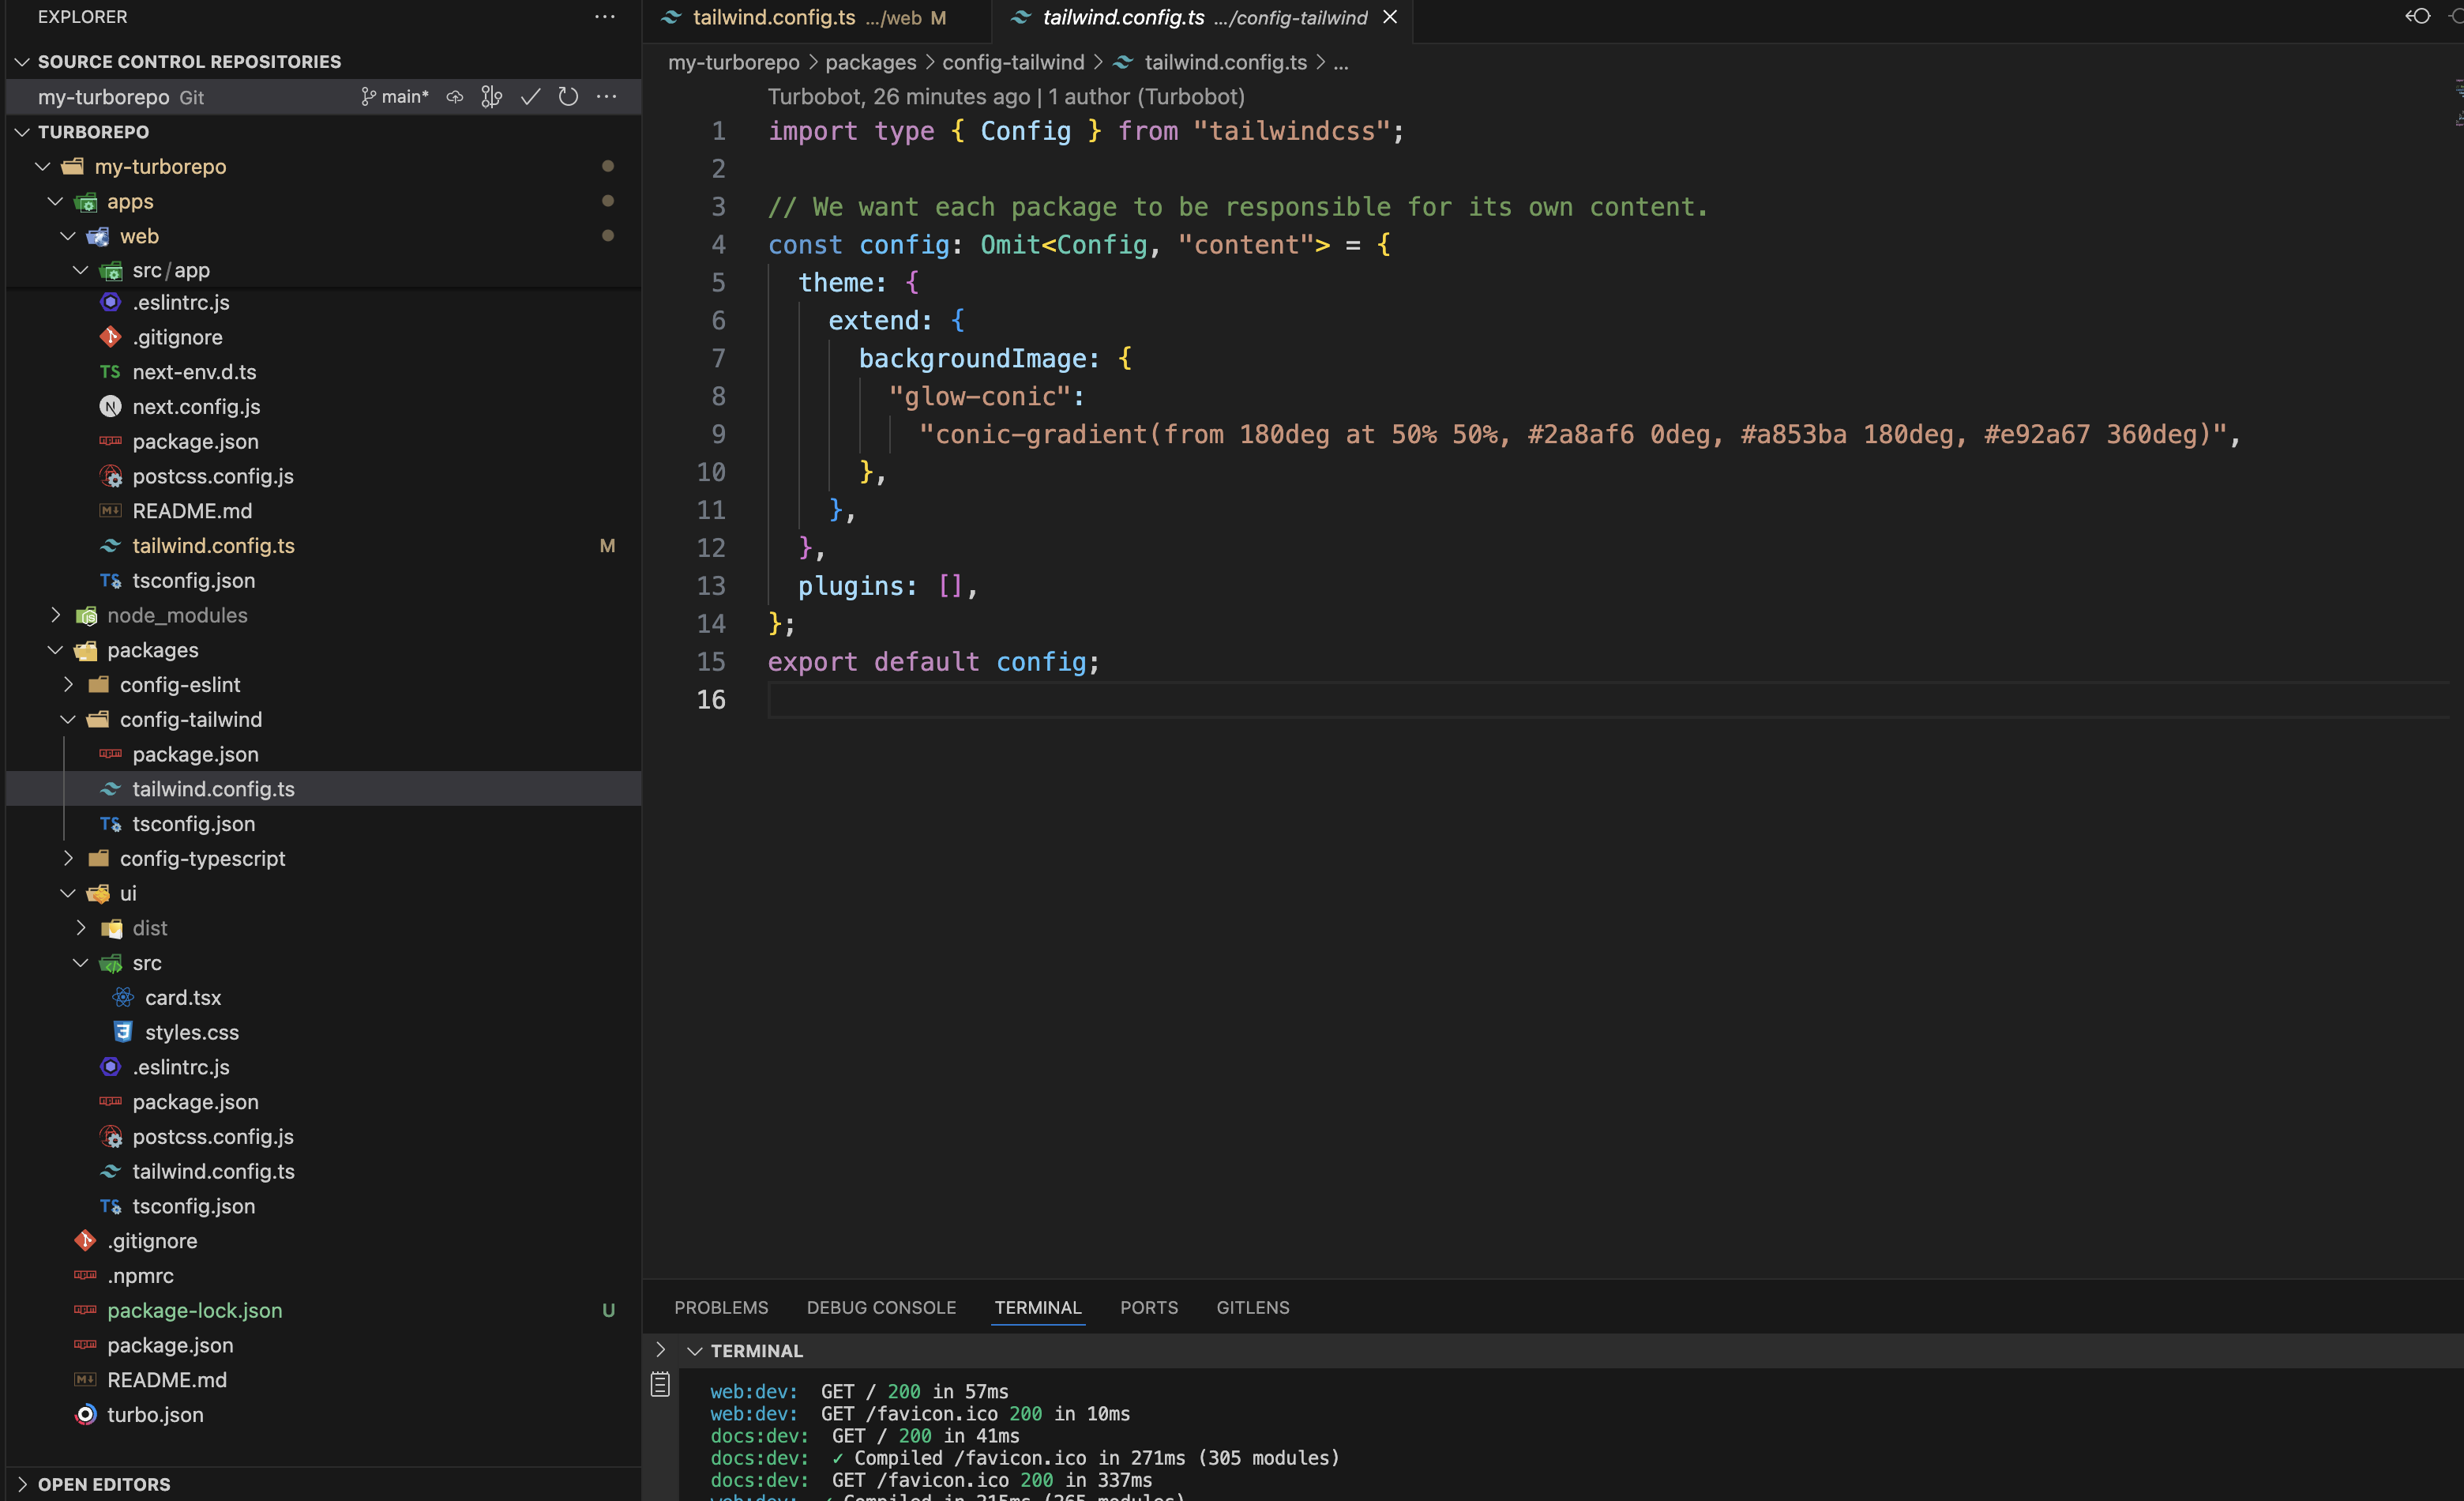
Next, let's add tailwind and its dependencies to our "web" workspace and extend our shared config to use tailwind:
npm install --save-dev tailwindcss postcss autoprefixer
npx tailwindcss init -p
Let's also add our local "tailwind-config" package as a dependency to our "web" app, so we can use the shared config.
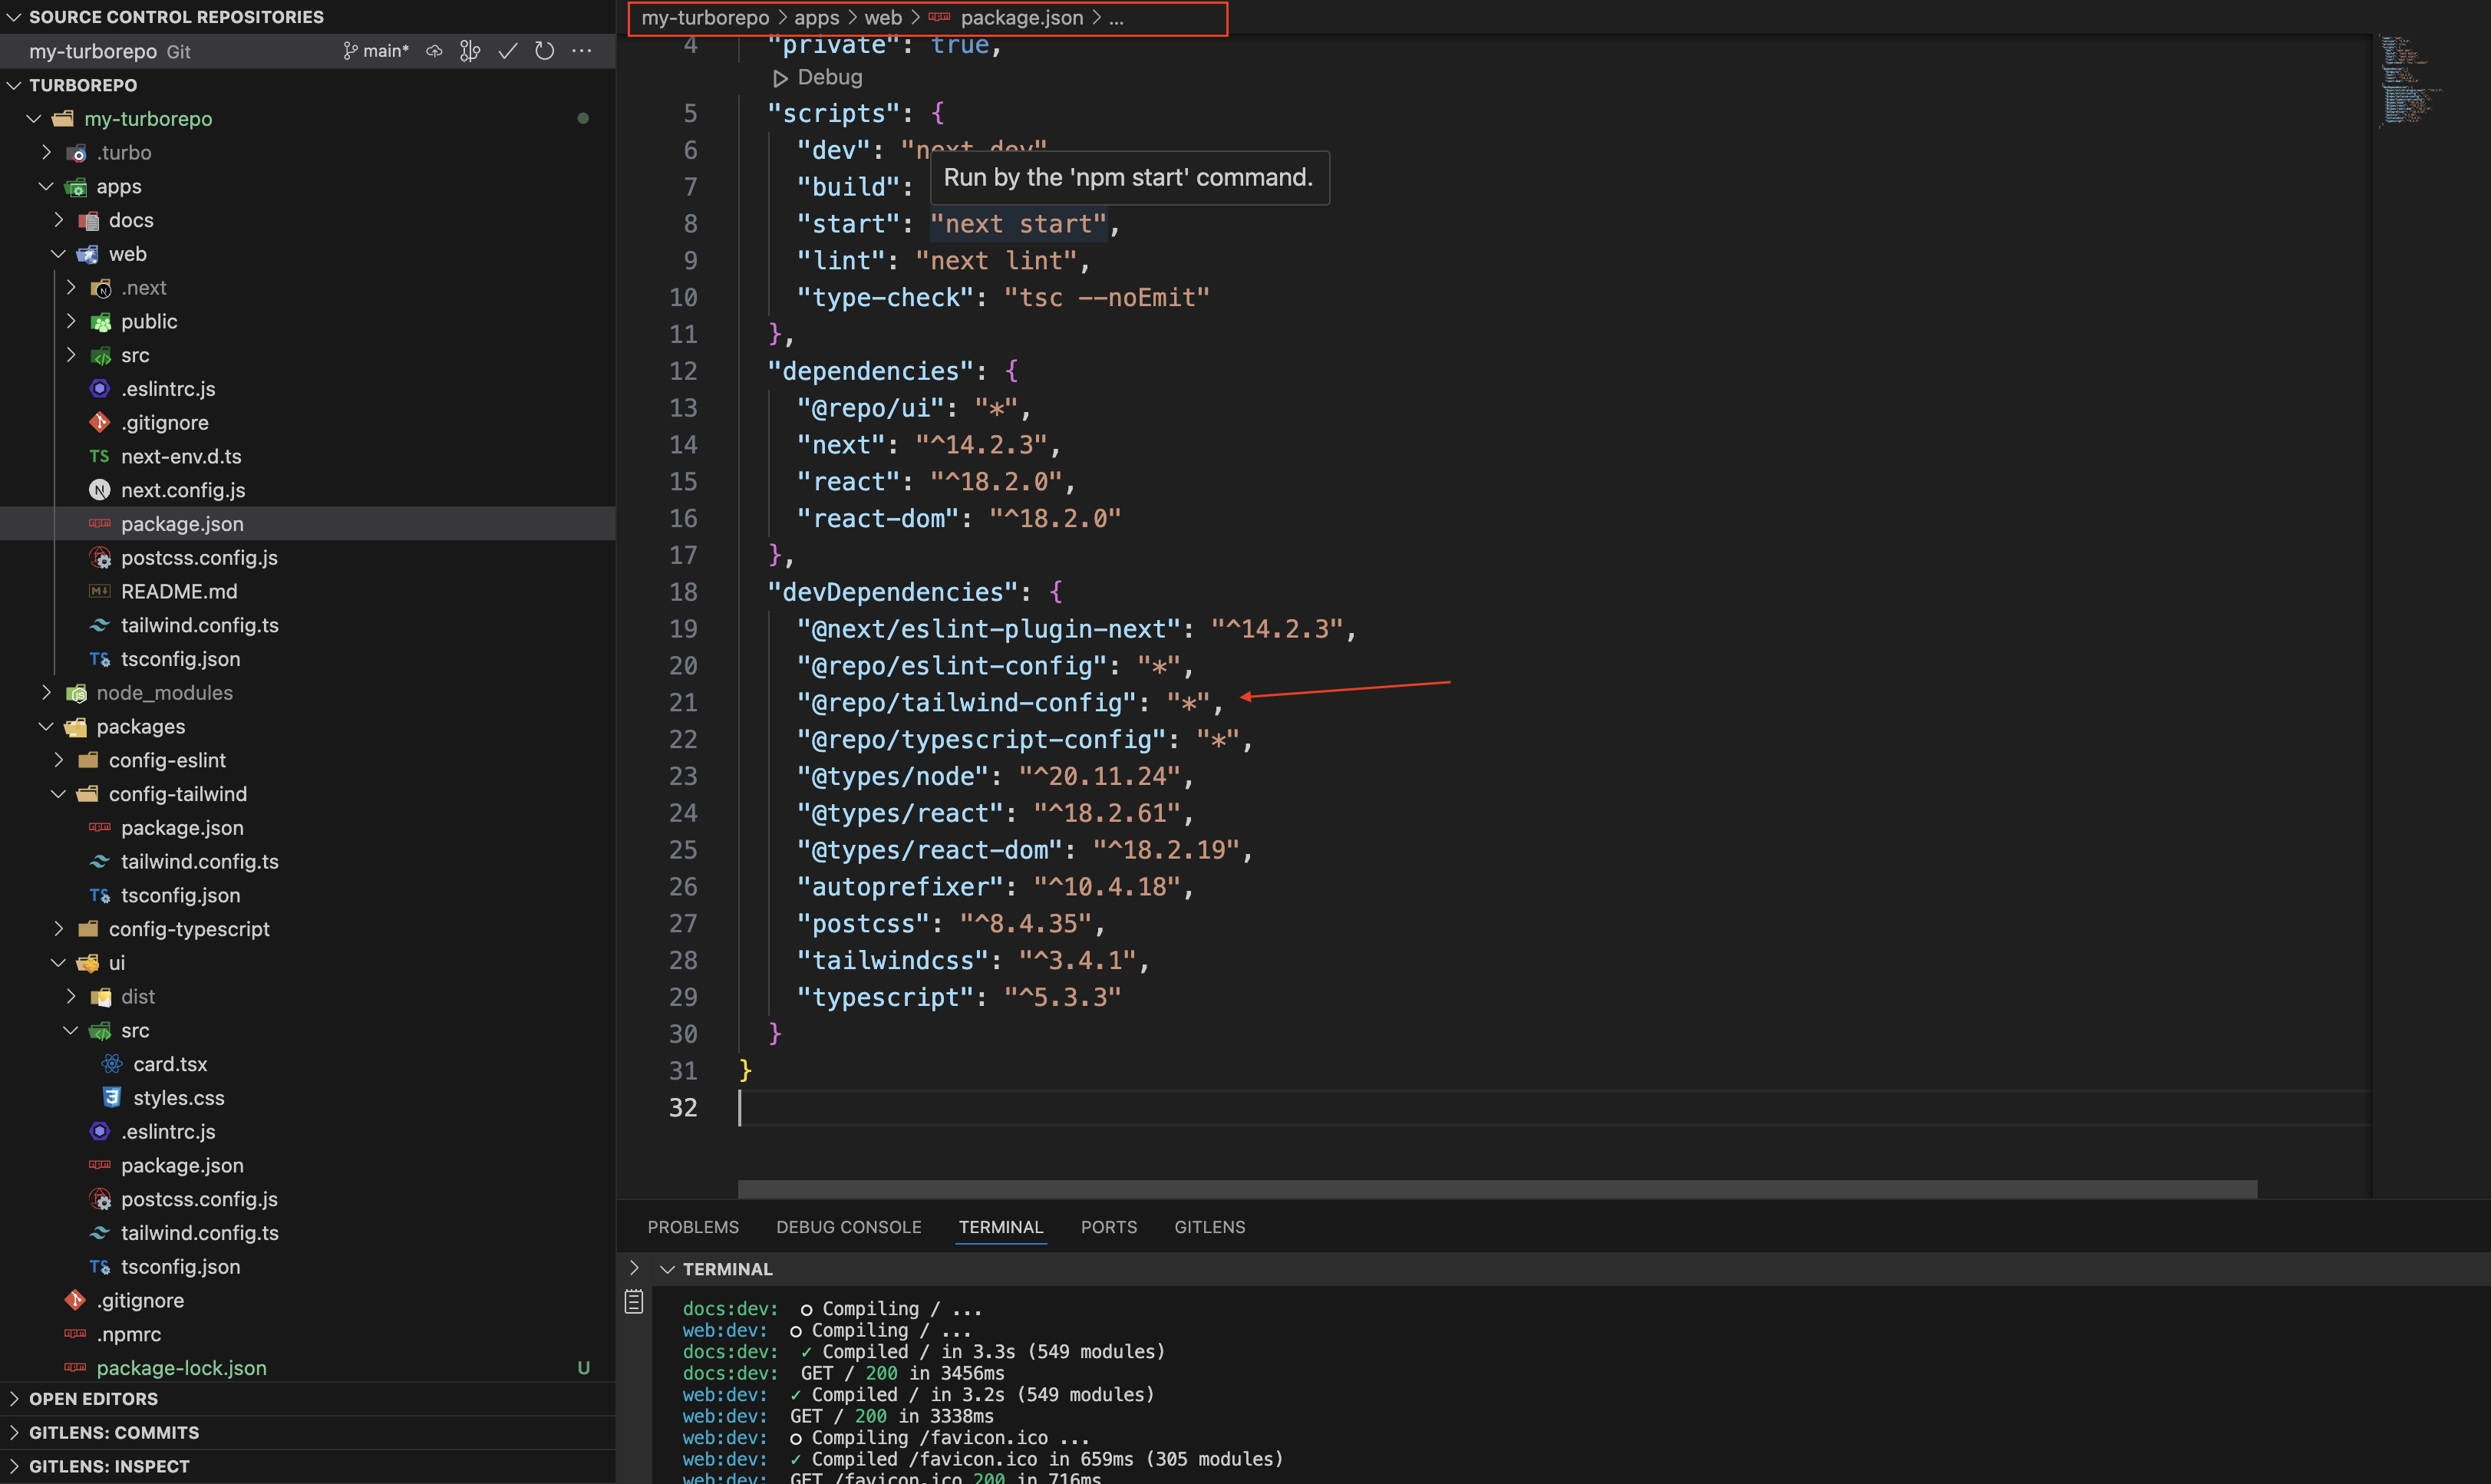
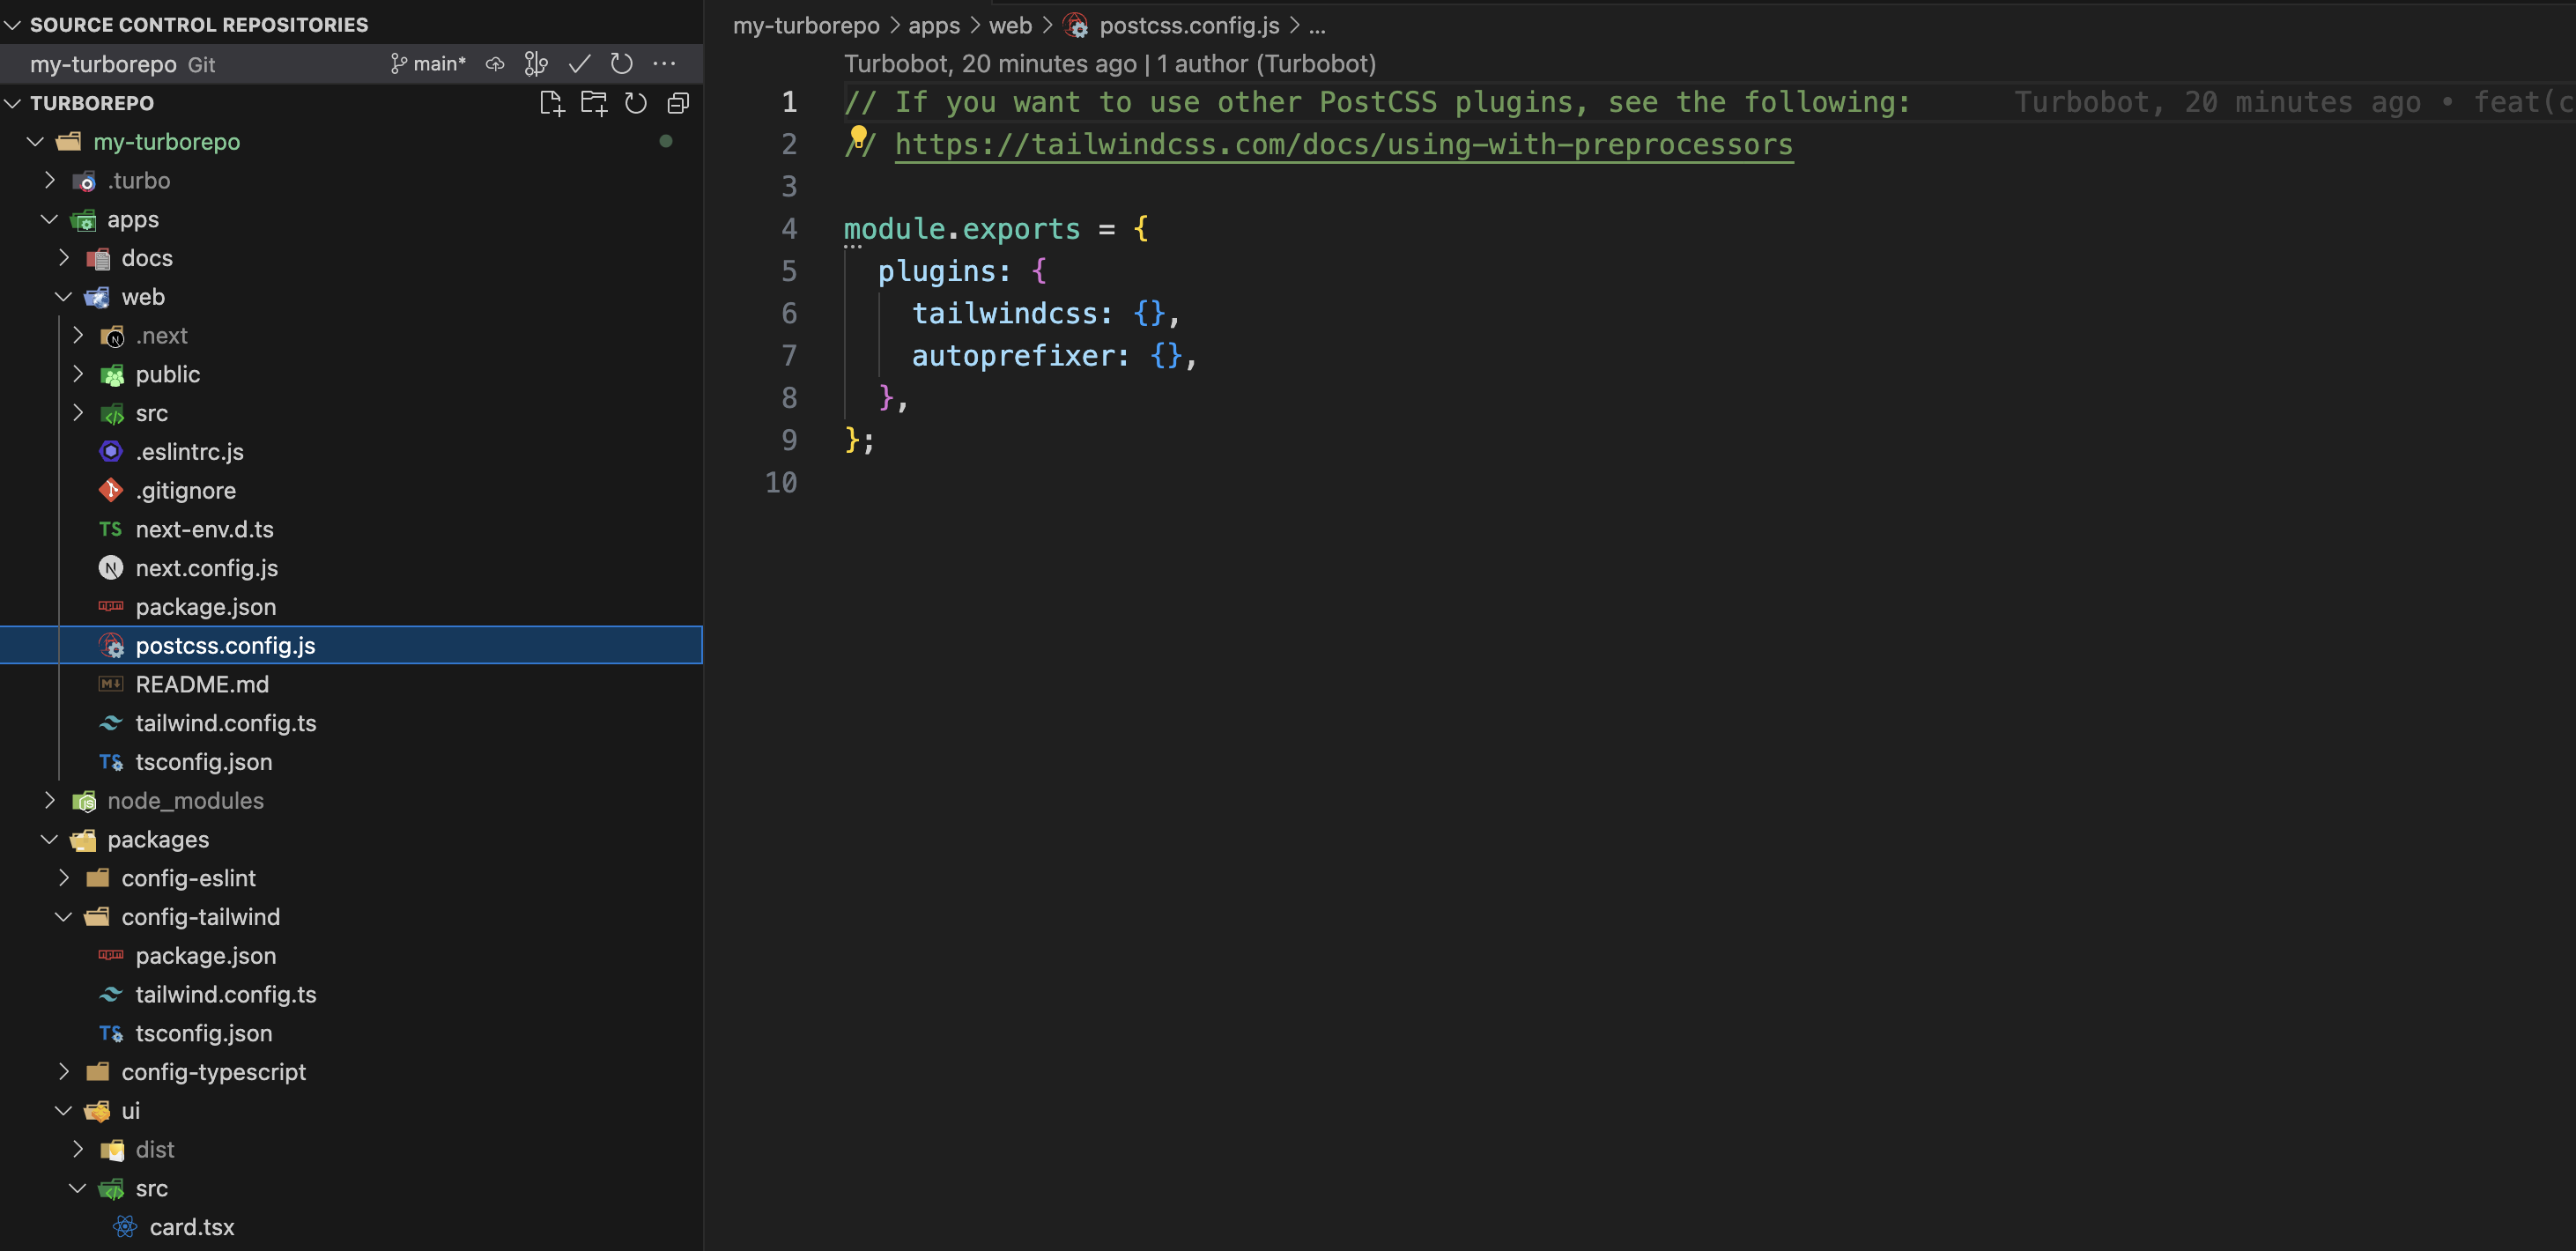
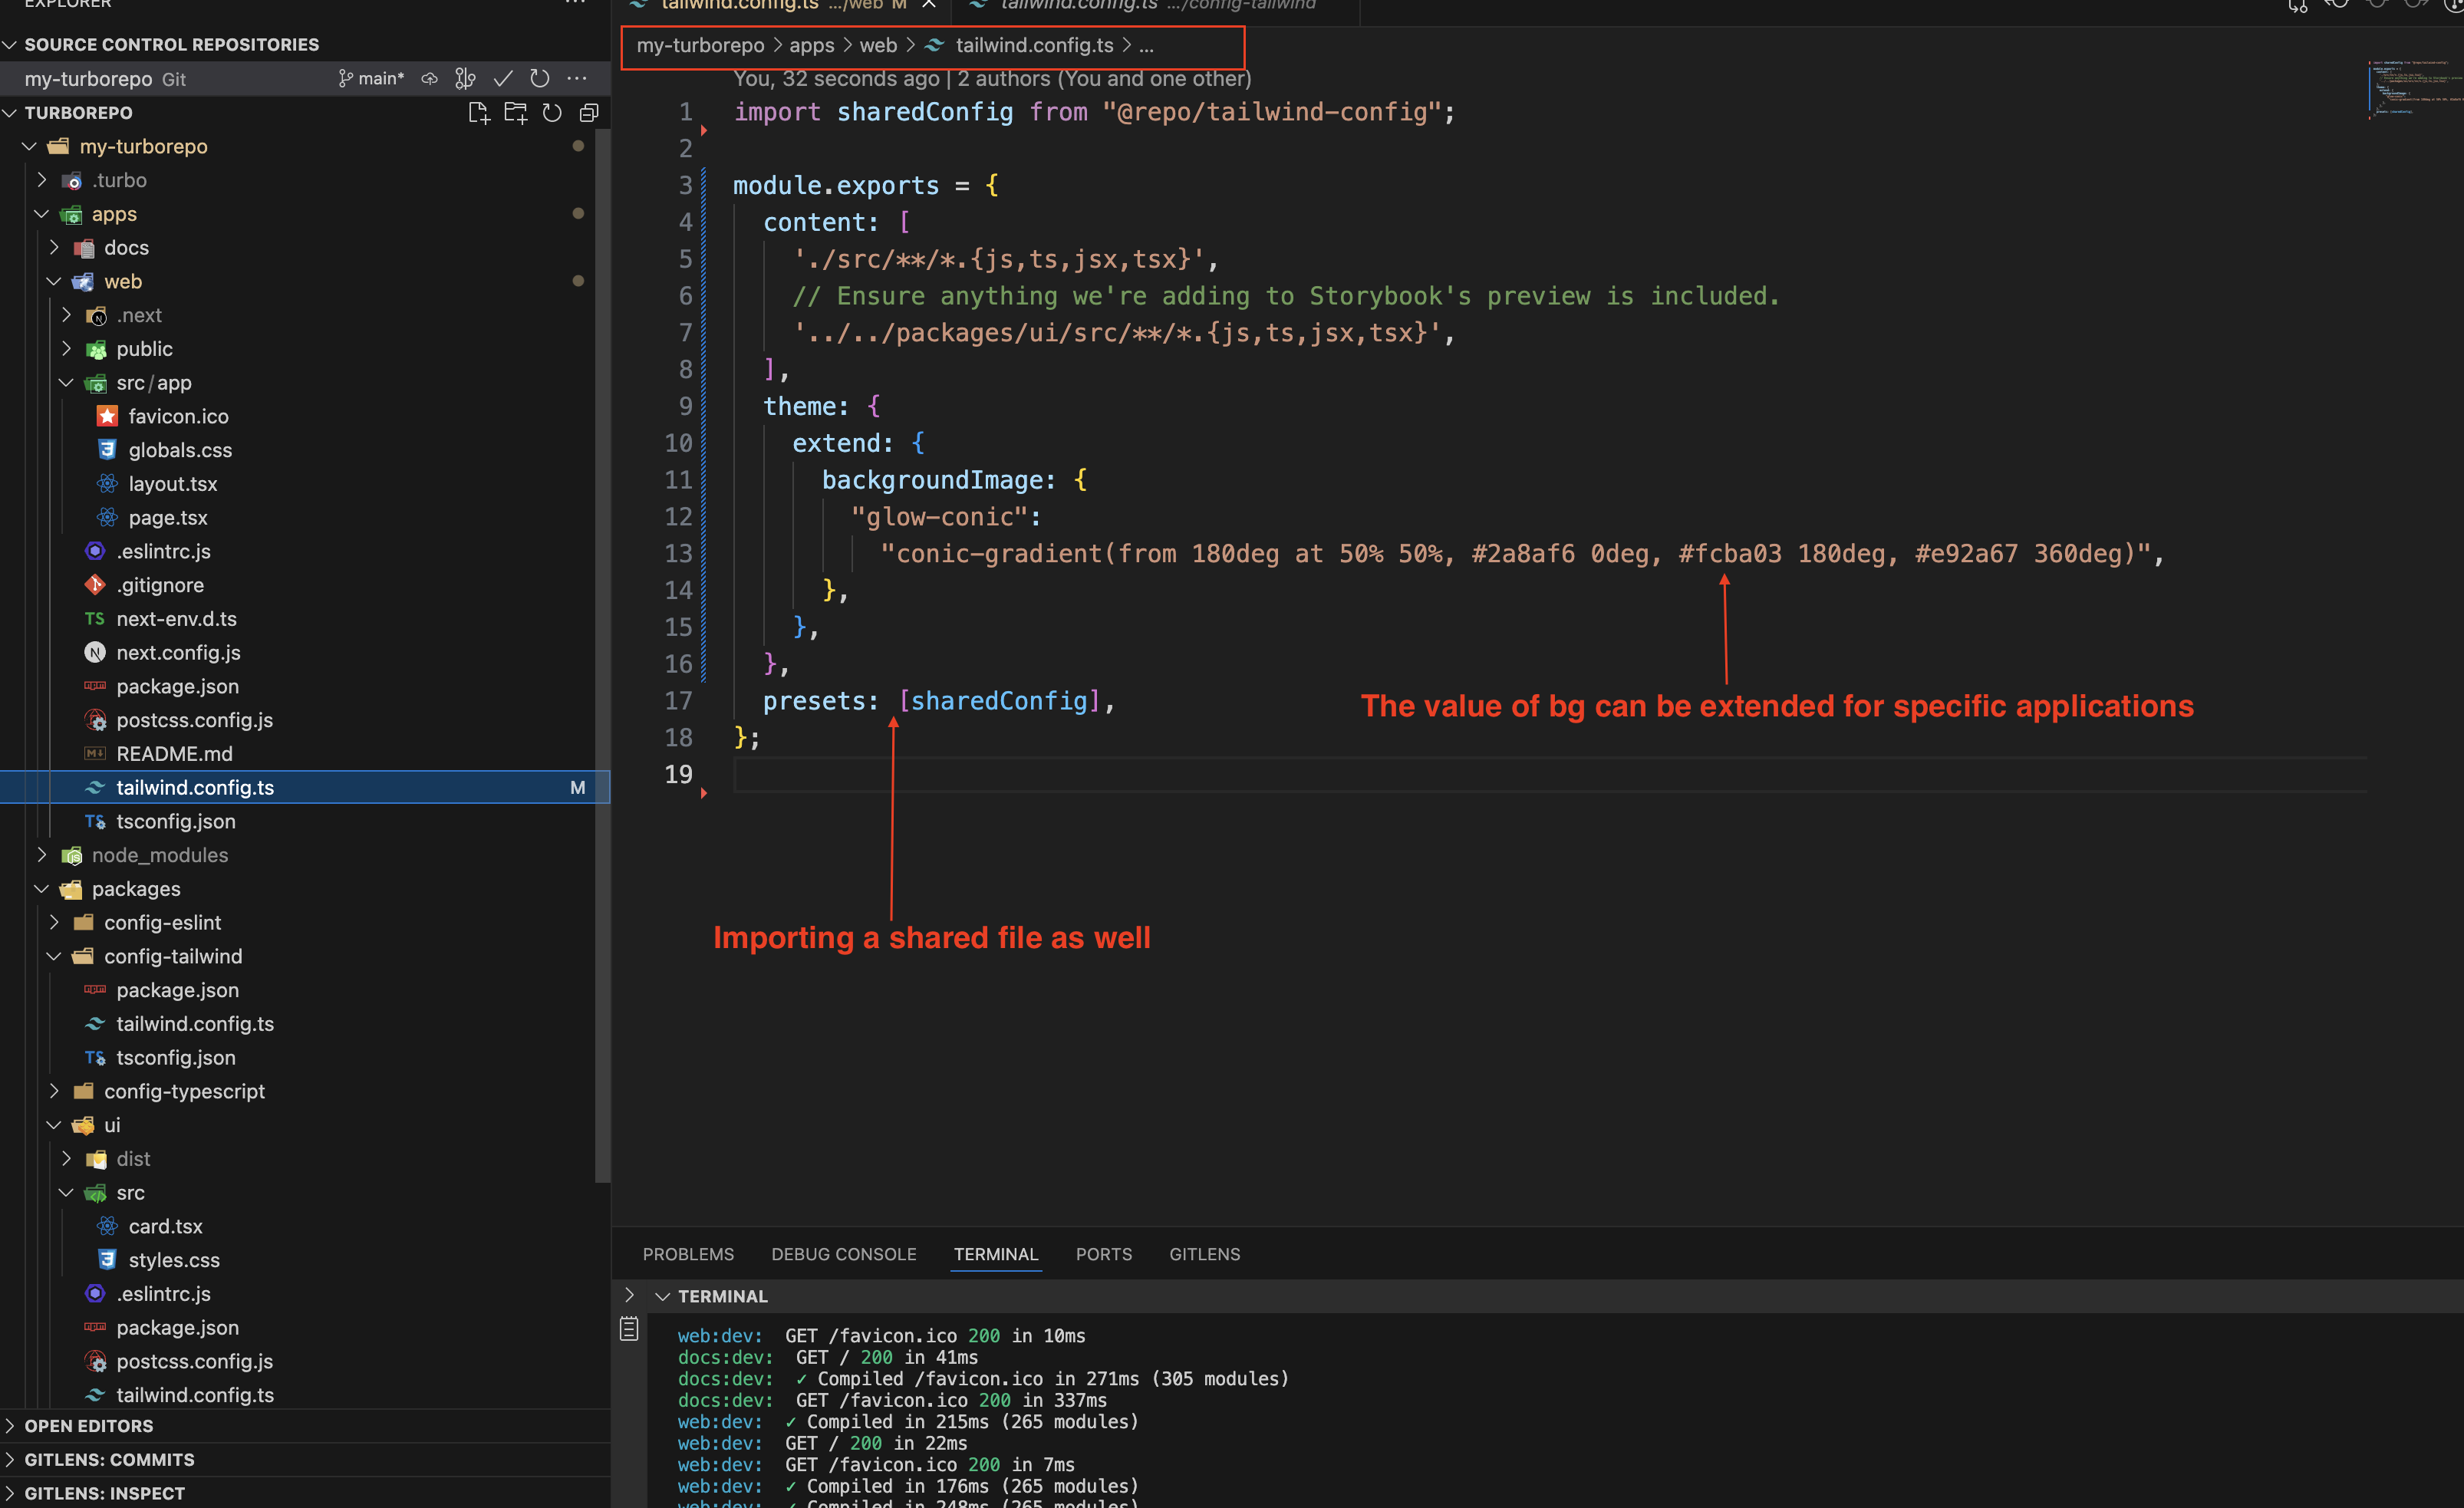
Now, within the newly created tailwind.config.js file in the "web" workspace, we can import our shared configuration from the "tailwind-config" package. Additionally, we can extend the value of any property based on the specific requirements of your application from the shared configuration.
Add the Tailwind directives to your CSS
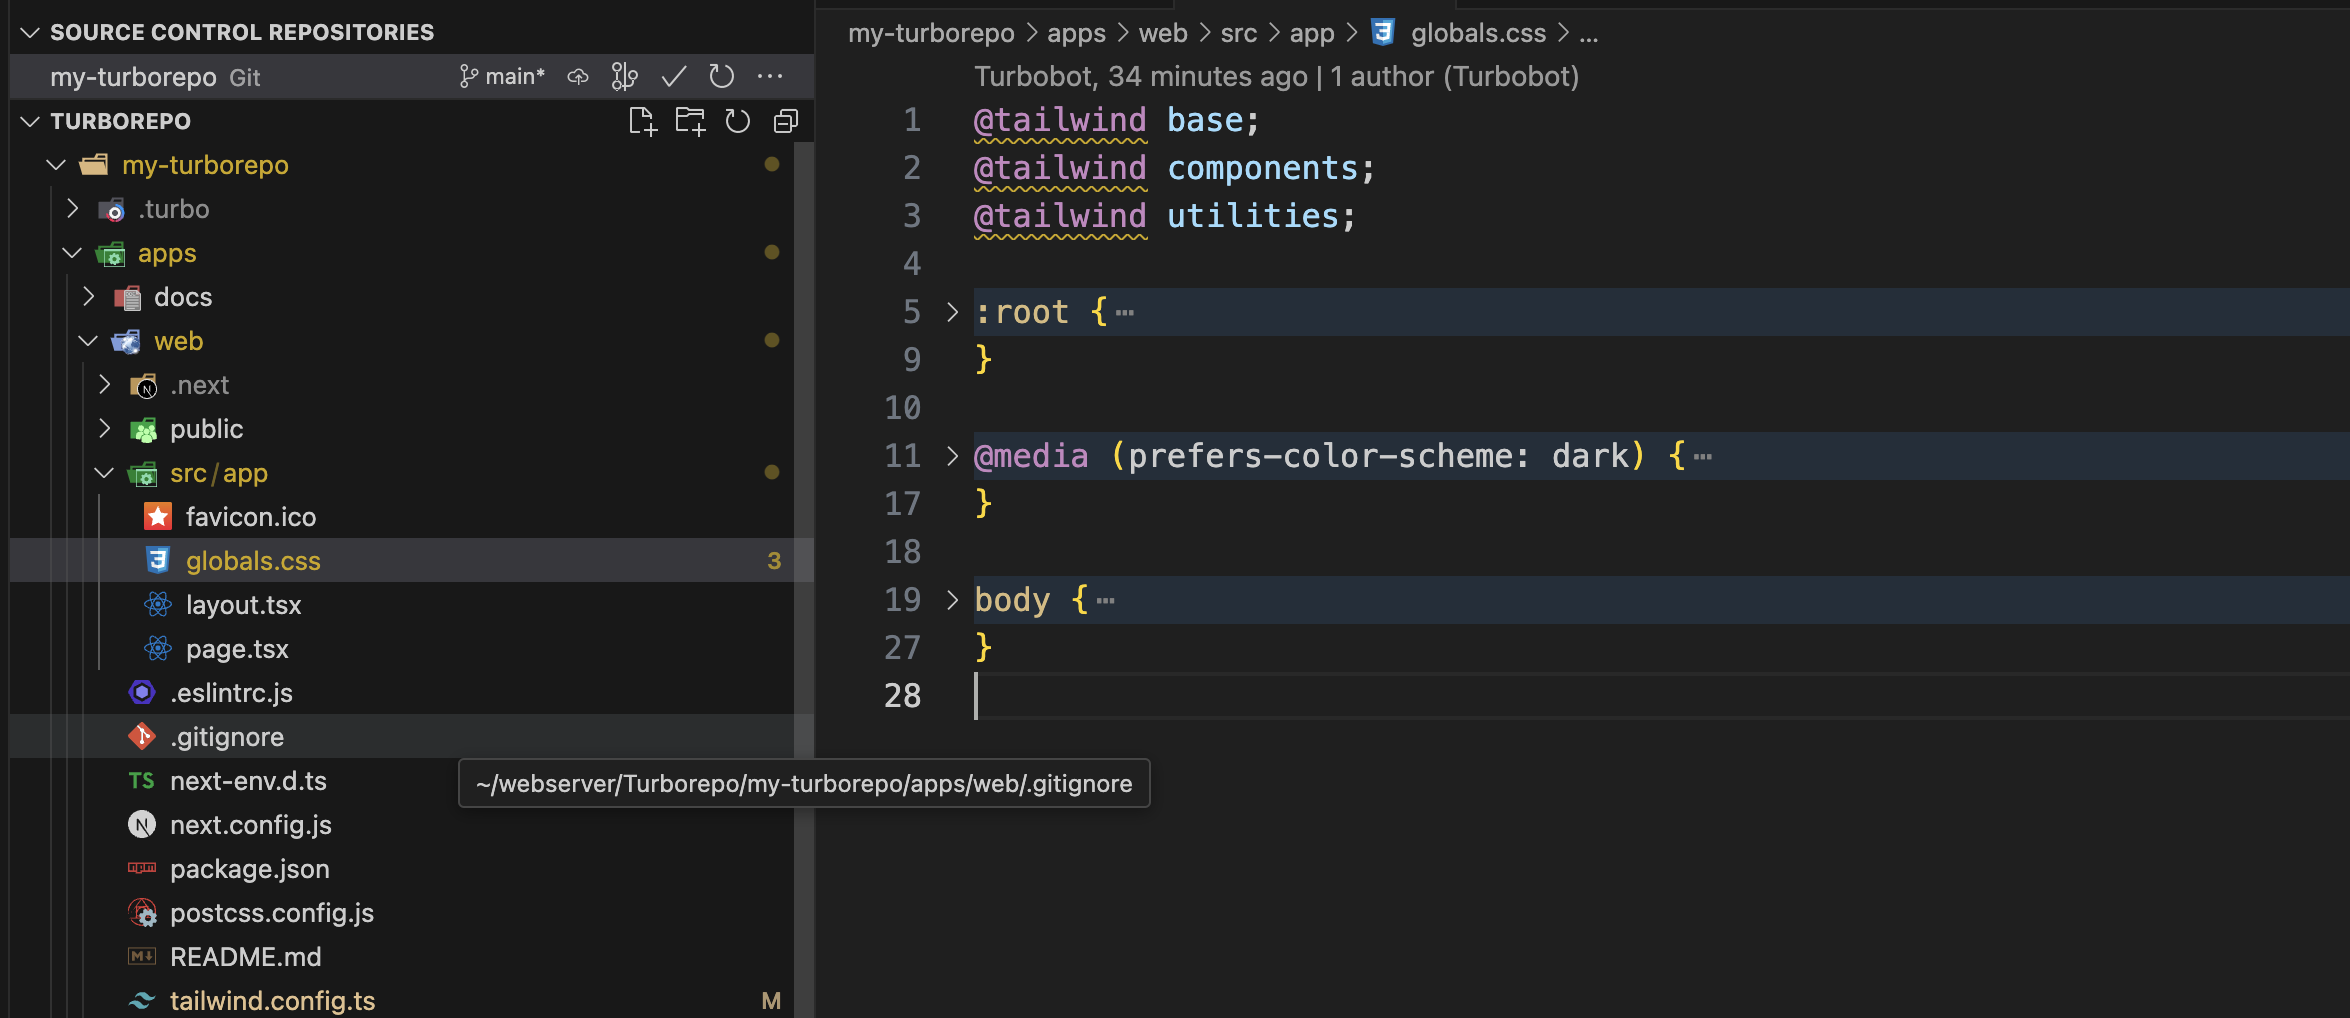
That's it, you can now use tailwind throughout your monorepo and share the same config between them.
Testing:
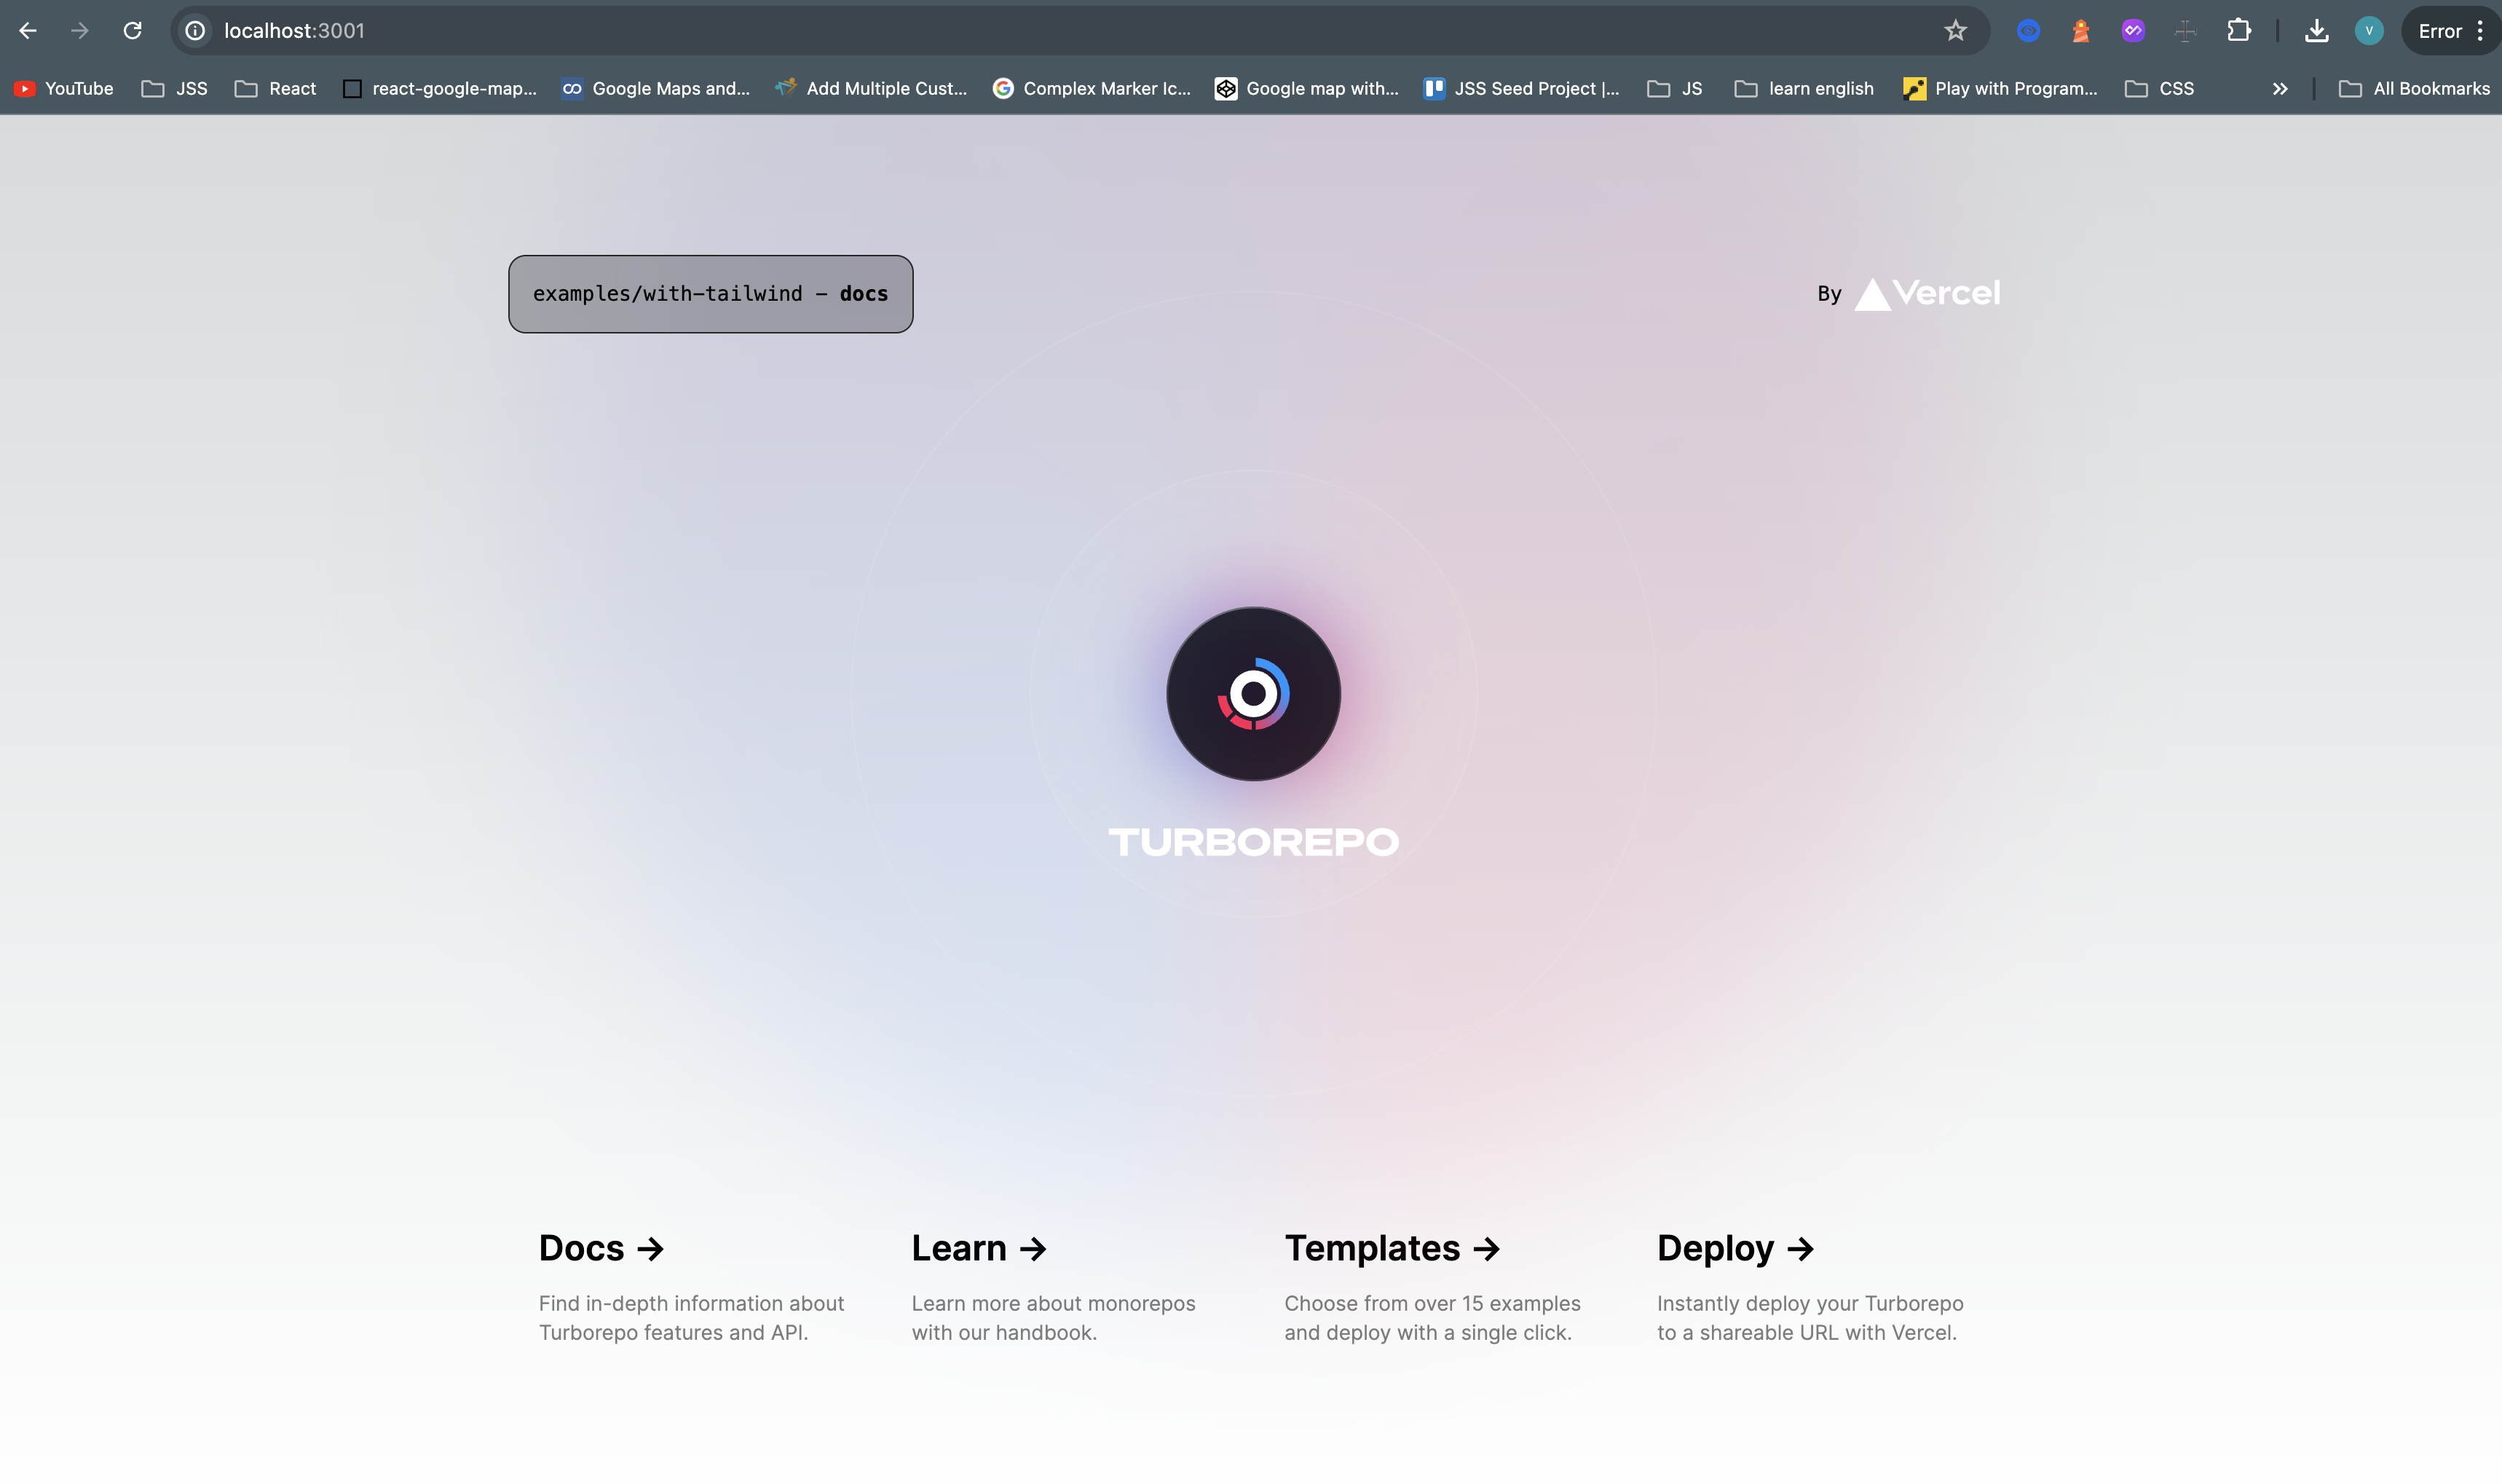
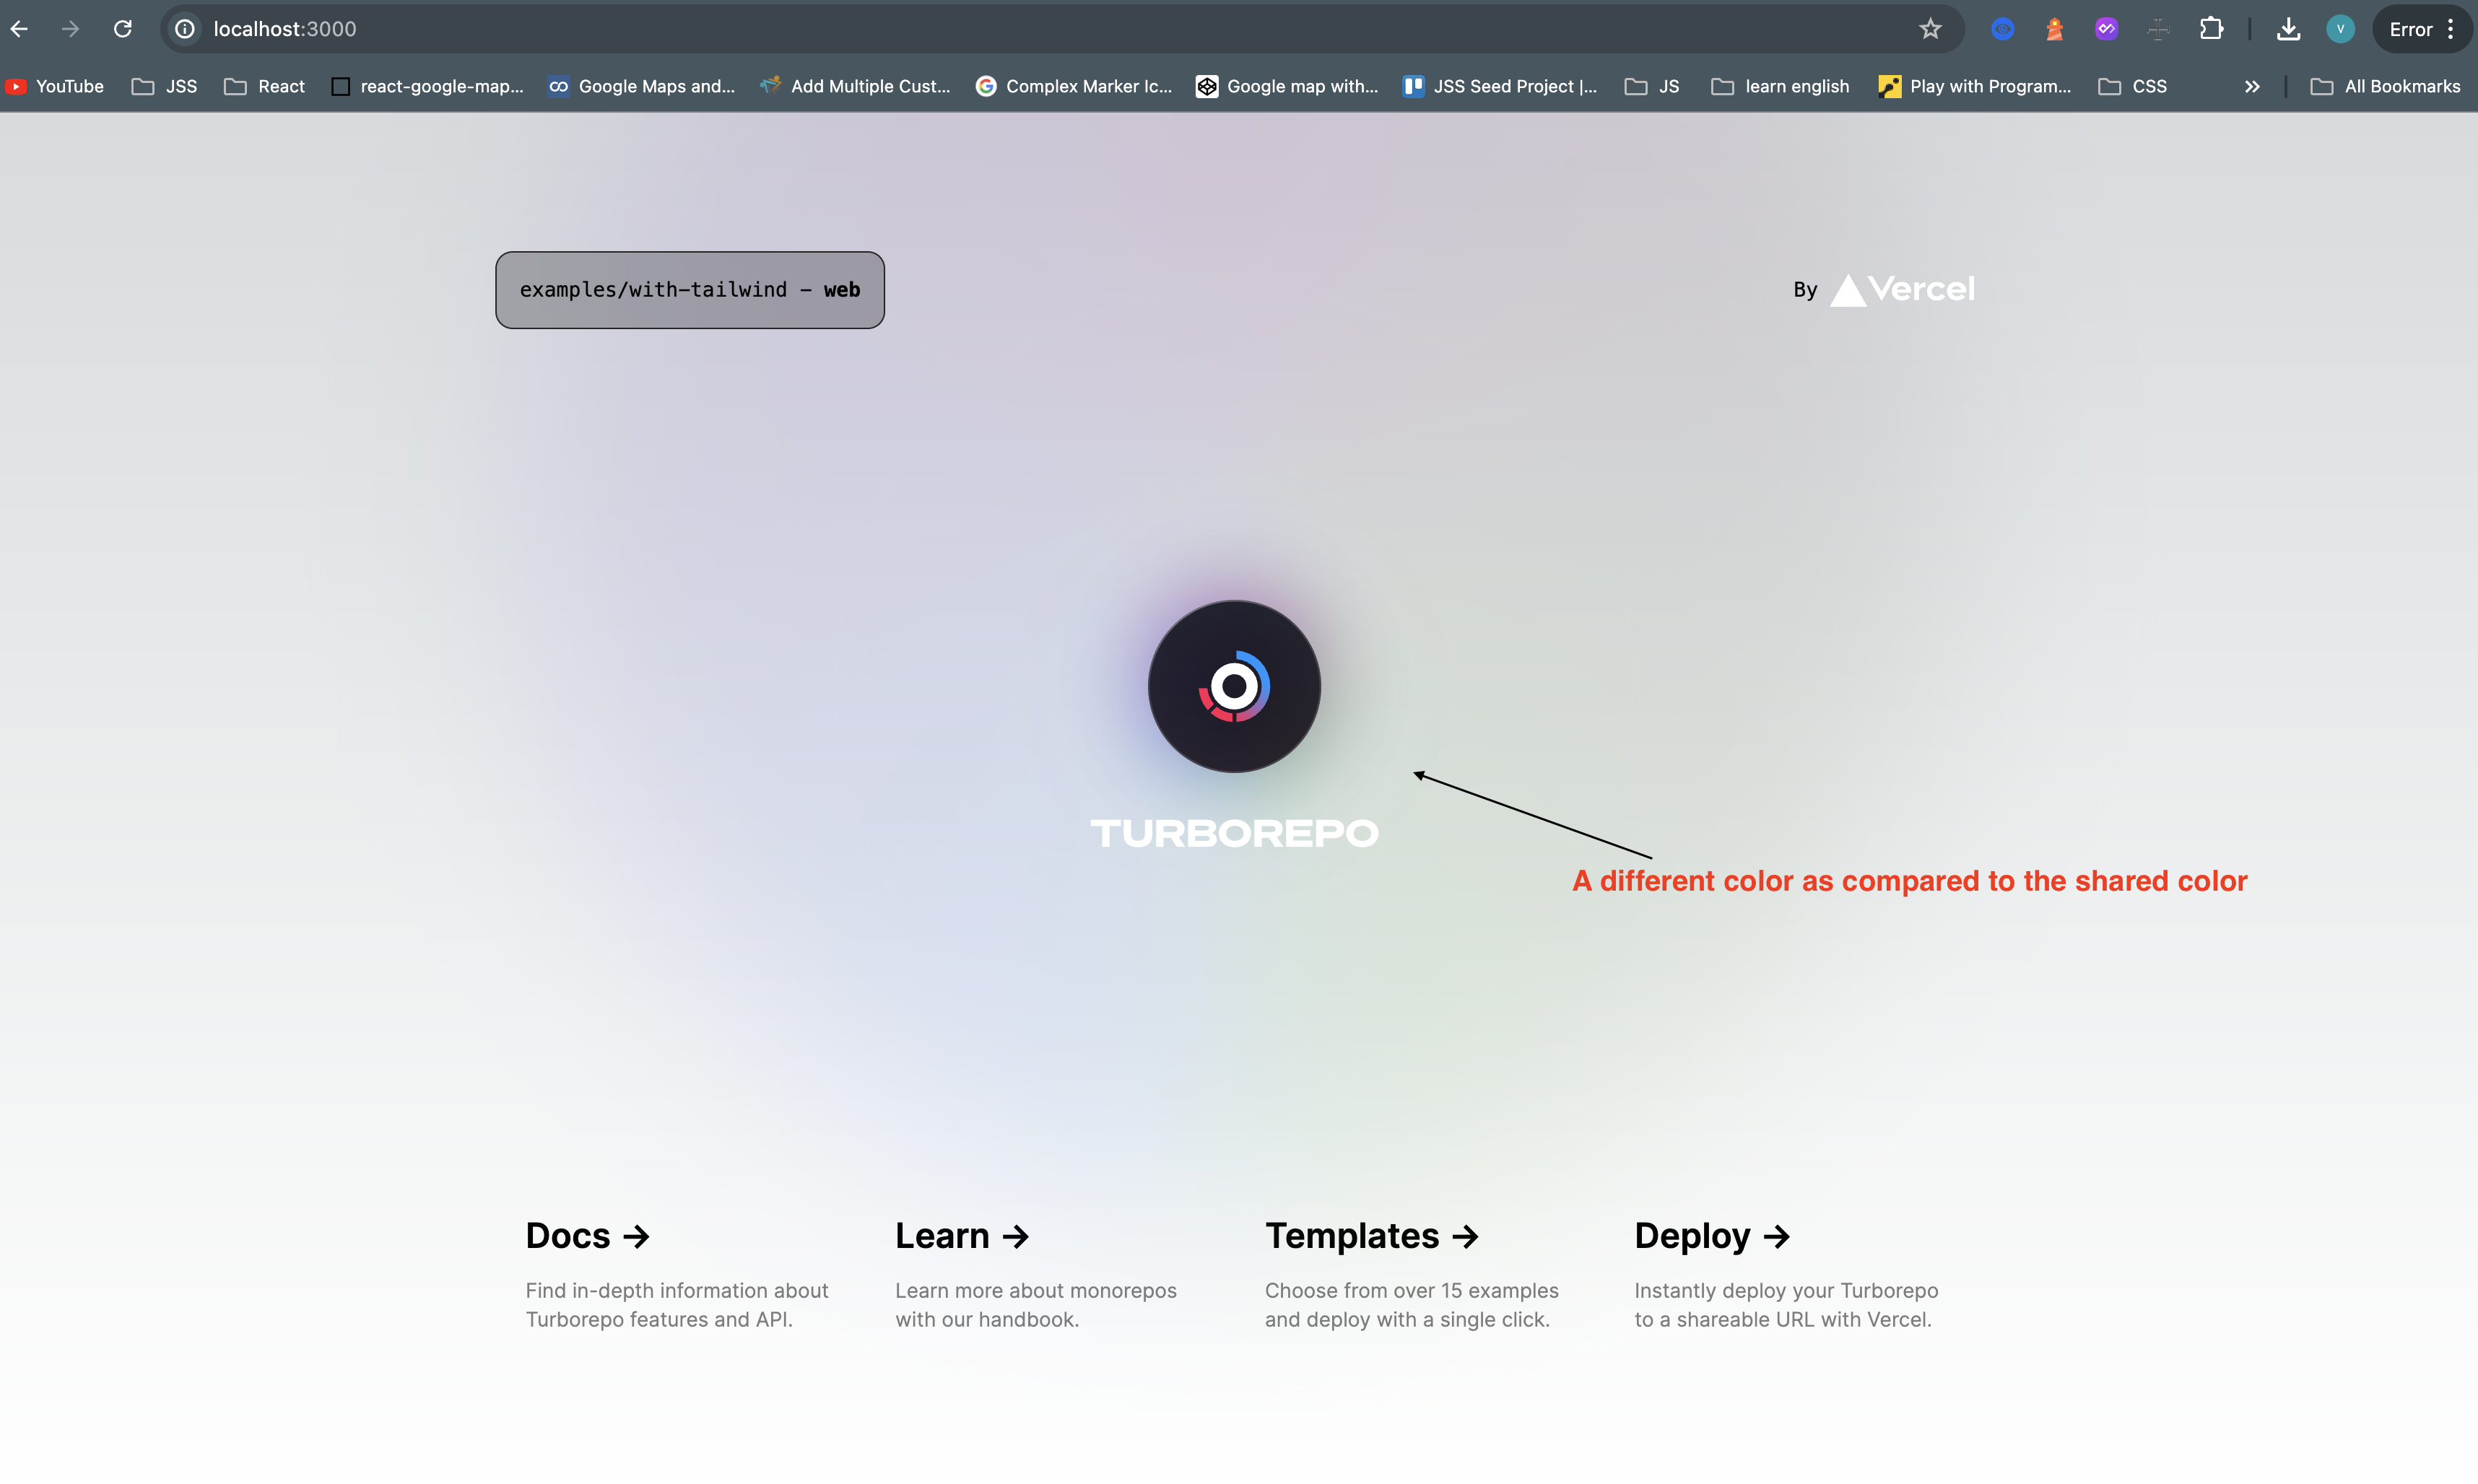
You can observe that the shared background colour is used on port 3001 (Docs application), as we have not extended that specific colour. However, on port 3000, you will see a different colour, which is due to the extended colour value specifically for the "web" application.
In conclusion, building a monorepo with Turborepo can significantly enhance your workflow. With an organized structure and streamlined processes, this approach allows you to efficiently manage large-scale projects and multiple applications, saving time and improving reliability. We encourage you to try it out and experience the transformation in your work.
Thanks for reading and any kind of feedback will be so much appreciated.
Subscribe to my newsletter
Read articles from Karangiya Vraj directly inside your inbox. Subscribe to the newsletter, and don't miss out.
Written by
Karangiya Vraj
Karangiya Vraj
Passionate Frontend Developer with 2.5 years of experience specializing in React.js and Next.js. Skilled in building responsive, user-friendly interfaces using Tailwind CSS. Enthusiastic about creating dynamic and engaging web applications.