12. creww 알림 숫자 구현 feat.SSE
 Thunder
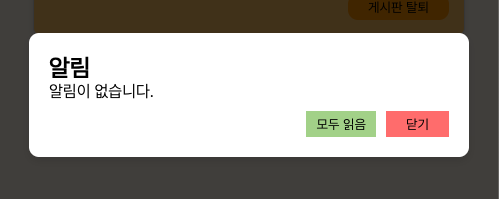
알림 버튼 옆에 알림이 몇개 있는지 알려주는 기능을 구현하려고 한다.
보통 새로운 기능 구현 시 구글링이나 GPT를 통해 구현 방식을 알아보고 결정한다. 그러나 Creww의 CRUD를 개발하는 과정에서, Notification 클래스를 작성할 때는 별 생각없이 나만의 방식으로.. 알림 기능을 구현하였다.
구현 순서를 정리하자면
PostService 클래스의 createPost 메서드에서 새로운 post 객체가 생성된다.
생성된 Post 객체가 테이블에 저장되면 NotificationDomainService의 giveNotification 메서드가 실행된다.
giveNotification 메서드는 postId와 userId를 가져와서 userList를 생성한다.
userList에 담긴 userId들을 기준으로 차례대로 Notification 객체를 생성하여 NotificationList를 구성한다.
bulkInsert 방식으로 NotificationList를 notification 테이블에 일괄 저장한다.
React에서 ajax를 통해 notificationService의 getNotification 메서드를 호출하여 userId에 해당하는 알림들을 조회한다. 이를 통해 로그인한 사용자를 대상으로 알림들을 화면에 표시한다.
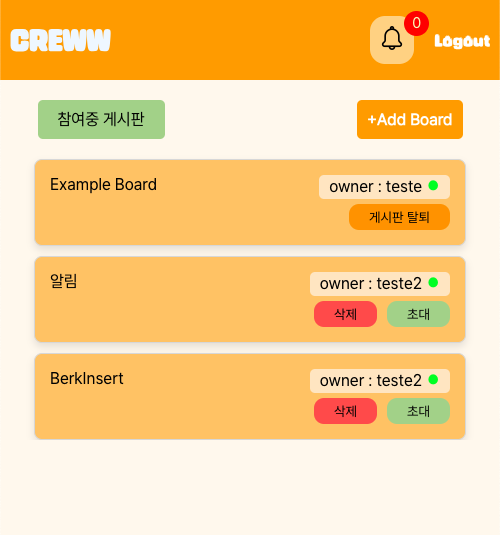
알림 기능을 구현하고, 잘되네~ 하면서 쿼리도 개선하고, 테스트 코드도 작성하고 하는중에 뭔가 허전한 마음을 느꼈다. 알림의 개수를 표현하는 것을 놓치고 있었다. 재빨리 css를 만져서 화면에 숫자표시를 해놨다. 이제 동적으로 알림의 개수를 업데이트 해줘야한다.
어떤 방식으로 알림의 개수를 표현할까?
두 개의 선택지에서 고민을 했다.
리액트에서 구현하기
스프링에서 메서드를 한개 만들어서 단순하게 알림의 개수를 count한 다음 프론트에서 요청하기
하지만 난 백엔드 개발자를 목표로 하고있기 때문에 후자를 선택했다.그리고 백엔드에서 알림 개수를 계산하는 것이 데이터 처리의 효율성이 더 좋다고 생각이 들었다.
프론트에서 계산할 경우, 모든 알림 데이터를 전송해야한다.
백엔드에서는 단일 숫자만 전송하면 된다.
백엔드에서 계산을 해서 전송하면 모든 클라이언트에게 동일한 결과를 제공할 수 있다.(디바이스 성능 등) <- 요즘은 왠만하면 디바이스들의 성능이 모두 좋을테지만...
어쨌든 알림의 개수를 count 하는 메서드를 작성하려고 자료를 찾다가 웹소켓을 생각해봤다. 실시간 알림이니깐 빠르게 알림을 주는게 좋지않을까????????
라는 생각을 하며 코드를 작성하다가 문득 오래전에 봤던 생활코딩님의 강의 영상에서 본듯한 조언이 떠올랐다.
"여러분 우리는 극단적인 예시를 들어야합니다. 만약 10개가 아니라 1억개의 이벤트가 생기면 어떻게 될까요?"
웹 소켓이란 계속 연결되어있는 상태인데, 서버에서 알림을 보내는 기능에 웹 소켓이 과연 필요할까? 최선일까? 하며 다른 더 좋은 방안을 찾았다. 바로 SSE다.
SSE (Server - Sent - Event)
SSE는 단방향 통신으로, 서버에 클라이언트로 데이터를 보내는 데 최적화 되어있다.
웹소켓처럼 양방향 연결을 유지할 필요가 없어 서버 리소스를 절약할 수 있다.
"절약" 매우 끌리는 단어다. 우리집 Nas같이 성능이 좋지 않은 상황에서는 더욱더.
수정된 구현 코드
NotificationDomainService
    @Transactional
    public void giveNotification(Long boardId, Long postId) {
        PostWithUser postWithUser = postRepository.findPostWithUserById(postId)
            .orElseThrow(() -> new ApplicationException("게시글 없음", HttpStatus.NOT_FOUND));
        String message = postWithUser.getUsername() + "님이 " + postWithUser.getPostTitle() + " 게시글을 작성하셨습니다.";
        List<Long> userIds = userBoardRepository.findUserIdsByBoardIdAndIsExitedFalse(boardId);

        if (userIds != null) {
            // 알림 객체를 생성
            List<Notification> notifications = userIds.stream()
                .map(userId -> new Notification(userId, message))
                .collect(Collectors.toList());

            if (notificationRepository != null) {
                // 알림을 한 번에 DB에 저장
                notificationRepository.bulkInsert(notifications);
                // Map<userId,알림개수>
                Map<Long, Long> userNotificationCounts = notificationRepository.countNewNotificationsByUserIds(userIds);
                notifications.forEach(notification -> {
                    sendNotification(notification); //현재 알림 전송
                    sendNotificationCount(notification.getUserId(), userNotificationCounts.get(notification.getUserId())); // 현재 알림 개수 전송
                });
            } else {
                throw new ApplicationException("notificationRepository is null", HttpStatus.INTERNAL_SERVER_ERROR);
            }
        }
    }


    public void sendNotification(Notification notification) {
        // 주어진 notification의 userId에 해당하는 SseEmitter를 맵에서 가져온다.
        SseEmitter emitter = emitters.get(notification.getUserId());
        //emitter가 존재하는 경우 (사용자가 SSE 연결을 열어두는 경우) 실행한다.
        if (emitter != null) {
            try {
                // SseEmitter를 사용하여 실제로 이벤트를 전송한다.
                emitter.send(SseEmitter.event()
                    .id(notification.getId().toString()) //이벤트의 고유 ID 설정
                    .name("New_Post") //이벤트의 이름 설정( 클라이언트에서 이 이름으로 이벤트를 구분)
                    .data(notification.getMessage())); //실제 전송할 데이터 (알림 메시지)
            } catch (IOException e) {
                //전송 중 오류 발생하면 해당 emitter를 맵에서 제거한다.
                emitters.remove(notification.getUserId());
            }
        }
    }
    private void sendNotificationCount(Long userId, Long count) {
        SseEmitter emitter = emitters.get(userId);
        if (emitter != null) {
            try {
                emitter.send(SseEmitter.event()
                    .name("notification_count")
                    .data(count));
            } catch (IOException e) {
                emitters.remove(userId);
            }
        }
    }
    public SseEmitter subscribe(@RequestParam Long userId){
        SseEmitter emitter = new SseEmitter(Long.MAX_VALUE);//SseEmitter 객체 생성, Long.MAX_VALUE는 연결 timeout 시간을 최대로 설정
        emitters.put(userId,emitter); //새 사용자 연결 추가
        emitter.onCompletion(() -> emitters.remove(userId));// 클라이언트와 연결이 완료되면 실행될 콜백 설정 (클라이언트가 연결을 종료하면 userId의 emitter를 제거
        emitter.onTimeout(() -> emitters.remove(userId));// 연결이 timeout 되면 실행될 콜백 설정 (마찬가지로 userId의 emitter를 제거)
        return emitter;
    }
NotificationController
    @GetMapping("/subscribe")
    public SseEmitter subscribe(Long userId) {
        return notificationDomainService.subscribe(userId);
    }
알림 기능을 다시 제대로 완성했다.
보너스 모두 읽음 기능 구현
NotificationRepository
    @Modifying
    @Transactional
    @Query("UPDATE Notification n SET n.isRead = true WHERE n.userId = :userId AND n.isRead = false")
    void markAllAsReadByUserId(Long userId);
NotificationRepository에 쿼리를 추가한다.
isRead(읽음) 필드가 false 인 notification들의 모든 상태를 true로 만들어주는 쿼리다.
NotificationController
    @PutMapping("/readAll")
    @ApiOperation(value = "알림 모두읽기", notes = "알림을 모두 읽음 표시 합니다.",tags = {"notification-controller"})
    public ResponseEntity<Void> markAsReadAll(HttpServletRequest request){
        notificationService.markAsReadAll(request);
        return ResponseEntity.noContent().build();
    }
NotificationService
    public void markAsReadAll(HttpServletRequest request) {
        String token = jwtUtils.validateTokenOrThrow(request);
        Long userId = Long.parseLong(jwtUtils.getUserIdFromToken(token));
        notificationRepository.markAllAsReadByUserId(userId);
    }
구현된 화면
- 다른 id로 로그인을 한다.
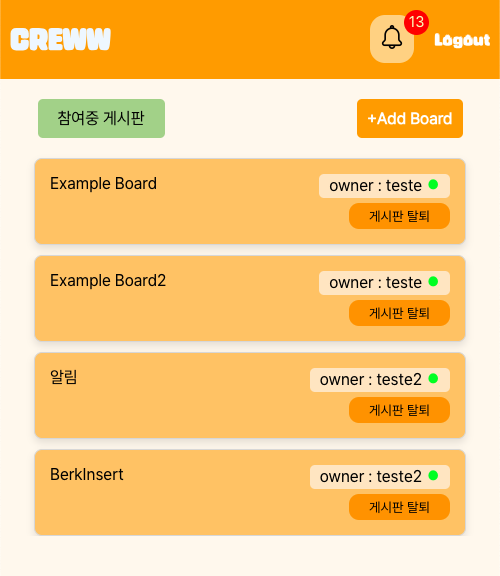
알림이 13개가 표시 되어있다.(클릭)
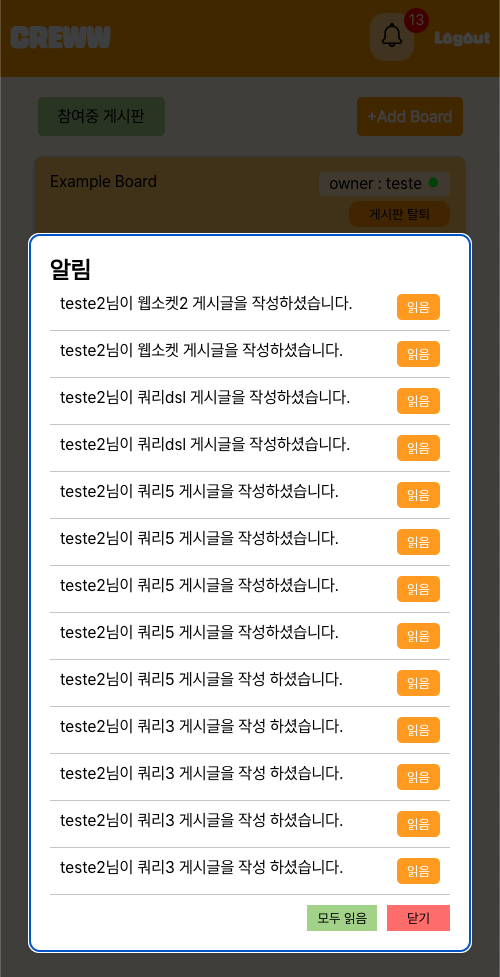
여기서 모두 읽음 버튼을 누른다
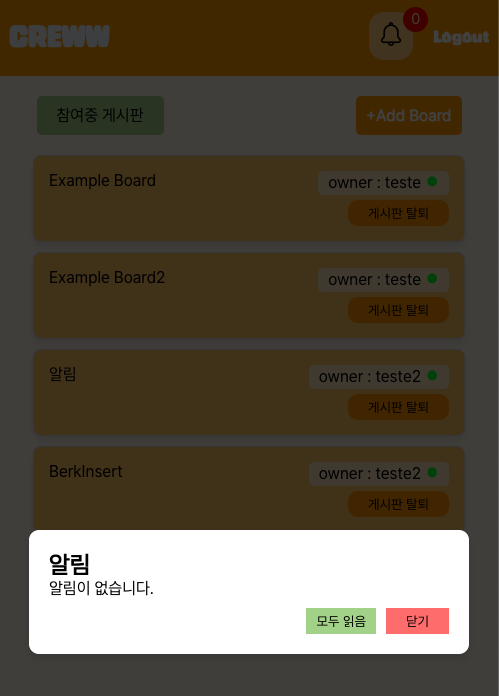
알림 숫자가 0이 되고 알림이 모두 사라진다.
이렇게 성공적으로 기능을 수정하고 구현했지만, 테스트 코드를 수정해야한다.. 그냥 처음부터 잘 만드는게 최고다.
Subscribe to my newsletter
Read articles from Thunder directly inside your inbox. Subscribe to the newsletter, and don't miss out.
Written by

Thunder
Thunder
안녕하세요! Web개발을 공부하고 있는 윤종일 입니다. 현재는 Java 백엔드 개발을 깊게 파고들고 있어요! 제 궁극적인 목표는 풀스택 개발자가 되는 것입니다. 프론트엔드와 백엔드 모두를 자유롭게 넘나들며, 사용자에게 가치를 전달할 수 있는 완성도 높은 애플리케이션을 만드는 것이 목표입니다.