Week - 3 : DevOps Zero to Hero
 Pratik Gote
Table of contents
- Day 14 : Configuration Management With Ansible | Puppet vs Ansible
- Day 15 : Ansible Zero to Hero
- Ansible Ad-hoc Commands
- Conclusion
- Day 16: Infrastructure as Code | Terraform
- Day 17 : Everything about Terraform | Write Your First Project | Remote Backend | Modules | Interview Q&A
- Day 18 : What is CI/CD? Introduction to CI/CD and How CI/CD Works
- Day : 19 : Jenkins ZERO to HERO | With Real world Live Projects
- Install Docker Pipeline Plugin
- Docker Slave Configuration
- Step 1: Install Docker
- Step 2: Grant Permissions
- Step 3: Restart Jenkins
- Practical Task 1 : A simple jenkins pipeline to verify if the docker slave configuration is working as expected.
- Step 1: Install Docker on Your Jenkins Master
- Step 2: Install the Docker Pipeline Plugin in Jenkins
- Step 3: Create a New Jenkins Pipeline
- Step 4: Configure the Jenkins Pipeline
- Step 5: Write the Jenkinsfile
- Step 6: Commit and Push the Jenkinsfile
- Step 7: Run the Jenkins Pipeline
- Step 8: Verify the Build Results
- That's It!
- Practical Task 2 : Multi Stage Multi Agent
- Step 1: Create a New Jenkins Pipeline
- Step 2: Configure the Jenkins Pipeline
- Step 3: Write the Jenkinsfile
- Step 4: Commit and Push the Jenkinsfile
- Step 5: Run the Jenkins Pipeline
- Step 6: Verify the Build Results
- Practical Task 3 : CI/CD Mastery: Jenkins, Argo CD, & Kubernetes Deployment
- Step 1: Create a GitHub Repository
- Step 2: Create a Jenkins Job
- Step 3: Configure the Jenkins Pipeline
- Step 4: Write the Jenkinsfile
- Step 5: Run the Jenkins Job
- Step 6: Create a Kubernetes Cluster
- Step 7: Install Argo CD
- Step 8: Create a Deployment Manifest
- Step 9: Configure Argo CD
- Step 10: Deploy the Application
- Go to your Argo CD dashboard.
- Step 11: Create a Jenkins Pipeline to Deploy to Kubernetes
- Step 12: Run the Jenkins Pipeline to Deploy to Kubernetes

Day 14 : Configuration Management With Ansible | Puppet vs Ansible
Introduction :
In this post, we'll be discussing configuration management with Ansible, a popular tool in the field of DevOps. We'll also compare Ansible with Puppet, another well-known configuration management tool.
What is Configuration Management?
Configuration management is the process of managing the configuration of servers or infrastructure. It involves ensuring that the configuration of multiple servers is consistent and up-to-date. This is a crucial task in DevOps, as it helps to ensure that the infrastructure is stable and secure.
Challenges of Configuration Management:
Before the advent of configuration management tools, system administrators had to manage the configuration of servers manually. This was a time-consuming and error-prone process, especially when dealing with a large number of servers. The challenges of configuration management include:
Upgrading servers to the latest version
Installing default packages
Ensuring security patches are up-to-date
Managing multiple servers with different distributions (e.g., Ubuntu, CentOS, Windows)
Ansible:
A Configuration Management Tool Ansible is a popular configuration management tool that uses a push mechanism to manage the configuration of servers. It's an agentless tool, which means that it doesn't require any agents to be installed on the servers being managed. Ansible uses YAML manifests to write playbooks, which are then executed on the servers.
Puppet vs Ansible:
Puppet is another well-known configuration management tool that uses a pull mechanism to manage the configuration of servers. The main differences between Puppet and Ansible are:
Puppet uses a pull mechanism, while Ansible uses a push mechanism
Puppet requires agents to be installed on the servers being managed, while Ansible is agentless
Puppet uses a proprietary language, while Ansible uses YAML manifests
Ansible Modules:
Ansible has a wide range of modules that can be used to perform specific tasks, including:
File management: Ansible has modules for managing files, such as copying, moving, and deleting files.
Package management: Ansible has modules for managing packages, such as installing and removing packages.
User management: Ansible has modules for managing users, such as creating and deleting users.
Ansible Playbooks:
Ansible playbooks are YAML files that define the desired state of a system. They are used to orchestrate the deployment of applications and the configuration of servers.
Ansible Roles:
Ansible roles are pre-defined playbooks that can be used to perform specific tasks, such as configuring a web server or deploying a database.
Advantages of Ansible:
Ansible has several advantages over other configuration management tools, including:
Easy to learn and use
Supports both Windows and Linux
Agentless architecture
Uses YAML manifests, which are easy to read and write
Can be used to manage thousands of servers
Disadvantages of Ansible :
While Ansible is a powerful tool, it's not without its disadvantages. These include:
Windows support can be tricky
Debugging can be challenging
Performance issues can occur when managing a large number of servers
Ansible Interview Questions :
1. What is the programming language used by Ansible?
Answer:YAML (YAML Ain't Markup Language) Ansible uses YAML to write playbooks, making it easy to read and write configurations.
2. Does Ansible support Linux and Windows?
Answer:Yes! Ansible supports both Linux and Windows. For Linux, Ansible uses SSH protocol, and for Windows, it uses WinRM protocol.
3. What is the difference between Ansible and Puppet?
Answer:Ansible: Push mechanism, agentless, uses YAML Puppet: Pull mechanism, master-slave architecture, uses its own language
4. Is Ansible a push or pull mechanism?
Answer:Push Mechanism Ansible's control node pushes the configuration to the target nodes, making it a push mechanism.
5. Does Ansible support all cloud providers?
Answer:Cloud Agnostic! Ansible doesn't care about the cloud provider. As long as the machine has a public IP address and SSH (or WinRM for Windows) is enabled, Ansible can automate it, regardless of whether it's on AWS, Azure, GCP, or any other cloud provider.
Conclusion:
In this post, we've discussed configuration management with Ansible and compared it with Puppet. We've also covered the advantages and disadvantages of Ansible and provided some common Ansible interview questions. Ansible is a powerful tool that can help to simplify the process of configuration management, and it's definitely worth considering for your DevOps needs.
Day 15 : Ansible Zero to Hero
In this blog post, we will continue our journey of learning Ansible, a powerful automation and configuration management tool. In the previous post, we discussed the theory of configuration management and compared Ansible with Puppet. Today, we will focus on the practical knowledge of Ansible, starting from the basics.
Prerequisites
Before we start, make sure you have an Ubuntu machine or an EC2 instance. If you are a first-timer, I recommend using an EC2 instance for a hassle-free experience.
Installing Ansible
Ansible can be installed using package managers like apt for Ubuntu, brew for MacOS, or chocolatey for Windows. Alternatively, you can install Ansible using Python's package manager pip. Here's how you can install Ansible on Ubuntu:
Update your package list:
sudo apt updateInstall Ansible using
apt:sudo apt install ansibleVerify the installation:
ansible --version
Setting up Passwordless Authentication
Passwordless authentication is a prerequisite for Ansible to communicate with the target servers. Here's how you can set up passwordless authentication between the Ansible server and the target server:
Generate a new SSH key pair on the Ansible server:
ssh-keygenCopy the public key to the target server:
ssh-copy-id user@target-server
Replace user with your username and target-server with the IP address or hostname of the target server.
Ansible Ad-hoc Commands
Ansible ad-hoc commands allow you to execute simple tasks on the target servers without creating a full playbook. Here's an example of how to use Ansible ad-hoc commands to create a file on the target server:
Create an inventory file:
touch inventoryAdd the target server to the inventory file:
echo "target-server" >> inventoryRun the ad-hoc command:
ansible -i inventory all -m file -a "path=/tmp/test state=touch"
This command will create a file named test in the /tmp directory on the target server.
Ansible Playbooks
Ansible Playbooks are reusable, structured, and human-readable configuration scripts written in YAML format. They allow you to automate complex tasks and configurations.
Here's an example of a simple Ansible Playbook that installs and starts the Nginx web server on the target server:
Create a new file named
install-nginx.yml:touch install-nginx.ymlOpen the file and add the following content:
 ---
 - name: Install and start Nginx
   hosts: all
   become: yes
   tasks:
     - name: Install Nginx
       apt:
         name: nginx
         state: present

     - name: Start Nginx
       service:
         name: nginx
         state: started
Run the Playbook:
ansible-playbook -i inventory install-nginx.yml
This Playbook will install and start the Nginx web server on all servers specified in the inventory file.
Conclusion
In this blog, we covered the basics of Ansible, how to install it, set up passwordless authentication, and run Ansible ad-hoc commands. We also discussed the difference between Ansible ad-hoc commands and Ansible Playbooks and demonstrated how to write a simple Playbook to install and start the Nginx web server. With this knowledge, you can now start automating your infrastructure using Ansible.
Day 16: Infrastructure as Code | Terraform
Hello everyone, and welcome back to our complete DevOps course. Today, we're going to talk about Infrastructure as Code (IaC) and how Terraform solves the problem of learning too many tools.
What is Infrastructure as Code (IaC)?
Imagine you're a DevOps engineer working for a company like Flipkart. You need to create compute resources, such as servers, to deploy 300 applications. You can create these resources on various cloud platforms like AWS, Azure, Google Cloud, or even on-premises. As a good DevOps engineer, you want to automate the entire process.
Let's say you decide to use AWS CloudFormation Templates (CFT) to automate the infrastructure creation on AWS. You write hundreds of scripts, and everything is working well. But then, your management decides to shift from AWS to Microsoft Azure. Suddenly, all your CFT scripts become useless, and you need to migrate them to Azure Resource Manager (ARM) templates.
This is where the problem lies. You need to learn multiple tools and scripting languages to automate infrastructure creation on different cloud platforms. This is where Terraform comes in.
What is Terraform?
Terraform is a tool developed by HashiCorp that allows you to write infrastructure as code using a single language. You can create Terraform scripts, and Terraform will take care of automating the resources on any cloud provider. You don't need to learn AWS CFT, Azure ARM, or OpenStack Heat templates. Terraform solves the problem of learning too many tools.
How does Terraform work?
Terraform uses the concept of API as Code. When you write a Terraform script, Terraform converts it into API calls that the cloud provider can understand. For example, if you want to create an EC2 instance on AWS, Terraform will convert your script into an API call that AWS can execute.
What is API as Code?
API as Code is a concept that allows you to automate any provider using their APIs. Instead of manually talking to the application using a user interface, you can programmatically talk to the application using APIs. Terraform uses this concept to automate infrastructure creation on various cloud providers.
Benefits of Terraform
Single language: You only need to learn one language, Terraform, to automate infrastructure creation on multiple cloud providers.
Smooth migration: When you need to migrate from one cloud provider to another, you only need to update the provider details in your Terraform script.
API as Code: Terraform uses the concept of API as Code to automate infrastructure creation, making it a powerful tool for DevOps engineers.
What did we learn today?
Infrastructure as Code (IaC): A concept that allows you to automate infrastructure creation using code.
Terraform: A tool that solves the problem of learning multiple tools for automating infrastructure creation on different cloud providers.
API as Code: A concept that allows you to automate any provider using their APIs.
What's Next?
In tomorrow's class, we'll see Terraform live examples and work on a live project using Terraform. We'll start with the installation, create EC2 instances on AWS, and show you how exactly Terraform works. Thank you, and I'll see you in the next blog!
Day 17 : Everything about Terraform | Write Your First Project | Remote Backend | Modules | Interview Q&A
What is Terraform?
Terraform is an infrastructure as code (IaC) tool that allows you to manage and provision infrastructure resources on various cloud and on-premises environments.
Terraform is written in Go and is open-source.
Why Use Terraform?
Version control: Terraform allows you to version control your infrastructure code, making it easy to track changes and collaborate with team members.
Reusability: Terraform modules allow you to reuse infrastructure code across multiple projects and environments.
Consistency: Terraform ensures consistency across multiple environments and deployments.
Efficiency: Terraform automates the provisioning and management of infrastructure resources, reducing the time and effort required to manage infrastructure.
Writing Your First Terraform Project
Install Terraform from the official website: https://www.terraform.io/downloads.html
Verify the installation by running
terraform --versionin your terminal or command promptCreate a new directory for your project and navigate to it in your terminal or command prompt
Initialize a new Terraform project by running
terraform initCreate a new file called
main.tfand add the following code to it:provider "aws" { region = "us-west-2" } resource "aws_instance" "example" { ami = "ami-0c94855ba95c71c99" instance_type = "t2.micro" }Run the command
terraform applyto provision the infrastructureTerraform will create the EC2 instance and output the instance's ID and public IP address
Remote Backend
By default, Terraform stores its state locally in the
terraform.tfstatefile.However, this can be a problem when working in a team or when you need to manage infrastructure across multiple environments.
To solve this problem, Terraform provides remote backends that allow you to store the state remotely.
Some popular remote backends include AWS S3, Azure Blob Storage, and Google Cloud Storage.
To use a remote backend, you'll need to configure it in your
main.tffile. For example, to use an AWS S3 bucket as a remote backend, add the following code:terraform { backend "s3" { bucket = "my-terraform-state" key = "terraform.tfstate" region = "us-west-2" } }
Modules
Terraform modules are reusable components that allow you to organize your infrastructure code into logical units.
Modules can be used to create repeatable infrastructure patterns, such as a web server or a database cluster.
To create a module, create a new directory for the module and add a
main.tffile to it.In the
main.tffile, define the resources that make up the module. For example:# File: modules/webserver/main.tf resource "aws_instance" "example" { ami = "ami-0c94855ba95c71c99" instance_type = "t2.micro" }
To use the module in your main Terraform project, add the following code to your
main.tffile:# File: main.tf module "webserver" { source = file("./modules/webserver") }
Interview Q&A on Terraform
What is Terraform?
- Terraform is an infrastructure as code (IaC) tool that allows you to manage and provision infrastructure resources on various cloud and on-premises environments.
What is the difference between Terraform and Ansible?
- Terraform is an IaC tool that focuses on provisioning infrastructure resources, while Ansible is a configuration management tool that focuses on configuring and managing existing infrastructure resources.
How does Terraform store its state?
- By default, Terraform stores its state locally in the
terraform.tfstatefile. However, you can also use remote backends such as AWS S3 or Azure Blob Storage to store the state remotely.
- By default, Terraform stores its state locally in the
What is a Terraform module?
- A Terraform module is a reusable component that allows you to organize your infrastructure code into logical units. Modules can be used to create repeatable infrastructure patterns, such as a web server or a database cluster.
GitHub Repo
You can find the complete code for this project on GitHub at
Conclusion
In this tutorial, we took our first steps in Terraform by creating a simple project, configuring a remote backend, and building reusable modules. We also covered some essential interview questions and answers to help you prepare for your next DevOps interview. With this foundation, you're now ready to explore more advanced Terraform concepts and start managing your infrastructure as code.
Day 18 : What is CI/CD? Introduction to CI/CD and How CI/CD Works
What is CI/CD?
CI/CD is a process that automates the build, test, and deployment of code changes
It consists of two parts: Continuous Integration (CI) and Continuous Delivery (CD)
CI is the process of integrating code changes into a central repository
CD is the process of delivering the integrated code to production
Why CI/CD?
Manual testing and deployment can take months
CI/CD automates the process, reducing the time to deliver code changes to customers
It ensures that code changes are tested and validated before deployment
Steps involved in CI/CD
Let's say you are a developer working on a web application that is hosted on a cloud platform like AWS. You have made some changes to the code and want to test and deploy it to the production environment. Here's how CI/CD can help you:
Unit Testing: Testing individual units of code to ensure they work as expected
Static Code Analysis: Analyzing code for syntax errors, formatting, and security vulnerabilities
Code Quality and Vulnerability Testing: Testing code for quality and security vulnerabilities
Automation Testing: Testing the entire application end-to-end
Reporting: Generating reports on test results and code quality
Deployment: Deploying the code changes to production
Legacy CI/CD Tools: Jenkins
Jenkins is a popular CI/CD tool that automates the build, test, and deployment process
It integrates with version control systems like GitHub and GitLab
Jenkins pipelines can be configured to automate the CI/CD process
Modern CI/CD Tools: GitHub Actions
GitHub Actions is a modern CI/CD tool that automates the build, test, and deployment process
It is event-driven, meaning it can be triggered by events like code changes or pull requests
GitHub Actions provides a scalable and cost-effective solution for CI/CD
It can be integrated with multiple projects and repositories
Advantages of GitHub Actions over Jenkins
GitHub Actions is event-driven, whereas Jenkins requires webhooks to be configured
GitHub Actions provides a scalable and cost-effective solution for CI/CD
GitHub Actions can be integrated with multiple projects and repositories
Conclusion
CI/CD is an essential process for automating the build, test, and deployment of code changes
Legacy tools like Jenkins can be used for CI/CD, but modern tools like GitHub Actions provide a more scalable and cost-effective solution
In the next video, we will experiment with Jenkins and GitHub Actions to implement CI/CD for a project.
Day : 19 : Jenkins ZERO to HERO | With Real world Live Projects
Introduction:
In this blog post, we will explore the practical implementation of Jenkins, a powerful automation server that enables developers to build, test, and deploy their software. We will cover topics such as installing Jenkins on an EC2 instance, configuring it to be accessible from the outside world, using Docker as agents, and deploying applications using GitOps. We will also go over some common interview questions related to Jenkins.
Installation on EC2 Instance
Step 1: Launch an EC2 Instance
Go to the AWS Console
Click on "Instances" and then "Launch instances"
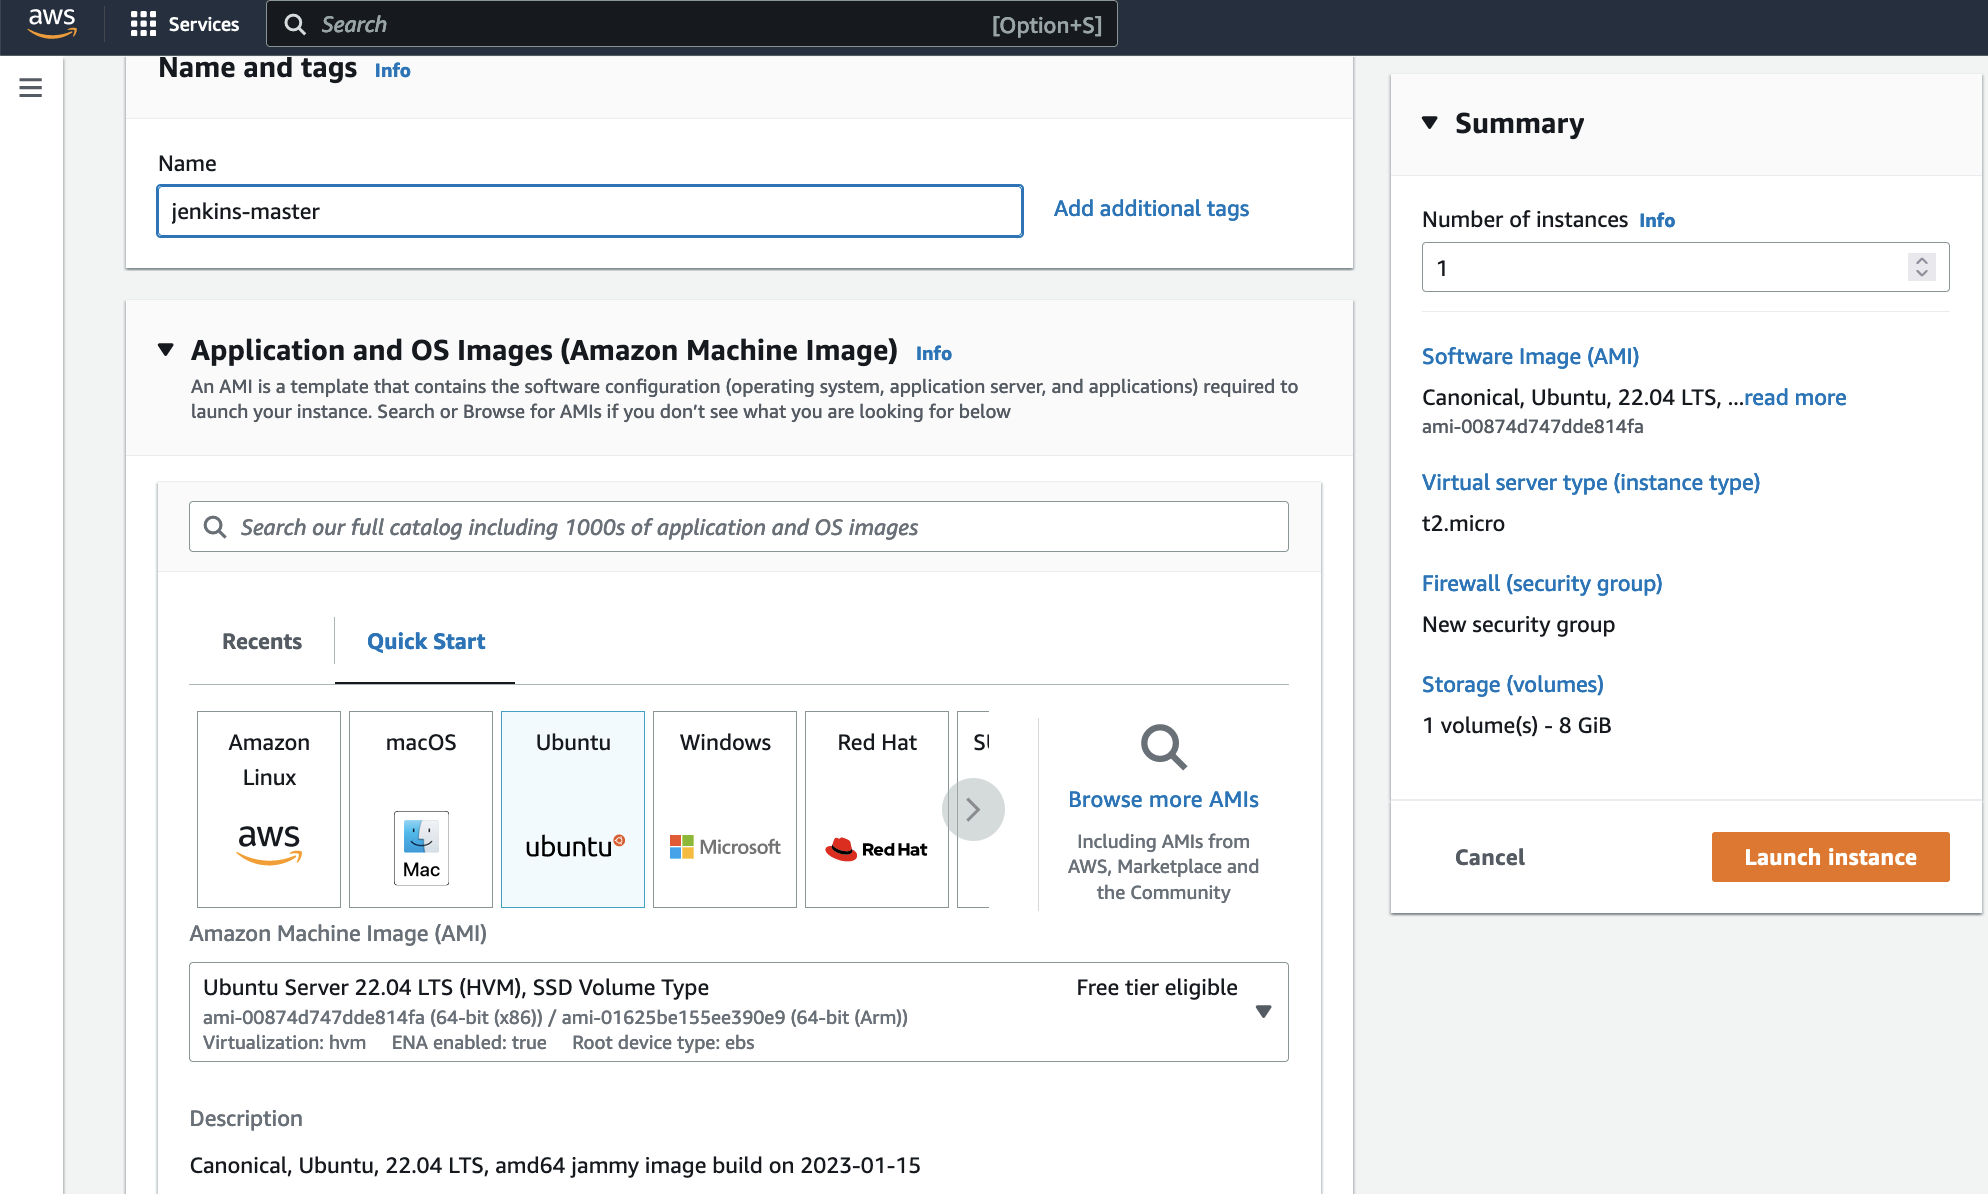
Step 2: Install Java and Jenkins
Pre-Requisites:
- Java (JDK)
Run the below commands to install Java and Jenkins
Install Java:
sudo apt update
sudo apt install openjdk-11-jre
Verify Java Installation:
java -version
Install Jenkins:
curl -fsSL https://pkg.jenkins.io/debian/jenkins.io-2023.key | sudo tee \
  /usr/share/keyrings/jenkins-keyring.asc > /dev/null
echo deb [signed-by=/usr/share/keyrings/jenkins-keyring.asc] \
  https://pkg.jenkins.io/debian binary/ | sudo tee \
  /etc/apt/sources.list.d/jenkins.list > /dev/null
sudo apt-get update
sudo apt-get install jenkins
Note: By default, Jenkins will not be accessible to the external world due to the inbound traffic restriction by AWS. Open port 8080 in the inbound traffic rules.
Step 3: Configure Inbound Traffic Rules
Go to EC2 > Instances > Click on the instance
In the bottom tabs, click on "Security"
Click on "Security groups"
Add inbound traffic rules as shown in the image (allowing TCP 8080 or All traffic)

Step 4: Login to Jenkins
Use the URL:
http://<ec2-instance-public-ip>:8080Run the command to copy the Jenkins Admin Password:
sudo cat /var/lib/jenkins/secrets/initialAdminPasswordEnter the Administrator password
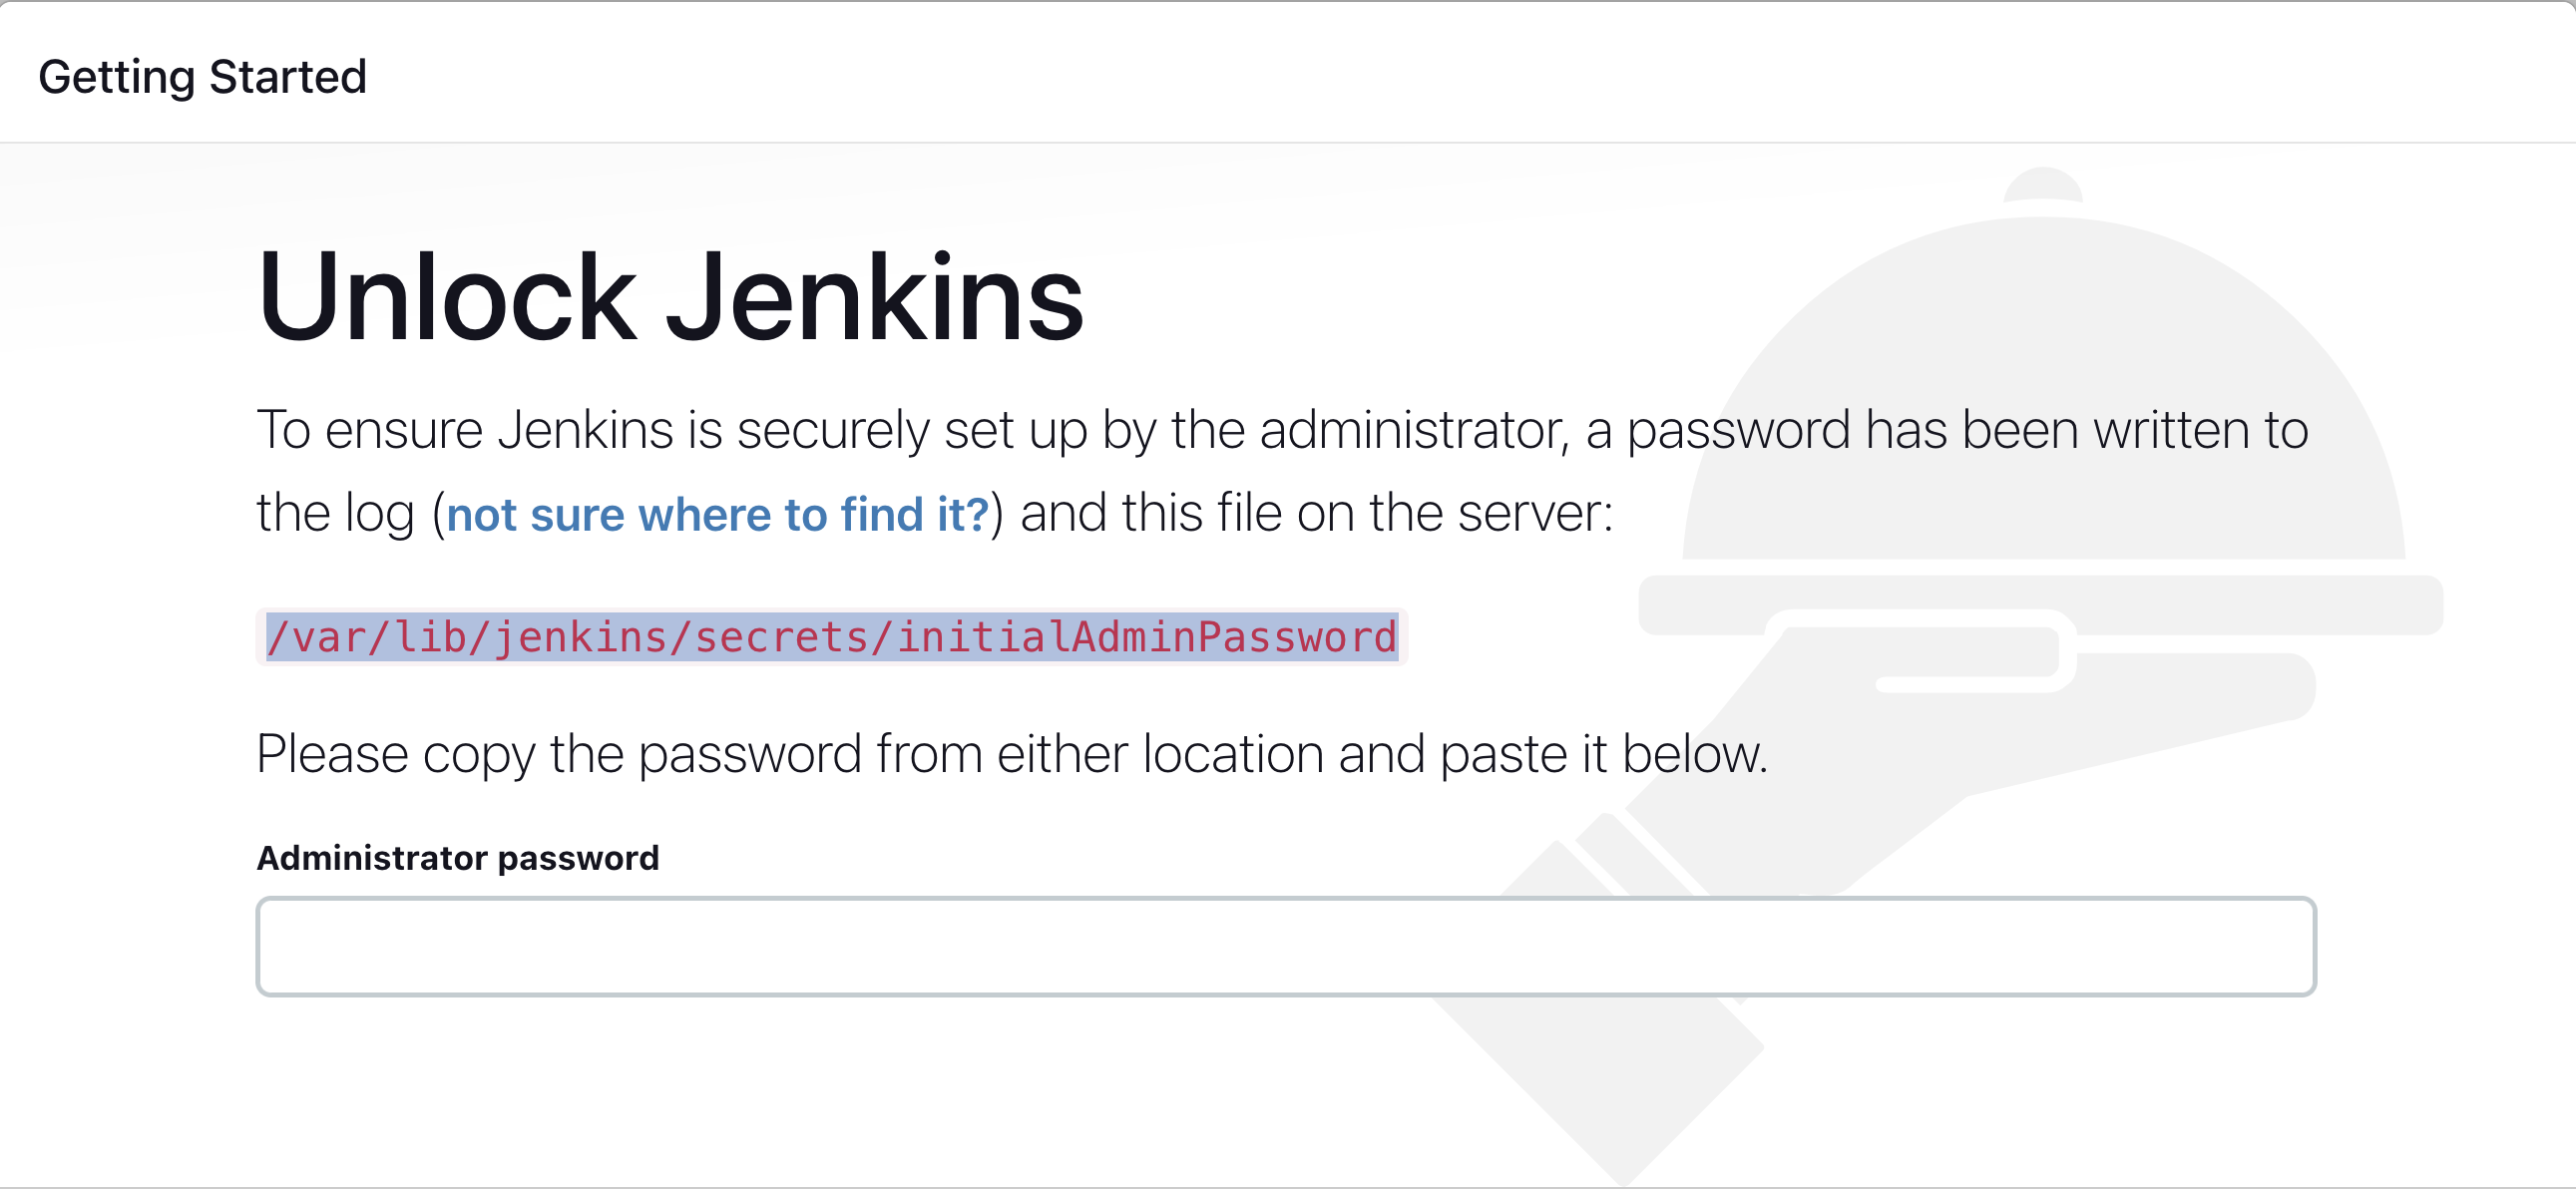
Step 5: Install Suggested Plugins
Click on "Install suggested plugins"
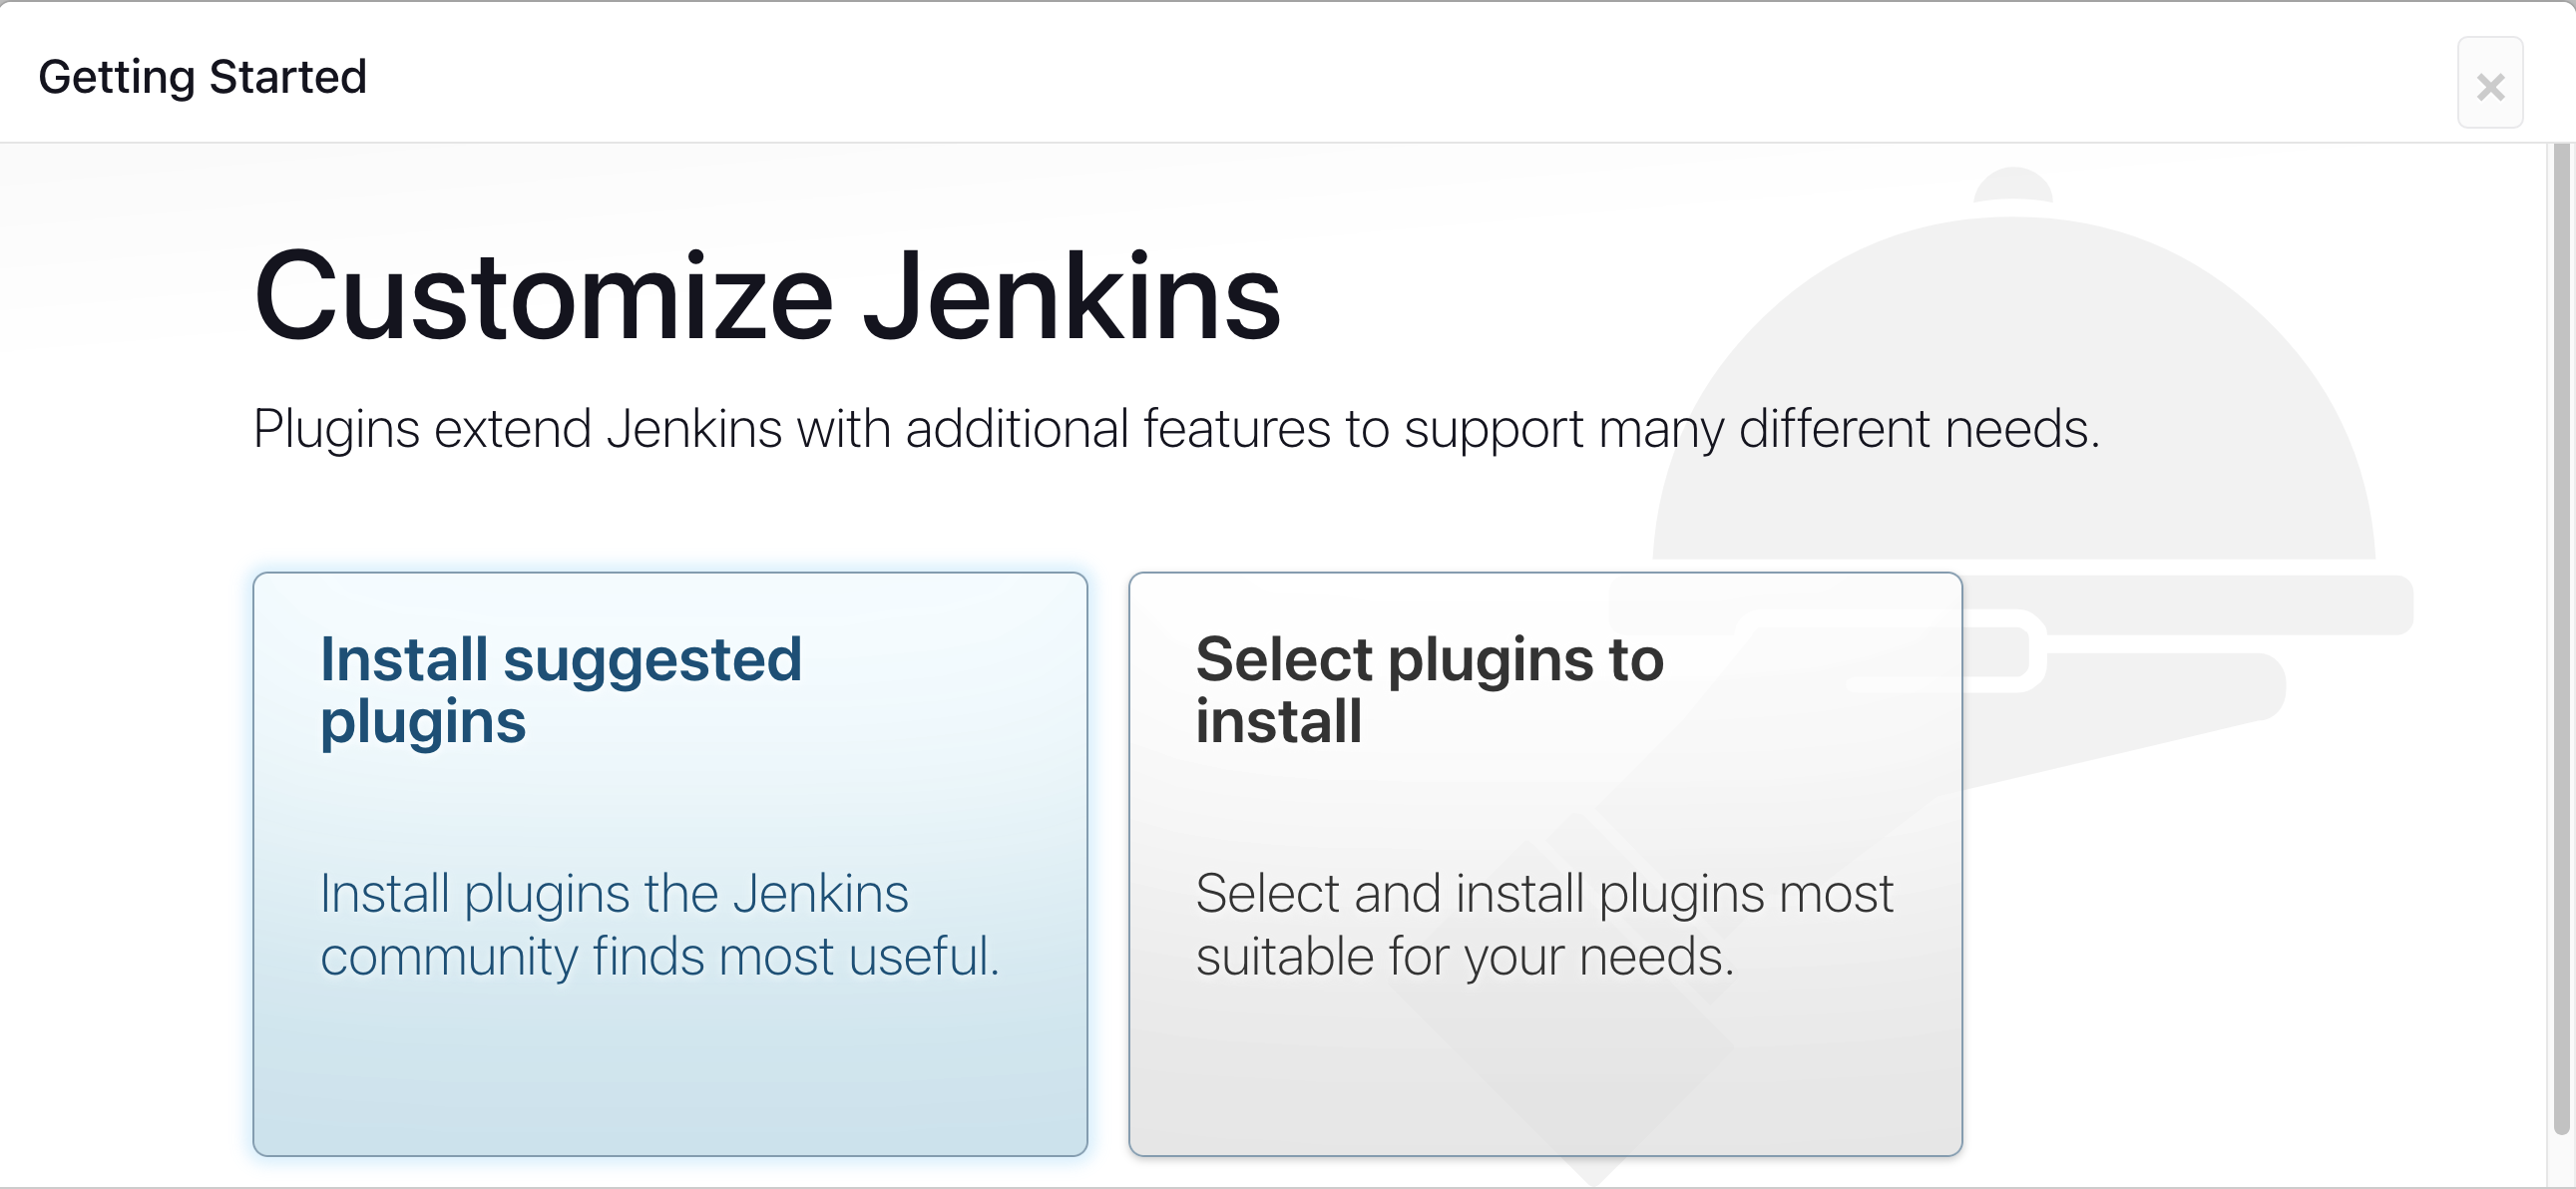
Wait for the Jenkins to install suggested plugins
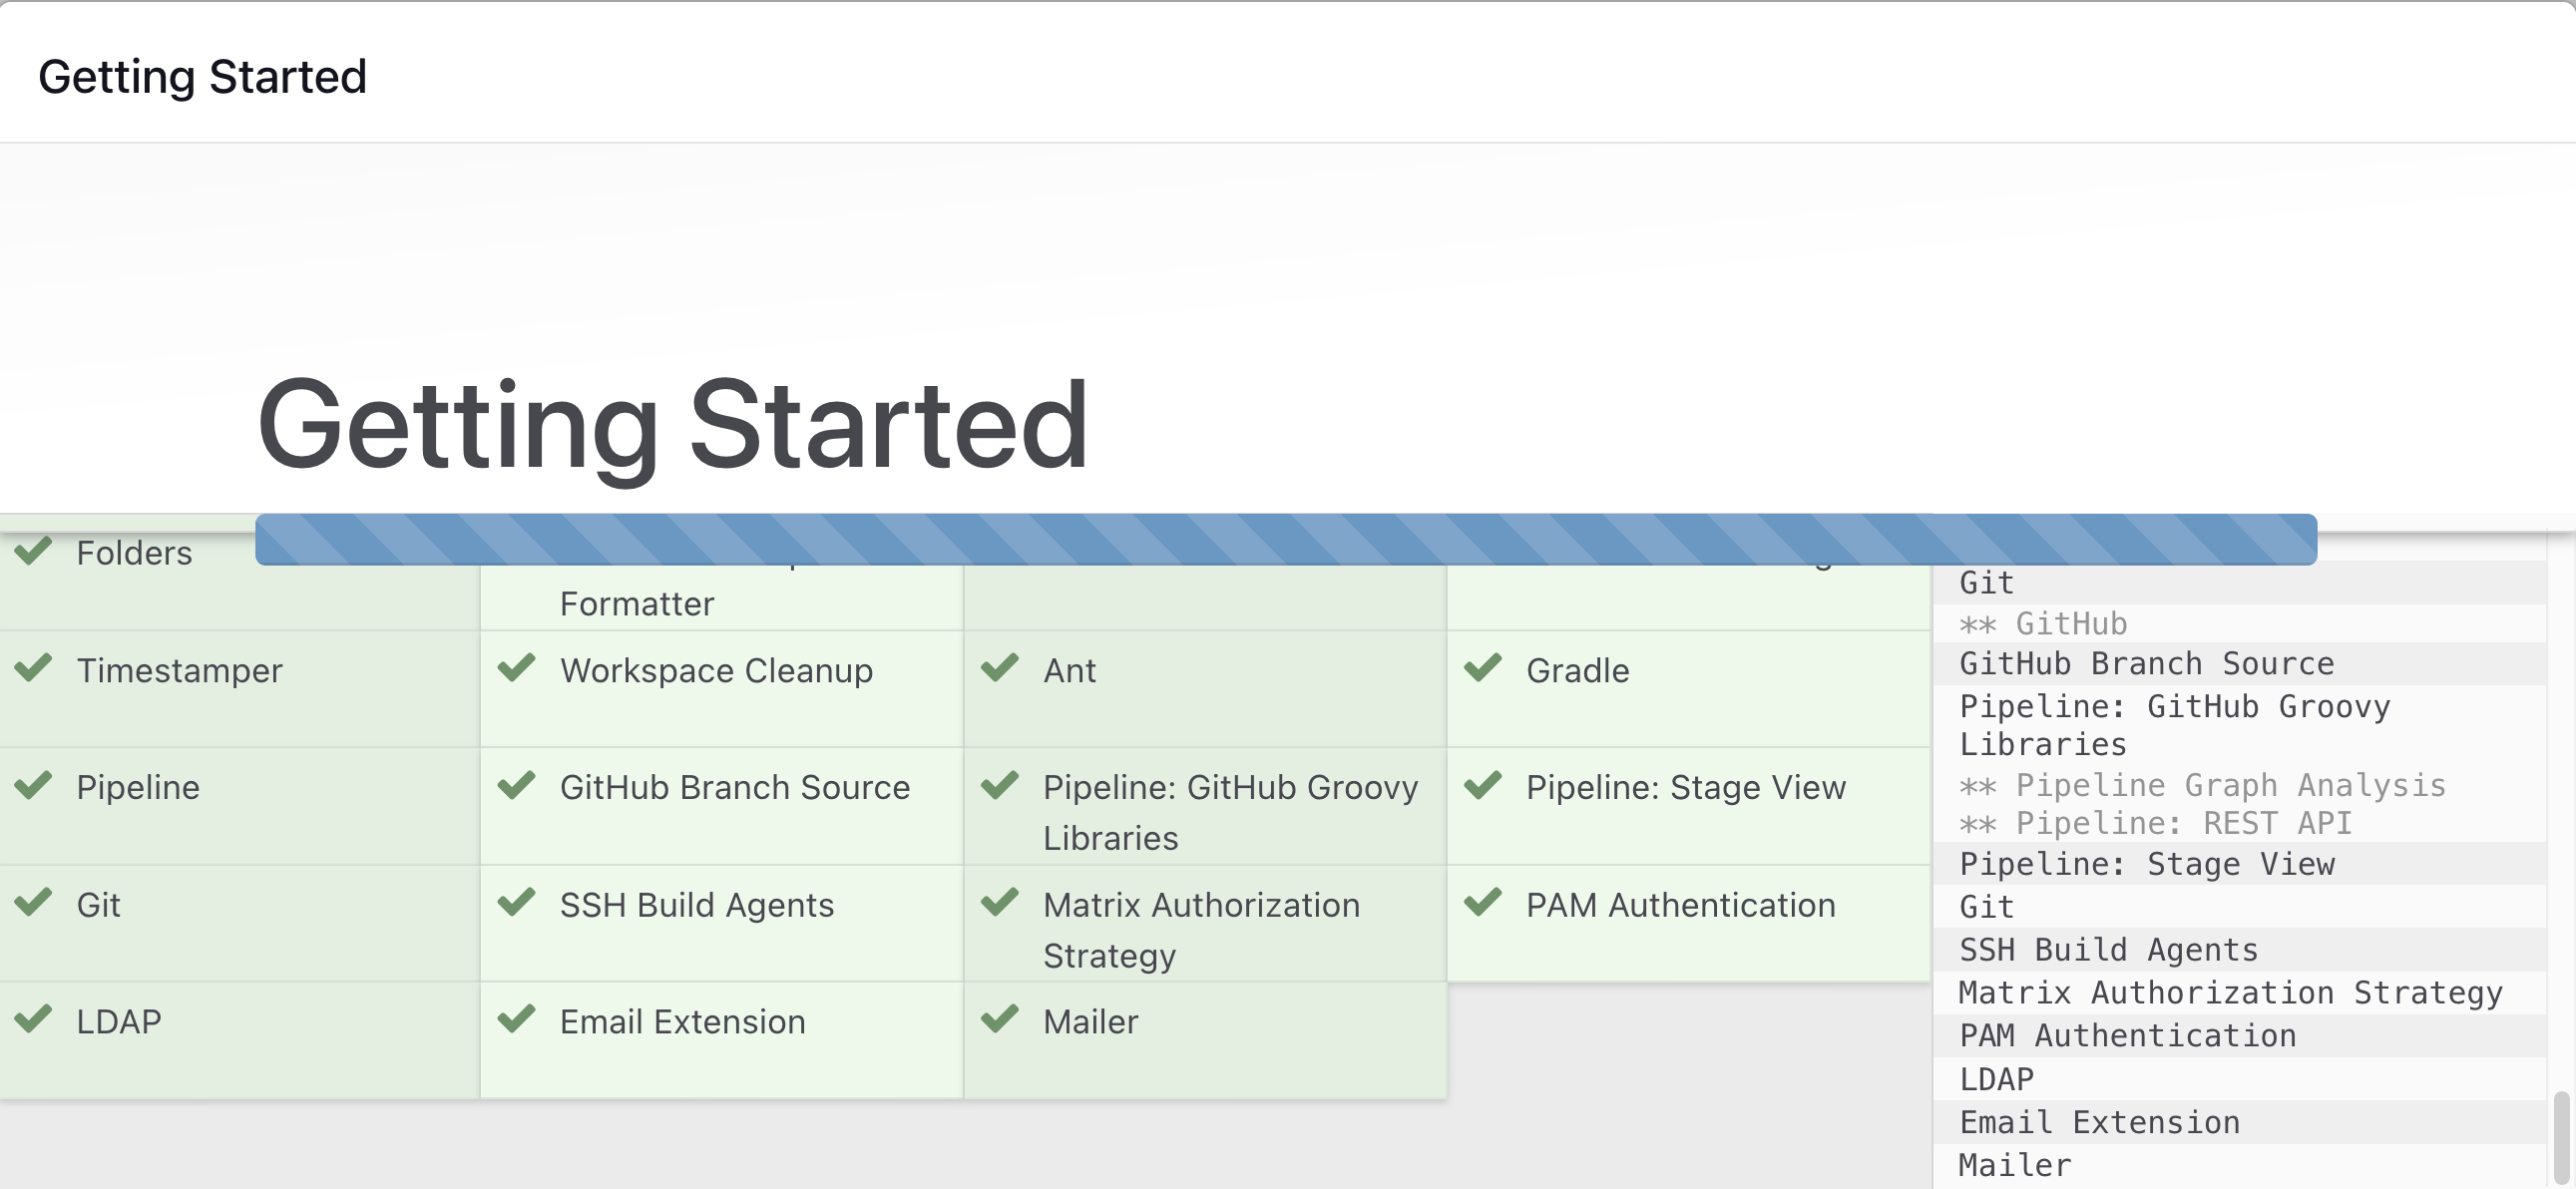
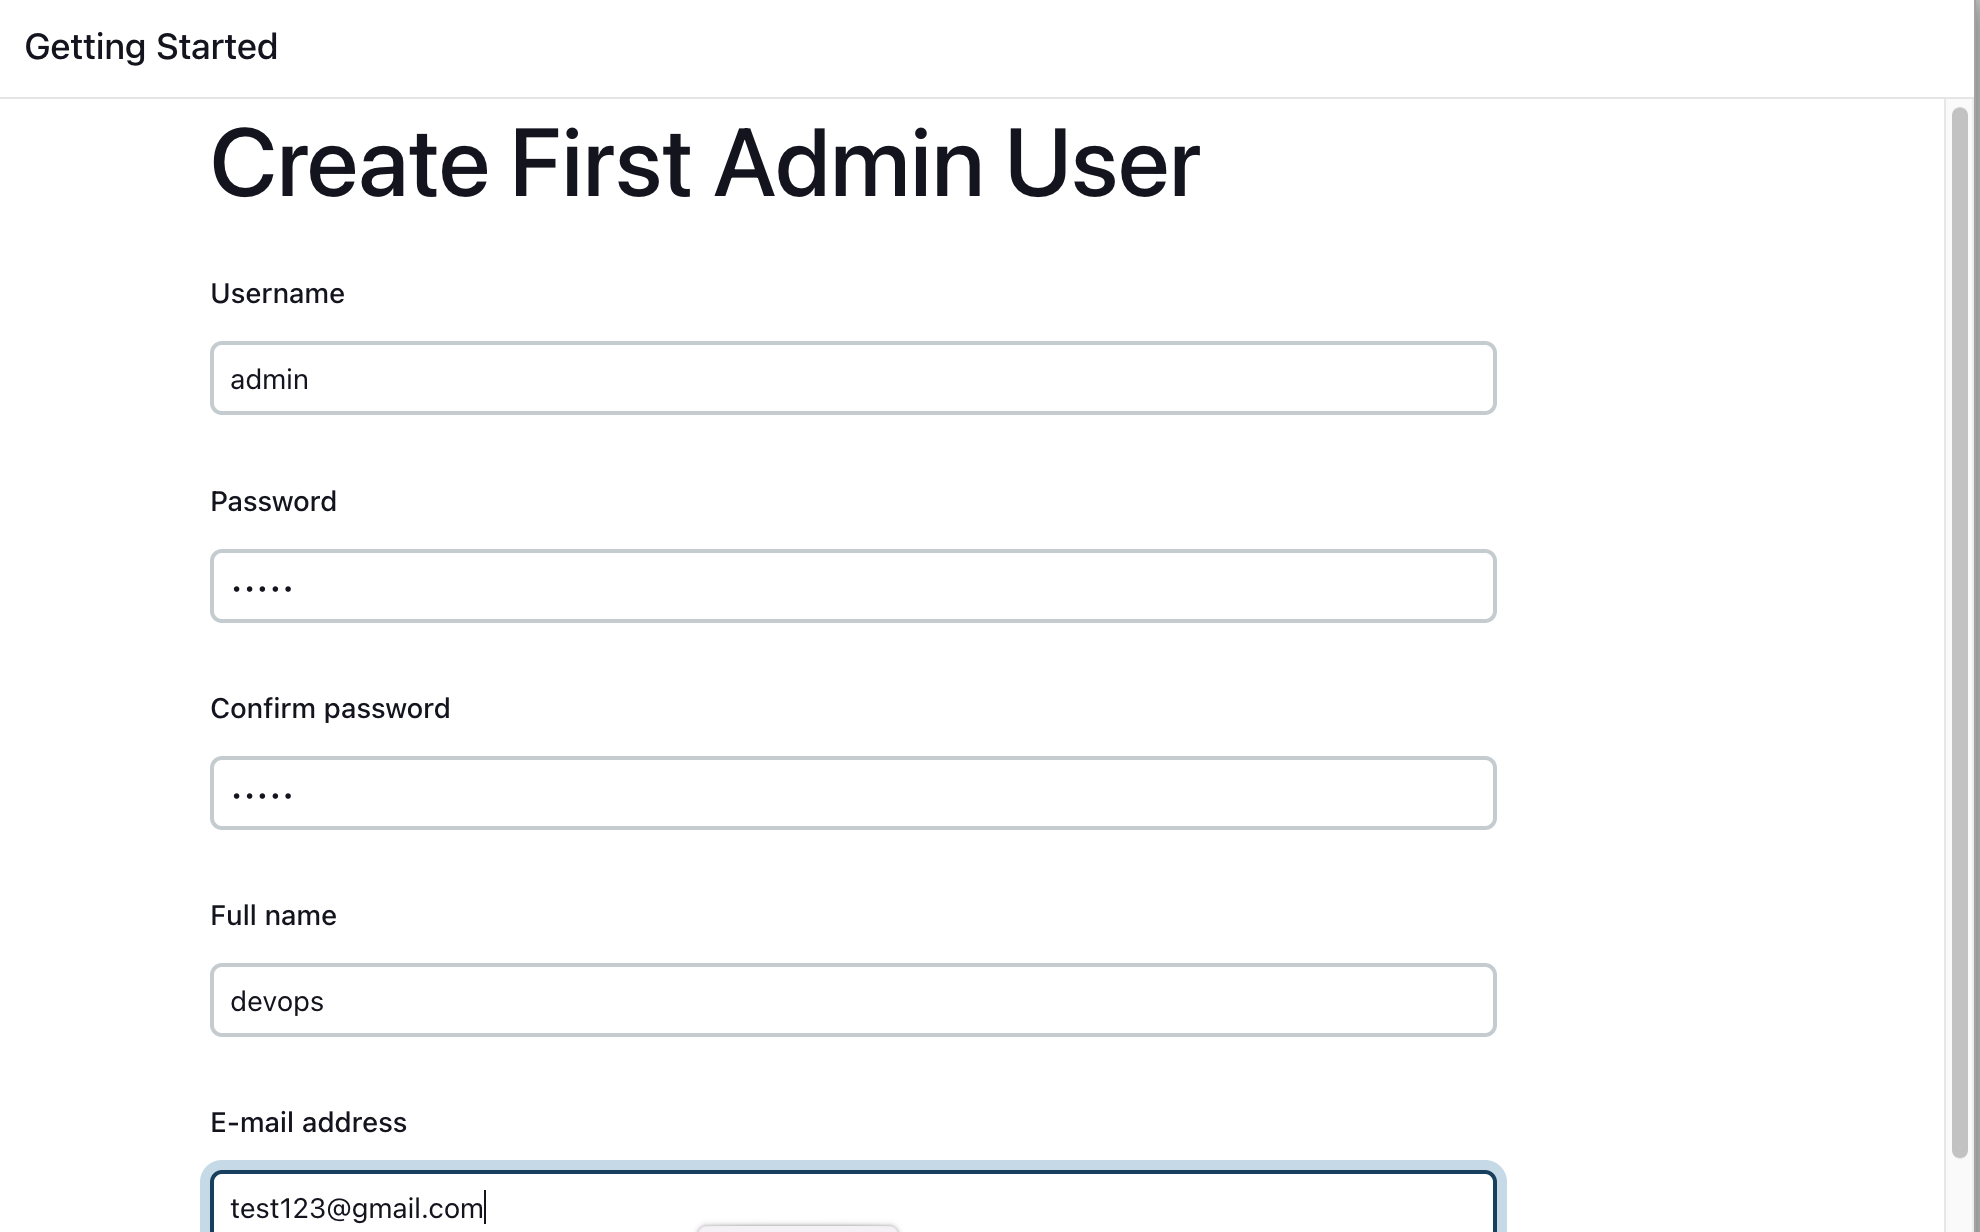
Step 6: Create First Admin User (Optional)
Create a first admin user or skip this step
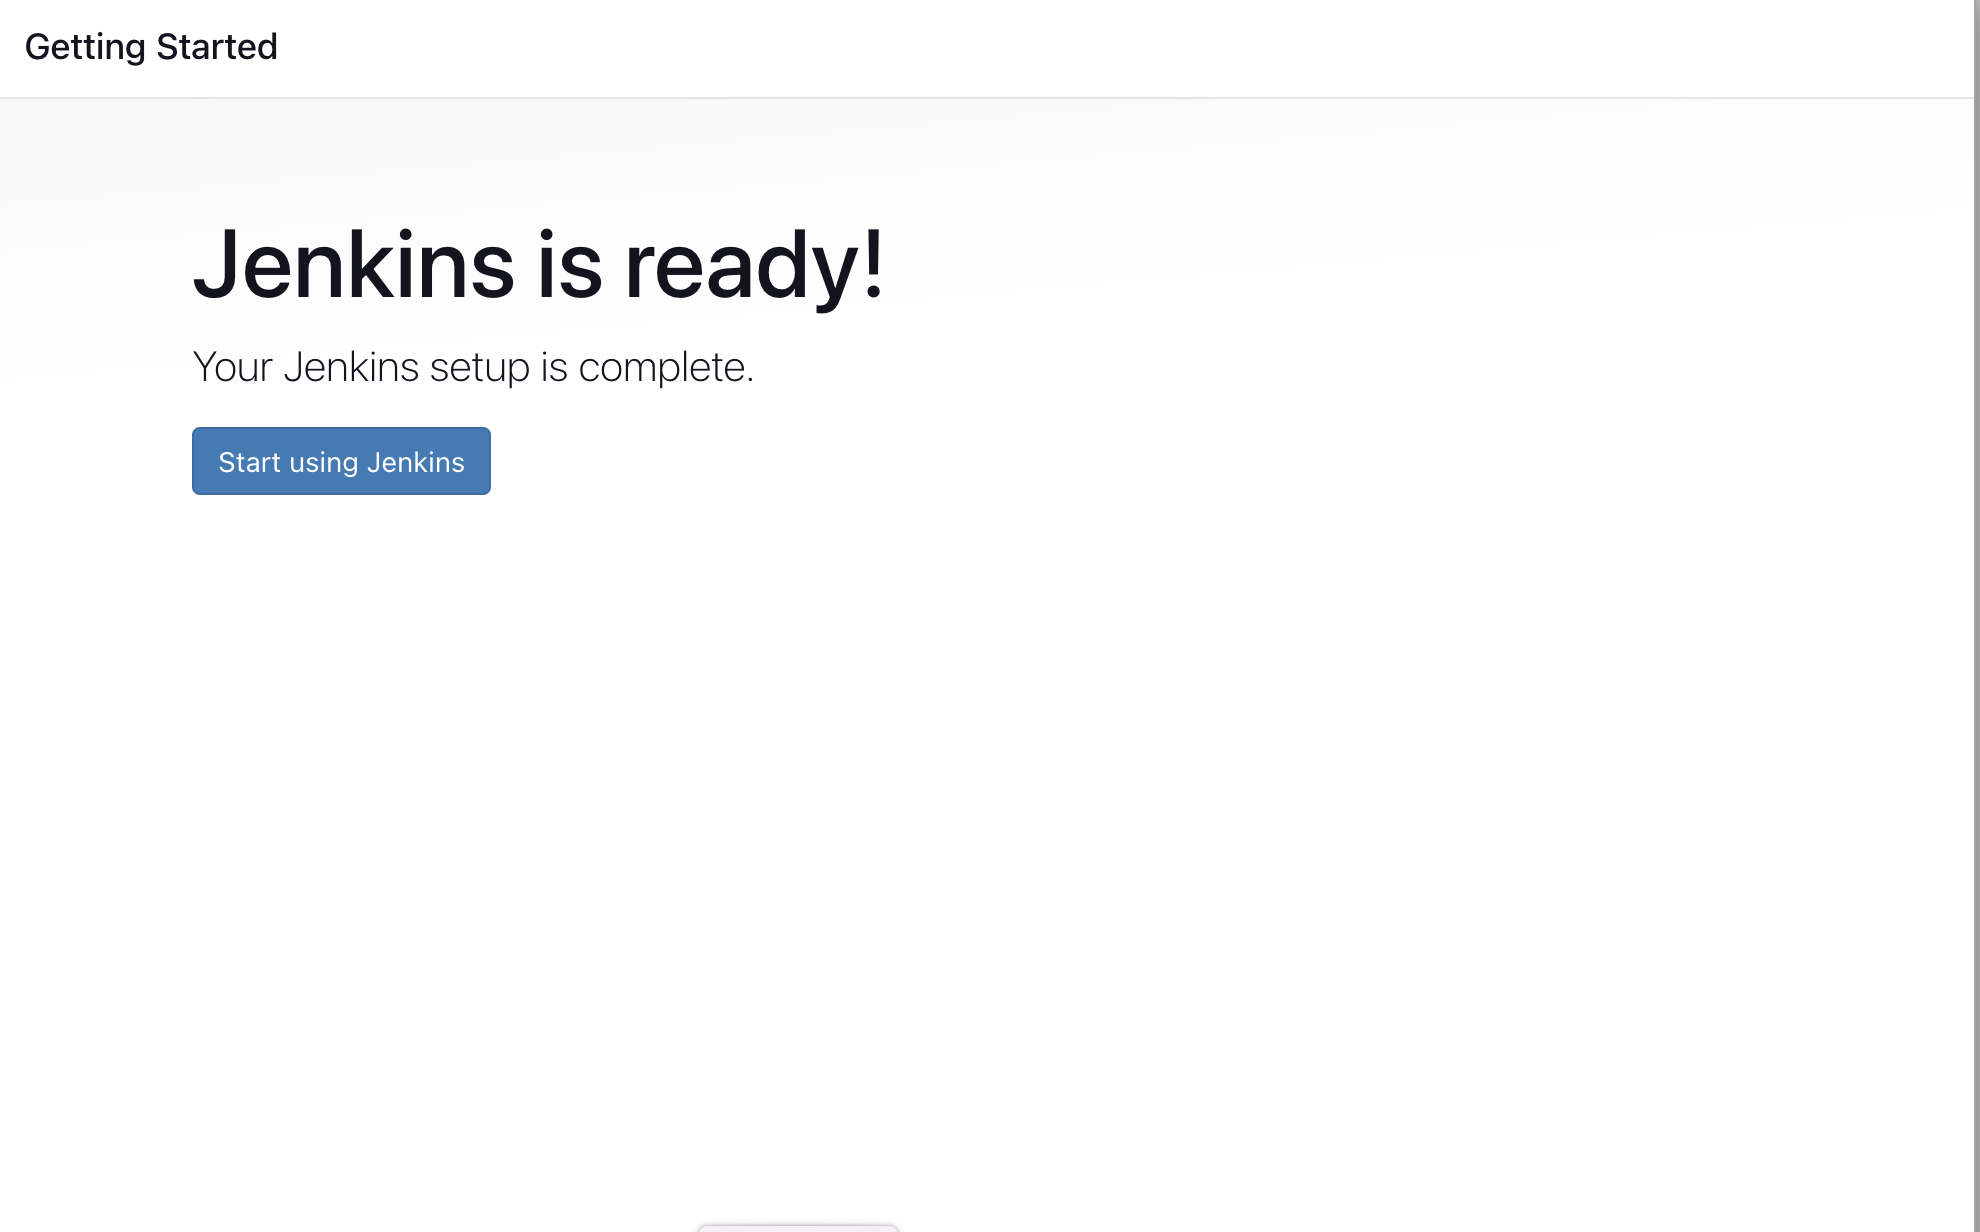
Jenkins Installation is Successful. You can now starting using the Jenkins
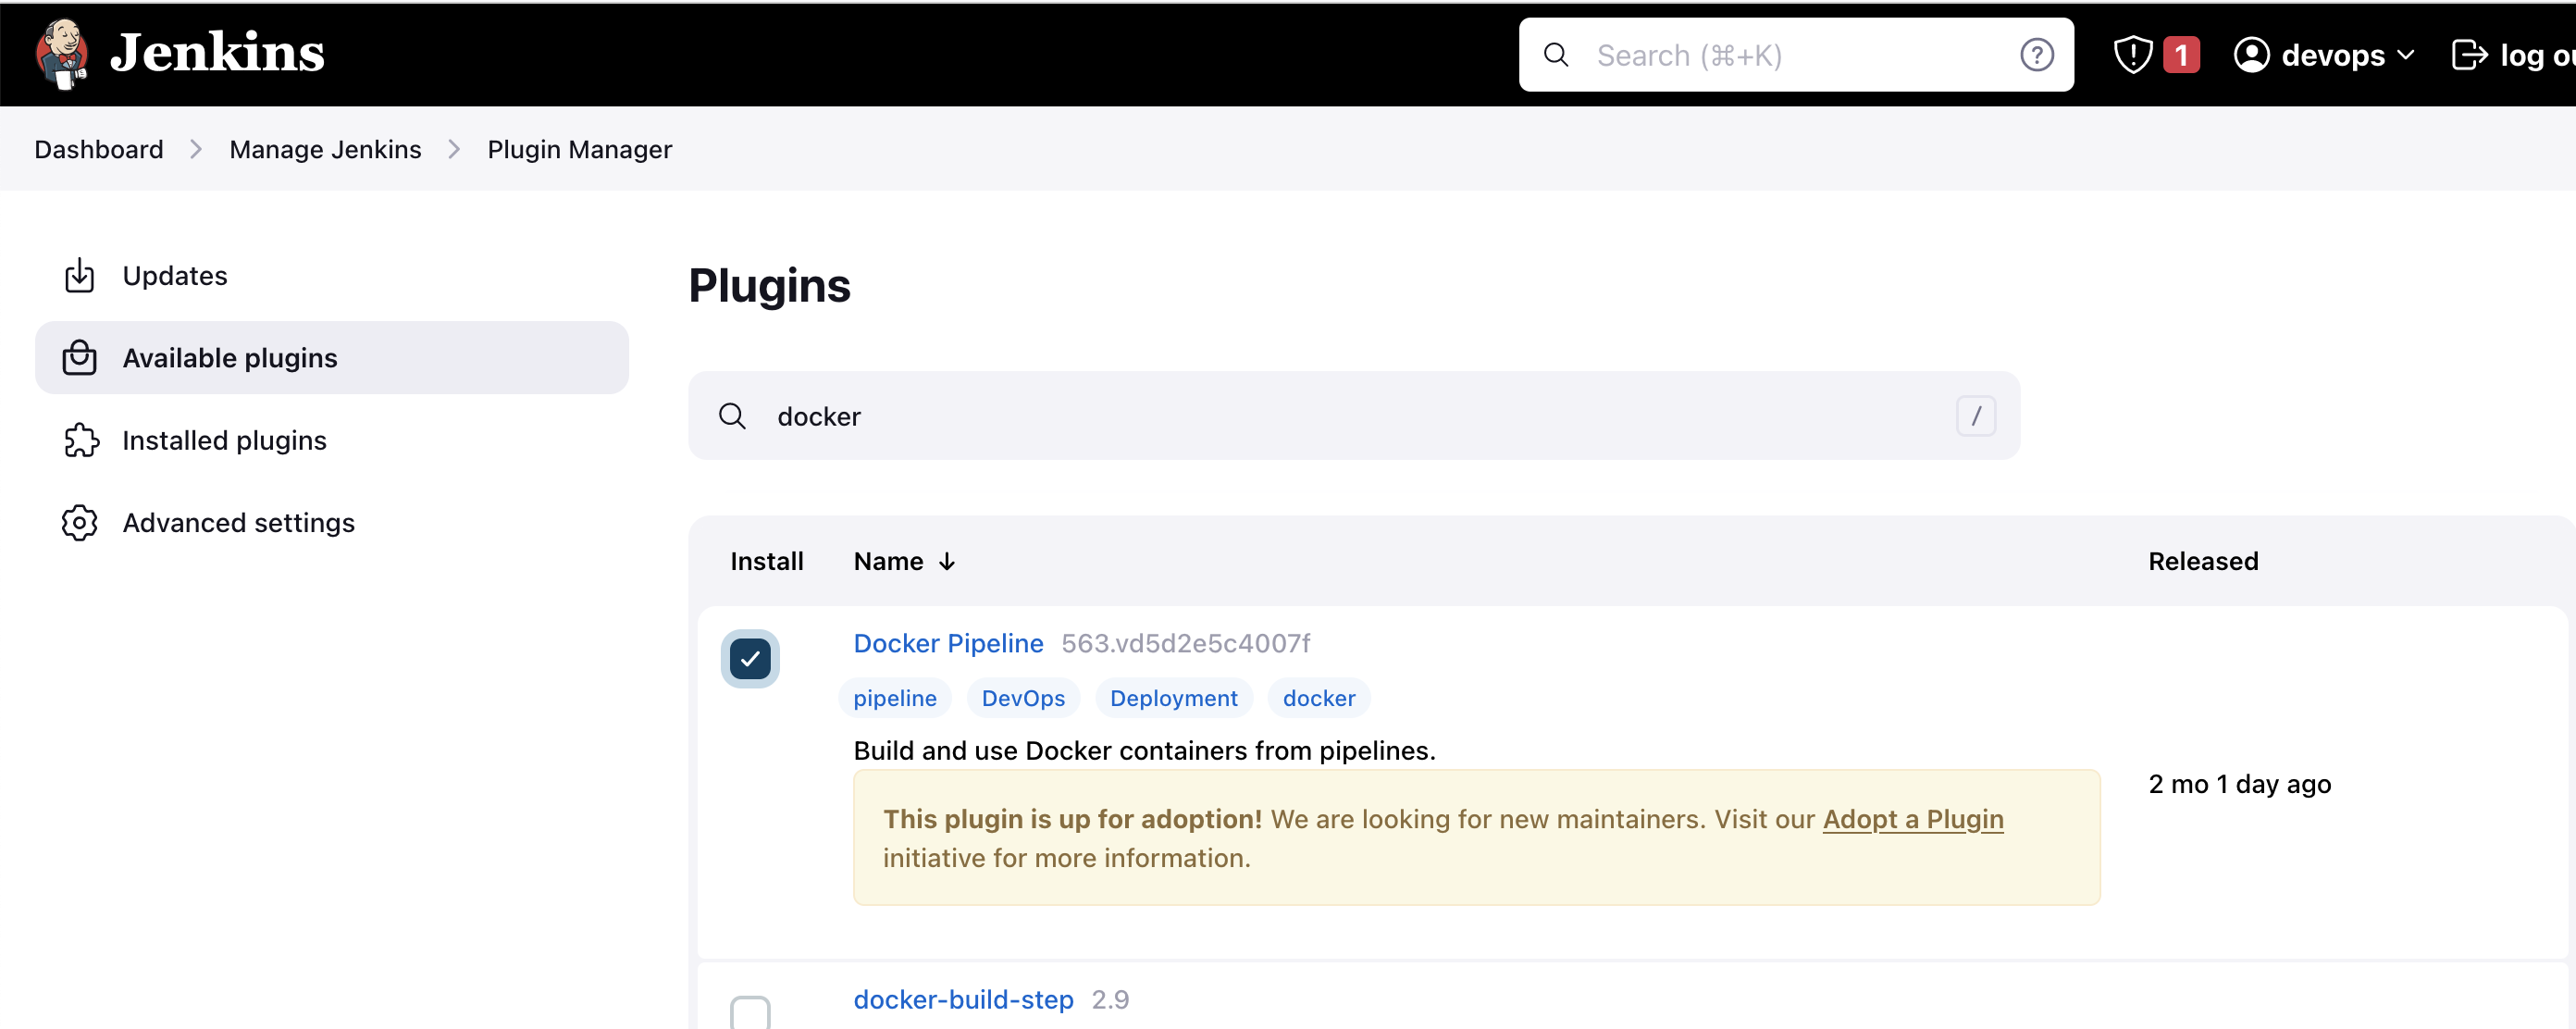
Install Docker Pipeline Plugin
Step 1: Log in to Jenkins
- Go to
http://<ec2-instance-public-ip>:8080
Step 2: Install Docker Pipeline Plugin
Go to Manage Jenkins > Manage Plugins
In the Available tab, search for "Docker Pipeline"
Select the plugin and click the Install button
Restart Jenkins after the plugin is installed
Docker Slave Configuration
Step 1: Install Docker
Run the below command to Install Docker
  sudo apt update
  sudo apt install docker.io
Step 2: Grant Permissions
Grant Jenkins user and Ubuntu user permission to docker daemon:
  sudo su -
  usermod -aG docker jenkins
  usermod -aG docker ubuntu
  systemctl restart docker
Step 3: Restart Jenkins
- Restart Jenkins:
http://<ec2-instance-public-ip>:8080/restart
The Docker agent configuration is now successful.
Practical Task 1 : A simple jenkins pipeline to verify if the docker slave configuration is working as expected.
Want to try this project at your end ? Fork the GitHub repository:
Step 1: Install Docker on Your Jenkins Master
Before you can use Docker as an agent in your Jenkins pipeline, you need to make sure that Docker is installed on your Jenkins master. Follow the official Docker installation guide for your operating system to get started.
Step 2: Install the Docker Pipeline Plugin in Jenkins
To use Docker as an agent in your Jenkins pipeline, you need to install the Docker Pipeline plugin. Here's how:
Go to your Jenkins dashboard and click on "Manage Jenkins"
Click on "Manage Plugins"
Go to the "Available" tab and search for "Docker Pipeline"
Check the box next to it and click "Install without restart"
Step 3: Create a New Jenkins Pipeline
Create a new Jenkins pipeline by following these steps:
Go to your Jenkins dashboard and click on "New Item"
Enter a name for your pipeline (e.g., "Docker Slave Test")
Select "Pipeline" as the project type
Click "OK"
Step 4: Configure the Jenkins Pipeline
In the pipeline configuration page, scroll down to the "Pipeline" section and select "Pipeline script from SCM". Then:
Select "Git" as the SCM
Enter the URL of your Git repository where the Jenkinsfile is located
Enter your Git credentials if necessary
Step 5: Write the Jenkinsfile
Create a new file called "Jenkinsfile" in your Git repository and copy the following code into it:
pipeline {
    agent {
        docker { image 'node:16-alpine' }
    }
    stages {
        stage('Test') {
            steps {
                sh 'node --version'
            }
        }
    }
}
This Jenkinsfile uses a Docker agent with the Node.js 16 Alpine image to run the pipeline. It has one stage called "Test" that runs the node --version command to verify that Node.js is installed and working correctly.
Step 6: Commit and Push the Jenkinsfile
Commit the Jenkinsfile to your Git repository and push the changes to the remote repository.
Step 7: Run the Jenkins Pipeline
Go back to your Jenkins dashboard and click on your pipeline. Click on "Build Now" to start a new build.
Step 8: Verify the Build Results
Once the build is complete, click on the build number to see the build results. You should see that the "Test" stage passed and that the Node.js version was printed in the console output.
That's It!
You have now created a Jenkins pipeline for verifying Docker slave configuration using the provided Jenkinsfile. This pipeline uses a Docker agent to run the pipeline, and the node --version command to verify that Node.js is installed and working correctly.
Practical Task 2 : Multi Stage Multi Agent
Want to try this project at your end ? Fork the GitHub repository:
Set up a multi stage jenkins pipeline where each stage is run on a unique agent. This is a very useful approach when you have multi language application or application that has conflicting dependencies.
Step 1: Create a New Jenkins Pipeline
Create a new Jenkins pipeline by following these steps:
Go to your Jenkins dashboard and click on "New Item"
Enter a name for your pipeline (e.g., "Docker Slave Test")
Select "Pipeline" as the project type
Click "OK"
Step 2: Configure the Jenkins Pipeline
In the pipeline configuration page, scroll down to the "Pipeline" section and select "Pipeline script from SCM". Then:
Select "Git" as the SCM
Enter the URL of your Git repository where the Jenkinsfile is located
Enter your Git credentials if necessary
Step 3: Write the Jenkinsfile
Create a new file called "Jenkinsfile" in your Git repository and copy the following code into it:
pipeline {
  agent none
  stages {
    stage('Back-end') {
      agent {
        docker { image 'maven:3.8.1-adoptopenjdk-11' }
      }
      steps {
        sh 'mvn --version'
      }
    }
    stage('Front-end') {
      agent {
        docker { image 'node:16-alpine' }
      }
      steps {
        sh 'node --version'
      }
    }
  }
}
Step 4: Commit and Push the Jenkinsfile
Commit the Jenkinsfile to your Git repository and push the changes to the remote repository.
Step 5: Run the Jenkins Pipeline
Go back to your Jenkins dashboard and click on your pipeline. Click on "Build Now" to start a new build.
Step 6: Verify the Build Results
Once the build is complete, click on the build number to see the build results. You will see that the stage passed and that the result will printed in the console output.
Practical Task 3 : CI/CD Mastery: Jenkins, Argo CD, & Kubernetes Deployment
Want to try this project at your end ? Fork the GitHub repository:
Here is a step-by-step guide to creating a Jenkins pipeline, deploying an application to a Kubernetes cluster using Argo CD, and setting up a CI/CD process:
Step 1: Create a GitHub Repository
Go to GitHub.com and create a new repository.
Name your repository (e.g., "my-first-pipeline").
Initialize the repository with a README file.
Step 2: Create a Jenkins Job
Go to your Jenkins instance and click on "New Item".
Enter a name for your job (e.g., "My First Pipeline").
Select "Pipeline" as the job type.
Click "OK".
Step 3: Configure the Jenkins Pipeline
In the Jenkins pipeline configuration page, click on the "Pipeline" tab.
Select "Pipeline script from SCM" as the pipeline definition.
Enter the GitHub repository URL and credentials.
Click "Save".
Step 4: Write the Jenkinsfile
In your GitHub repository, create a new file called "Jenkinsfile".
Copy the following code into the file:
  pipeline {
      agent {
          docker {
              image 'python:3'
          }
      }
      stages {
          stage('Build') {
              steps {
                  sh 'python --version'
              }
          }
      }
  }
Commit and push the changes to your GitHub repository.
Step 5: Run the Jenkins Job
Go back to your Jenkins instance and click on the "Build Now" button.
Wait for the job to complete.
Step 6: Create a Kubernetes Cluster
Create a Kubernetes cluster using a tool like Minikube or k3s.
Make sure you have kubectl installed and configured.
Step 7: Install Argo CD
Install Argo CD on your Kubernetes cluster using the following command:
  kubectl create namespace argocd
  kubectl apply -n argocd -f https://raw.githubusercontent.com/argoproj/argo-cd/stable/manifests/install.yaml
Step 8: Create a Deployment Manifest
Create a new file in your GitHub repository called "deployment.yaml".
Copy the following code into the file:
  apiVersion: apps/v1
  kind: Deployment
  metadata:
    name: my-app
  spec:
    replicas: 1
    selector:
      matchLabels:
        app: my-app
    template:
      metadata:
        labels:
          app: my-app
      spec:
        containers:
        - name: my-app
          image: my-registry/my-app:latest
          ports:
          - containerPort: 8080
Replace "my-registry" and "my-app" with your own values.
Commit and push the changes to your GitHub repository.
Step 9: Configure Argo CD
Create a new file in your GitHub repository called "argocd-config.yaml".
Copy the following code into the file:
  apiVersion: argoproj.io/v1alpha1
  kind: Application
  metadata:
    name: my-app
  spec:
    project: default
    source:
      repoURL: https://github.com/<your-github-username>/<your-repo-name>
      targetRevision: HEAD
      path: ./
    destination:
      server: https://kubernetes.default.svc
      namespace: default
    syncPolicy:
      automated:
        prune: true
        selfHeal: true
Replace "<your-github-username>" and "<your-repo-name>" with your own values.
Commit and push the changes to your GitHub repository.
Step 10: Deploy the Application
Go to your Argo CD dashboard.
Click on "New App" and enter the following values:
Application Name: my-app
Project: default
Sync Policy: Automated
Click "Create".
Wait for the application to be deployed.
Step 11: Create a Jenkins Pipeline to Deploy to Kubernetes
Create a new file in your GitHub repository called "jenkins-deploy.yaml".
Copy the following code into the file:
  apiVersion: v1
  kind: Pod
  metadata:
    name: my-app-deploy
  spec:
    containers:
    - name: my-app-deploy
      image: my-registry/my-app-deploy:latest
      command: ["/bin/sh"]
      args: ["-c", "sleep 3600"]
    restartPolicy: Never
Create a new file in your GitHub repository called "Jenkinsfile-deploy".
Copy the following code into the file:
  pipeline {
      agent {
          docker {
              image 'my-registry/my-app-deploy:latest'
          }
      }
      stages {
          stage('Deploy') {
              steps {
                  sh 'kubectl apply -f deployment.yaml'
                  sh 'kubectl apply -f argocd-config.yaml'
                  sh 'kubectl rollout status deployment/my-app'
                  sh 'kubectl delete -f jenkins-deploy.yaml'
              }
          }
      }
  }
Commit and push the changes to your GitHub repository.
Step 12: Run the Jenkins Pipeline to Deploy to Kubernetes
Go back to your Jenkins instance and create a new pipeline job.
Select "Pipeline script from SCM" as the pipeline definition.
Enter the GitHub repository URL and credentials.
Select "Jenkinsfile-deploy" as the pipeline script path.
Click "Save".
Click on "Build Now" to run the pipeline.
Wait for the pipeline to complete.
Congratulations! You have now created a Jenkins pipeline, deployed an application to a Kubernetes cluster using Argo CD, and set up a CI/CD process.
Thanks for reading the blog! Let's Connect for More DevOps Insights!
Follow Me Pratik Gote
Linkedin: https://www.linkedin.com/in/pratik-gote-516b361b3/
Stay connected and explore my latest blog posts, professional updates, and more. Let's grow and learn together!
____________________________________________________________________________________
Subscribe to my newsletter
Read articles from Pratik Gote directly inside your inbox. Subscribe to the newsletter, and don't miss out.
Written by

Pratik Gote
Pratik Gote
About Me 👋 Greetings! I'm Pratik Gote, a dedicated software developer with a strong passion for staying at the forefront of technological advancements in the industry. Armed with a solid foundation in Computer Science, I excel in creating innovative solutions that push boundaries and deliver tangible results. What I Do I specialize in: Full-Stack Development: Crafting scalable applications using cutting-edge frameworks such as React, Vue.js, Node.js, and Django. 💻 Cloud Computing: Harnessing the capabilities of AWS, Azure, and Google Cloud to architect and deploy robust cloud-based solutions. ☁️ DevOps: Implementing CI/CD pipelines, Docker containerization, and Kubernetes orchestration to streamline development workflows. 🔧 AI and Machine Learning: Exploring the realms of artificial intelligence to develop intelligent applications that redefine user experiences. 🤖 My Passion Technology is dynamic, and my commitment to continuous learning drives me to share insights and demystify complex concepts through my blog. I strive to: Demystify Emerging Technologies: Simplify intricate ideas into accessible content. 📚 Share Practical Insights: Offer real-world examples and tutorials on state-of-the-art tools and methodologies. 🛠️ Engage with Fellow Enthusiasts: Foster a collaborative environment where innovation thrives. 🤝 Get in Touch I enjoy connecting with like-minded professionals and enthusiasts. Let's collaborate on shaping the future of technology together! Feel free to connect with me on LinkedIn : https://www.linkedin.com/in/pratik-gote-516b361b3/ or drop me an email at pratikgote69@gmail.com. Let's explore new horizons in technology! 🚀